Windows 10/11 All about Windows Autopilot
Overview
Windows Autopilot is Microsoft's deployment program that uses a collection of technologies to fast setup and pre-configure new devices. In general, it is similar to Apple's Device Enrollment Program or the Knox Mobile Enrollment or Android Zero Touch for Samsung Knox and Android devices.
Devices or device identifiers will be added to a cloud service and when devices or users are starting with the out-of-the-box experience, internet connected devices will contact the cloud service and will retrieve configurations. To add devices to the cloud service, you have different options and the first one is to contact your hardware vendor as they might be capable to add devices after purchasing them into the Windows Autopilot deployment program for you. Another option is to add devices manually to Windows Autopilot and this is what we will do as one part of this Guide.
In general, Windows Autopilot simplifies the complete lifecycle of the device. Users will be able to easily enroll devices from the out-of-the-box experience without any interaction of the IT department. Your users only need to connect to an internet connection, and they need to know their Microsoft Entra ID Credentials and can enroll the device within a few steps. After that, Silverback can apply all configurations and can transform the device into an enterprise ready and secured device and can install the UEM Agent to install Software Packages on top. Additionally, you can easily deploy the EgoSecure Data Protection agent for an additional security layer.
This guide is intended to provide an overall Autopilot overview with some different experiences and with several settings that can be added to customize the complete Autopilot setup and reset.
Requirements
To meet the best experience with Windows Autopilot, please review all requirements below:
Software Requirements
The following operating system versions are supported for Windows Autopilot. Ensure to try to use Windows Autopilot with one of the following Windows 10 or Windows 11 editions:
- Windows 10/11 Pro
- Windows 10/11 Pro Education
- Windows 10/11 Pro for Workstations
- Windows 10/11 Enterprise
- Windows 10/11 Education
It may be that the software requirements have changed since this guide was created. To be on the safe side, please check the current requirements under the following link: Windows Autopilot software requirements
Licensing Requirements
Windows Autopilot depends on specific capabilities in the Windows 10 or Windows 11 clients and on Microsoft and for sure it requires a Mobile Device Management solution like Silverback, but we think by starting with this guide you have already Silverback and a valid license in place. To meet the licensing requirements from Microsoft, you can obtain these capabilities through several editions and subscriptions programs. The following overview shows the specific possible programs:
- Microsoft 365 Business Premium subscription
- Microsoft 365 F1 or F3 subscription
- Microsoft 365 Academic A1, A3, or A5 subscription
- Microsoft 365 Enterprise E3 or E5 subscription, which include all Windows client, Microsoft 365, and EMS features (Azure AD).
- Enterprise Mobility + Security E3 or E5 subscription, which include all needed Azure AD features.
- Intune for Education subscription, which include all needed Azure AD features.
- Microsoft Entra ID Premium P1 or P2
Please review the current licensing requirements from the following link at your time of starting with your project: Windows Autopilot licensing requirements. In general, you need next to a valid Silverback license, the automatic MDM enrollment and company branding features from Microsoft Entra ID. With Microsoft Entra ID Premium P1 or P2 you might already be ready to go with Windows Autopilot from the minimum requirements point of view. In case you have doubts about the right subscription from Microsoft, please contact your reseller or partner. If you have in your subscription Intune in place, it will provide you more features then without as we will show this later in this guide.
A well-known indication that you might not have the sufficient subscription is when you try to add your MDM and MAM application and your view does not look like that. If you do not see the MDM user scope, then you should get in touch with your reseller or partner.

Network Requirements
Windows Autopilot depends on a variety of cloud and internet-based services like the Windows Autopilot Deployment Service, Microsoft Entra ID, Windows Update and further. Please review the following Windows Autopilot networking requirements to ensure that your network is properly configured and prepared. Please refer to the Unsupported Feature section in this guide, to ensure to configure the right and only necessary services parts. As an example, the Hybrid Domain Join is at this stage not supported, so you don't' have to configure this network requirement for now. If you do not have Intune in your subscription, you also don't need to configure the service requirements for Intune, and so on.
Configuration Requirements
For Windows Autopilot, you can split the configuration into several parts of the services that will be used. Please refer to the official Windows Autopilot configuration requirements before we are starting with comparing what we need:
| Requirement | Context |
|---|---|
| Configure Microsoft Entra ID automatic enrollment | This will be done by adding the MDM and WIP application into your Microsoft Entra ID. If you review the screenshot from above, this is exactly what we need to do and we have a dedicated article for that. You will find the links for the creation within this guide. |
| Configure Microsoft Entra ID custom branding | This is an optional topic, and you might have already configured this experience. This part is totally separated from Silverback, and you can configure the general Microsoft Entra ID login experience for your users. You can refer to Quickstart: Add your company branding for additional information. |
| The first logon user needs to have Microsoft Entra join permissions for all deployment scenarios, except for Windows Autopilot self-deployment mode as this method works in a user less context. | As the self deployment mode is not yet supported in Silverback, you only need to ensure your first logon users have the Microsoft Entra join permissions. To ensure this, you must configure the Device Settings in your Microsoft Entra ID. Navigate in your Azure Tenant to Microsoft Entra ID, expand Manage, click Devices, expand Manage again and select Device settings. Here you will find the Users may join devices to Microsoft Entra option where you can add memberships. Additionally, you can additionally configure administrative accounts to enrolled devices and limit the maximum number of devices per user. |
| Optional: To automatically step up from Windows Pro to Windows Enterprise, enable Windows Subscription Activation. | This part is separated from Silverback, and you might need to contact your reseller, partner or with Microsoft to review this functionality. |
| Devices must be added to Windows Autopilot to support most Windows Autopilot scenarios | This is what we will later do in this guide and there are two ways to manually upload the collected hardware hash. Depending on your subscription, you are required to upload the hashes to the Windows Autopilot cloud services either via Intune or our Unified User Experience. To automate the process of generating and uploading the hardware hashes in the device purchasing process, please get in touch with your hardware vendor. For existing devices that are currently not added to Windows Autopilot you might be able to find a way to collect this information with your current client lifecycle management system or by performing an automatic execution of the PowerShell scripts with a target location for storing the *.csv files. We are planning to provide the feature set with Empirum as soon as possible. |
| Profile configuration | This we will do also together, and this can be executed either in Intune or our Unified User Experience. |
Unsupported Features
As of today, not all capabilities that Microsoft can offer in the combination with Office365, Microsoft Entra ID and Windows 10 or Windows 11 enrollment methods are available to third party vendors. By reading the previously mentioned requirements, you might have faced one of the following terms that are currently not available with Silverback when using Windows Autopilot:
- Hybrid Domain Join
- Enrollment Status Page
- Autopilot self-Deploying mode and Autopilot pre-provisioning
- Change Primary Users
We are continuously working on extending our feature set in the area of Mobile Device Management with Windows 10 and Windows 11 and we want to provide everything what is possible to you as a customer.
Configure MDM and MAM Application
The first requirement for using Windows Autopilot with Silverback is to create a specific Mobility (MDM and WIP) application in your Azure Tenant. For Cloud Customers, the process starts already one step before as they are required first to validate their Silverback SaaS URL as a verified or trusted domain in their Azure Tenant. The Mobility (MDM and WIP) applications defines as an example, which users are allowed to enroll via Autopilot or Microsoft Entra join and where or to which Silverback instance the devices should be enrolled.
Please perform the following guides to create and configure your MDM and WIP Application in Azure and save the application details in Silverback:
Upload Devices
As mentioned in the Configuration Requirements section, there are multiple available processes about adding devices to Windows Autopilot. You can either let your hardware vendor upload your new devices or you can add existing devices manually to Windows Autopilot. Microsoft offers several platforms for device registrations for new devices to Windows Autopilot. As we want to start quickly with adding a device to Windows Autopilot, we will manually add a device to the Autopilot services within this guide. Independent from your Portal, a major task is to upload the hardware hash and link the target device with the Autopilot service, so we will need to get the hardware hash by executing a PowerShell script. Within the next chapter, we will collect the Hardware ID (also known as hardware hash) from an already used device and upload it either via Intune or the Unified User Experience. If you want to collect and upload the Hardware ID from a device during the OOBE (with having Intune in place), please review the video below. Otherwise please proceed with Get Hardware ID.
Use Shift+F10 to start the Command Prompt
Get Hardware ID
- Please perform the Get Hardware ID section in the following guide: Microsoft Entra ID Integration III: Windows Autopilot
Upload in Intune
- Login to https://endpoint.microsoft.com/
- Navigate to Devices and select Enrollment in the Device onboarding section
- In the Windows Autopilot section, select Devices
- Click Import and select the *.csv file and press upload
Upload via Unified User Experience
- First, you will need to install and configure the Windows Autopilot Extension
- After the successful integration, you can perform the following steps: Add Devices to Windows Autopilot
Review Devices in Microsoft Entra ID
You can navigate after uploading devices to Windows Autopilot to your Microsoft Entra ID > Devices > All Devices. Autopilot devices will be displayed with a different icon. When you hover over the icon, you will see the Autopilot Device information. Please note that recently uploaded devices may be indicated by their serial numbers. The device name might change after the device was enrolled the first time to Microsoft Entra, e.g., via Autopilot.
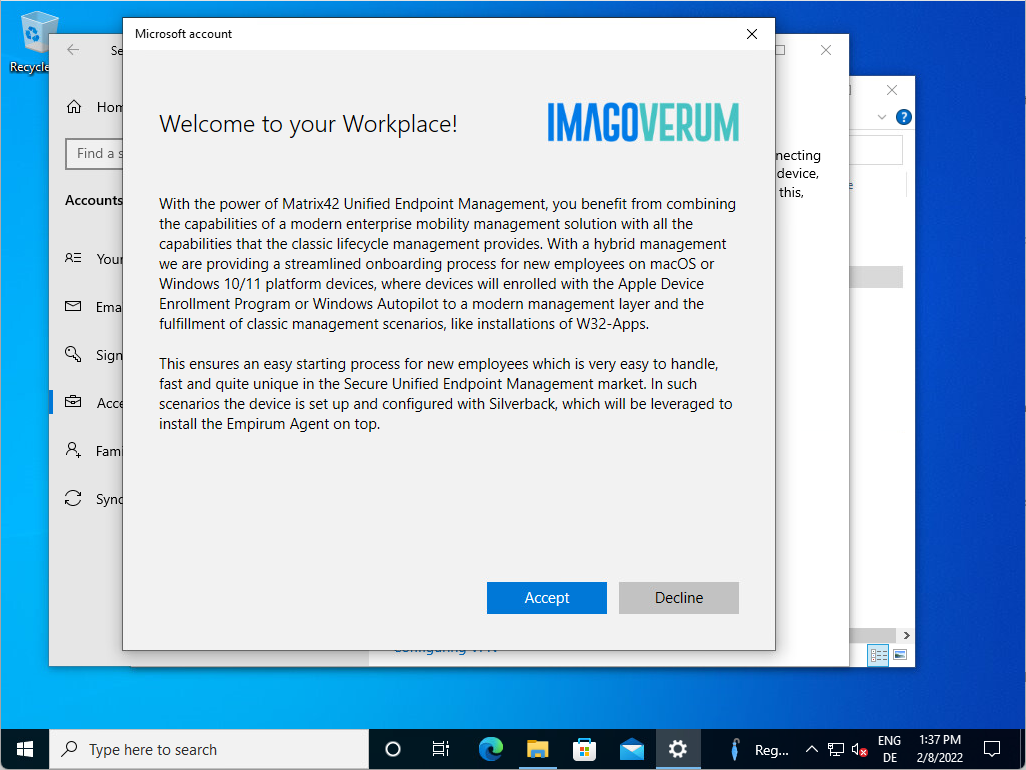
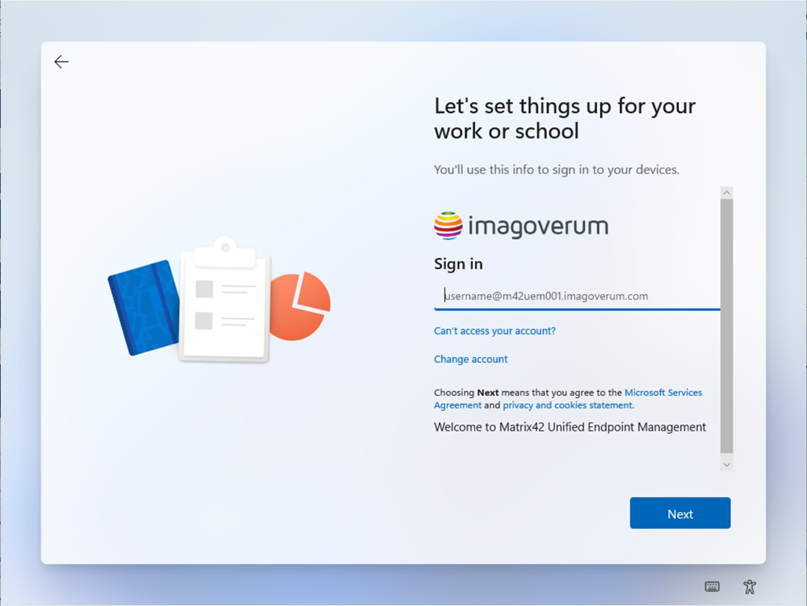
Customize Terms of Use
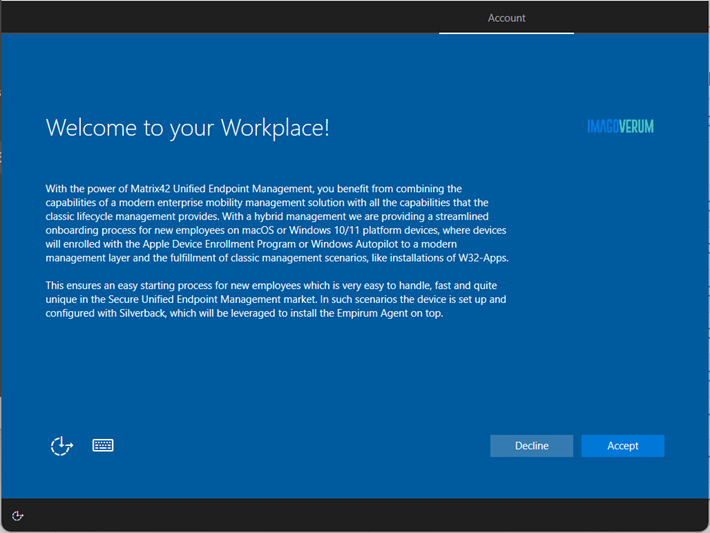
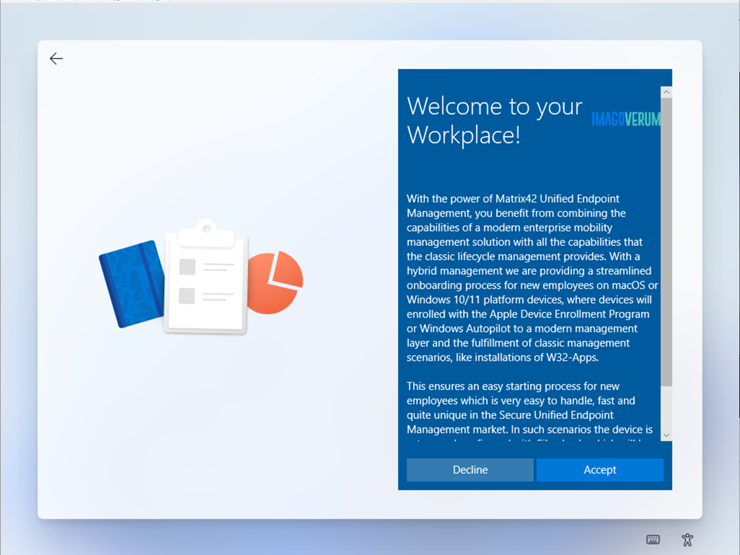
When you added your MDM and WIP application to your Microsoft Entra ID, you may remember the MDM Terms of Use URL. This URL contains the Terms of Service that your users will see during the enrolment process. After entering their credentials, they will be asked to accept the Terms of Service, which is a Matrix42 branded experience by default. You can replace the default title, description and Matrix42 logo with your own, as shown in the screenshot below:
Configuration
- Login as Administrator to your Silverback Management Console
- Navigate to the Admin tab
- Select Microsoft Entra ID
- Navigate to Terms & Conditions
- Customize your Terms of Conditions and press save

User Experience
After customizing your Terms of Use, you can press the Preview for dark theme or the Preview for light theme. A new browser tab will open and will demonstrate the look & feel for your users during the enrollment process. As of today, the white theme will be shown for Microsoft Entra joins, when the device will be joined after the out-of-the-box experience and the dark theme during enrollments through the out-of-the-box-experience. Themes are currently not related to Windows 10 or Windows 11, but this might change in the future.
| Theme / Experience | Standard | Customized |
|---|---|---|
| Dark Theme for Windows 10 OOBE | 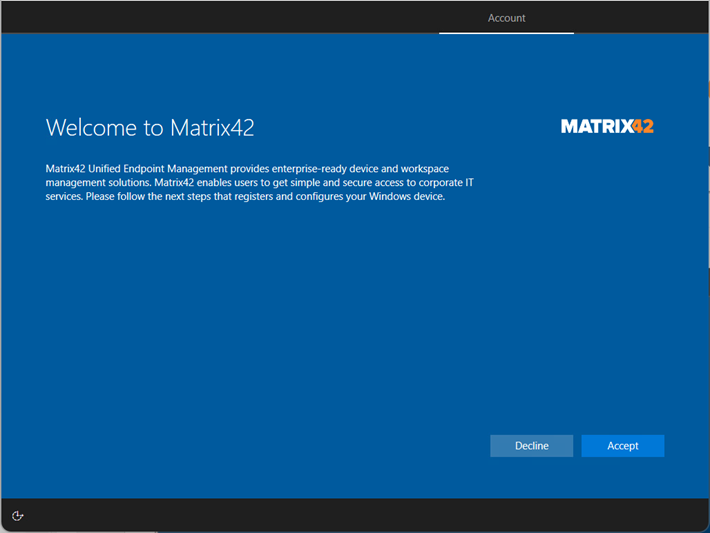 |
 |
| Dark Theme for Windows 11 OOBE | 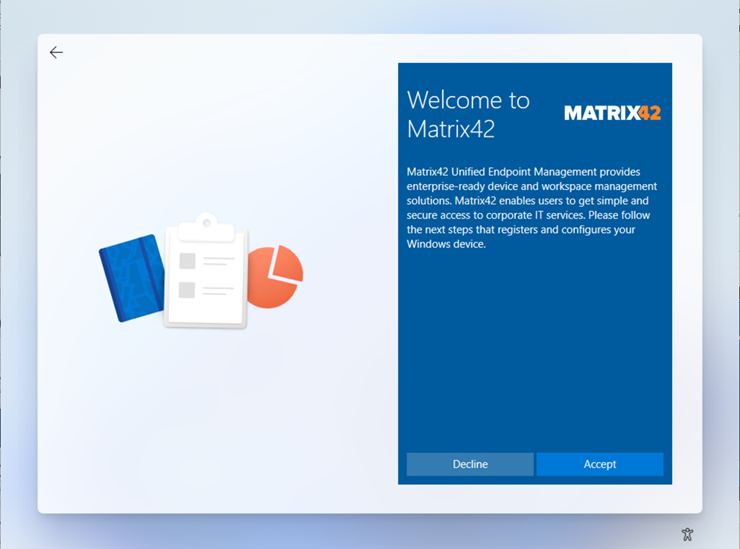 |
 |
| Customized White Theme for Windows 10 and Windows 11 Microsoft Entra join | 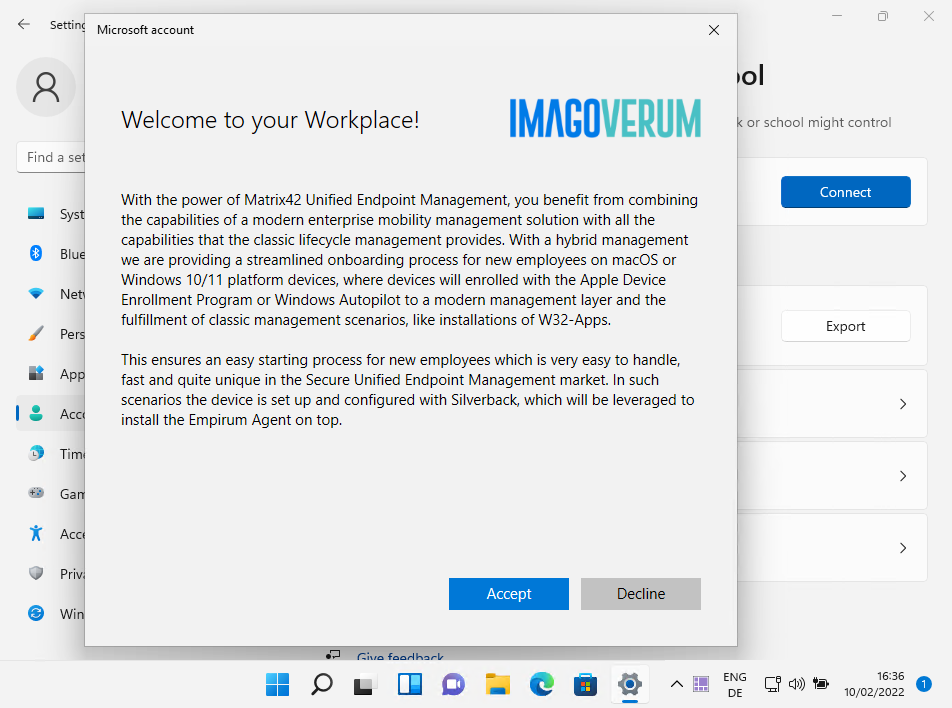 |
 |
After customizing your Terms of Use and reviewing the User Experience, you might want to give a try to your Autopilot enrollment, but first we need to configure additional settings that will apply during the Out-of-the-box experience. These options are quite similar to the Device Enrollment Program for Apple devices and you might be already familiar with the profile creation for Apple devices
Profile Creation for Setup Wizard
As highlighted in the previous chapter, we are now going to configure the out-of-the-box experience for users during the Autopilot setup. For this, we need to create a profile with several OOBE settings and assign this profile to your uploaded devices. We are still having the option to perform the actions for the profile creation in Intune or in our Unified User Experience. Within the Unified Experience, the values for deployment options are set by default according to the supported features with Silverback.
Before starting with the Profile creation, you can review the effect of several options in the End User Experience Screens section.
Profile Creation with Intune
- Login to https://endpoint.microsoft.com/
- Navigate to Devices and select Enrollment in the Device onboarding section
- In the Windows Autopilot section, select Deployment profiles
- Select Create Profile and select Windows PC
- Enter as Name, e.g. Autopilot Standard Profile
- Press Next
- Configure the following options
| Setting | Supported Options | Description |
|---|---|---|
| Deployment Method | User-driven | User-driven must be set as the deployment method, as this means that User credentials are required to enroll the device. |
| Join Microsoft Entra ID as | Microsoft Entra joined | Specify how devices join Microsoft Entra ID in your organization. As the Microsoft Entra hybrid joined feature is not supported for 3rd party vendors, ensure to select Microsoft Entra joined. |
| Microsoft Software License Terms | Show / Hide | Beginning with Windows 10 Version 1709, you can decide to skip the EULA page presented during the OOBE process. Please refer to Windows Autopilot EULA dismissal below for important information to consider about hiding the Microsoft Software License Terms. |
| Privacy Settings | Show / Hide | This optional setting configures to not ask about privacy settings during the out-of-the-box experience |
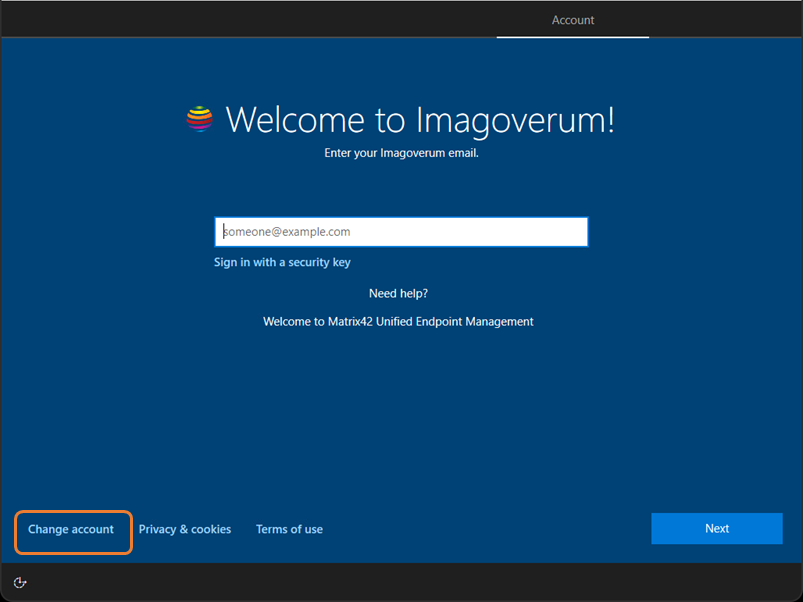
| Hide change account options | Show / Hide | When users are at the Welcome Screen where they should enter their credentials, a button will be shown or hidden that lets the user to proceed with the change account option. |
| User Account Type | Administrator / Standard | Here you can configure whether the user setting up the device should have administrative access once the enrollment process is complete. |
| Allow pre-provisioned deployment | No | As this feature is not supported for 3rd party vendors, you are required to set this setting to No. Here you could enable the previously named White Glove feature, when you meet the physical requirements and beginning with Windows 10 1903. |
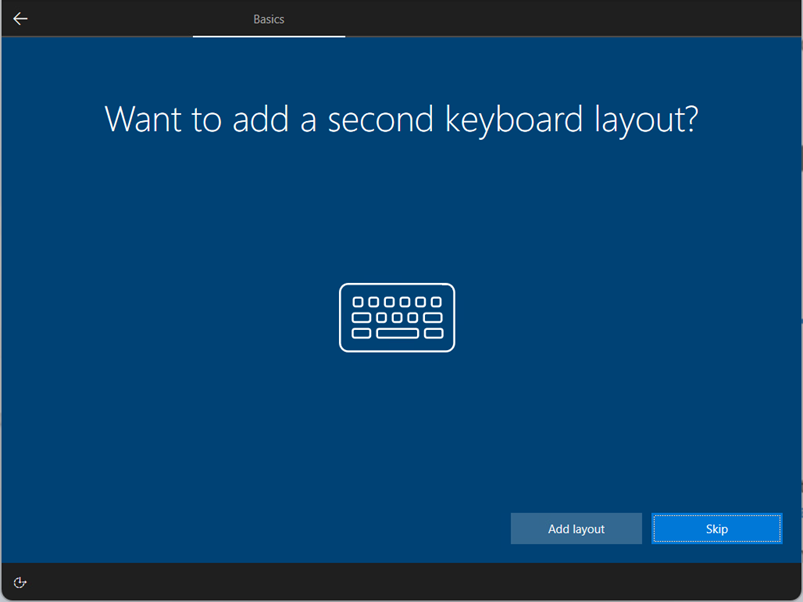
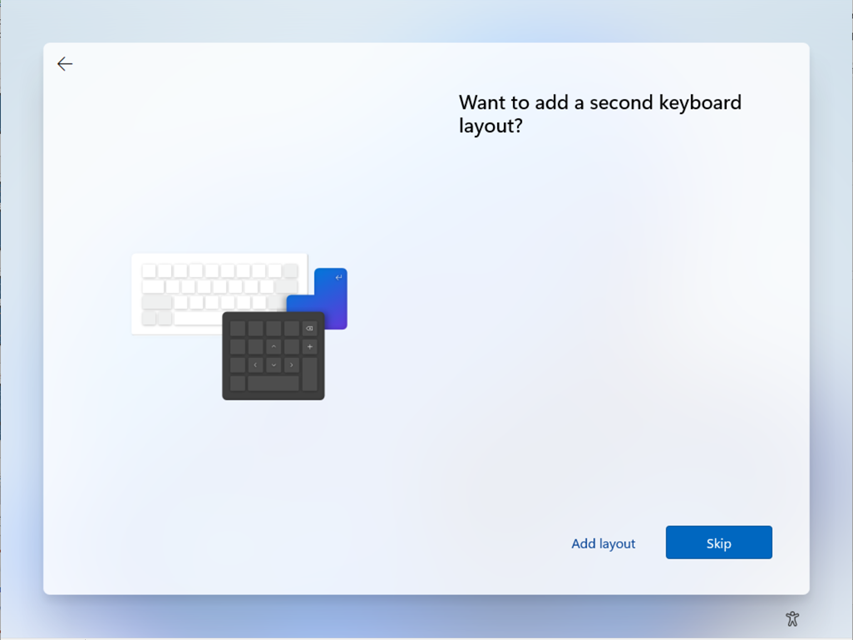
| Language (Region) | User Select / Define Language | This options lets you define the language to use for the device and is supporting beginning with Windows 10 2004. Please be aware that language settings require Ethernet connection so that the Autopilot profile containing these settings can be downloaded and processed early on. Wi-Fi connections have the requirement to choose a language, local, and keyboards. |
| Automatically configure keyboard | No / Yes | If a language is selected, you can enable this option to the keyboard selection page. This options requires as the Language (Region) section, an Ethernet connection, too. |
| Apply device name template | No / Yes | With Windows 10 Version 1809 or later, you can configure a template to name a device during enrollments. The names must be 15 characters or less, and can contain letters, numbers, and hyphens. You can use the %SERIAL% macro to add e.g. the serial number or the %RAND:x% macro to add a random strings of numbers. E.g the following macro with add a two digits number add the end SUEM-SSZ-CL0%RAND:2% |
- Press Next
- At the assignment page, do not assign the profile now as we will do it later.
- Press Next
- Press Create
- Wait for the Profile successfully created notification
- Proceed with End User Experience Screens or Profile Assignments
Profile Creation with Unified Endpoint Management
With Unified Endpoint Management, you can create, modify, and delete Windows Autopilot Profiles. Please note that the creation and assignment of Autopilot profiles in Intune is performed in two separate operations. With Unified Endpoint Management, the assignment is already done directly during the profile creation, so feel free to familiarize yourself with the next chapter Profile Assignments already at this point.
- Please refer to the following article to create, modify, delete, and assign Windows Autopilot Profiles
End User Experience Screens
With the Profile creation, you decide how the user experience will be after powering on the device for the device. To provide you an overview about the effects of the settings, this section will show you the screens that users might see or not.
| OS/Screen | Microsoft Software License Terms | Hide change account options |
|---|---|---|
| Windows 10 | 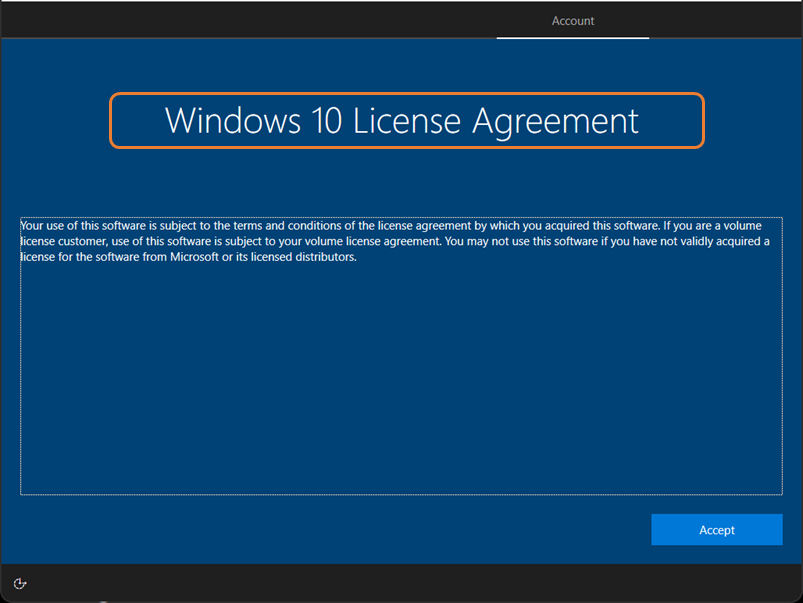 |
 |
| Windows 11 | 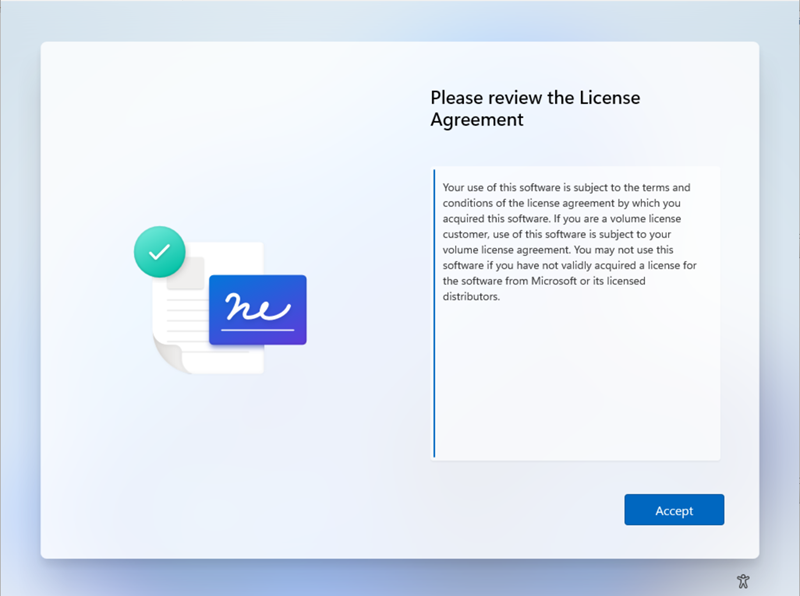 |
 |
| Automatically Configure Keyboard | Automatically Configure Keyboard | |
| Windows 10 | 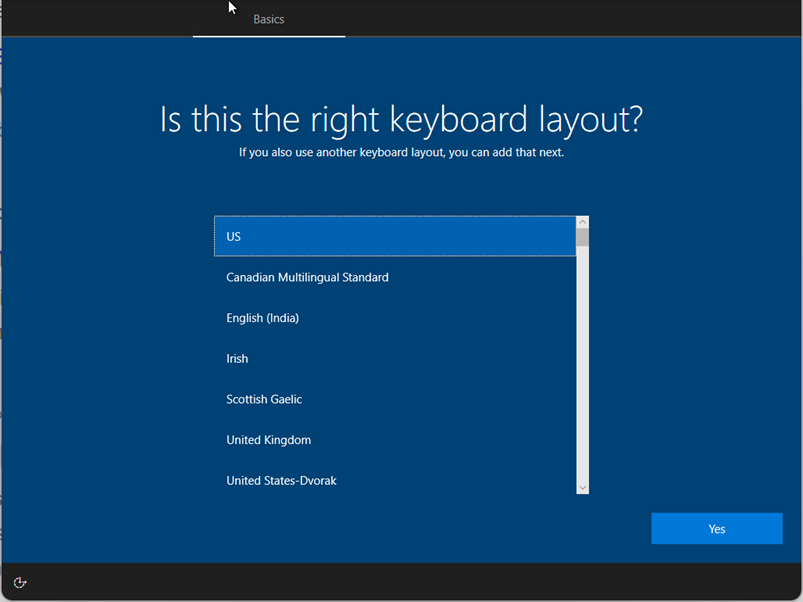 |
 |
| Windows 11 | 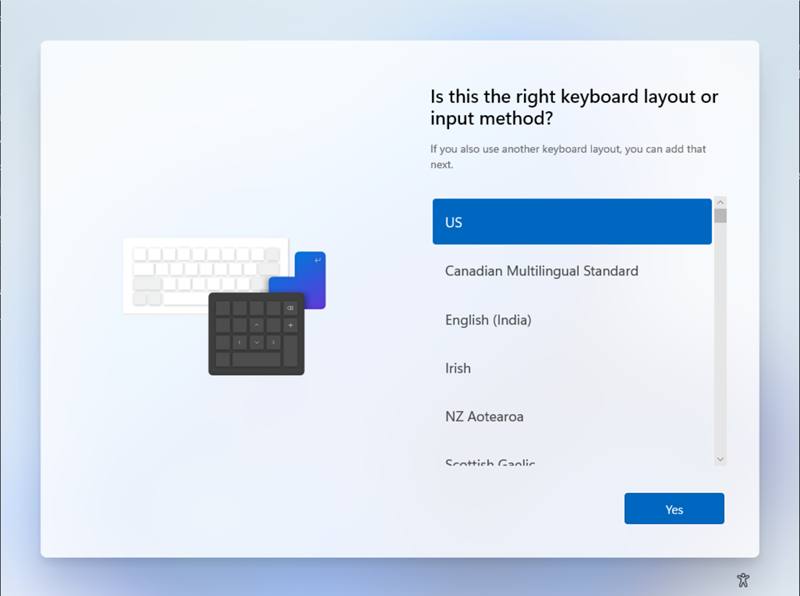 |
 |
| Administrator Account | Standard Account | |
| Windows 10/11 | 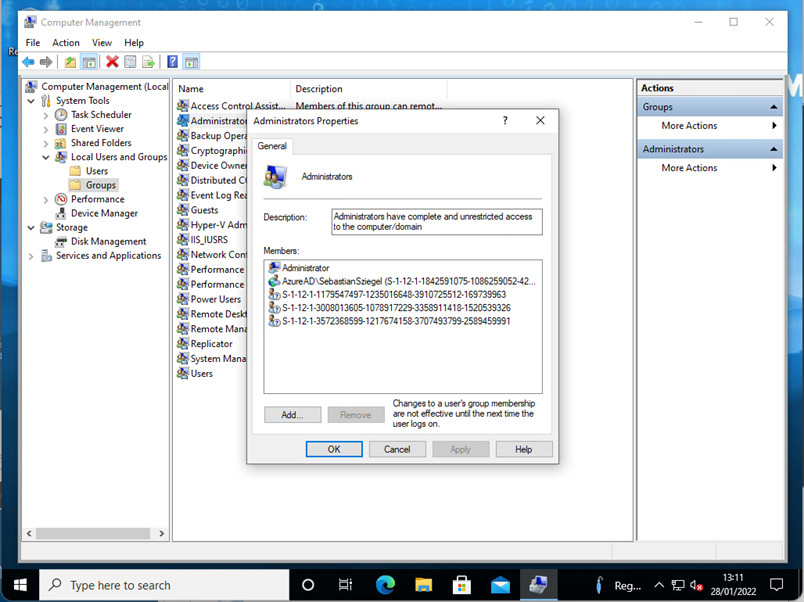 |
 |
Profile Assignments
One next step before we can with try enrollments is the part of assigning profiles. Again, here are some differences in the options that are provided within Intune or our Unified User Experience. As Intune allows to assign profiles to device groups, you can configure a dynamic or static device group in Microsoft Entra ID with Autopilot devices and assign the profiles to the device groups. Since the Windows Autopilot integration in our Unified User Experience uses API calls to Microsoft Graph or Intune, the mechanism of assigning profiles to groups is also the way to go. For this purpose, we have built in a quick option in the Unified Endpoint Management that can be used to create the dynamic group(s) very easily.
Create a dynamic group in Intune
As Intune only provides the assign feature via Groups, you can decide if you want to create a dynamic membership or a static membership group for assigning profiles. To create a dynamic membership, you can complete the following steps:
- Login to your Azure Portal and select Microsoft Entra
- Select Groups and click New group
- Enter a Group Name, e.g. Autopilot Dynamic Membership
- Enter a Group description
- Select as Membership Type Dynamic Device
- Click Add dynamic query
- Click Under Rule Sync edit
- Add the following Rule
(device.devicePhysicalIDs -any _ -contains "[ZTDId]")"
- Press OK
- Press Save
- Press Create
- Wait a couple of moments and press refresh to review your created group
- Proceed with Assign Profile to Group in Intune or depending or your needs, try to create a static group for Intune
Create a dynamic group with Unified Endpoint Management
As mentioned already in the chapter introduction, the Windows Autopilot integration in our Unified User Experience uses API calls to Microsoft Graph or Intune, which means that the mechanism of assigning profiles to groups is also the way to go. For this purpose, we have built in a quick option in the Unified Endpoint Management that can be used to create the dynamic group(s) very easily:
- Please refer to the following article to create dynamic Autopilot device groups
Create a static group in Intune
Next to dynamic groups, you can create a static group in Microsoft Entra ID and assign the profile to this static group. To create a static group, perform the following and add afterwards each device that should receive the profile for this group:
- Login to your Azure Tenant and select Microsoft Entra ID
- Select Groups and click New group
- Enter a Group Name, e.g. Autopilot Profile 1
- Enter a Group description
- Select as Membership Type assigned
- Click Members
- Search for your device(s) and select the target device(s)
- Press Select
- Press Create
- Wait a couple of moments and press refresh to review your created group
- Proceed with Assign Profile to Group in Intune
Assign Profile to Group in Intune
- Start at the Windows Autopilot deployment profiles overview
- Select your Profile
- Click Properties
- Under Assignments, click edit
- Press Add under Included Groups
- Select your previously created group and confirm with Select
- Press Review + save
- Confirm with Save
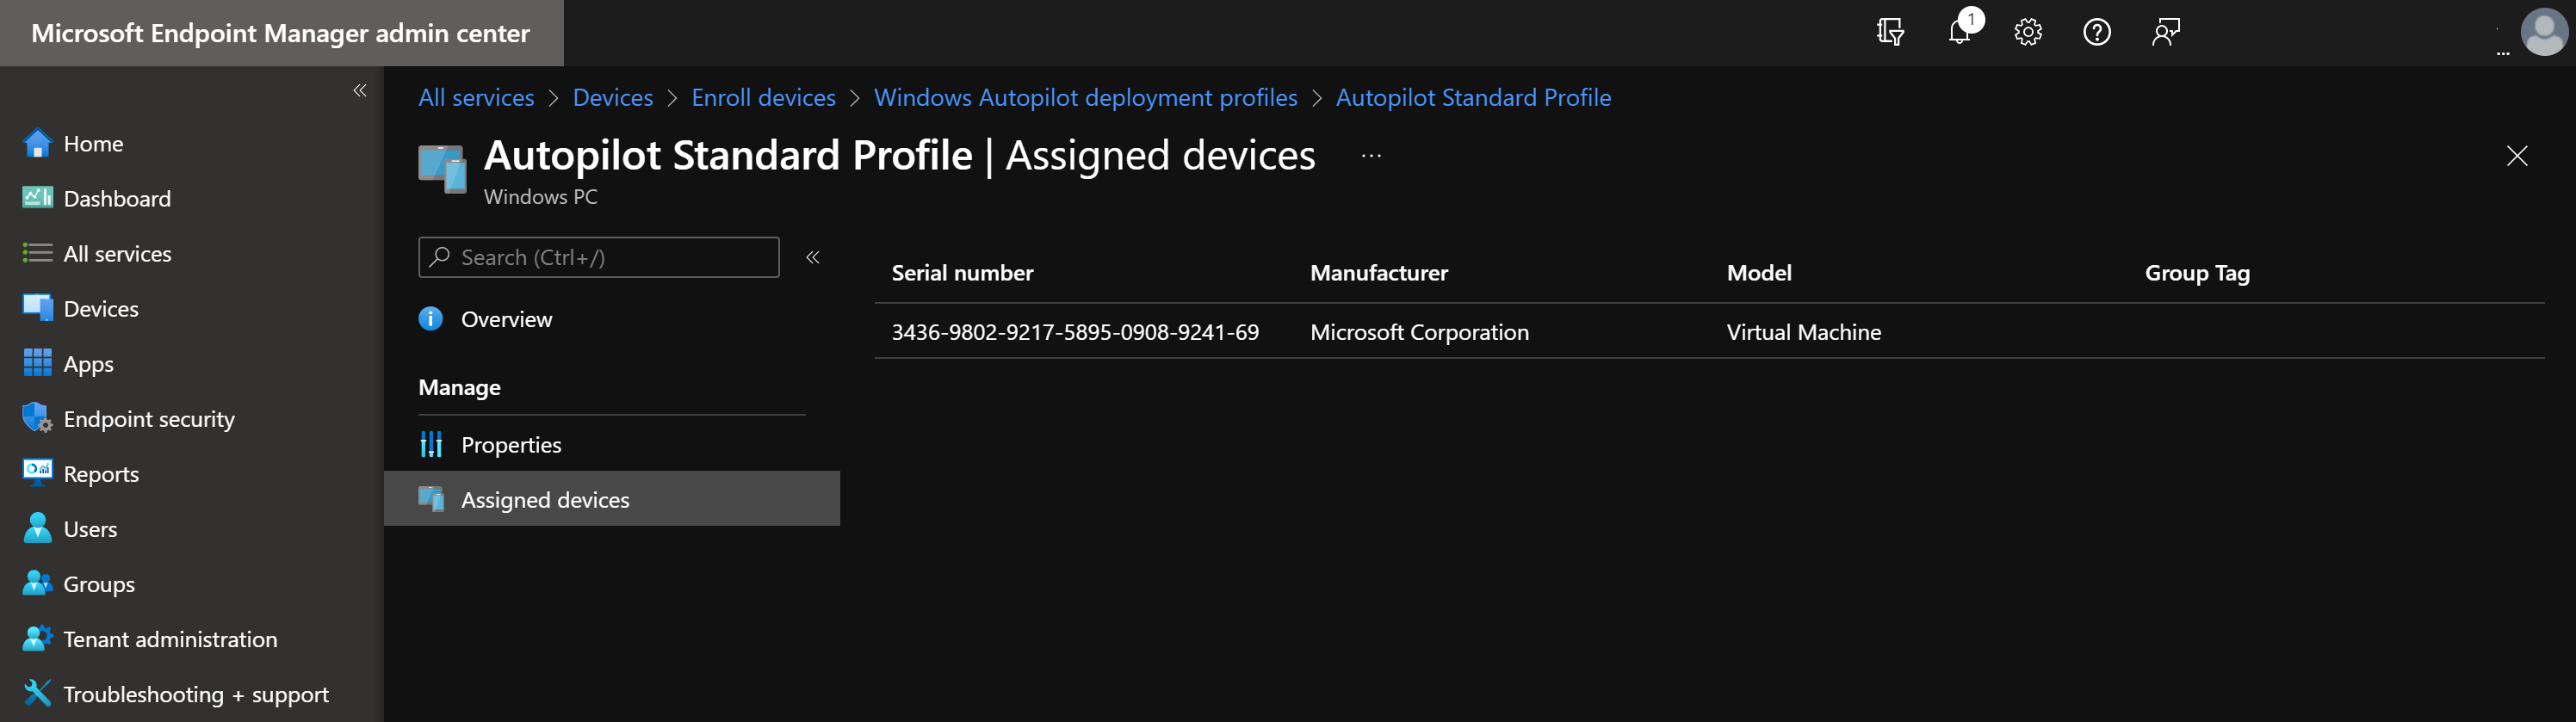
- After some time, new devices should appear under the Assigned devices section
Assign Profile to Group with Unified Endpoint Management
If you create a Windows Autopilot profile via the Unified User Experience or via Unified Endpoint Management, the part of assigning the profile to groups is already integrated in the simplified profile creation wizard.
- Please refer to the following article to create and assign Windows Autopilot Profiles
Enrollment
After you have now configured everything what is needed for Windows Autopilot, you can factory wipe a device or start your Autopilot devices for the first time and enjoy the Windows Autopilot experience with Matrix42 Silverback. The following video provides the enrollment experience for Windows 11 with a basic Autopilot profile in combination with Matrix42 Unified Endpoint Management Version 21.0 Update 2.
Additional Features
The following sections describes some useful settings and options that will enrich and modify the Autopilot experience with Silverback.
Autopilot Reset
With the Autopilot Reset functionality two scenarios are supported in general. One scenario is the Local reset that can be started as an example by an IT administrator if he has a physical access to the device and administrative permissions on the device. A remote reset can be executed by Silverback from any Administrators.
Remote Reset
Remote Autopilot reset is an action that came with Silverback 22.0 and the Autopilot Reset works like a PC Reset, like the other Wipe operations that Silverback supports for Windows 10 and Windows 11 devices, except that the Autopilot reset keeps the device enrolled in Microsoft Entra ID and in Silverback. In addition to that the Autopilot reset will perform the following actions:
- Removes personal files, apps, and settings.
- Reapplies a device's original settings.
- Sets the region, language, and keyboard to the original values.
The Windows Autopilot Reset process automatically keeps information from the existing device:
- Wi-Fi connection details.
- Provisioning packages previously applied to the device.
- A provisioning package present on a USB drive when the reset process is started.
- Microsoft Entra ID device membership and Silverback enrollment information.
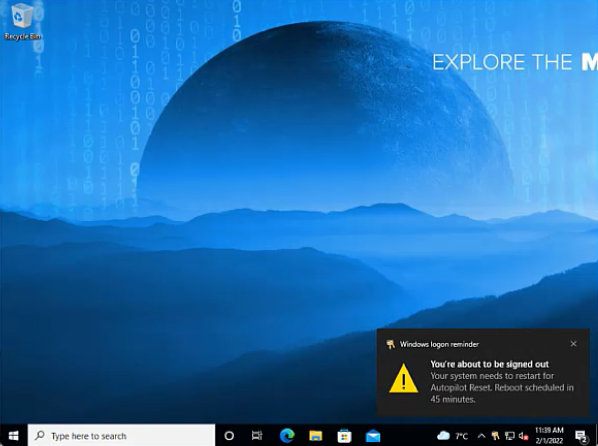
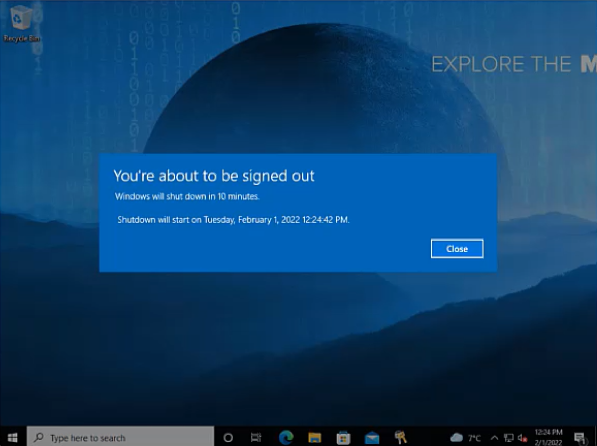
By executing a Remote Reset, the current user will receive a short notification that the Autopilot Reset is scheduled in 45 Minutes. 10 Minutes before the Autopilot reset will be initiated users will receive the final notification
| First Notification | Final Notification |
|---|---|
 |
 |
During the execution of Autopilot reset, you can review the status of the operation in the device overview. Overall the following status information are available
- Complete
- Reset has been scheduled
- Reset is scheduled and waiting for a reboot
If errors appear during the Autopilot reset, a second line of information will be shown with an Error info:
- Failed during CSP Execute
- Failed: power requirements not met.
- Failed: reset internals failed during reset attempt.
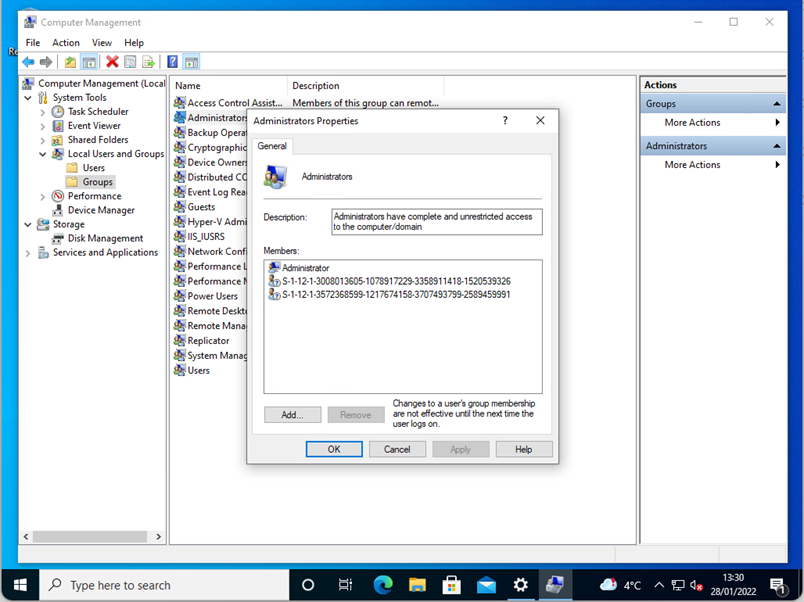
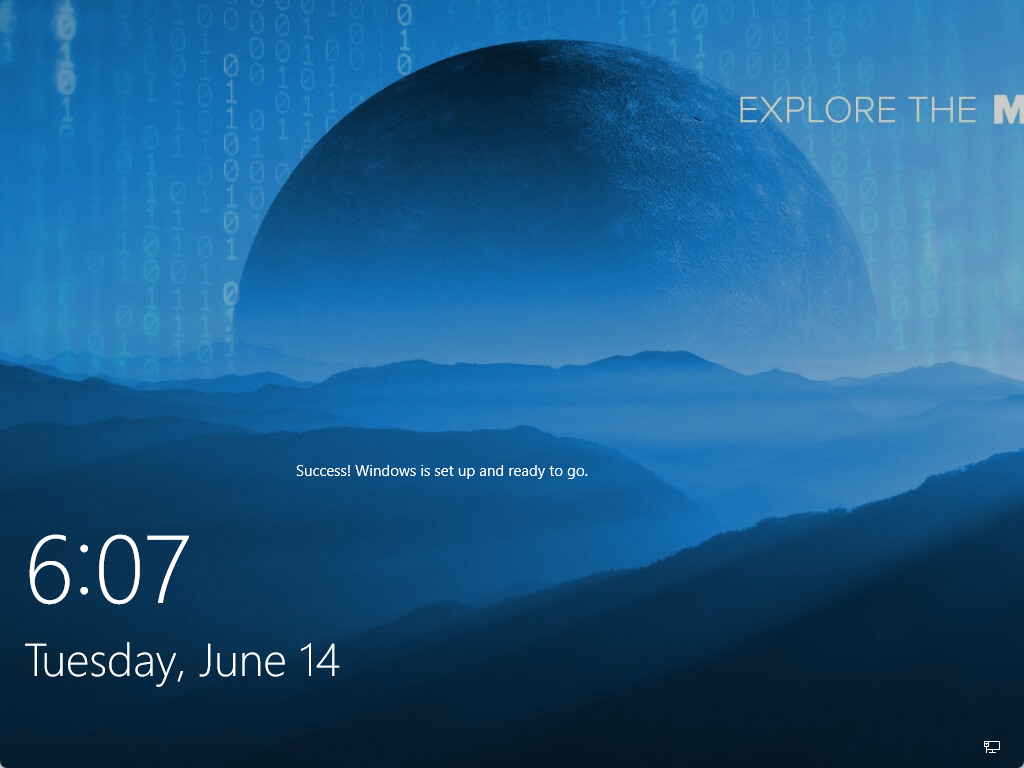
The Remote Autopilot reset can be helpful in break and fix scenarios, as the device remains in management and will reinstall distributed applications after the current or next user signs in with having a fresh setup of Windows 10 or Windows 11. Please be aware when Autopilot reset is executed on a device, the primary user of the device will be removed and the next user who signs will be set as the primary user in Microsoft Entra ID. As per current design, Silverback keeps the device enrolled with the initial owner of the device who performed the enrollment. Due to the vendor design of the Autopilot Reset feature, the Terms & Conditions must not be accepted again from the next user who logs in.
| Successful Autopilot Reset | User Login Screen |
|---|---|
 |
 |
In our test labs we experienced that for Windows 11 21H2 the You're about to signup notification does not appear and after the Autopilot reset, the next user is presented to enter the password prompt for the defaultuser0. By pressing Other Users, the next user is able to sign-in and sign-out defaultuser0. This behavior might change in the future for newer Windows 11 releases.
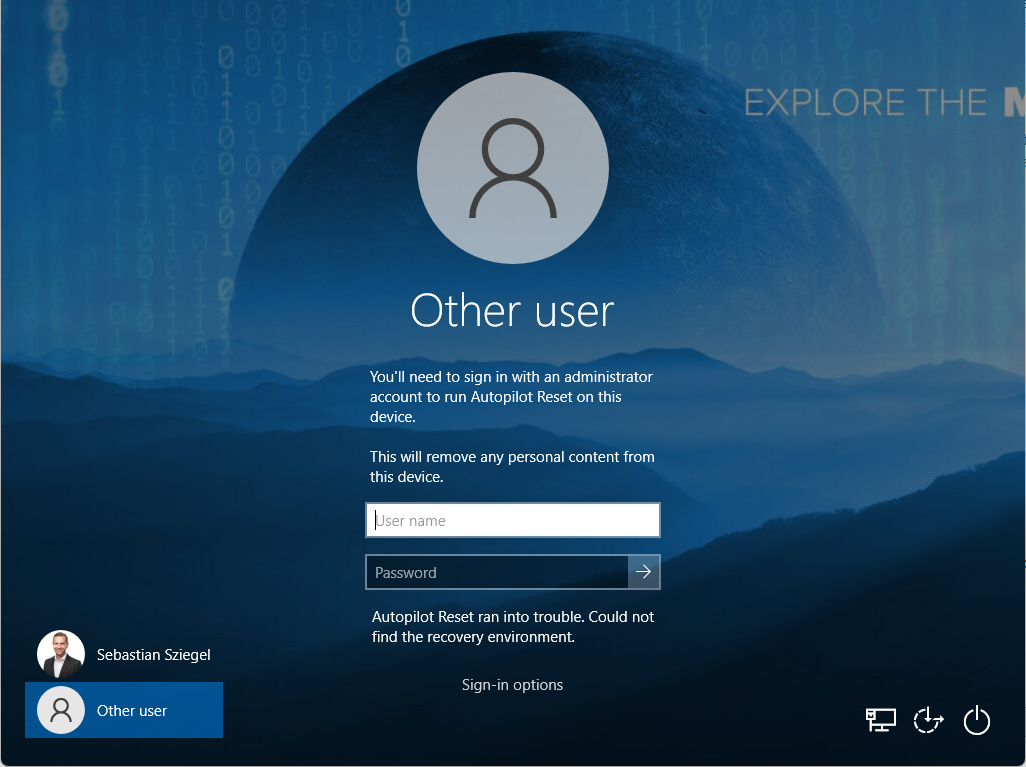
Local Reset
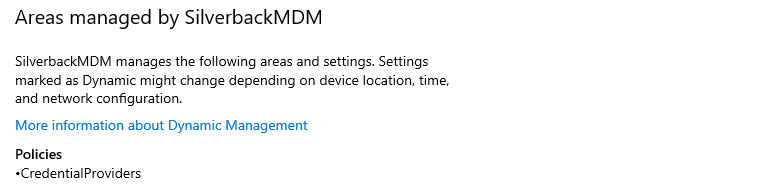
If you want to execute a local Autopilot reset, you need to enable the option first as it is by default set to disabled. To do so, ensure to have set and applied within the Restriction profile, the Local Windows Autopilot Reset (formerly known as Disable the Visibility of the Credentials for Autopilot Reset) in the Credential Providers group to enabled. It will configure the Credential Provider CSP and will allow to display the Autopilot reset option in the Lock Screen.
After applying the restriction, perform the following:
- Lock the device screen
- Perform the following key stroke:

You should see now a login screen with "Sign-in to proceed with Windows Autopilot reset". Sign in with admin account credentials and the local Autopilot reset is triggered. If you have a provisioning package prepared, ensure to plug it in the USB drive before triggering the local Autopilot Reset. As this local reset option does not inform Silverback about the Reset operation, Profiles and Applications won't be automatically reapplied on the devices after the Reset process is finished. To reapply the profile and apps again, you need to edit, remove or assign a Tag to a device. After the next synchronization process, Silverback will install all profiles and apps again on the device.
In our test labs we faced regularly the information that Autopilot Reset ran into trouble when performing the key stroke at the lock screen. Anyway, after logging in with administrative credentials, the Autopilot Reset was executed successfully. For further information, please refer to the official Troubleshooting information about Windows Autopilot Reset here: Troubleshooting
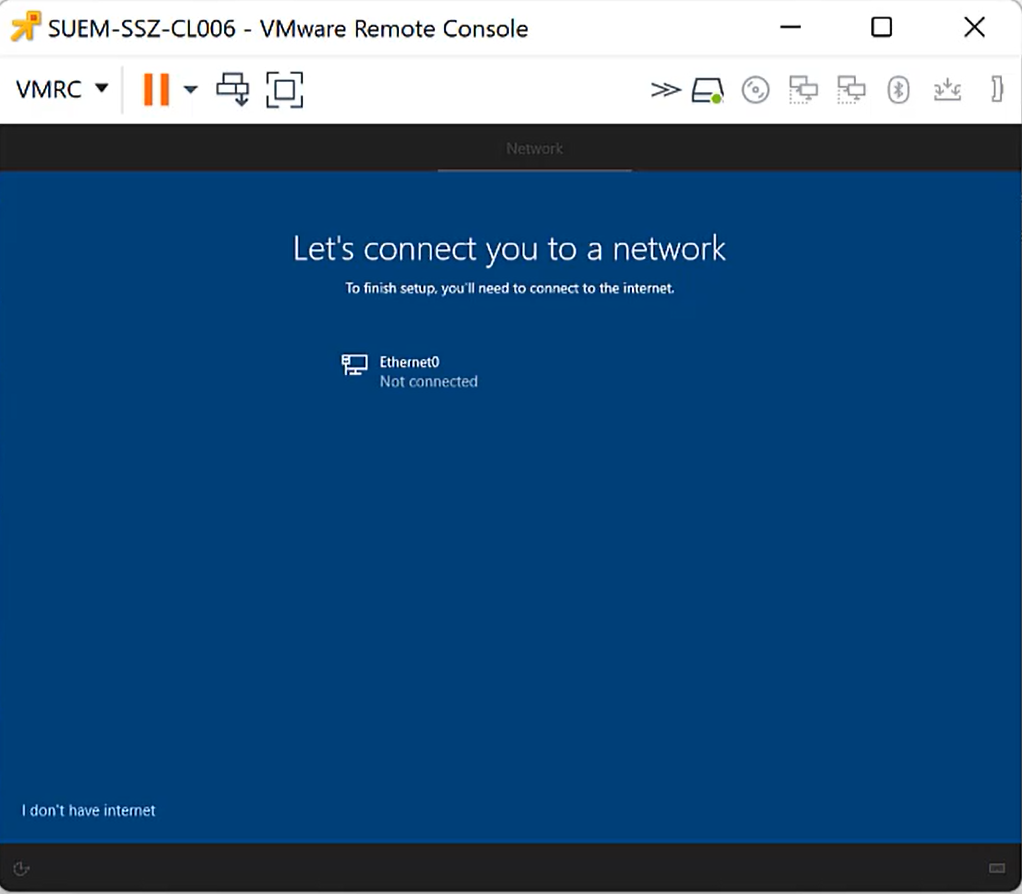
Require Network In OOBE
The Require Network in OOBE option is available with Silverback 22.0 as a new restriction and this is a typical deployment program option. It will help to actively force a user to perform a device enrollment. As an example, for the Device Enrollment Program the similar option is the Force Enrollment setting and most likely it is doing the same but in a different way. During the out-of-the-box-experience of Windows 10 and Windows 11 devices, users might circumvent the Autopilot enrollment by just simply providing no internet connection. In this case, Windows 10 and Windows 11 device have by default, the I don't have internet connection available and if the user would press this button, they would be able to create a local account on the machine and use the device without being managed. The background here is that devices, doesn't matter to which deployment program they belong, require a network connection to receive a profile from this cloud service and it is pretty simple. No internet connection means no cloud service.
To prevent this situation, you can configure with Silverback the new Require Network in OOBE restriction, which correlates to a UEFI variable that is set to require a network connection and a change in Windows 10 1809 that checks this variable. As compared in the following screenshots, the I don't have internet option will be shown or will be hidden during the out-of-the-box-experience, but you need to be aware that the device must be one time enrolled to Silverback to apply this restriction. So, at the first out-of-the-box-experience of the device, this option will be available. After the Autopilot setup, you can apply this restriction and during the next OOBE, this option will be hidden and kept active for all next OOBE scenario. That is how the TenantLockdown CSP is designed and mostly this feature is intended for users who accidentally reset they device.
| First OOBE with the I don't have internet option. | After applying the restriction and a factory wipe, the option will be hidden. |
|---|---|
 |
 |
Please note, that users might have a second option to perform a local account creation and circumvent the Autopilot enrollment. If you have read the complete article, you might remember the Hide change account options in the Autopilot profile. If the Autopilot is set to show the account options, users could press at the sign-in page the Account options button and create a local account on the device, so to fully avoid the local account creation on devices, you must set this option to hide.
Enable Agility Post Enrollment
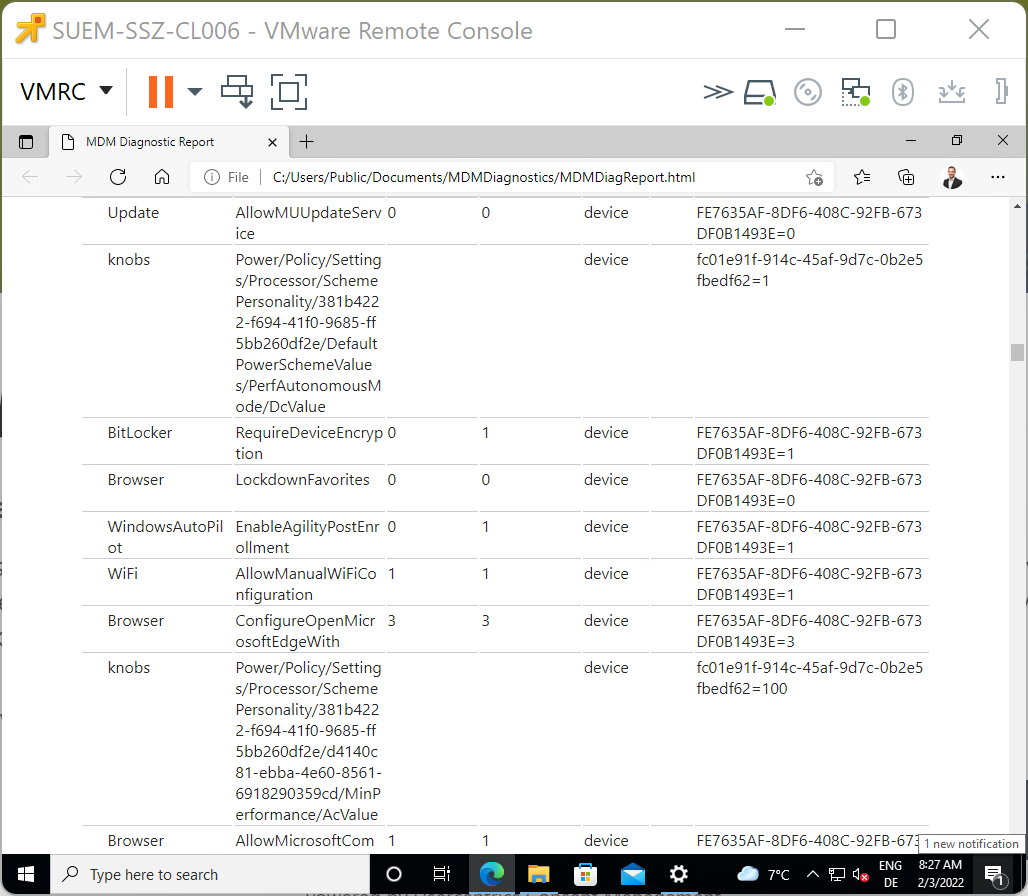
Autopilot agility is a recently introduced feature that allows updates and bug fixes to the OOBE experience. Microsoft started rolling out this feature to Windows 10 1909 and 2004/20H2 with August (2021) cumulative update and is not yet available for Windows 11. From the documentation point, there are currently conflicting statements as the updates should occur either before or after the device enrollment and may result in an additional reboot and authentication prompt to the user. In our test lab we were able to set the Enable Agility Post Enrollment restriction to yes and the configuration was applied on the device.
| Windows Autopilot configuration displays the applied restriction | In the MDM Diagnostic Report the Enable Agility Post Enrollment is set to 1 |
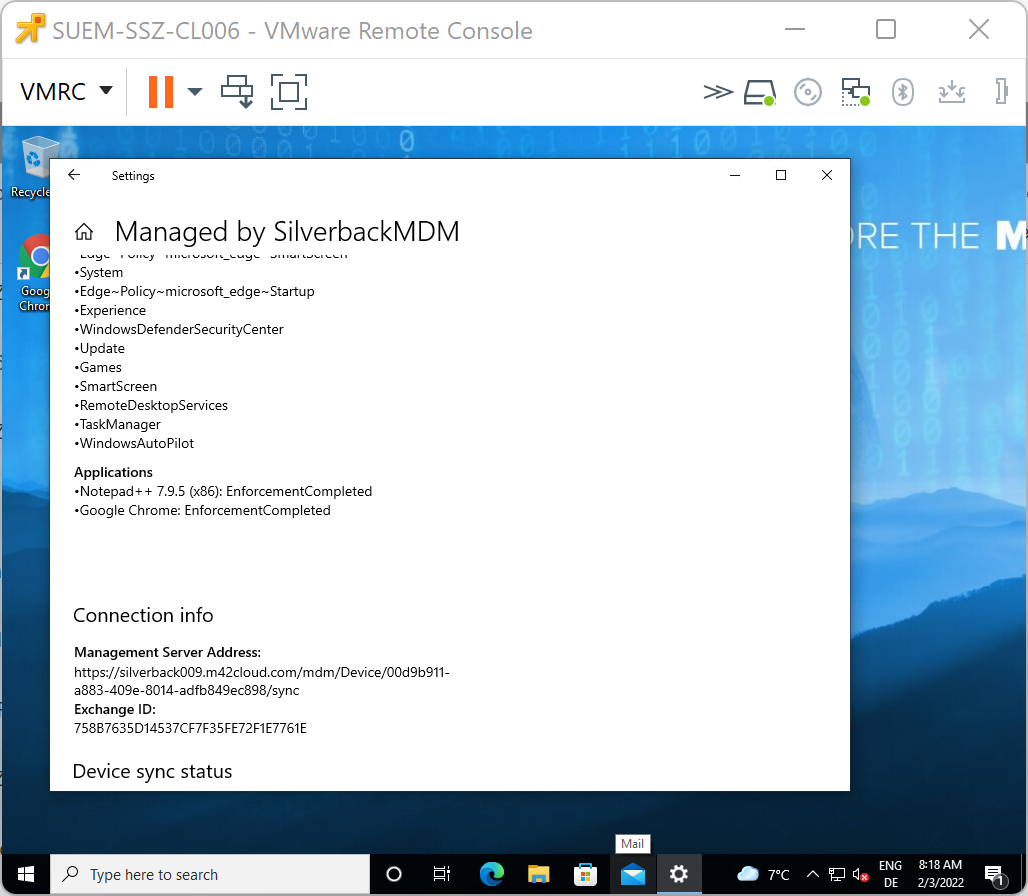 |
 |
Assign a user to a device
You might have heard about a features that makes the experience for users even more powerful with predefining the username at the sign-in page for Windows Autopilot devices. The assign a user to a device during Windows setup feature was introduced by Microsoft in 2018 and has been deprecated in the meantime. Please refer to the following Updates to the Windows Autopilot sign-in and deployment experience article by the Intune support team about the background for the deprecation.
Additional Notes
- You can use this article to Troubleshoot Microsft Entra join issues
- Use this article to Troubleshoot Autopilot OOBE issues via Event Viewer or Registry
- You can utilize the dsregcmd /status with a Command Prompt or Windows Terminal to understand the state of devices in Microsoft Entra ID (Azure AD). The cmd utility must be run as a domain user account
- If you receive a something went wrong information, you can try again or try to find the correlated error message. There are plenty articles about OOBE issues, as the following with an example OOBEAADV10 error message
- In most our cases, after receiving a something went wrong information, either a device reboot or a second attempt brought a success. In case you are using Virtual Machines with snapshots, some issues might appear, so ensure to restart your machines after resetting and having an issue during the OOBE.
- Be careful when predefining languages with the Autopilot Profile. It might be that the OOBE will fail with an indication that the language is wrong