Home Screen Layout Configuration
Overview
The Home Screen layout allows Administrators to organize app icons and Web Clips across supervised iOS and iPadOS devices. A unified layout of interfaces makes switching between devices easier and users and support can expects apps to be in the same location on their devices. Apps which aren't used very often can be organized into folders and moved as an example to page 2 or 3 on the devices.
| Device Type | iPhone | iPad | iPod |
|---|---|---|---|
| Availability | available | available | available |
Configure Home Screen Layout
Create a new Tag
- Open your Silverback Management Console
- Login as an Administrator
- Navigate to Tags
- Click New Tag
- Enter a Name, e.g. Imagoverum Home Screen Layout
- Enter a description (optional)
- Under Enabled Features select Profile
- Under Device Types select a minimum one of iPhone, iPad or iPod
- Press Save
Create your Profile
- Navigate to Profile
- Select now first your desired device type tab in case you have enable multiple device types
- Navigate to Home Screen Layout
- Enable the Profile
- Enter a Profile Name, e.g. Corporate Layout
- Press Save
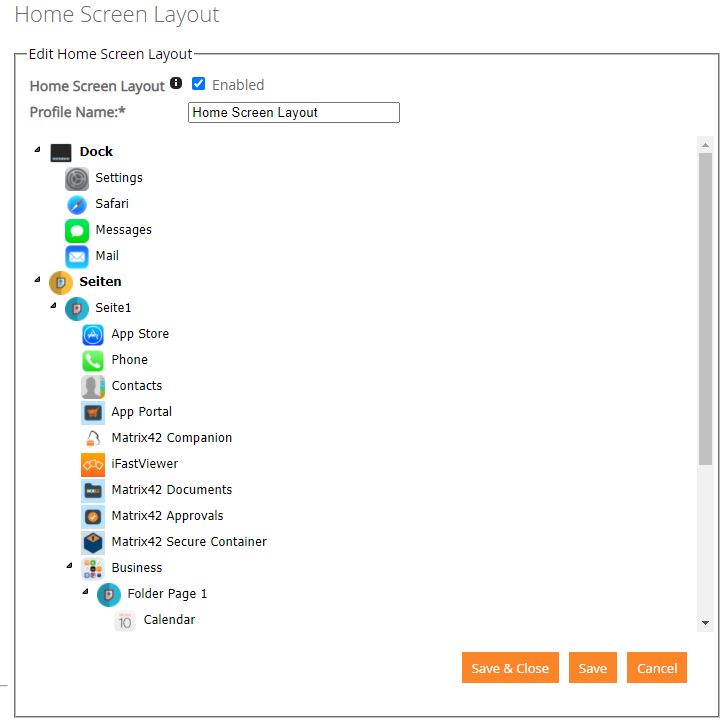
Configure Dock
- Right-Click Dock
- Click Add Application
Now you have the following options:
- Add Application
- Add Folder
- Add Web Clip
| Add Application | Description | Handling |
|---|---|---|
| Select from native applications | iOS and iPadOS delivers a couple of pre-installed or native applications with the operating systems. You can select them from here. | Type as an example Phone, afterwards all results are shown with Phone in the name: e.g. Find iPhone and Phone. Click on the application icon to select the desired app. |
| Select from App Store | We implemented a direct search in Silverback, so that you can search for any app which is listed in the public App Store. | Type as an example Matrix42 and you will see all a list of related applications. Click on the application icon to select the desired app. |
| Enter the Bundle ID of application | This field will be auto filled after selecting the desired App by select from native applications or from App Store. If you distributed any Enterprise app, then enter here the Bundle ID of your Enterprise App. | Will be filled automatically or needs to be entered manually when adding an Enterprise app to Home Screen Layout. |
| Enter the name of application | This field will be auto filled after selecting the desired App by select from native applications or from App Store. You can rename the application if you want but be aware that the Name is only visible in the Tag, the Application name on the devices will stay in the original name. | Will be filled automatically or can be entered or adjusted for convenience. |
Ensure that you enter just applications that you will deploy with Silverback to your device fleet or native application. So every application, excluding native applications, should be available in App Portal section in Silverback.
| Add Folder | Description |
|---|---|
| Enter the name of folder | Here you can enter the name of the folder you want to create on your Home Screen Layout. Afterwards you can add with Add Application apps that will be organized in this folder. The name you will enter here will be the name of the folder on every included device. |
Each folder contains as well pages. By default Silverback will create the Folder Page 1 as default. Right Click Folder Page 1 to add applications to that page.
| Add Web Clip | Description |
|---|---|
| Add App Portal Web clip | Enable this checkbox to place the App Portal Web Clip. It will only have an effect if the App Portal is enabled for the particular device(s). |
| Select from predefined in the current tag | The approach to place Web Clips on devices is to add first your Web Clips in the Web Clip Profile. Afterwards use this search functionality here to place the Web Clips within your Layout. |
| Enter the URL of the web clip | This field will be prefilled automatically by selecting existing Web Clips. Anyway it is additionally possible to add here a custom URL in case Web Clips are not managed by Silverback and already present on the device. |
| Enter the name of the web clip | This field will be auto filled after selecting the desired Web Clips by selecting them from the search. You can rename the application if you want but be aware that the Name is only visible in the Tag, the Web Clip name on the devices will stay in the original name. |
Configure Pages
- Right Click Pages
- Click Add
- Right Click Page 1
- Add here in the same way applications and/or folders.
- Proceed with creating pages and adding applications and/or folders
- For ordering everything just drag & drop folders or applications.
- Click Save
Assign Home Screen Layout
As usual, you have now three different options to assign the Tag to your devices:
- Navigate in the Tag to Definition and use the Associated Devices button to attach devices
- Navigate in the Tag to Definition and enable the Auto Population
- Navigate to Devices and use the assign Tag button and select the Tag and press save
Review Changes
After assigning the Tag to your device(s), the application icons should be sorted and placed on the devices as in your configuration. The following configuration shows the result on the device:
 |
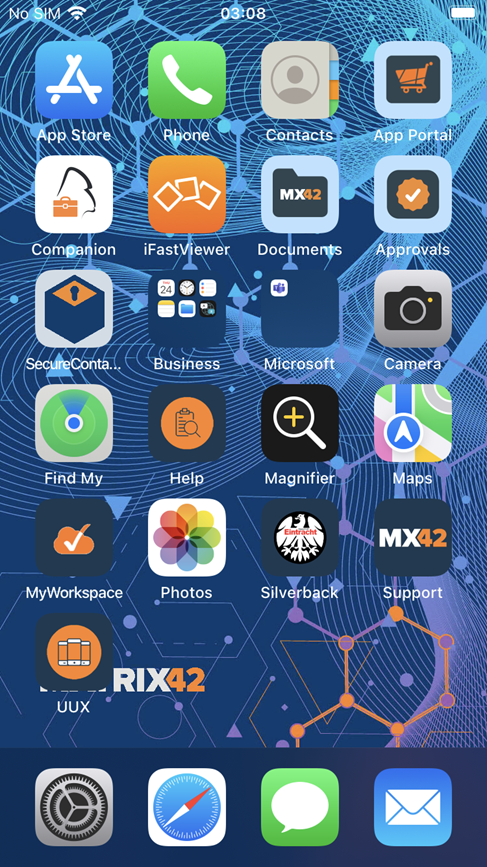 |
You can review the installation status from the Management Console in the pending commands section for each device:

Additionally, you will find an entry in the Profile List in the Device Overview:
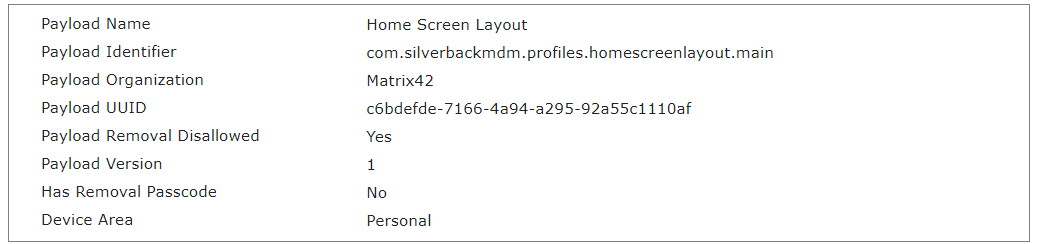
Last but not least, the MDM Profile on the device displays an entry for Home Screen Layout
Additional Information
- Dock allows to add and assign overall 6 applications or folders
- Pages section allows to create overall 20 pages
- Each page allows to add 24 applications, folders or web clips
- Applications can be placed only once on a device, so applications should be placed either in dock or in pages
- If Dock or Pages are fully loaded it is not possible to drag & drop apps or folders into the right position. Remove one app or folder and rearranging is again possible
- Apps that have not been assigned a screen position and apps that have been installed on the device manually will appear after the assigned apps in alphabetical order
- If you want to hide additional installed applications that are not part of the Home Screen Layout, please refer to Enforced Blacklist Whitelist for iOS and iPadOS
- Once a home screen layout is applied:
- The app icon layout cannot be modified on the device itself by the user
- Apps can be uninstalled only via the Managed Application section in the Device Overview portal or from Settings > Storage on the device
- Manually added WebClips via the Add to Home Screen action in Safari can't be removed or manipulated afterwards
- If two or more Home Screen Layout profiles are assigned to one device, the latest edited will win
- Shortcuts can be used
- Rename (F2)
- Delete (Del)
- Add Application (Shift + A)
- Add Folder (Shift + F)
- Add Web Clip (Shift + W)
- Add Page (Shift + P)