Multiple Domain Connection with LDAP Mappings
Overview
If you have in your organization has an example multiple subsidiaries with dedicated domains, you can let your user’s login to Silverback from up to 21 different domains. All you need to do is to setup a two-way transitive trust relationship between the (main) domain configured in the LDAP section and the additional domains that you want to use. The additional domains have to be added in the LDAP Mapping configuration of Silverback. Within this guide, we want to highlight the requirements and the configuration steps to let your user’s login from the main domain and from additional domain(s).
Scenario
The current scenario for this knowledge base article is an existing domain controller (SUEM-DC-S001) with the source domain m42cloud.eu. In addition to this domain, we will create and connect the target domain imagoverum.com (SUEM-DC-S002) to Silverback. In this case, users from both domains can login to the Self-Service Portal to create their pending enrollments or enroll their devices directly.
- Source Domain: m42cloud.eu on SUEM-DC-S001
- Target Domain: imagoverum.com on SUEM-DC-S002
Create your Trust Relationship
As mentioned above, the requirement is a two-way transitive trust relationship between both domains. If your trust relationship between the domains is currently not yet configured, you can use the overview below about the main steps. As in our test lab only the source domain was already created, we executed the additional steps to create a new Windows Server with the target domain and installed ADDS on it. If you have already your domains ready, you can skip the first two steps:
- Create a new Windows Server as your target domain
- Install Active Directory Domain Services and Promote your new Server to a Domain Controller
- Ensure the DNS name resolution between the two forests and make sure each domain name can be pinged from a client or DC in the other domain
- e.g., with Conditional Forwarders
- Open on the source domain the Active Directory Domains and Trusts snap-in and right click your domain and select Properties, followed by Trusts
- Select New Trust and follow the wizard to create a Forest Trusts with Two-way direction for your target domain
- Under Sides of Trust select Both this and the specified domain and enter an administrative User Name and password from your Target domain.
- Select Forrest-wide authentication as Outgoing Trust Authentication Level-Local and Specified Forest and finish the Wizard with confirming the trusts
- Review in your target domain with the Active Directory Domains and Trusts snap-in if the trust relation has been established
Test the trust relationship
To validate the trust relation, we will perform now two different tests. The first one is to login from a m42cloud.eu domain joined computer with a user account from the imagoverum.com domain. The second step is to simply verify if the locations are present when you want to assign a user to a group.
Logon on to a client in another Domain
- Get access to any computer that is joined in the m42cloud.eu domain
- Change the User and enter the credentials of a user from the target domain (imagoverum.com)
- You should be able to login to the device and create a session
- After the login, you can run a command prompt and enter SET and compare the USERDOMAIN information (IMAGOVERUM) and the Domain name (m42cloud.eu) from the System Properties (sysdm.cpl)
Lookup a group in the source domain
- On your target domain (imagoverum.com), open Active Directory Users and Computers
- Open the Properties of any user and select Member Of
- Press Add and Select Locations
- Now select your Source Domain (m42cloud.eu) and press OK
- Select Advanced and Press Find Now
- Select any Group and confirm with OK (2x)
- Depending on your rights you will see a prompt that you do not have permission to modify the group, but we know now that the trust is established.
Configure Silverback
After you have validated your Trust Relationship, you are good to go and configure Silverback.
In case you have a Cloud Connector in place, please ensure first to have Send LDAP Requests through Tunnel enabled under the Cloud Connector menu in the Web Settings, before navigating to the LDAP section within the next chapter.
Configure Source Domain (LDAP)
- Open your Silverback Management Console
- Login as a Setting Administrators
- Navigate to LDAP and enter your source domain (m42cloud.eu) connection
| LDAP Connection | Example |
|---|---|
| LDAP Type | AD |
| LDAP Server | SUEM-DC-S001-m42cloud.eu |
| LDAP Port | 389 |
| LDAP SSL | No |
| LDAP Lookup Username | service_ldap@m42cloud.eu |
| LDAL Lookup Password | Pa$$w0rd |
- Now configure your LDAP Filter settings to let only specific users access the Self-Service Portal (User Filter) and ensure to not exclude administrative accounts in the Base DN.
| LDAP Filter | Example |
|---|---|
| Base DN | DC=m42cloud,DC=eu |
| User Filter | ((&(objectClass=user)(userPrincipalName={0})(MemberOf=CN=Mobile-Users,OU=Groups,DC=m42cloud,DC=EU))) |
- Enter your desired LDAP Attributes and Custom LDAP Attributes Fields
- Press the Check LDAP Connection button. You should see the LDAP server is available message.
- Confirm with OK, Press Save and Confirm again with OK
In case you have a Cloud Connector in place, ensure to restart the Cloud Connector Services afterwards.
Review additional notes about LDAP SSL
If you are intending to use LDAP SSL over 636, ensure that all minimum requirements for the LDAP SSL communication are met. The setup for a valid LDAP SSL configuration is out of scope of this article but in general, you need to ensure that the trusted chain is verified for the whole LDAP SSL communication. If you are not sure that all requirements are met or you want to verify it first, ensure as a starting point that you can connect via the ldp.exe utility, which can be installed with the AD LDS Server Role, first to the primary Domain Controller (SUEM-DC-S001) itself on Port 636 with enabled SSL. After that ensure that you can connect from your Silverback or Cloud Connector Server to the first Domain Controller with the same port and settings. After that ensure that you can connect from your first Domain Controller (SUEM-DC-S001) to your second domain controller (SUEM-DC-S002). To finalize the check, ensure that you can connect from the Silverback or Cloud Connector Server to the second Domain Controller (SUEM-DC-S002). If you have issues with any of the SSL connection, review your certificates and ensure that they are present on the servers/clients in the required Cert Store Locations. When all connections are working, you are good to use LDAP SSL in the LDAP Connection Configuration in Silverback. In case you have difficulties to get it work, review the Event Viewer Logs, as highlighted in the Troubleshooting Example for LDAP SSL section.
Logins with sAMAccountName
In case you want to the sAMAccountName instead of the userPrincipalName for the logins, replace userPrincipalName={0} inside the User Filter for your source domain to sAMAccountName={0} according to the following example:
| LDAP Filter | Example |
|---|---|
| Base DN | DC=m42cloud,DC=eu |
| User Filter | ((&(objectClass=user)(sAMAccountName={0})(MemberOf=CN=Mobile-Users,OU=Groups,DC=m42cloud,DC=EU))) |
This ensures, that users from your source/primary domain can login with their sAMAccountName without the domain (e.g., mmiller for Maria Miller) prefix.
To make this later work for your target domain(s), ensure to configure your LDAP Mapping for the target domain according to the following example:
| LDAP Filter | Example |
|---|---|
| Upn suffix | IMAGOVERUM |
| Base DN | DC=imagoverum,DC=com |
| LDAP Filter | ((&(objectClass=user)(sAMAccountName={0})(MemberOf=CN=Mobile-Users,CN=Users,DC=imagoverum,DC=com))) |
Your users from the target domain(s) will be able to login with this configuration with their sAMAccountName with the domain (e.g., IMAGOVERUM\mmiller for Maria Miller) prefix.
In case you want to let your user’s login with the domain prefix at the source/primary domain as well, add the domain additionally to the LDAP Mapping section according to the following example:
| LDAP Filter | Example |
|---|---|
| Upn suffix | M42CLOUD |
| Base DN | DC=m42cloud,DC=eu |
| LDAP Filter | ((&(objectClass=user)(sAMAccountName={0})(MemberOf=CN=Mobile-Users,OU=Groups,DC=m42cloud,DC=EU))) |
This configuration ensures in combination with your LDAP source domain configuration, that your users can login with and without the domain (e.g., M42CLOUD\mmiller or mmiller for Maria Miller) prefix on your source/primary domain.
In case you have multiple domains with the same domain prefix (e.g., M42CLOUD for m42cloud.eu and m42cloud.com), it is required to configure the LDAP Filters with the userPrincipalName={0}.
Test Source Domain Login
After the two digressions about LDAP SSL and Logins with sAMAccountName, we are ready to go to login with an account from the source domain:
- Open your Self-Service Portal
- Login with a valid domain user and press Start to create a pending enrollment
- If you see now the QR-Code and all other enrollment information, you are good to add your target domain.
Configure Target Domain (LDAP Mapping)
- Navigate back to your Silverback Management Console
- Select again LDAP and remove your LDAP Lookup Username and LDAP Lookup Password
- Press Save and Confirm with OK
- Navigate now to LDAP Mapping
- Enter now for each target Domain, the following values:
| Base DN Mappings | Example |
|---|---|
| Upn suffix | imagoverum.com |
| Base DN | DC=imagoverum,DC=com |
| LDAP Filter | ((&(objectClass=user)(userPrincipalName={0})(MemberOf=CN=Mobile-Users,CN=Users,DC=imagoverum,DC=com))) |
- Press Save and Confirm with OK
In case you have a Cloud Connector in place, ensure to restart the Cloud Connector Services.
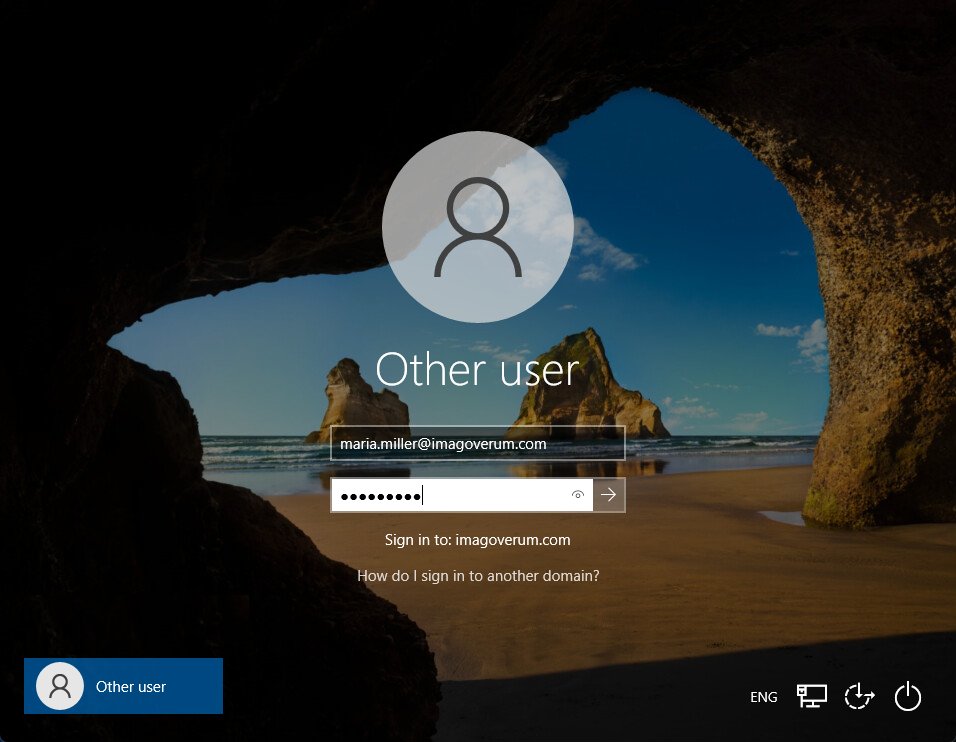
Test Target Domain Login
- Open your Self Service again in an incognito mode
- Login with a valid domain user from the target domain (e.g., maria.miller@imagoverum.com)
- Press Start to create a pending enrollment
Troubleshooting Example for LDAP SSL
Next to ensuring the trusted chain for the whole LDAP SSL communication, you can review Errors from the Event Viewer > Windows Logs > System from the Schannel Source on each server/client. The following shows an example Error Entry with the Event ID 36882 from the Schannel about a not trusted chain for the request from the Silverback / Cloud Connector Server to the second Domain Controller (SUEM-DC-S002). In this case the Login on the Self-Service Page showed only Username or password is incorrect after some time, but in the Event Viewer several entries in the system logs have been created on the Silverback / Cloud Connector Server:
"The certificate received from the remote server was issued by an untrusted certificate authority. Because of this, none of the data contained in the certificate can be validated. The TLS connection request has failed. The attached data contains the server certificate."
After adding the missing public key from SUEM-DC-S002 to the Trusted Root Certification Authorities store on the Silverback / Cloud Connector Server, the issue could be solved.
Additional Notes
- Ensure to not have any Local Users present that has the same username as your LDAP users from the trusted domain. Silverback is always verifying first local users before LDAP users. So, in case you have a Local User with the same name in the database, your login might fail due to different passwords.
- If you are creating the Trust in a Test Lab, ensure that your Servers have a different SID. Otherwise, the trust wizard will not be finished successfully. You can check the SID as an example with the following PowerShell command:
get-adcomputer computername -prop sid
- If you want to use the Provision Users feature, usernames from all target domains can be entered, but you need to use an administrative account in the primary domain (that is part of any configured Active Directory Group in the admin section) to authorize the action.