Enforced Blacklist Whitelist for iOS and iPadOS
Overview
Silverback offers two ways to influence installed applications on iOS and iPadOS devices. The fist one, Silverback blacklist is a method that does not interfere directly with the device and Silverback will perform here certain actions based only on the list of installed applications that devices send to the management system if an unwanted application is installed or detected on the device. Another method is the Enforced blacklist/whitelist, which Apple originally made available with iOS 9.3 on supervised devices but due to a change in the configuration keys used by Apple, this feature now requires iOS or iPadOS 15. Here, the management actively influences the device with a restriction and configures it in such a way that an array of unwanted or explicitly wanted applications become unusable/usable. These capabilities allow it to prevent of almost any app except the setting application of being shown or launchable.

In this article, we will focus on the Enforced blacklist/whitelist method and before we start, we want to highlight some basics.
| Option | Description |
|---|---|
| Blacklist | The starting point here is that by default all applications will be allowed and launchable on the device, except the applications that are explicitly configured or added in the blacklist section. |
| Whitelist | The starting point here is that all applications will be disabled by default, except the applications that are explicitly configured or added in the whitelist section. |
By default, the whitelist has a higher priority, so if you configure and assign both options to a device, the whitelist will win for System Applications. If third-party applications are added to the blacklist and whitelist section in parallel, the application will be unusable on the devices and we will demonstrate this particularity within this guide later on.
Requirements
To enforce the application blacklist or whitelist, the device(s) must meet the following criteria:
- iOS 15 and newer
- Supervised device
As the enforced black- & whitelisting requires supervised devices, you may want to utilize the native black- & whitelisting option instead.
Disable System Applications
We will first now start with disabling several system applications with the blacklist option, before we will disable additionally the App Store and several third-party applications. To disable system applications, please perform the following:
- Open your Silverback Management Console
- Login as an Administrator
- Create a new Tag with enabled Policy Feature and iPhone, iPad or iPod enable as device type or modify an existing Tag
- Navigate to Policy
- Select Application Blacklist
- Click Enforced blacklist/whitelist
By default, you will start now in the whitelist configuration section, and you can easily switch by selecting blacklist. From here you have for both methods the same experience. System application can be selected in the UI interface and any other third-party application can be specified by its bundle ID.
- As we want to blacklist specific system applications within this guide, we select the following applications:
- iTunes Store
- Measure
- Photo Booth
- Podcasts
- Shortcuts (iOS 13)
- Stocks
- Tips
- Press Save after selecting the system applications and assign the Tag to one of your devices
In newer iOS versions, the Phone application can no longer be disabled. If the application is selected in the Blacklist configuration, the profile installation returns an error and will fail and none of the selected applications will be disabled.
The App Portal falls under Web Clips, so if you blacklist Web Clips as System App, the App Portal including all other Web Clips will be disabled on the devices.
Review Disabled System Applications
After assigning the tag, you can review the configuration in the MDM Profile on your device. To do that, perform the following steps:
- Open Settings
- Select General > VPN & Device Management
- Select Silverback MDM Profile > Restrictions
- Review the entry Prohibited application list added
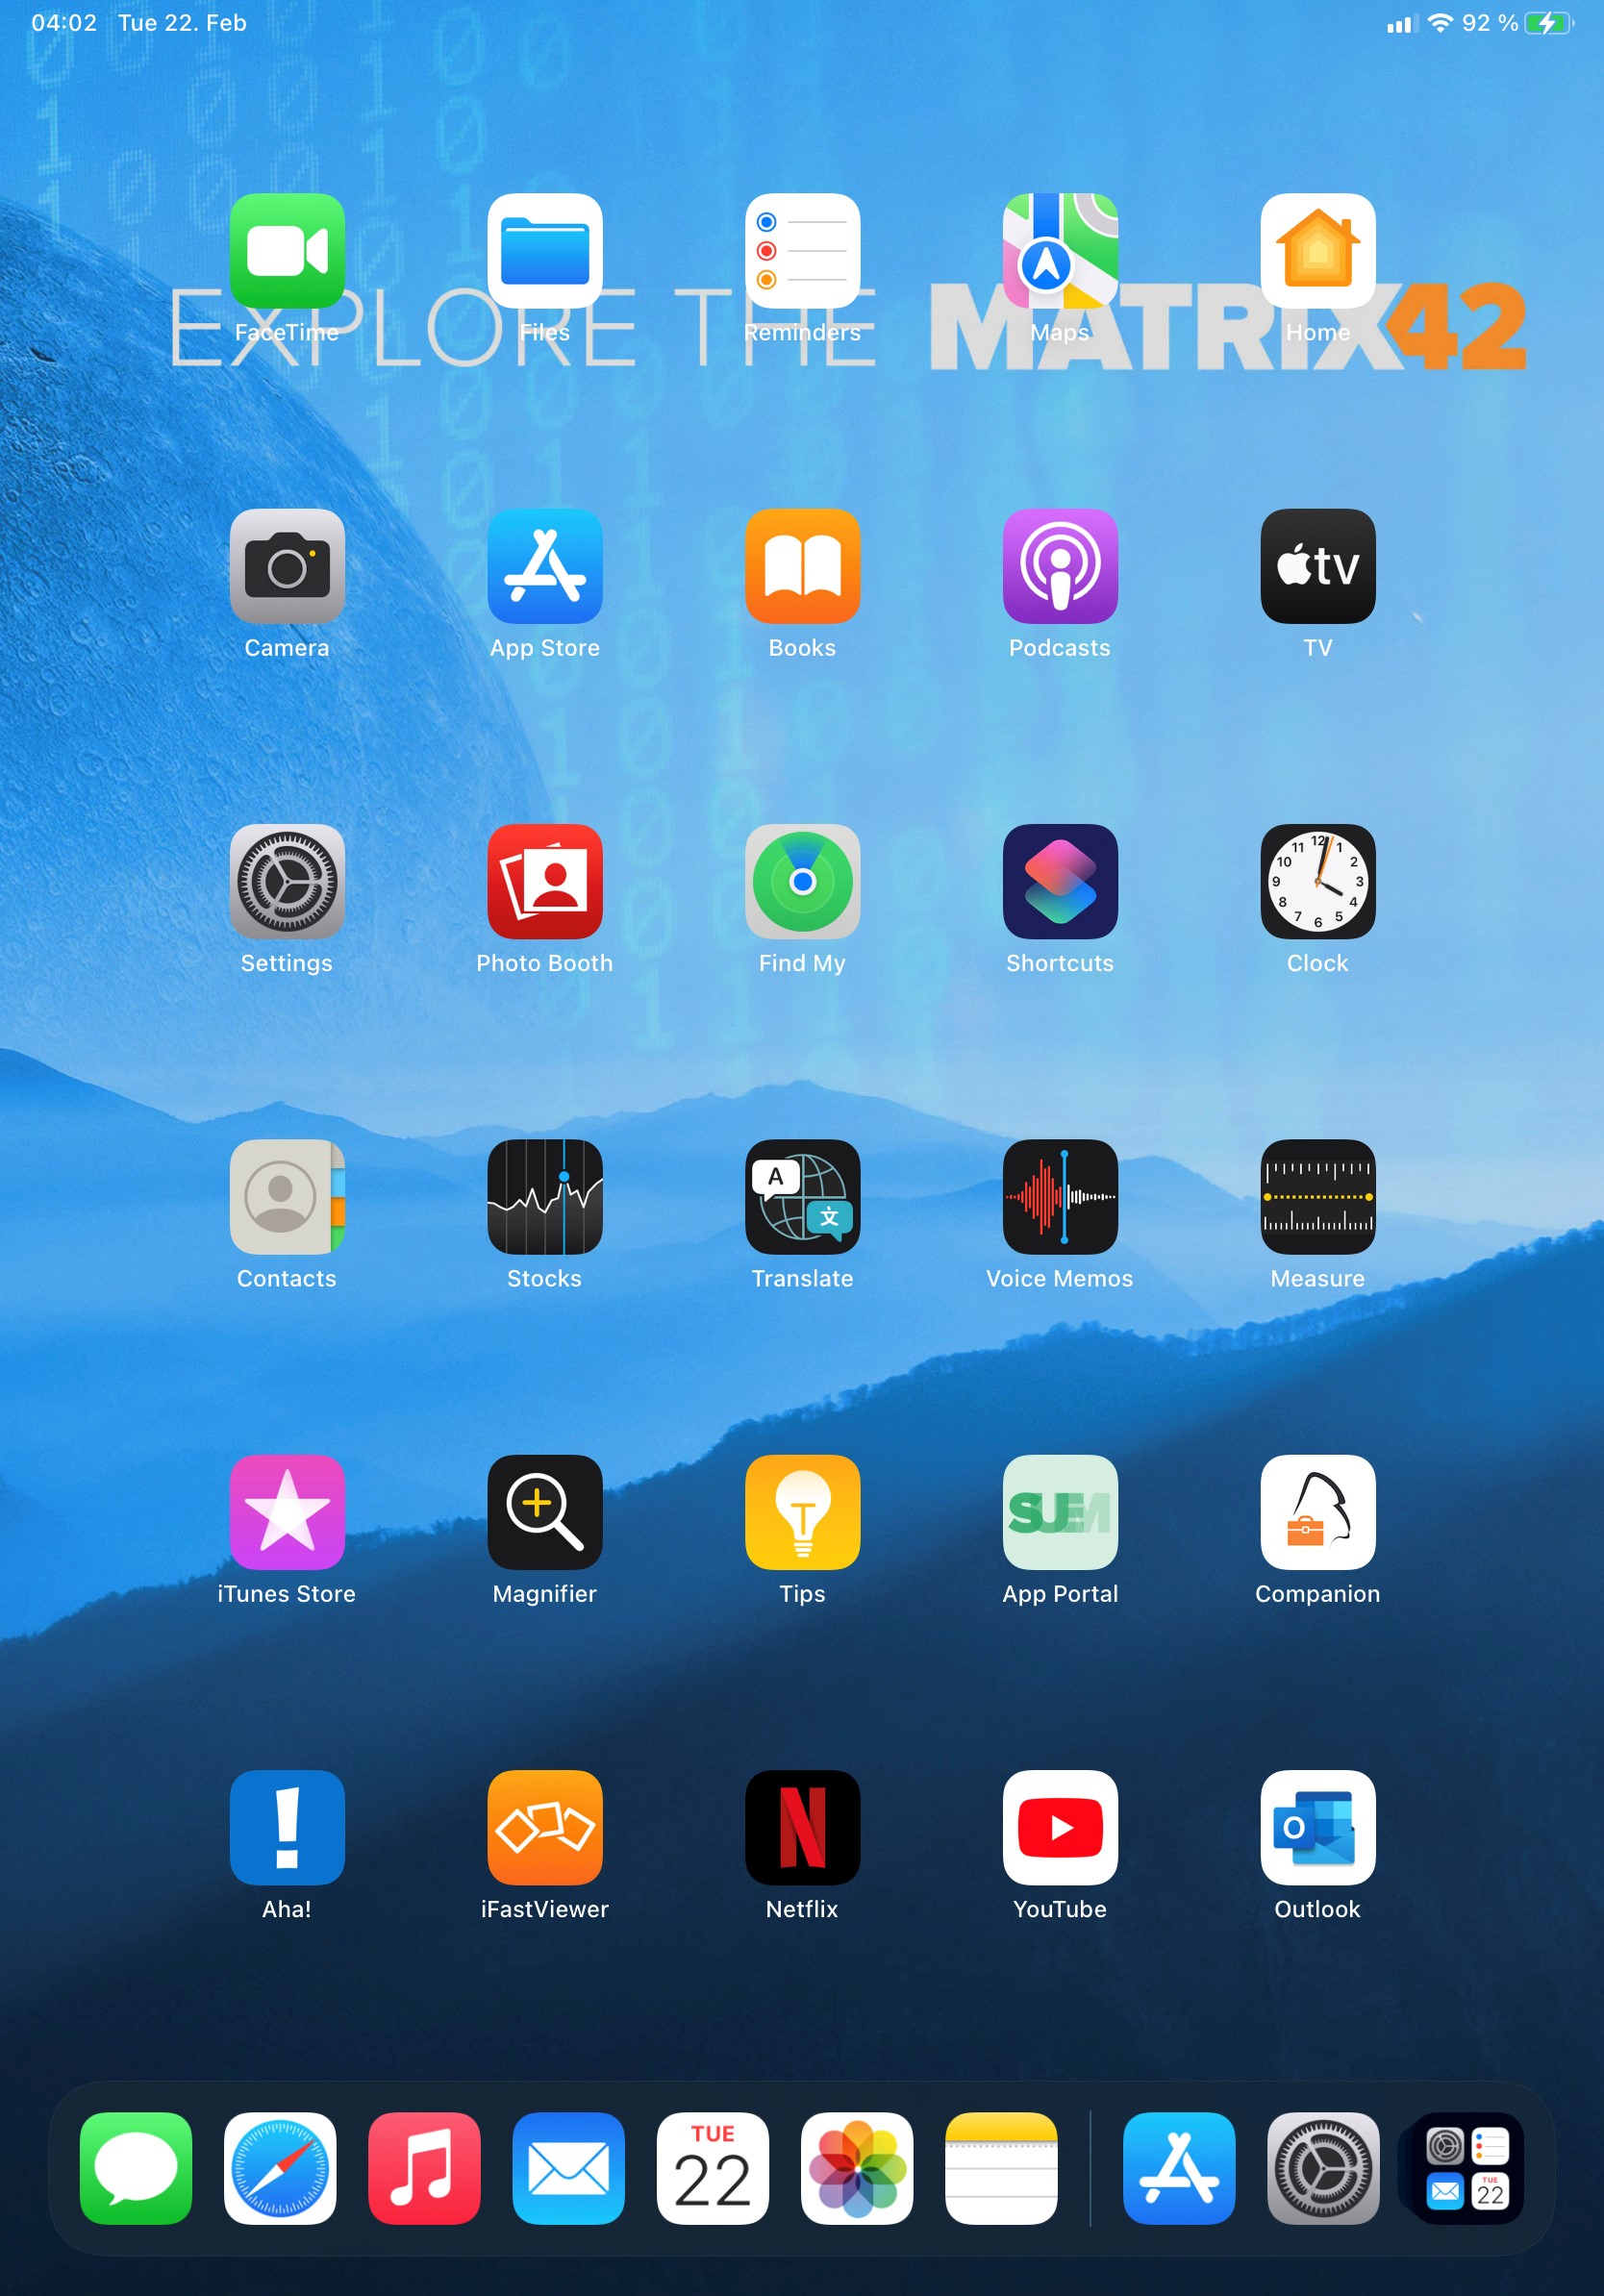
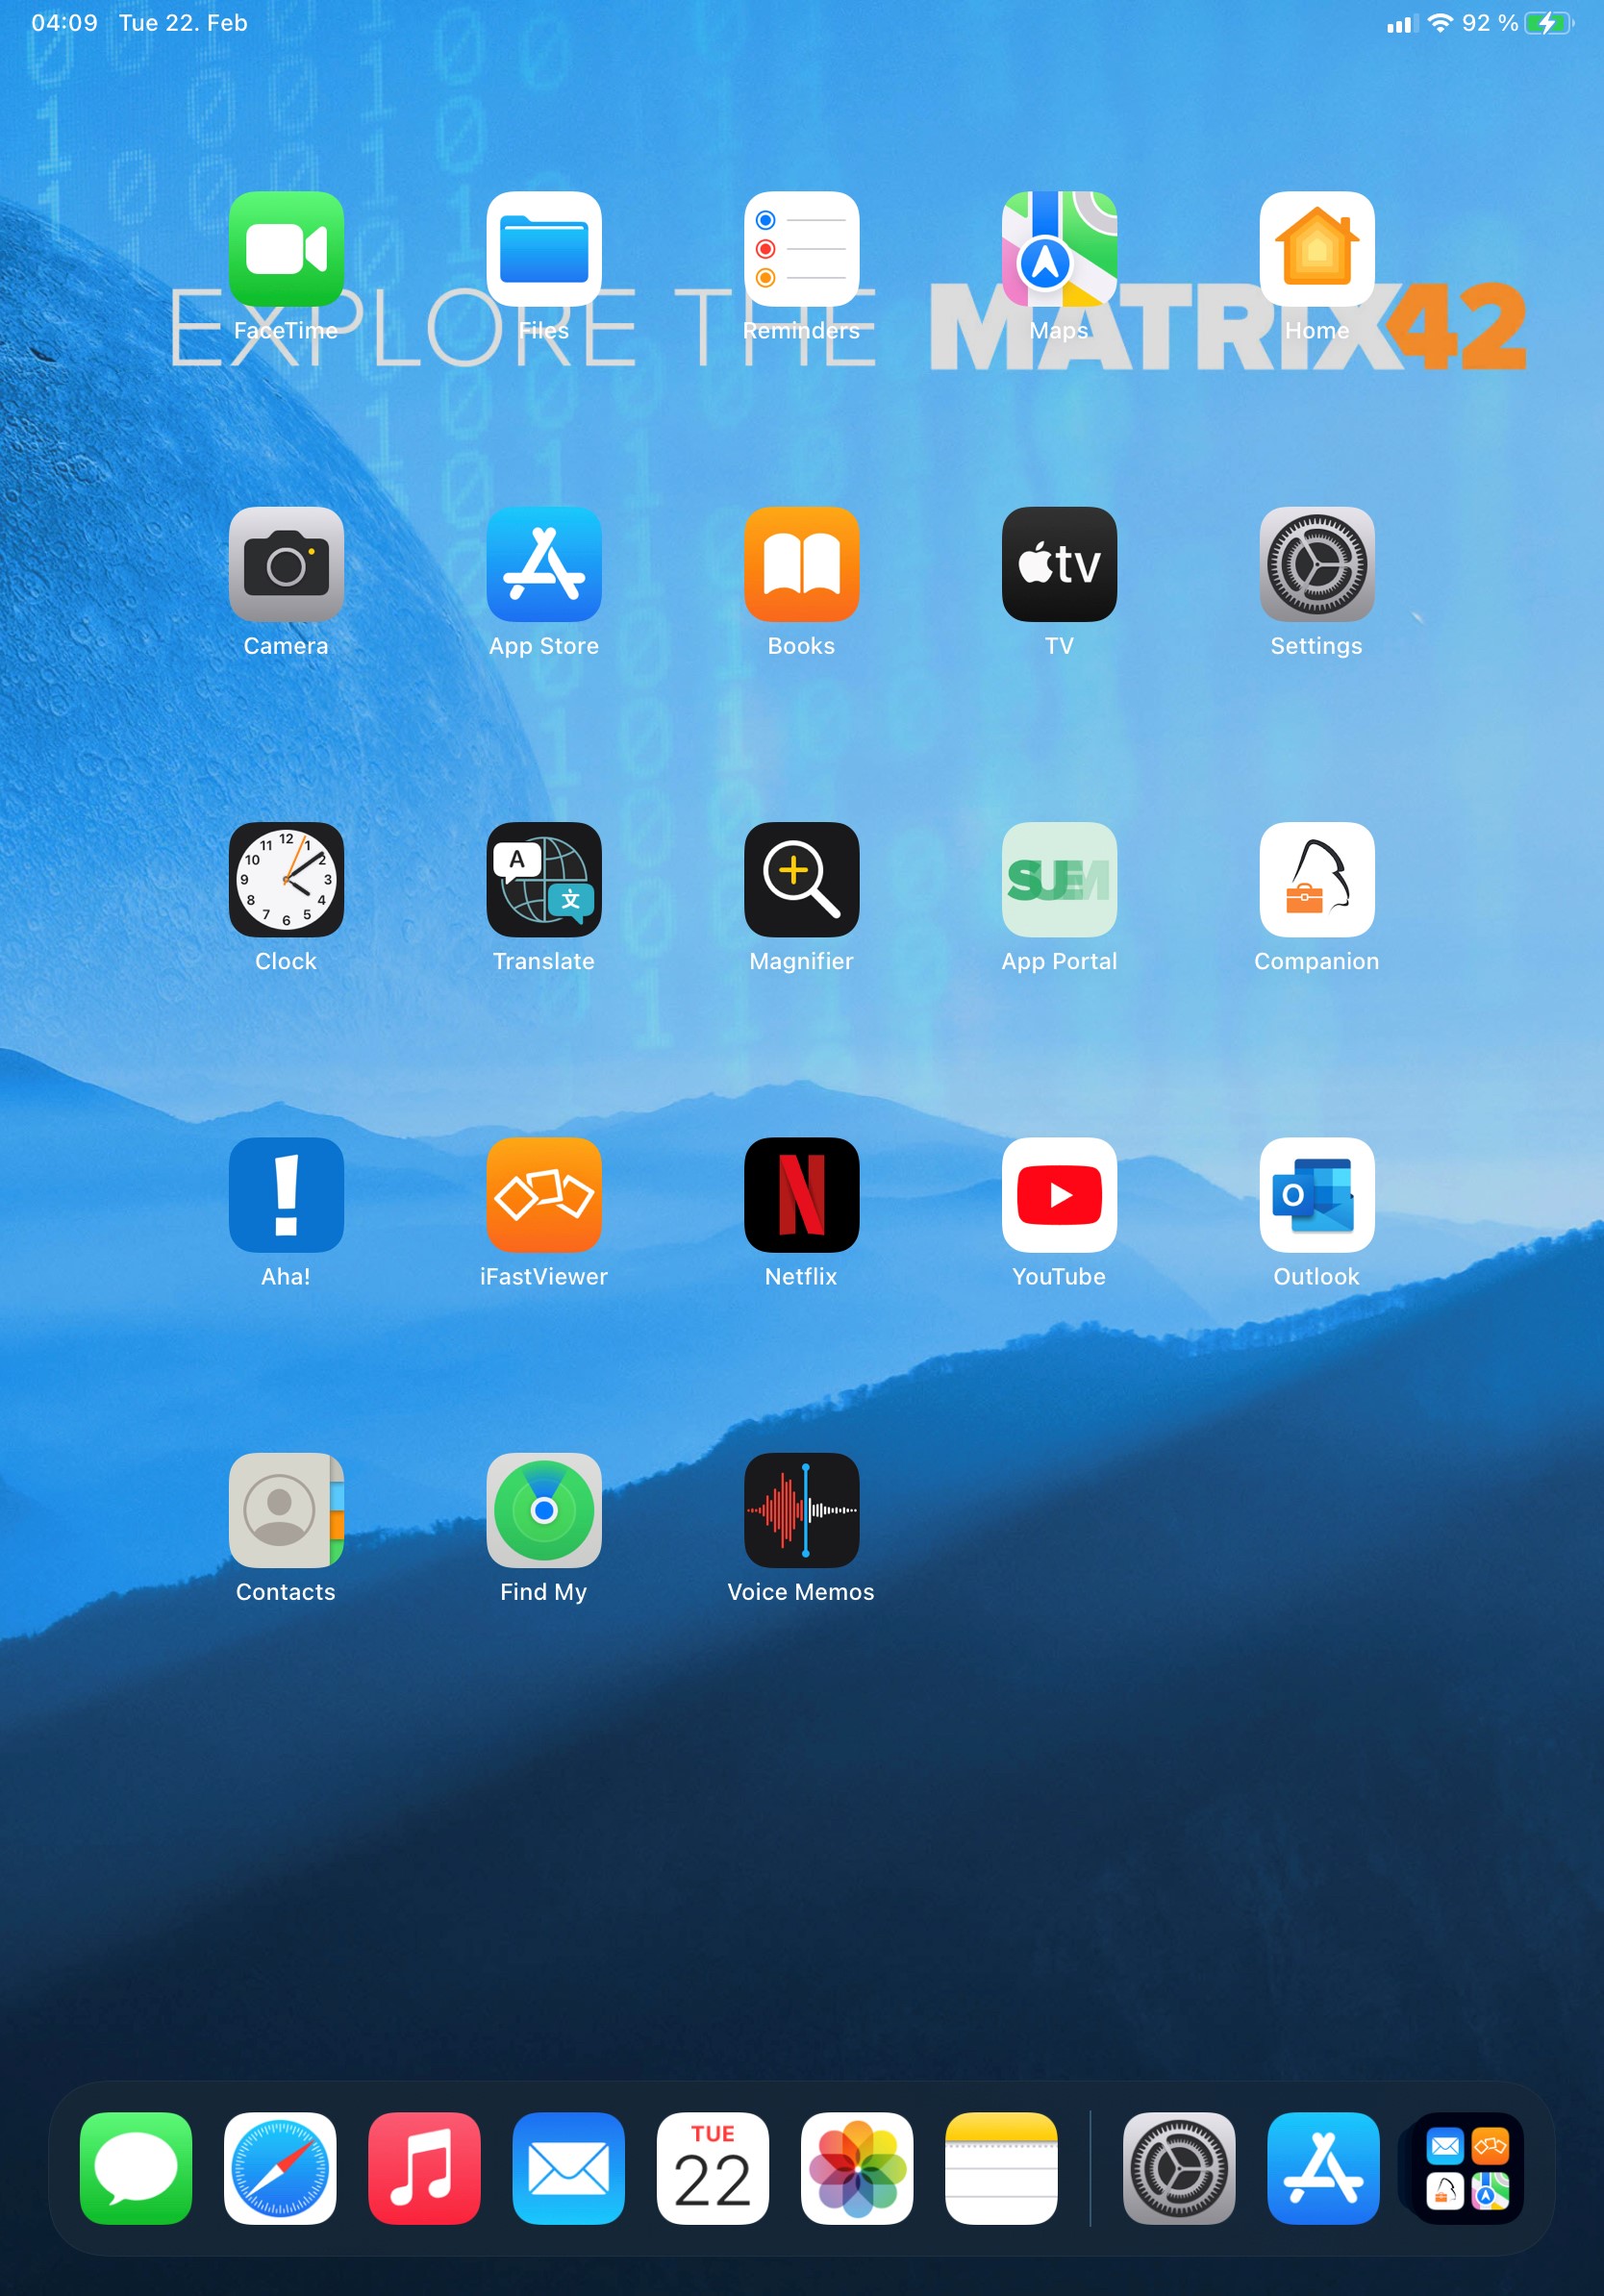
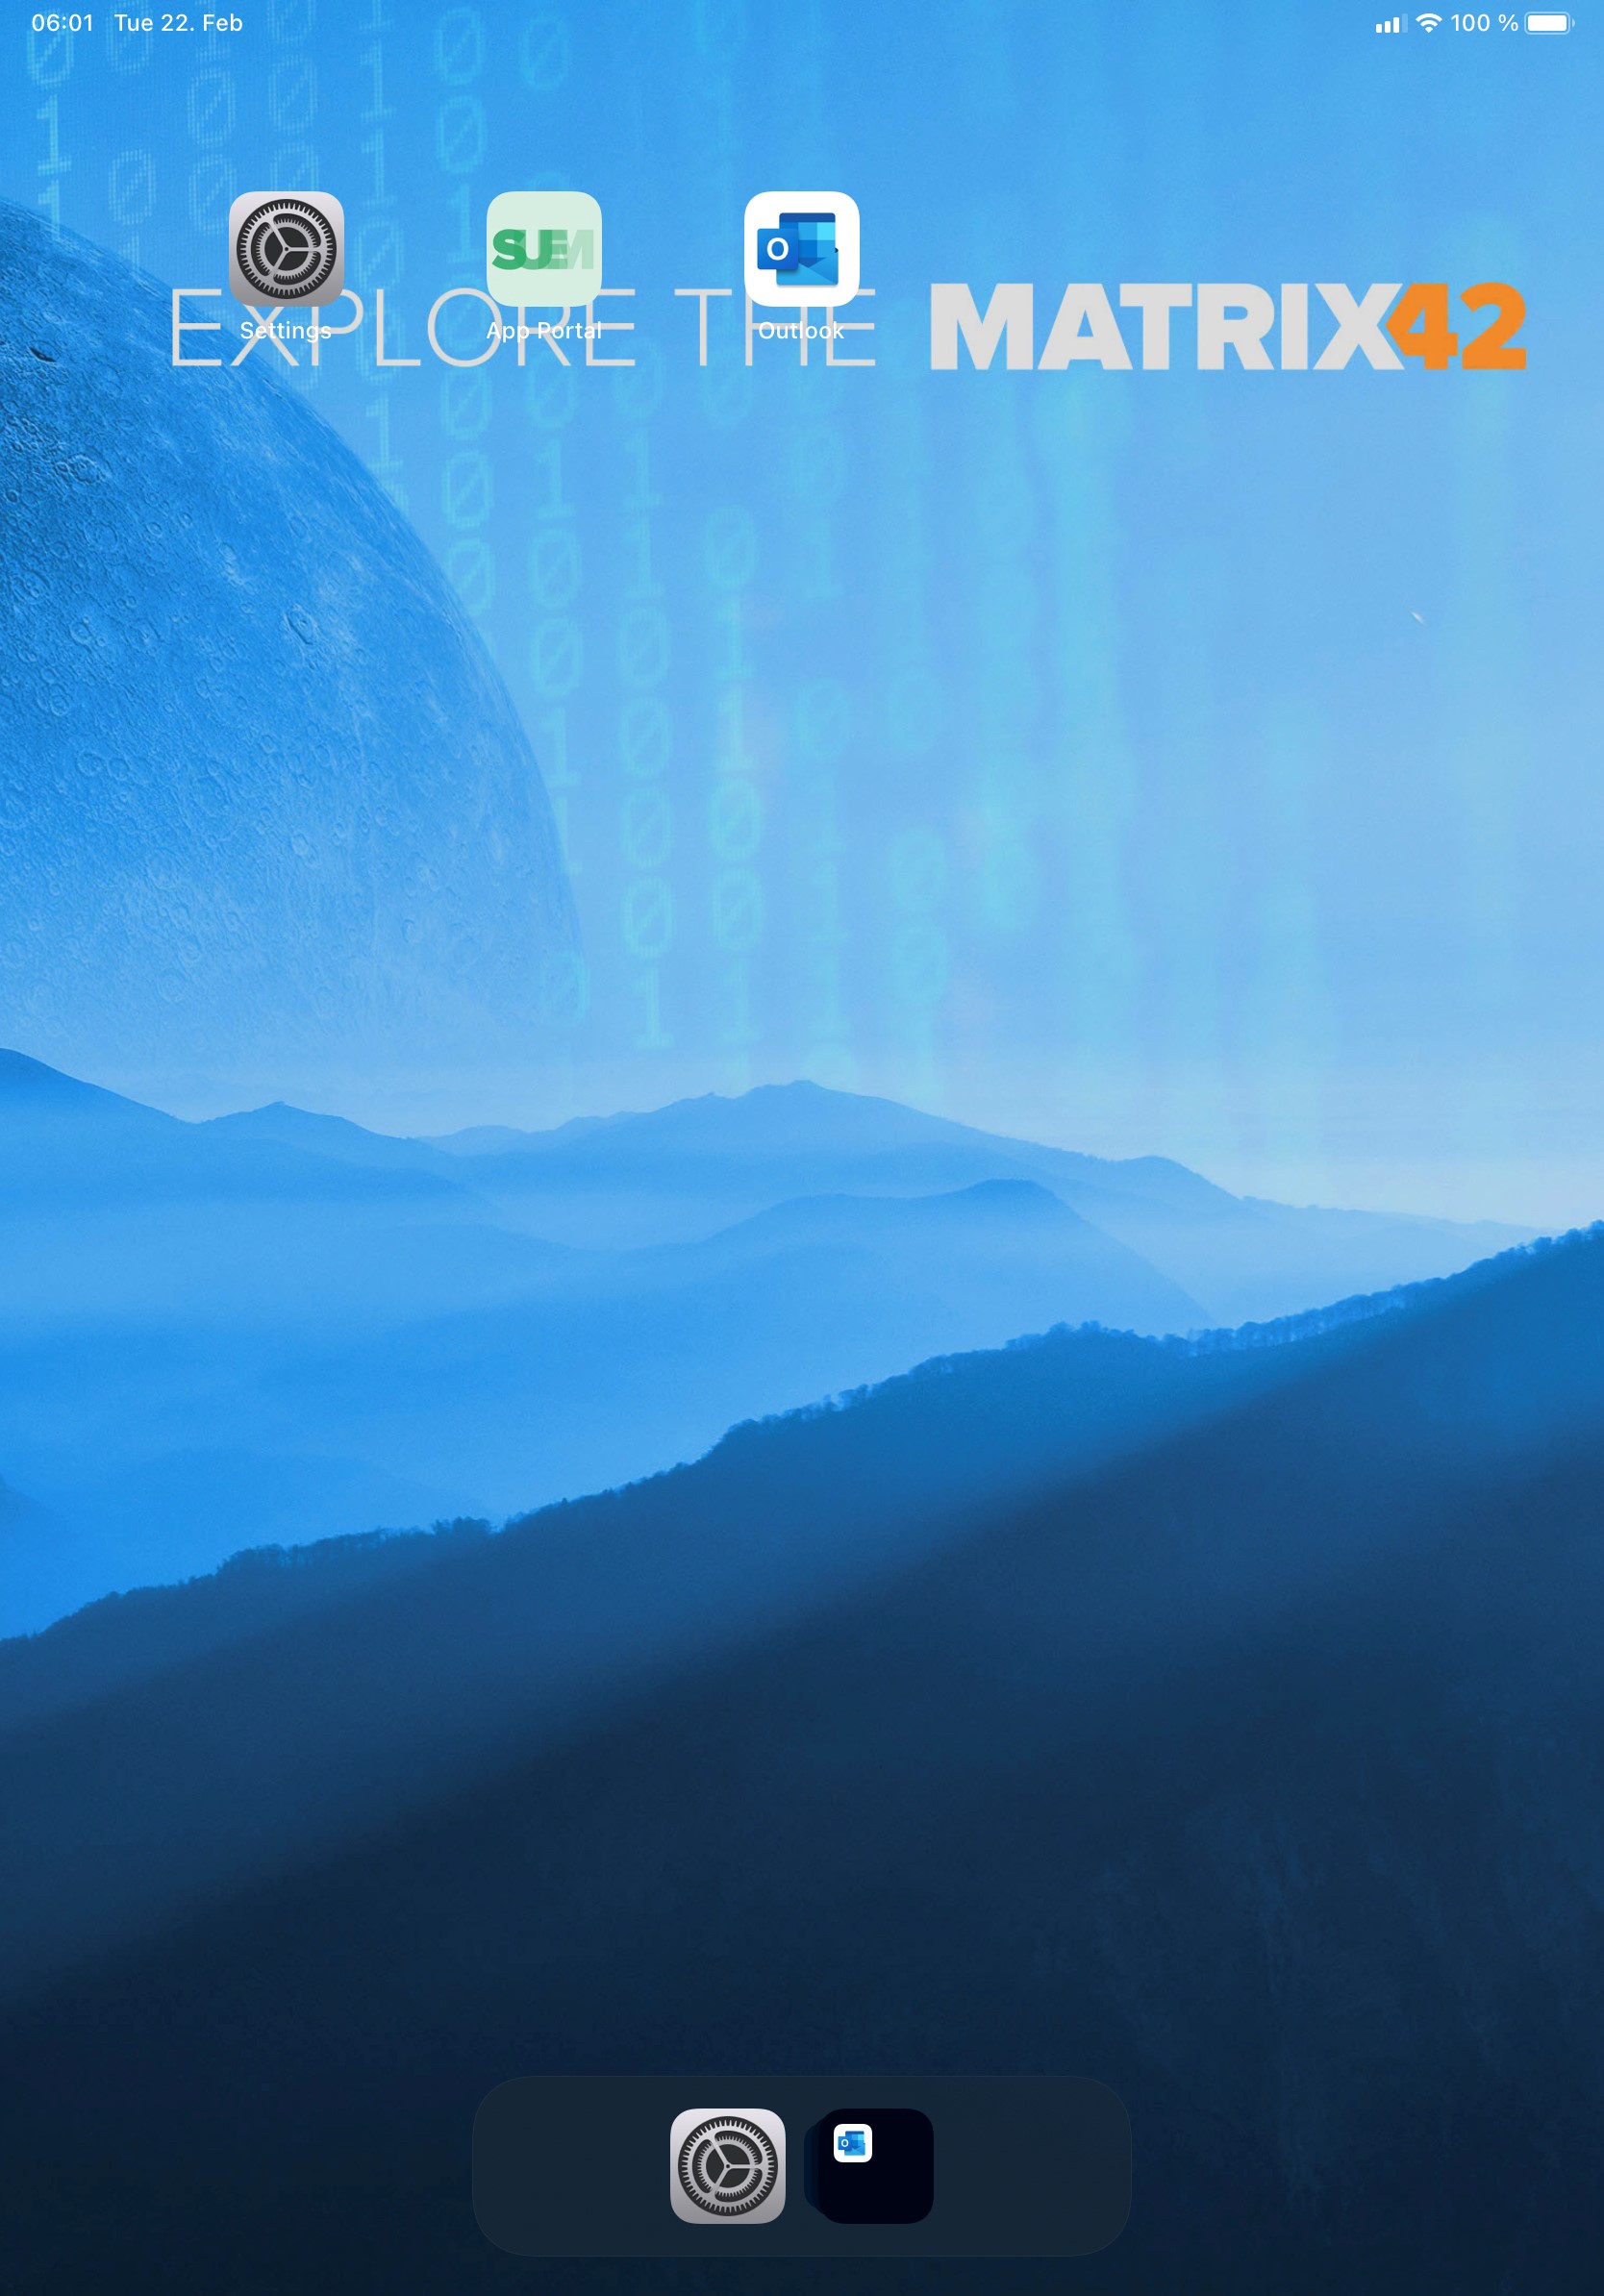
In addition to the entry in the MDM Profile, you should see now that select system applications are hidden in the user interface:
| Before applying the policy, all applications are ready to use. | After applying the policy, all selected applications are not available anymore. |
 |
 |
Disable App Store
We are often asked how to prevent the use of the App Store, so that only apps from the App Portal can be installed. For this purpose, the App Store can be selected in the policy and is thus no longer available for users on the device. To disable the App Store application through this policy, perform the following steps:
- Navigate back to your previously used Tag
- Now select the App Store from the System Apps selection in your blacklist section
- Press Save
- Navigate to Definition
- Press Push to Devices
- Review now the applied changes on the device and that the App Store icon should be disappeared now.
Another option to achieve the same result is to disable the Allow App Installation restriction for supervised devices. It will hide the App Store, too.
Disable Third Party Applications
As the App Store is now disappeared on the device, we want to focus now on third party apps and make now YouTube and Netflix unusable on the devices. For adding third party applications, you require the specific bundle identifier for this applications.
Get Bundle Identifier
- Navigate to the App Portal Tab
- Select either iPhone, iPad or iPod
- Press New Application
- Ensure that as Type App Store is selected
- In the Name field, just start entering the application name until your desired application is listed
- Now you can note down the Bundle ID below the application name:
- For Netflix the Bundle ID is com.netflix.Netflix
- For YouTube the Bundle ID is com.google.ios.youtube
In case you selected the application by accident, press cancel and click again New Application to view a different application. In case the search function stuck, reload the page.
Add Bundle Identifier
- Navigate back to your previously used Tag
- In the blacklist configuration scroll down to the Apps List
- Enter your first Bundle ID com.netflix.Netflix and press Add
- Enter your second Bundle ID com.google.ios.youtube and press Add
- Repeat this for all desired Bundle IDs
- Press Close
- Navigate to Definition
- Press Push to Devices
- Wait until the changes are applied on the device
Review Disabled Third Party Applications
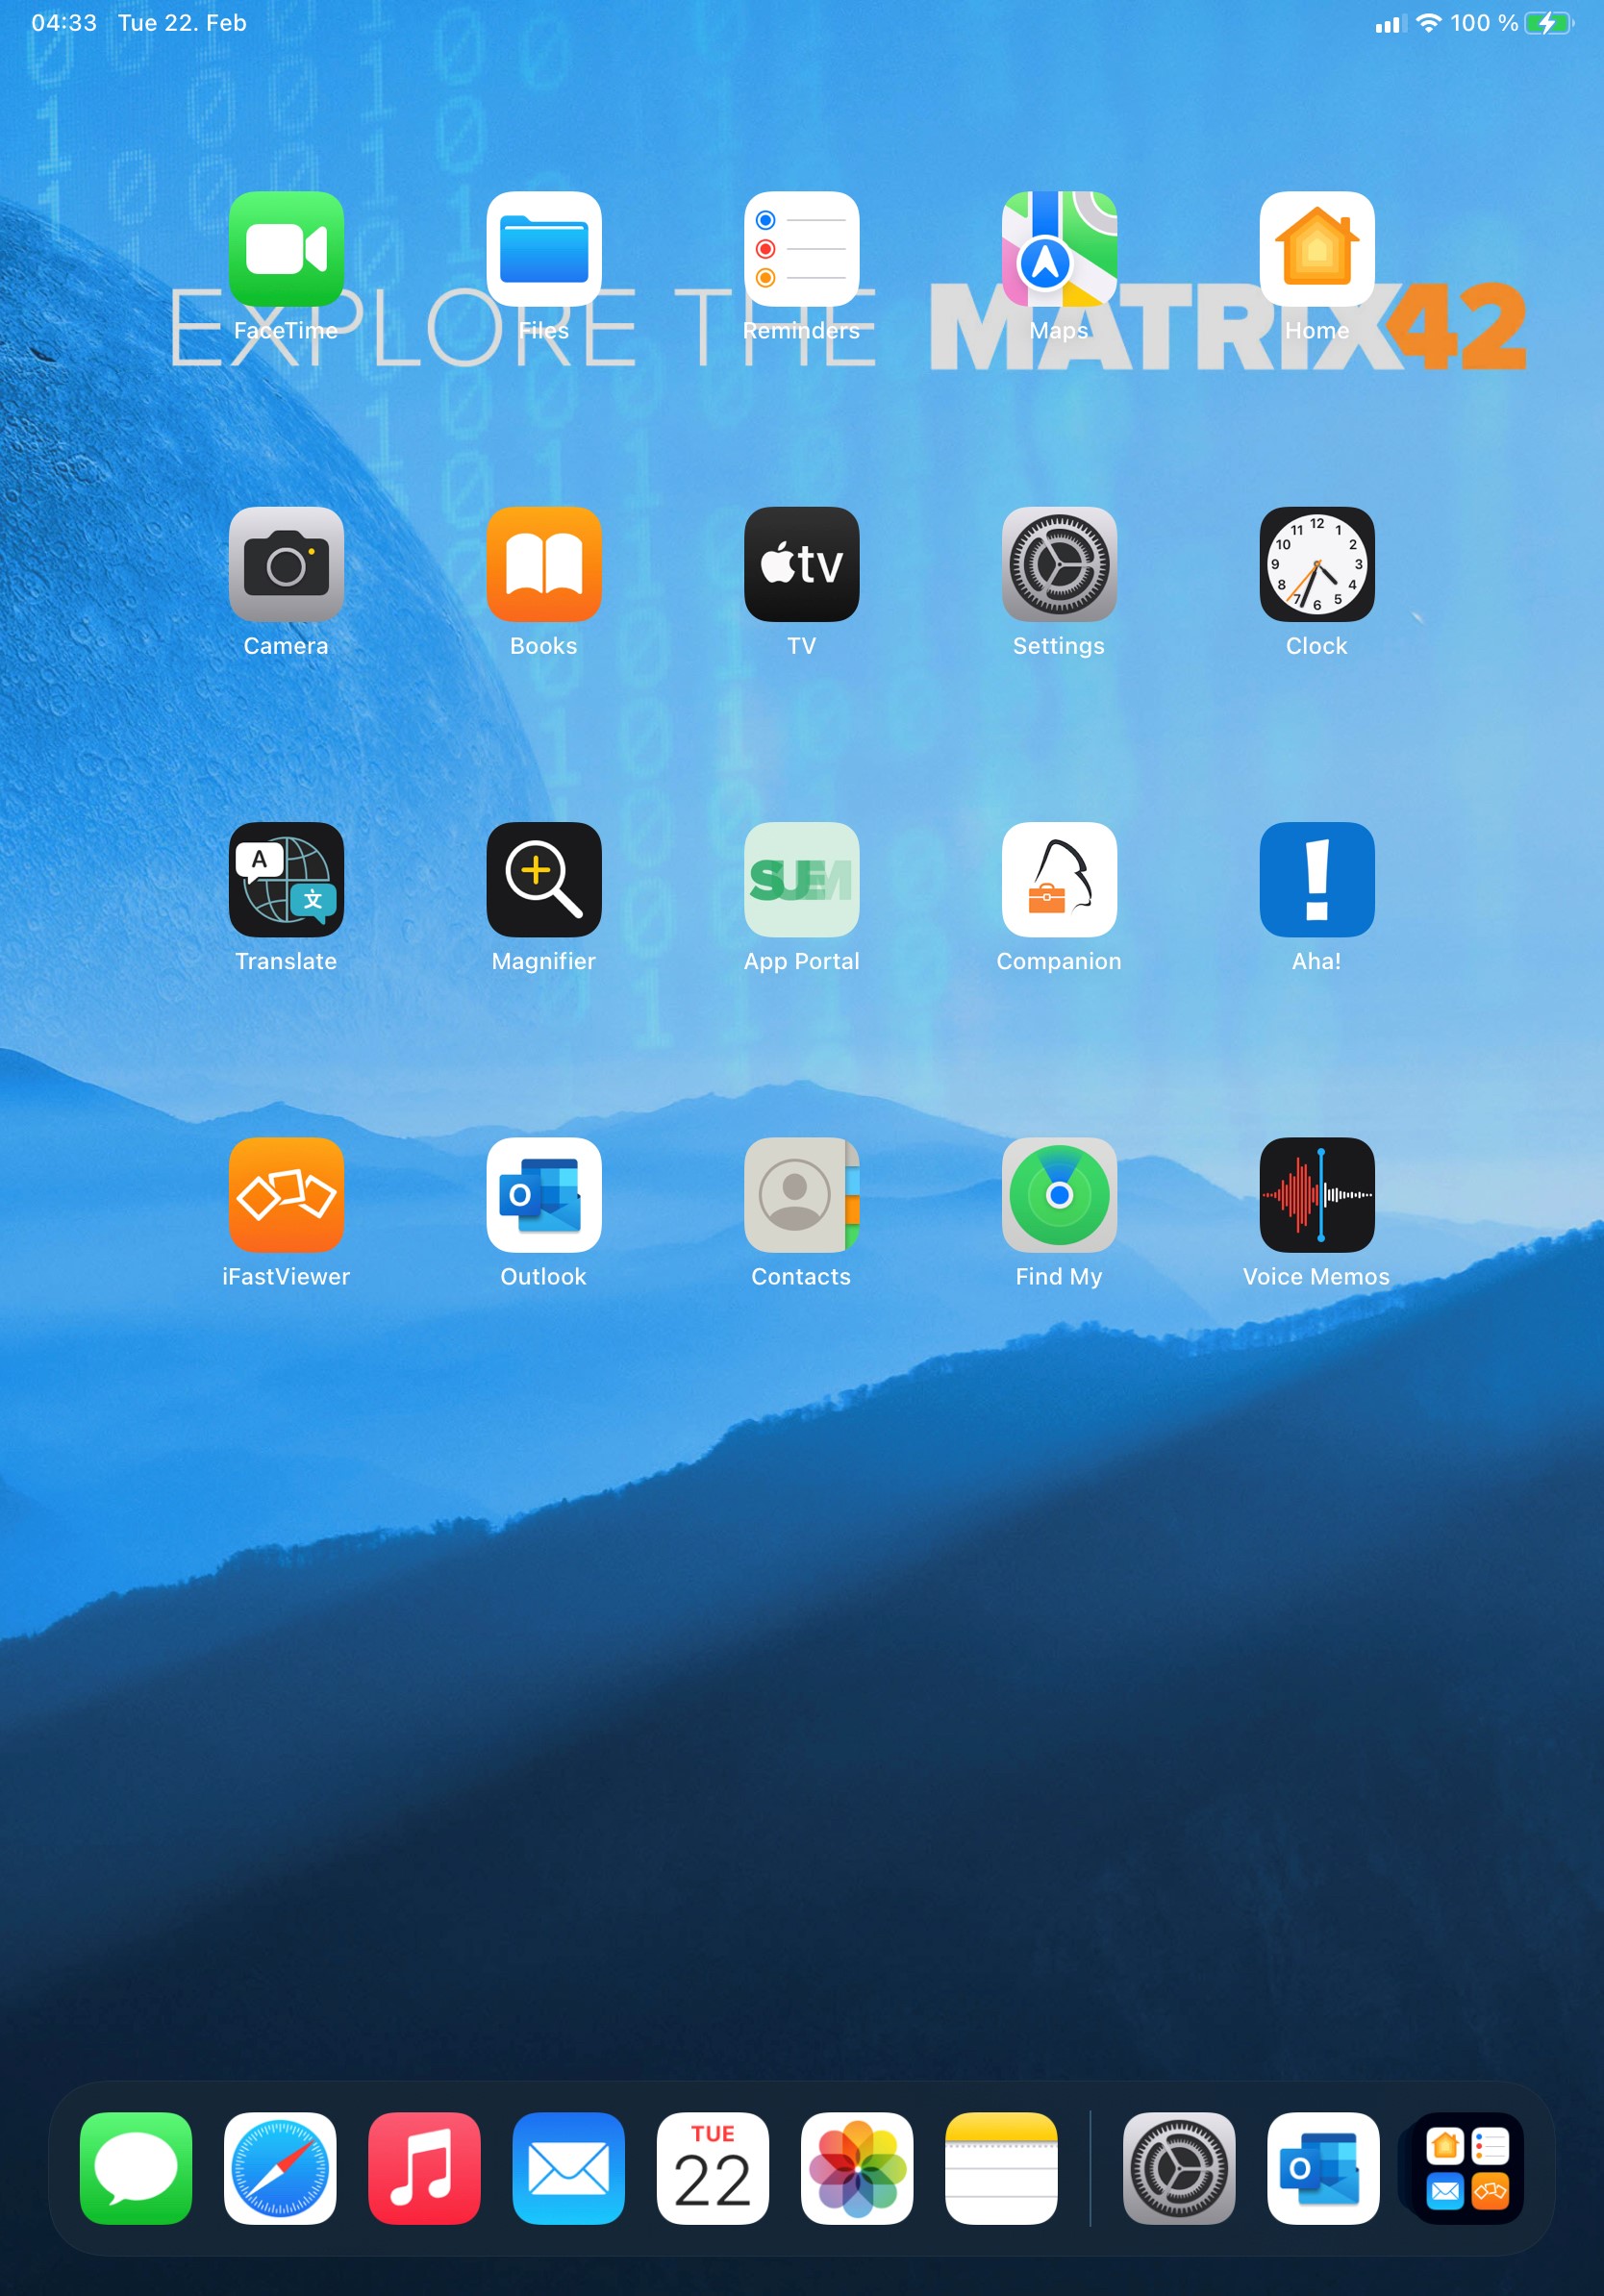
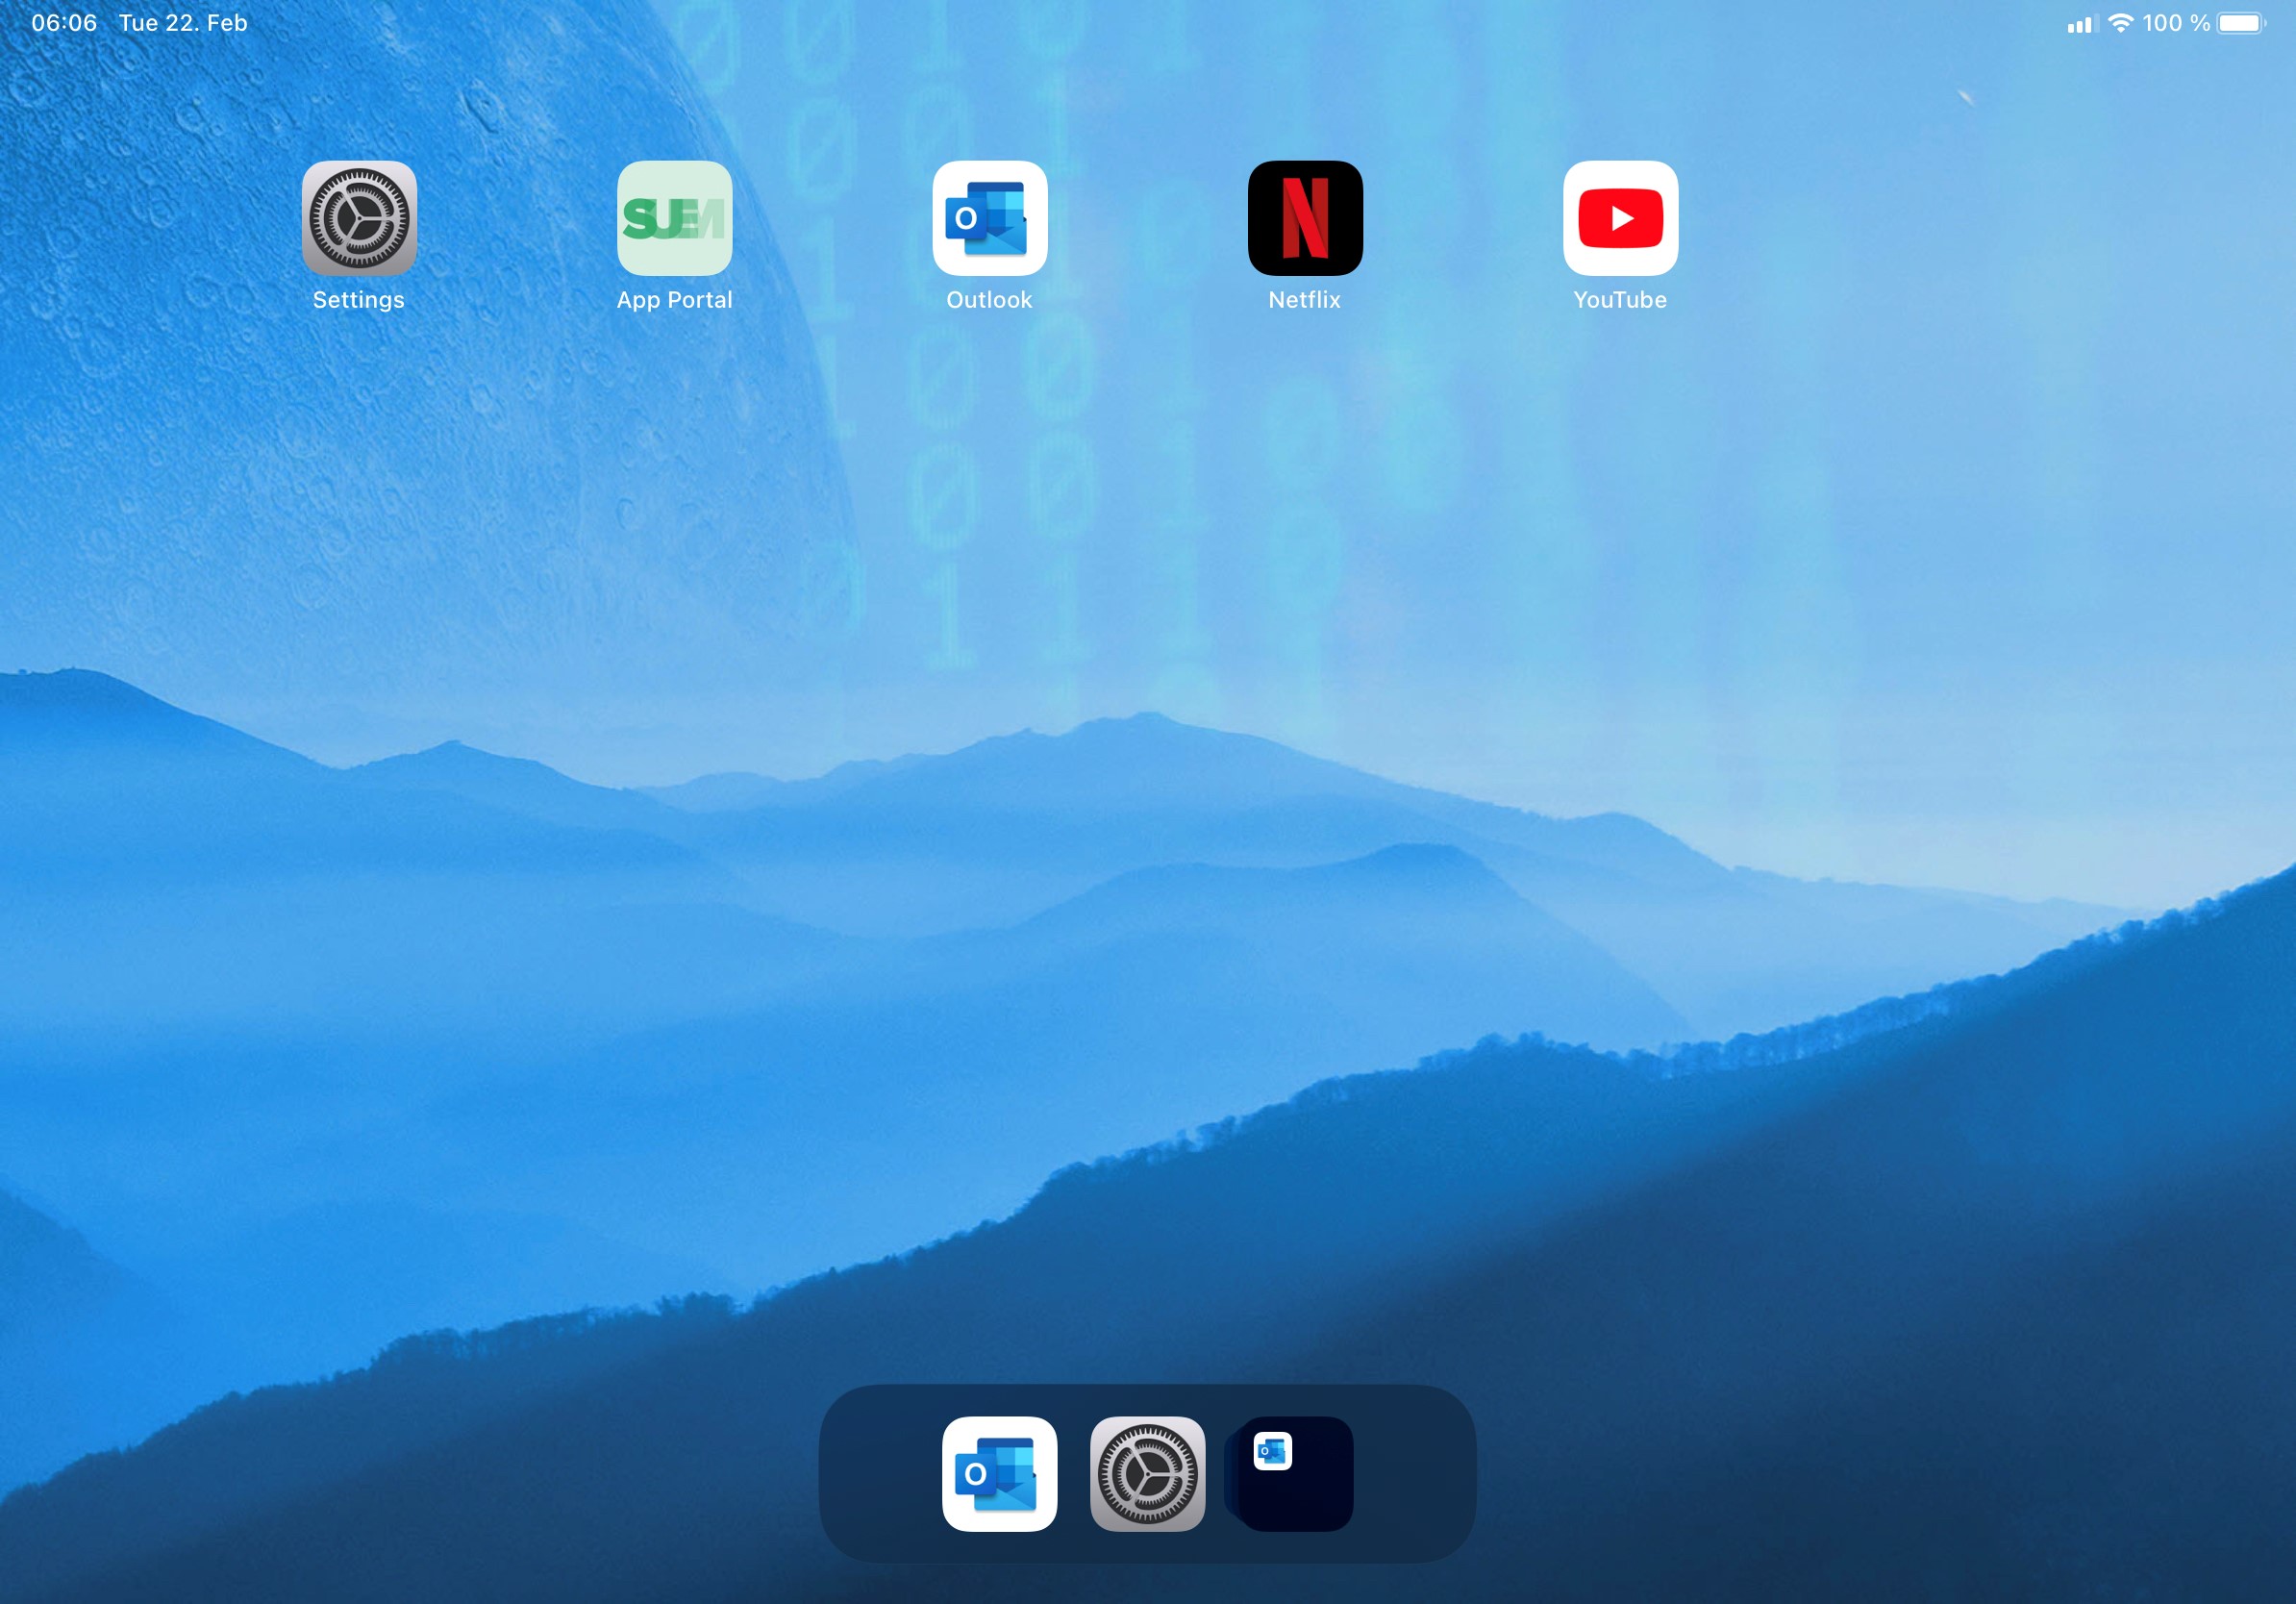
After applying the modified policy on the device, the App Store, Netflix, and YouTube should be unusable:
| Before applying the modified policy | After the policy is applied, all three applications are unusable |
|
 |
Utilize Whitelist
As it is probably easier to configure an allowed application list instead of blacklisting all applications, you can utilize the whitelist option instead. As explained in the beginning of this article, the starting point here is that all applications will be disabled by default, except the applications that are explicitly configured or added in the blacklist section. Instead of selecting the blacklist option, ensure to use the whitelist section in the policy configuration and enable all system applications and add all bundle identifiers that your users should be allowed to use. Ensure to enable the Web Clips System application to let the App Portal being usable on your devices.
In addition to setup the whitelist or as an alternative, you could prevent as an example that the App Store is shown in the UI with the blacklist to ensure that only assigned applications through the App Portal are installable on devices. Another option to achieve the same result is to disable the Allow App Installation restriction for supervised devices. It will hide the App Store, too. Disabling the supervised Allow Account Modification restriction would be also another approach.
Allow only Settings and App Portal
- Navigate back to your previously used Tag
- Navigate to Policy > Application Blacklist > Enforce blacklist/whitelist
- Select Whitelist
- Select and enable Web Clips
- Press Save
- Navigate to Definition
- Press Push to Devices
- Wait until the changes are applied on the device
Review Enabled Applications
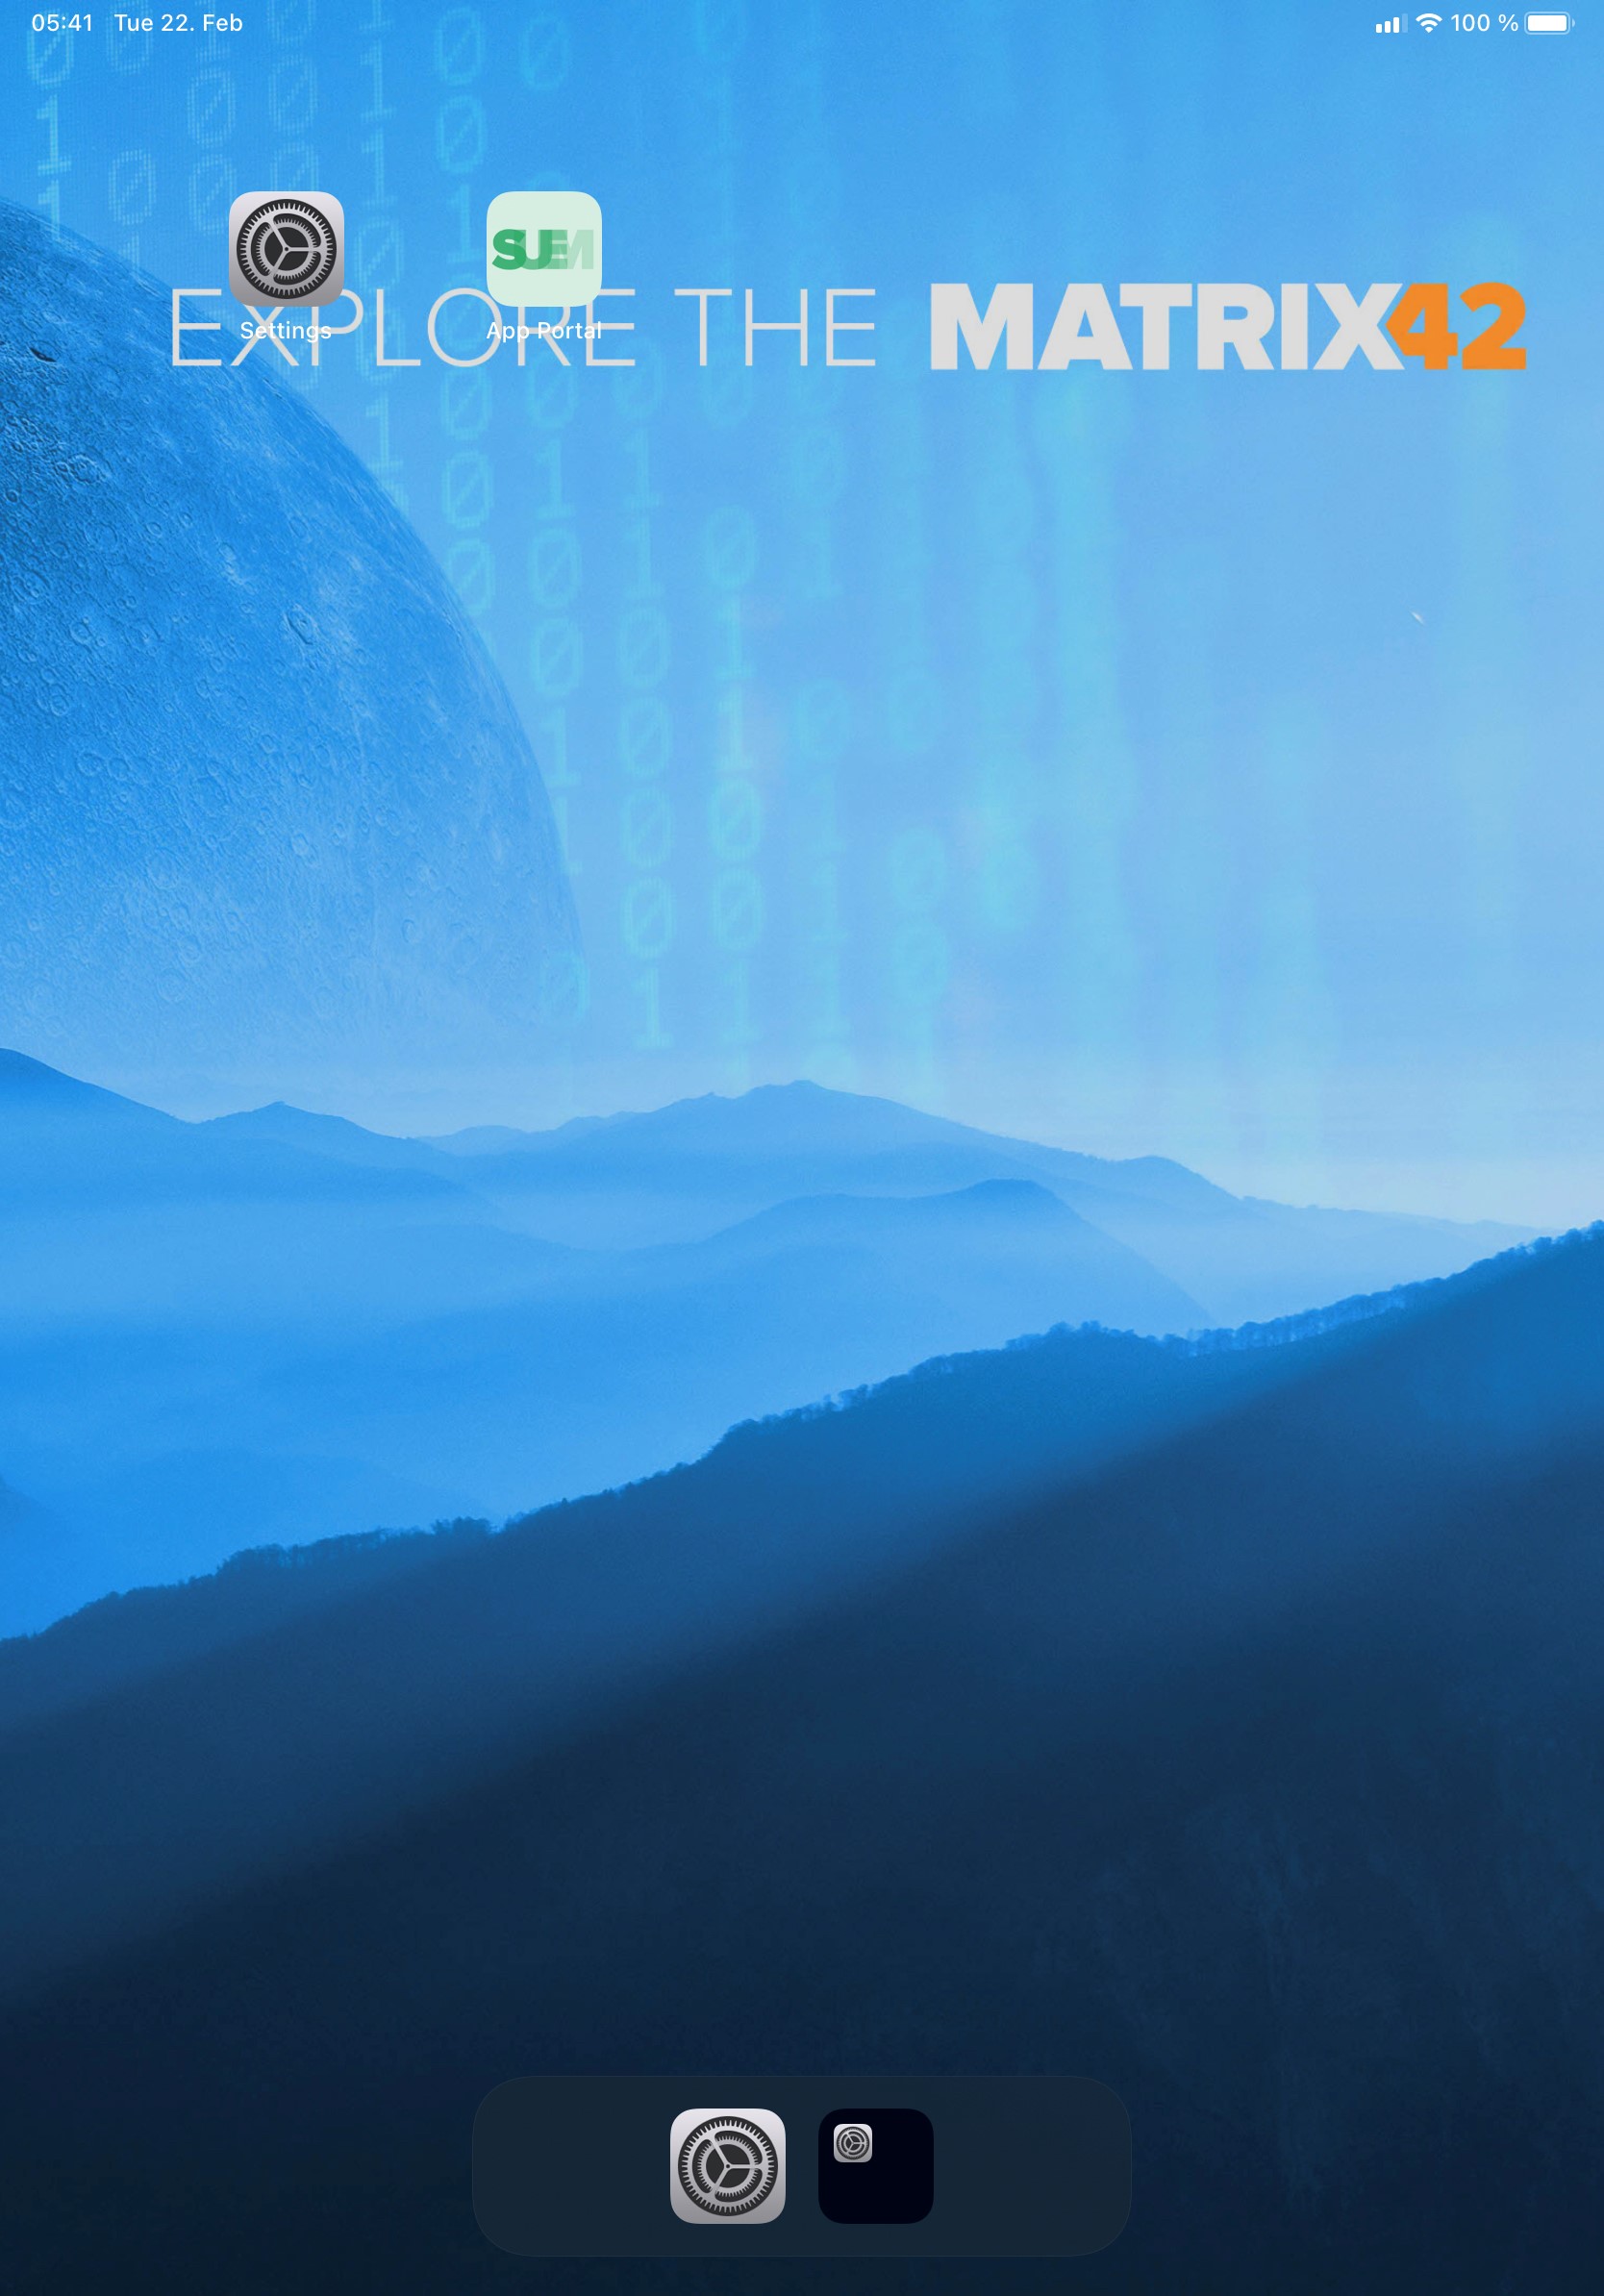
As Apple does not provide the option to black-/whitelist the Settings application (com.apple.Preferences), the configuration of the policy will set the device to the following state:
| Before enabling the whitelist, the application list is as in the previous chapter | After enabling the whitelist, only Settings and the App Portal is usable |
|
 |
Enable Third-Party Applications
Within this section, we want to demonstrate now how to enable third party applications with the whitelist option and show simultaneously one particularity, if you have added the same third-party applications already to the blacklist section.
- Navigate back to your previously used Tag
- In the whitelist configuration scroll down to the Apps List
- Enter your first Bundle ID com.netflix.Netflix and press Add
- Enter your second Bundle ID com.google.ios.youtube and press Add
- Enter a third Bundle ID com.microsoft.Office.Outlook and Press Add
- Perform this for all desired Bundle IDs
- Press Close
- Navigate to Definition
- Press Push to Devices
- Wait until the changes are applied on the device
| Before adding Netflix, YouTube, and Outlook to the allowed list | Only Outlook will be enabled, as YouTube and Netflix are still part of the blacklist. |
|
 |
- Now you can remove YouTube and Netflix from the blacklist section, and you will see that all three added third-party applications will be enabled on the device
 |
Useful Bundle Identifier for your Whitelist
The following list contains useful iOS application you might consider useful to whitelist them:
- Matrix42 Companion App: com.matrix42.silverback.companion
- Matrix42 Documents: com.matrix42.M42Content
- iOS native Safari Browser: com.apple.mobilesafari
- Microsoft Outlook: com.microsoft.Office.Outlook
- Microsoft Word: com.microsoft.Office.Word
- Microsoft Excel: com.microsoft.Office.Excel
- Microsoft Powerpoint: com.microsoft.Office.Powerpoint
Additional Notes
- In case an enforced list is set to the device, it will not prevent users from installing the application but after the installation process, the application will become unusable.
- Apple does not provide the option to black-/whitelist the Settings application (com.apple.Preferences).
- In case that Apple delivers new applications between Silverback Releases, take a look at this application list: Apple Bundle Identifiers
- If your App Portal Web Clip disappeared from enrolled devices you might have forgotten to enable Web Clips in the System Apps
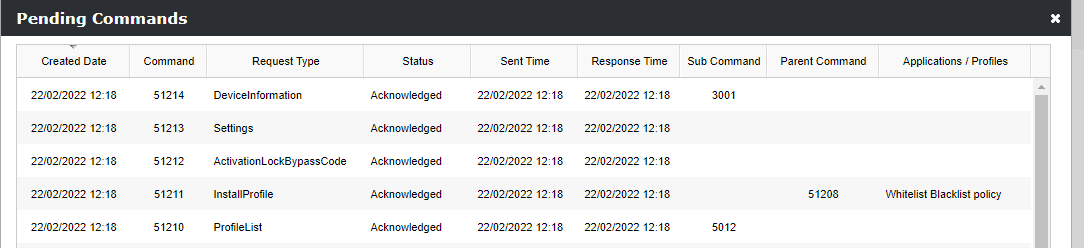
- To review the Profile installation, you can check the pending commands for a specific device from the device overview under More > Pending Commands and search for Request Type InstallProfile with Applications / Profiles Whitelist Blacklist policy
- As the enforced black- & whitelisting requires supervised devices, you may want to utilize the native black- & whitelisting option.