Bulk Provision Users
Overview
One scenario for the bulk provisioning users feature is that administrators can setup multiple devices on behalf of users. In addition to that this functionality is useful to speed up the starting process for users by sending them their enrollment information via E-Mail or SMS instead of using the Self Service Portal as the starting point for them. This allows a large number of enrollments to be created in a single run, to speed up large rollouts and simplify the process. After completing this how-to you will be able to exactly speed up large rollouts and use one simple method for enrollments. The Bulk Provisioning Users method has been used historically as the most common one, but there are in the meantime several other methods available for executing bulk or mass enrollments, especially by utilizing deployment programs.
As an example, the Device Enrollment Program for Apple devices offers the option to directly use the Username and Password during the enrollment, which does not require to create pending enrollments upfront. Instead of entering the Username and OTP during the enrollment, the activation page for Device Enrollment Program devices accepts username and password for authentication. For Android and Samsung Knox devices, there are additional options available that circumvent the need of presenting authentication information at all during the enrollment process or you can let your users start at the Self Service Portal during the enrollment where they can finalize the enrollment without the need of having a pending enrollment created upfront. Please refer to Advanced QR-Code Provisioning, Zero Touch Enrollment or Bulk Enrollments with Samsung Knox Mobile Enrollment for additional information. In addition, Windows Autopilot or Azure AD Joined Windows 10 or Windows 11 devices does not require an upfront created pending enrollment, too.
It is also important to mention that some of the processes described above in turn rely or partially utilize this functionality, so depending on your further steps, you might come back to the Bulk Provision User feature soon. During this guide we will create first a *.csv file containing all users that you want to provision. Afterwards we will create for each of the containing user a pending enrollment and review the output of the process.
Prepare User List
- Download the example.csv for modification here
- This example *.csv contains in each row a username, the email address, and the phone number.
- Open the downloaded Bulk_Enrollment with an Text Editor, e.g. Notepad++
- Replace and add now your users
But before replacing, please note the following:
- In case you want to bulk import local users first into your system, please refer to Users Guide Part II: Bulk Import Local Users
- The username field is the only mandatory field as it will reflect the username for the device in the management system
- Email and Phone Number are optional fields, but useful if you want send out Emails or SMS with the enrollment information to your users
- For local accounts your usernames must match with the information from the Users section
- For LDAP users, ensure to not use excluded users from the LDAP User Filter configured in the Web Settings
- For LDAP users and for the authorization process, ensure to use the correct username format (e.g. UPN) as configured in LDAP Account Field in the Web Settings
- By using LDAP, ensure to have a proper configured and running Cloud Connector (if used) in place.
Upload User List and Create a Bulk Provisioning
- Open your Silverback Management Console
- Login as an Administrator
- Navigate to Device
- Select Pending
- Click Bulk Provision Users
When entering the Bulk Provision Users section, a table is shown displaying previous bulk enrollments that have been created.
- Press New Bulk Provisioning
- Please fill out all information as explained in the table below:
| Option | Description |
|---|---|
| Choose File | Click Choose file to upload your prepared user list. |
| OTP Expiry | Defines how long the created pending enrollment will be valid. If the expiry is set to 1 hour and users are trying to use the provided credentials after 1 hour, they will fail as the pending enrollment will be expired. |
| Email User Details | Selects whether to send user an email with the enrollment information. |
| SMS User Details | Selects whether to send the user an SMS with the enrollment link. |
| Define OTP | By enabling the Define OTP, each pending enrollment will contain the same One Time Password for all users in your list. In case you are provisioning devices on behalf of your users, this might be a good choice for you. |
| Ownership | Sets the ownership flag for the users device. |
| Username | If you have local users in your user list, you can use any other user that is present as a System User in the User Management section. If your list is containing LDAP users, it is required to use an account that is present in the Active Directory Group that you added under User Management > Active Directory. |
| Password | Enter here the password for the account that you provided. |
- After entering all mandatory information, press on Submit
Process Review
- After pressing Submit, you will receive the information that a new bulk enrollment has been queued
- Press OK in the Information popup
- Wait until this process is finished
- Depending on the amount of entries in your User list, this process might take some time
- When the process is finished click download
- Open the downloaded file
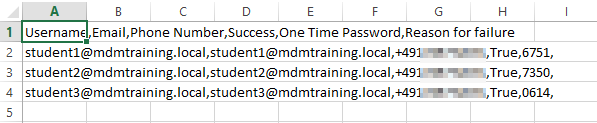
- It should look like this now
- Navigate back to your Silverback Management Console
- Click Back and review recently created pending enrollments
Additional Information
- If you receive a success information with false, the reason for failure will be displayed in the downloaded status csv file
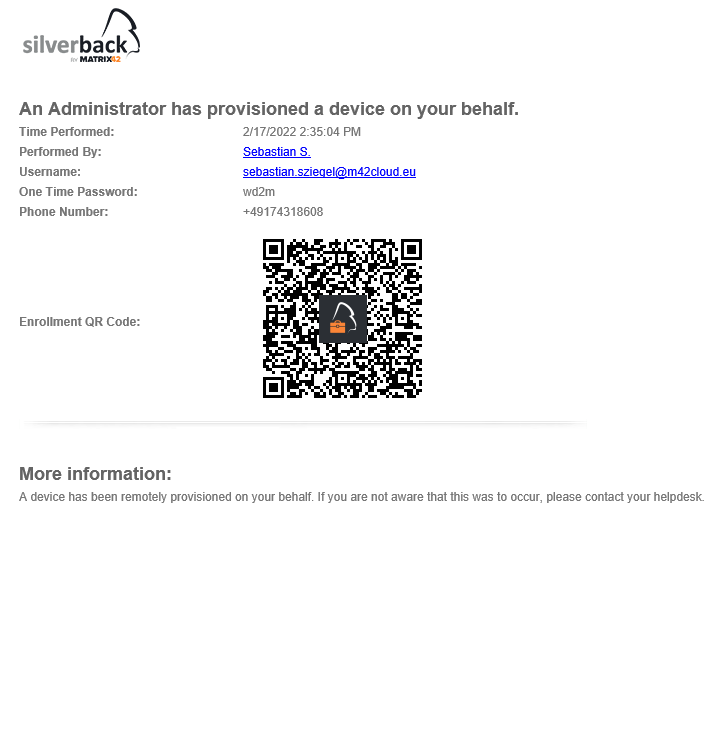
- In case you are enrolling devices on behalf of your users, you can now review for each user the corresponding enrollment information
- If you want to create for a specific account pending enrollments with an unlimited expiration date, please refer to Bulk Staging Mode
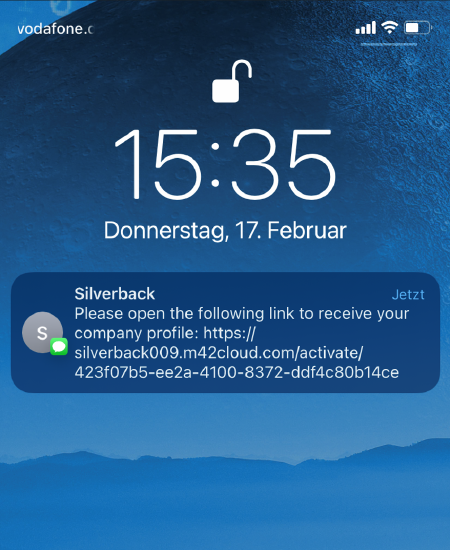
- In case you have enabled Email User Details or SMS User Details, users will receive the following to execute their enrollment
| SMS | |
|---|---|
 |
 |