Dealing with Apple Disk Image (*.dmg) files on macOS
Overview
An Apple Disk Image (*.dmg) is a disk image format used by the macOS operating system and is the equivalent of *.iso files in the Windows ecosystem. When you open an Apple disk image on a macOS device, it is mounted as a volume in the Finder. Since the MDM protocol for macOS devices only supports the distribution and installation of *.pkg files for all Mobile Device Management solutions, you may be faced with the challenge of how to distribute and install the *.dmg files on your managed macOS devices. This article describes how to overcome the burden of being able to distribute and install the desired application in two ways. The first option is to convert the *.dmg package to a distributable *.pkg file using the Mobile Device Management protocol, and the second is to distribute the *.pkg using the Unified Endpoint Management Agent, which is capable of distributing *.pkg files by the creation of distributable packages.
Convert the *.dmg to *.pkg
Within this guide, we will use as an example application the Jitsi: Free Video Conferencing Software for Web & Mobile. The process for converting the *.dmg to *.pkg is straight forward and should be valid for all *.dmg files that will contain and install an application.
Download and Install
- Download your *.dmg file to your macOS device
- Open the Finder and navigate to Downloads
- Double-click the downloaded *.dmg file
- Now drag and drop the application icon to the Applications folder to install the application
- Close the window and press the eject button in Finder to dismount the image
Get the application name
- From Finder, navigate to Applications
- Locate the recently installed application, in our case its the Jitsi application
- Perform a right-click and select Get Info
- Check the name of the application under Name & Extension, in our case its Jitsi.app
Convert the dmg with Terminal
- Open the Terminal application
- Now adjust the following command and press enter:
sudo productbuild --component /applications/Jitsi.app ~/Desktop/Jitsi.pkg
The first path is where the application is currently installed and the second part is where to save the extracted *.pkg file. Use alt/option and N to create the ~ symbol
- Enter your Mac password to start with the execution
- After executing the command, wait a couple of moments and navigate to the Desktop Folder
- Here you should see now the Jitsi.pkg
Package Verification
The next step is to verify the package, first by trying to install it, and then by verifying the signature.
Verifiy the installation
- As next step, move back to Finder and navigate to the Applications Folder
- Drag and drop the Jitsi application to the trash icon to remove the installation
- Now navigate to the Desktop and double-click the recently created *.pkg file
- Navigate through the installation process
In case the security settings of macOS prevents from direct installation, perform a right click on the package and select open with Installer and confirm the popups.
- When the application is finished, you have ensured that the installation is installable as a *.pkg application, which is the first verification step.
Check the signature
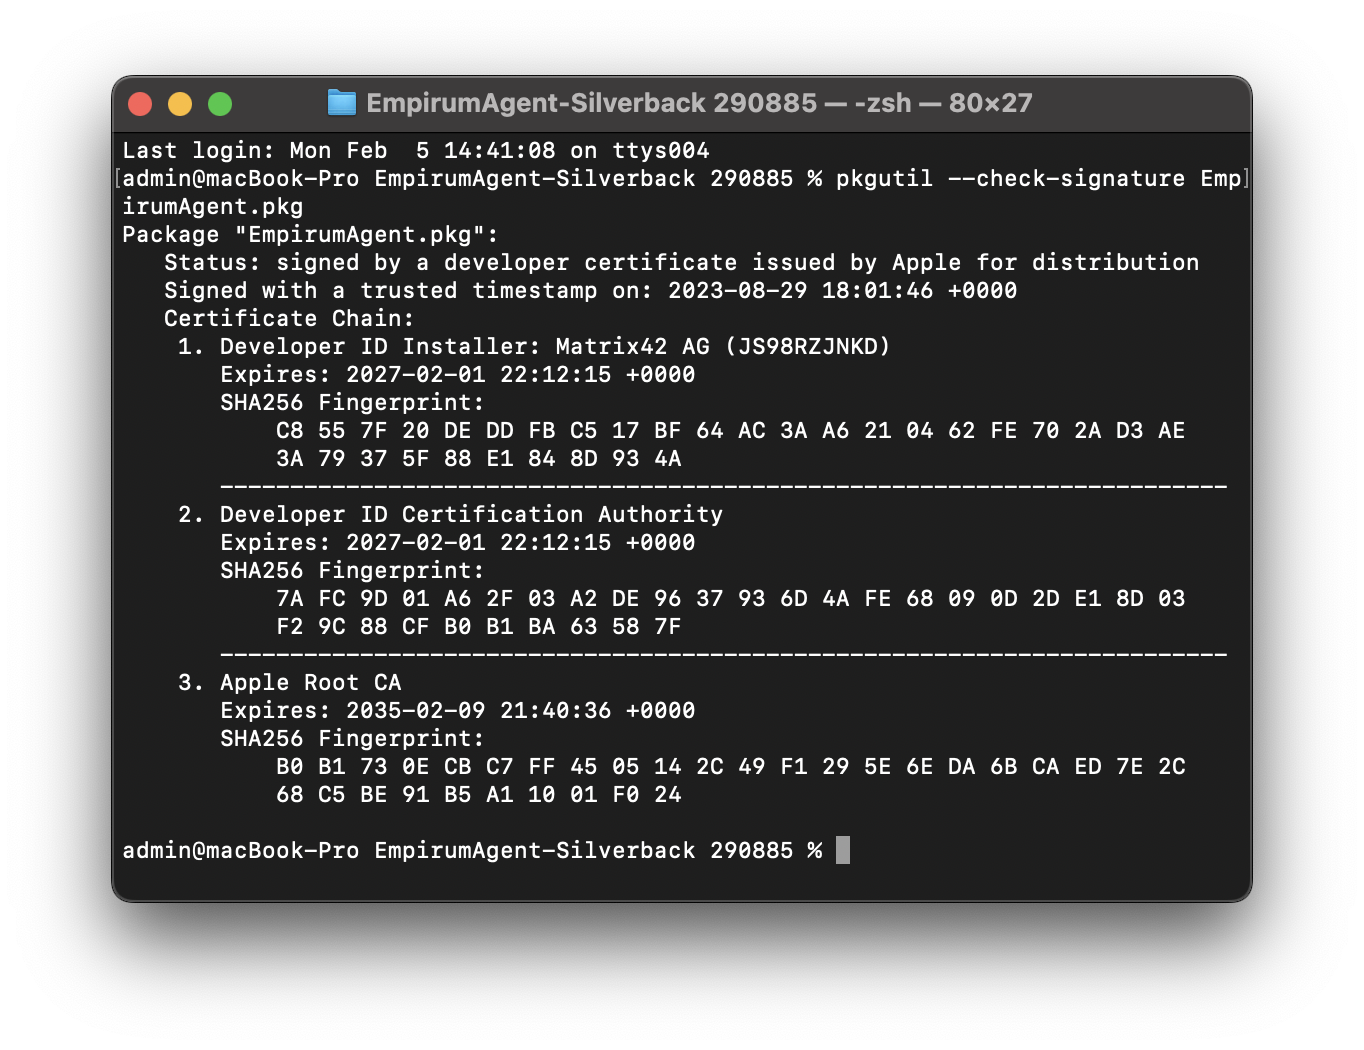
Another requirement for distributing and installing *.pkg files through Mobile Device Management or Enterprise Mobility Management systems is that the application/package must be signed with a valid Developer ID certificate to verify that it comes from a trusted source. To verify that the installation is signed by the application vendor, run the following command
- Jump back to the Terminal application
- From your desktop folder, run the following command to check the signature
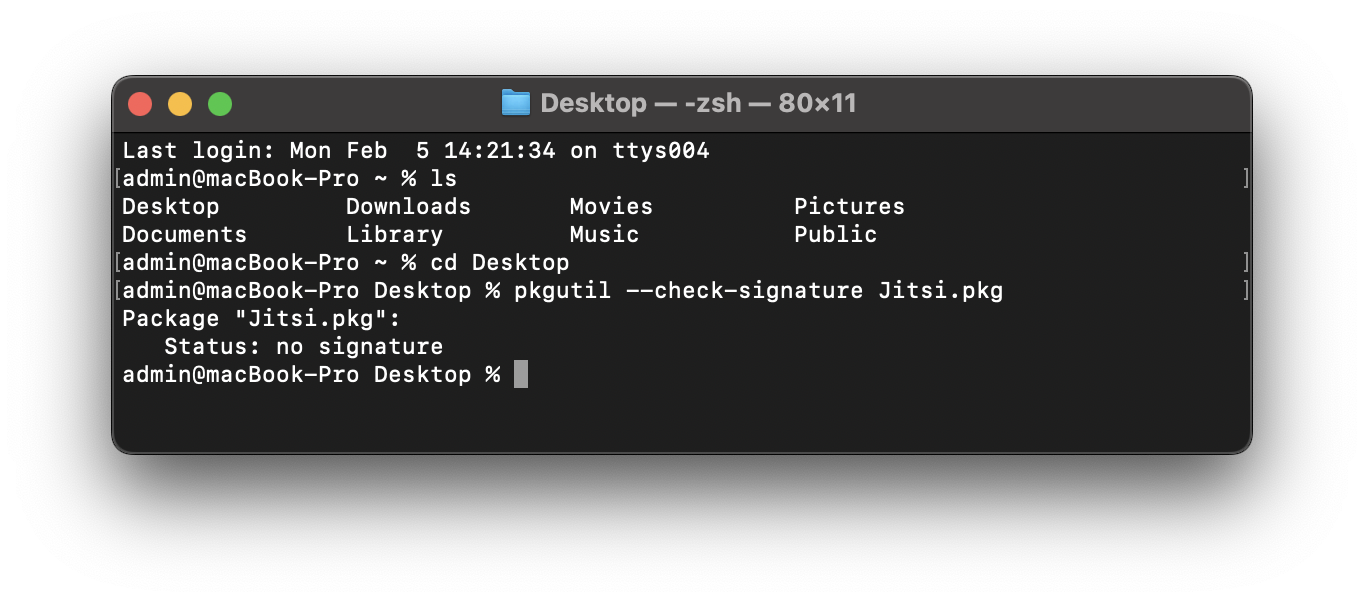
pkgutil --check-signature Jitsi.pkg
- Depending on the output of the signature verification, you will need to proceed in a different:
- If the package is not signed, as shown in the example on the left, the only way to distribute the application is to use the extracted *.pkg file and distribute it via Empirum as part of your Unified Endpoint Management suite. Please proceed in this case with Create Empirum Package.
- If the package is signed, as shown in the example on the right, you can proceed to distribute the application using Silverback. To do this, you must first create a valid *.plist and upload the application, as highlighted in Create a PLIST for Enterprise Applications on macOS.
If you try to install an unsigned package via Silverback, the installation will fail. You can review the installation failure by opening the Console application on the macOS device and search for the application name. You will find an entry indicating that the distribution was successful and another entry indicating an error that an authorization is required to install the package.
| Signature check with a not existing signature | Signature check with an existing signature |
 |
 |
Create Empirum Package
If your converted *.pkg package is not signed with a valid Developer ID certificate to verify that it comes from a trusted source, you can use Empirum to distribute the application, as we will demonstrate in the following chapters.
Download and run Mac Package Wizard
- Download the latest macOS Components from the Marketplace to your macOS device
- After downloading, open the Finder and navigate to Downloads
- Double-click the macOS Components folder
- Double-click the Mac Package Wizard and expand the extracted folder
- Double-click the Mac Package Wizard.dmg and open the Mac Package Wizard application
- Confirm the Security warning by pressing open
Create and Export Package
- Now drag and drop your recently extracted *.pkg file into the Drop App here area
- Proceed with Next
- Enter a Name, Vendor, Version and Revision
- e.g. Jitsi
- e.g. Jiti.org
- e.g. 1.0
- e.g. 0
Since this information is important for package handling in Empirum, it does not need to be correct once.
- Proceed with Next
- Enable your desired supported OS X Versions. Pease note that on non-selected operating systems, the application will not installed by Empirum
- Proceed with Next
- Modify if needed the scripts or press directly Create
- Select the output location of the Empirum package
- Wait until the process is finished and press Quit
- Locate your output location with the Finder application, the package name will have a syntax like {47902E5F-8D34-4D5E-BF03-CD53097ACF28}
Upload and Assign Package
After the package creation, all you need to do is to upload and assign the package via Empirum to devices that have the Unified Endpoint Management Agent installed and configured. On a high level, you have three different options:
- Unified User Experience: First you need to *.zip the created package by performing a right-click on the folder and execute the compress command. Then Login to your Unified User Experience, navigate to Unified Endpoint Management, expand Software Distribution and select Software Packages. Now press Add Package and select your compressed package and press the upload package button. After a successful upload, create a new Assignment and add the target computers and the package into the Assignment.
- Empirum (SaaS): Use WinCSP to upload the package to the /Matrix42-Empirum/Configurator/PackageStore folder as highlighted in the Getting started with OS Deployment guide. Then open the Empirum Management Console and navigate and select on the bottom left Configuration, followed by Software Management. Now select the MAC OS X section and perform a right-click and select Import/Export and select Import Package. Press twice Next and then select None from the listed Packages and enable your recently uploaded package. Proceed with Next and press Finish. Wait until the process is finished and then navigate back to Management and Administration to create a new assignment group with the target computers and your recently added package via drag & drop and activate the group afterwards with a right click.
- Empirum On-Premise: Upload the Package to your Empirum Package Store (e.g. C:\Empirum\Configurator\PackageStore). Then open the Empirum Management Console and navigate and select on the bottom left Configuration, followed by Software Management. Now select the MAC OS X section and perform a right-click and select Import/Export and select Import Package. Press twice Next and then select None from the listed Packages and enable your recently uploaded package. Proceed with Next and press Finish. Wait until the process is finished and then navigate back to Management and Administration to create a new assignment group with the target computers and your recently added package via drag & drop and activate the group afterwards with a right click.
Package Installation
After assigning the package, the Unified Management Agent will install the package based on the set polling interval in the corresponding Agent Template. You can speed up the process by performing a right-click on the Agent and pressing Run Inventory Now.