Renew your Issuing CA Certificate
Overview
If you have configured a certificate deployment for Windows 10/11 devices, you may reach the point or date when your Issuing CA certificate will expire, and failure to renew this certificate will result in failures when deploying certificates to your Windows devices. You will receive a warning in the Silverback Management Console when the expiration date is approaching and this article provides instructions on how to create and update the new certificate.

Renew CA Certificate
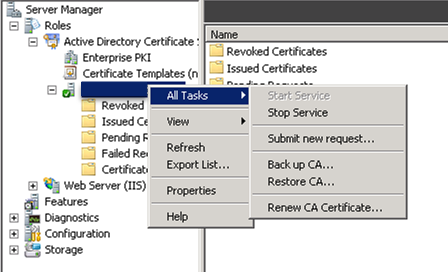
The first step is to contact your CA administrator to renew the certificate. In principle, the expiration of the certificate means that a new root certificate must be issued on the CA. To do this, you can initiate the Renew CA Certificate function from the CA's user interface. For a detailed description of the procedure, you can find some useful articles on the Internet that describe this process.
Import and select new CA Certificate
The next step is to make the new certificate available to your Silverback server. Depending on your current setup, the approach is slightly different and will be explained at a high level below:
- Your Silverback server is a domain member: In this case all you need to do is wait for the new CA certificate to be available in your server's certificate store under your Trusted Root Certification Authorities. When this point is reached, log in to your Silverback Management Console as a Settings Administrator and navigate to Certificates. In the Certificates view, locate the Windows Certificate Settings section and the (Enrollment) Issuing CA entry. Select your new CA certificate from the drop down menu and press Save.
- As an alternative, you can export the certificate the CA certificate from the CA's user interface as highlighted in the Export Certification Authority Certificate chapter from the integration guide. After the export, you can import the CA certificate to the Trusted Root Certification Authorities store on your Silverback Server. When this point is reached, log in to your Silverback Management Console as a Settings Administrator and navigate to Certificates. In the Certificates view, locate the Windows Certificate Settings section and the (Enrollment) Issuing CA entry. Select your new CA certificate from the drop down menu and press Save.
- As a cloud customer, export the CA certificate from the CA's user interface as highlighted in the Export Certification Authority Certificate chapter from the integration guide, create a ticket at our technical support and provide the certificate to the support engineers. Our cloud engineers will take care of uploading the certificate on your cloud environment. When this point is reached, log in to your Silverback Management Console as a Settings Administrator and navigate to Certificates . In the Certificates view, locate the Windows Certificate Settings section and the (Enrollment) Issuing CA entry. Select your new CA certificate from the drop down menu and press Save.
- In Silverback 24.0 Update 3, we have significantly expanded the functions of our product to make the distribution of certificates on Windows 10 and 11 devices more flexible. This included a change where the address for your CA and the selected Issuing CA, CEP Encryption Agent and Exchange Enrollment Agent certificates configured in Web Setting will be used as defaults in each individual client certificate configuration, but can be overwritten individually. This means that you have now only changed the default settings for new certificate profiles. To update your current certificate profiles, open your Tag(s), navigate to Profile, select Certificate Profile, press the Edit button and select your new Issuing CA. Press Save to update the profile.
Restart Services
- After selecting your new certificate in the Web Settings, run PowerShell with elevated privileges
- Run the following command:
- restart-service w3svc,silv*,epic*
For all cloud customers, restart your Cloud Connector services after the certificate has been updated in Web Settings.