Set and configure Time Zones for Apple devices
Overview
Starting with version 24.0, Silverback offers several different ways to change the time zone on your managed devices or to define which time zone should be set on all Apple platforms. Firstly, iOS, iPadOS and Apple TV offer the ability for supervised devices to remotely set the time zone with a one-time command. The alternative option is to define a policy where Silverback checks the target and actual status at each device check-in based on the device's reported information and, if there is a discrepancy, resets the time zone to the one defined in the policy.
In general, Apple only provides here the ability to change the time zone with a single command on these platforms. This means that, unlike macOS, there is no way to set the time zone permanently via a profile. However, to overcome this lack of functionality, we have added the ability to define a policy that will take care of setting the correct time zone on your managed supervised devices, and this will be a part of the demonstration within this article. This also means that on these platforms and for not supervised devices, users can still manually change a device's time zone, with the exception of one available restriction.
On supervised devices, you have the option to set the Force Set Date and Time Automatically restriction to prevent users from changing the time zone. But conversely, enabling this restriction leads to the situation that if the time zone is changed remotely or by policy, Silverback's single commands will be ignored due to the design of the operating system, so please keep this information in mind.
On the other hand, the macOS platform offers the possibility of creating a dedicated profile that includes the option of configuring a time server and setting the time zone, and in this guide we will demonstrate the use and configuration on all Apple platforms.
Platforms
Depending on your used platform, you might want to use the quick jump to your desired parts:
Configuration on iOS, iPadOS and tvOS
This section demonstrate how to set and configure the time zone on iOS, iPadOS, and tvOS.
Before you Start
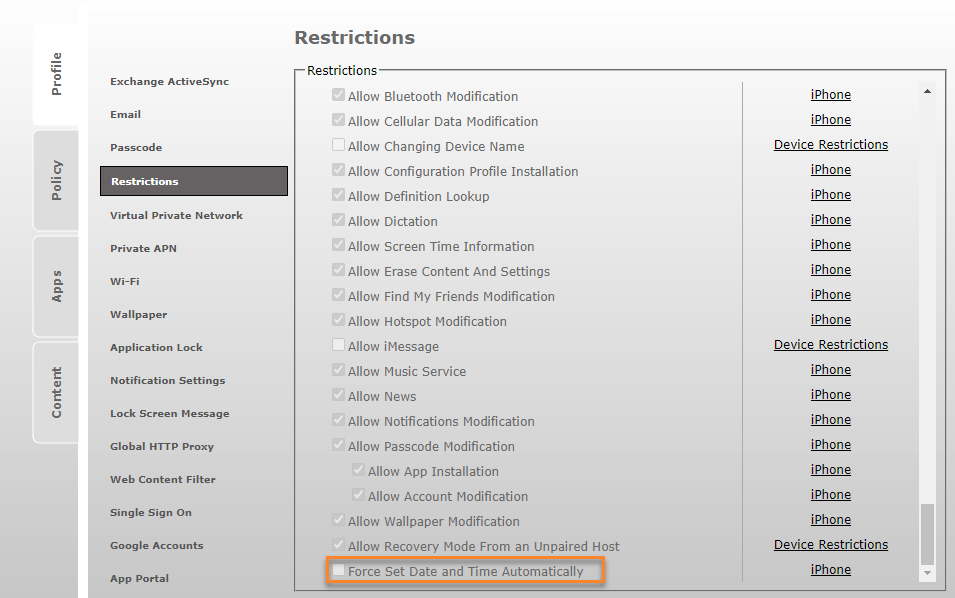
Before you start with changing the time zone on iOS, iPadOS, and tvOS devices, you need first to ensure that the restriction Force Set Date and Time Automatically is not enabled. In addition, changes on these platforms requires a supervised device. You can either check the configuration by opening your Tag that contains the restriction you have configured, or you can check the configuration by opening the Device Overview for a specific device, pressing the Resultant Tag button in the top right corner, and navigating to Profile > Restrictions. Scroll down to the Security & Privacy section and check that the Force Set Date and Time Automatically option is not selected.
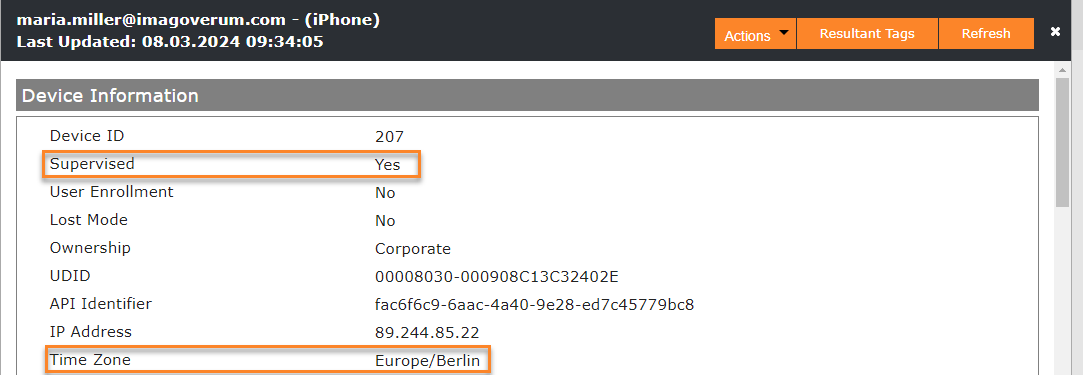
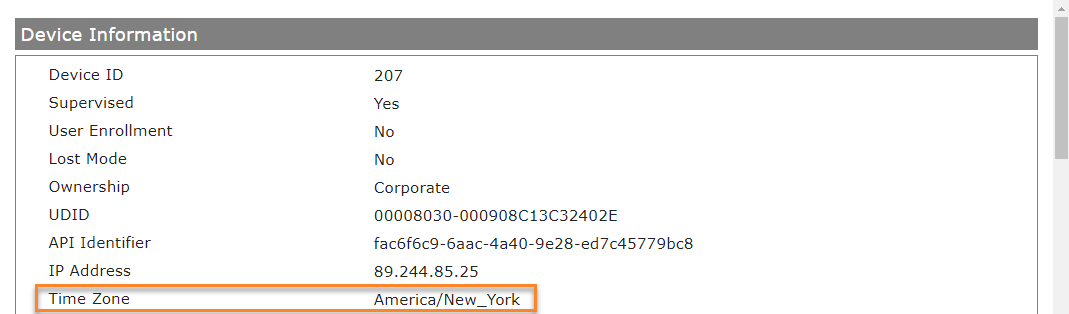
You can also use the device overview to check whether your target device is being supervised and what time zone it is currently in.
Change the Time Zone via One Time Action
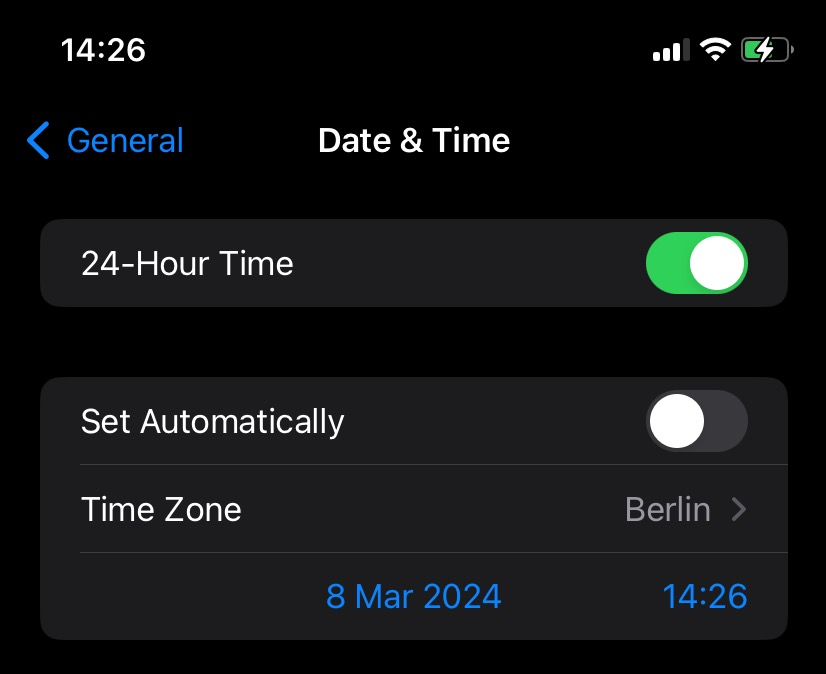
Using the test device above, you can see that the time zone is currently set to Europe/Berlin. You can find this information on your iOS, iPadOS, or tvOS device by opening the Settings application and navigating to General > Date & Time.
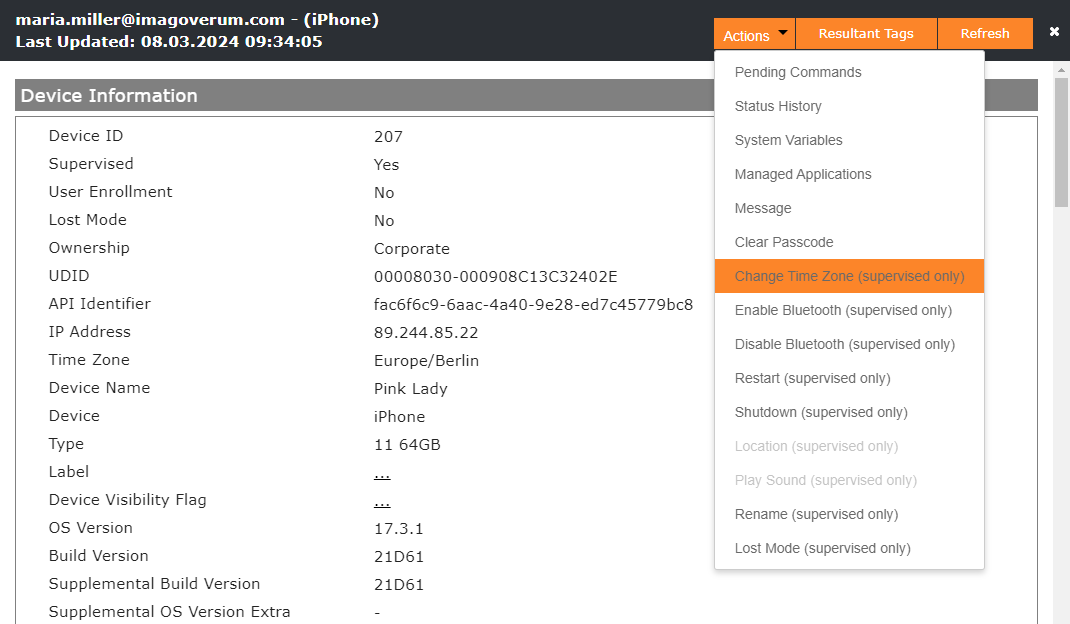
To change now the time zone in a single action, use the Actions button in the Device Overview and select Change Time Zone.
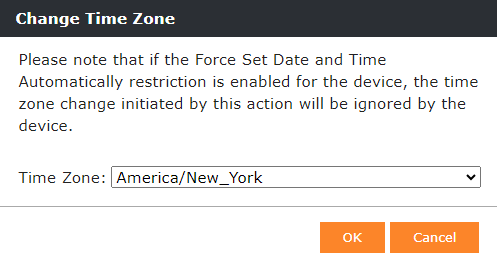
In the new pop-up window, select your desired time zone. In our case we will use America/New_York. Press OK to save your changes.
Then open the Pending Commands to check the command execution. By design of the MDM protocol, time zone changes are part of the Settings commands and you should see the status Acknowledged next to the Request Type Settings.

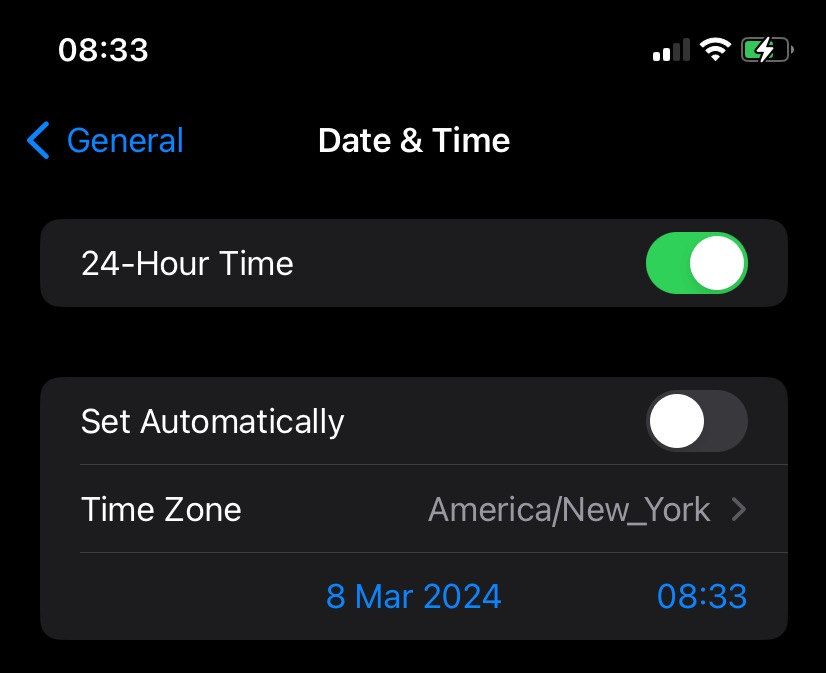
Once the device has received the command, it will automatically change the time zone to America/New_York, as shown in the screenshots below:
| Before executing the change. | After the Settings command has been acknowledged. |
 |
 |
The next time the device checks in and reports its new device information, you should see a change in the time zone information in the device overview. To speed up the process, you can press the Refresh button from the Device Overview. The reported value will change to America/New_York.
Set the same Time Zone as reported
As a side note at this stage, we would like to demonstrate what happens if we now use the Remote Action to set the time zone to the same as the one currently set on the device. To do this, we will run the Change Time Zone action again and check the Pending Commands. In this case you will see that the status is Abandoned.

Change the Time Zone via Policy
Once we have verified that the one-time action timezone change works as intended for iOS, iPadOS and tvOS devices, we will proceed to create a policy where Silverback checks the target and actual status at each device check-in based on the reported device information, and resets the timezone to the one defined in the policy if there is a discrepancy. To create the policy we will use a new Tag, but you can of course use any existing Tag.
Create a Tag
- Navigate to Tags and press New Tag
- Enter a name, e.g. Time Zone Policy
- Enable the Policy Feature
- Enable at least one target Device Type, e.g. iPhone, iPad or Apple TV
- Press Save
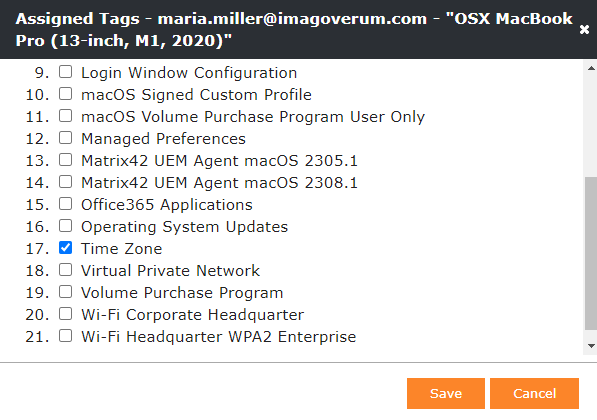
- Now navigate to Policy and select Time Zone
- Enable Time Zone Settings
- Now select your target Time Zone, e.g. Europe/Berlin
- Press Save and confirm with OK
Assign the Tag
As usual, you have multiple options to assign the Tag. You can either navigate back to Definition tab inside the Tag and press the Associated Devices button to Attach More Devices or you can navigate to the Devices tab and press the Tag button in the Actions column. After you verified the Policy with one or more test devices, you can also enable the Auto Population for the Tag. For additional information, please refer to Tags Guide Part I: Create and Deploy. For demonstration purposes, we will go to the Devices tab and manually assign the Tag to the test device.

Refresh the Device
Once the tag has been assigned, you can press Refresh from the device overview. In this guide, we have manually set the timezone to America/New_York and during the checkin process, the policy will now evaluate the current timezone set on the device and, if necessary, change it to the one configured in the policy. After pressing Refresh, you can check the command execution again by opening the Pending Commands view. Again, you should see the Acknowledged status for the Settings command.

Review new Time Zone
After pressing Close in the Pending Commands view, you should now see the device reporting the new time zone in the Device Overview.

Try again
Now you can take your device and manually change the time zone to something other than Europe/Berlin. Then navigate back to your device overview and press refresh. You will see that the time zone has changed back to Europe/Berlin. You may need to run the refresh twice, as the device may report the manually changed time zone in the meantime, but in general you can now rely on Silverback to change the time zone to the one configured in the policy each time it checks in.
Configure Time Server and Time Zone on macOS
As mentioned in the overview, macOS provides a dedicated profile for configuring a time server and a time zone. Depending on where you started in this article, you can either create a new Tag or use the Tag we created in the previous chapters. For demonstration purposes, we will create a new Tag. If you are using the same Tag as for iOS, iPadOS or tvOS, go to Tags and edit your existing Tag and enable the Profile feature and select macOS as the device type.
Create a Tag
- Navigate to Tags and press New Tag
- Enter a name, e.g. Time Zone
- Enable the Profile Feature
- Enable macOS as Device Type
- Press Save
- Now navigate to Profile and select Time Server
- Enable Time Server Settings
- Now enter your desired Time Server or keep the default Apple Time Server as time.apple.com
- For demonstration purpose, we will use time.windows.com
You can find a list of List of Top Public Time Servers on Github
- Now select your target Time Zone, e.g. Europe/Berlin
- For demonstration purposes, we will use America/New_York
- Press Save and confirm with OK
- Before assigning the Tag, lets review first the current configuration on the device
Review the current configuration
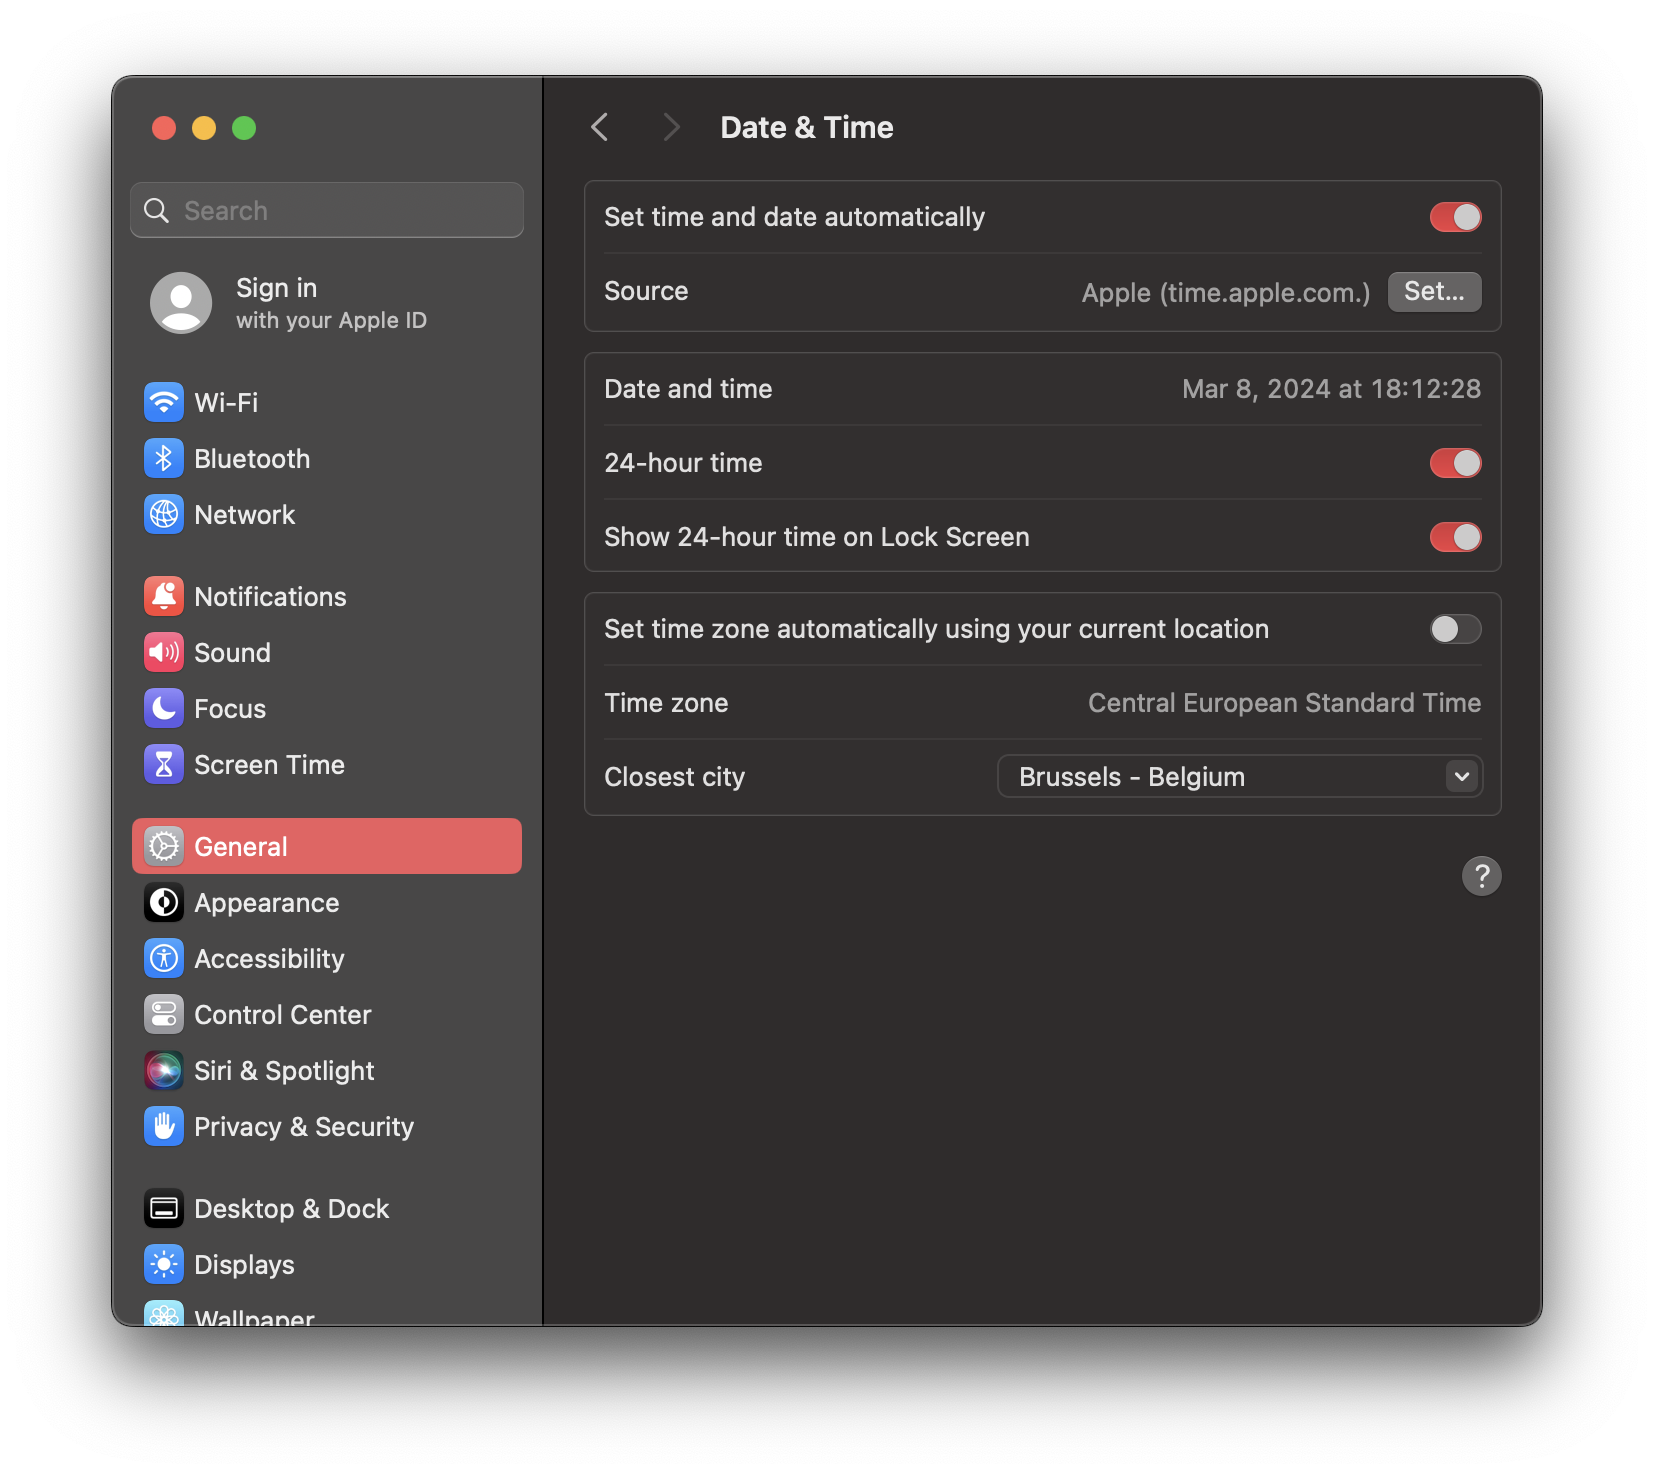
- On your macOS device, open System Settings
- Select General and navigate to Date & Time
- Review the Set time and date automatically switch and the Source
This article has been written using a MacBook Pro running macOS Sonoma. The experience or location of settings may be different on older and future OS versions. You can refer to Set the date and time manually on your Mac for the official Apple Guide.
- Currently it should look similar to this:
Assign the Tag
Now it is time to assign the Tag, as usual, you have several options to assign the Tag. You can either navigate back to Definition and press the Associated Devices button to Attach More Devices or you can navigate to the Devices Tab and press the Tag button in the Actions column. Once you have verified the Tag with one or more test devices, you can also enable the Auto Population for the Tag. For additional information, please refer to Tags Guide Part I: Create and Deploy. For demonstration purposes, we will go to the Devices tab and manually assign the Tag to the test device.
Review Profile Installation
Once the Tag has been assigned, you can press Refresh from the Device Overview to speed up the Tag assignment. After pressing Refresh, open the Pending Commands and locate the InstallProfile command with the Applications / Profiles Time Server. Acknowledged means that the profile has been successfully installed.

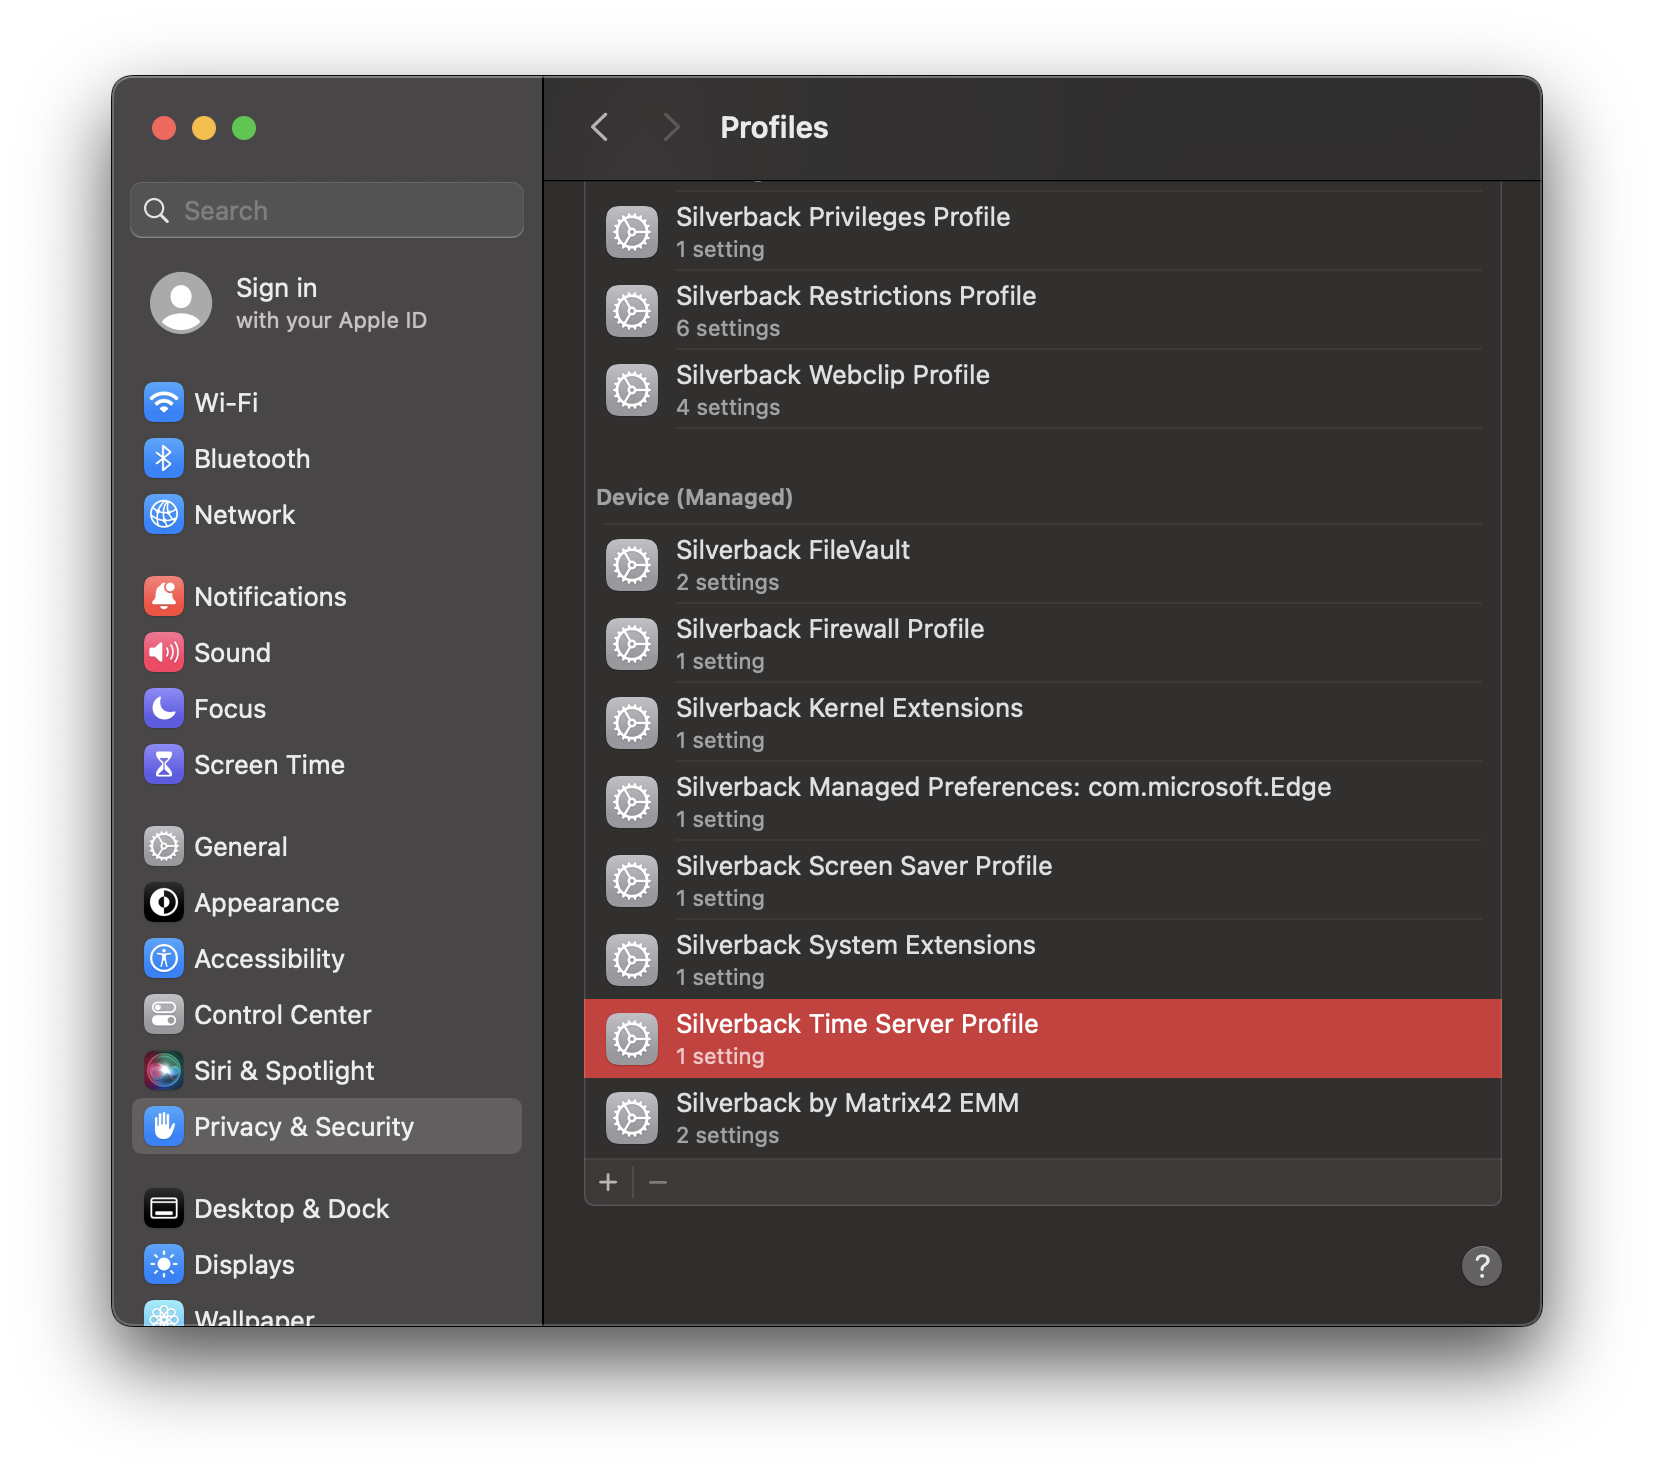
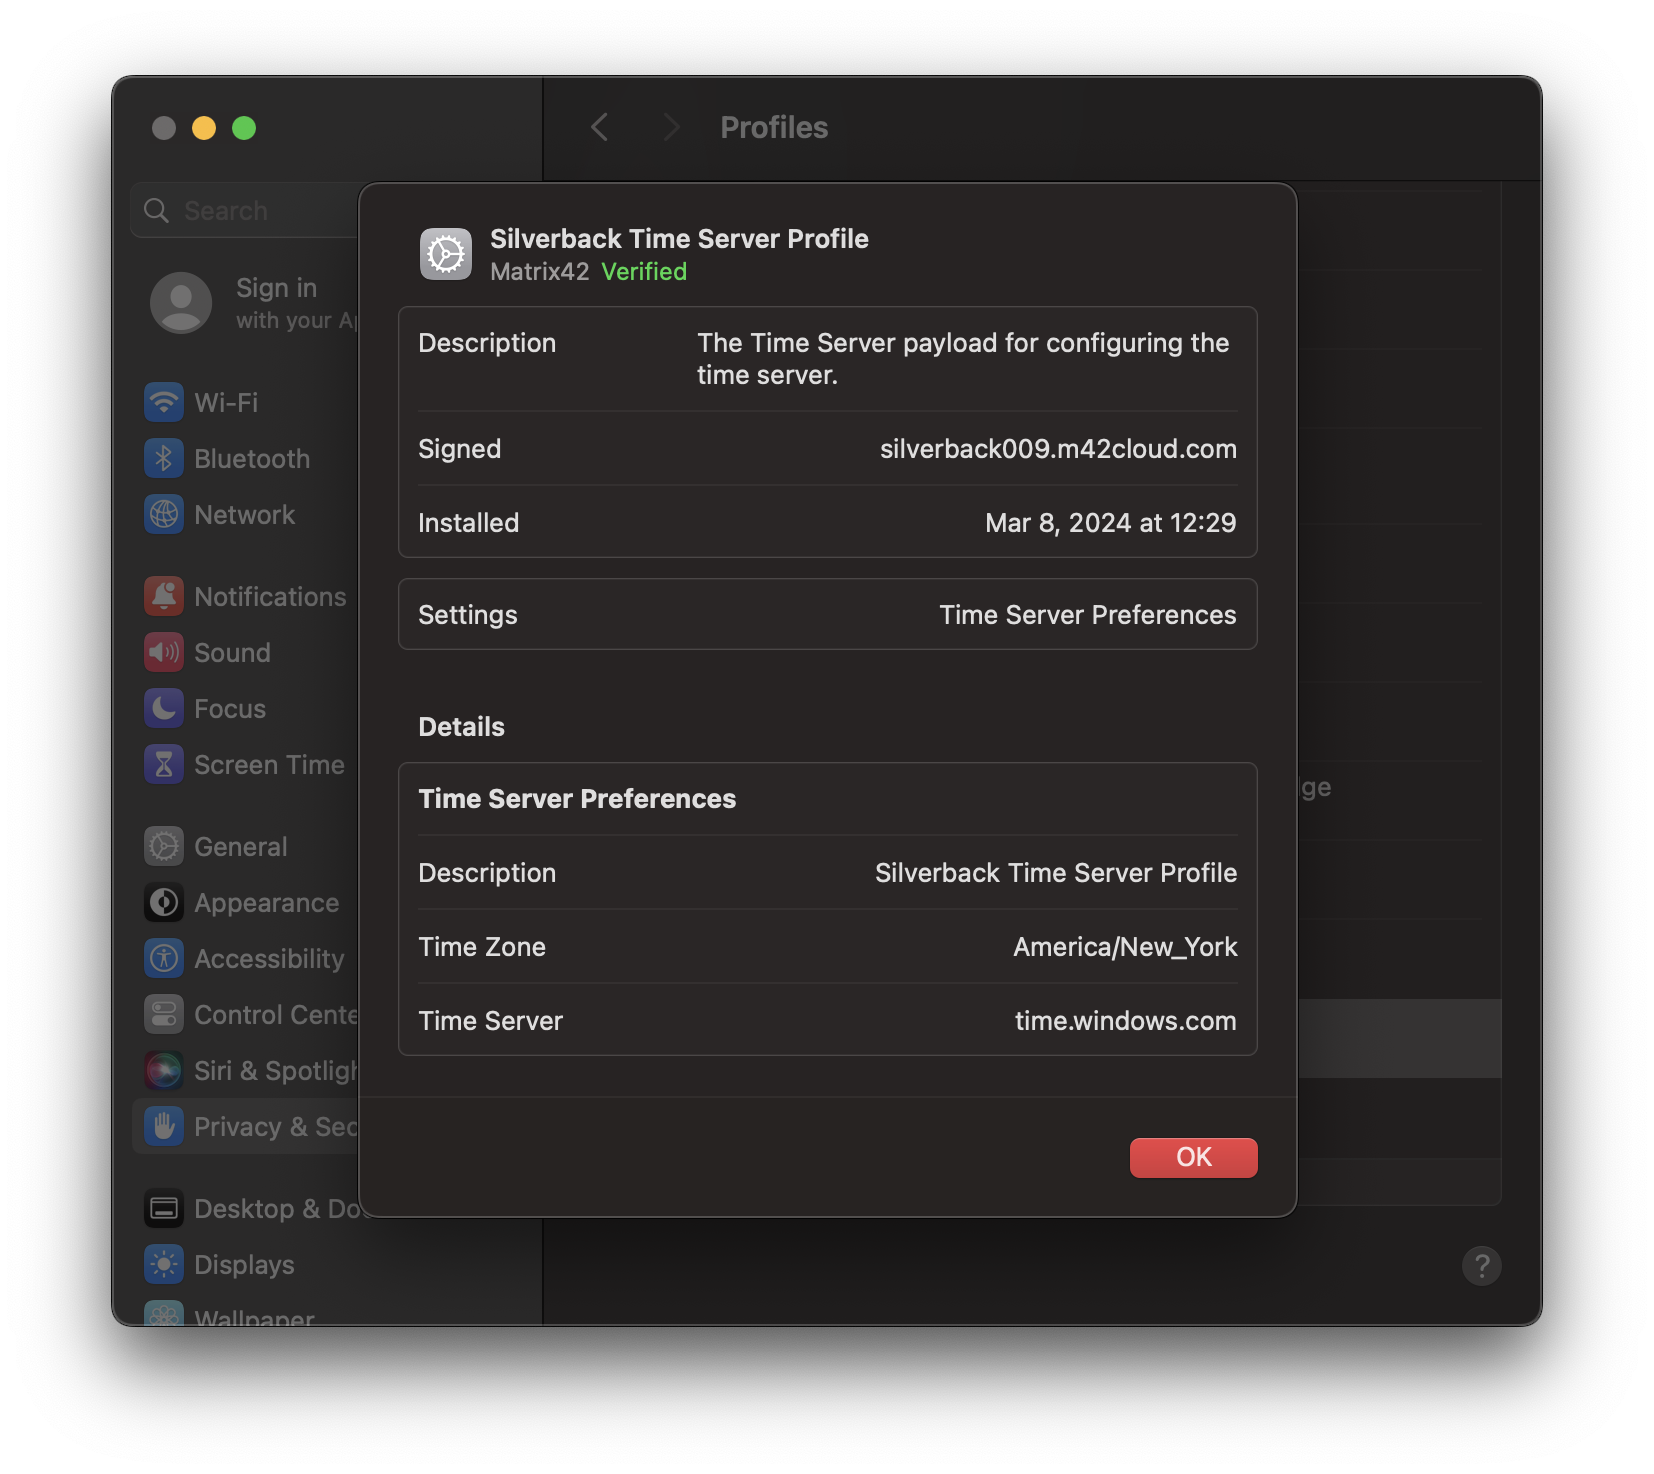
Now go to your macOS device to check the profile installation. To do this, open System Preferences, select Privacy & Security, and scroll down to the Profiles menu. When you open the menu, you will see an overview of all installed profiles. Under Device (Managed) you should see the Silverback Time Server Profile entry. Double-click to open the details.
 |
 |
Review Date & Time
- Now, press OK in the detailed view of the installed Time Server Profile
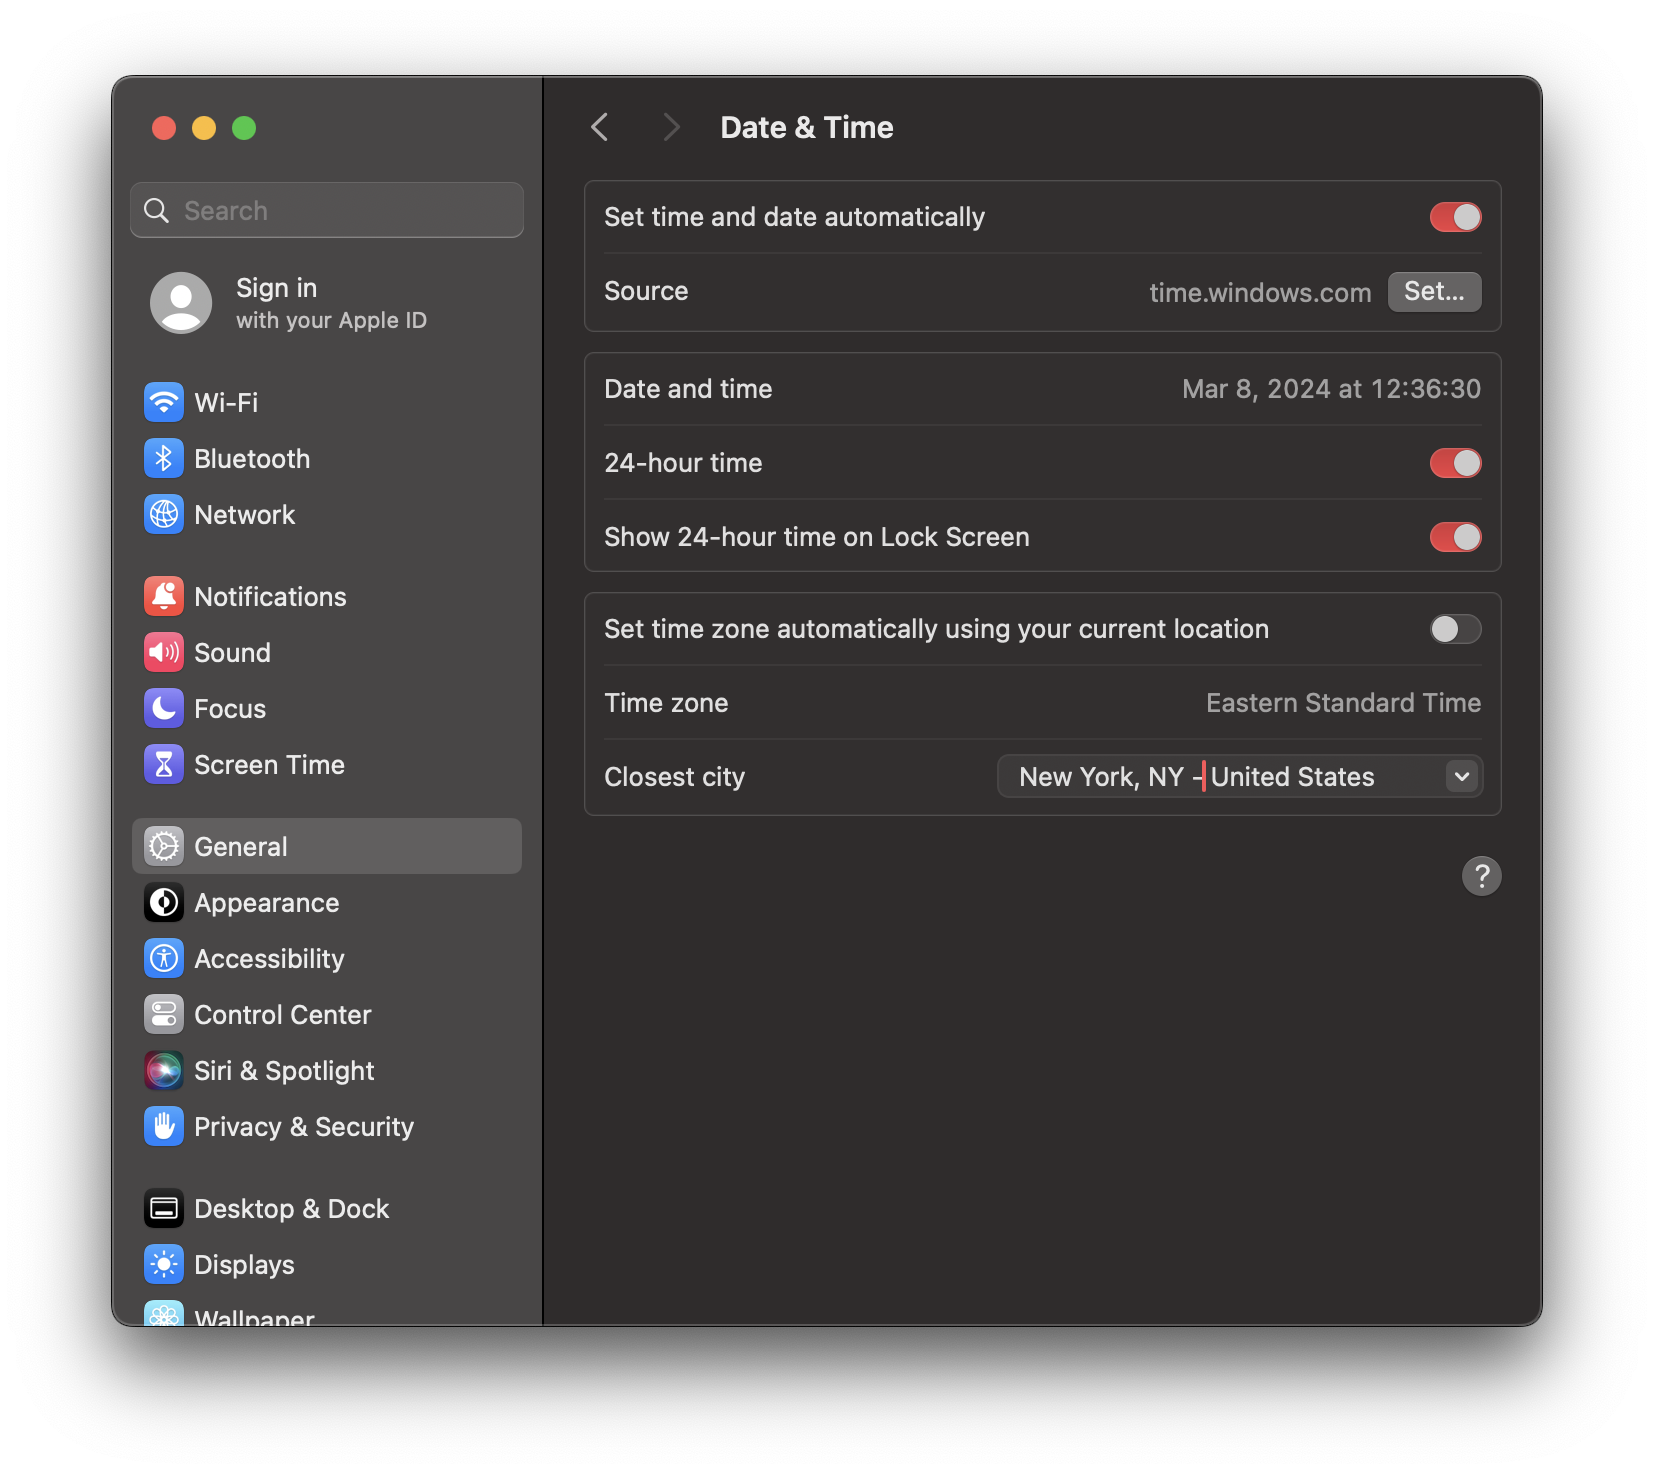
- Navigate back to General in the left pane and select Date & Time
- You will probably notice that the source has already changed, but the Set time and date automatically switch is still active
- There will also be other switches still active
- In this case, simply close the System Settings applications and reopen the Date & Time configuration
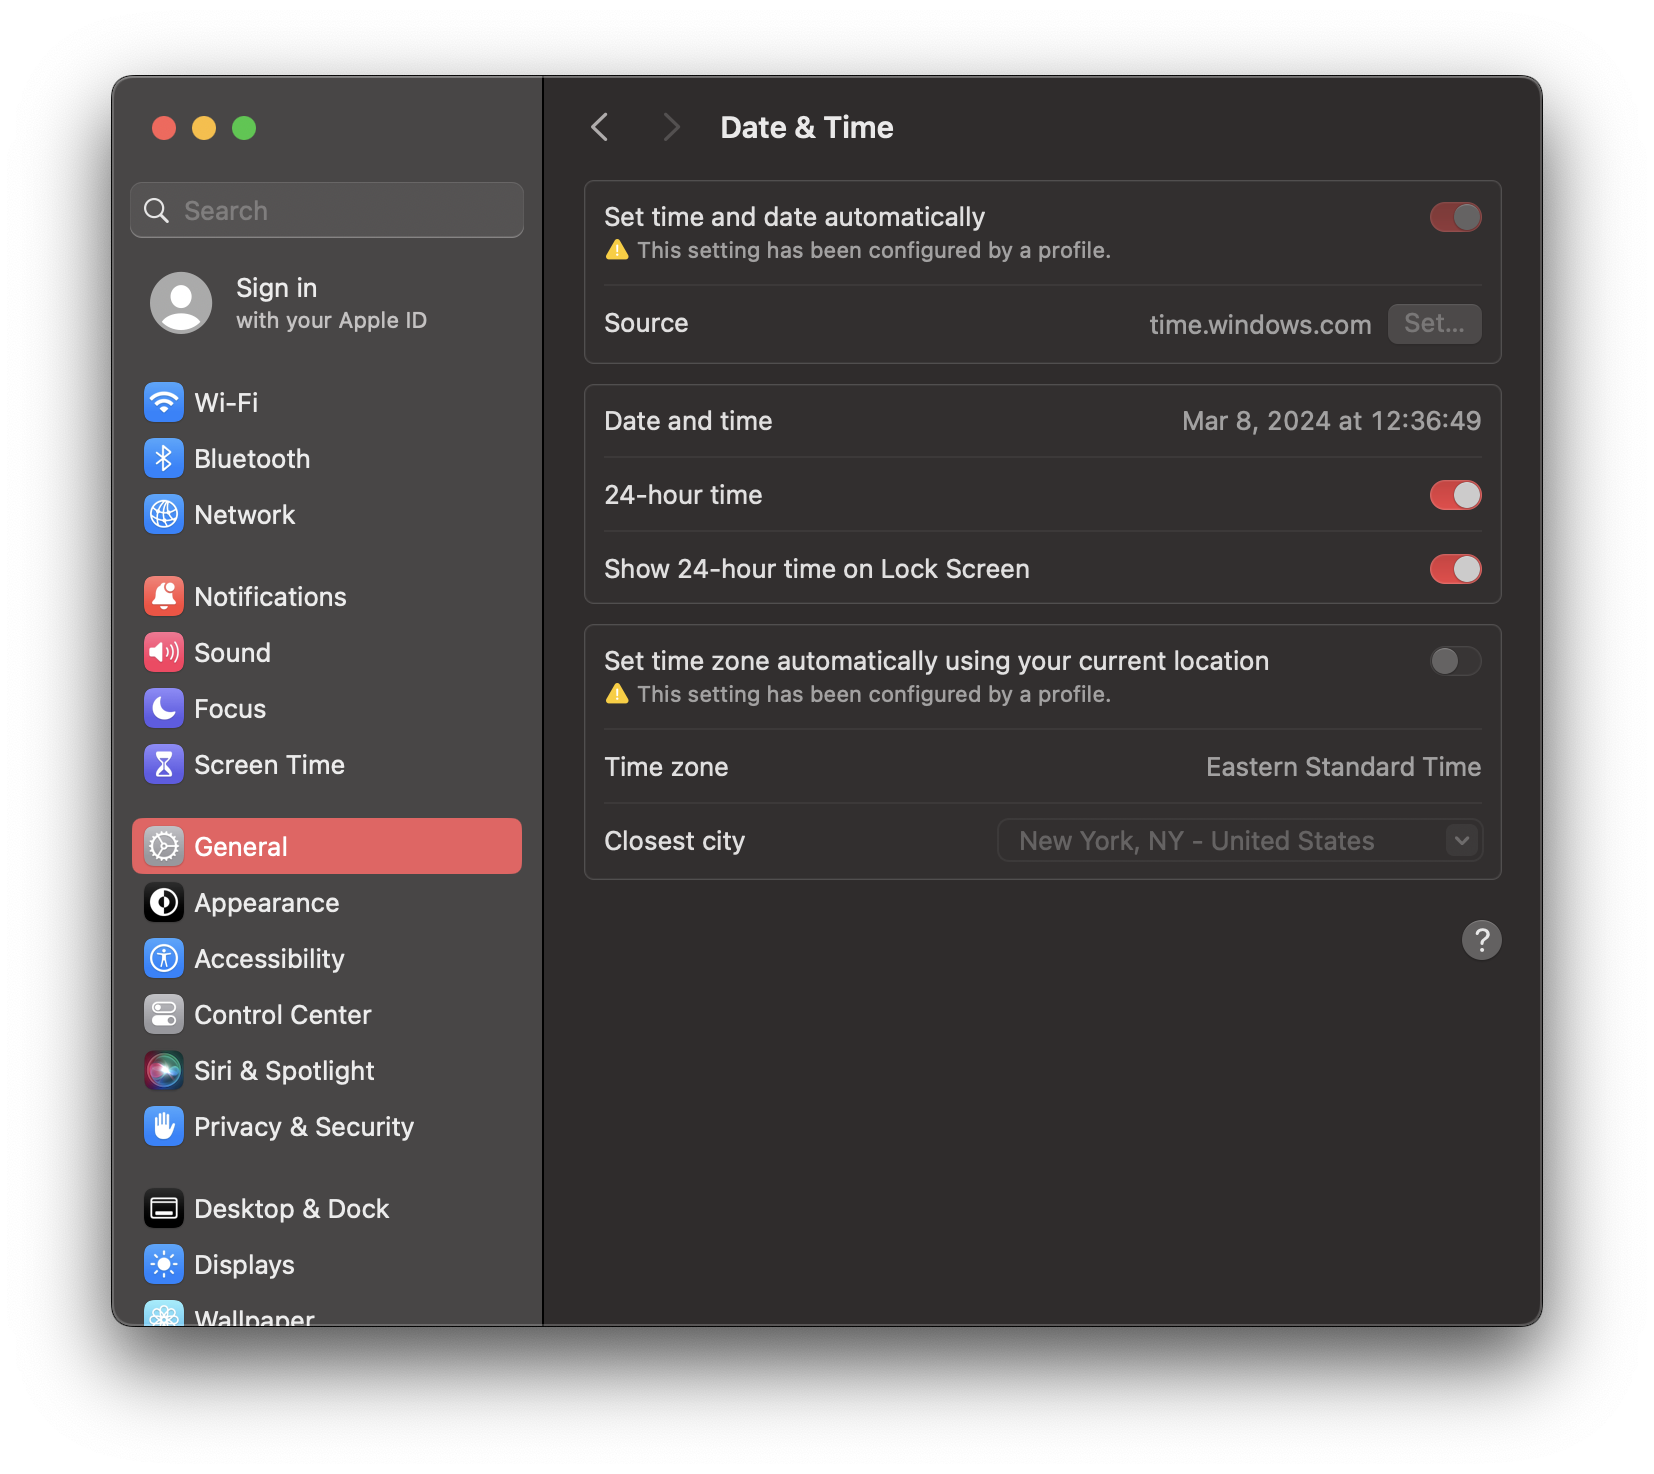
- You will now see the information that the behaviour and user interface has changed with the information that the settings are configured by a profile
- This means, that you have successfully configured the Time Server and the Time Zone. Congratulations!
| Before re-opening System Settings | After re-opening System Settings |
 |
 |