Application Black- and Whitelisting
Overview
When managing mobile devices, administrators will sooner or later, depending on the security policy of the organization, have to deal with the question of which applications are allowed in the corporate context and which can or may be installed by users. Depending on the scenario, the devices used and the type of management used, Silverback offers options to allow or prohibit applications on iOS, iPadOS, Android and Samsung Knox devices, which we will cover in this guide.
The first option is the Silverback blacklist as a method that does not directly interfere with the device and Silverback can detect and perform certain actions based on the list of installed applications that devices send to the management system. Since the Silverback blacklist does not directly configure the device, this option is probably a good choice for you if your devices do not provide the ability to actively control existing applications on the device. This includes the following scenarios:
- Your iOS and iPadOS devices are not supervised, e.g. if you are not using the Device Enrollment Program or manually supervise devices
- You are using the Android Enterprise Device Owner mode and users are allowed to add personal Google accounts for using Google Play, but you want to take an action if a non desired application will be installed by your users
- You are using the Android Enterprise Device Owner mode and users are allowed to Access to All Apps in Google Play Store, but you want to take an action if a non desired application will be installed by your users
- You have non-Android Enterprise managed devices in your organization
Another method is Enforced Blacklist/Whitelist, where the management actively affects the device with a restriction and configures it to make a set of unwanted or explicitly wanted applications unusable/usable/installable. As this method is applicable to supervised iOS and iPadOS and Android or Samsung Knox devices, please refer to the following articles:
- Enforced Blacklist Whitelist for iOS and iPadOS
- Enforced Blacklist Whitelist for Android and Samsung Knox
In any case, you should consider to use black- and whitelist feature only for corporate owned devices. Especially, when we look to the Android or Samsung Knox device management and users are connecting to the organization as an example via the Work Profile, the device should be considered as a personal device that should be allowed to install any application in the personal area of the device. So, here you should align your Tag structure to exclude these devices as a target of the policy.
Silverback Blacklist/Whitelist Configuration
As the enforced methods are covered in dedicated articles, we will focus in this guide on the Silverback blacklist option. The configuration covers the following parts:
- Make a decision if you want to enforce the Application Blacklist or Application Whitelist (explained below)
- Add applications to the Silverback blacklist policy or Add applications to the tag (for the Application Whitelist)
- Configure Lockdown actions
Create a new Tag
- Open your Silverback Management Console
- Navigate to Tags
- Click New Tag
- Enter a Name, e.g. Imagoverum Application Policy
- Enter a description (optional)
- Under Enabled Features select Policy
- Enable the Apps feature if you want to use the application whitelist
- Under Device Types select one of the supported device types:
- iPhone, iPad, iPod
- Android, Samsung Knox
- Press Save
Review Lockdown Options
- Navigate to Policy
- Select Lockdown
- Review now the following two lockdown options as they are important to understand before proceeding:
- Enforce Application Blacklist
- Enforce Application Whitelist
- Please compare the options:
| Option | Description |
|---|---|
| Enforce Application Blacklist |
With the Enforced Blacklist option, Silverback checks all names that match the application list configured in the Silverback blacklist section with the reported installed application list from the devices. If the app is called Skype for iPad on the device, and the blacklist contains an entry called Skype, it is considered as a violation once the Lockdown option is enabled. |
| Enforce Application Whitelist |
The Application Whitelist considers all applications that were added to the same tag, where the policy is set, as whitelisted applications. So in case you have a Tag with applications and you configure in a separate tag the Enforce Application Whitelist option, this will not work as expected. Ensure to add applications and configure the lockdown option in the same tag. If the app is called 'Skype for iPad' on the device and you enter 'Skype' in the App Portal tab, it is considered a violation. So you have to take the complete application name that is visible in the device details / application list. |
Configure Applications Blacklist
First, we will configure the Application list by adding applications into the Silverback blacklist policy, before we enable the Lockdown policy and switch afterwards to the whitelist function for reviewing the differences.
Add blacklisted applications
- Navigate to Policy
- Select Application Blacklist
- Choose Silverback blacklist
- In the text field, enter now the display name of the application, e.g. Outlook
- Press Add
- Repeat this for all applications that you want to blacklist
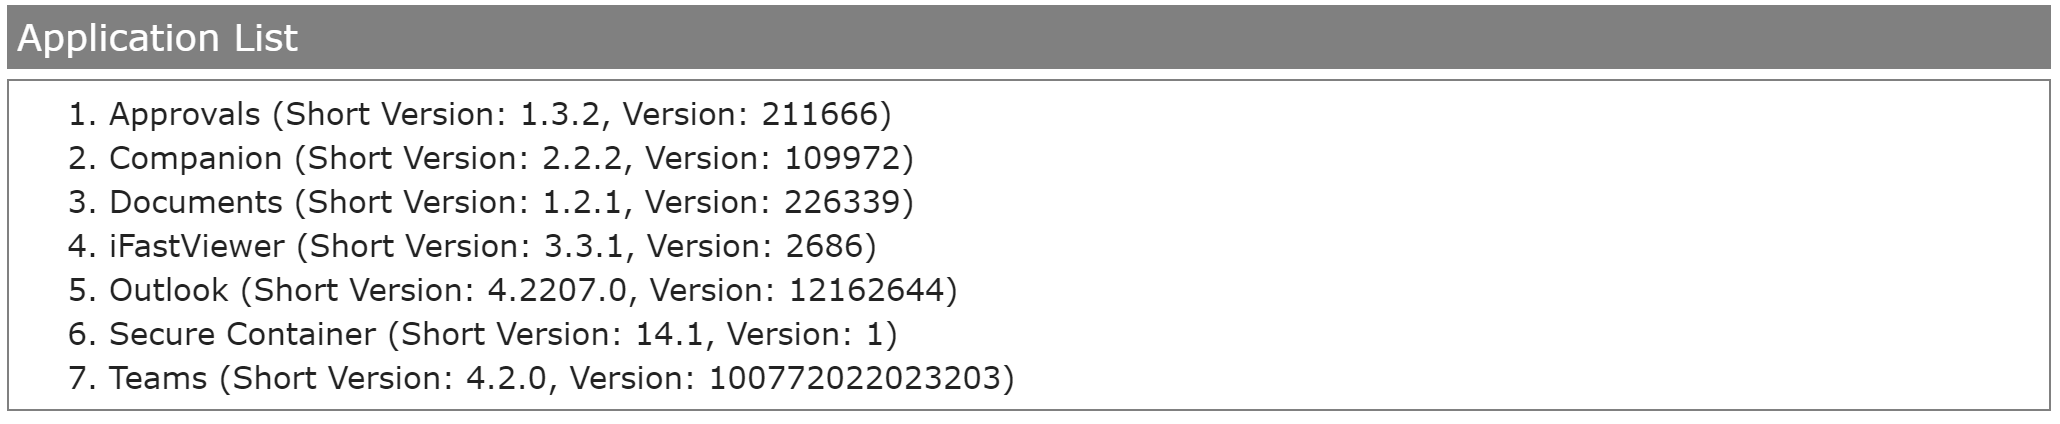
You can review the application names in the application list section within the Device Information
- Proceed with Enable Lockdown Policy
Enable Lockdown Policy
In case you do not configure the lockdown actions, no policy violation will be detected and displayed in the device overview for devices that have the tag assigned. This means we need now to configure what should happen with the devices, if an installed application on the devices is part of your blacklist.
- Navigate now from the Application List to the Lockdown section
- Here you have several lockdown options that will be checked periodically against your corporate policies.
- Enable Enforce Application Blacklist
- Select one of the following actions:
- No Action (recommended as a starting point and for auditing purpose)
- Lock
- Block
- Delete Business Data
- Factory Wipe
- Force (By selecting force, you will enable the Enforced Blacklist Whitelist for Android and Samsung Knox)
- Additionally, you can enable the Alert Administrator checkbox. In case a policy violation is detected, administrators with the enabled Receive Email Alerts option will get informed about policy violations.
- Press Save
- Confirm with OK
Prepare and Review the Device
- After enabling the Lockdown Policy with a configured Application Blacklist, it is time to assign the Tag. As always, you have three different ways to assign the Tag to your device(s):
- Navigate in the Tag to Definition and use the Associated Devices button to attach devices
- Navigate in the Tag to Definition and enable the Auto Population
- Navigate to Devices and use the assign Tag button and select the Tag and press save
- Install now any of your blacklisted application on the device
- Press from the device overview refresh and wait until the device has successfully checked-in
- You should see now the following device policy violation in the device overview.

- Additionally, your configured action should be executed and the device might be locked, blocked etc.
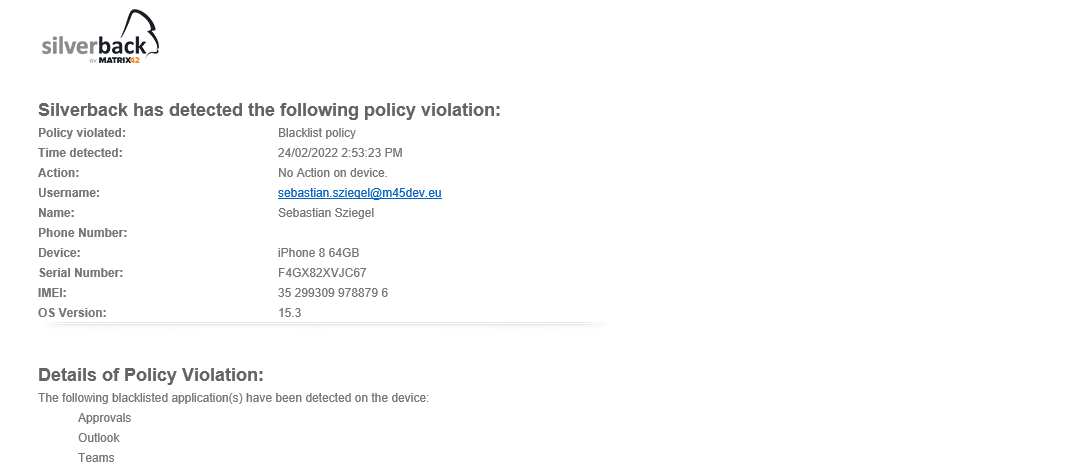
- If you enabled the Alert Administrator option, review your inbox
- The Email contains information about the policy violation as shown in the screenshot below:
Configure Application Whitelist
After we configured and reviewed the Application Blacklist option, we want to use the same Tag and switch to the Application Whitelist option. For this, we need to add our applications to the tag and switch the Lockdown options from blacklist to whitelist.
Add whitelisted applications
- Switch back to your previously used tag
- Enable under definition the App Feature for this tag
- Navigate to Apps
- Select Assign More Apps
- Select now applications from the available app list
- Press Add Selected Apps
Switch Lockdown Policy
- Navigate to Policy
- Select Lockdown
- Now disable the Enforce Application Blacklist option
- And enable the Application Whitelist option
- Select one of the following actions:
- No Action (recommended as a starting point and for auditing purpose)
- Lock
- Block
- Delete Business Data
- Factory Wipe
- Force (available for Samsung Knox device, as you will here enable the Enforced Blacklist Whitelist for Android and Samsung Knox)
- Additionally, enable the Alert Administrator checkbox. In case a policy violation is detected, administrators with the enabled Receive Email Alerts option will get informed about policy violations.
- Press Save
- Confirm with OK
Review the Device
- As the tag should be still applied to your device, you can either navigate to Definition and press Push to Devices or
- Perform a device refresh from the Devices Tab
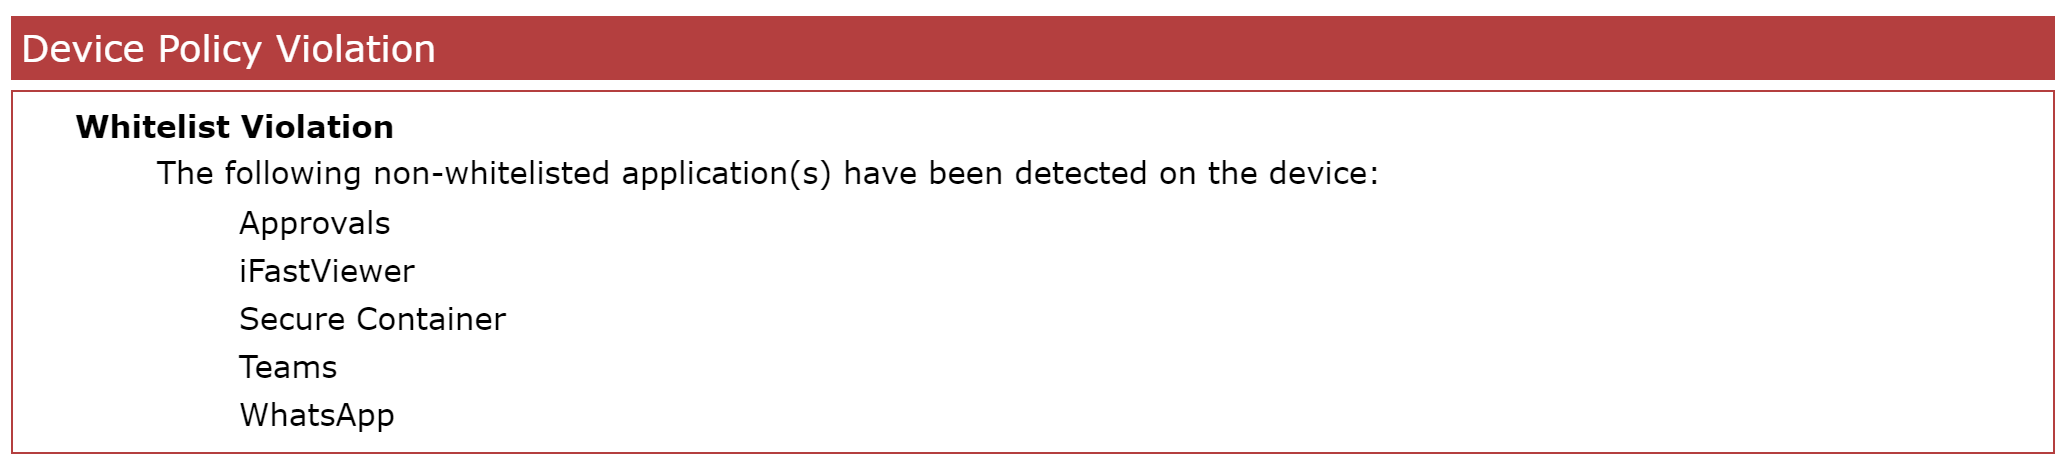
- Applications that are currently in the reported application list not present in your Tag, will now be listed with the following violation:
- Additionally, your configured action should be executed and the device might be locked, blocked etc.
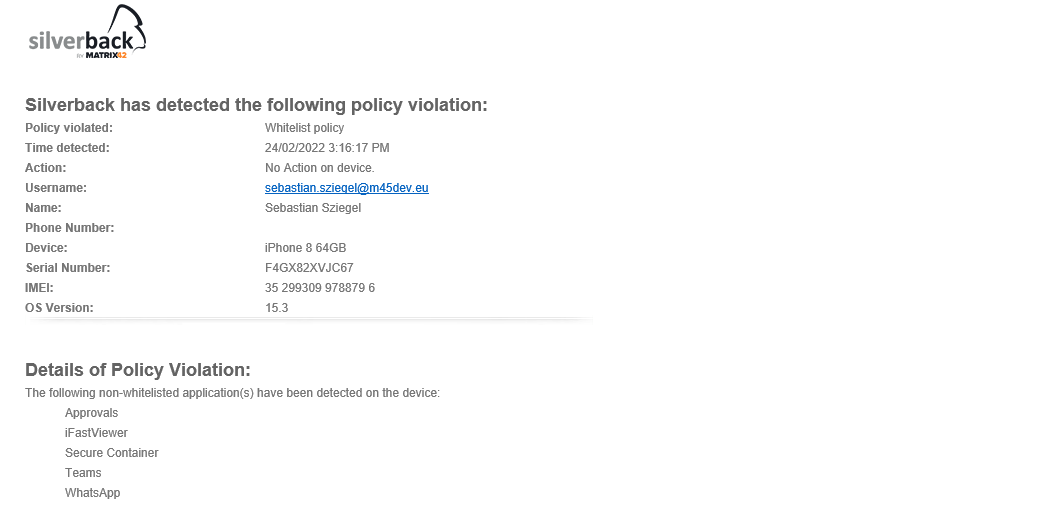
- If you enabled the Alert Administrator option, review again your inbox
- The Email contains information about the policy violation as shown in the screenshot below:
Additional Information
- To configure the interval for the policy violation tracking, please refer to Admin Guide Part III: Admin Tab
- If the Application List Privacy is enabled for devices, the blacklist and whitelist policy is still working
- Devices equipped with a work profile will show the installed application list from the personal section only. These devices should have a personal ownership and the Application List Privacy should be enabled for personal devices.
- System Applications are not part of the installed application list as the devices does not report them, but several pre-installed applications might be available in the list
- In case you have some duplicates in the violation lists on iOS and iPadOS devices, it might be that the application is already installed on the device and you have enabled the App Management option Automatically push to managed devices for this device with disabled the Take management if the app is already installed option.
- In case you have some duplicates in the whitelist violation list on Android or Samsung Knox, it might be that you have either the application multiple times in your App Portal, e.g. as a different application type or that applications might have the same or similar parts of the name. E.g., if you have the Knox Deployment and the Knox Service Plugin application in your App Portal, this app will might be shown twice as it contains both times the part Knox. This behavior should be fixed in Silverback 23.0 Update 1 and should not occur in newer versions.