Discovery
Overview
FireScope includes multiple discovery engines as a means of initially populating Configuration Items (CIs), identifying changes in infrastructure and augmenting configuration data from integration partners. Each discovery engine is configured independently, enabling you to choose which engines are appropriate for your environment and to schedule ongoing scans at an appropriate frequency based on the rate of change in your environment.
For example, you may want Network discovery to run only once a week if you are rarely introducing new physical servers or devices, while VMware discovery may be scheduled daily if you are frequently activating and decommissioning Virtual Machines (VMs). Additionally, if you are pulling CI data from a CMDB integration partner, there is an option to automatically run discovery against each CI brought over, which can be useful for updating the configuration data pulled over and to identify the available attributes for monitoring.
For best results, multiple discovery scans using all appropriate engines should be used. Each discovery engine can be configured to either automatically create and profile detected systems, or to follow a manual method whereby discovery results are only captured. If using the manual method, Configuration Administrators will need to view the discovery results and select the specific CIs that they want to track with FireScope.
Discovery is by nature a somewhat invasive process. Always get approval from your Network Administrator before running Discovery jobs. Also, any targeted device must also be pingable on the network by the FireScope Edge Device, or it will be skipped during the scans.
Discovery Job List
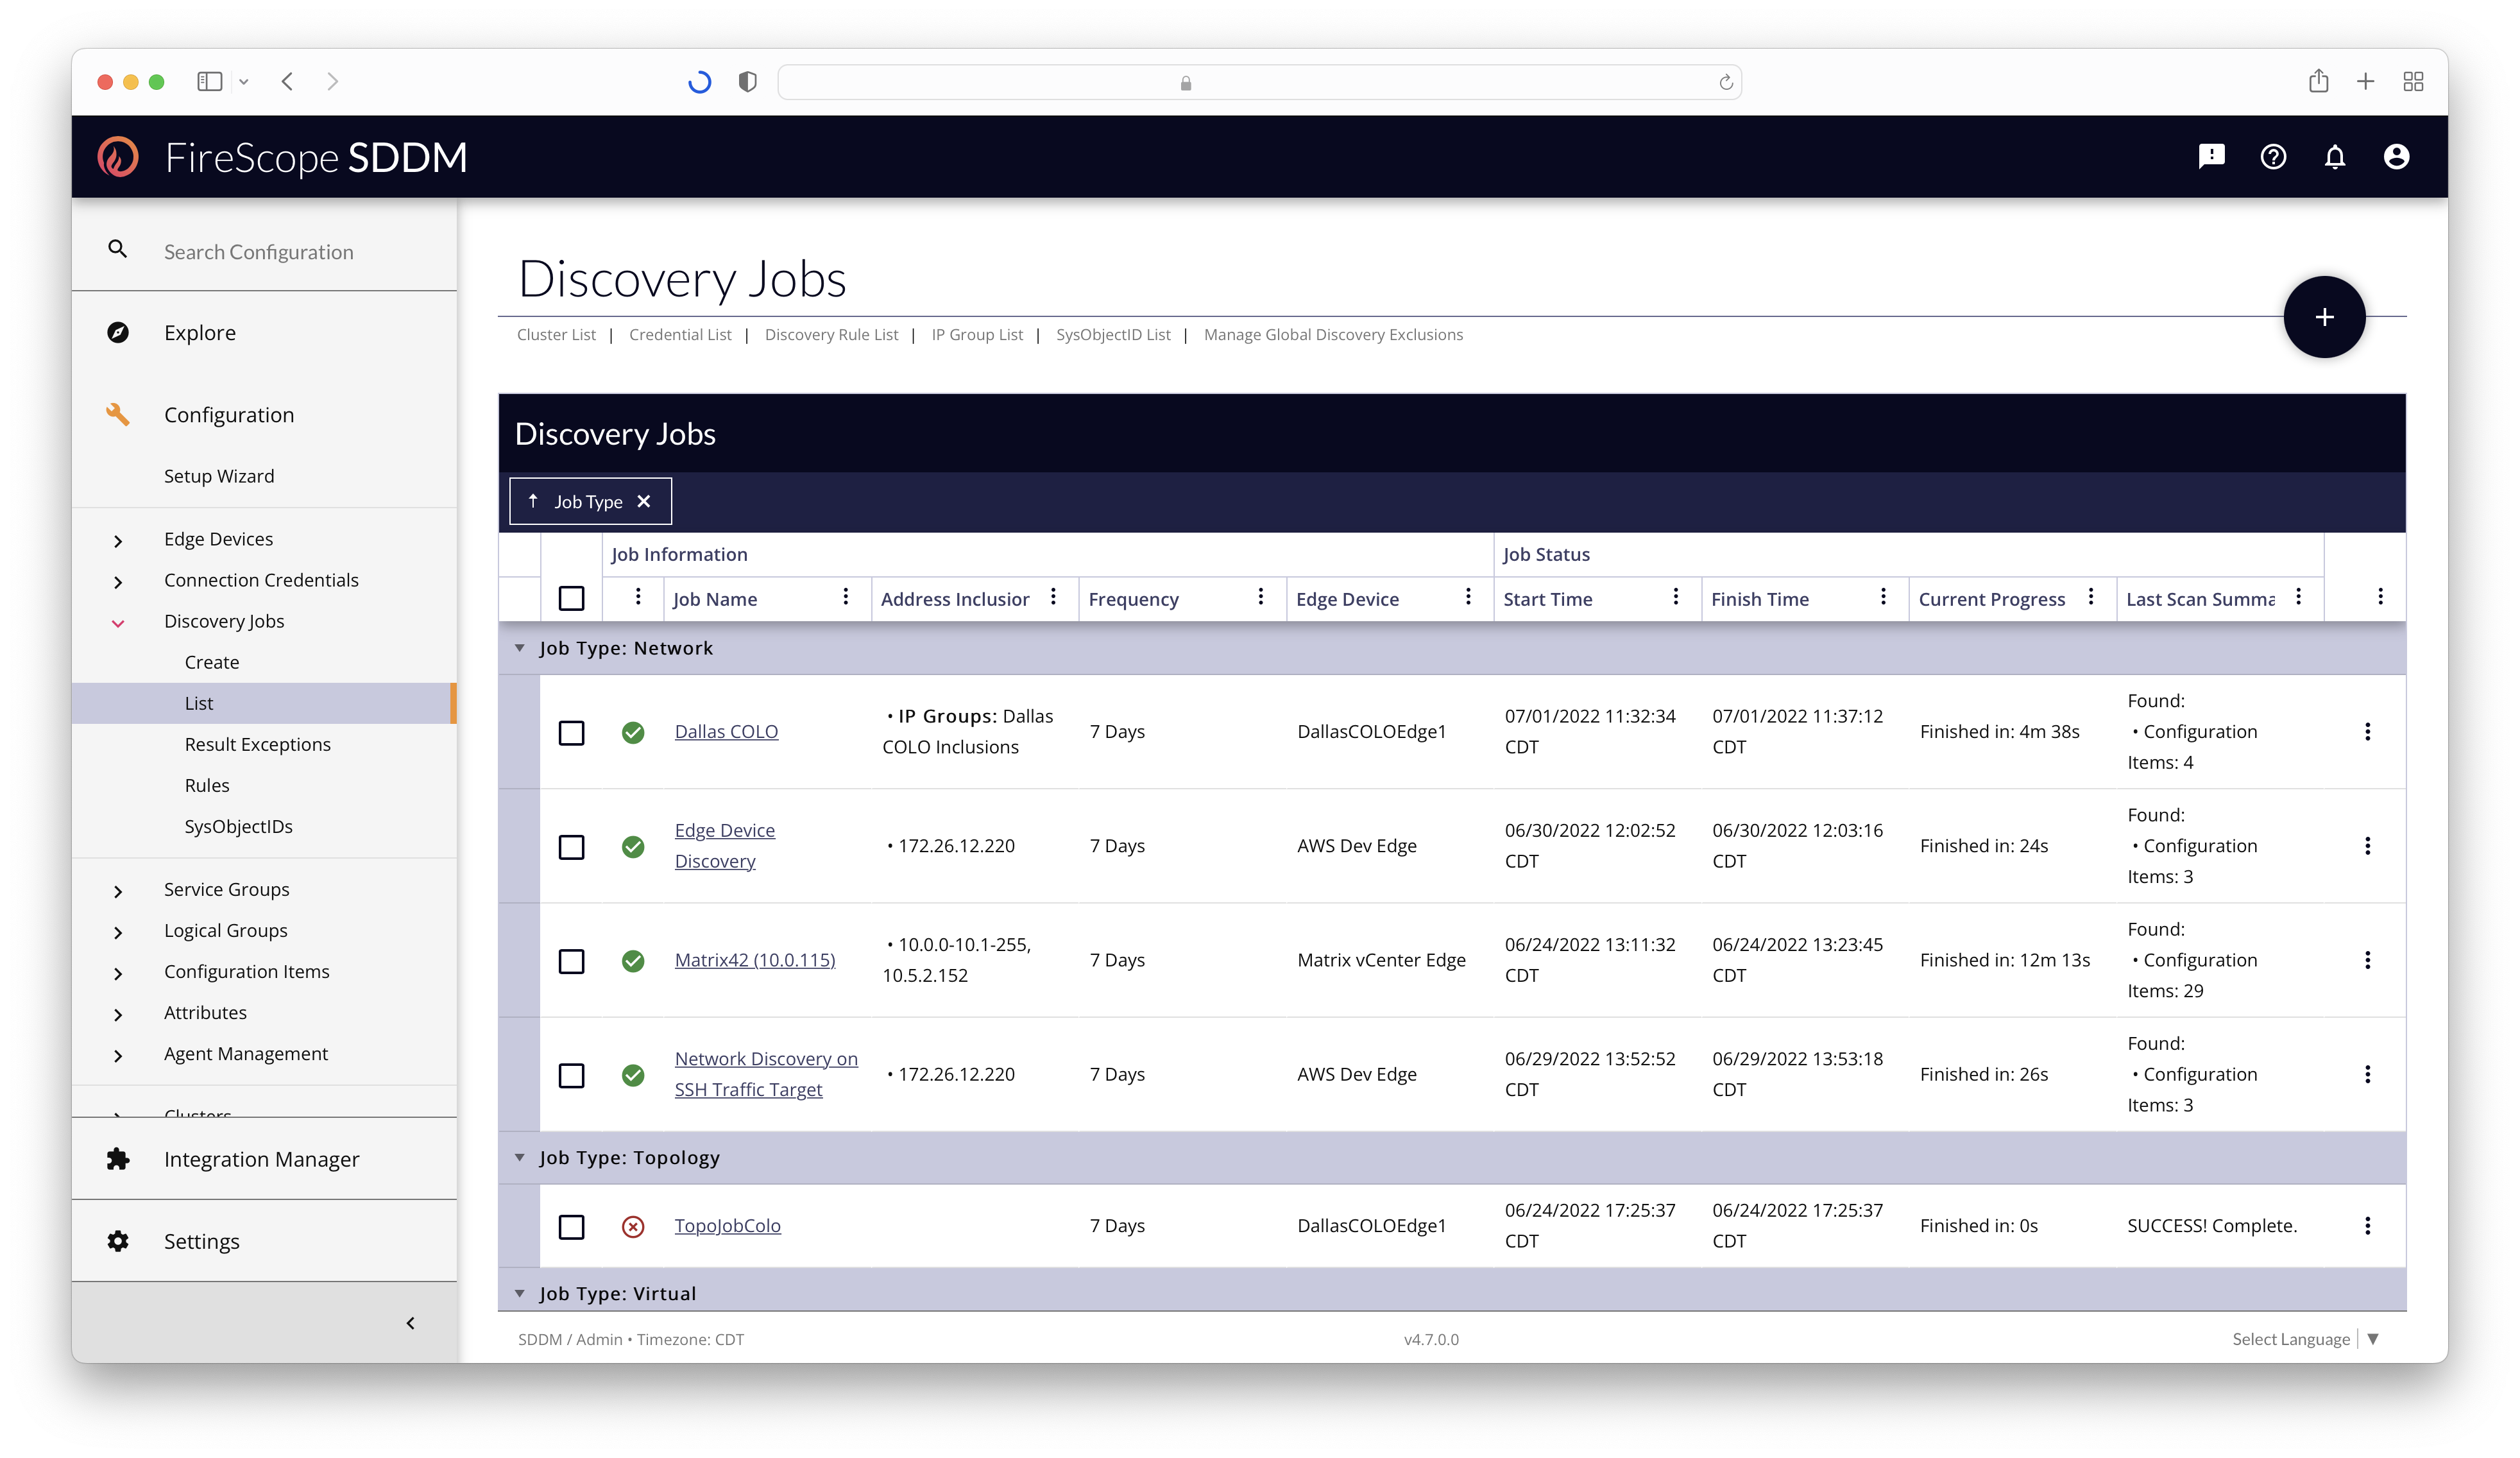
Configuration Administrators and FireScope Administrators can view, manage, and create all aspects of Discovery Jobs by going to the Configuration > Discovery Jobs section in the left navigation.
Before creating Discovery Jobs, make sure you have created the appropriate Connection Credentials, and Edge Device for the network segment.
Discovery Job Types
- Amazon AWS
- The Amazon Web Services (AWS) discovery utilizes a connectivity to your CloudWatch account to create AWS attributes and map your instances as CIs. This enables monitoring for your cloud deployment and the hosted applications.
- Load Balancer
- The Load Balancer will be scanned to discover Cluster dependencies. For Cluster dependencies to be found, ensure you have added the proper SNMP credentials for the Load Balancer.
- Microsoft Azure
- The Microsoft Azure Discovery will use the Azure Connection Credential to scan & create CIs for each of the instances found. It will add them to a Service Group for each Subscription found, and a Logical Group for each Resource Group. The CIs will then be assigned Tags accordingly for easy identification.
- Network
- This discovery engine is an
nmapstyle network scan. Initially, a range of IP addresses is scanned via ICMP to identify which addresses are currently in use. This is followed by OS fingerprint discovery, SNMP discovery and a test of well known ports which can identify service applications such as Apache, MySQL, Active Directory and more. These scans also check to see if a FireScope Agent has been deployed, which can further derive information for discovery results. - Topology
- Using nearest neighbor and related commands, this discovery engine is designed to walk your network to identify what is plugged into what. This helps the solution understand the physical dependencies within the infrastructure, such as which servers are connected to a given switch. The Topology Discovery enables you to detect and map your network environment. It creates a complete view of your assets and their interconnections which can be helpful in keeping the network functioning effectively. It can also be helpful in detecting any network problems. This feature provides an option to scan only the specified IP, and utilizes SNMP credentials.
- Virtual (VMware)
- FireScope takes advantage of the Virtual Infrastructure Java API to communicate directly with VMWare Virtual Center. This allows FireScope to directly access to all health metrics for the Virtual Center as well as the Virtual Hosts, Virtual Machines, Data Stores, Data Centers, and other items associated with it. This process does not require an Agent installation or any additional software.
Discovery Job Change Actions
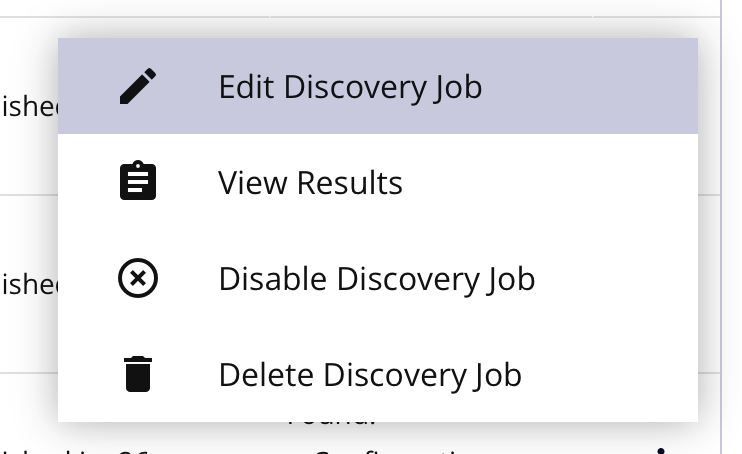 |
For Individual Discovery Jobs
|
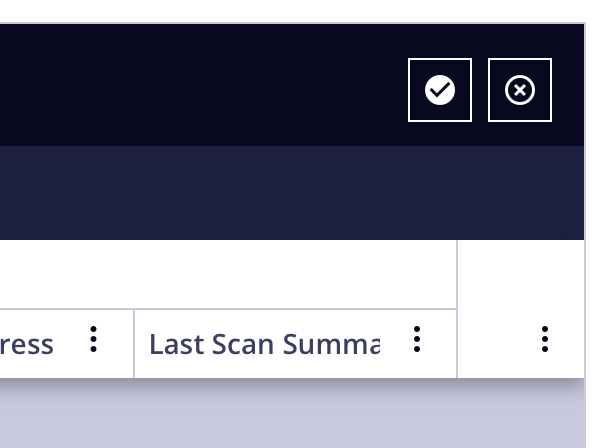 |
For Multiple Discovery Jobs
|
Discovery Job Edit Form
To create a Discovery Job, you can click the Add (+) button in the top-right of the list page, or go to Configuration > Discovery Jobs > Create in the left-navigation.
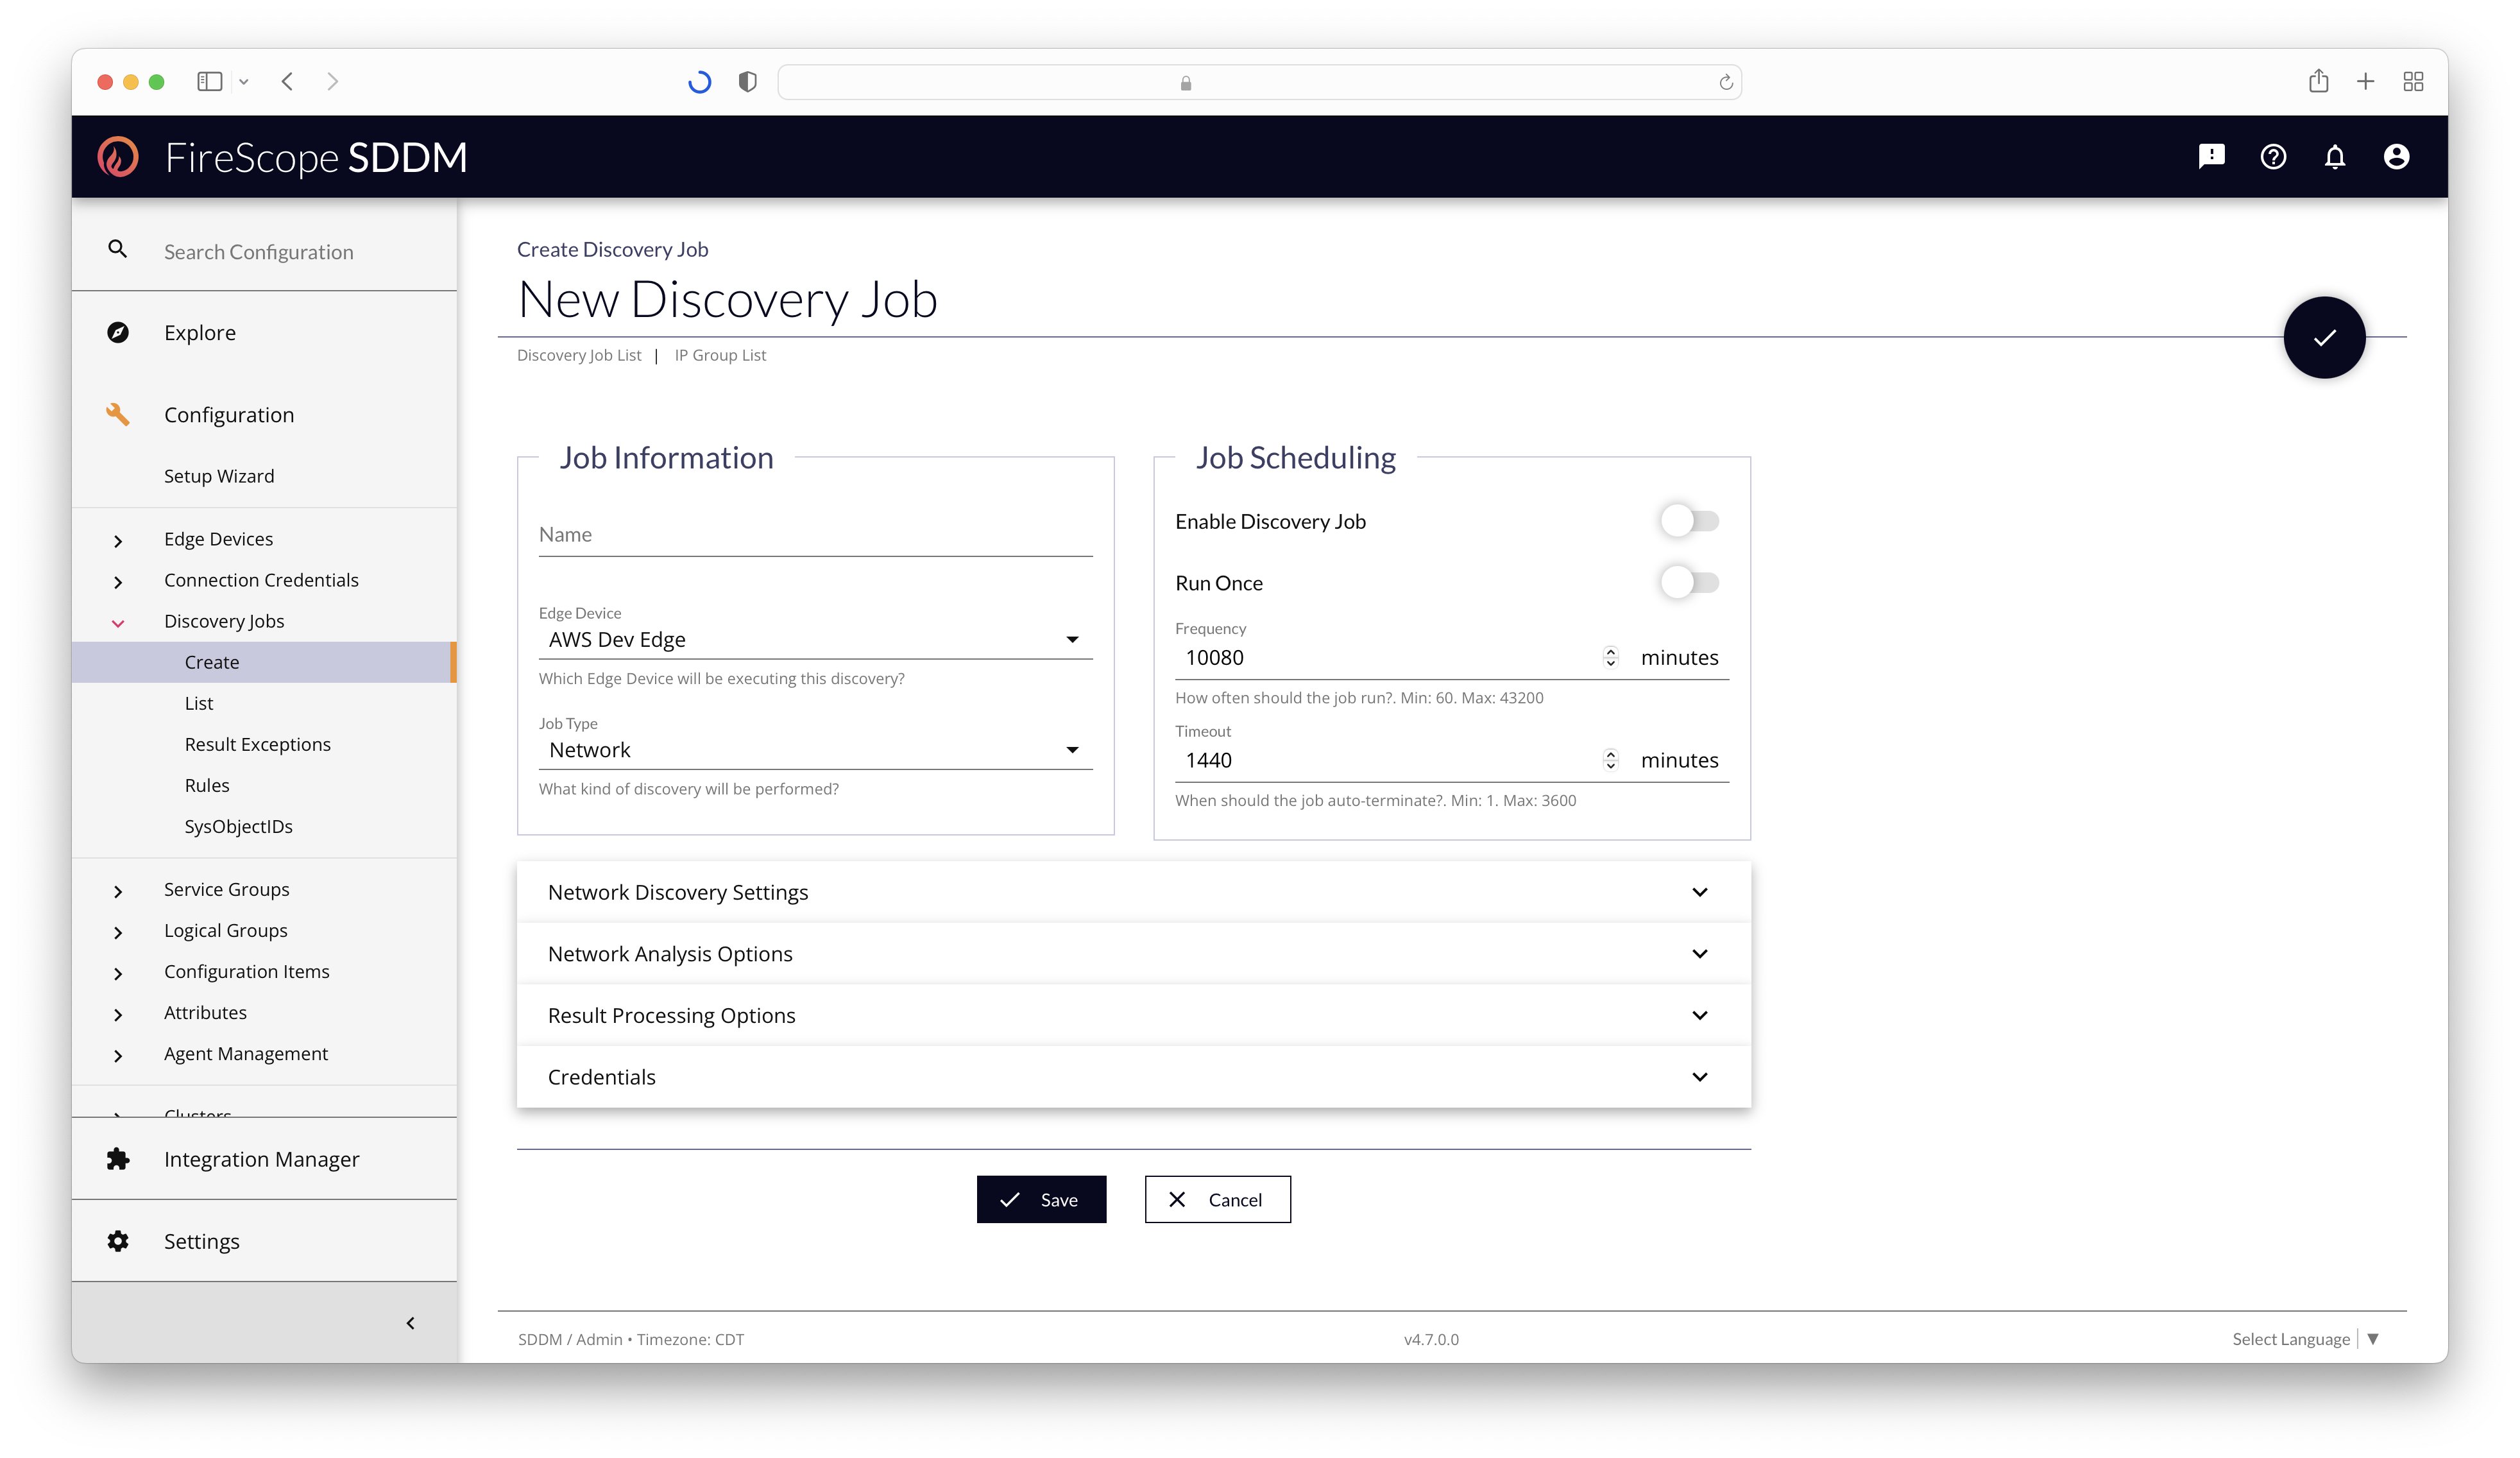
Job Information
| Field Name | Description | Required? |
|---|---|---|
| Name | Provide a short, but descriptive name for the discovery job. | Yes |
| Edge Device | Select the Edge Device that can see the portion of the network you wish to | Yes |
| Job Type | Determines which kind of discovery will run, and how, as it will change the rest of the form's panel offerings | Yes |
Job Scheduling
| Field Name | Description | Required? |
|---|---|---|
| Enable Discovery Job | If toggled on, the discovery will trigger a scan once saved.If toggled off, any running instance of this discovery job will halt as soon as it's transmitted to the Edge Device. |
Yes |
| Run Once | If toggled on, the discovery job will execute once, and then delete itself.Pro-Tip: Only use this option on jobs you have configured to either create or update CIs. You will not have an opportunity to see the results of the discovery otherwise. |
No |
| Frequency | If Run Once is toggled off, this is the delay between scans. The timer starts at the completion of the run triggered by saving the job.Default: 7 days worth of minutes (10080 minutes) |
Conditionally |
| Timeout | The maximum runtime of a Discovery Job before it will terminate, indicating it is was unable to complete, or the IP-space was too large. Default: 24 hours worth of minutes (1440 minutes) |
Yes |
Amazon AWS Discovery Settings Panel
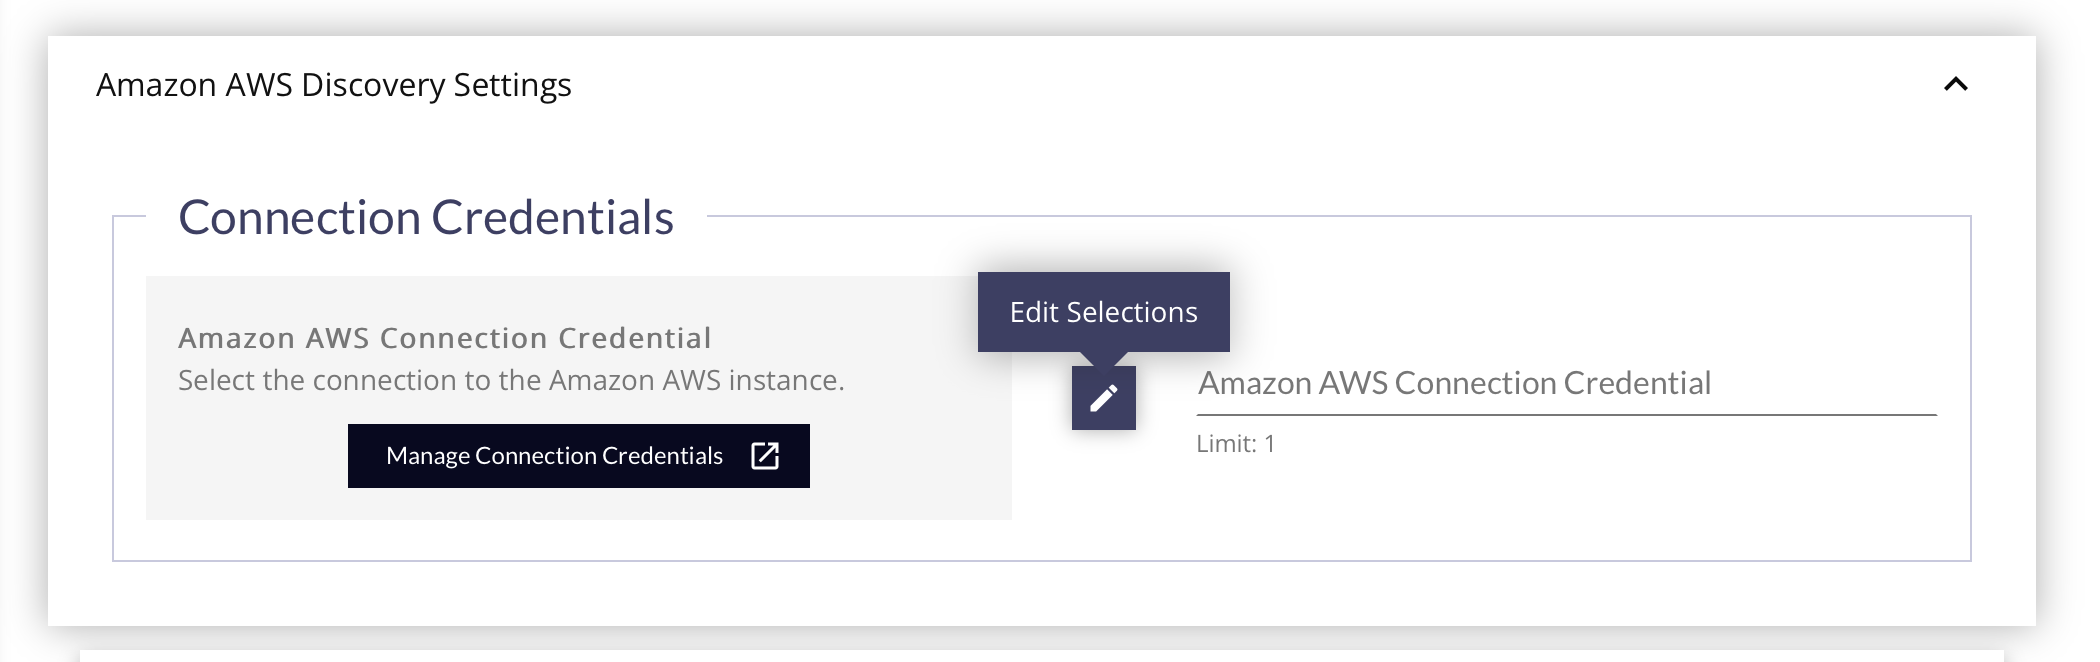
- Select the Amazon AWS Connection Credential to use for the discovery by clicking the Edit Selections (pencil) button. This credential will provide all the information needed about the device, addresses, and authorization needed.
- If you have not created any Amazon AWS Credentials, click the Manage Connection Credentials button to open a new tab and create one.
- Proceed to the Result Processing Options Panel below
Load Balancer Discovery Settings Panel
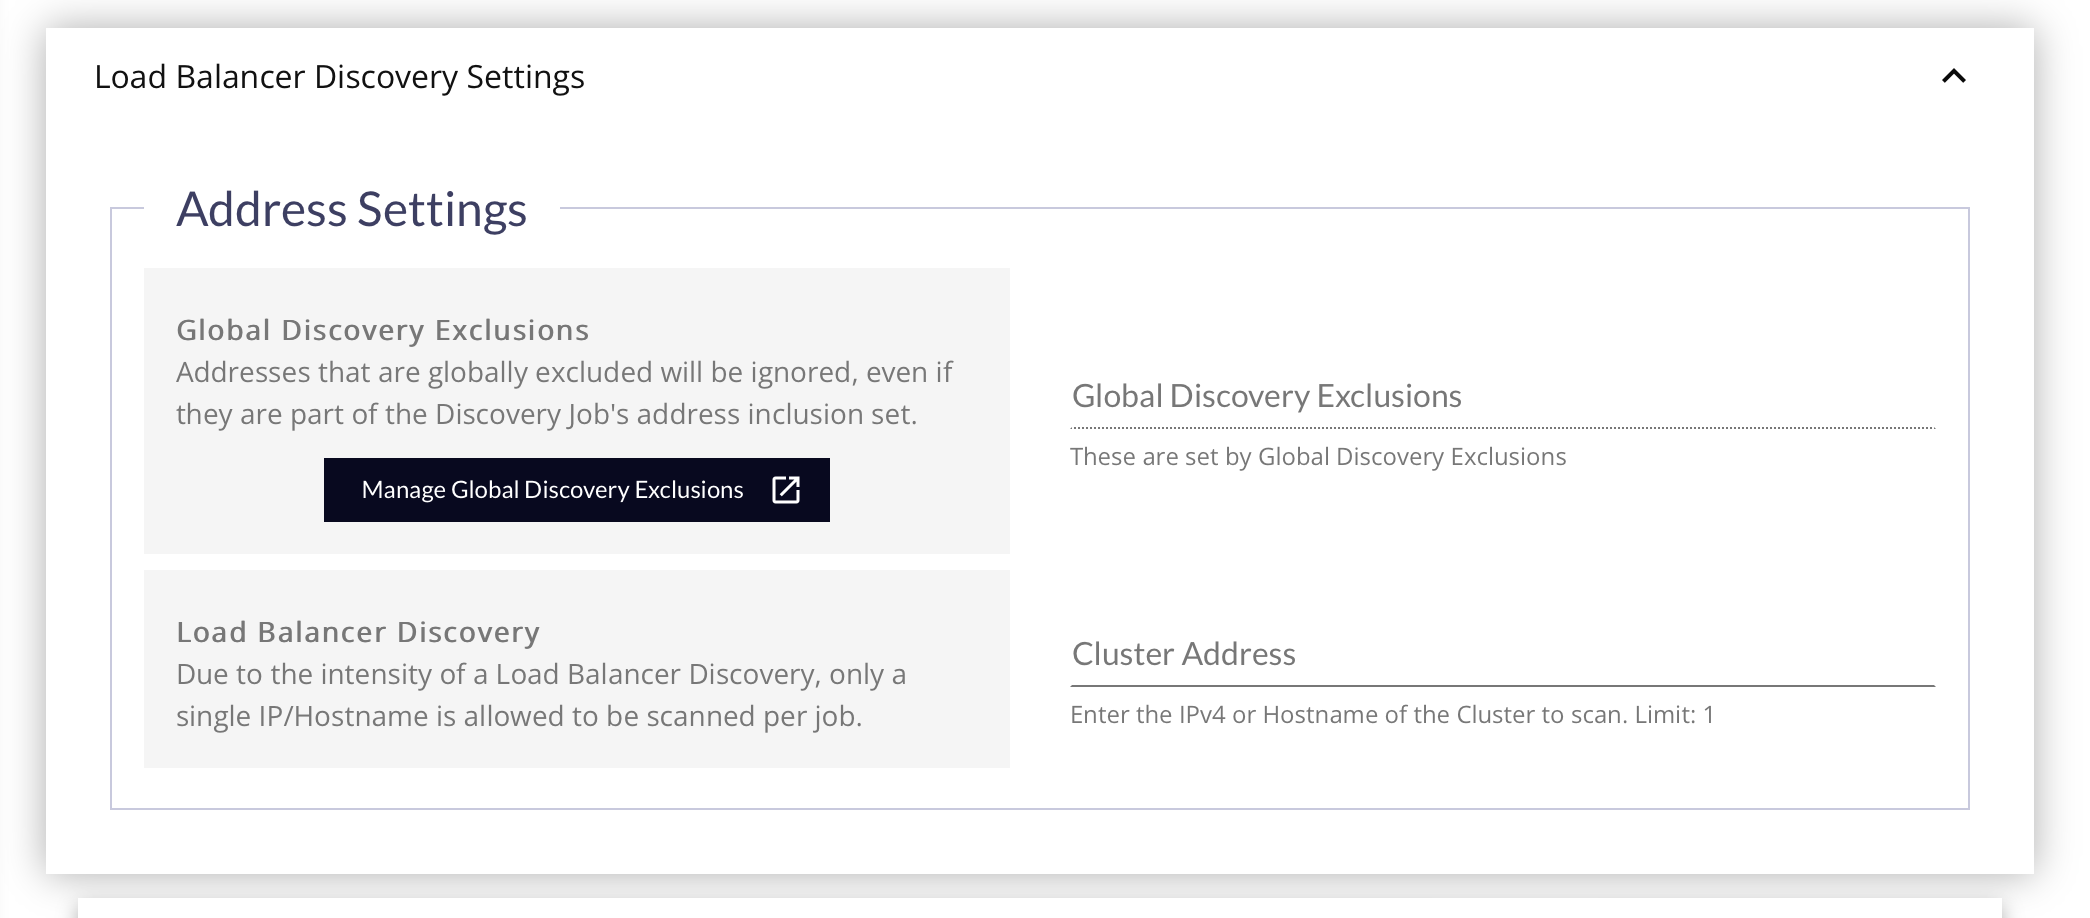
Load Balancer Discovery Jobs will work over A10, Netscaler, F5, and any other load balancer that supports SNMP tables.
- Global Discovery Exclusions - Click this button to specify a List of IPv4, IPv4 Ranges, CIDRs or Host Names to exclude from Discovery Jobs, even if they are part of the Job’s specified network range. If you need to adjust the Global Discovery Exclusions, click the Manage Global Discovery Exclusions button to open a new tab with those settings.
It is recommended that you try to exclude any items that you can to make processing more efficient. This field is read-only, and does not get saved with the job. Changing the settings while editing the job will be obeyed when the job is saved, even if it's not displayed on the form.
- Cluster Address: Enter the IPv4 or Host Name of the Cluster to scan.
- Proceed to the Network Analysis Options Panel below.
- Proceed to the Result Processing Options Panel below.
- Proceed to the Credentials Panel below.
Microsoft Azure Discovery Settings Panel
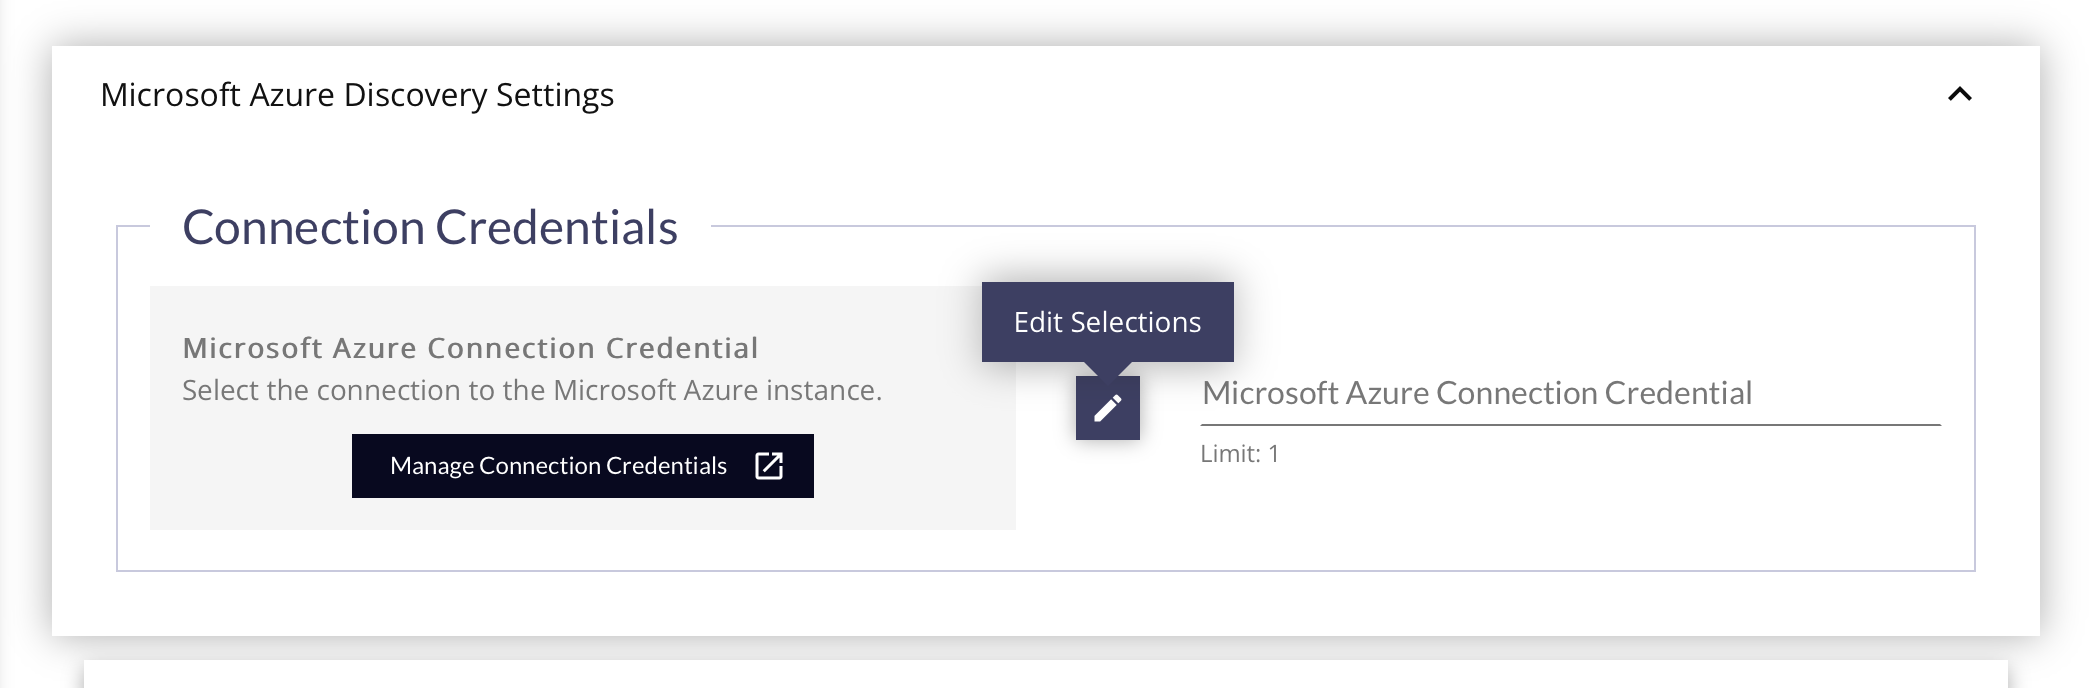
- Select the Microsoft Azure Connection Credential to use for the discovery by clicking the Edit Selections (pencil) button. This credential will provide all the information needed about the device, addresses, and authorization needed.
- If you have not created any Microsoft Azure Credentials, click the Manage Connection Credentials button to open a new tab and create one.
- Proceed to the Result Processing Options Panel below.
Starting with FireScope v4.8.0, in addition to virtual machines, Microsoft Azure Discovery Jobs will find hosted applications: SQL Server instances, Service Bus instances, Static Web Applications, Dynamic Web Applications. Each one will be created as a CI with its public IP or URL, and will receive a set of Custom Inventory Fields enumerating all available data about the device, and some type-specific things based on the discovered instance:
- Dynamic Web Applications will receive 2 CSV lists: Outbound IP Addresses, Enabled Host Names.
- SQL Server instances will receive a CSV list of hosted Databases.
- Service Bus instances will receive a CSV list of available Queues..
All discovered items will receive:
- A CSV list of Azure-defined Tags.
- A Custom Inventory Field, Service Group assignment, and FireScope Tag for their "Subscription" name.
- A Custom Inventory Field, Logical Group assignment, and FireScope Tag for their "Resource Group" name.
- A Logical Group assignment, FireScope Tag, and Inventory Asset Type to match the kind of discovered instance.
Network Discovery Settings Panel
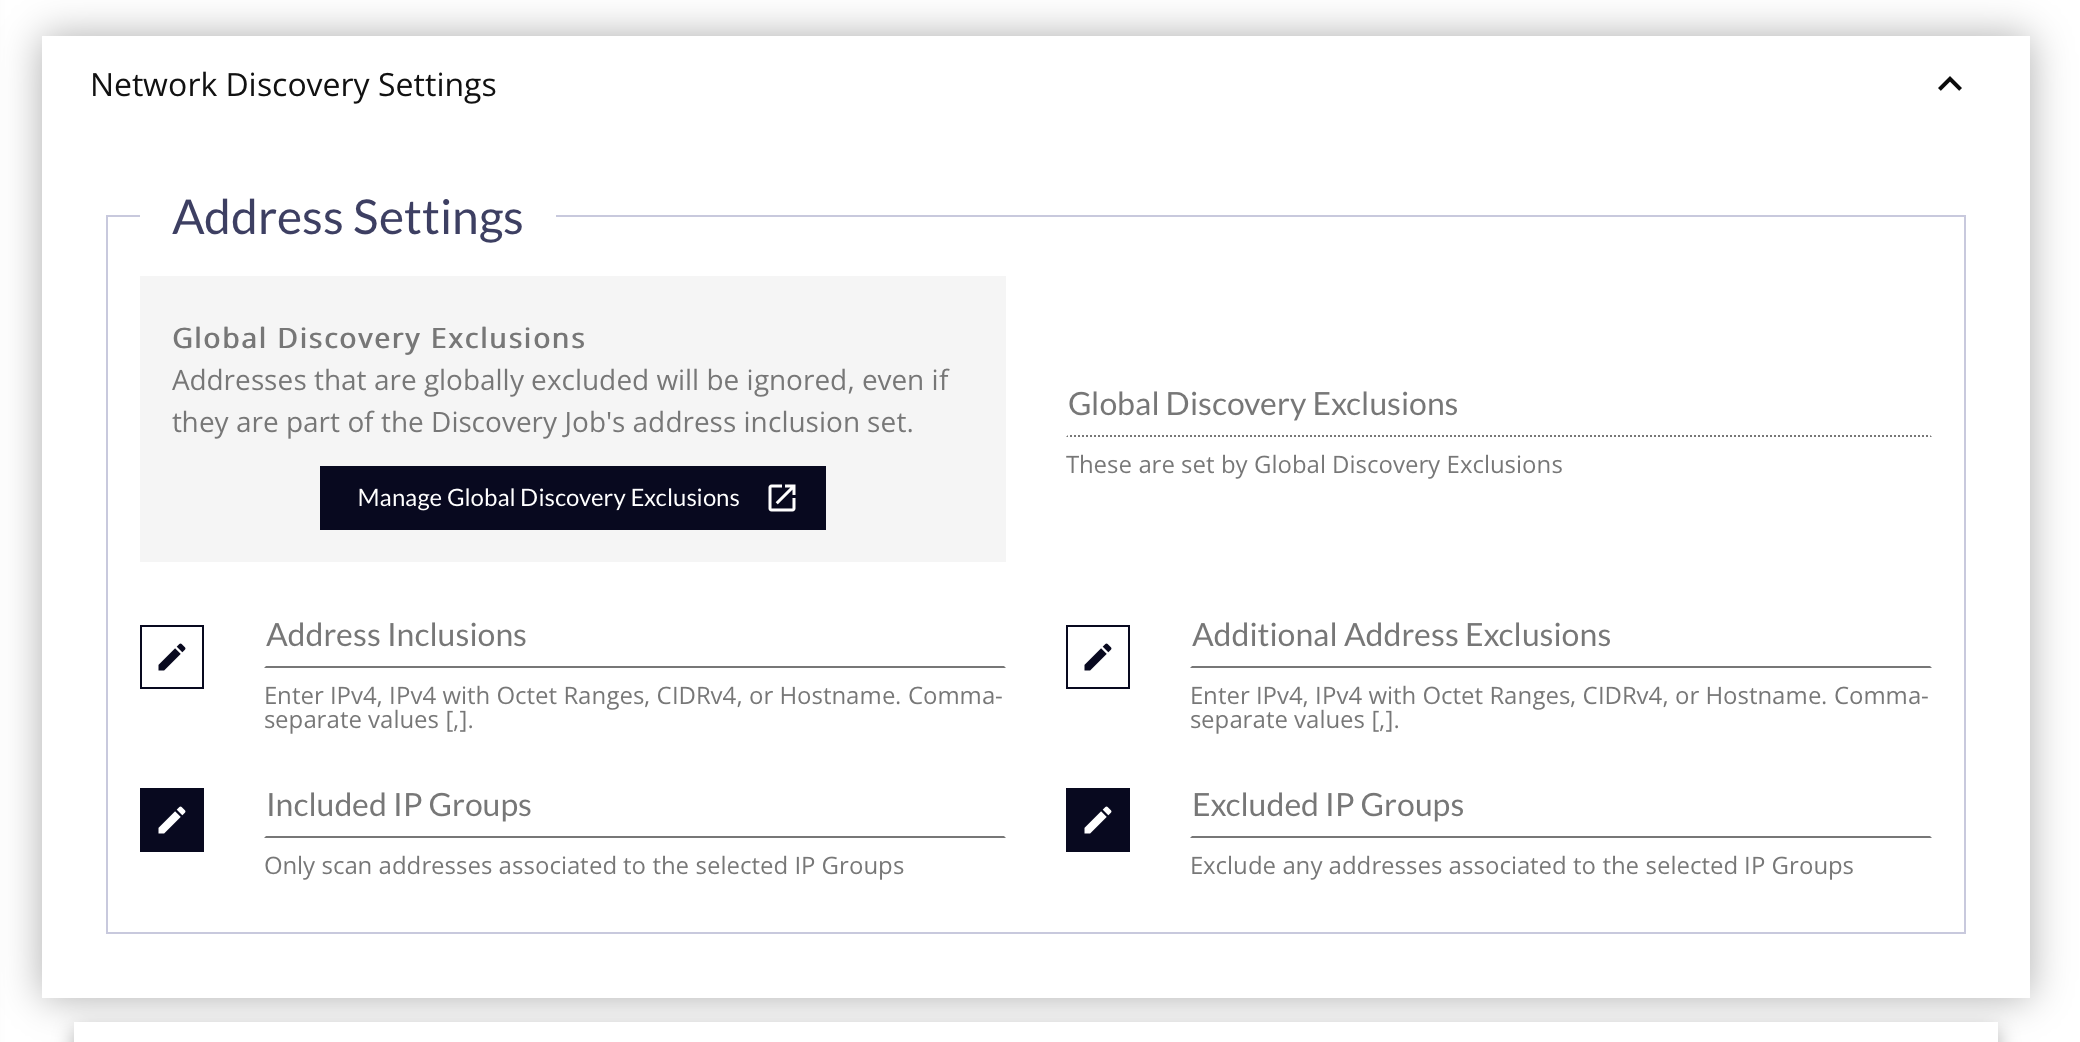
- Global Discovery Exclusions - Click this button to specify a List of IPv4, IPv4 Ranges, CIDRs or Host Names to exclude from Discovery Jobs, even if they are part of the Job’s specified network range. If you need to adjust the Global Discovery Exclusions, click the Manage Global Discovery Exclusions button to open a new tab with those settings.
It is recommended that you try to exclude any items that you can to make processing more efficient. This field is read-only, and does not get saved with the job. Changing the settings while editing the job will be obeyed when the job is saved, even if it's not displayed on the form.
- Address Inclusions - Enter any number of IPv4, IP Ranges, CIDRs or Host Names to be scanned.
Using narrow/focused CIDR ranges is advised to avoid timeouts, and to keep a reasonably regular schedule by letting the job finish faster.
- Additional Address Exclusions - If you need to skip specific areas of the network just for this job, and don't want them to be excluded globally, enter those IPs, IP Ranges, CIDRs, or Host Names here.
- Included IP Groups - To make scanning network space easier, and centrally located, use IP Groups instead of manually identifying the Address Inclusions manually. Using IP Groups, all new and existing CIs will be checked to see if they belong to this network space on this Edge Device, and receive a link to the IP Group to identify them easier.
- Excluded IP Groups - Similar to the Inclusions, using IP Groups for Exclusions will make identifying CIs that should have been excluded, so they can be managed and or removed from the application if found.
- Proceed to the Network Analysis Options Panel below.
- Proceed to the Result Processing Options Panel below.
- Proceed to the Credentials Panel below.
Topology Discovery Settings Panel
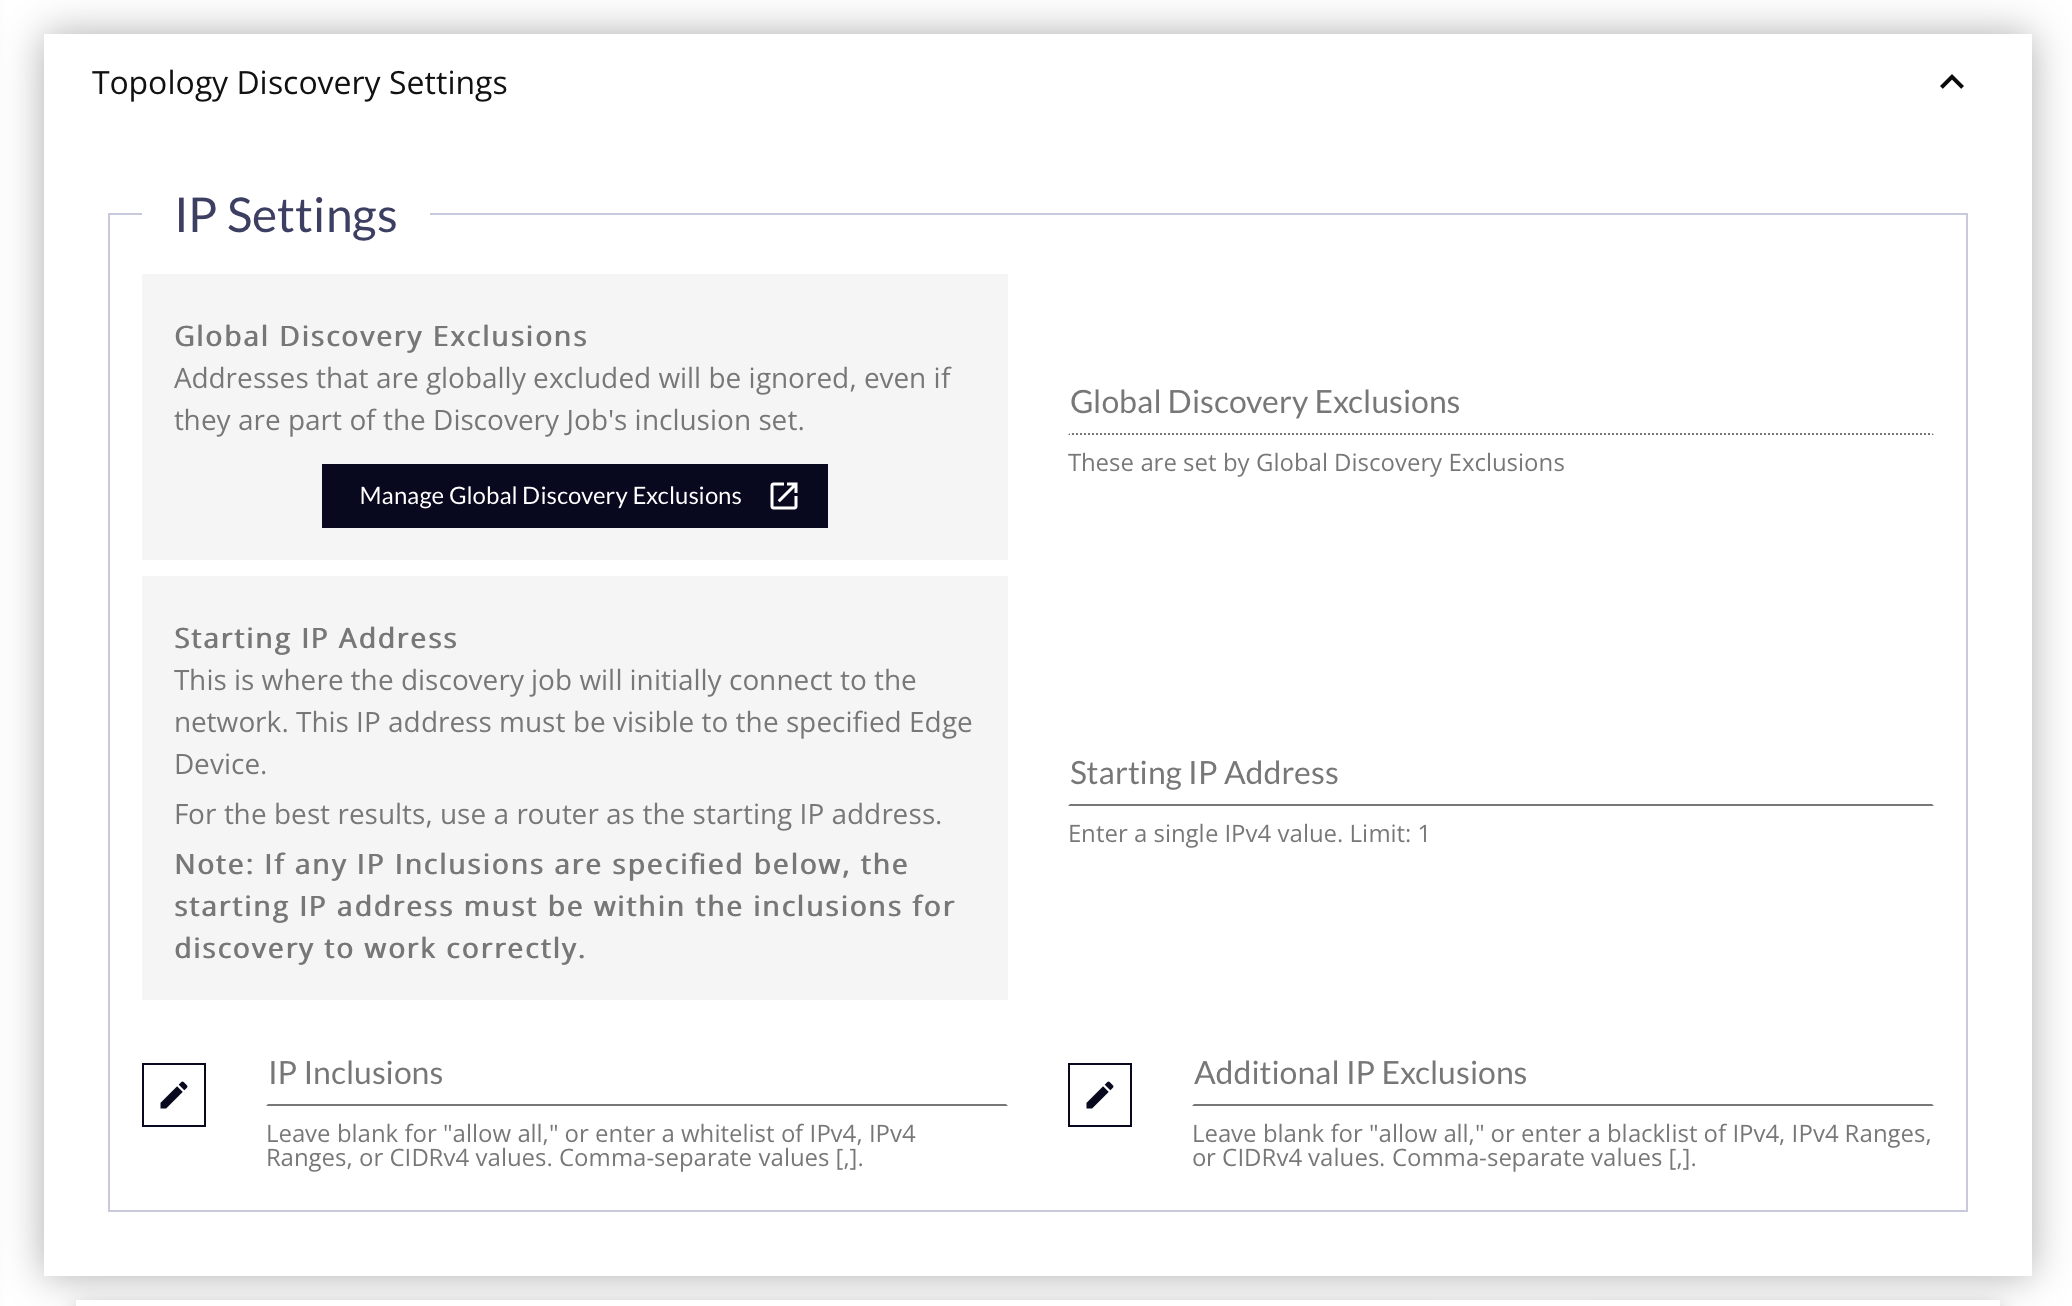
- Global Discovery Exclusions - Click this button to specify a List of IPv4, IPv4 Ranges, CIDRs or Host Names to exclude from Discovery Jobs, even if they are part of the Job’s specified network range. If you need to adjust the Global Discovery Exclusions, click the Manage Global Discovery Exclusions button to open a new tab with those settings.
It is recommended that you try to exclude any items that you can to make processing more efficient. This field is read-only, and does not get saved with the job. Changing the settings while editing the job will be obeyed when the job is saved, even if it's not displayed on the form.
- Starting IP Address - This is where the discovery job will initially connect to the network. This IP address must be visible to the specified Edge Device. For the best results, use the inbound side of a router as the starting IP address.
- IP Inclusions - This serves as a whitelist of any IPs you wish to focus on during the scan. Leave this blank to scan all addresses found that are connected to the Starting IP Address.
If you use a the IP Inclusions whitelist, the Starting IP Address must be included in the IP Inclusions for the discovery job to work correctly.
- Additional IP Exclusions - If you need to skip specific areas of the network just for this job, and don't want them to be excluded globally, enter those IPs, IP Ranges, or CIDRs here.
- Proceed to the Result Processing Options Panel below.
- Proceed to the Credentials Panel below.
Virtual Discovery Settings Panel
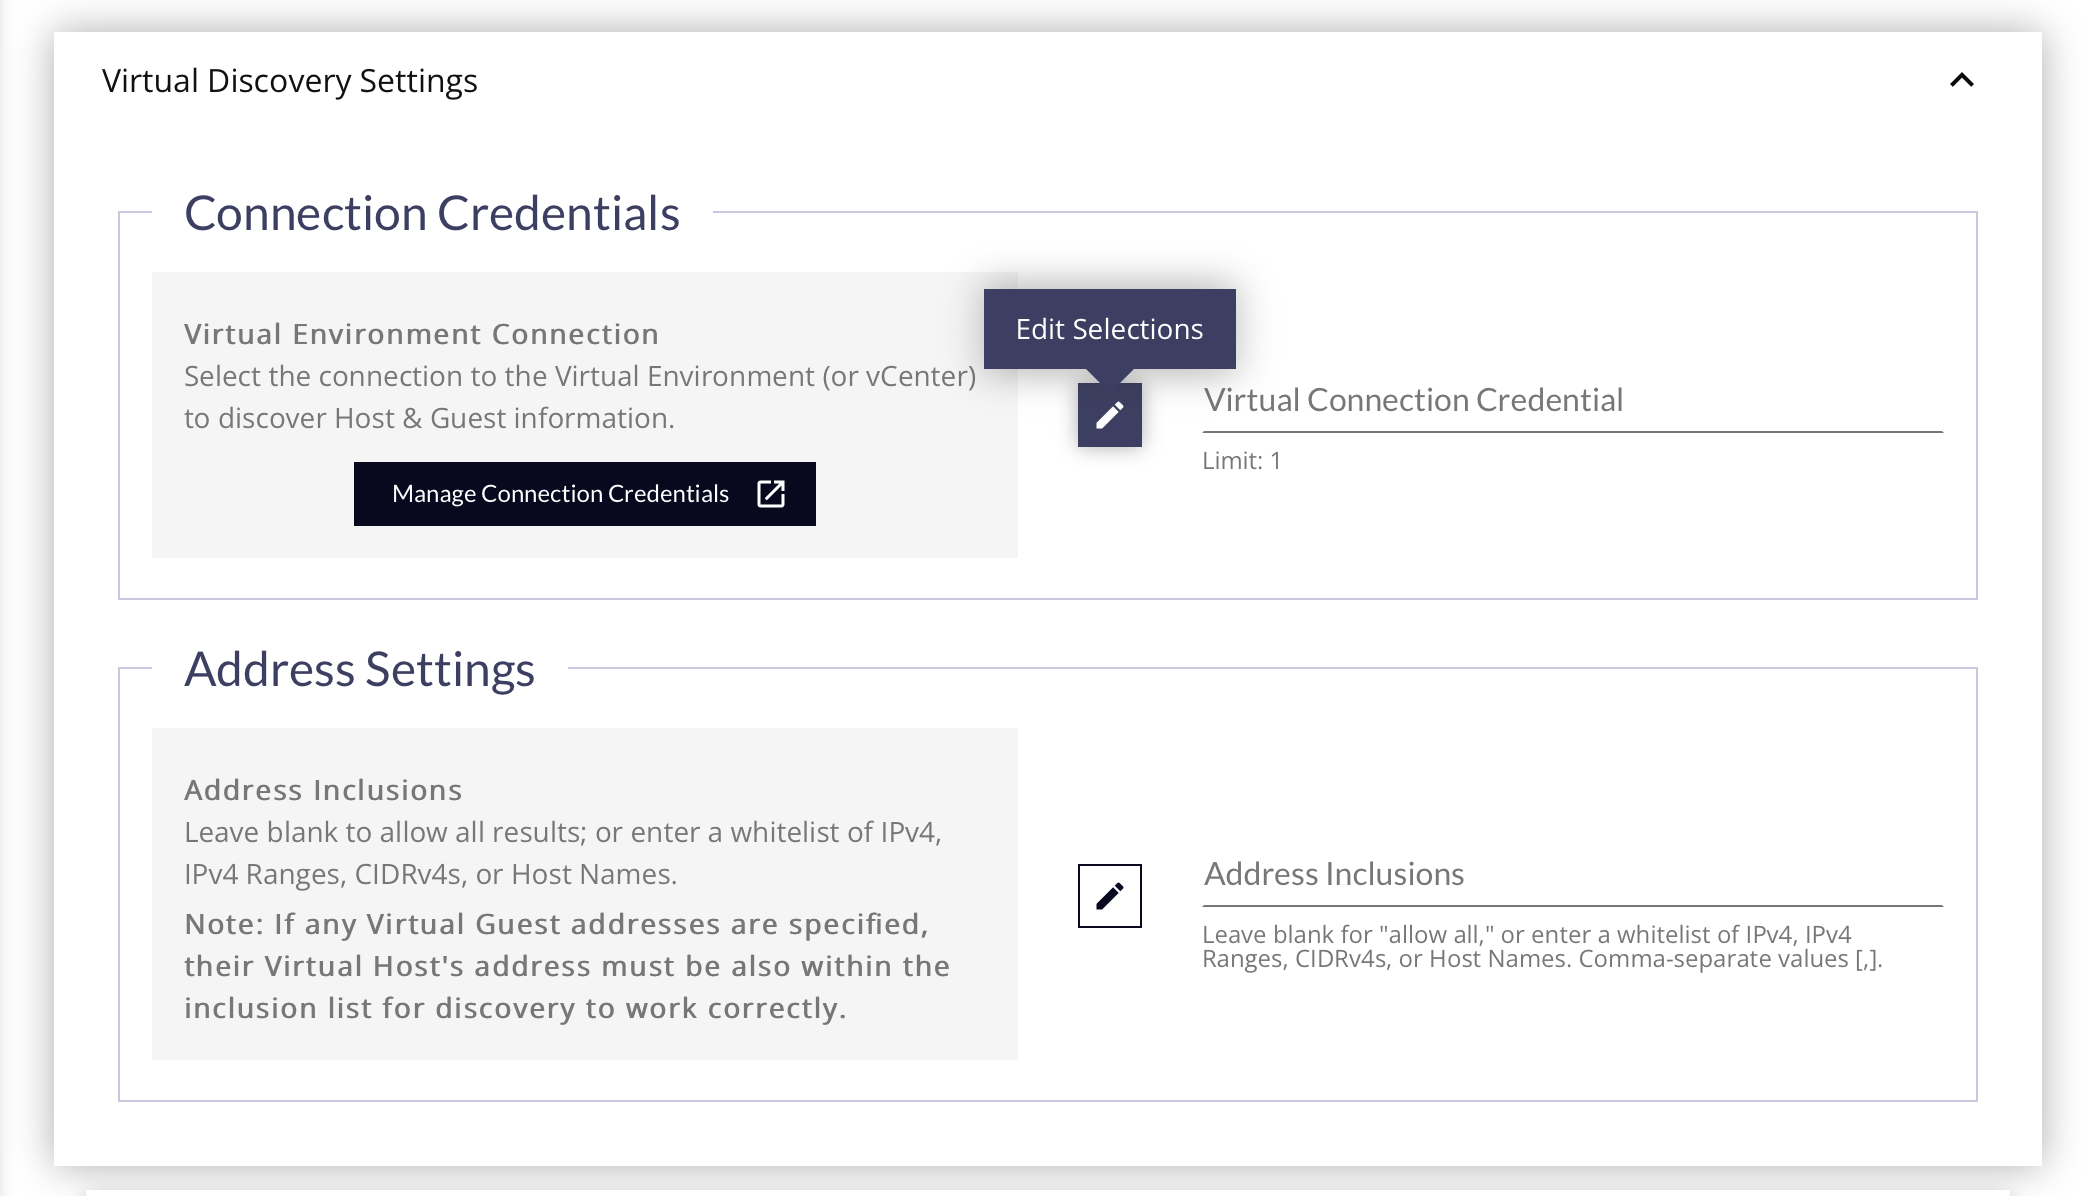
- Select the Virtual Connection Credential to use for the discovery by clicking the Edit Selections (pencil) button. This credential will provide all the information needed about the device, addresses, and authorization needed.
- If you have not created any Virtual Connection Credentials, click the Manage Connection Credentials button to open a new tab and create one.
You can only create 1 Virtual Discovery Job per Virtual Connection Credential. For proper results, this credential should be allowed to see every device you wish to create a CI for in FireScope. For segmenting Virtual Hosts/Guests for visibility purposes, use Service & Logical Groups, not multiple Virtual Discovery Jobs.
If your Virtual Discovery Job & Credential cannot see the entire Virtual Environment from a single Edge Device, then it is required that you create a duplicate version of the credential for each necessary Edge Device, and a separate Virtual Discovery Job for each Edge Device & Credential. However, the results will appear as multiple Virtual Centers in FireScope.
- If you have not created any Virtual Connection Credentials, click the Manage Connection Credentials button to open a new tab and create one.
- Address Inclusions - This serves as a whitelist of any IPs, IP Ranges, CIDRs or Host Names you wish to focus on during the scan. Leave this blank to scan all addresses found on the Virtual Center.
If any Virtual Machine addresses are specified, their Virtual Host's addresses must also be part of the Address Inclusion list for discovery to work correctly.
- Proceed to the Result Processing Options Panel below.
- Proceed to the Credentials Panel below.
Network Analysis Options Panel
For both Load Balancer & Network Discovery Job Types, the Network Analysis Options Panel describes some settings to use during the scan, and on the devices found.
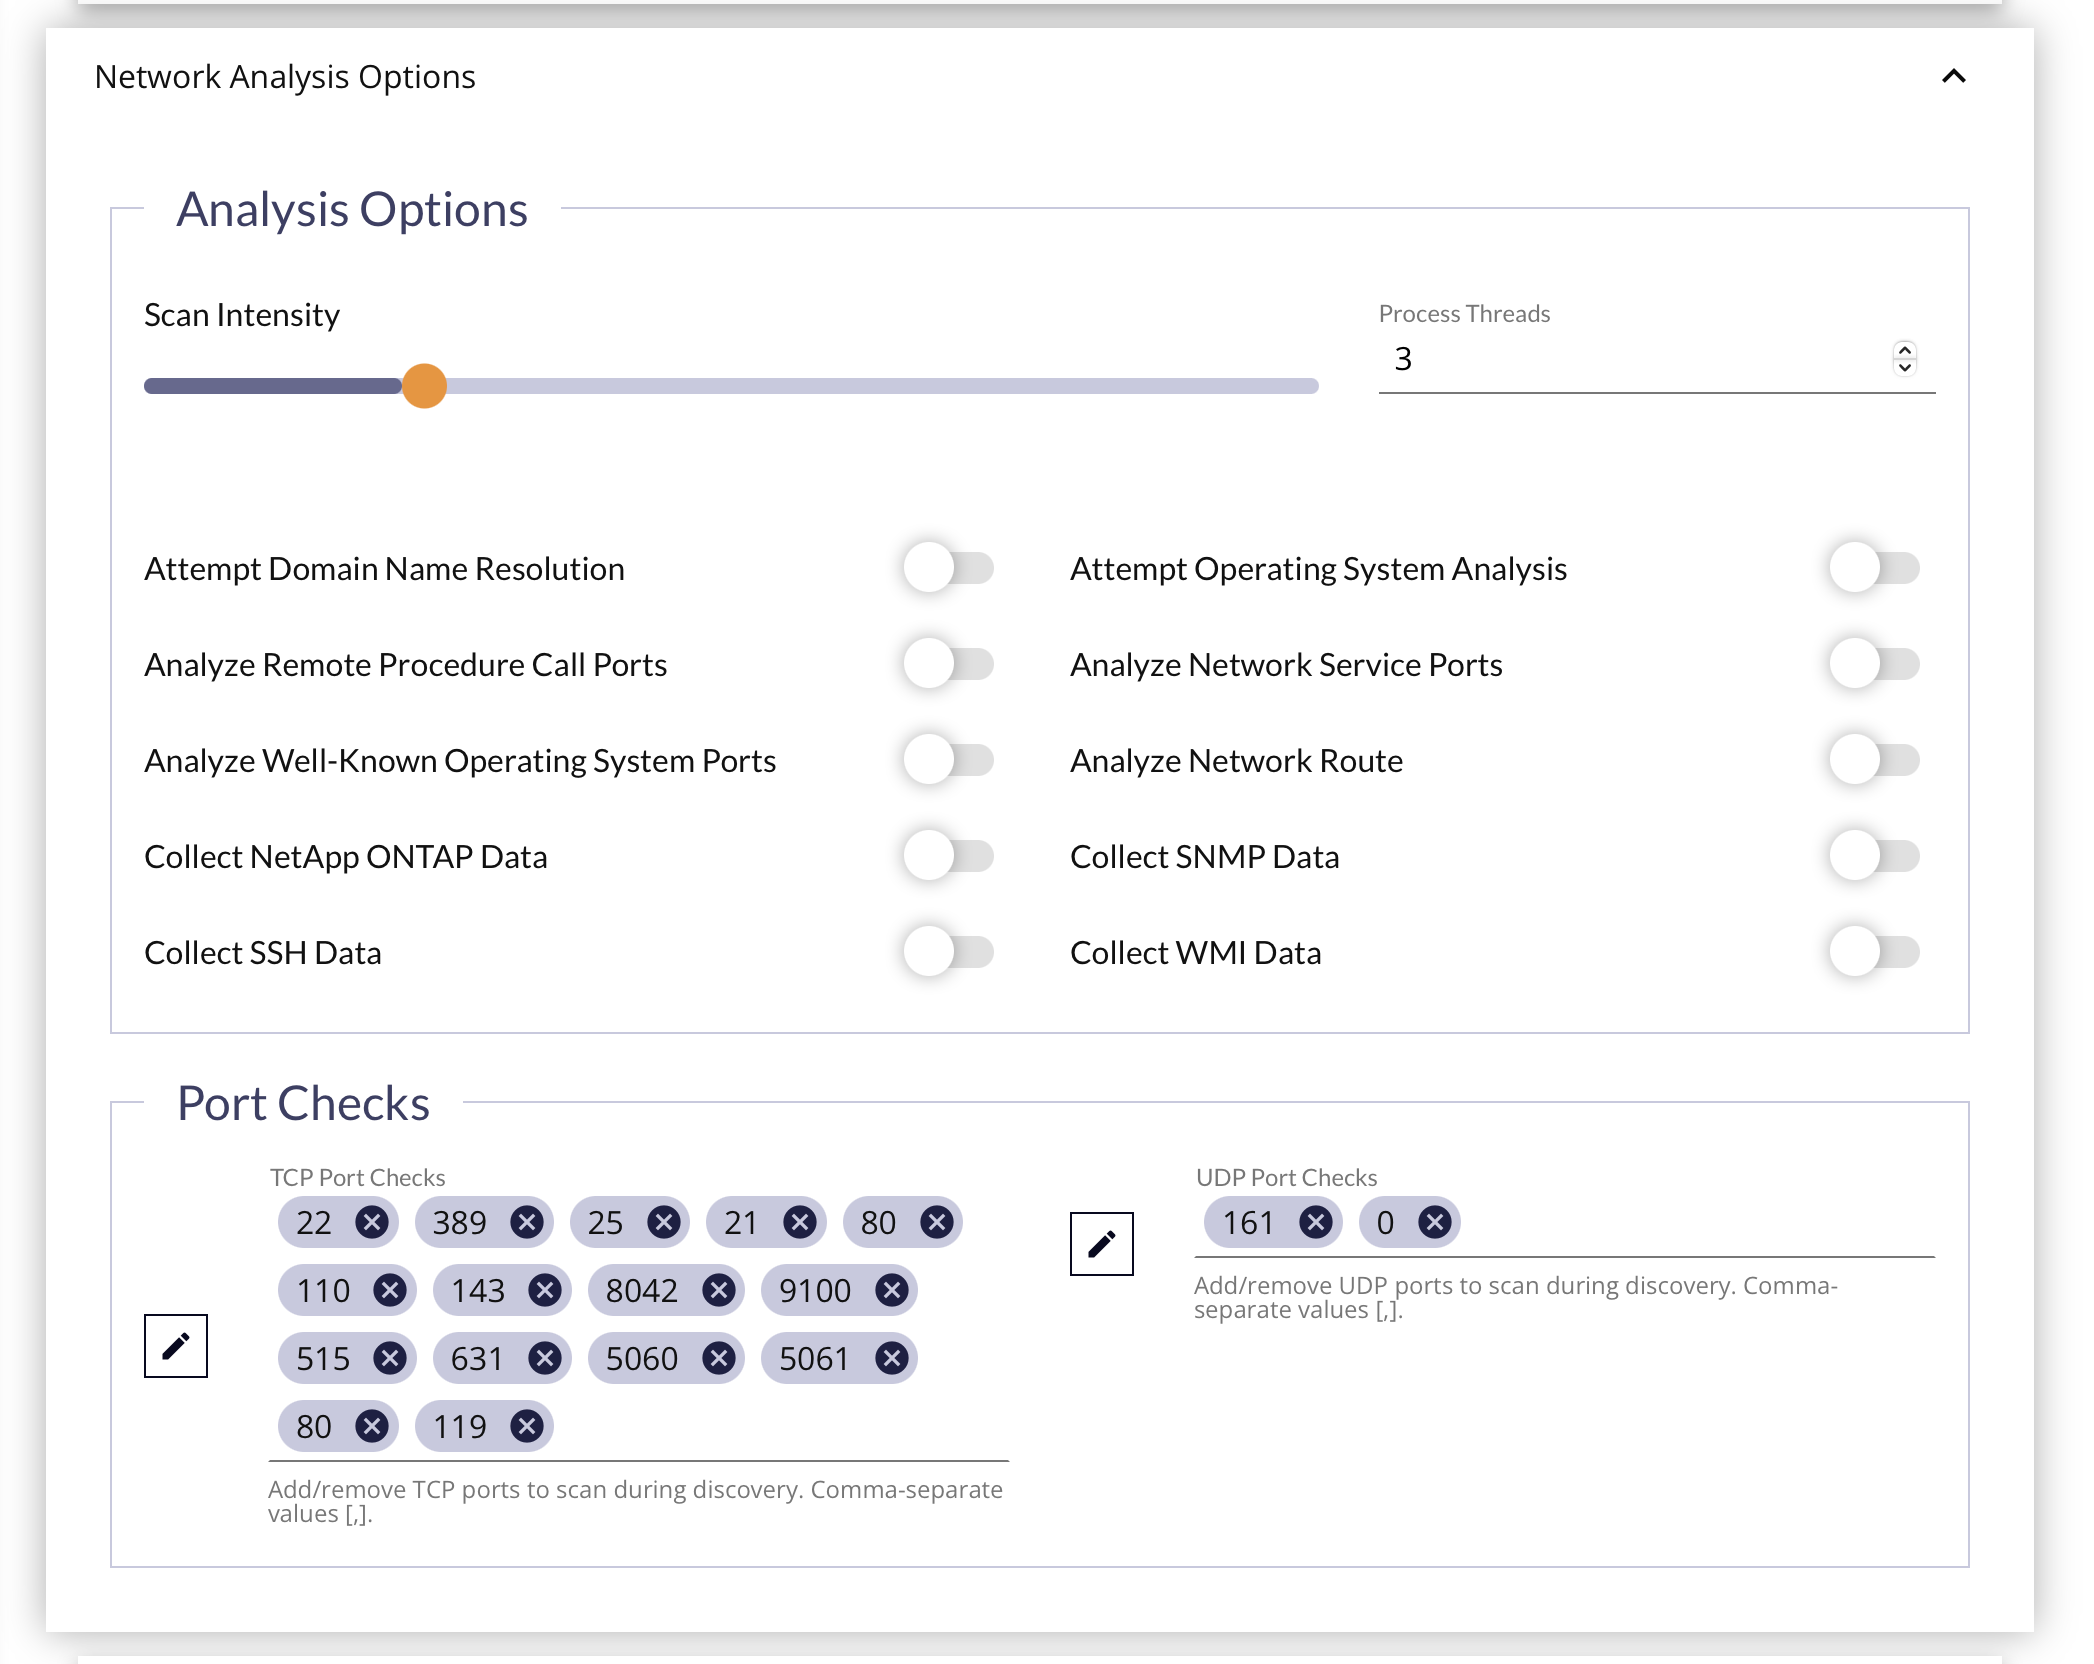
Analysis Options Subsection
| Field Name | Description |
|---|---|
| Scan Intensity (Process Threads) | Defines the number of process threads that will be used to execute the discovery scan on the Edge Device. Default: 3 A higher number of threads will result in a faster scan, at the cost of increased network traffic, and resource usage normally allocated to other work done by the Edge Device. A lower number of threads will result in a lower level of network traffic, but the scan will take longer to complete. |
| Attempt Domain Name Resolution | The Discovery Job will attempt to resolve the discovered IP Addresses to a Fully Qualified Domain Name (FQDN) to use as the Host Name. |
| Attempt Operating System Analysis | The Discovery Job will attempt to perform an Operating System analysis based on the ports identified as "open and listening". |
| Analyze Remote Procedure Call (RPC) Ports | When an open RPC service port is identified, the Discovery Job will attempt to query it to find other open RPC services on the host. |
| Analyze Network Service Ports | The Discovery Job can identify open Network Services on the hots. When an open TCP service port is identified, FireScope will attempt to query it and identify the Network Service name and version for that listening port. |
| Analyze Well-Known Operating System (OS) Ports | The Discovery Job utilizes open TCP ports to assist in performing OS analysis and identification. While you can specify a list of ports to use during the scan, FireScope also provides a list of "well-known" OS ports. This list of ports will be added to the scan to improve OS detection. These are the default ports provided in the Port Checks list. |
| Analyze Network Route | The Discovery Job can determine the network location and distance of the scanned hosts. This is done by tracing the route path to the discovered IP address. |
| Collect SNMP Data | Query SNMP-enabled devices in this network space to get more accurate device and service information. If toggled on, you must choose which Credentials to use, and order the selected ones Most Frequently to Lead Frequently used (to reduce "invalid credential" lockouts). 🚩 See Credentials Panel below. |
| Collect SSH Data | Enabling this option allows the Edge Device to authenticate as the SSH Connection Credential user to execute some common commands on the server to get more accurate device and service information. This allows for "agent-less discovery & inventory" on Linux machines and others that support SSH access. If toggled on, you must choose which Credentials to use, and order the selected ones Most Frequently to Lead Frequently used (to reduce "invalid credential" lockouts). 🚩 See Credentials Panel below. |
| Collect WMI Data | Enabling this option allows the Edge Device to authenticate to the Windows Management Interface to gather more accurate device and service information. This allows for "agent-less discovery & inventory" on Windows machines. If toggled on, you must choose which Credentials to use, and order the selected ones Most Frequently to Lead Frequently used (to reduce "invalid credential" lockouts). 🚩 See Credentials Panel below. |
Port Checks Subsection
The TCP & UDP Port lists enumerate the specific ports you want to check during the Discovery process. It is pre-populated with the default ports that will be checked, and which protocol they will be checked on.
Result Processing Options Panel
The content of this panel is constant across all Discovery Job Types, but the ability to change the toggles is determined by the Discovery Job Type chosen. Some items will be forced on, or off, while others may be conditionally left up to the user. Some choices made by the user may trigger other options to be forced on or off based on the underlying requirements. To help with this distinction, you'll see which Discovery Job Types can edit a field using the following key:
- ✅ - Forced
onfor the Job Type - ❌ - Forced
offfor the Job Type - 🙋 - At the User's discretion for the Job Type. (may be conditional)
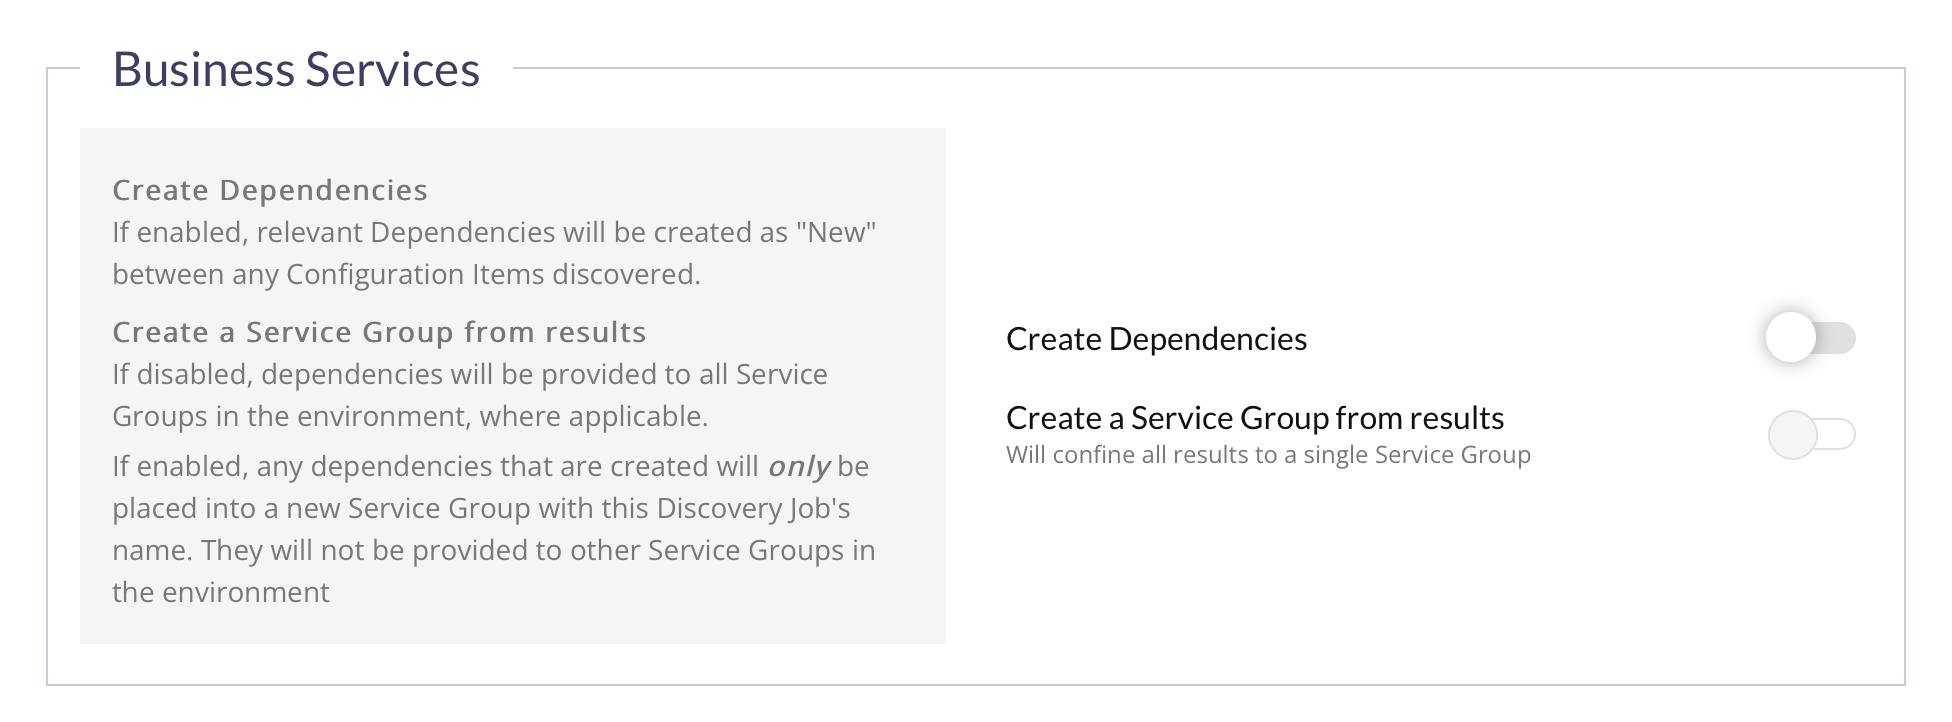
Business Services Subsection
| Field Name | Description | Available For... |
|---|---|---|
| Create Dependencies | If toggled on, relevant Dependencies will be created as "New" between any Configuration Items discovered. |
|
| Create a Service Group from results | If toggled off, dependencies will be provided to all Service Groups in the environment, where applicable.If toggled on, any dependencies that are created will only be placed into a new Service Group with this Discovery Job's name. They will not be provided to other Service Groups in the environment |
|
Configuration Items Subsection
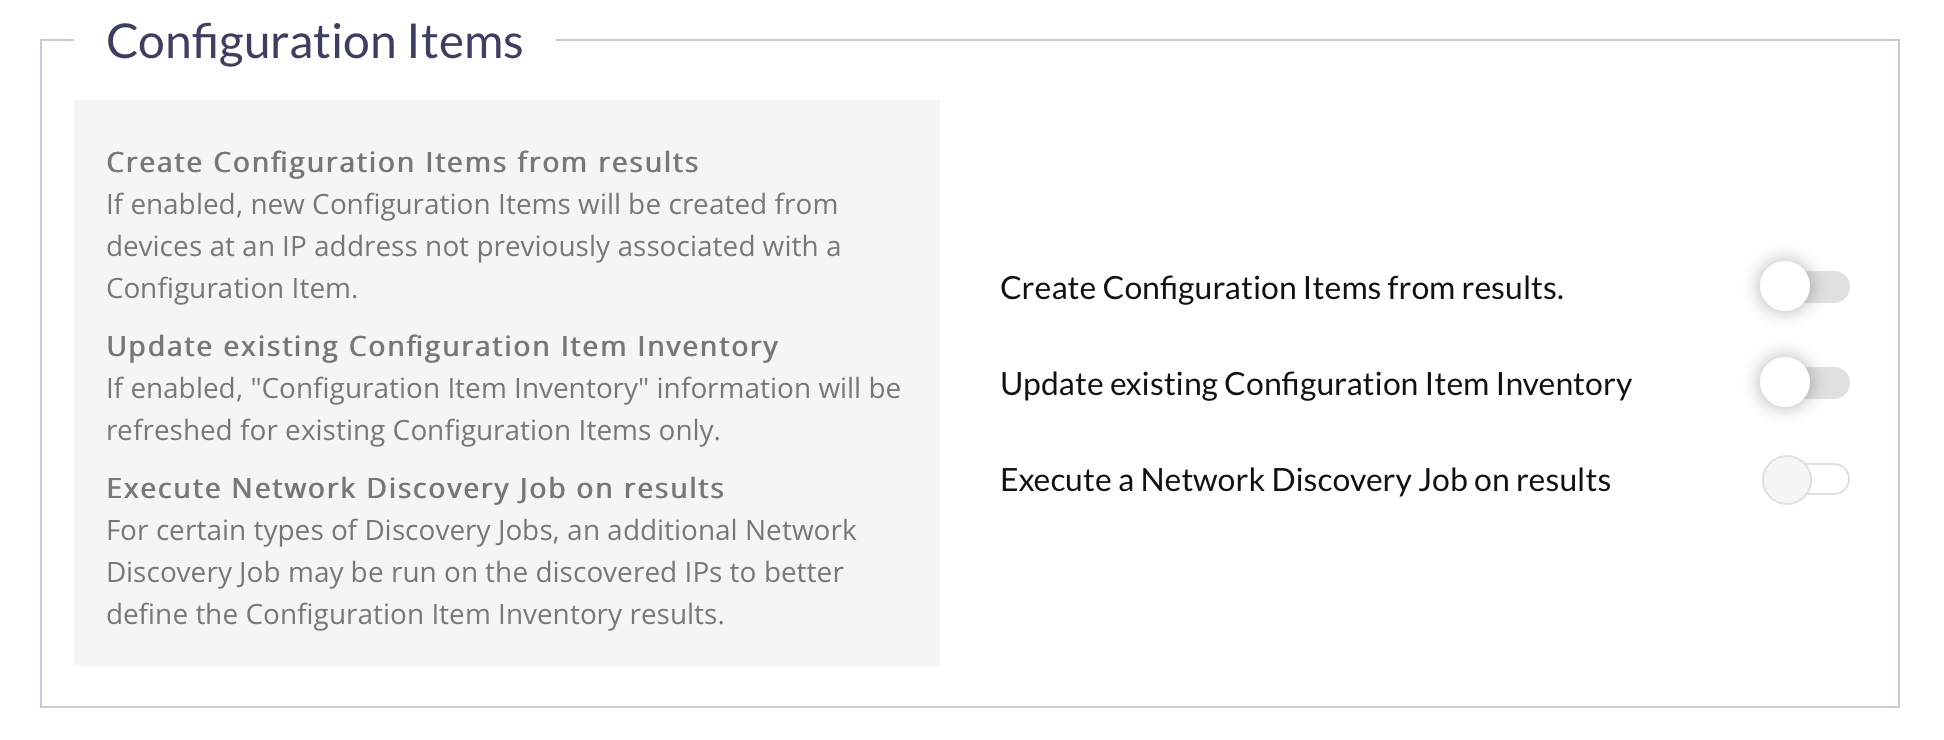
| Field Name | Description | Available For... |
|---|---|---|
| Create Configuration Items from results | If toggled on, new Configuration Items will be created from devices for any scanned IP address not previously associated with a Configuration Item. |
|
| Create a Service Group from results | If toggled off, dependencies will be provided to all Service Groups in the environment, where applicable.If toggled on, any dependencies that are created will only be placed into a new Service Group with this Discovery Job's name. They will not be provided to other Service Groups in the environment |
|
| Execute a Network Discovery Job on results | For certain types of Discovery Jobs, an additional Network Discovery Job may be run on the discovered IPs to better define the Configuration Item Inventory results. |
|
Attributes Subsection
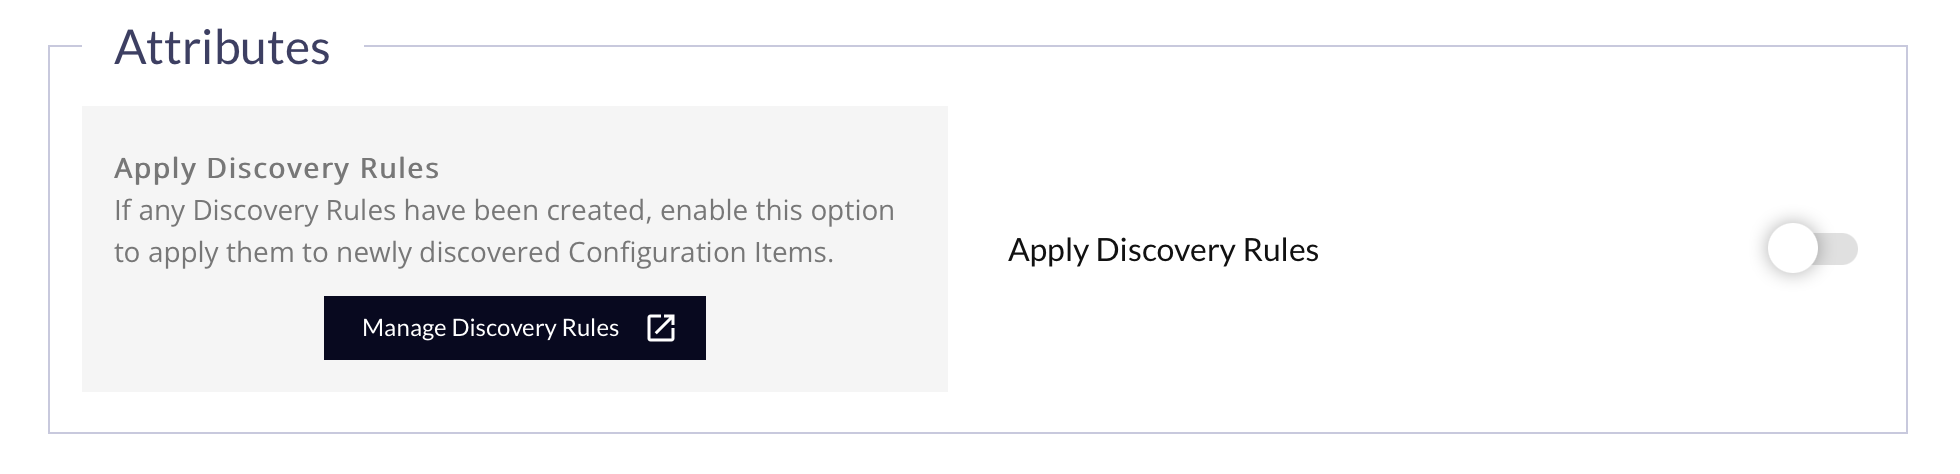
| Field Name | Description | Available For... |
|---|---|---|
| Apply Discovery Rules | If toggled on, any Discovery Rules that have been created will be applied to newly discovered Configuration Items. |
|
Blueprint Assignments Subsection
For Network & Load Balancer Types
SNMP Table Blueprints allow a user to specify a Blueprint that contains Blueprint Attributes with specific macros which expand when applied to a specific SNMP table based on the number of rows found. Typically a user will already know the exact table OID they are targeting or they will use a MIB browser to determine the location of the data they are interested in monitoring.
For example, to target the ifTable (1.3.6.1.2.1.2.2) in this document, all OIDs that belong to an SNMP table would follow the same general format:
<tableOID>.1.<column>.<rowIndex>
The <rowIndex> can be something as simple as an integer, but it can also be something more complicated like an IP address.
The key to knowing where the <column> part of the OID begins is the repeating .1 preceding it, which is common for all SNMP tables. In the case of the ifTable, this is called ifEntry.
Most users may opt to run the Discovery Job without turning on "Create Configuration Items from Results". If that is the case, the CI must already exist, and the user will need to manually assign the appropriate SNMP credential to the CI.
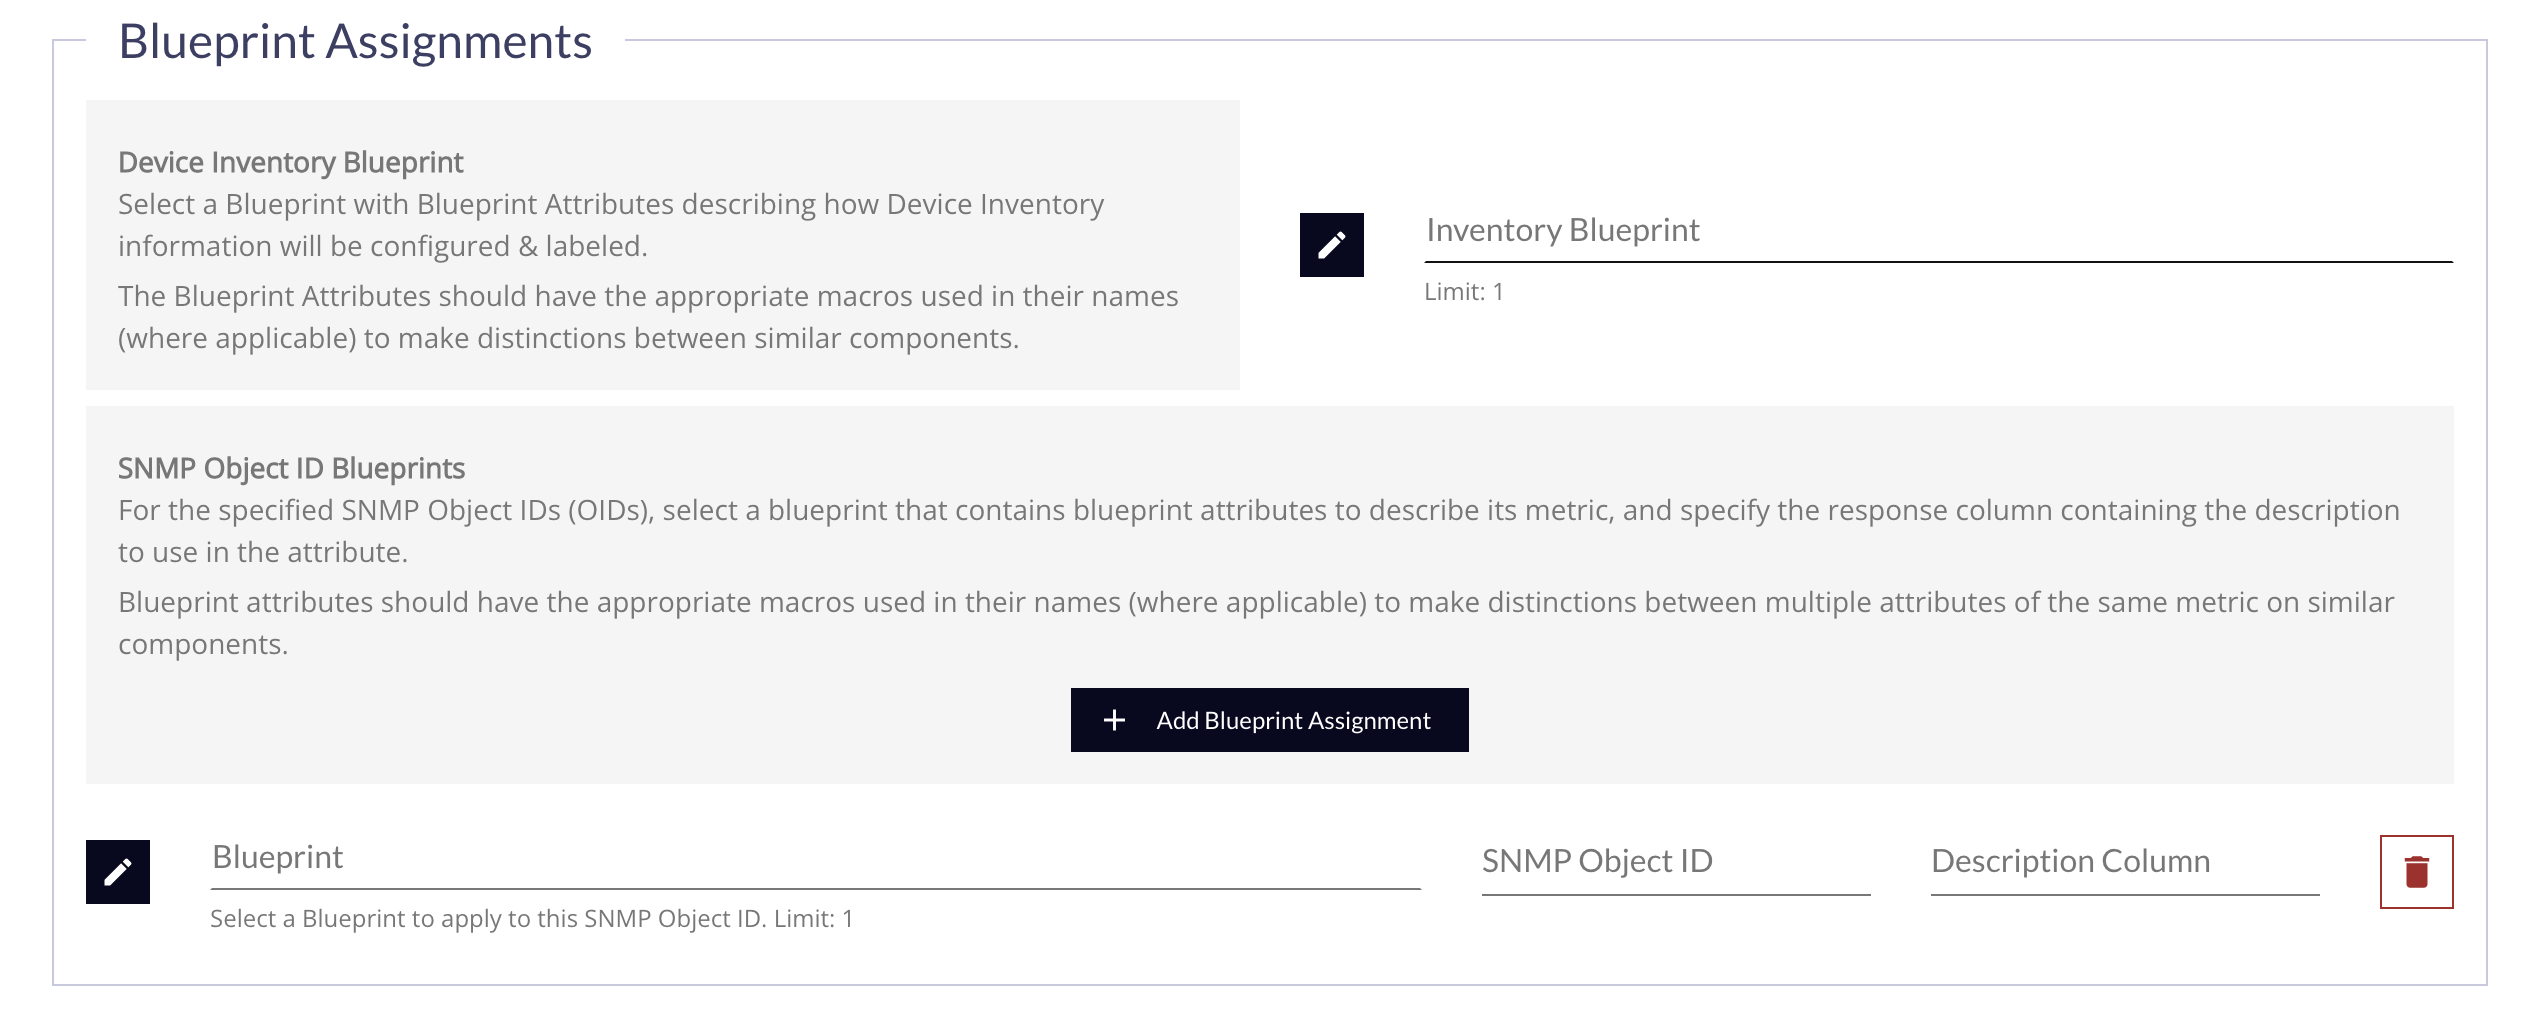
In the form, for the specified SNMP Object IDs (OIDs), select a blueprint that contains Blueprint Attributes to describe its metric, and specify the response column containing the description to use in the attribute. Blueprint Attributes should have the appropriate macros used in their names (where applicable) to make distinctions between multiple attributes of the same metric on similar components.
| Form Field/Content | Description | Is Required? |
|---|---|---|
| Blueprint | Click the Edit Button to reveal the Blueprint Picker Drawer, and select the Blueprint to use | Yes |
| SNMP Object ID | Specify the SNMP Object ID to use | Yes |
| Description Column |
Enter the column of the SNMP table which contains something descriptive and preferably unique. This is used by the For the |
Yes |
| Remove Button | Click the button to remove this Blueprint assignment |
For Virtual Job Type
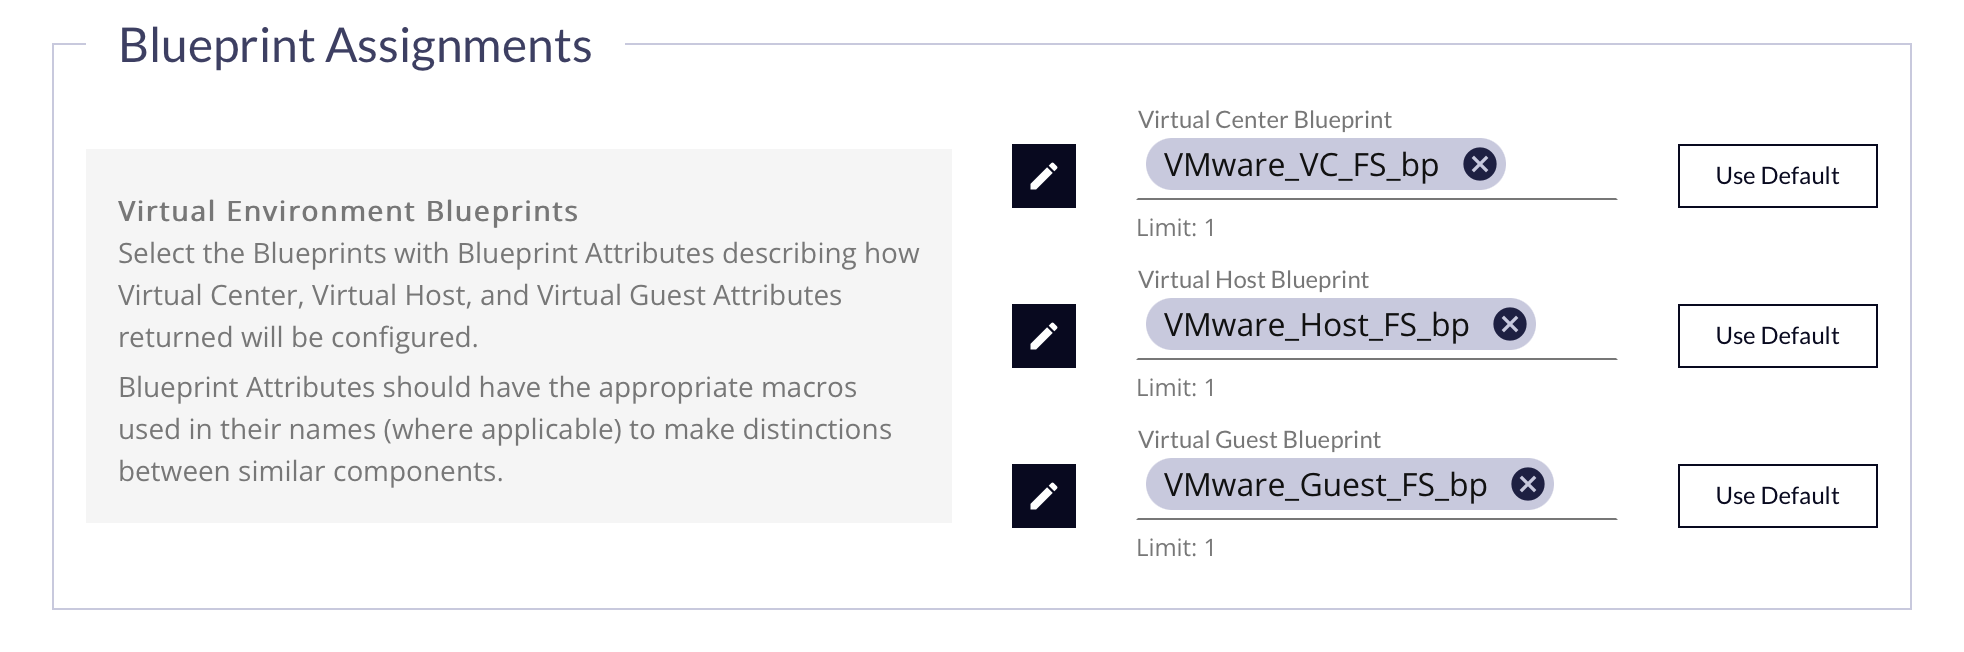
Select a Blueprint with Blueprint Attributes describing how Device Inventory information will be configured & labeled. The Blueprint Attributes should have the appropriate macros used in their names (where applicable) to make distinctions between similar components.
Credentials Panel
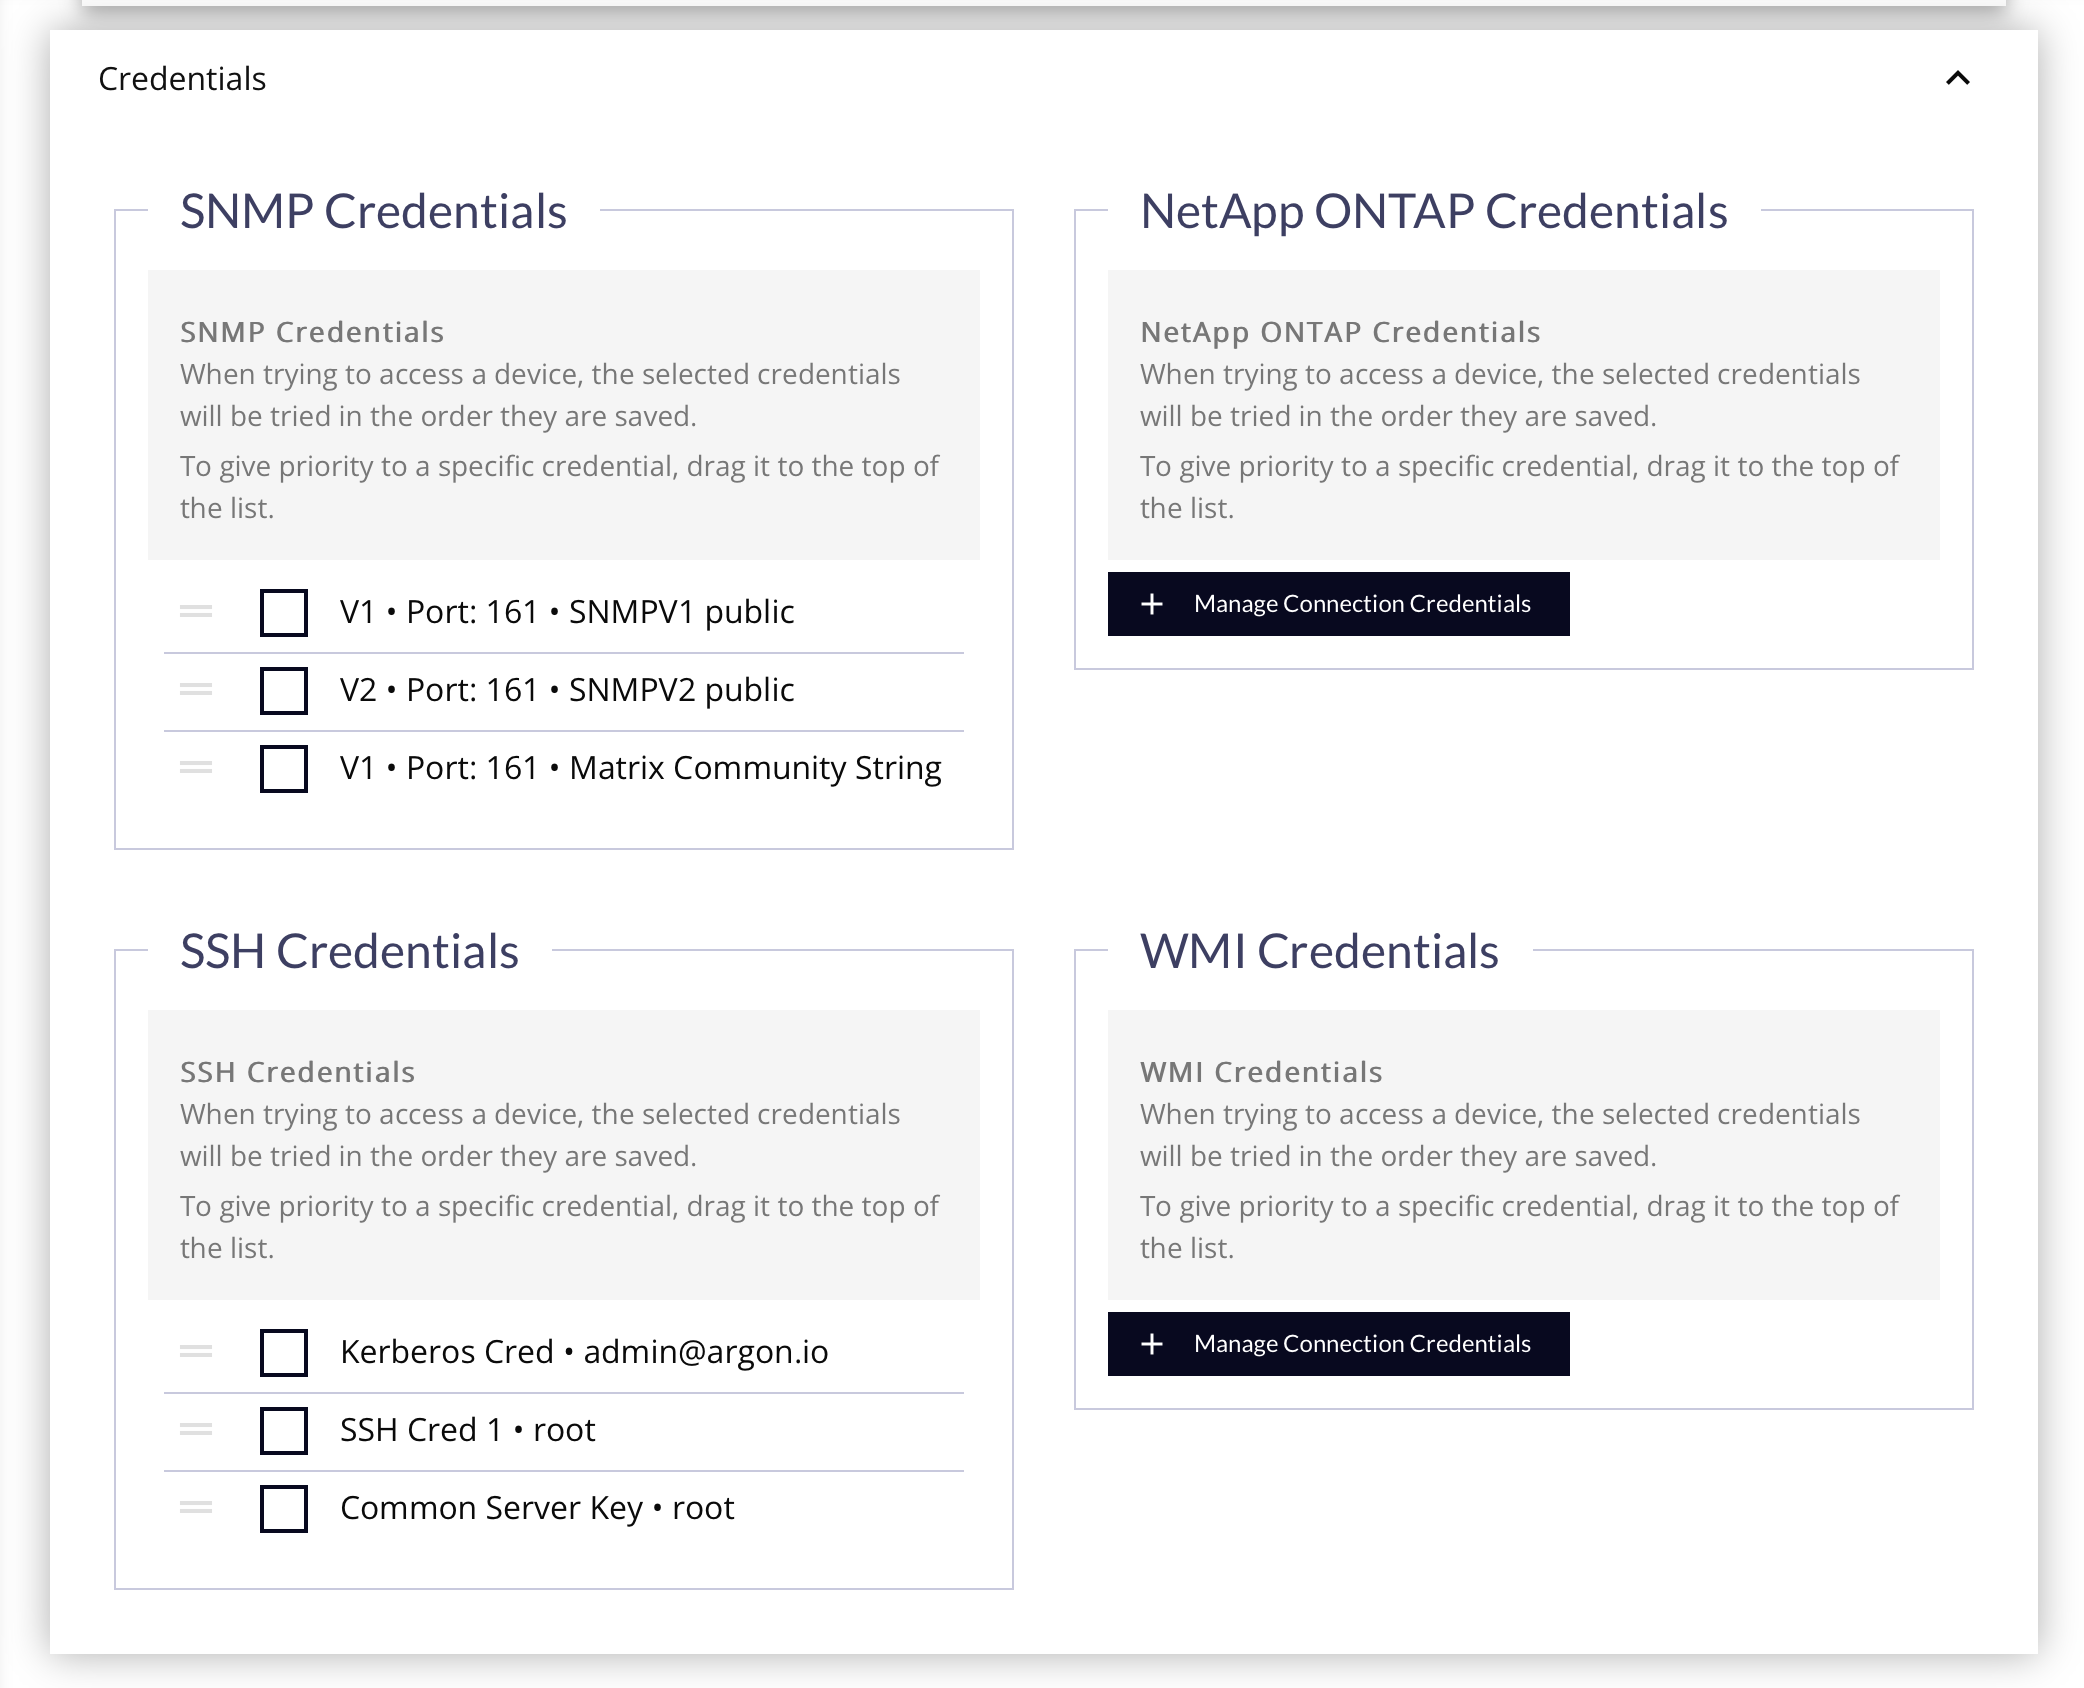
- Mark the checkboxes of the specific credentials to use during the discovery.
- Drag & drop them into the order they should be used, with the "most frequently to encounter" at the top of the list. Each credential type will be tried in succession on a device until one succeeds for that type.
Deleting a Discovery Job
When you delete a job, only the discovery results will be removed. All CIs created from the job will remain; any IP Groups, Credentials, and Discovery Rules will also be unaffected. Without the job results, the hierarchy view will no longer be available.