Credentials
Overview
Connection Credentials have two purposes:
- During discovery, to gather additional information about the devices that are found
- During Attribute data collection, to continue to collect the data from the devices, without installing the FireScope Agent on the machines.
In order for FireScope to connect to, or collect data from, your infrastructure, the devices must be willing to accept the appropriate inbound connections from their respective Edge Device IP.
You will be required to enter your credentials into the FireScope application. It is advised to create credentials specific to the FireScope application's use. These credentials will be stored in the database using reversible encryption so that they are encrypted at rest, but usable when needed.
Some Credential types are Edge Device specific. This means for those Credential types, you can specify unique credentials for each Edge Device, or you can use the application to replicate the same Credential to be used across all Edge Devices so you only have to enter it once.
Credentials List
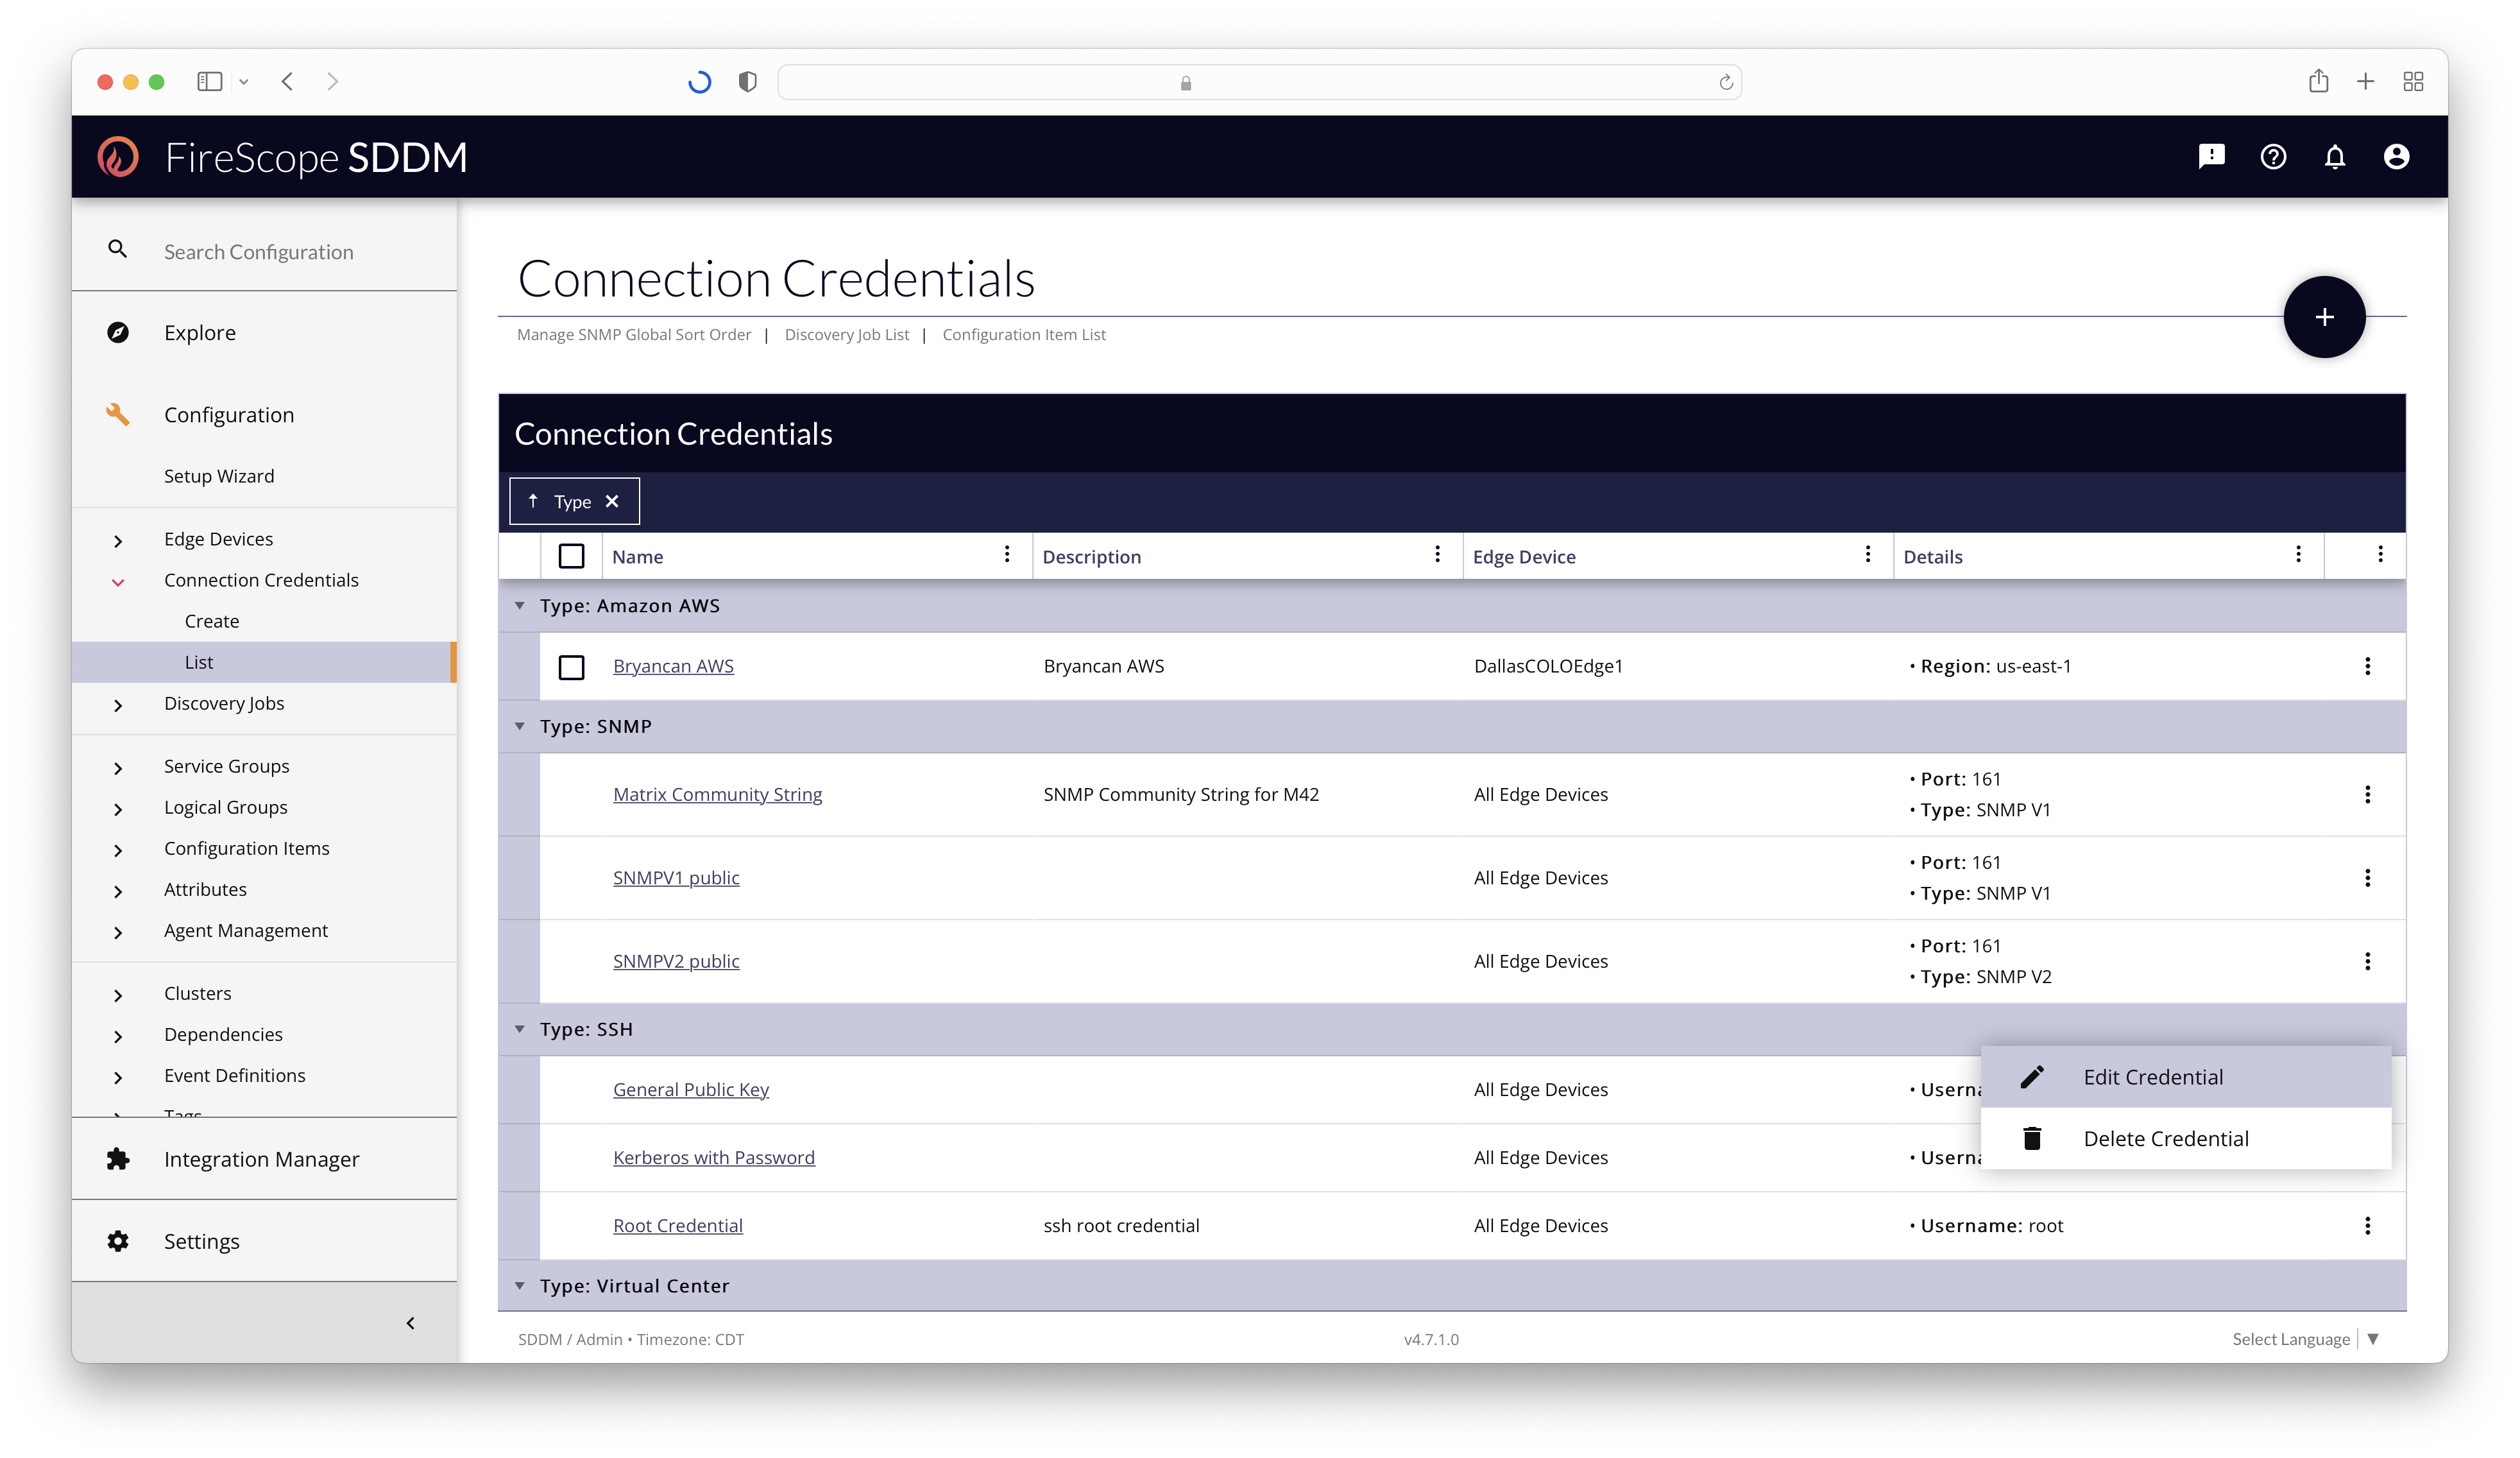
Any Configuration Administrator or FireScope Administrator can view, manage, and delete Connection Credentials from the Configuration > Connection Credentials > List page. The List is grouped by Credential Type by default.
Credential Types
- Amazon AWS
- Unique per Edge Device
Used to access your Amazon Web Services (AWS) account automatically. The Access Key and the Secret Access Key are required special tokens that allow FireScope services to communicate with your AWS account by making secure REST or Query protocol requests to the AWS service API. - LDAP
- Unique per Edge Device
Used to perform queries against LDAP servers, including Microsoft Active Directory, for identifying user privilege escalation, changes in group policy and more. - Microsoft Azure
- Unique per Edge Device
Used to access your Microsoft Azure account. Each tenant will need to have an App and Service Principal set up. The Directory ID, Application ID and Client Secret are values that are created during this set up process, and they are the special tokens that will allow FireScope services to communicate with your Azure account via REST or Query protocol requests to the Azure service API. - NetApp ONTAP
- Shared across Edge Devices
Used to access the NetApp ONTAP operating system of the NetApp devices in your infrastructure to gather information about the device, and collect data for Attributes. - SNMP
- Shared across Edge Devices
Used to by Configuration Items & Attributes for data collection, by Network Discovery Jobs for device information, by Load Balancer Jobs to populate VIPs and Cluster Members, and many other parts of the application. - Secure Shell (SSH) Keys
- Shared across Edge Devices
Used to run remote command-line operations to gather operating system information and monitor the performance of Linux and Unix-based servers, offering Password or Public Key, or Kerberos Authentication. SSH keys provide a more secure way for FireScope to log into a Linux and Unix-based server. This allows for Agent-less monitoring of Linux devices - VMware Virtual Center
- Unique per Edge Device
Used to establish a connection to a Virtual Center or ESX server to propagate the Hosts & Guests to build out a Virtual Infrastructure view, and gather regular data about the configuration and health of the Virtual Environment. - Windows Management Interface (WMI)
- Shared across Edge Devices
Used to connect to Windows-based computers to gather information about the device and collect data for Attributes. This allows for Agent-less monitoring of Windows devices.
Credentials Edit Form
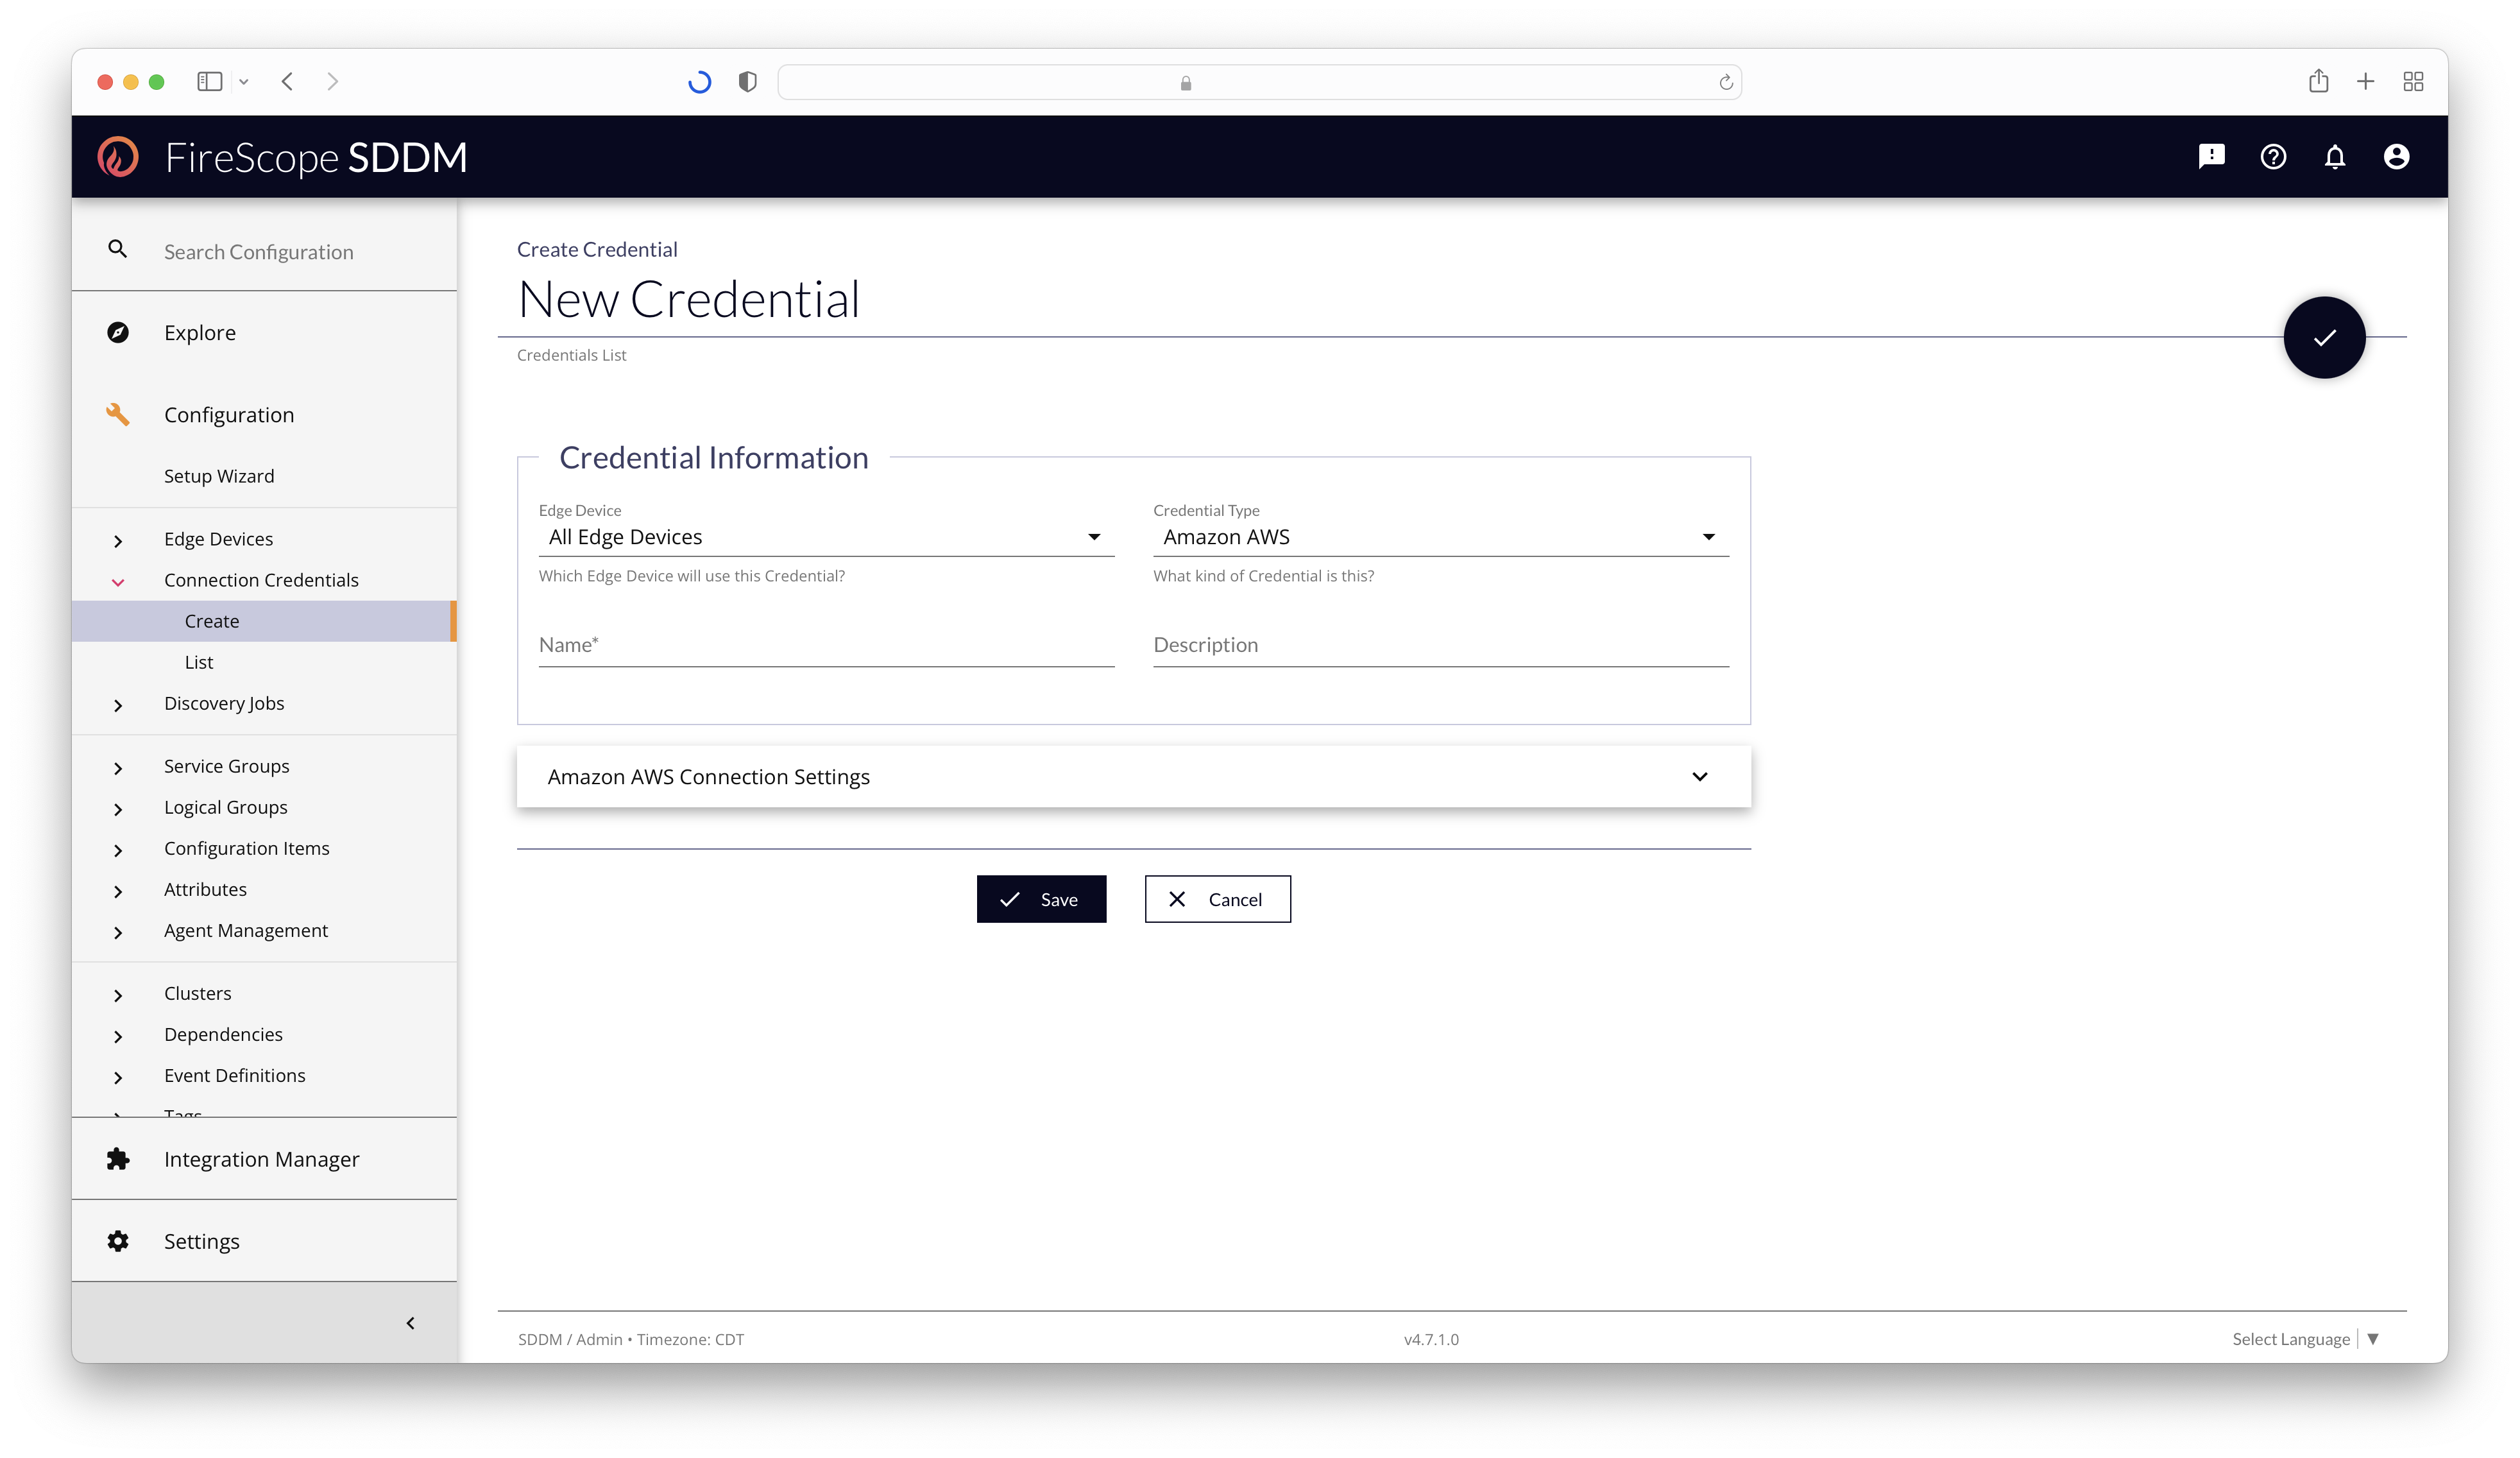
Credential Information Section
| Field Name | Description | Required? |
|---|---|---|
| Edge Device | Select the Edge Device (if unique) that should use this Credential. If the Credential Type is "Unique per Edge Device," then choosing "All Edge Devices" will generate copies of this Credential for every Edge Device at the same time. If the Credential Type is "Shared across Edge Devices," then one Credential will be created, and shared to all Edge Devices. |
Yes |
| Credential Type | Select the kind of Credential to create. This will alter the Edit Form's panels and Edge Device dropdown capabilities. | Yes |
| Name | Add a short name for the credential to be displayed in chips throughout the application. | Yes |
| Description | Additional descriptive details about the Credential, its purpose, or its unique configuration. | No |
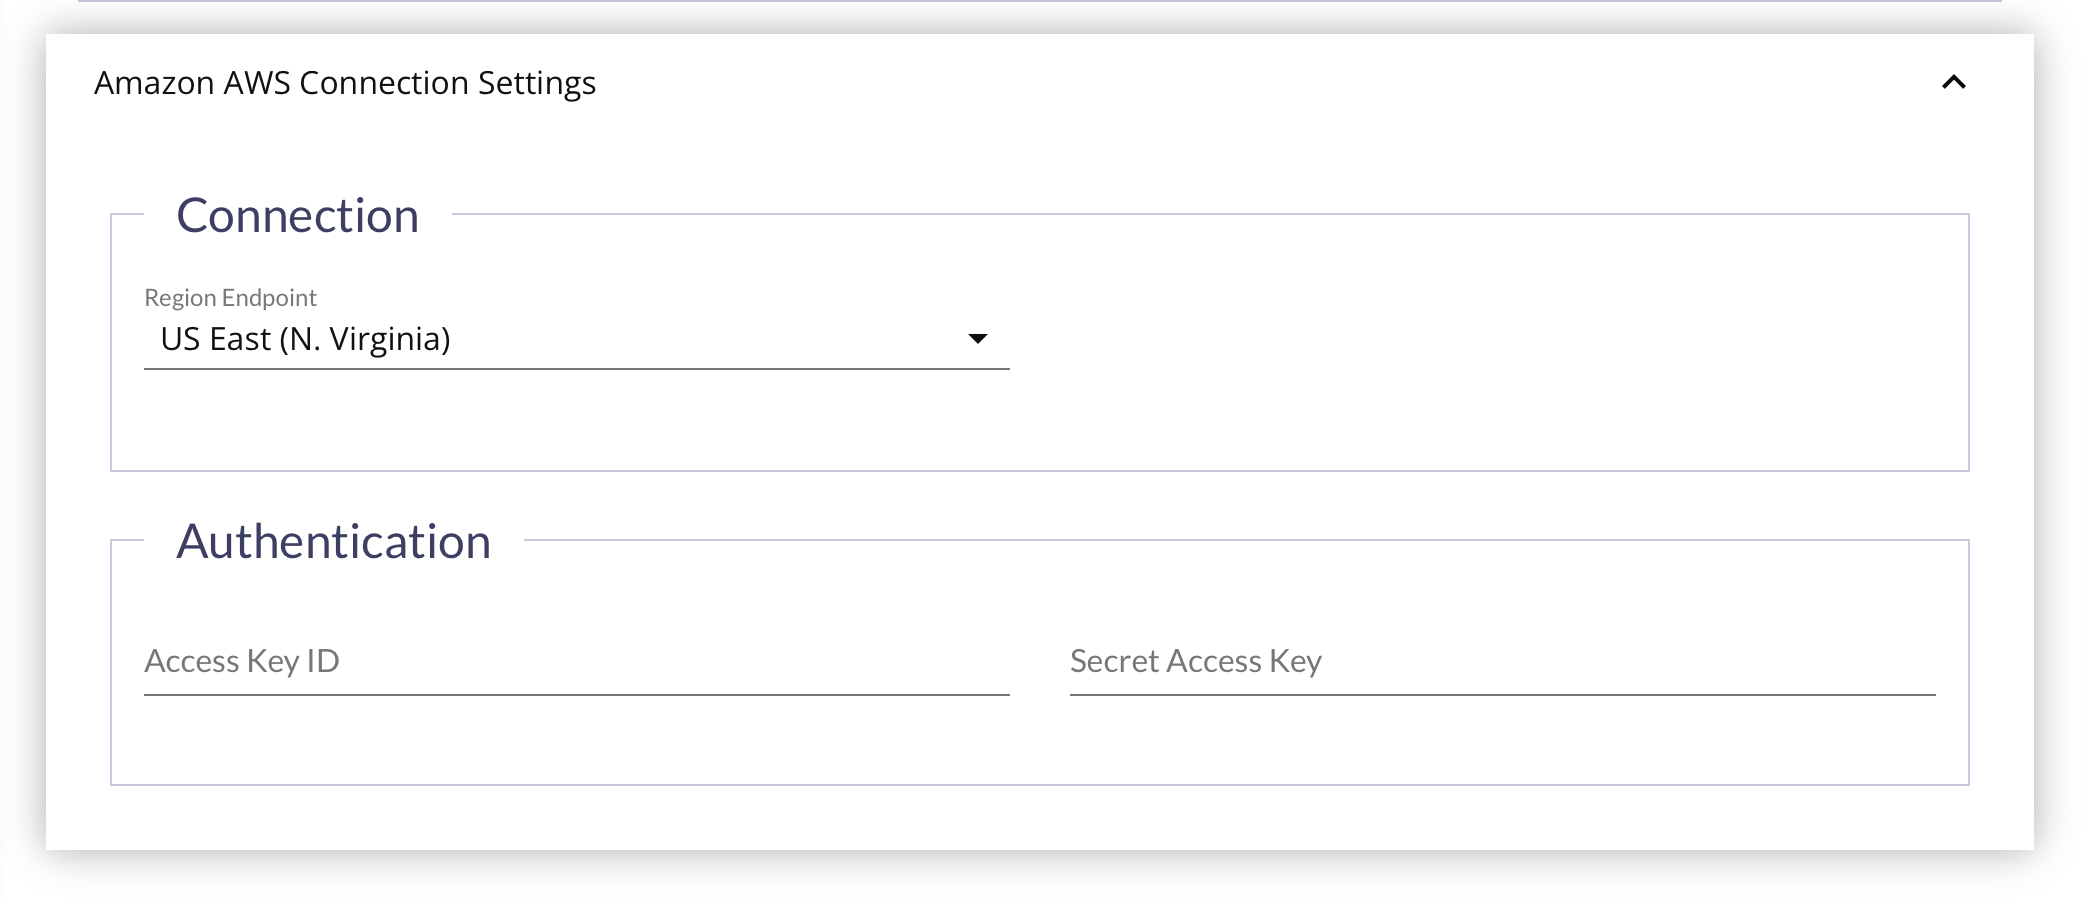
Amazon AWS Connection Settings Panel
First, you'll need to get the credentials from the AWS Management Console:
- Log in to your AWS Management Console.
- Click on your user name at the top right of the page.
- Click on the Security Credentials link from the drop-down menu.
- Find the Access Credentials section, and copy the latest Access Key ID.
- Click on the Show link in the same row, and copy the Secret Access Key.
Then return to the FireScope application, and:
- Choose the Region Endpoint for the credential.
- Enter the Access Key ID for the AWS Account.
- Enter the Secret Access Key for the AWS Account.
- Click Save at the bottom of the page.
Once an Credential has been created, a CI can be associated with it using the Credential Usage Panel or the CI Edit Form's Connection Credentials Panel.
LDAP Connection Settings Panel
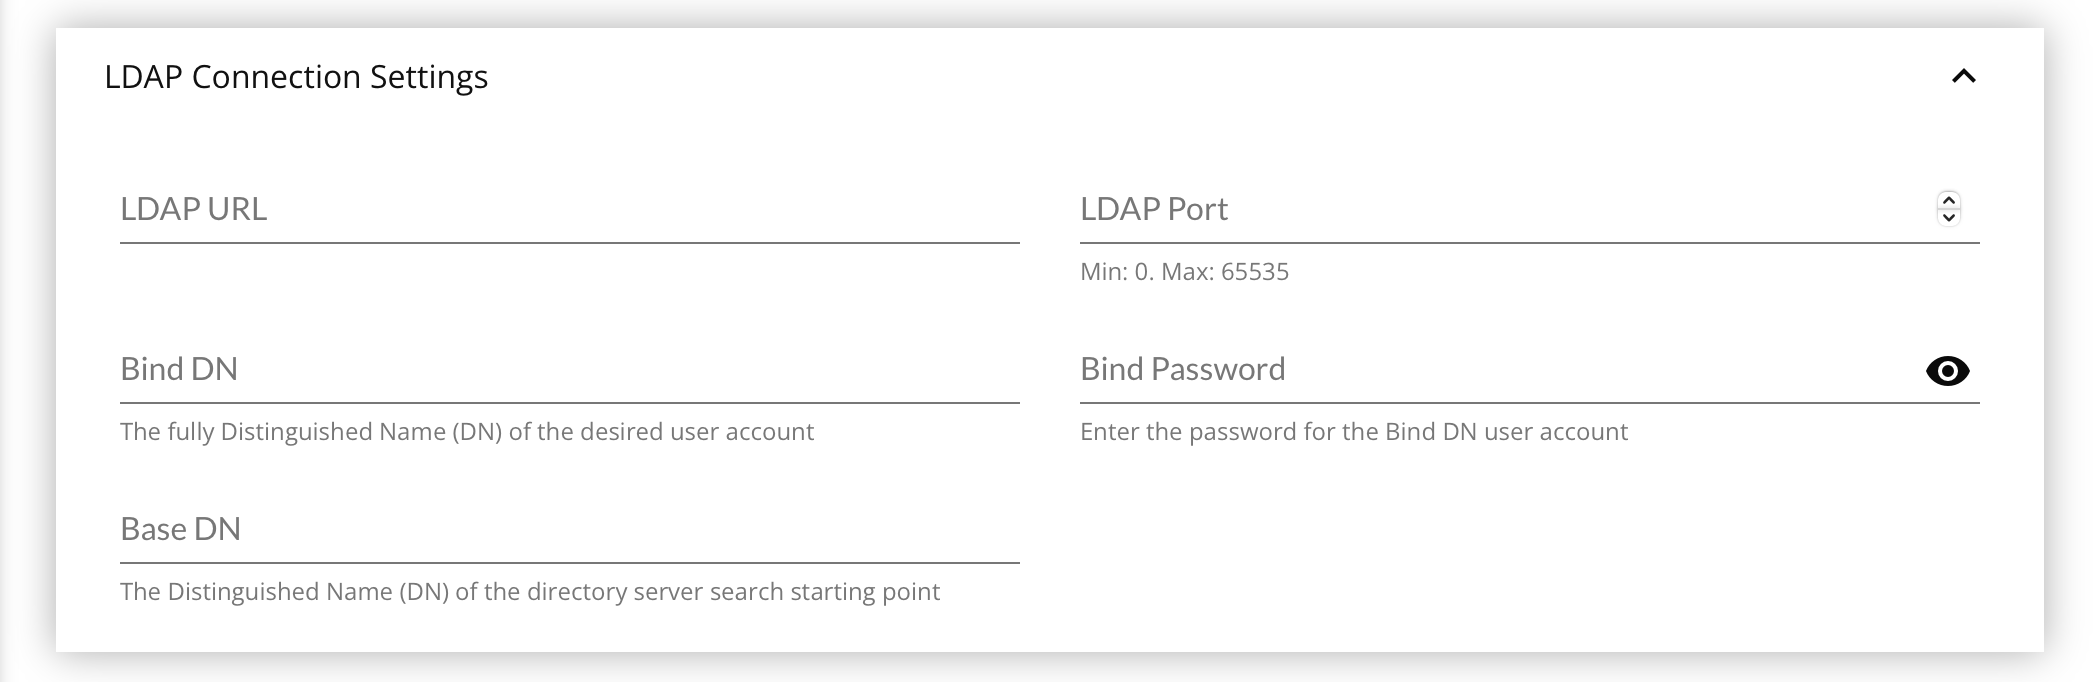
- Enter the LDAP URL for the LDAP Server, without any trailing slash, e.g.:
ldap://local.server.dnsorldap://10.0.22.35 - Enter the LDAP Port on which the server is listening, usually
389. - Enter the Bind DN, a fully distinguished name of the account to be used, e.g.:
CN=Administrator,CN=Users,DC=matrix42,DC=com. - Enter the Bind Password for the Bind DN being used.
- Enter the Base DN, a fully distinguished name for the directory server search starting point, e.g.:
OU=Department,DC=matrix42,DC=com. - Click Save at the bottom of the page.
Once an Credential has been created, a CI can be associated with it using the Credential Usage Panel or the CI Edit Form's Connection Credentials Panel.
With a valid LDAP Credential associated to a CI, you can create LDAP Check Attributes. Only Attributes of CIs that have an LDAP Credential will be able to collect LDAP data.
Microsoft Azure Connection Settings Panel
First you need to prepare your Microsoft Azure environment:
- Sign in to your Azure Account through the Azure portal.
- Select Azure Active Directory.
- Select App registrations.
- Select New registration.
- Name the application.
- Select a supported account type, which determines who can use the application.
- Under Redirect URI, select Web for the type of application you want to create.
- Enter the URI where the access token is sent to.
- Record the Directory (tenant) ID and Application (client) ID for use in the Firescope configuration.
- After setting the values, select Register.
- Use the "Create a New Application Secret" method as the authentication option.
- Select Azure Active Directory.
- From App registrations in Azure AD, select your application.
- Select Certificates & secrets.
- Select Client secrets -> New client secret.
- Provide a description of the secret, and a duration. When done, select Add.
After saving the client secret, the value of the client secret is displayed. Copy this value to a safe location now because you won't be able to retrieve the key later. You will provide the key value with the application ID during the next steps.
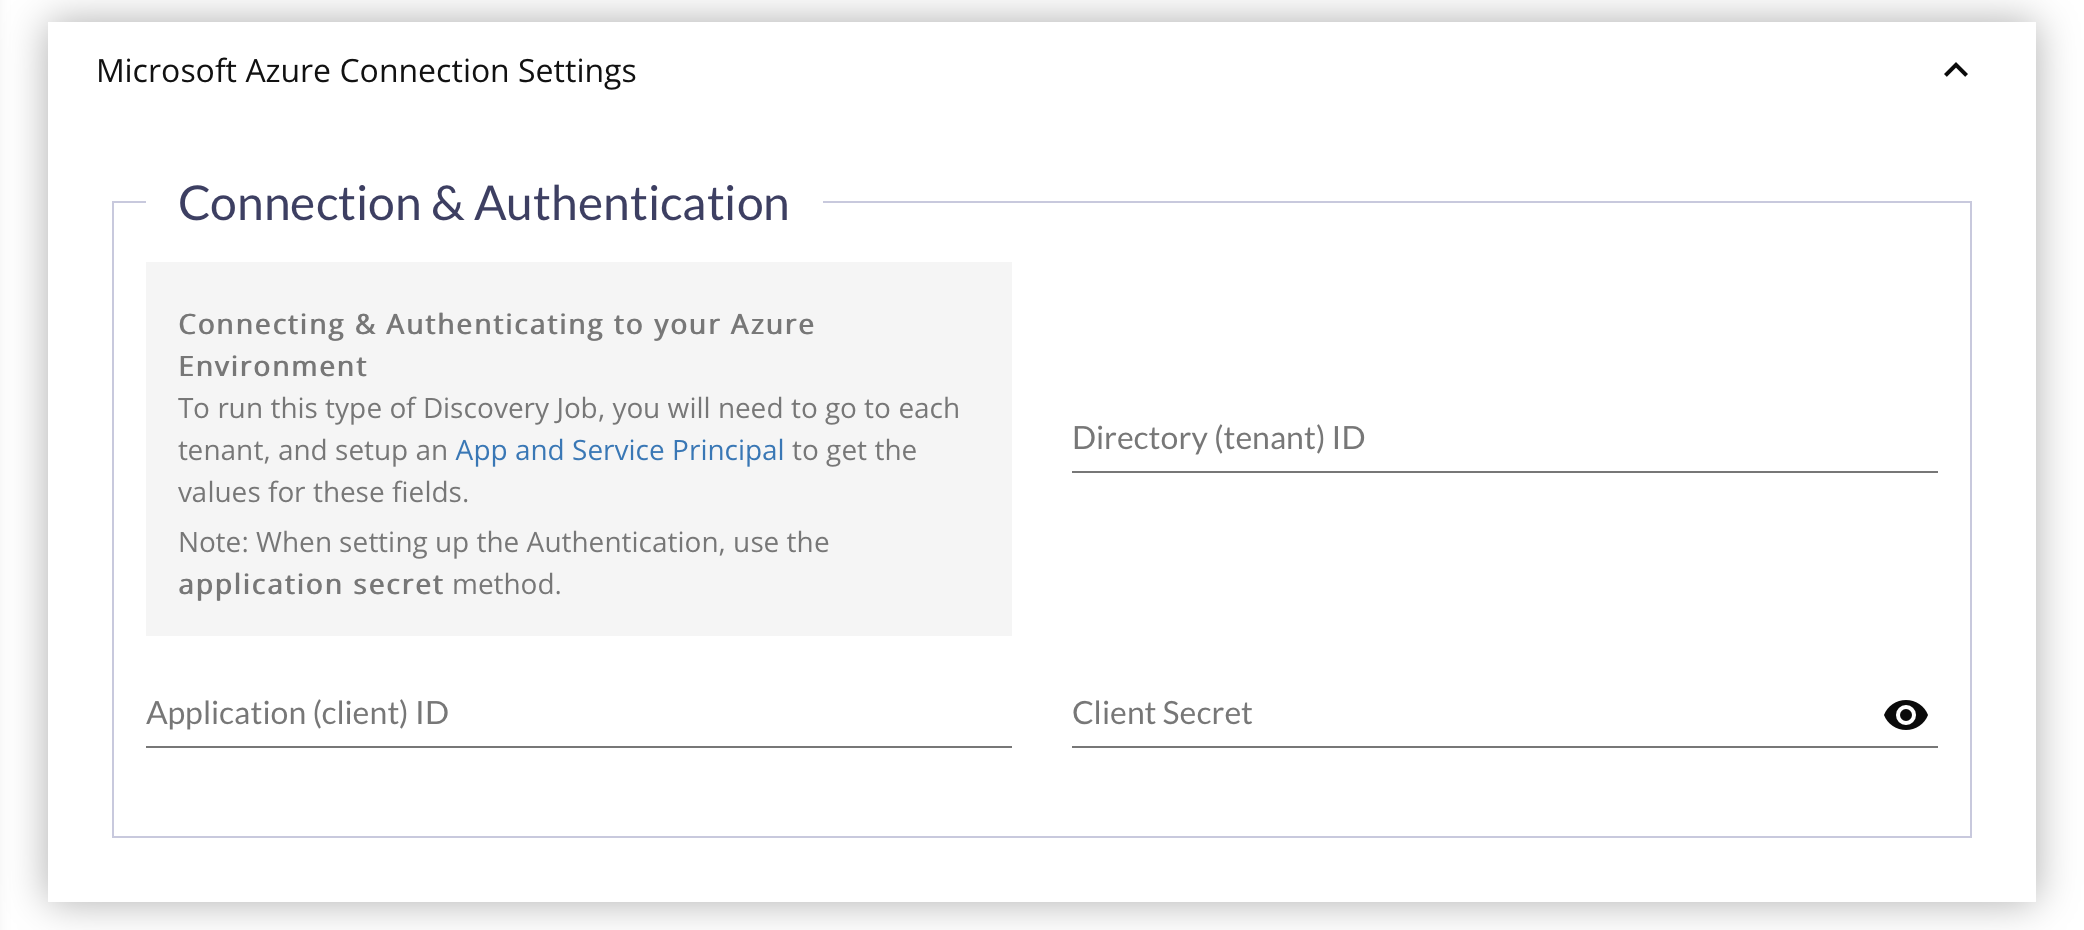
Now return to the FireScope application and fill out the panel's fields:
- Enter the Directory (tenant) ID collected during the Azure Service Principal configuration.
- Enter the Application (client) ID collected during the Azure Service Principal configuration.
- Enter the Client Secret value collected during the Azure Service Principal configuration.
- Click Save at the bottom of the page.
NetApp ONTAP Connection Settings Panel
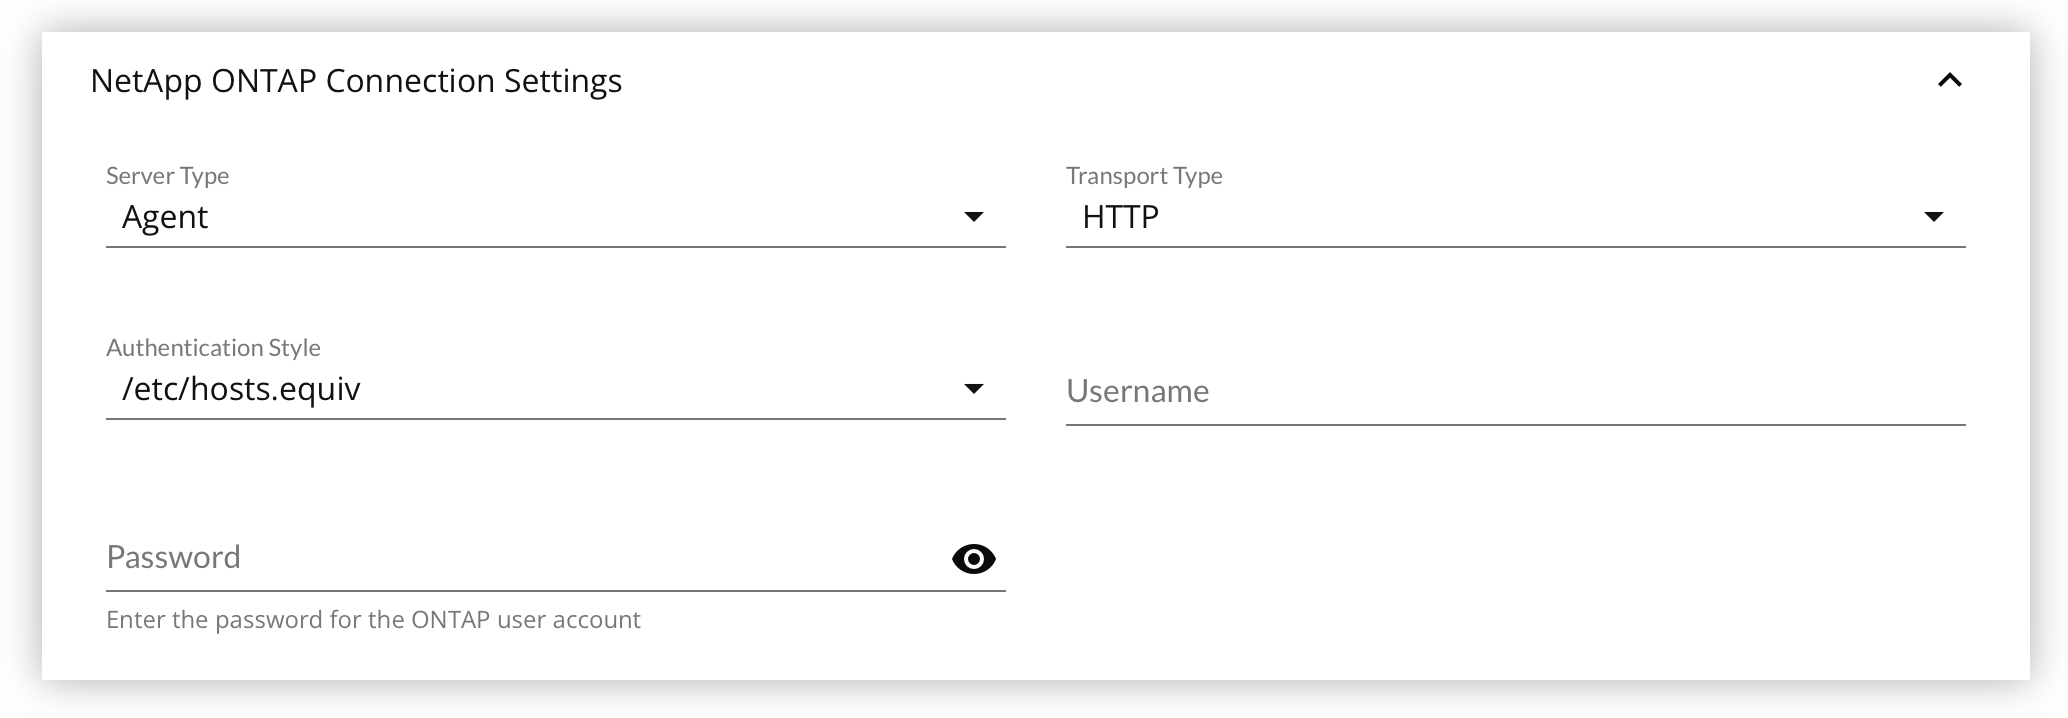
- Select the Server Type from the drop down list.
- One of
Agent,Filter, orNetCache
- One of
- Select the Transport Type from the drop down list.
- One of
HTTPorHTTPS.
- One of
- Select the Authentication Style from the drop down list.
- One of
/etc/hosts.equiv,Username/Password, orRPC (Remote Procedure Call)
- One of
- Enter the Username.
- Enter the Password.
- Click Save at the bottom of the page.
SNMP Connection Settings Panel
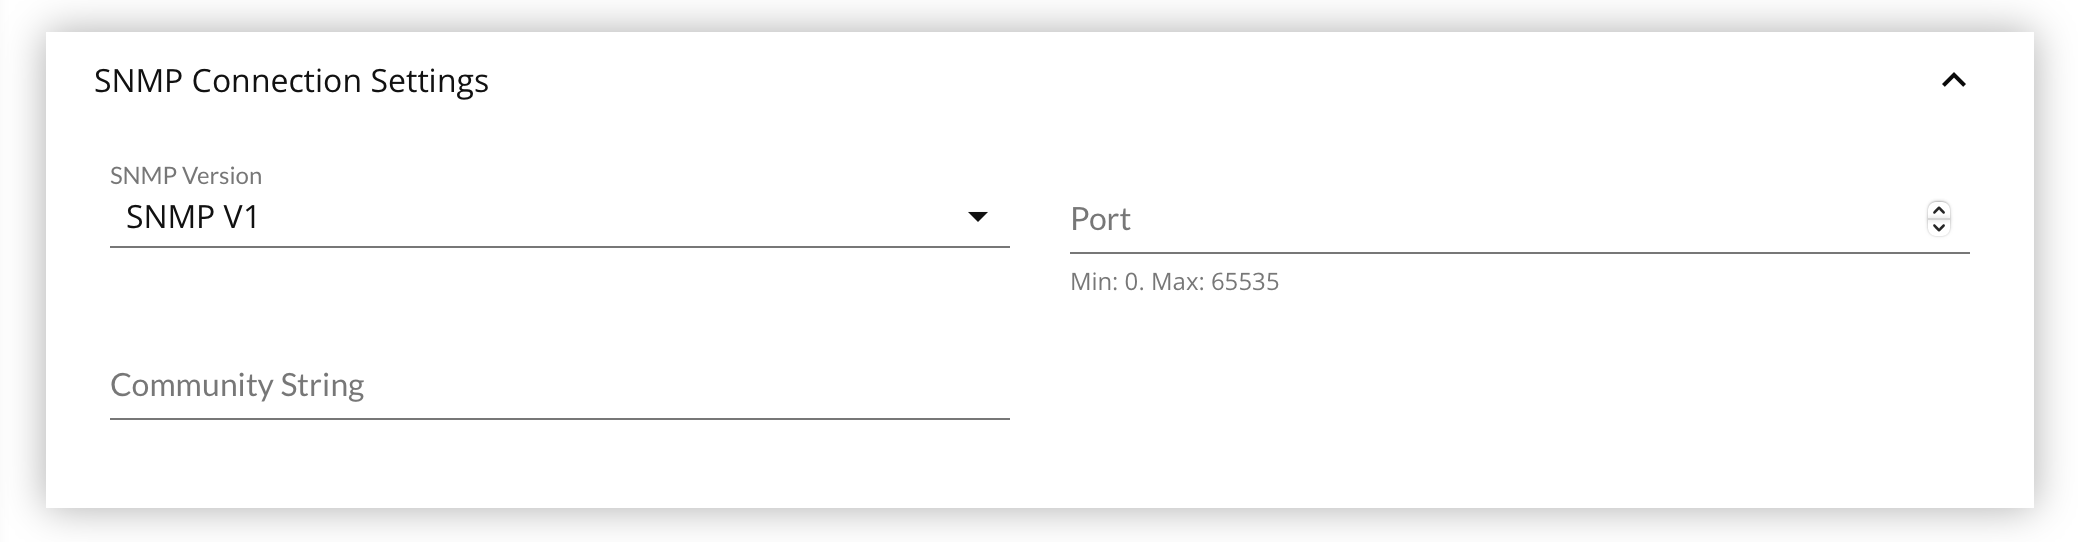
To get started, select which SNMP Version to use: v1, v2, or v3. This will change how the panel fields are displayed.
SNMP v1
Your targeted device must be compatible with SNMP v1, or have an SNMP Agent installed. This includes most networked assets.
The SNMP v1 SMI specifies the use of a number of SMI-specific data types, which are divided into two categories: Simple Data Types, and Application-Wide Data Types.
Most devices have community string support for public.
- Enter the Port listening for SNMP lookups, usually 161.
- Enter the Community String to use.
- Click Save at the bottom of the page.
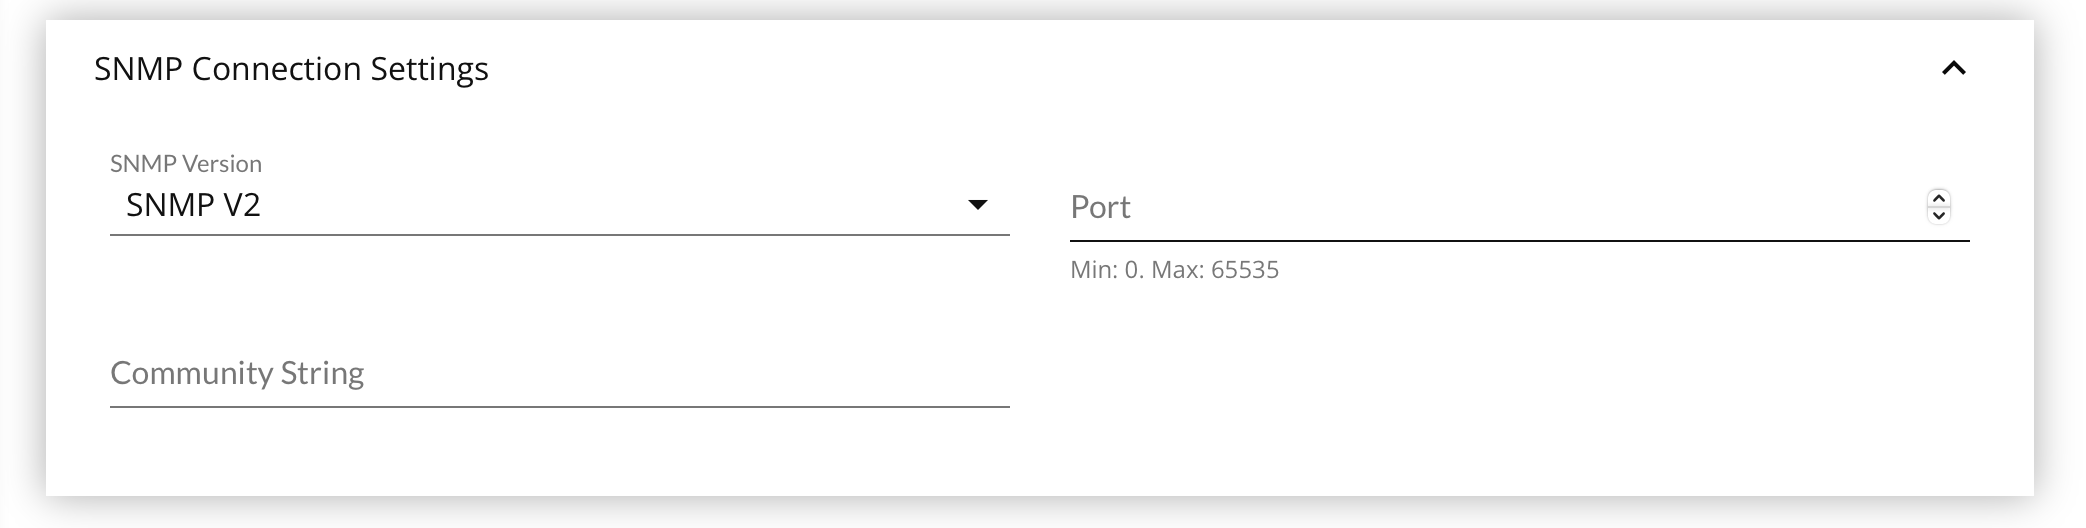
SNMP v2
Your targeted device must be compatible with SNMP v2, or have an SNMP Agent installed. This includes most networked assets.
The SNMP v2 SMI is described in RFC 2578. It makes certain additions and enhancements to SNMP v1's SMI-specific data types, such as including bit strings, network addresses, and counters. Additional SNMP v2 also specifies three types of information modules: MIB modules, compliance statements, and capability statements.
- Bit strings are defined only in SNMP v2 and comprise zero or more named bits that specify a value.
- Network addresses represent an address from a particular protocol family. SNMP v1 supports only 32-bit IP addresses, while SNMP v2 can support other types of addresses as well.
- Counters are non-negative integers that increase until they reach a maximum value, and then return to zero. In SNMP v1, the counters are 32-bit. In SNMP v2, both 32-bit and 64-bit counters are defined.
- MIB Modules contain definitions of interrelated managed objects.
- Compliance statements provide a systematic way to describe a group of managed objects that must be implemented for conformance to a standard.
- Capability statements are used to indicate the precise level of support that an agent claims with respect to a MIB group. An NMS can adjust its behavior toward agents according to the capability’s statements associated with each agent.
Most devices have community string support for public.
- Enter the Port listening for SNMP lookups, usually 161.
- Enter the Community String to use.
- Click Save at the bottom of the page.
SNMP v3
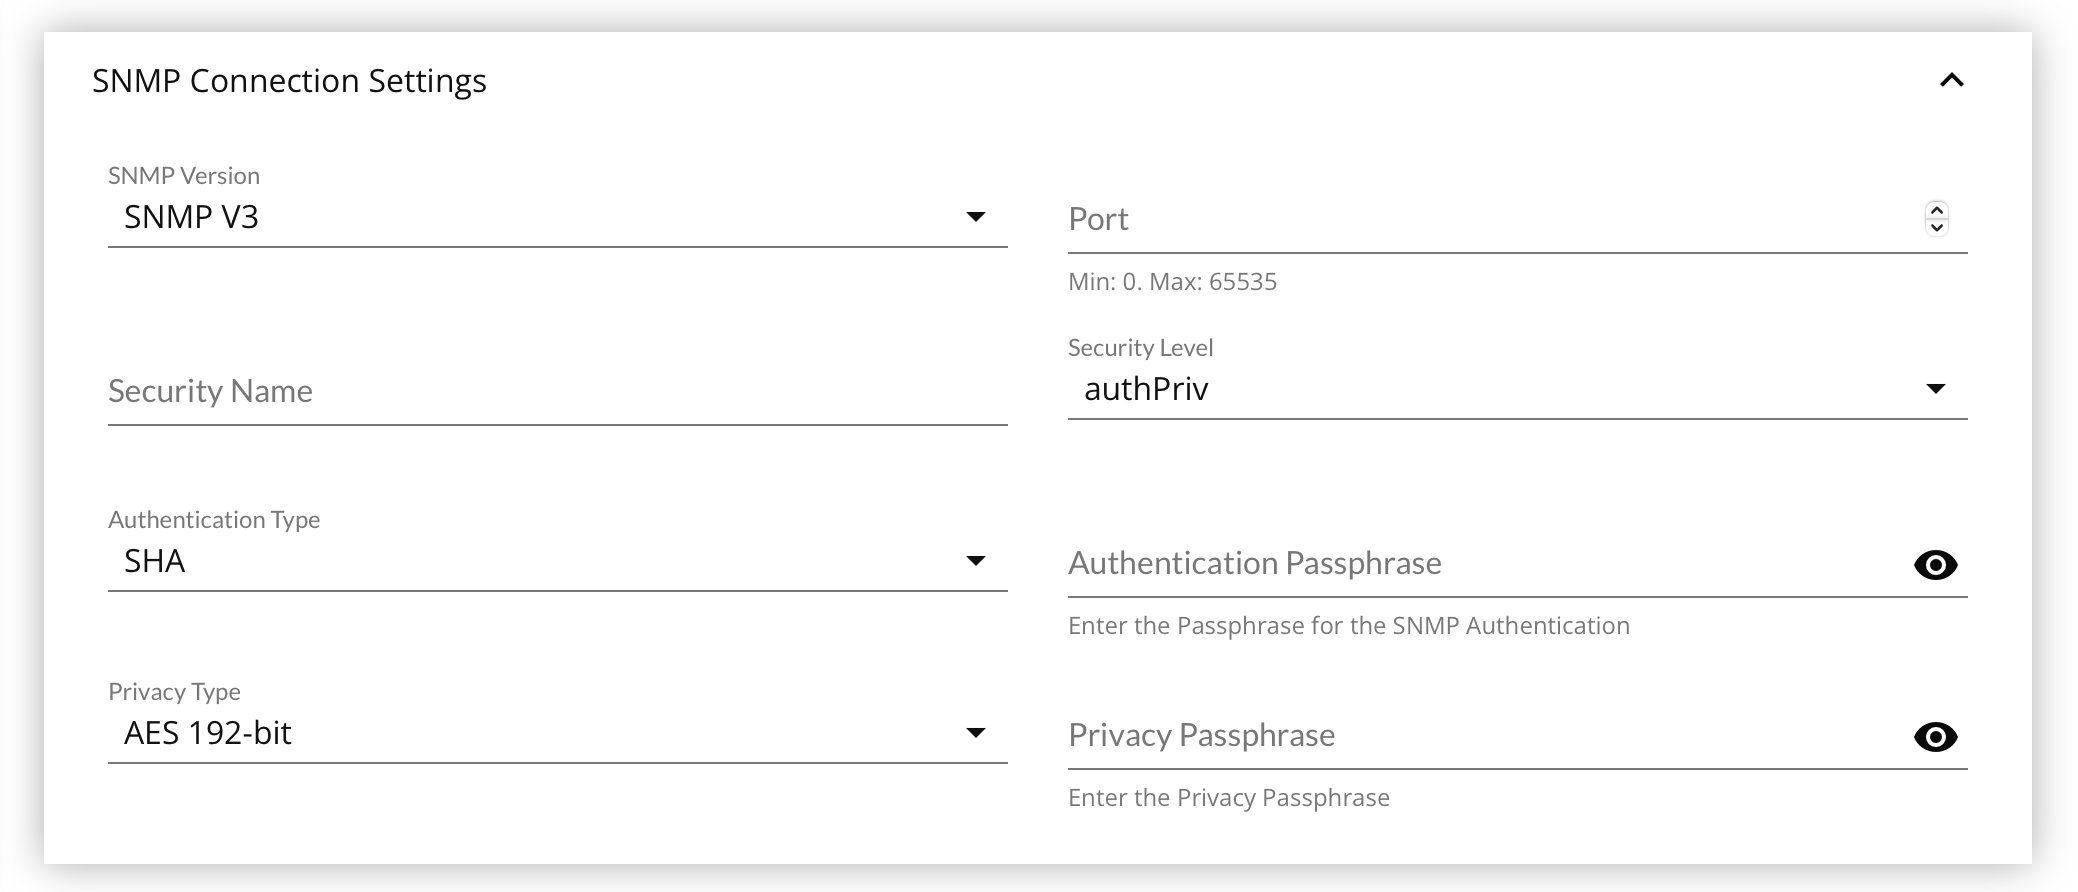
Your targeted device must be compatible with SNMP v3, or have an SNMP Agent installed.
SNMP v3 essentially offers the same information as SNMP v2, with the addition of 3 important security features:
- Message integrity to ensure that a packet has not been tampered with in transit.
- Authentication to verify that the message is from a valid source.
- Encryption of packets to prevent snooping by an unauthorized source.
SNMP v3 has specific access requirements due to the variations of access control offered. You will need to provide some of the following values based on the type of authentication required by the device's settings:
- security name
- security level
- authentication type
- authentication passphrase
- authentication type
- privacy passphrase
- Enter the Port listening for SNMP lookups, usually 161.
- Enter the Community String to use.
- Select the Security Level, which will change the form presentation
noAuthNoPriv- Unauthenticated access, and no privacy/encryptionauthNoPriv- Authenticated access, but no privacy/encryption- Select the Authentication Type
- One of
MD5orSHA.
- One of
- Enter the Authentication Passphrase
- Select the Authentication Type
authPriv- Authenticated access, with privacy/encryption- Same as
authNoPrivfor Authentication settings. - Select the Privacy Type.
- One of
AES 128-bit,AES 192-bit,DES, orTriple DES.
- One of
- Enter the Privacy Passphrase.
- Same as
- Click Save at the bottom of the page.
SSH Connection Settings Panel
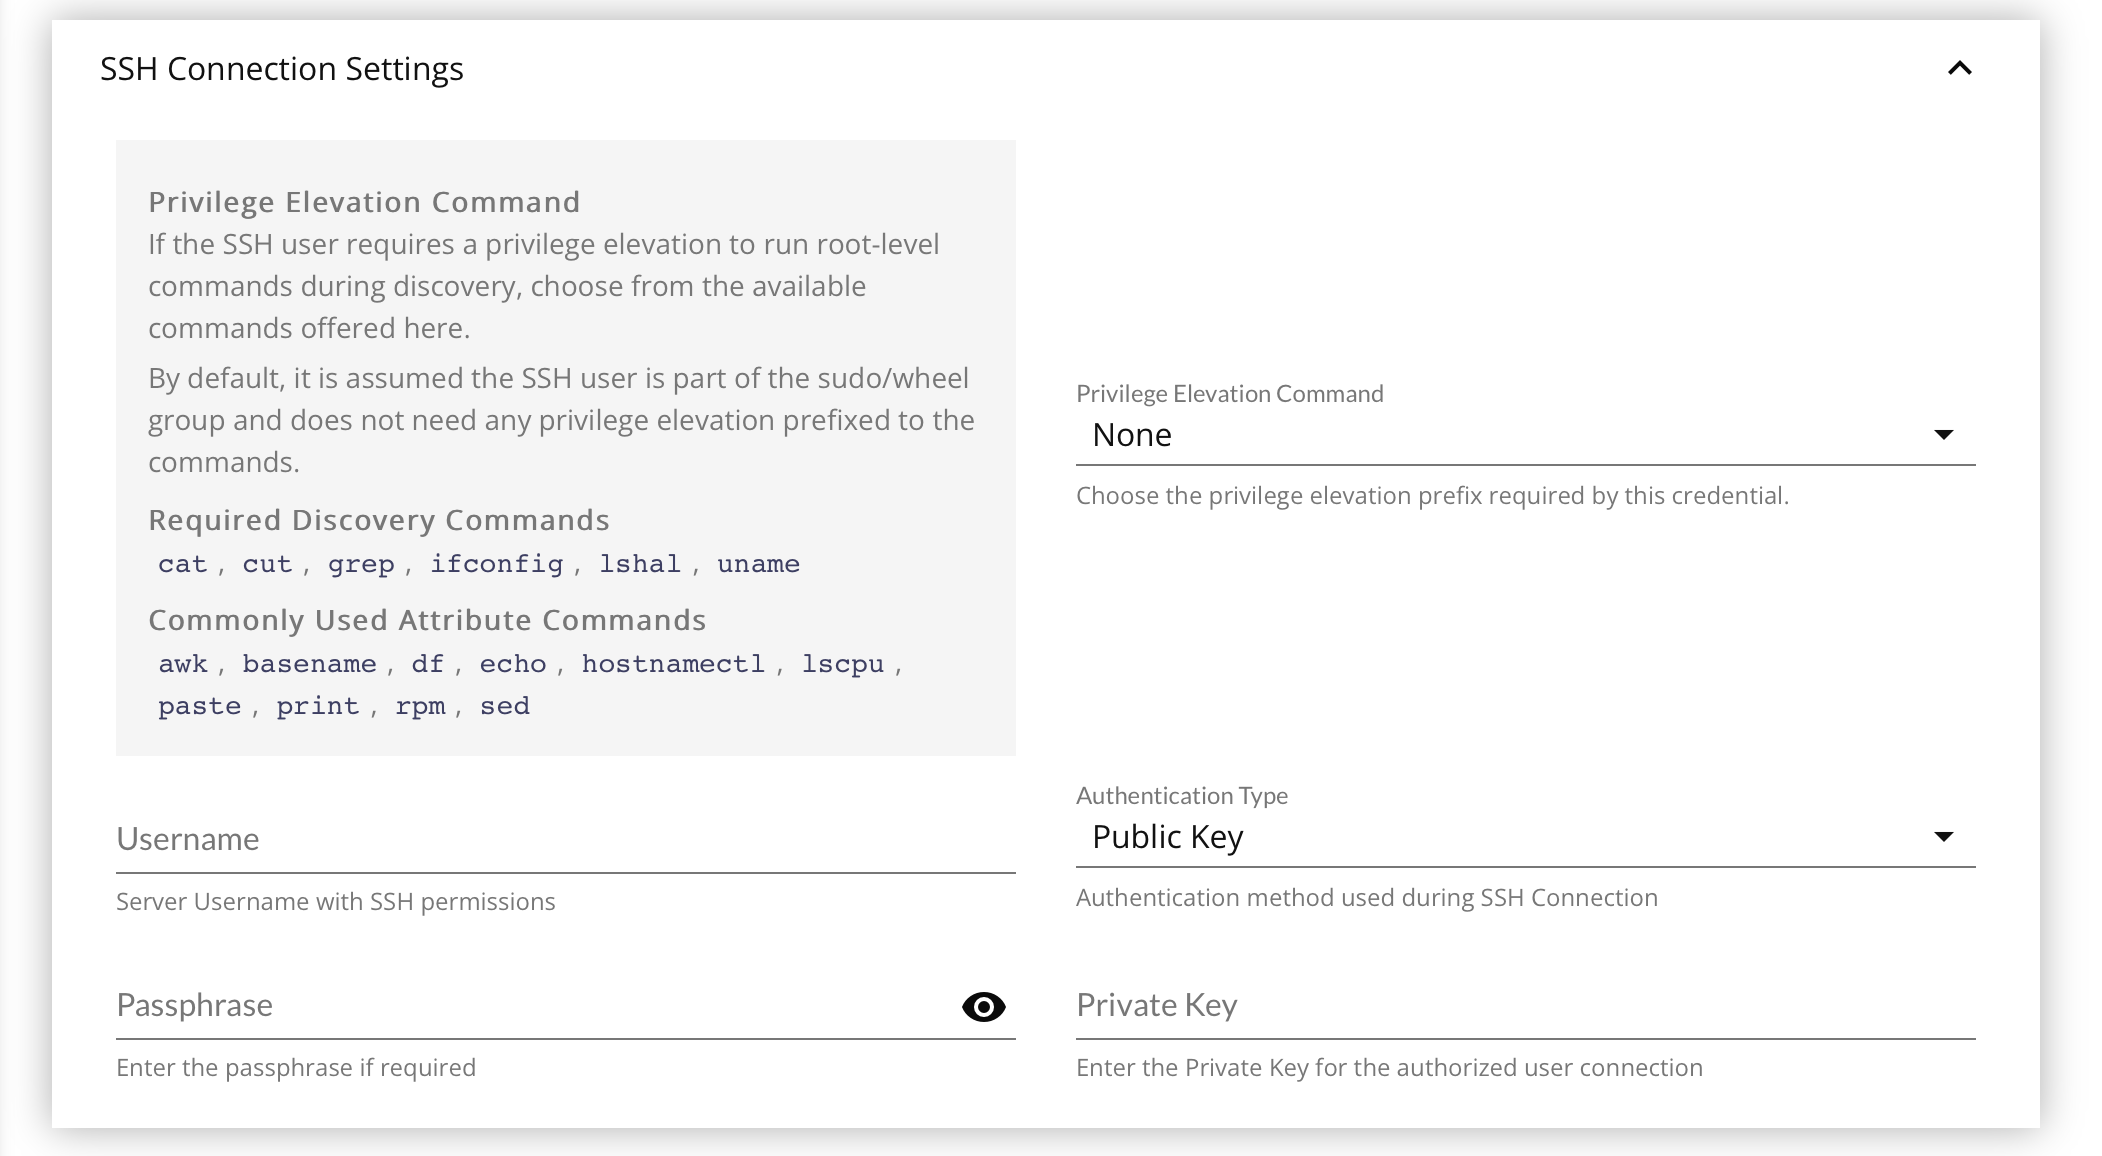
Privilege Elevation Command
By default, credentials are assumed to be members of the sudo/wheel group, or root itself, and does not require privilege elevation to execute the arbitrary discovery job, or Attribute operation commands on the targeted CIs that use the credential.
Starting with FireScope v4.7.0, the option to provide a use which can execute sudo-prefixed commands has been added to SSH Credentials. In the future, additional privilege elevation commands may be added as needed.
To aid in setting up non-root users, a list of required & common binaries that such a user must be able to access is provided:
| Required for Discovery Jobs | Commonly used in SSH Attribute Operations |
|---|---|
|
|
It is up to the device administrator to make sure these binaries are accessible via the PATH environment variable for the Credential's username. These binaries are not called with full file paths, as they cannot be guaranteed to be in the same location for all devices / operating systems.
It is also required that you configure access to these binaries in the NOPASSWD settings in the sudoers file for this non-root user, as there will be no way to handle a password prompt during discovery or Attribute collection.
- Select the Privilege Elevation Command, if any is required.
- Enter the Username for authentication
- Select the Authentication Type to use.
- One of
PasswordorPublic Key.
- One of
- Enter the Passphrase, either for the User if
Passwordauthentication, or for the Private Key (if any) if usingPublic Keyauthentication. - If using
Public Keyauthentication, paste the full, raw text of the Private Key.- See How to Set Up Public Key Authentication Type below.
- Click Save at the bottom of the page.
How to Set Up Public Key Authentication Type
- Create the SSH key pair using
ssh-keygencommand. - Copy and install the public ssh key using the
ssh-copy-idcommand on a Linux or Unix server. - Add the user to the
sudoorwheelgroup admin account. - Disable the password login for the
rootaccount. - Test your password-less SSH keys by authenticating using the
ssh user@server-namecommand.
Virtual Center Connection Settings Panel
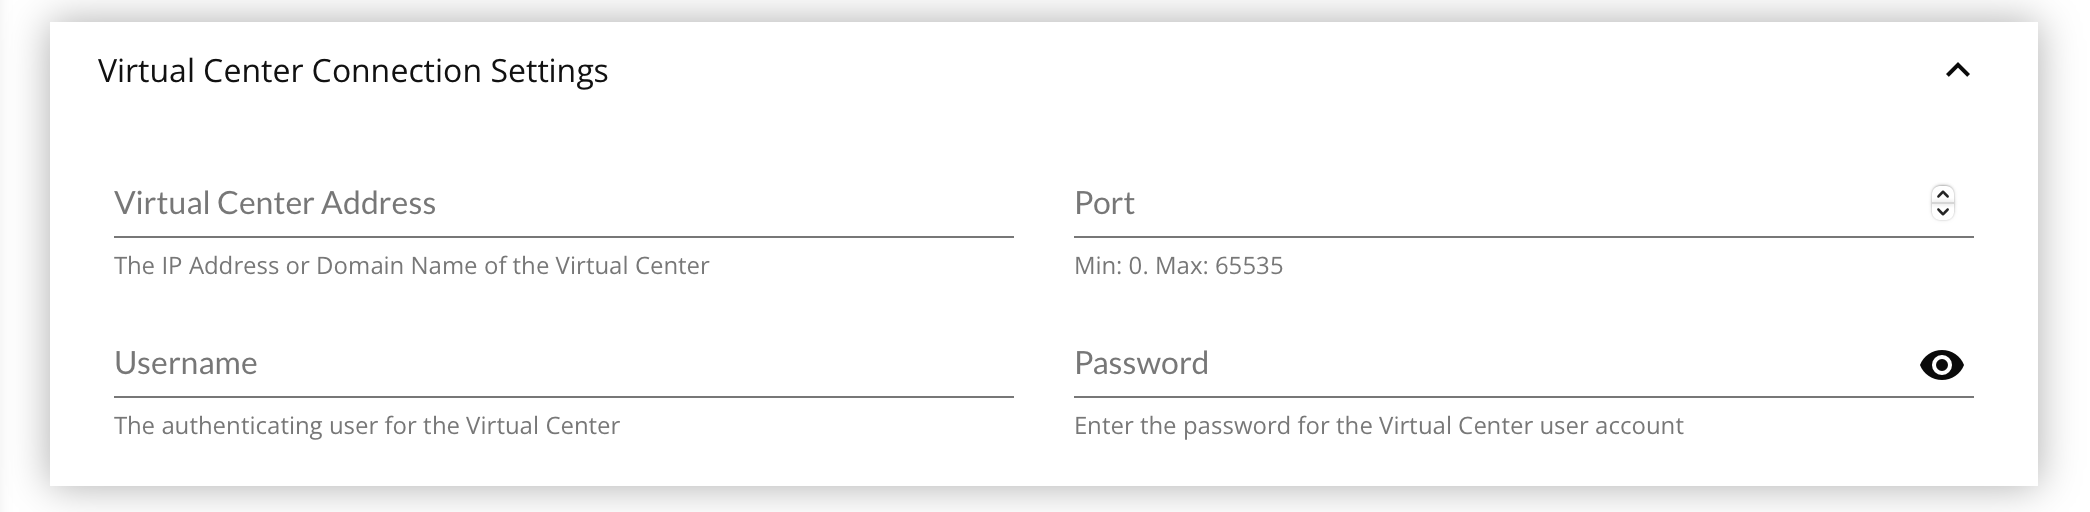
You may only use 1 Virtual Center Connection with 1 Virtual Discovery Job. It is strongly advised that you create a single Connection Credential that can see every Virtual Host & Guest in the Virtual Environment to gather a full picture of the infrastructure to avoid creating duplicate CIs for Virtual Hosts that are already represented. After running the Virtual Discovery Job and processing the results, use Service & Logical Groups to segment the devices for permissions or other general organization.
- Enter the Virtual Center Address, either an IP address or a host name.
- Enter the Port on which the VMware server is listening.
- Enter the Username, ideally one which can see every device you intend to catalog with FireScope.
- Enter the Password for the Username
- Click Save at the bottom of the page.
WMI Connection Settings Panel

For WMI features to work, on the Domain Controller a Windows Admin must first perform these steps in order for the WMI Features to work.
- Go to Administrative Tools > Active Directory Users & Computers
- Create a dedicated FireScope WMI Credential using a domain user
- Put the FireScope WMI Credential into the
Domain Adminsgroup.
This grants access to the WMI CIMV2 namespace where device data is queried. Local Admins are not supported at this time.
Return to the FireScope application and fill out the WMI Connection Settings panel fields
- Enter the Username as
domain\username. - Enter the Password for the Domain User.
- Click Save at the bottom of the page.
Credential Usage Panel

After a Credential has been created, coming back to the Credential Edit Form will reveal a "Credential Usage" panel where any Discovery Jobs or Configuration Items that are linked to the Credential will be listed.
To remove the Credential from the Discovery Job, you will have to go to the Discovery Job Edit Form's Credentials Panel, and uncheck the marked Credential to remove it.
To add/remove the Credential from Configuration Items, you can select/remove the CI from this Credentials Usage Panel or go to the Configuration Item Edit Form's Connection Credentials Panel to change the dropdown to None or to a different credential.
Deleting Credentials
A credential in use by a Discovery Job or Configuration Item cannot be deleted until it has been removed from use. See the Credential Usage Panel above.
Unused Credentials can be deleted from the Connection Credential List by clicking on the 3-dot button in the far-right column for the Credential to reveal the context menu. Then clicking on Delete Credential context menu item, and following the modals and prompts to completion.
An unused Credential can also be deleted from the Connection Credential Edit Form by clicking the Delete (trash can) button at the bottom of the page, and following the modals and prompts to completion.
What's Next
The User Guide may be accessed in any order, but the next logical step is to review the procedures and requirements involved in the Discovery process.