Configuration Items
Overview
Configuration Items (CI) are any asset, devices, platform, or software on your network that FireScope SDDM will discover (e.g. servers, routers, VMs, applications). They can be grouped into a Logical Group or a Service Group. CIs contain Attributes which are the metrics or logs you want to track (e.g., Processor Utilization, Free Disk Space, log entries). Each CI can be connected with FireScope SDDM using an optional agent or through SNMP, Syslog, or other communication methods.
CI’s Association with Credentials
Credentials allow a Configuration Item to gather information from your environment without loading or enabling additional agents and services. Depending on your environment, valid credentials may be required. Use the Manage Credentials page Configuration > Connection Credentials to add or update credentials. Credentials are Edge device specific. This allows you to designate shared credentials (such as SNMP) per environment with a dedicated Edge device.
Each discovered asset includes key elements:
- The Configuration Item – The CI acts as a container that identifies the IP Address or FQDN of the asset.
- Attributes – Attributes are the individual metrics, logs, and operational states of the CI.
Please note that this section describes the manual process for creating an individual CI and is rarely followed. In most cases, CIs are created automatically using Discovery, Integration or the Configuration Web Service. Additionally, Attributes are ideally applied via Blueprints in any scenario where you have more than one of a given class of CI.
Create CI
Following are the steps to create CIs manually. Log in to FireScope SDDM as a FireScope or Configuration Administrator.
- Click Configuration > Configuration Items > Create and the New Configuration Item page will be displayed.

Details
- Name - Enter a descriptive name for this item.
- Enable Monitoring - Select this if you want to enable monitoring for this item.
Connection
- Edge Device - Select an Edge Device to designate the data collection or operation target. Edge Device is the main connection point that is required for FireScope SDDM to collect data from this CI. This is server (or VM) that is connected to the FireScope SDDM cloud application but is local to your CIs that are monitored
- Connect Via - Select how FireScope should connect to the CI, from the drop-down list. Note: IP address is faster since it doesn’t require a DNS lookup process.
- IP Address - Enter IP address of the asset. This field is required only if you have selected IP Address from the Connect to list.
- Domain Name - Enter the domain name of the asset. This field is required only if you have selected Domain Name from the Connect to list.
- Port - Enter the port the agent is listening on. This field is required only if you are using the FireScope Agent, which by default uses port 8042.
Alternate Addresses
|
If a CI has been discovered and represented in the application multiple times due to a device having multiple IP addresses on the network, you can combine them into a single Compound CI by associating other CIs to a Primary CI. These alternate addresses will be considered Secondary CIs. Watch the video below to get a full demonstration of the feature and functionality. |
Impact to Licensing: CI Count
With the addition of Compound CIs, a change was made to how CIs are counted toward license usage. This table describes the type of Configuration Item and relevant data points used in determining the license usage. Use the following key to understand the table:
-
✅ - Counts against the CI License Limit
-
❌ - Does not count against the CI License Limit
| Type of CI | CI Condition | Is Counted? |
| Primary / Normal CI | Status is Enabled. |
✅ - Counted, regardless of Attributes. |
Status is Disabled. |
❌ - Not Counted | |
| Secondary CI | Status is Enabled. |
|
Status is Disabled. |
❌ - Not Counted | |
| Delegate / System CI | Status Irrelevant | ❌ - Not Counted |
This change is retroactive to all existing licenses and CIs. As CIs become merged into Compound CIs, the number counted against the license will automatically be reduced accordingly.
Assigning Secondary CIs
When creating or editing an existing CI, you can assign Secondary CIs to it, if they already exist in the application.

To assign CIs as Secondary CIs:
- In the Current Configuration Item is a dropdown, select
Primary Configuration Item. - Click on the Add Configuration Item button, and choose which CIs also represent this same device, but on a different address.
- Click the Save button at the bottom, or the Checkmark button at the top, of the page when done editing.
Promoting a Secondary CI to be a Primary CI
If you have already assigned Secondary CIs to a Primary CI, but decide to change which one is the representative object in the application, you can promote a Secondary to Primary by clicking the Promote to Primary button.
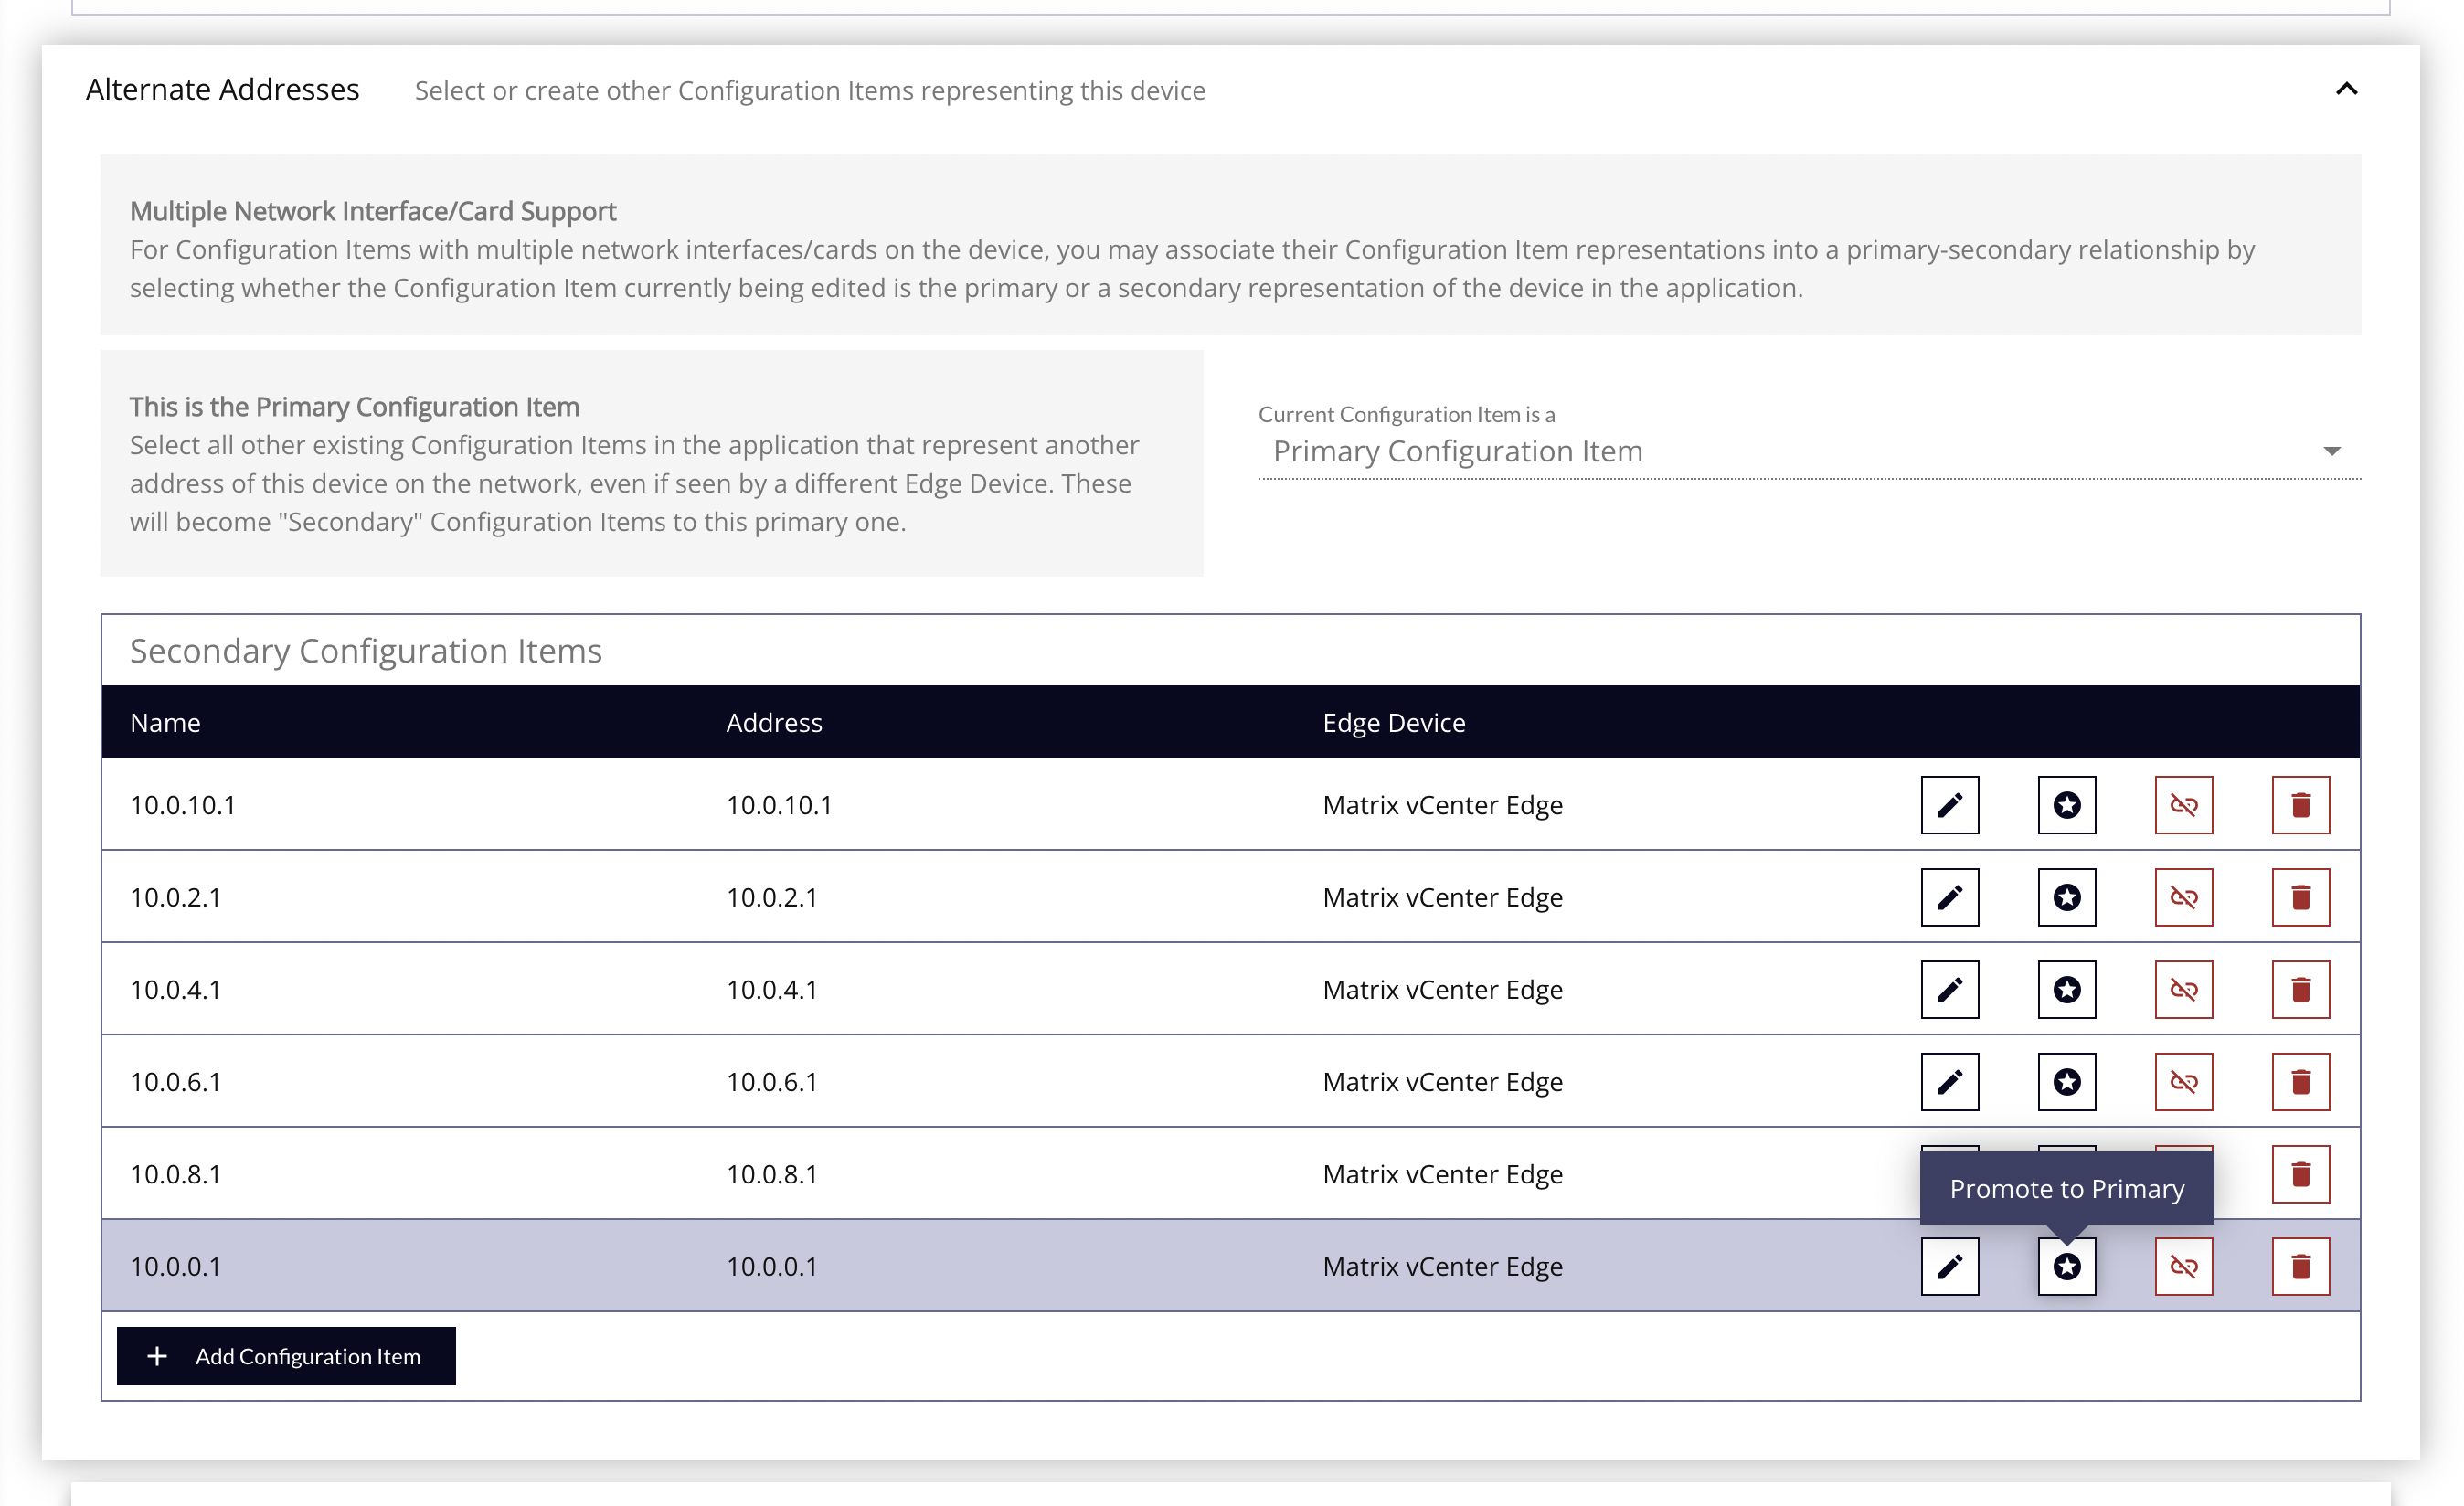
To promote a Secondary as the new Primary CI:
- Click the Promote to Primary button for the desired CI.
- Follow the modal confirmation prompts.
- The current Primary CI will be demoted, and all existing and recently added Secondary CIs will be reassigned to the new Primary CI. These will be saved in the background, and does not require the form to be saved again.
Blueprints Panel
Associate Blueprints to a CI to easily assign, change, or remove Attributes, Event Definitions, and other Blueprint-related data points.

Linked Blueprints - Click on the Edit button to add/remove blueprints that will be applied to this CI, once saved. When you link a blueprint to a CI, that CI inherits all defined blueprint elements and can be managed via this association. This is a quick way to start collecting data with your configuration.
Connection Credentials Panel
Linking a CI to stored credentials will allow attributes within this CI to connect to the device and collect data. Depending on the type of attribute used (SNMP, LDAP, NetApp, etc), you must provide the right type of credential. For example, to use the VM attributes, such as "vm_guest_cpu_host_util" will require connectivity to the VMWare API to collect this metric. The CI must have the reference link to the VM connection credential. Select one of the Credential connections from the list shown on the horizontal bar.
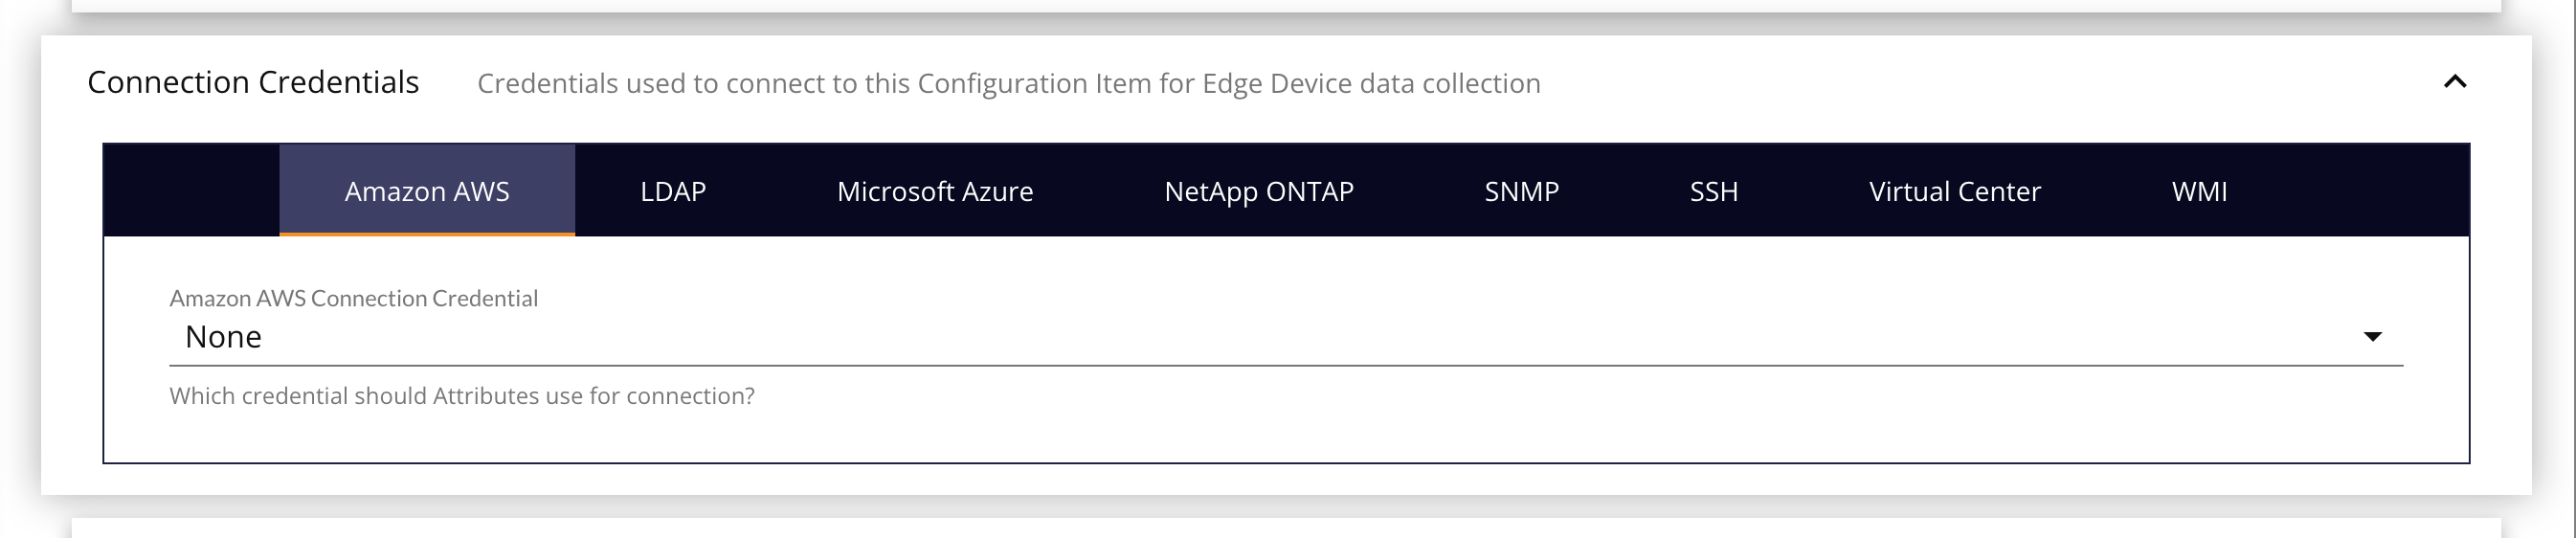
- Amazon AWS Credential - An AWS credential allows SDDM to connect to your AWS environment. You will be required to supply a Region Endpoint, an Access Key ID and a Secret Access Key.
- LDAP Connection - A LDAP access credentials allow attributes to connect to the LDAP service. User must provide login as well as binding information. Use with "ldap_check" attributes.
- NetApp ONTAP - This access credentials allow attributes to connect directly to the NetApp device and determine data relationships. Use with NetApp Check attribute type. (Ex. "netapp_perf")
- SNMP Credential - SNMP access credentials allow attributes to connect to the SNMP enabled devices. User must provide community
- SSH - SSH Access Credential allows you to connect to your Device via SSH. You will be required to supply a Username and Password and a Passphrase (if required)
- VMware Virtual Center Connection - A CI associated with a Virtual Center connection has the ability to gather Host and Guest information from your Virtual Environment (vCenter) without loading or enabling additional agents and services. This feature could also be used to gather capacity information across your virtual infrastructure. Virtual Center Infrastructure Client Name – used as the unique lookup to locate the associated virtual center host or guest. Use with VM Center, Host and Guest attributes.
- WMI - Allows you to connect to Active Directory via WMI. You are required to supply a Username and a Password.
Discovery Panel
Use this panel to configure a quick Network Discovery Job to scan the single CI with some default scan settings.
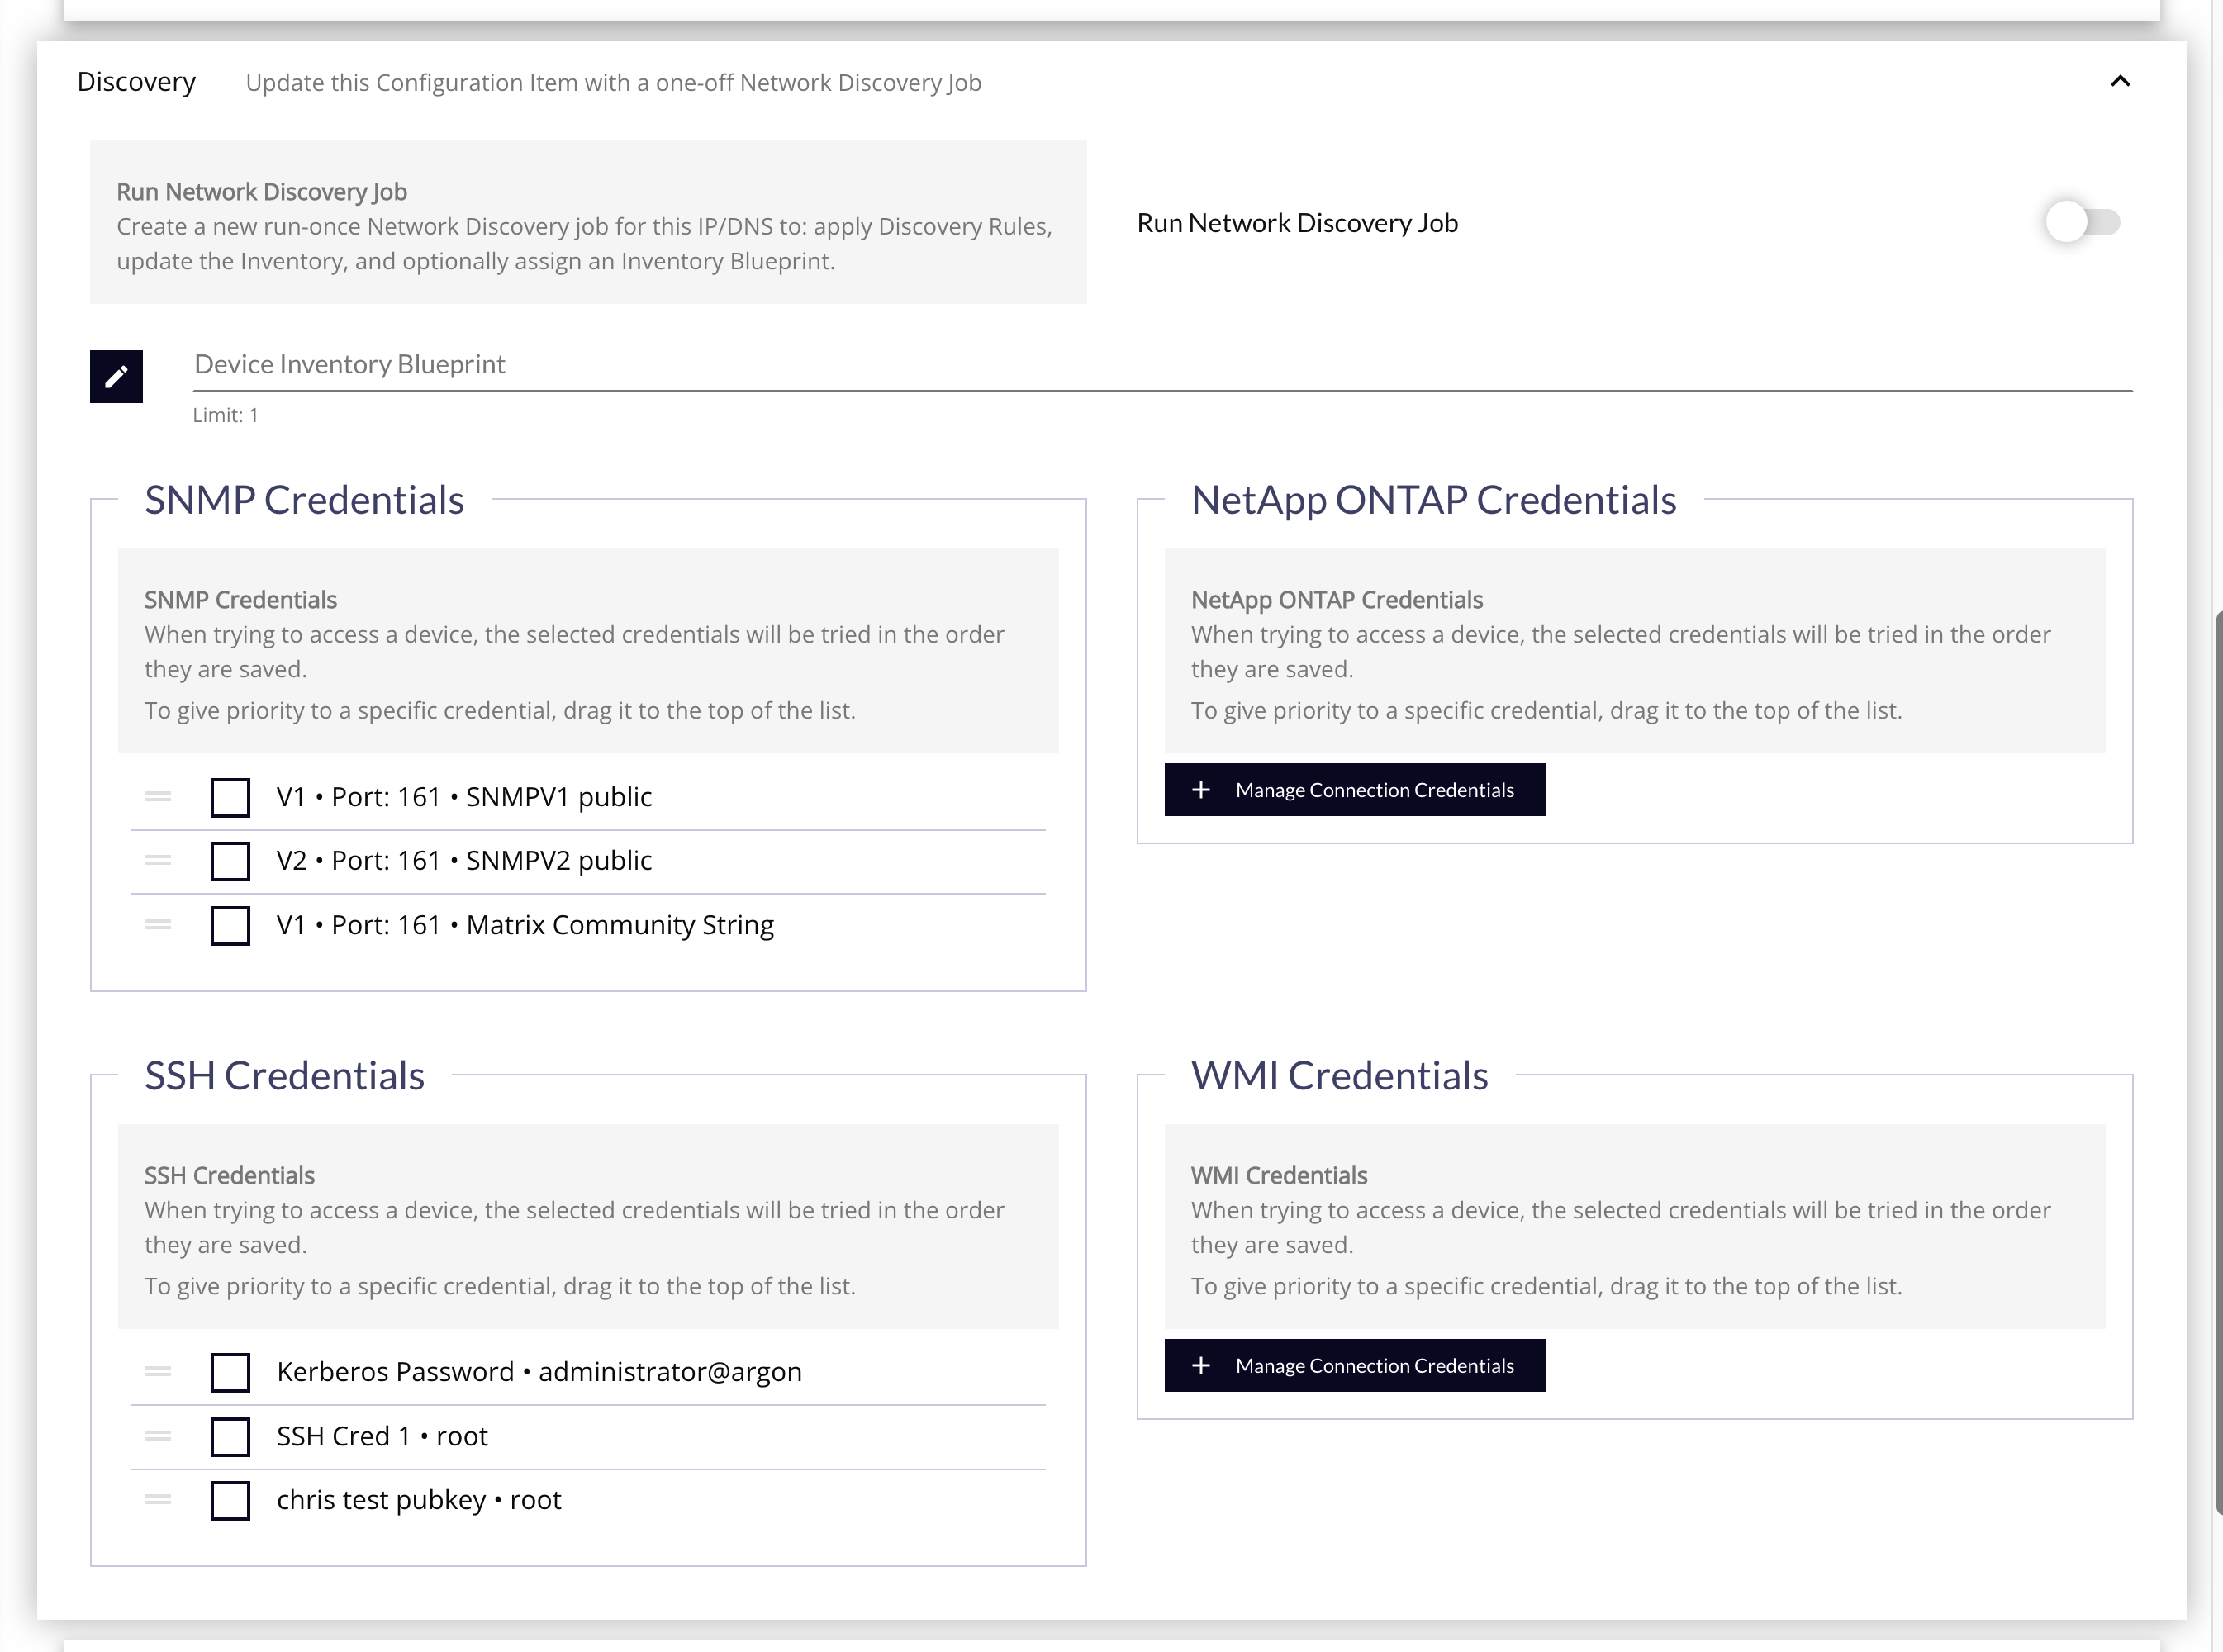
- Device Inventory Blueprint - Click on the edit button to select a blueprint. The Blueprint linked to this CI will try to expand dynamic elements with appropriate macros.
- Run Discovery Job - Select this to immediately run the Discovery Job after it is saved.
- SNMP Credentials - SNMP access credentials allows attributes to connect to the SNMP device.
- NetApp ONTAP Credential - NetApp ONTAP access credentials allows attributes to connect to the NetApp device and determine data relationships.
- SSH Credentials - Allows you to connect to servers in your environment via SSH
- WMI Credentials - Allows you to connect to your Active Directory environment.
Group Memberships Panel
Quickly see, and optionally change, the group memberships for the CI to keep it organized.
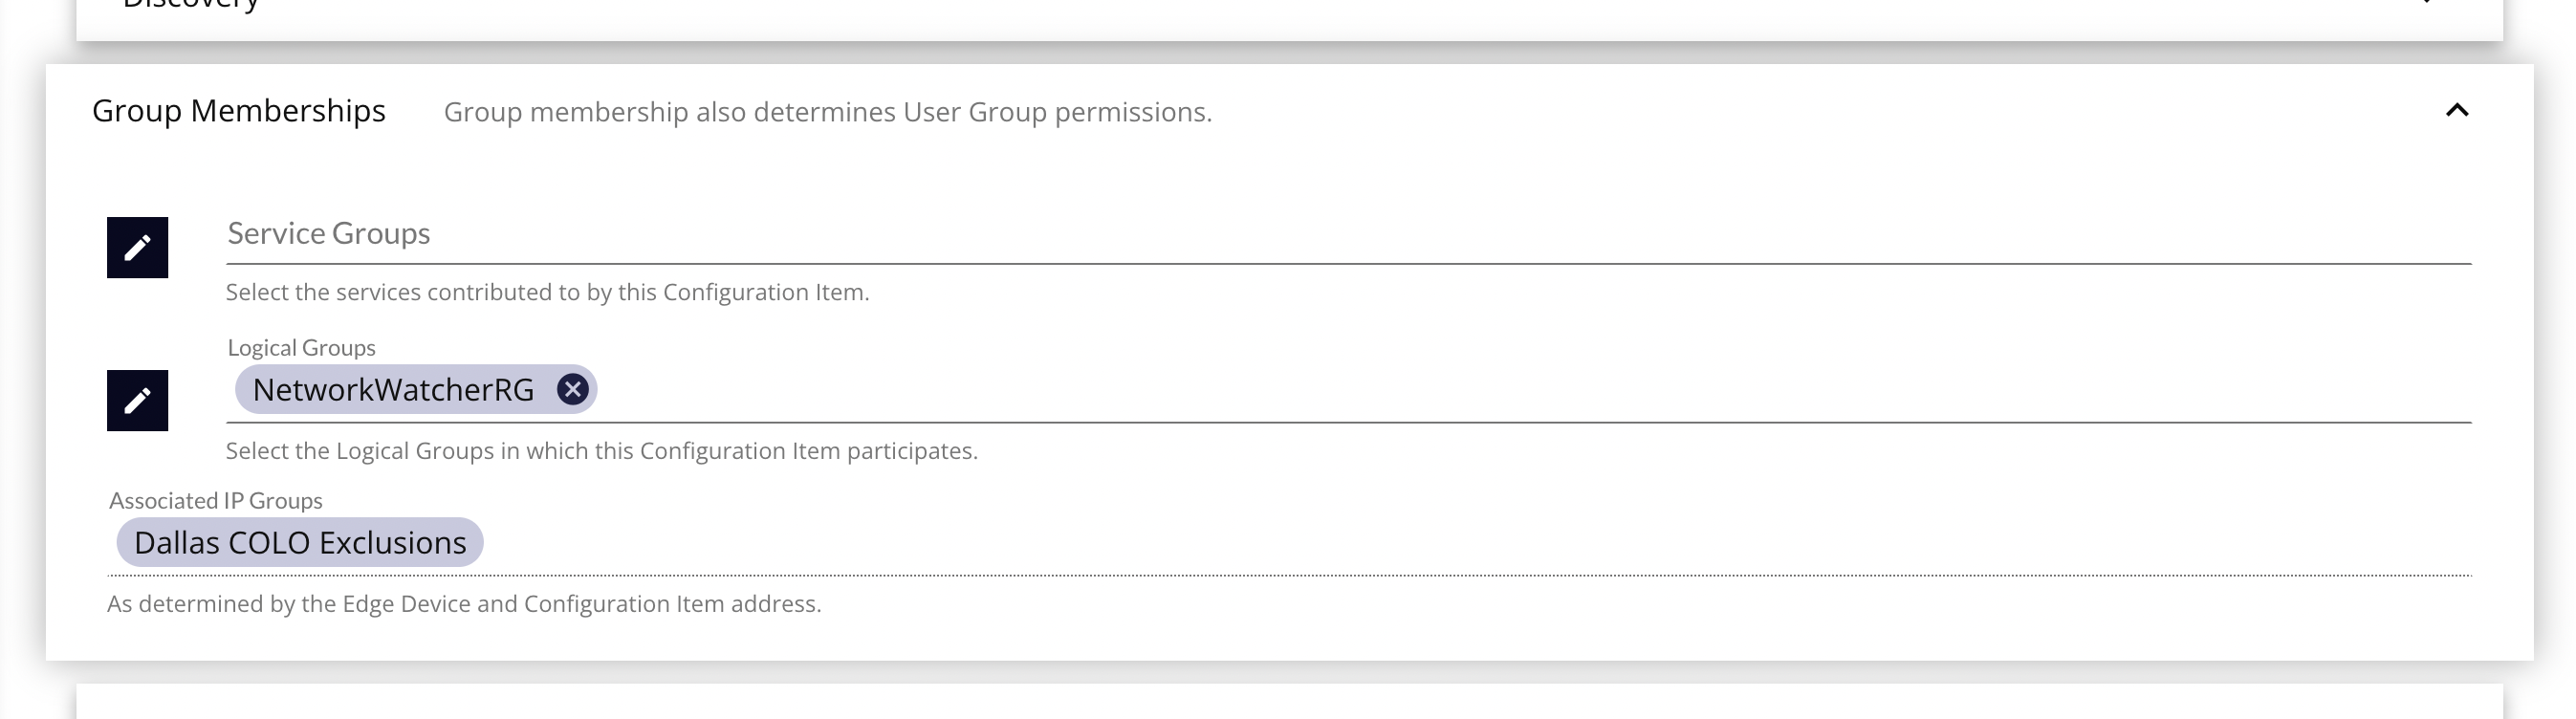
- Service Group - Grouping of CIs based on functionality or service provided by CIs. User groups linked to a Service Group will allow users access to all Logical Groups, CIs and related elements (attributes) under that Service Group & its Logical Groups.
- Logical Group – Grouping of CIs based on location, type of hardware, or another common factor between CIs. User groups linked to a Logical Group will allow users access to all CIs and related elements (attributes) under that Logical Group.
- Associated IP Groups – IP Groups are automatically associated to CIs based on the addresses configured in the group, and the addresses configured on the CI. As these are passive associations, they cannot be directly edited or changed, except by changing the addresses used in the IP Group.
Inventory Panel
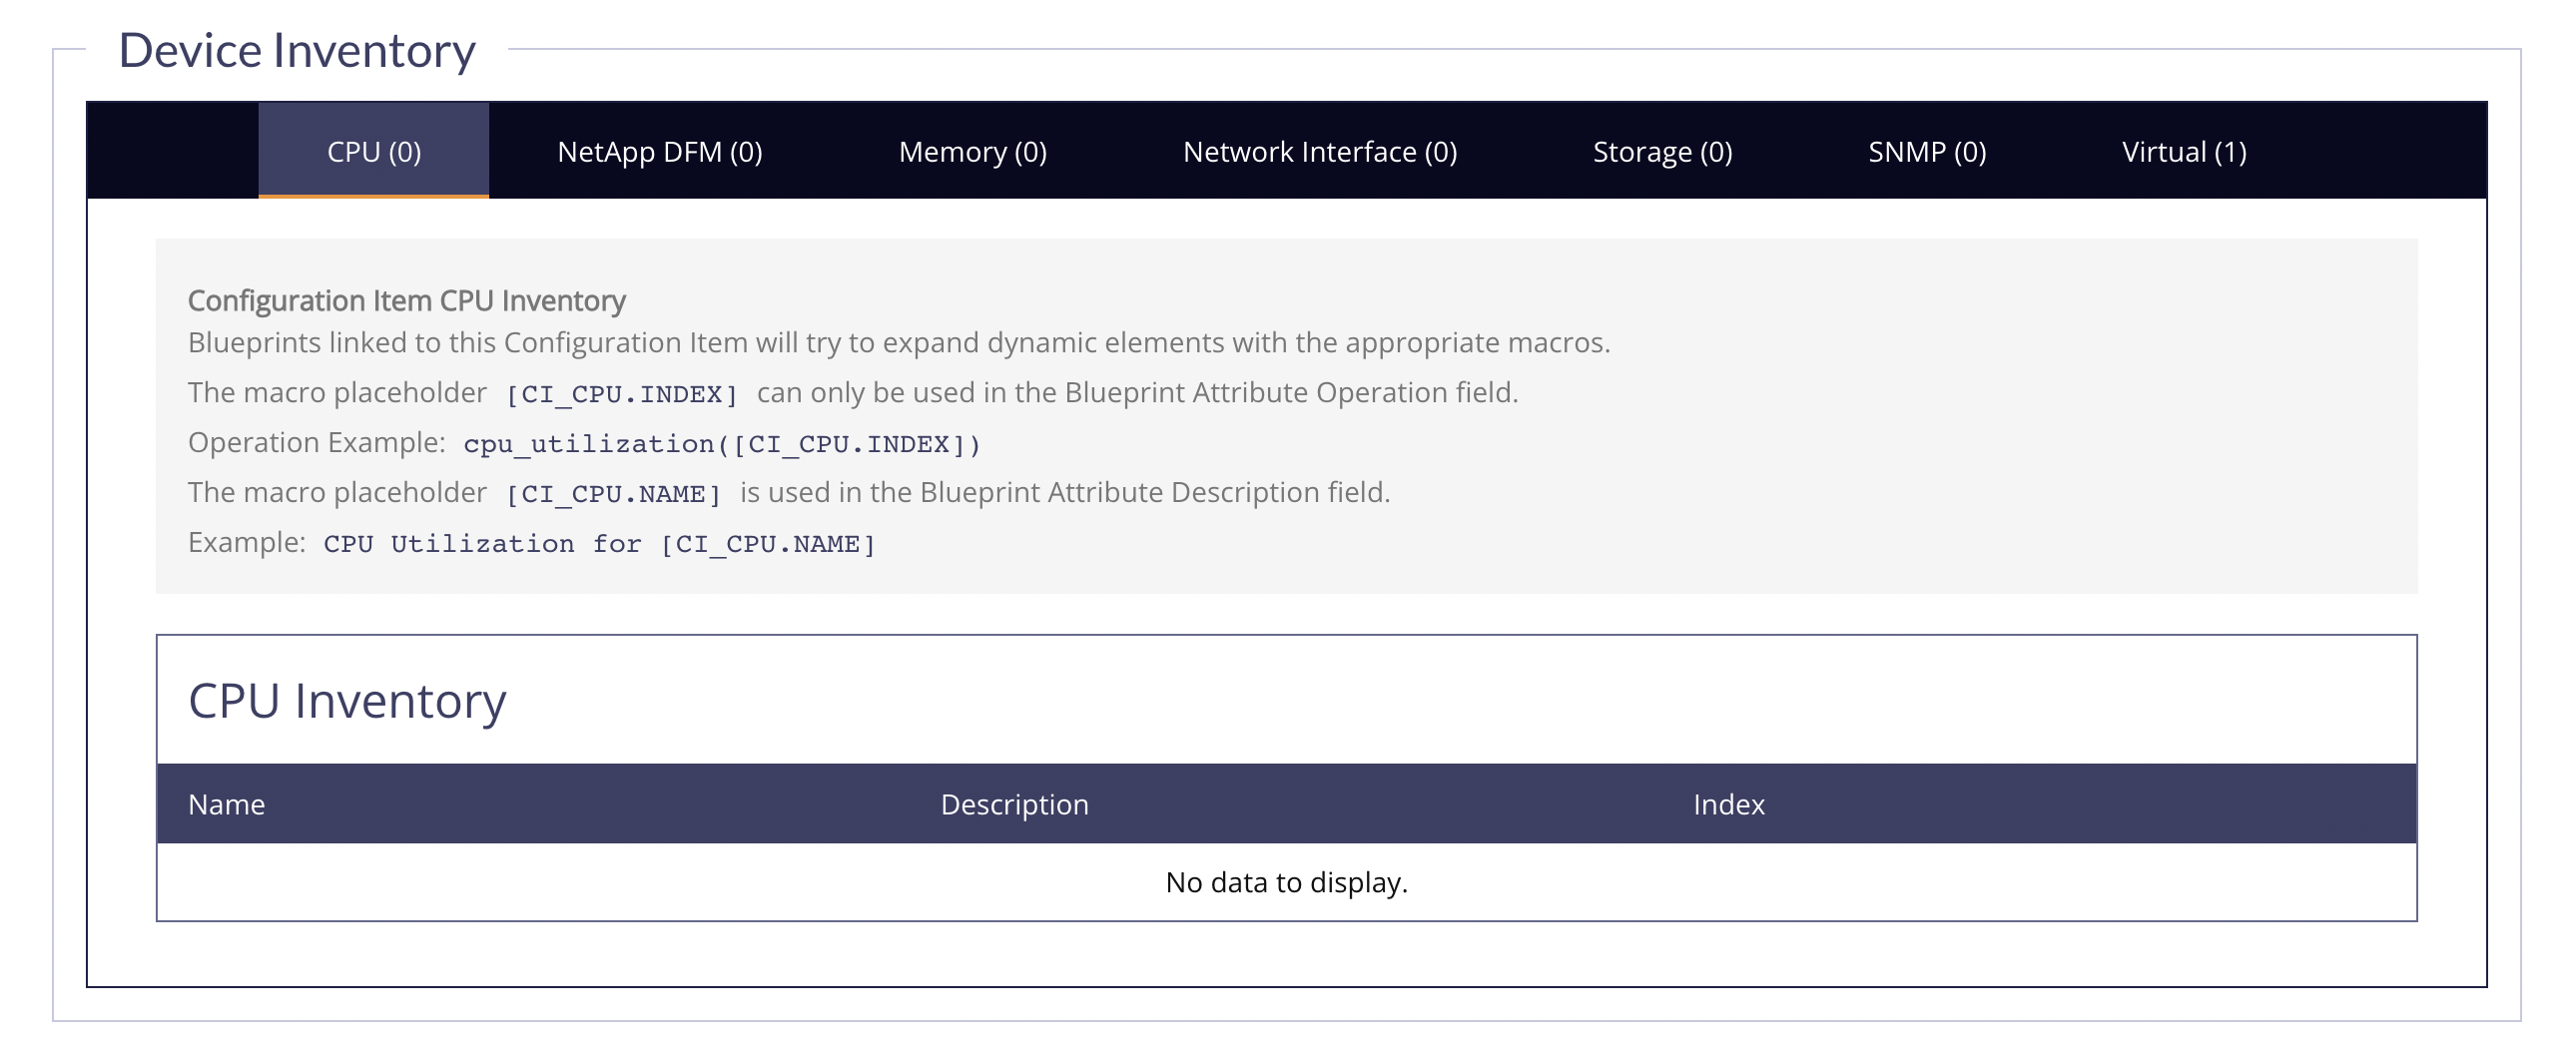
Device Inventory
This section contains an enumeration of the various bits of hardware that was found during the different types of discovery jobs run over the CI.
CMDB Inventory
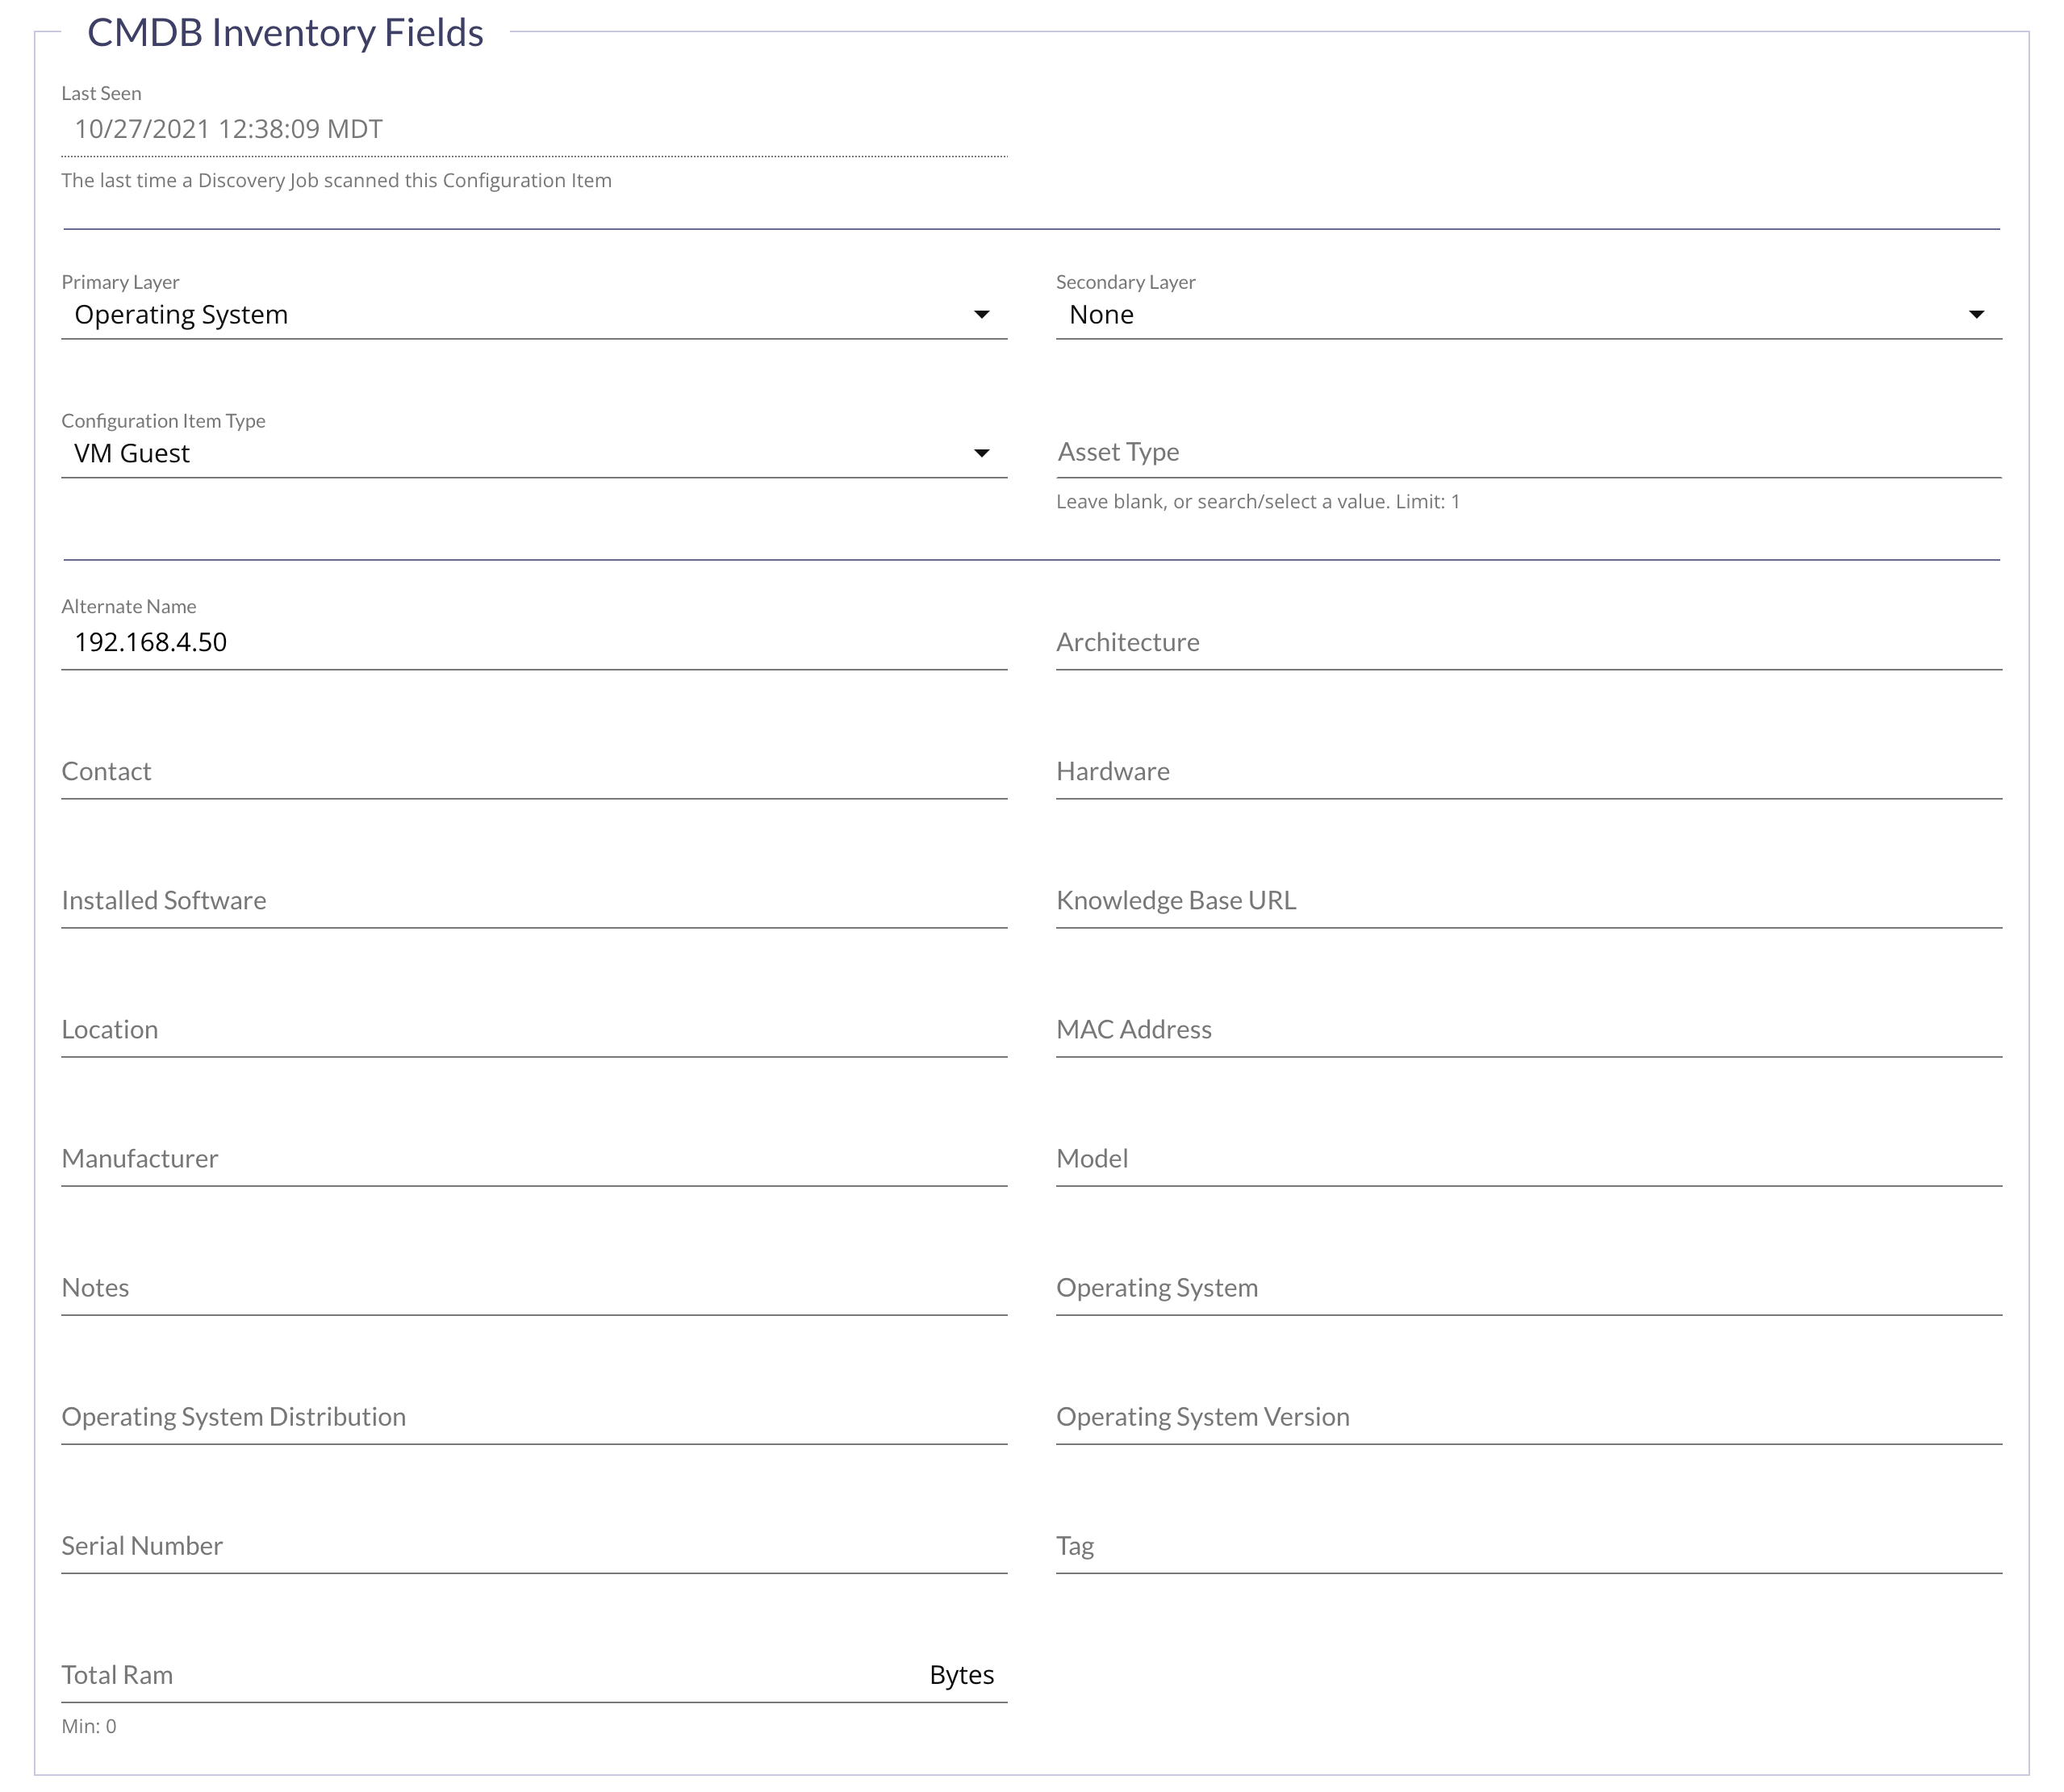
This section contains some manual entry, discovery-derived, and agent/attribute returned data that would be used to populate a CMDB. This data is then made available for CMDB Federation field mapping.
Read-Only CMDB Inventory Fields
- Last Seen – The last time FireScope scanned this Configuration Item with a Load Balancer or Network Discovery Job.
Required CMDB Inventory Fields
- Primary Layer – This is the type of function a CI supports in your defined service. For example, your network file server CIs for your CRM system should have the stack layer of
Storage. In various views throughout the application, we will use this identifier to help indicate your issues. - Secondary Layer – Same as the primary layer, but a secondary function, and optionally populated.
- Configuration Item Type – CI Types let you classify Configuration Items for reporting and other filtered views.
- Asset Type – The lower level of CI/device type. For example, if you have CI Type of
Networkthen you could set the Asset Type toRouterorSwitchaccordingly.
Optional CMDB Inventory Fields
- Alternate Name
- Architecture
- Contact
- Hardware
- Installed Software
- Knowledge Base URL
- Location
- MAC Address
- Manufacturer
- Model
- Notes
- Operating System
- Operating System Distribution
- Operating System Version
- Serial Number
- Tag
- Total Ram (Bytes)
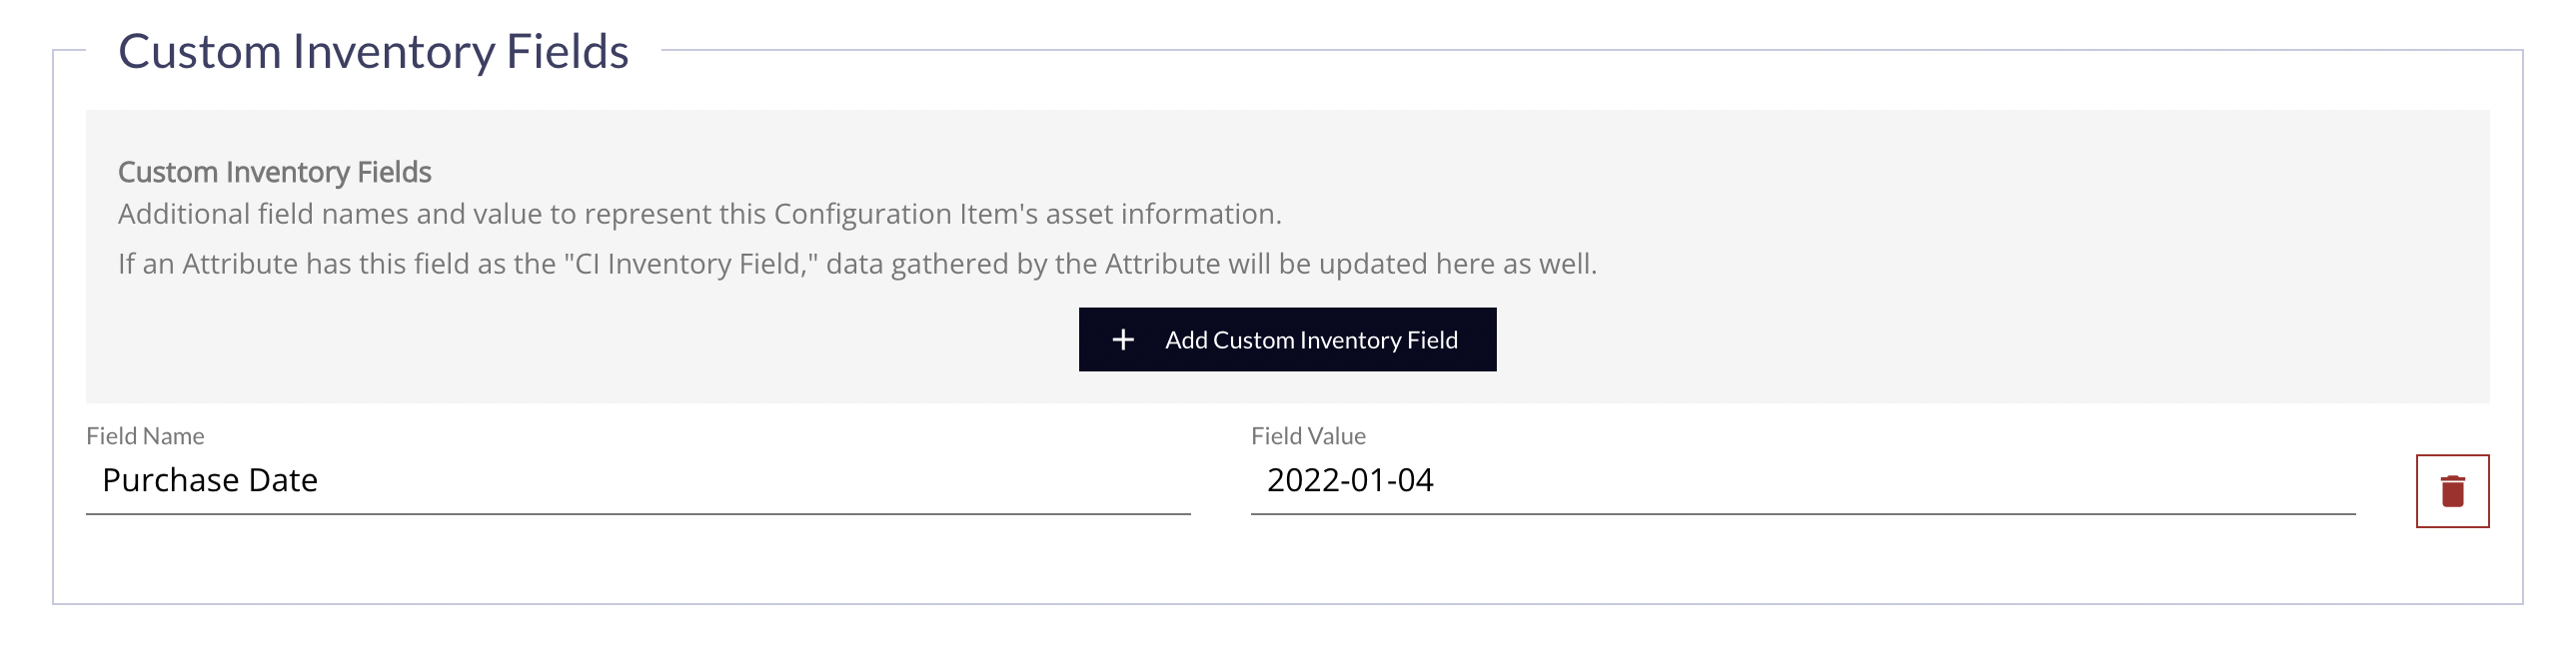
Custom Inventory Fields
You may create additional fields with custom names and values to populate manually, or via Attribute profile field targets. These will also be made available for CMDB Federation, in most cases.
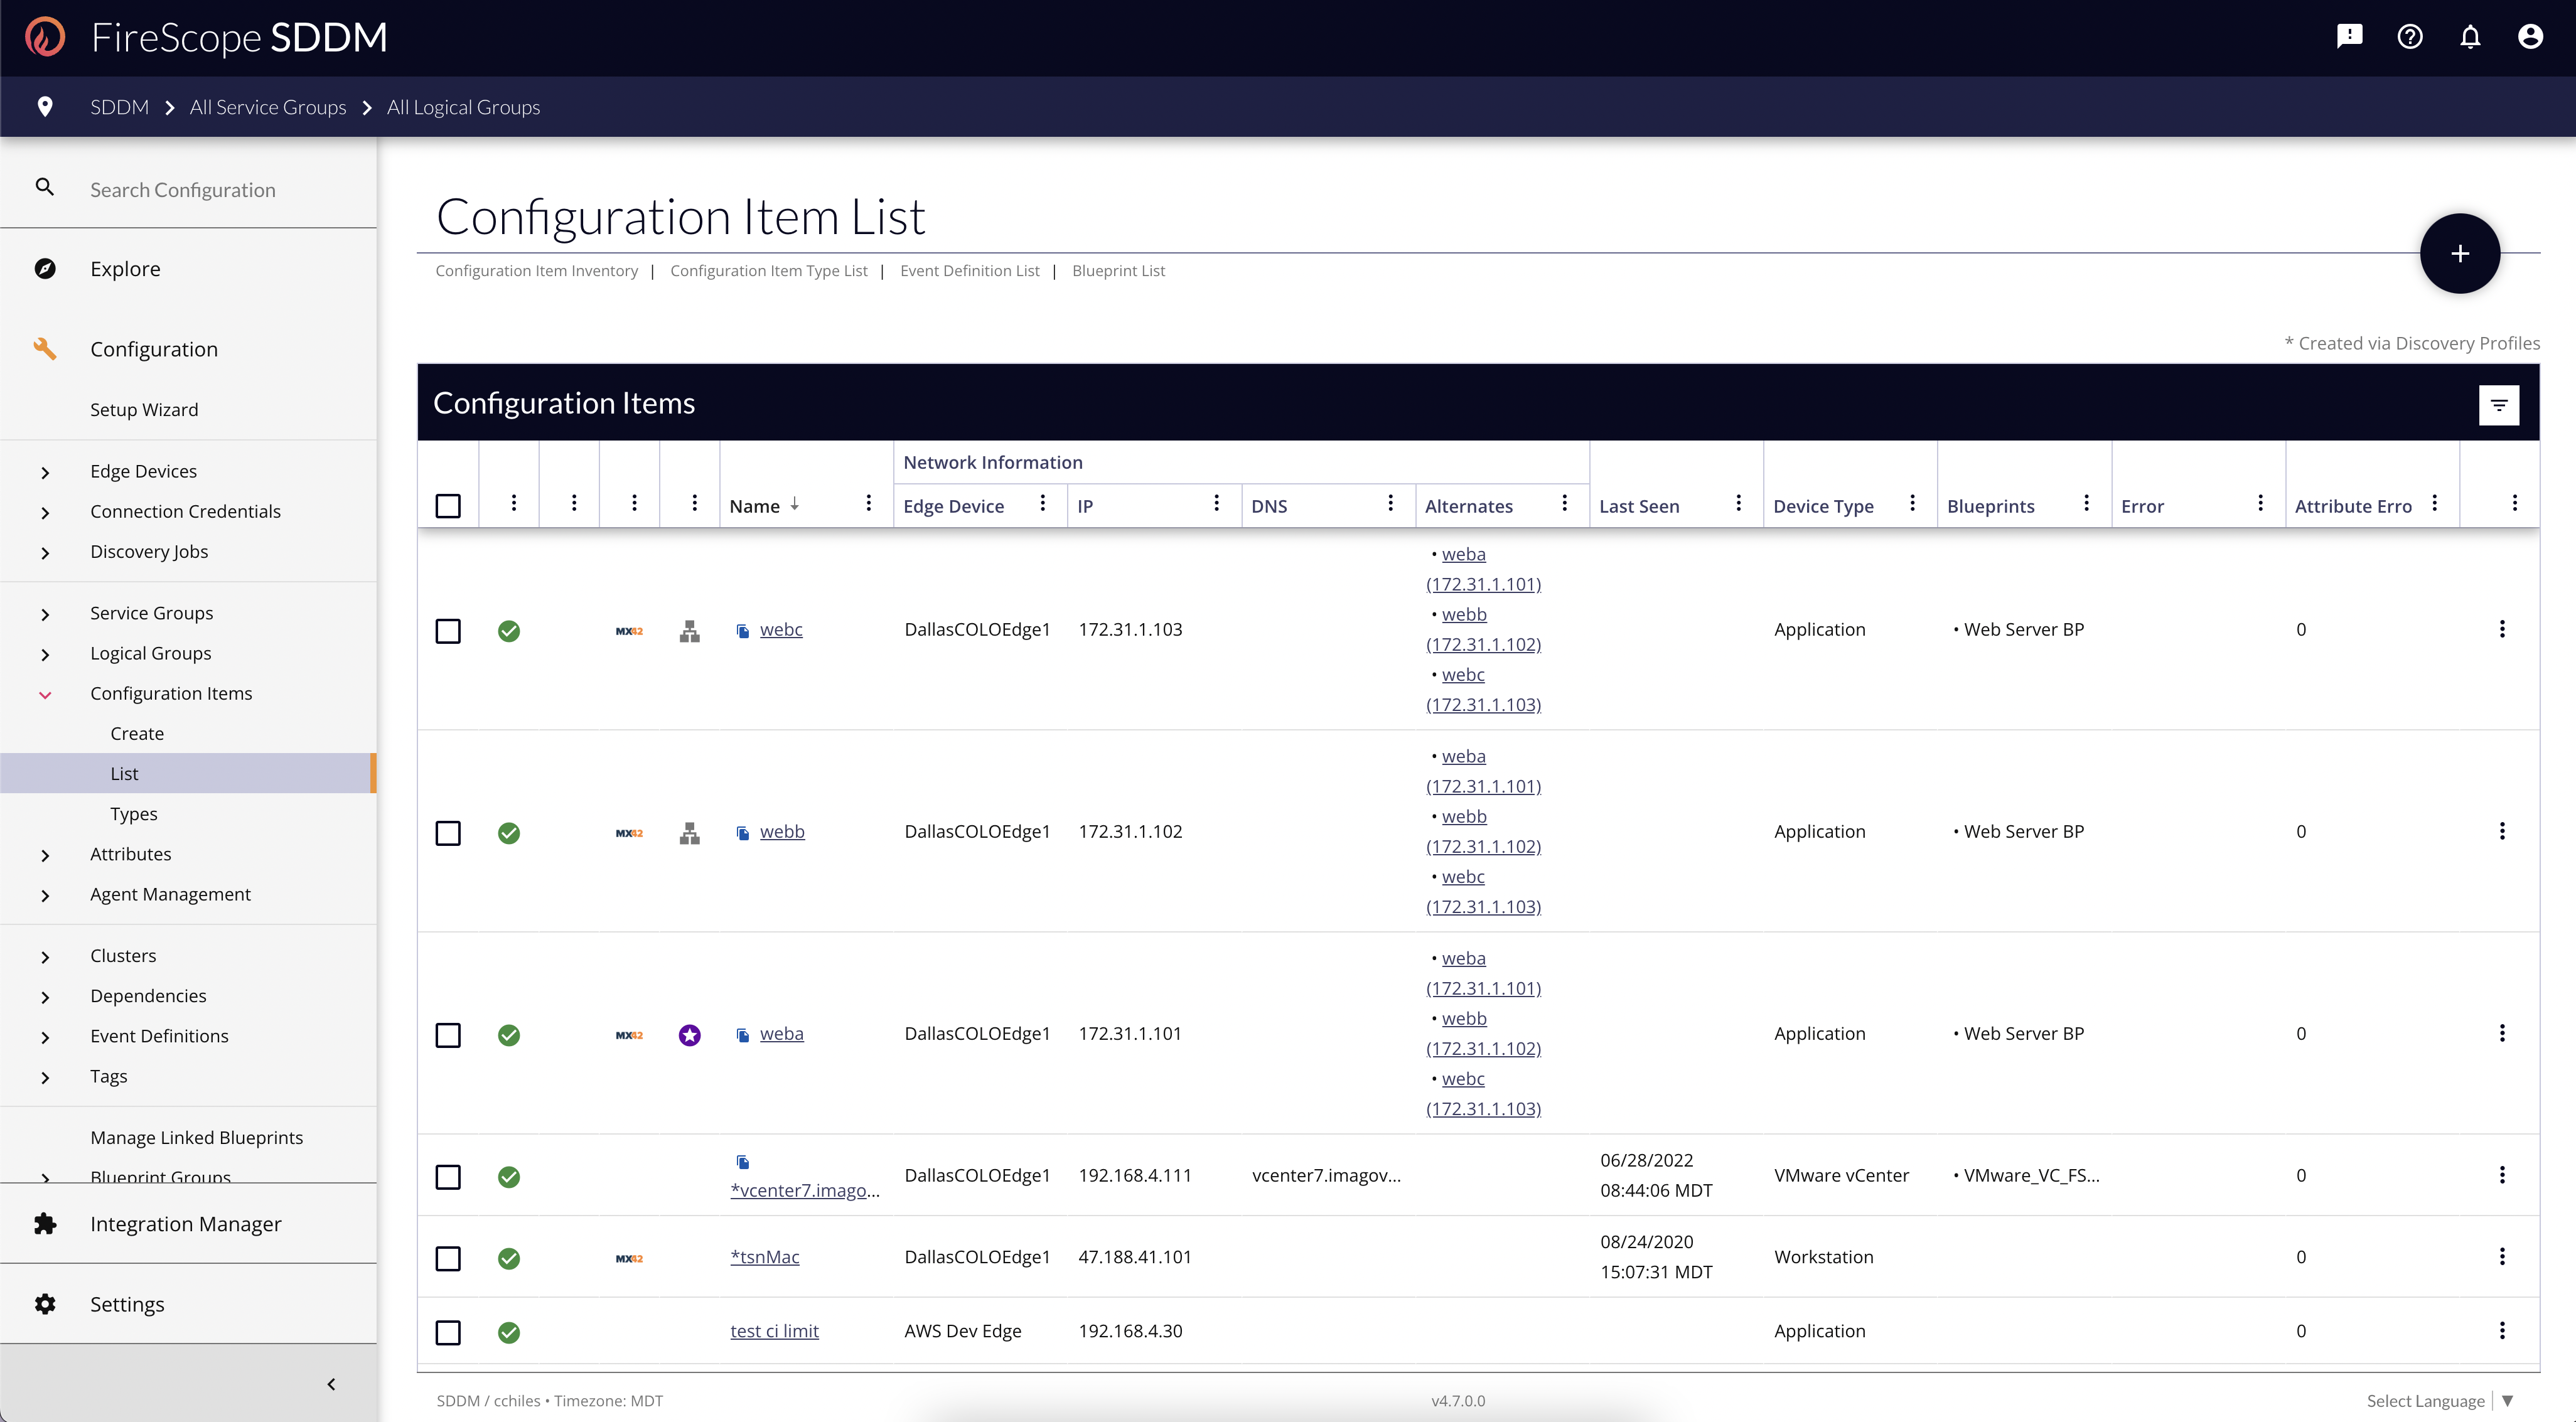
CI List & Change Actions
Click Configuration > Configuration Items > List and the Configuration Item List page will be displayed.
Editing a CI
- Find the Name of the CI you are interested in through scrolling, pagination, filtering, or sorting.
- Click the name of the CI.
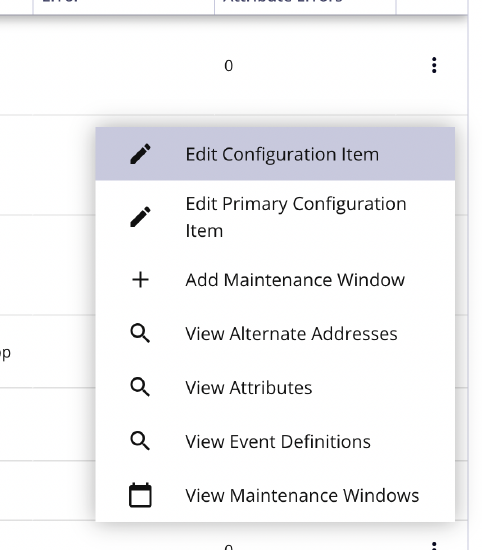
CI Change Actions
Managing CIs from anywhere other than the Edit Form is called a "Change Action". There are two ways to manage CIs from the List view.
Individual Change Actions
 |
|
Bulk Change Actions
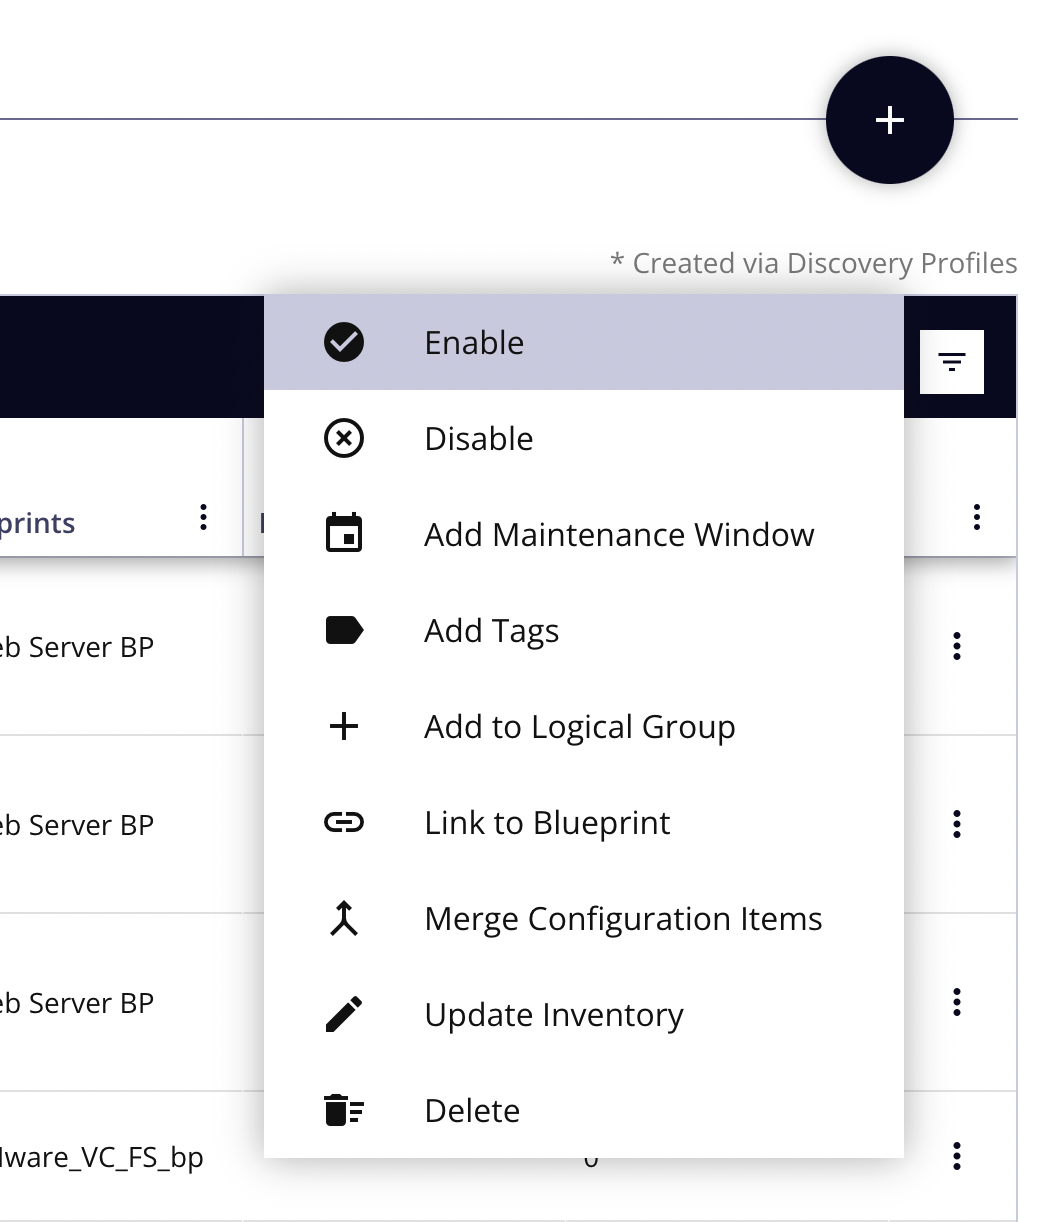 |
|
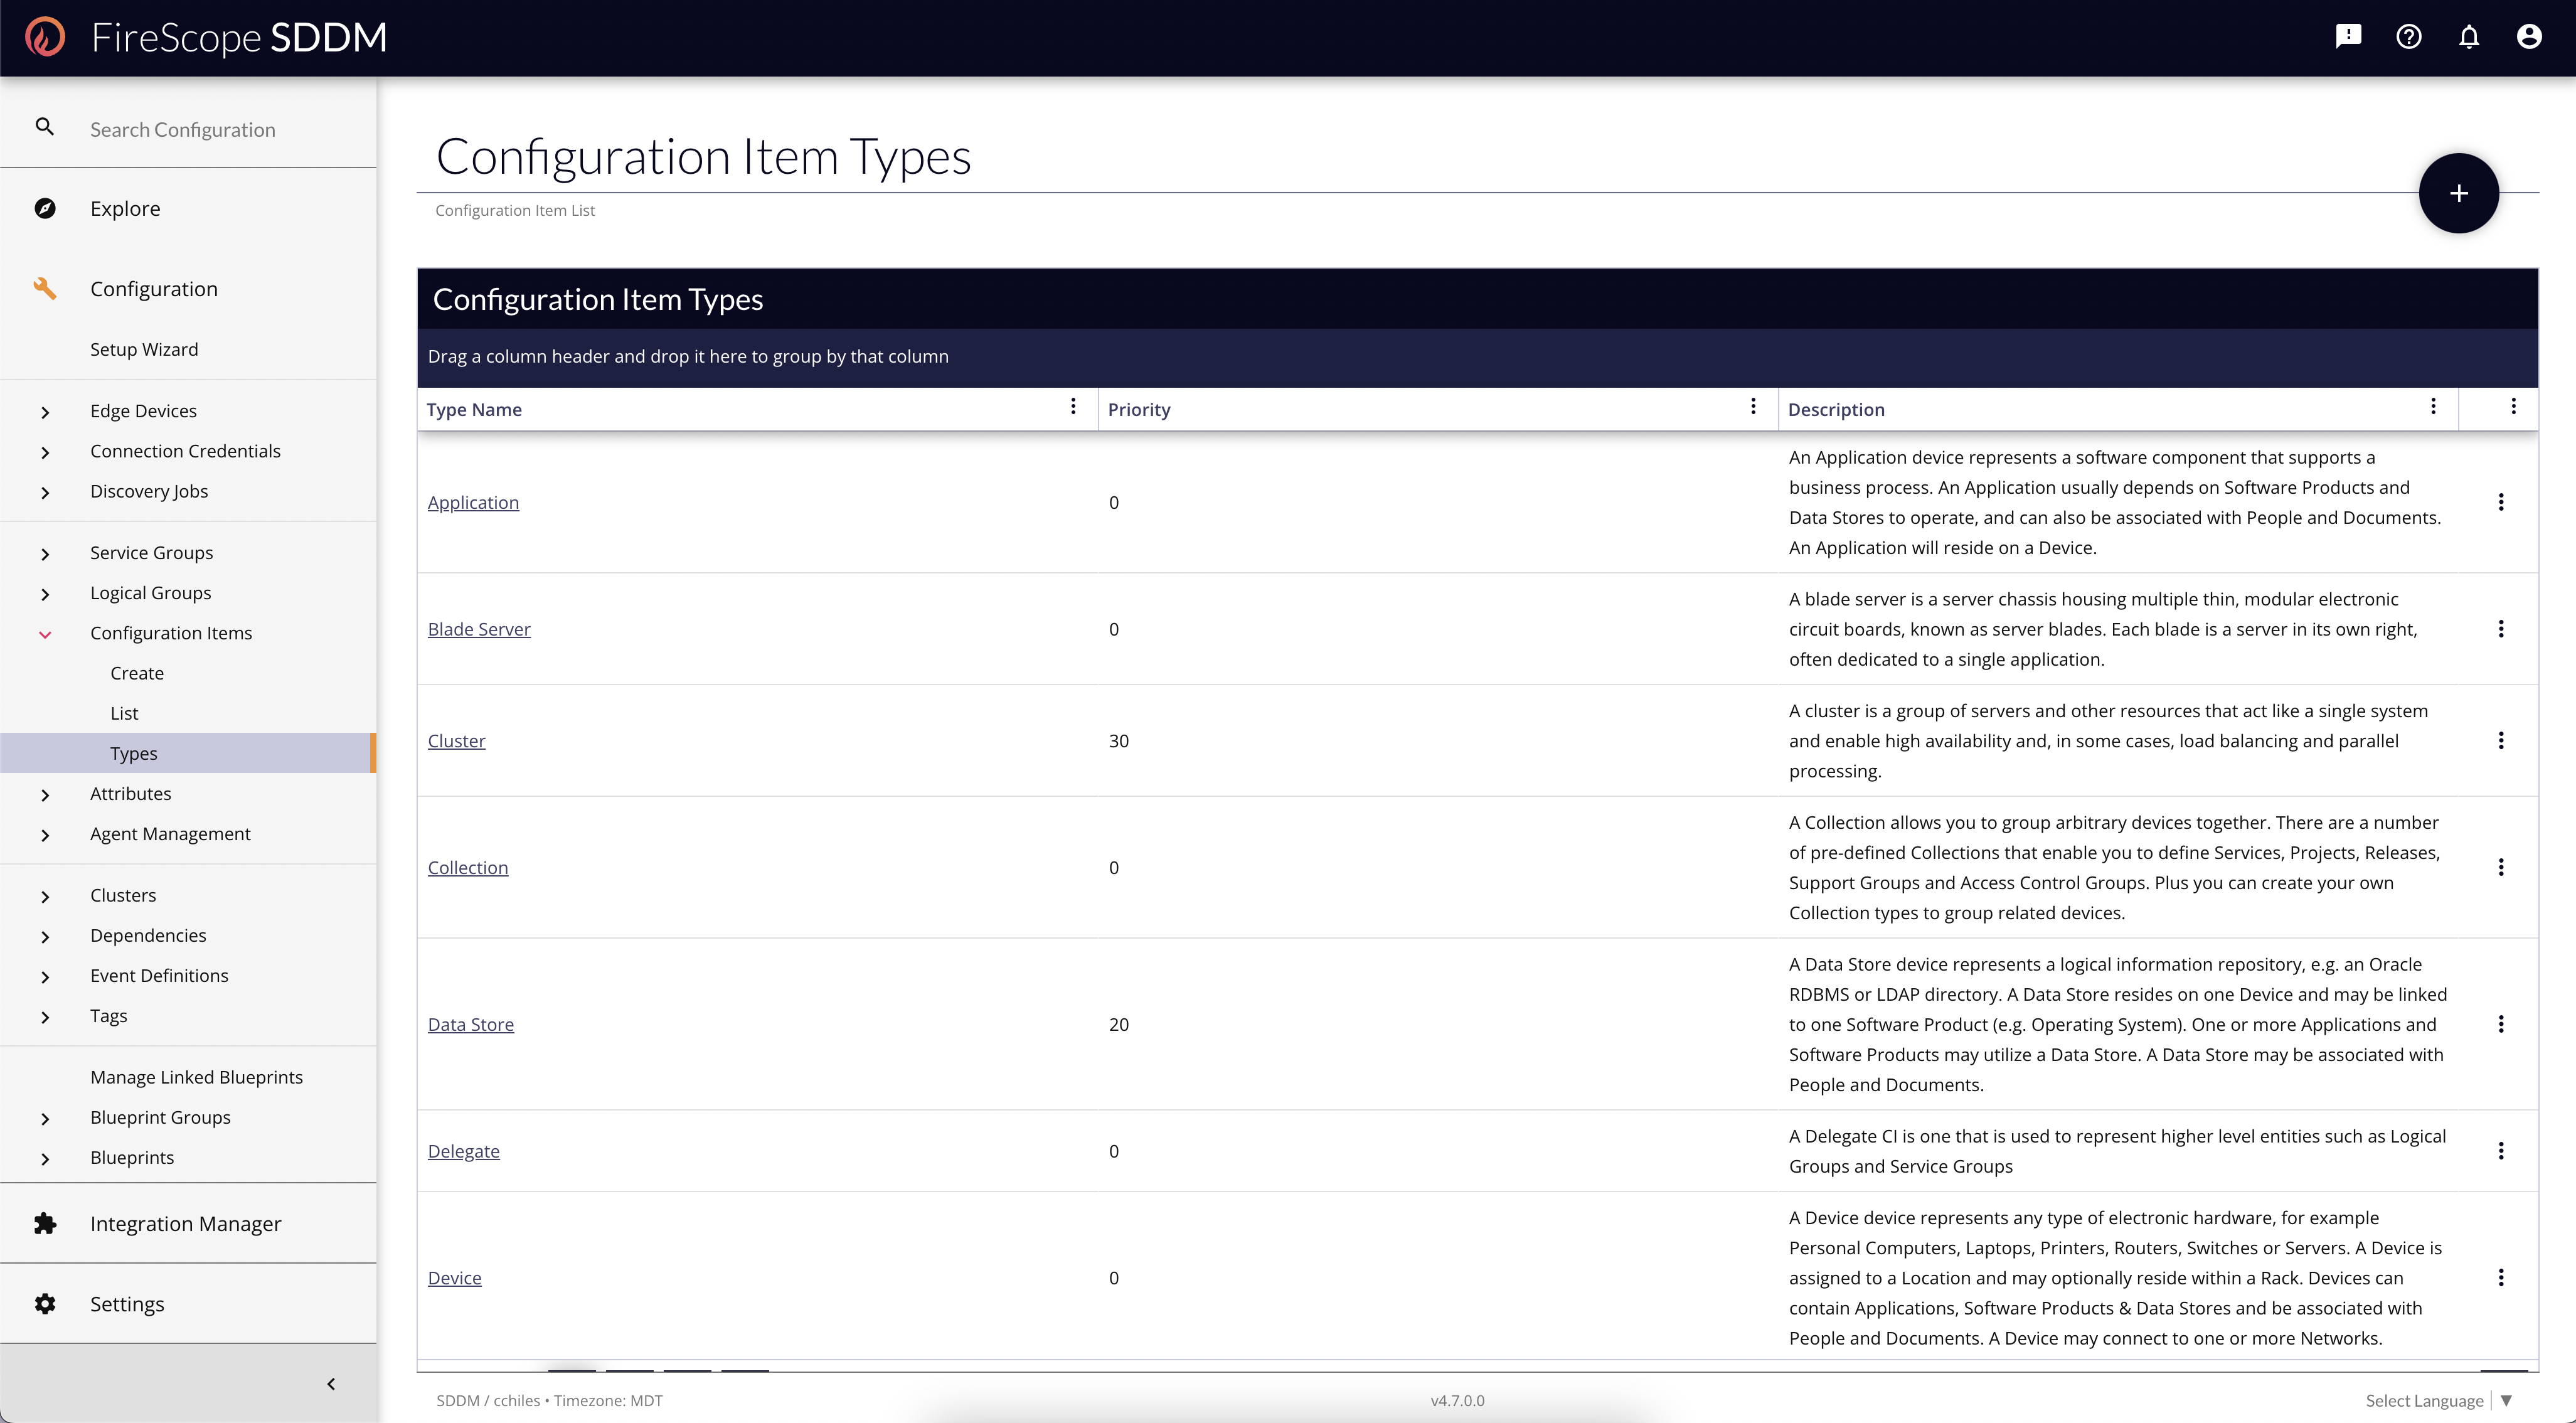
Configuration Item Types
CI Types let you classify Configuration Items for reporting and other view filters. You can edit defined types or add new types to be used.
- Click Configuration > Configuration Items > Types and the Configuration Item Types page will be displayed.
To Update CI Type
- Click on the existing CI Type Name and the CI Type form will be displayed.
- Make the necessary changes to the CI Type.
- Click the Save button.
To Create a new CI Type
- Click on the Add button (plus [
+
] sign in upper right of page) to create a new CI type and the Create CI Type page will be displayed.
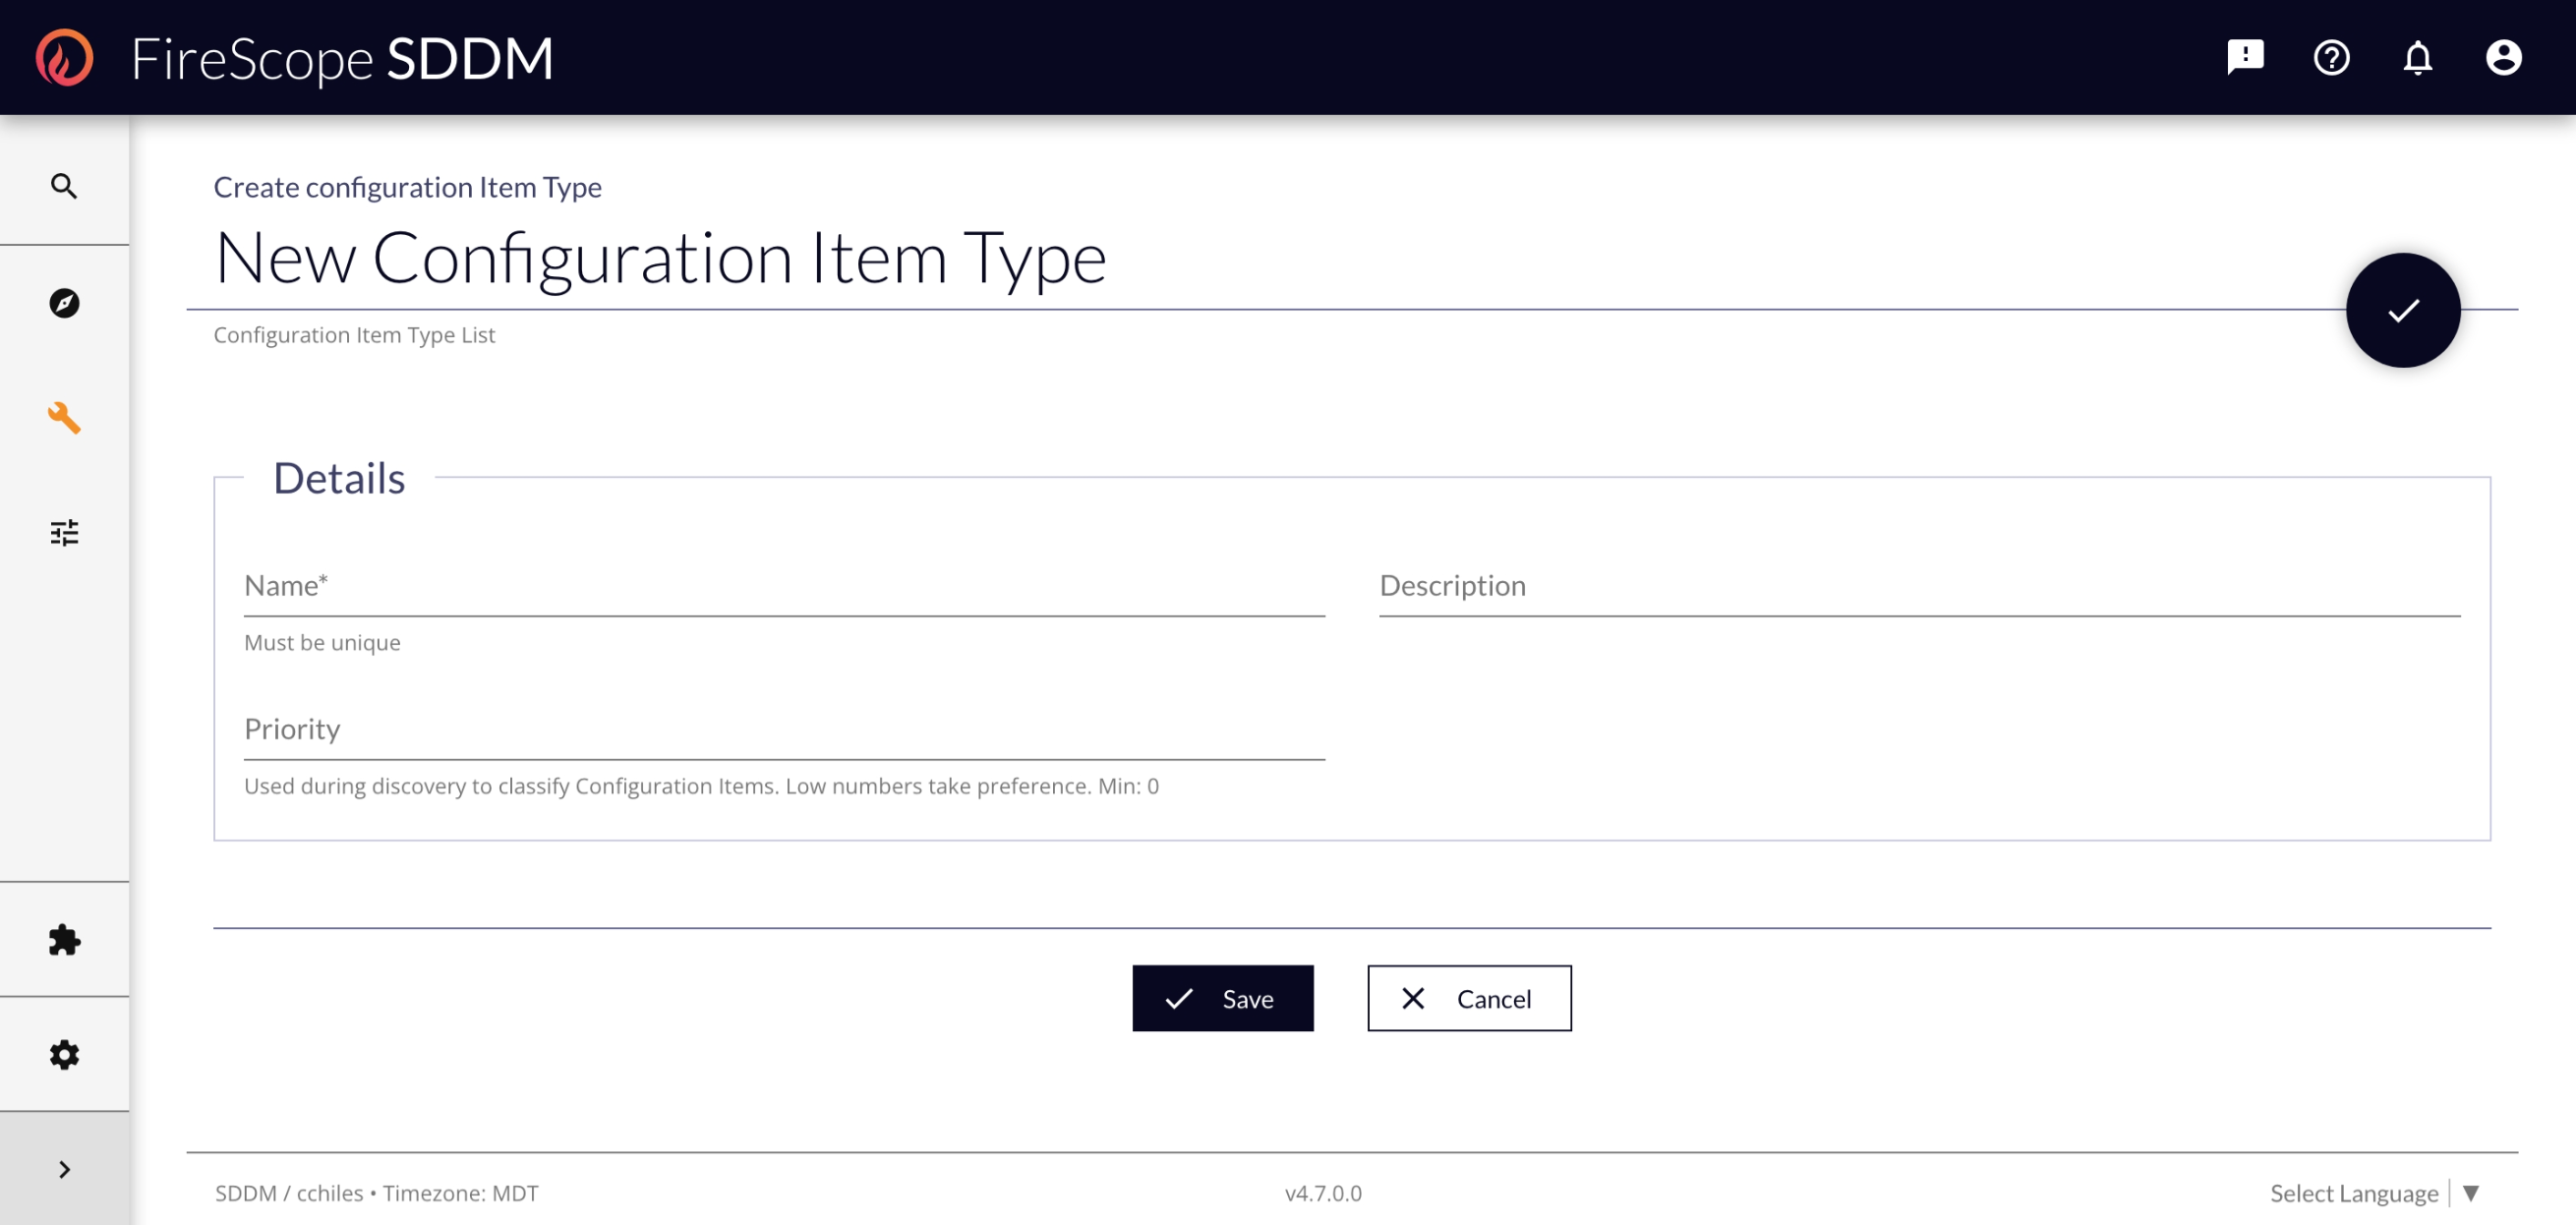
CI Type Fields
- Name - Provide a unique name for this type, as it will be referenced by text (not ID) in some features.
- Description - Provide a sufficient description for the types of devices that should receive this CI Type.
- Priority - Used during Discovery for System CI Types to determine the order in which they should be assigned. If there are some CI Types with the same priority, but are getting improperly assigned based on criteria, alter this field to make the CI Type more important if the criteria is found.