Managing change requests
Overview
Changes that are requested via the Matrix42 Self Service Portal are usually non-standard changes, where costs, risks and required activities for implementation and review are not clearly known at the time the change is requested. Therefore, they have to be analyzed in detail and approved by the Change Advisory Board before the implementation starts. Typical examples of non-standard changes are modifications in server, network or security infrastructure or the data center. These modifications mostly bear higher costs and risks and should be planned properly.
Requesting a Change
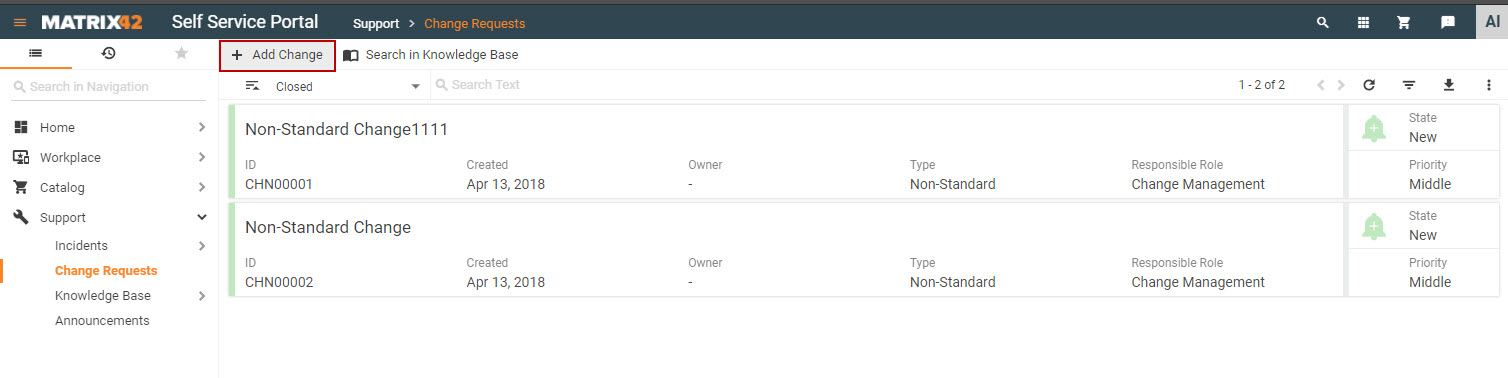
- Go to the Matrix42 Self Service Portal and click Support > Change Requests in the navigation area, then click Add Change in the toolbar located at the top of the screen.
- Enter detailed information for the change, specify Summary, add Description.
- If desired, upload attachments with further information.
- Click ADD.
Adding Comments to a Change Request
To add a comment to a change request:
- Go to the Matrix42 Self Service Portal and click Support > Change Requests in the navigation area.
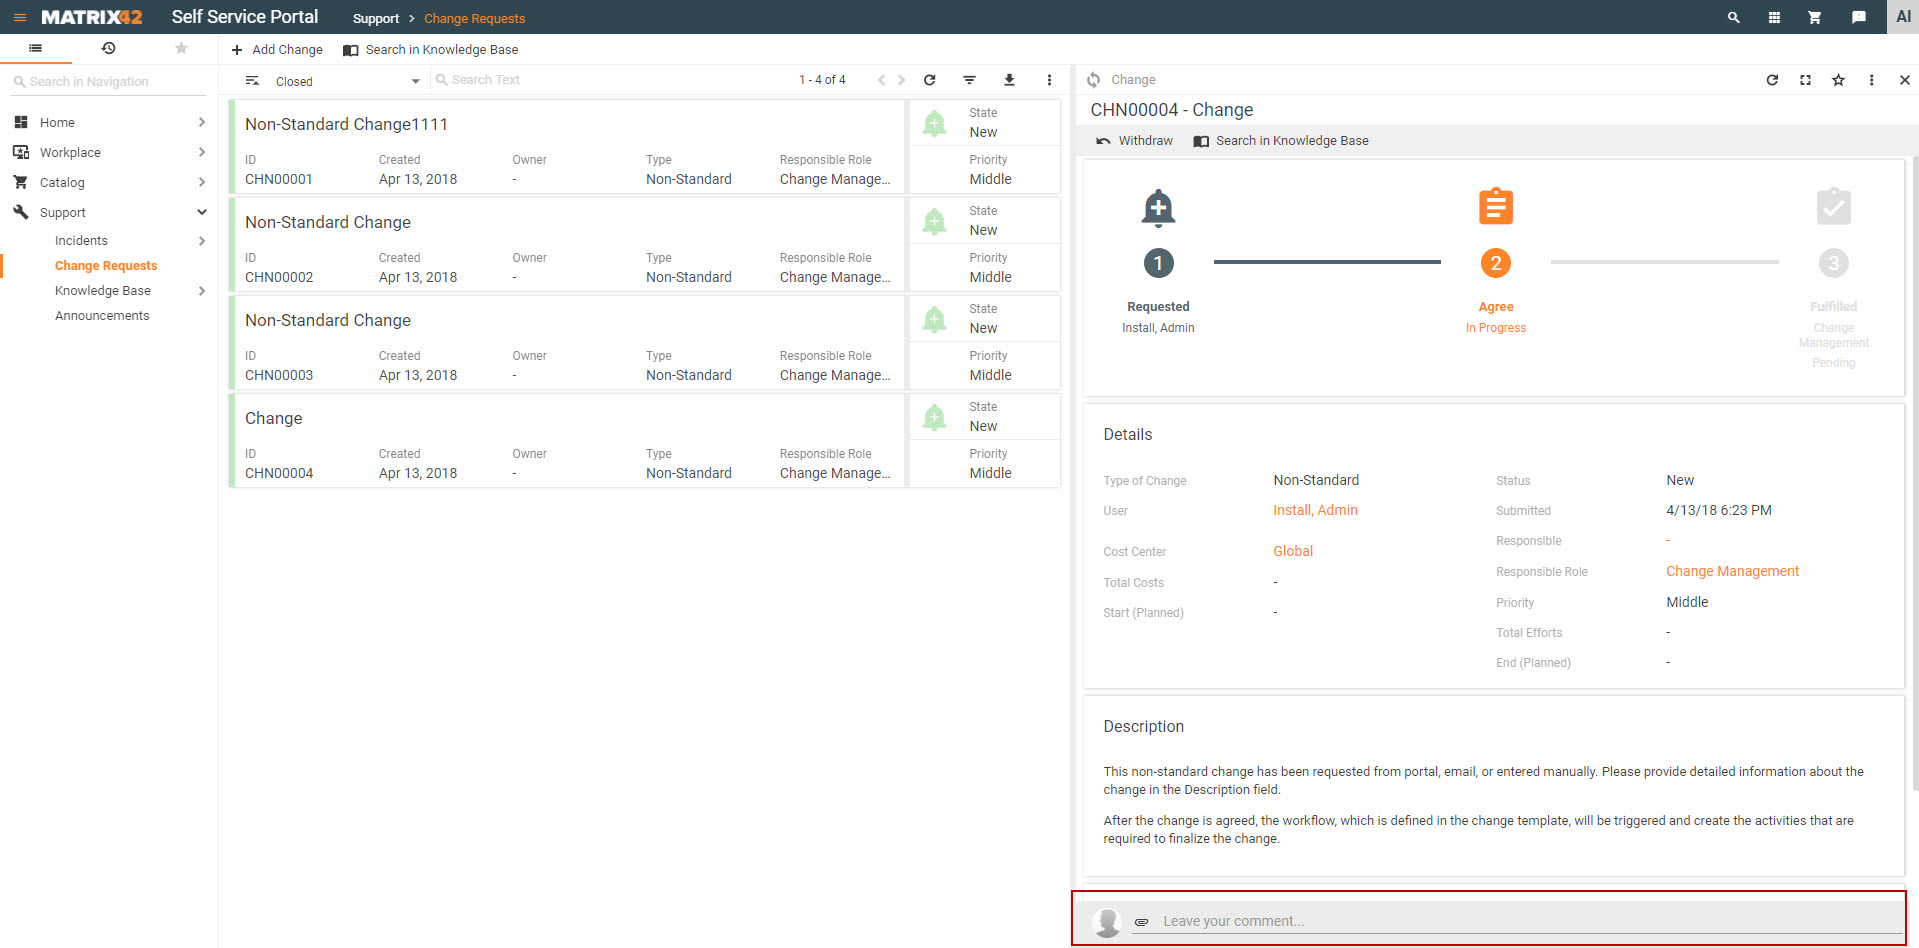
- Click a change request to open it in Preview.
- Click the Leave your comment... field.
-
Enter the comment, format the text, add links, images and media if needed, and click ADD to save the comment. TIP: leave the full screen mode to display the ADD button. The comment will be added to the Journal.
Attaching Files to a Change Request
To attach a file to a change request:
- Go to the Matrix42 Self Service Portal and click Support > Change Requests in the navigation area.
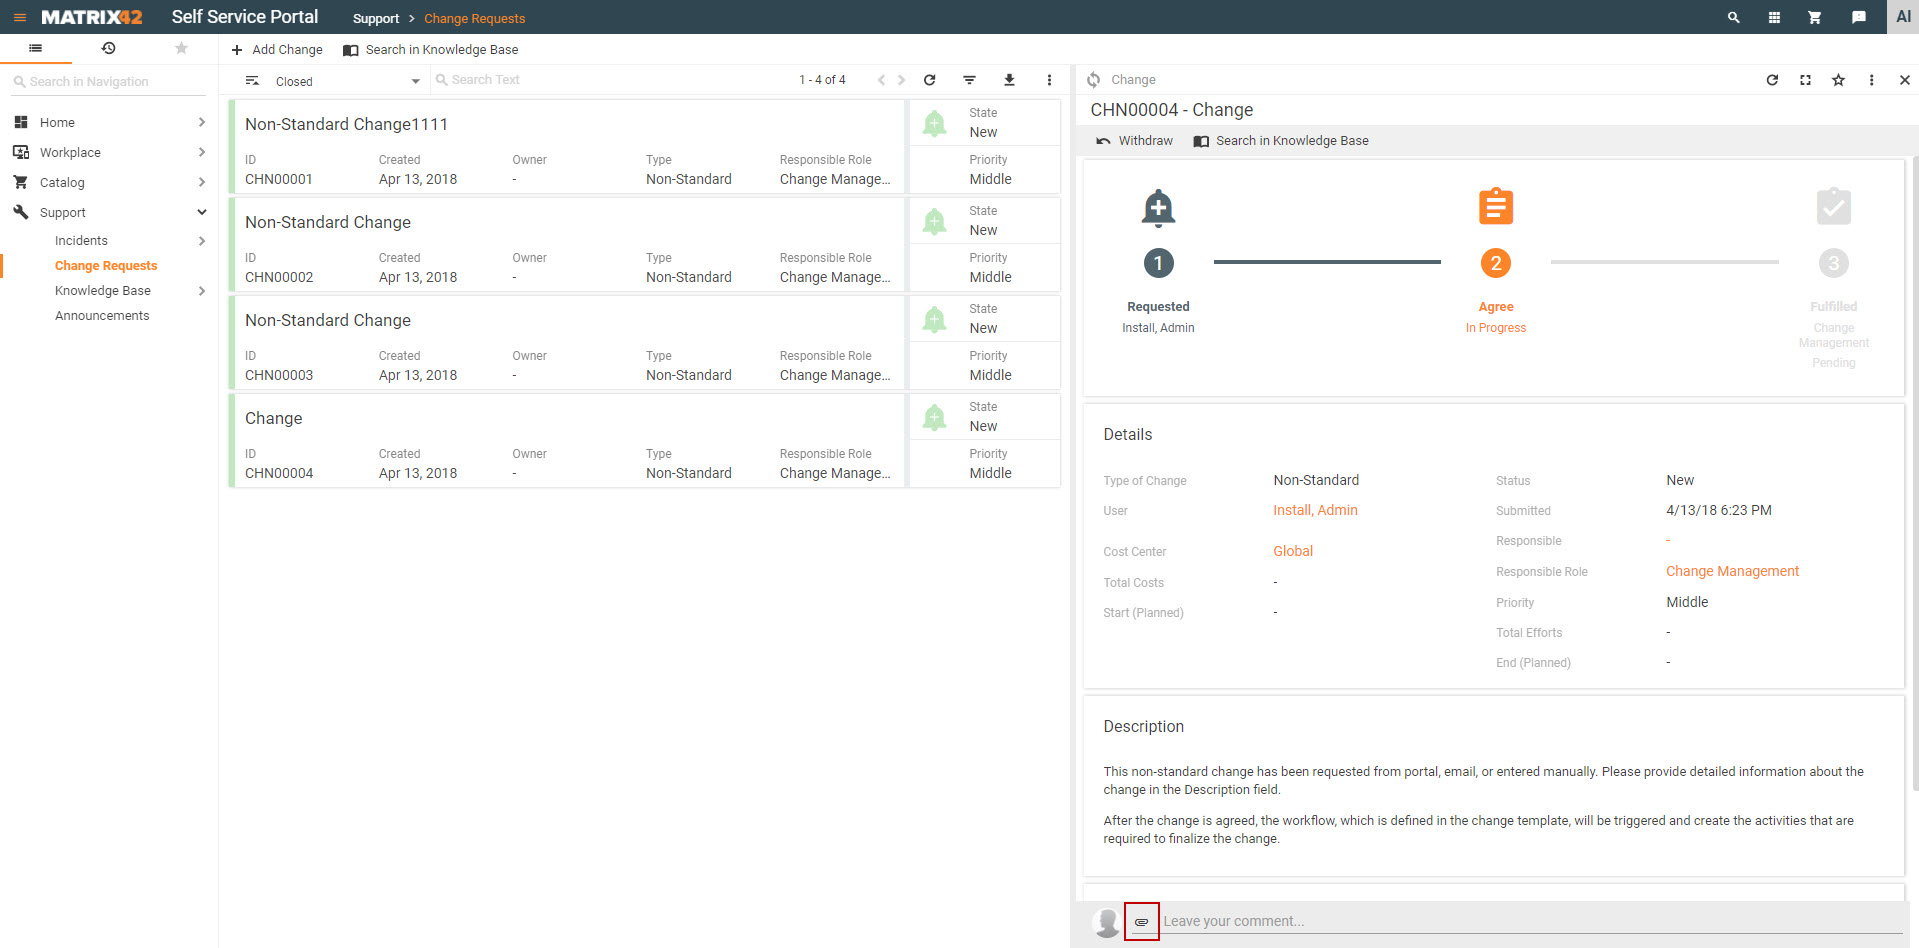
- Click a change request to open it in Preview.
- Click the Attachment icon located in the Leave your comment... field.
- Drag and drop your file(s) onto the DROP HERE placeholder on the dialog page that appears; alternatively, click the DROP HERE placeholder to select file(s) from your computer.
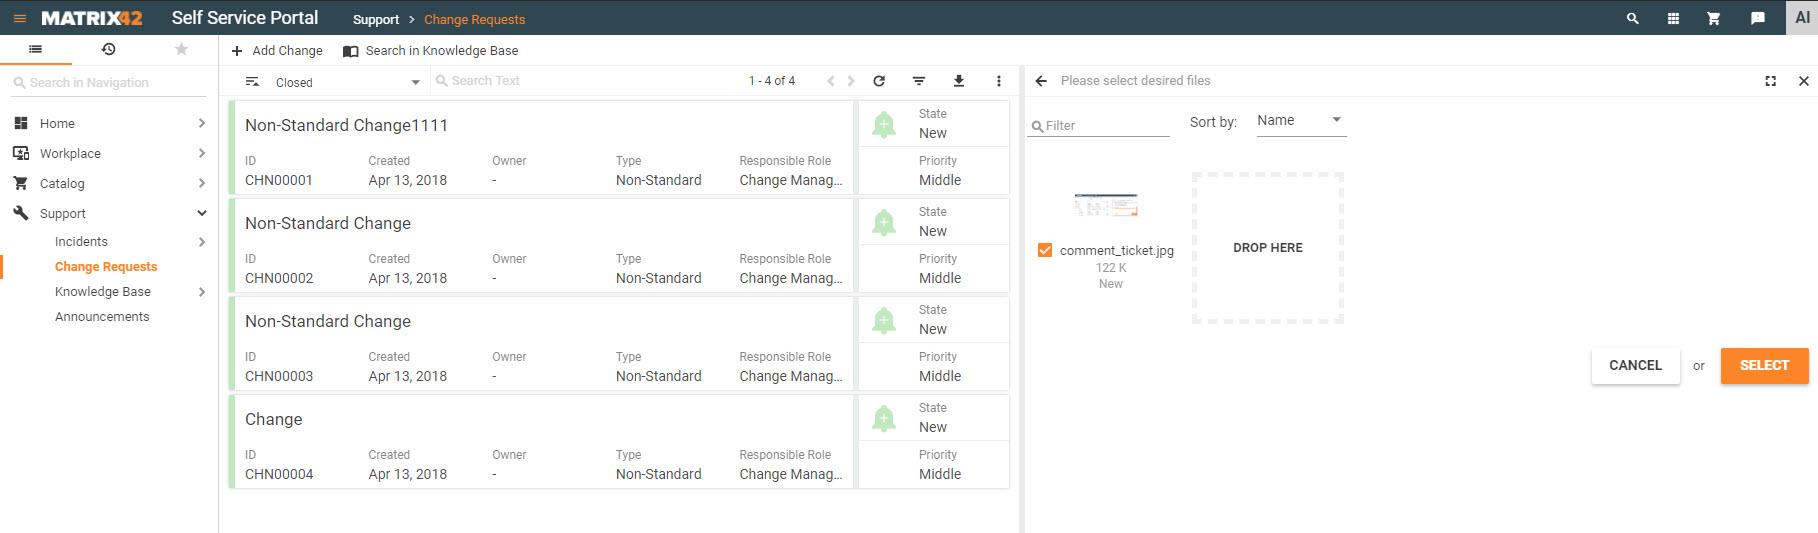
- Click SELECT. The selected file(s) are attached to the change request.
- Click ADD to save the change. The attached file(s) are available in the journal. Click an attached file in the Journal to download it on your computer.
Approving or Declining a Change
After a non-standard change is agreed and analyzed, it should be approved by the members of the Change Advisory Board before the final implementation. The decider will be informed via email about the required approval.
- Go to the Matrix42 Self Service Portal > Home > Decide > Change Approvals.
- If you cannot find the required approval, enter a search term into the Search Text field located at the top of the screen and press <Enter>.
- To approve or decline a change, click the change to open it in Preview, and then click Approve or Decline in the toolbar located at the top of Preview.
- If you have declined a change, enter a reason and click Submit. The reason for declining will be stored in the corresponding change approval task.
- Click Approve or Decline.
Monitoring Change Requests
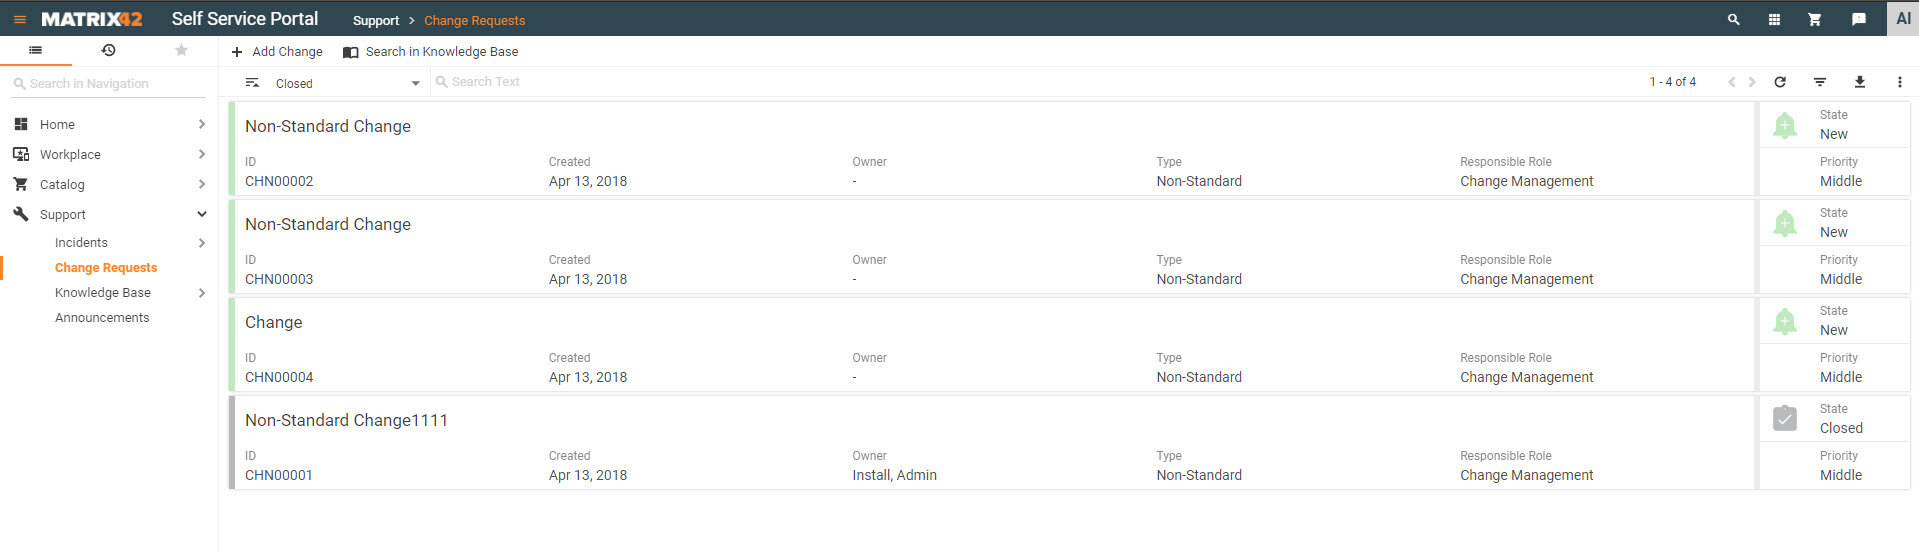
- Go to the Matrix42 Self Service Portal and click Support > Change Requests in the navigation area, or go to Workplace > My Change Requests.
All your change requests are listed there. The change requests are color coded for your convenience. We used colors and icons to help you easily differentiate between change requests with different statuses. For example, New change requests are set out in light green, and Closed change requests are grey.
- Click a change request to view its details in Preview. The following information is displayed:
- Change Progress: The progress diagram shows the current state of the change process.
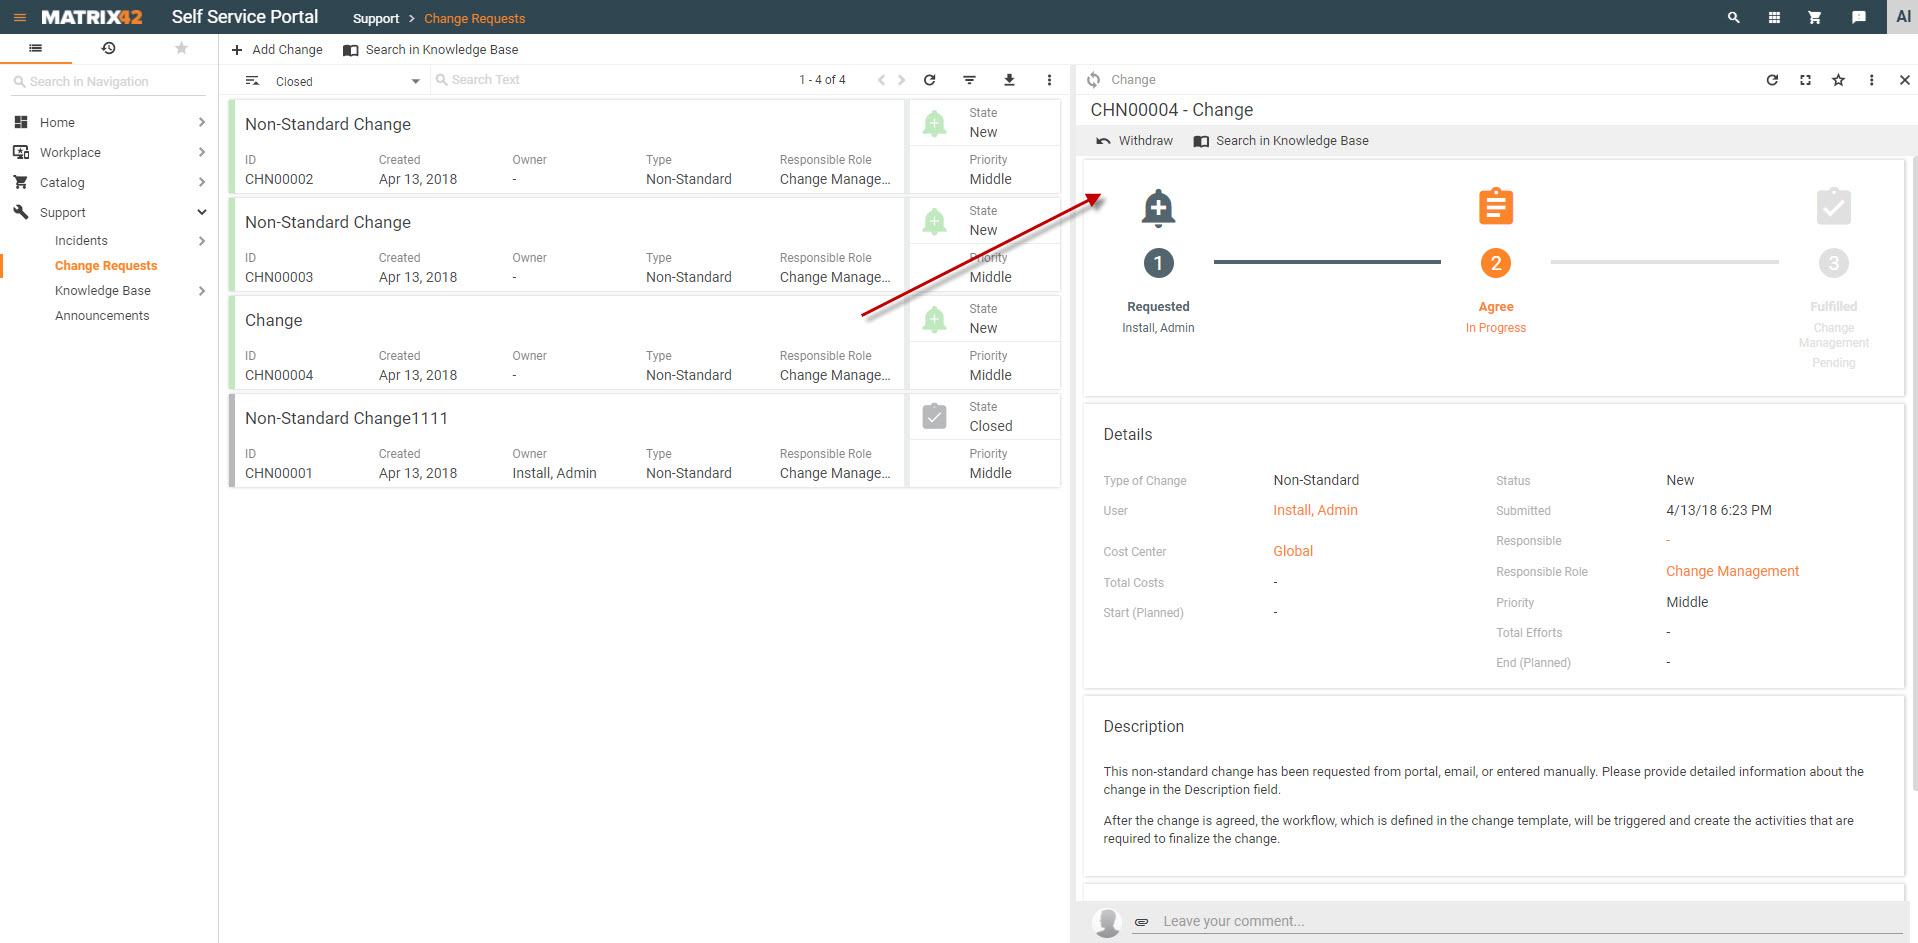
- Details of the Change Request: Type of Change, Submitted, Cost Center, Responsible User, Responsible Role, Status, Priority, Total Costs, Total Efforts, Start Date (planned) and End Date (planned).
- Solution: Solution of the change if it is closed.
- Description: Description of the change request.
- Journal: All journal entries of the change that are enabled for portal view.
- Change Progress: The progress diagram shows the current state of the change process.
If a change request has not been closed yet, you can withdraw it, add an attachment, or leave a comment.
Monitoring an Employee's Change Request
If you are responsible for cost centers, you can monitor changes that are requested by your employees.
- Go to the Matrix42 Self Service Portal and click Home > Management Area > Change Overview in the navigation area. All change requests of your employees are listed there. The change requests are color coded for your convenience. We used colors and icons to help you easily differentiate between change requests with different statuses.
- Click a change request to view its details in Preview. The following information is displayed:
- Change Progress: The progress diagram shows the current state of the change process.
- Details of the Change Request: Type of Change, Submitted, Cost Center, Responsible User, Responsible Role, Status, Priority, Total Costs, Total Efforts, Start Date (planned) and End Date (planned).
- Solution: Solution of the change if it is closed.
- Description: Description of the change request.
- Journal: All journal entries of the change that are enabled for portal view.
If a change request has not been closed yet, you can still withdraw it, add an attachment, or leave a comment.
Withdrawing a Change Request
Ticket creators can cancel the open change requests in the Matrix42 Self Service Portal.
- Go to the Matrix42 Self Service Portal and click Support > Change Requests in the navigation area.
- Click a change request to open it in Preview and then click Withdraw in the toolbar located at the top of Preview.

- Enter a reason and click Withdraw. The status of the ticket is set to Closed. The entered closing reason is shown in Solution.
Withdrawing an Employee's Change Request
If you are responsible for cost centers, you can cancel the open changes that were requested by your employees.
- Go to the Matrix42 Self Service Portal and click Home > Management Area > Change Overview in the navigation area.
- If you cannot find the required change, enter a search term into the Search Text field located at the top of the screen and press <Enter>.
- Click a change request to open it in Preview, then click Withdraw in the toolbar located at the top of Preview.
- Enter a reason and click Withdraw. The status of the ticket is set to Closed. The entered reason is shown as Solution.
Searching in Knowledge Base
To search for a possible solution in Knowledge Base articles:
- Click a change request to open it in Preview and then click the Search in Knowledge Base action in the toolbar.
- Specify search criteria in the right-hand search panel that appears, keeping in mind that at least one search keyword must be specified in one of the following fields: Keywords, Text, Subject, Category, Type, State, or Article ID.
Our search results are limited to 500 items. If you can't find what you need, apply additional filters, such as Category, Status, etc.
- Click Search.
Read the Searching in Knowledge Base article to learn more about how to use the Search in Knowledge Base functionality.