Installation
PreRequisites
A Matrix42 Account is required to access Matrix42 Marketplace. If you do not have a Matrix42 account, please register your personal account at https://accounts.matrix42.com/my/register.
A license in form of a CERTIFICATE file is needed for installing and configuring Marvin. To receive a license, log in to the Matrix42 Marketplace to purchase and download the Virtual Support Agent (Marvin) Addon for Service Management. You will receive your license once the purchase is complete.
Please make sure that inbound and outbound traffic to https://accounts.matrix42.com, https://marvinai.matrix42.com/ and https://m42-marvinai-prod.azurewebsites.net/ is permitted from your company network.
Service Management Setup
For administrators only.
Execute the previously downloaded Virtual Support Agent (Marvin) Addon as Administrator on the machine running Service Management. Please be careful which installer to use:
- Matrix42_Marvin_VirtualSupportAgent_9.1.1.2633.zip for Service Management version 9.1.1.X
- Matrix42_Marvin_VirtualSupportAgent_9.1.3.2886.zip for Service Management version 9.1.3.X
- Matrix42_Marvin_VirtualSupportAgent_10.0.0.2959.zip for Service Management version 10.0.0.X
- Matrix42_Marvin_VirtualSupportAgent_10.0.2.3011.zip for Service Management version 10.0.2.X and 10.0.3.X
Once the Addon is installed, please proceed with the next steps.
- Copy and paste your Marvin license CERTIFICATE file into the "Certificates" folder inside the root path of your Service Management installation.
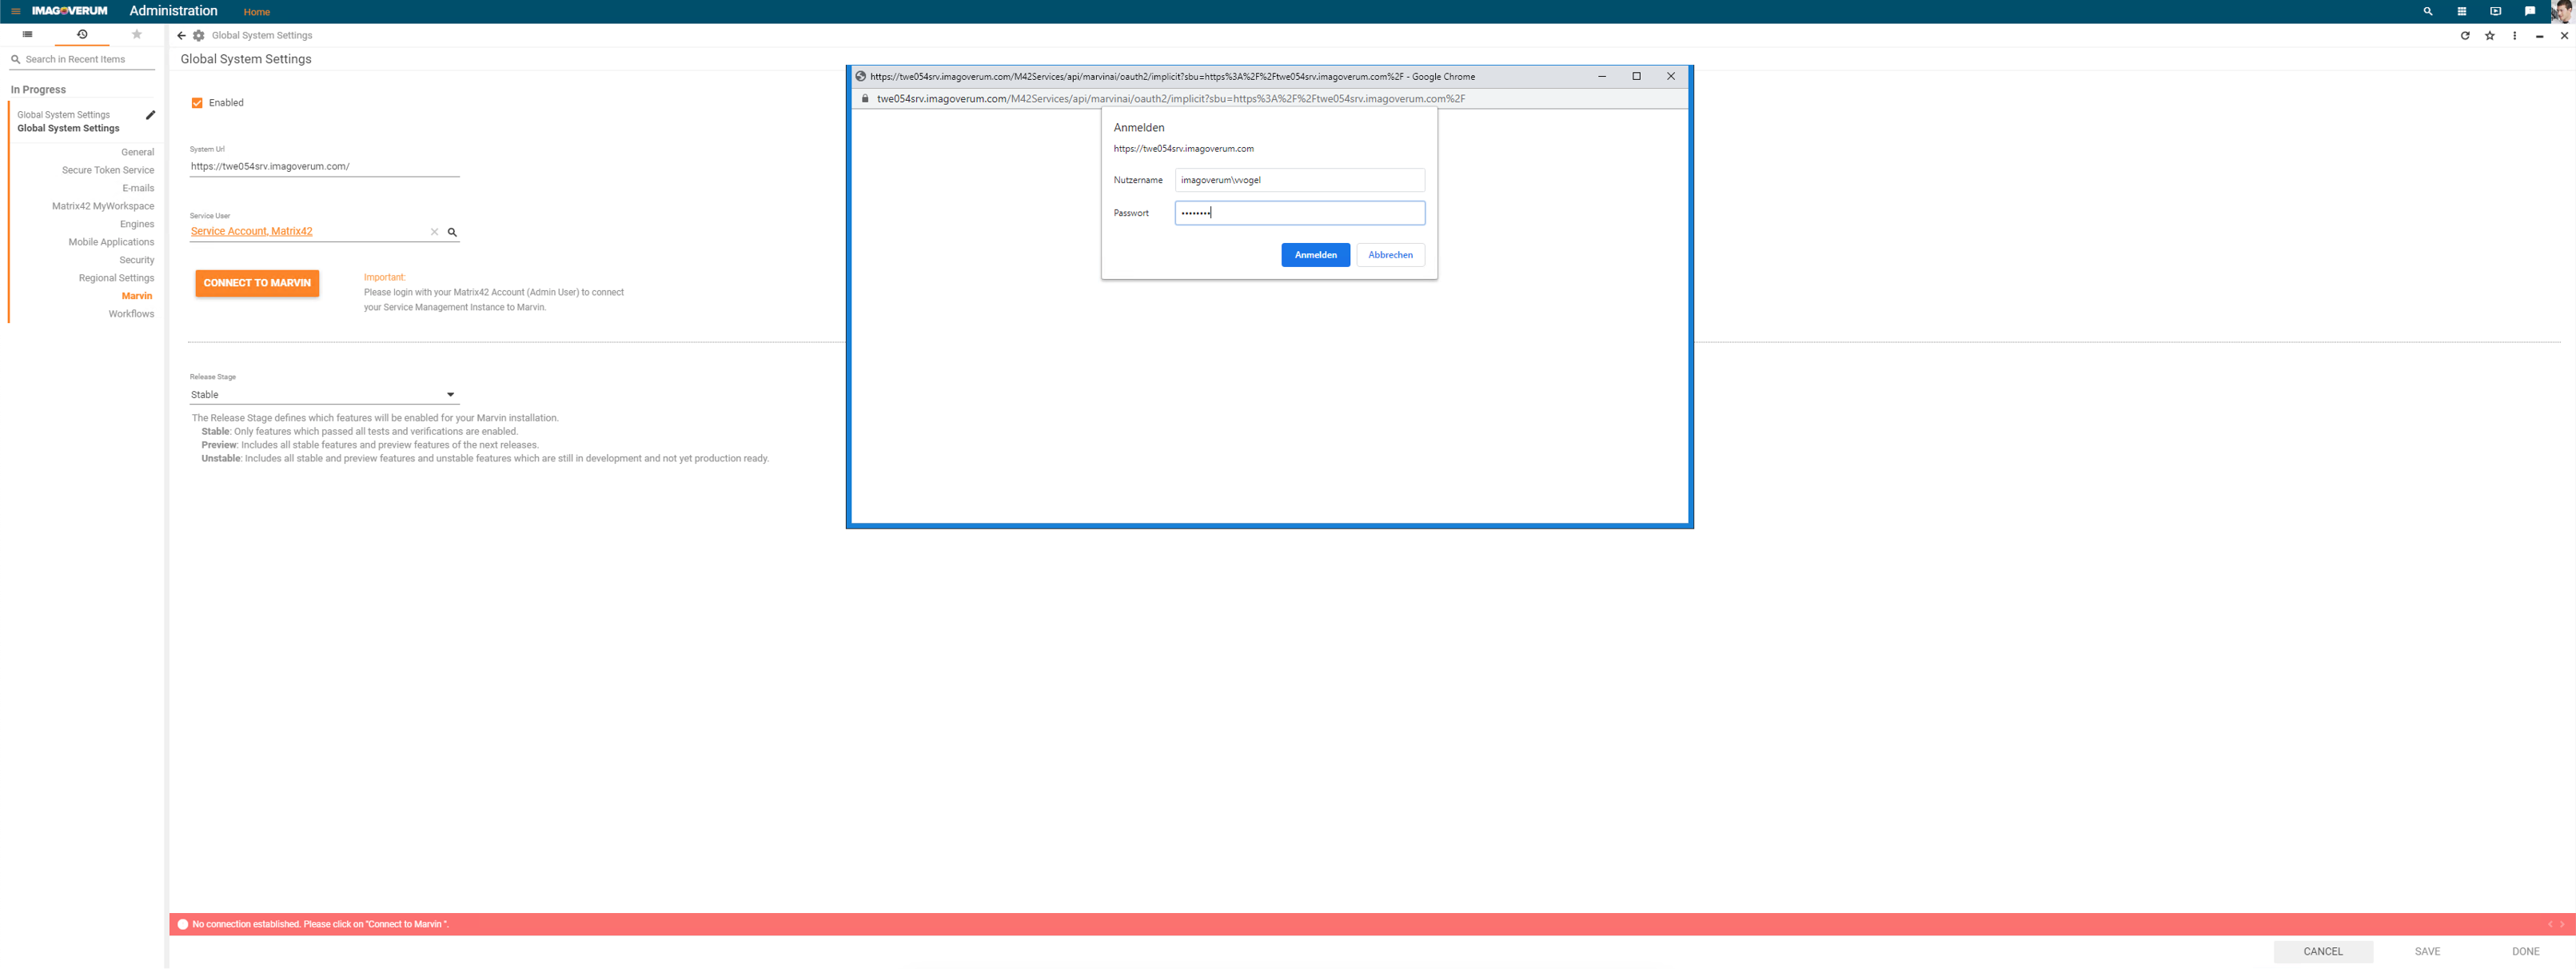
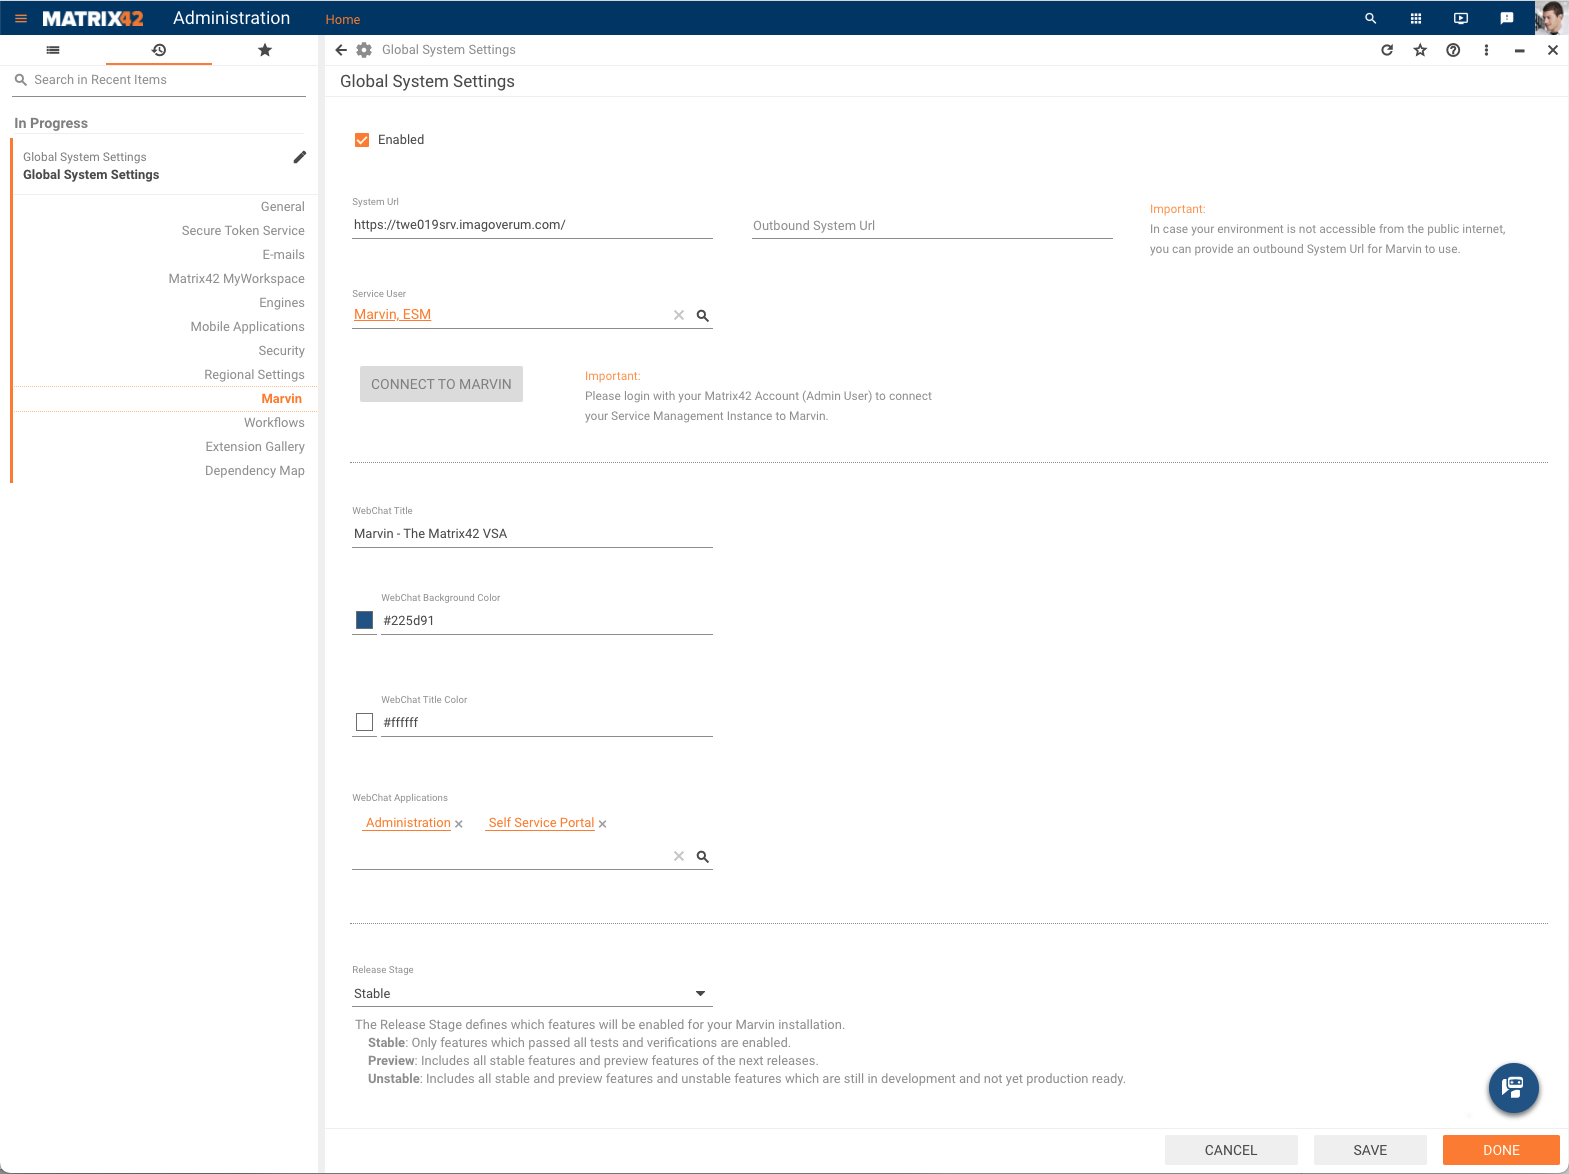
- Navigate to the Marvin settings section in the Global System Settings (Administration > Global System Settings > Edit > Marvin). Click the checkbox to enable the configuration.
- Under System URL you need to provide the URL of your Service Management system. By default this field should be pre-filled, already.
- Under Service User, specify a Matrix42 user with a valid Service Management account (imported from Active Directory, Azure Active Directory, manually created) and who is member of the 'Administration' role. We recommend creating a new user to later better track activities originated from Marvin.
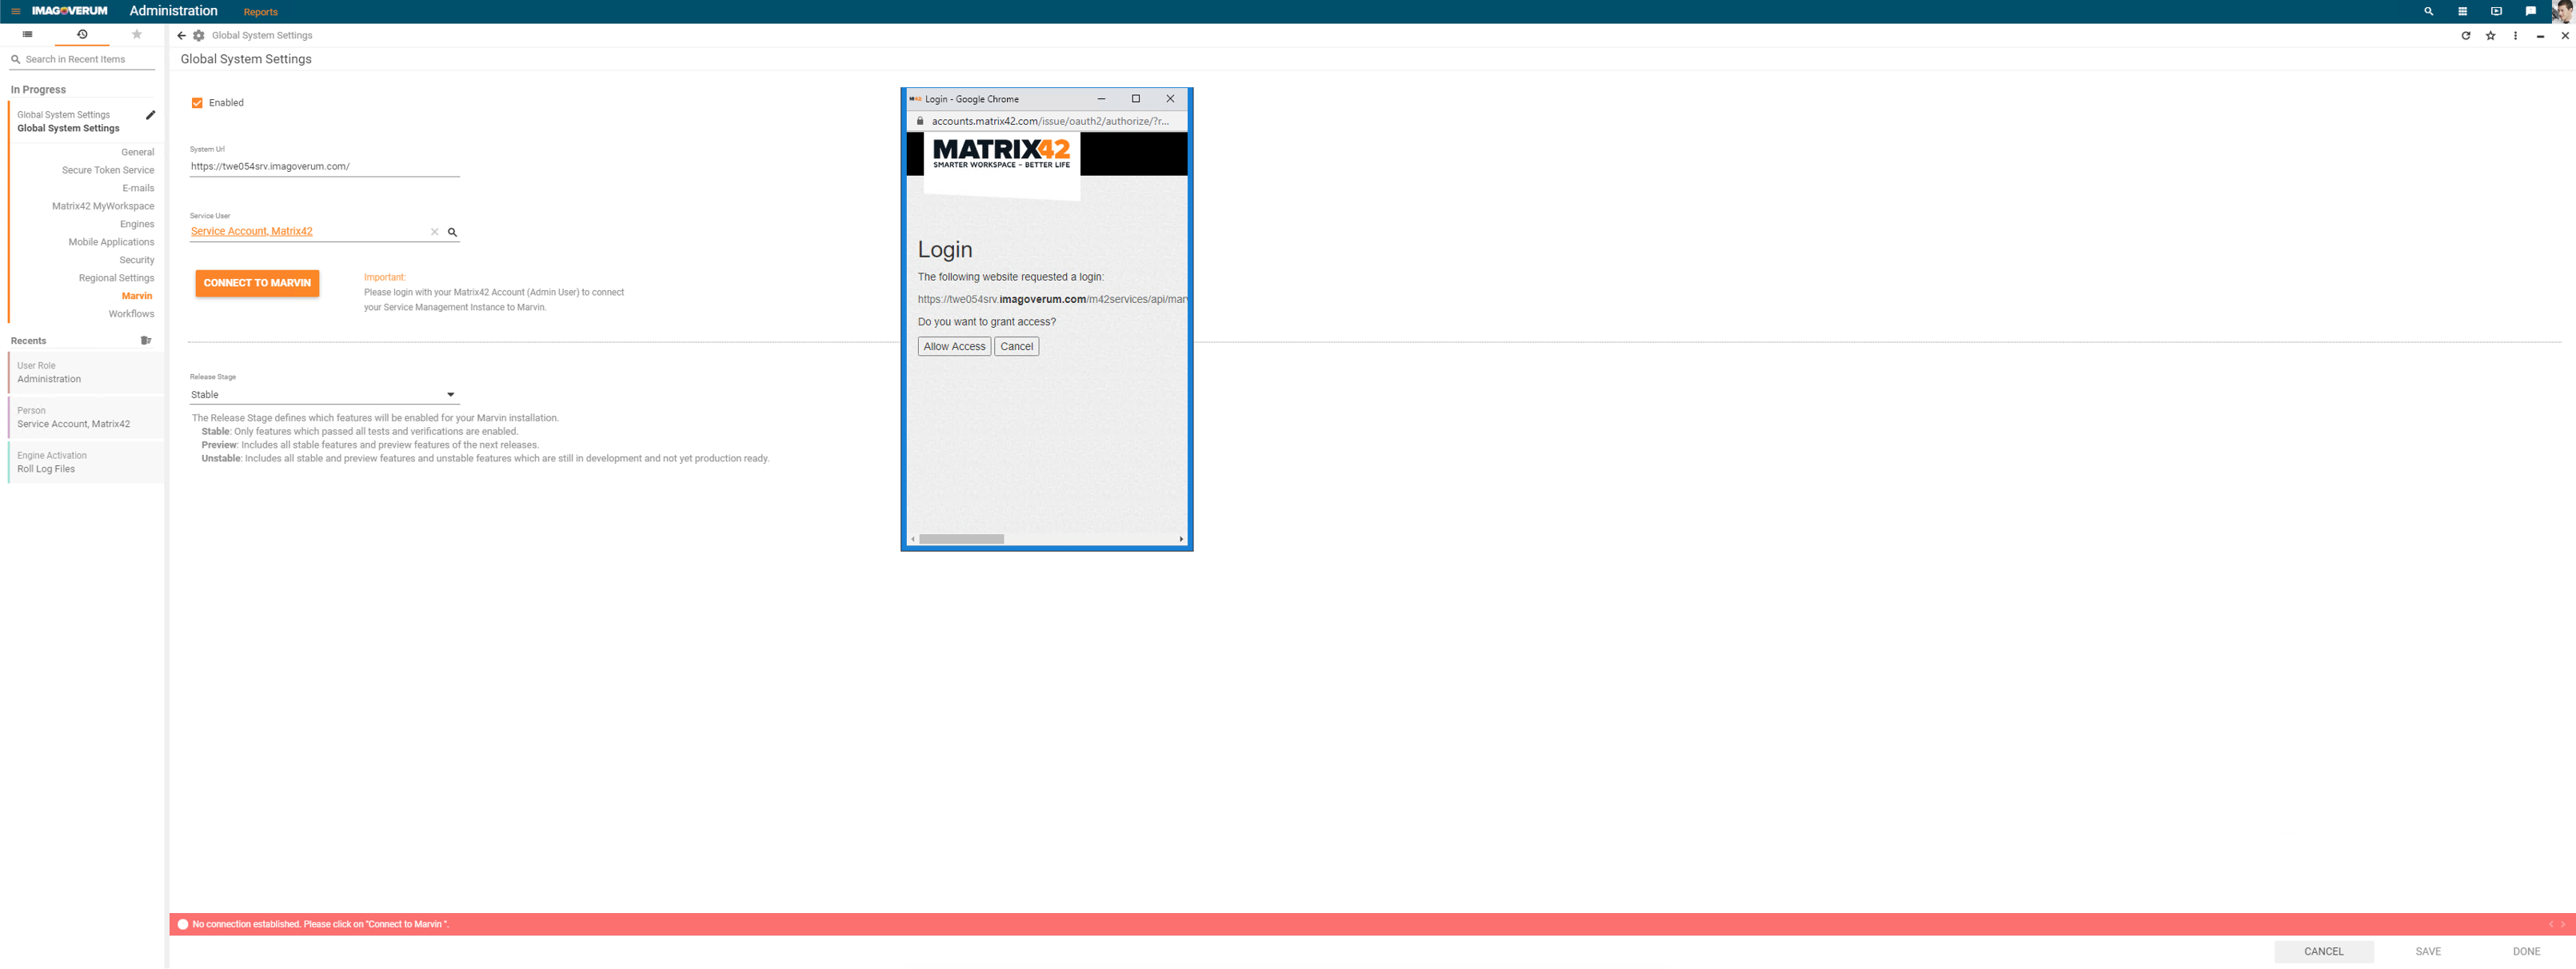
- Click on 'Connect to Marvin' to connect Marvin with your Matrix42 Account. Please use a User with Admin Role.
Based on your in place solutions and computer configuration alternative scenarios might happenScenarios Actions - Computer is part of domain which is as well hosting the application
- Matrix42 ACS (MyWorkspace) authenticated session in place
No additional user / password input requested, simply move on to the next step
- Computer is NOT part of domain which is as well hosting the application
or - Browser does not support windows basic login
You will be asked to provide user and password.
User either the same user which is used for 'Service User' or any other user available within Matrix42 Master Data
- Computer is NOT part of domain which is as well hosting the application
- Matrix42 ACS (MyWorkspace) authenticated session is NOT in place
You will need to provide user and password for windows basic authentication first, followed by user and password of a Matrix42 ACS (MyWorkspace) account - Log in with your Matrix42 Account and allow access
The Service Management setup is now complete. Once Marvin App is available in your companies Microsoft Teams Store, users from your company are able to link their accounts to your their Service Management accounts to interact through Marvin with the Self-Service.
Marvin System Settings
In case you e.g. need to apply advanced network security and a direct connection from the internet to your Enterprise Service Management server is not allowed the 'Outbound System URL' needs to be set to the according URL.
All external communication will use this URL instead of the 'System URL'; internal communication will still use the 'system URL'.
Auto-Discovery Setup
For administrators only.
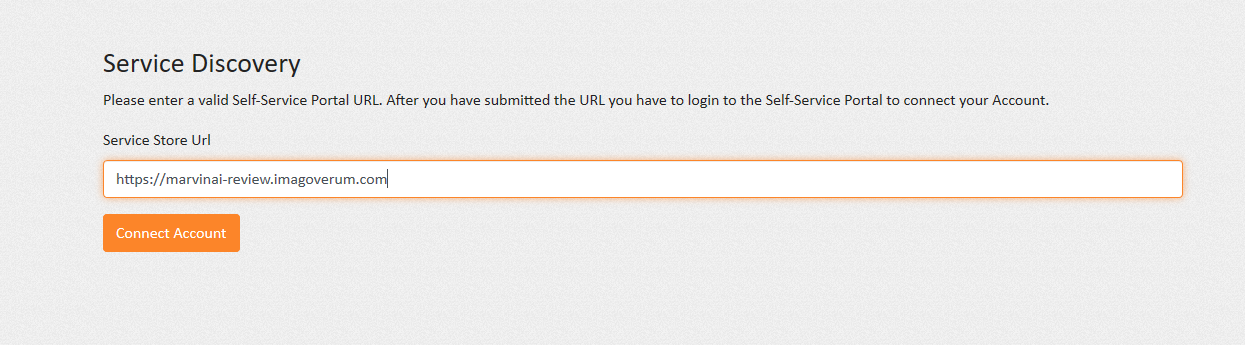
Users have to link their Self-Service Portal Account to Marvin (see below). This uniquely identifies the user and link the Microsoft Teams Account (Azure AD) to a person object in the Service Management Platform.
To make it as easy as possible to link the Self-Service Portal Account, we recommend to configure auto-discovery. This ensures the Self-Service Portal URL is recognized automatically in the linkage process.
Click here for more information on how to integrate auto-discovery.
Microsoft Teams Setup
For administrators only
Since Marvin is published into the Microsoft Teams App Store every user needs to "install" Marvin himself. This will happen automatically when opening Marvin's chat the first time.
You can guide and or restrict your users to use Marvin in Microsoft Teams with the built-in app permission and setup policies:
For Endusers
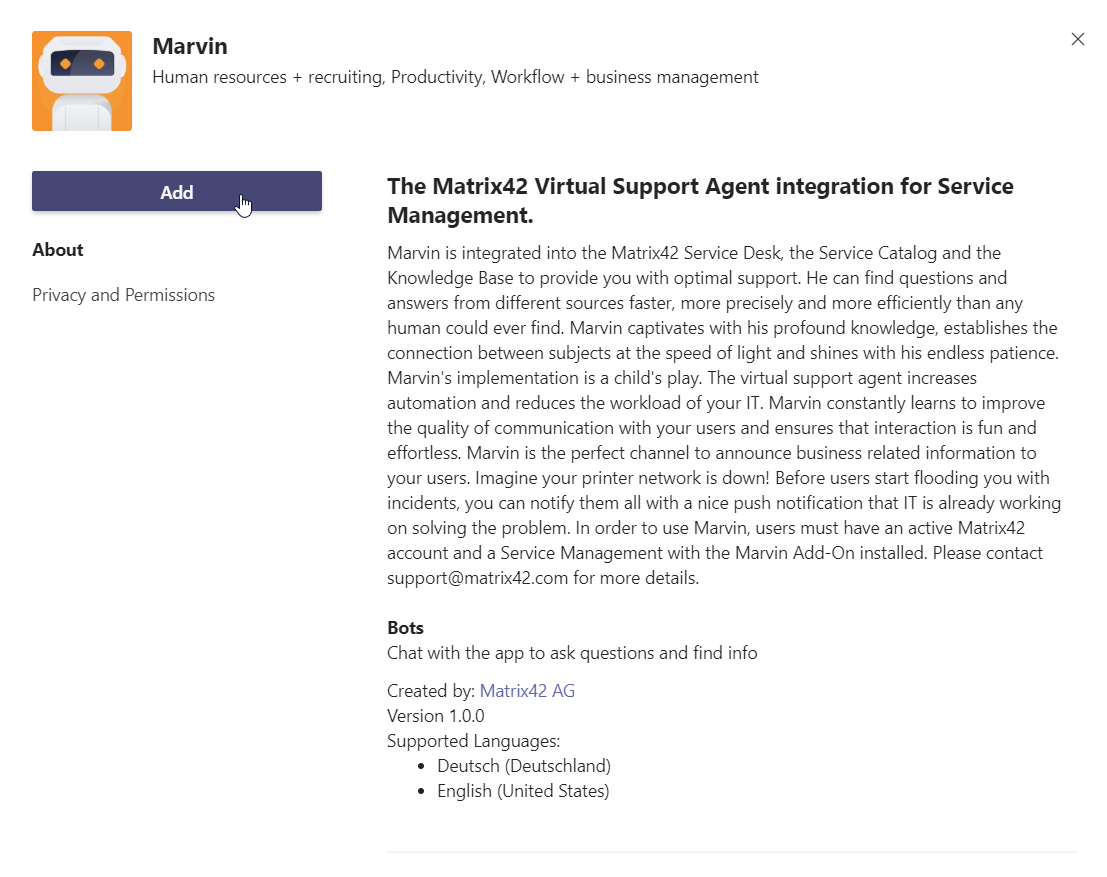
Firstly users have to install the Marvin Microsoft Teams app.
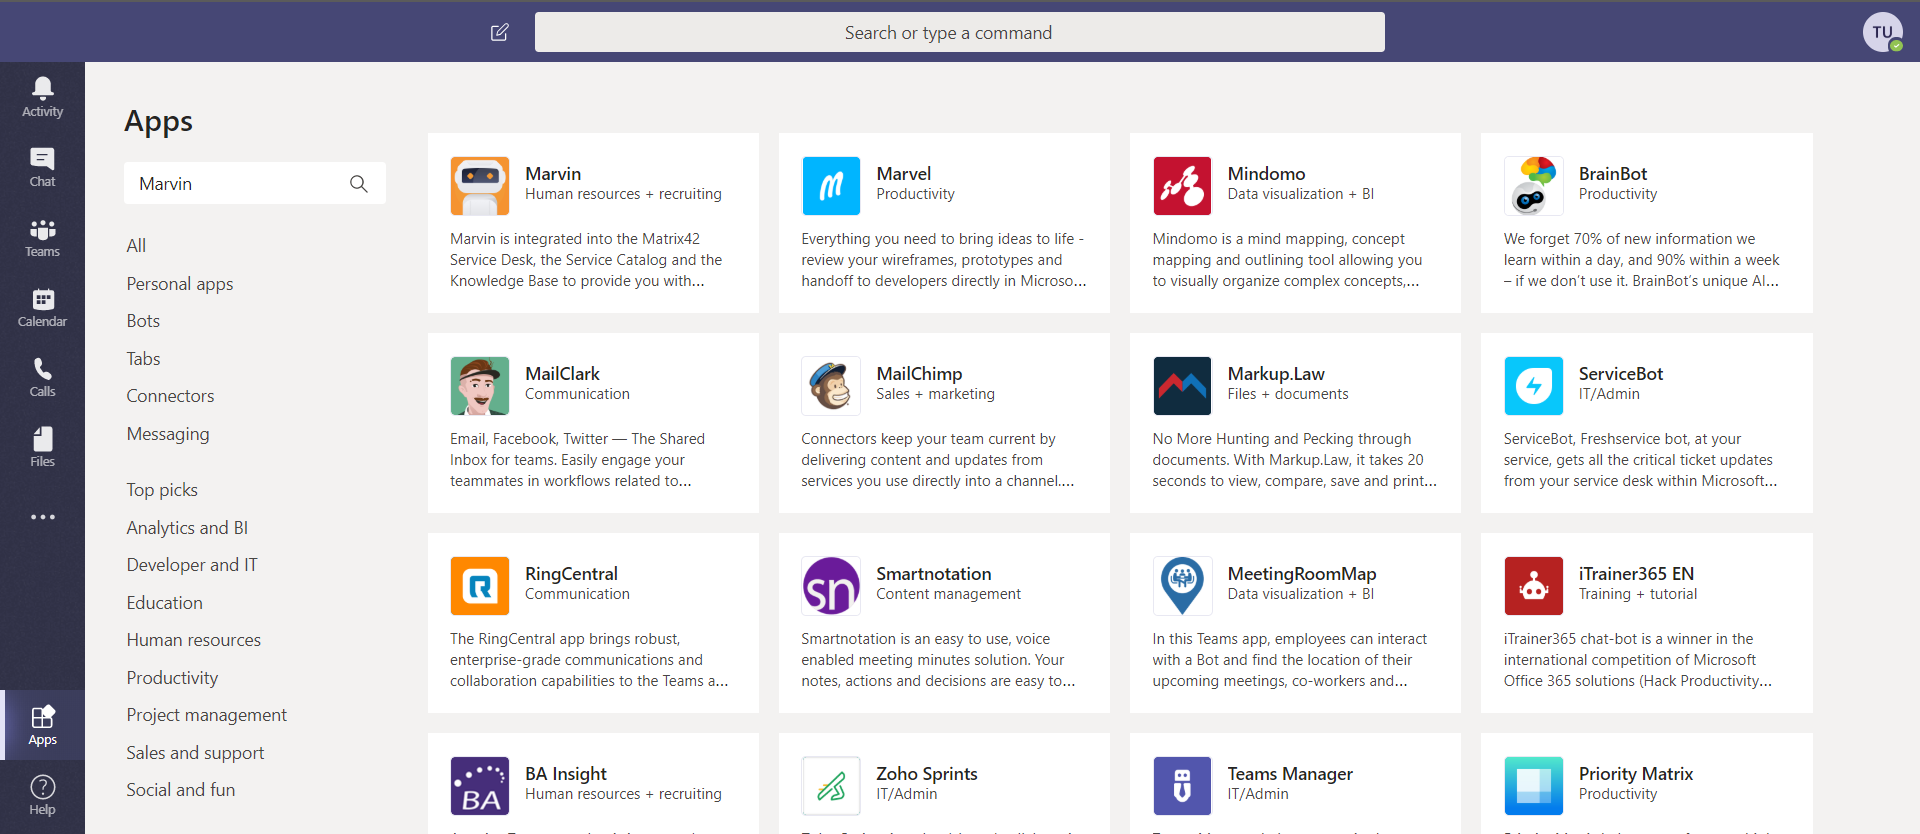
- Navigate to the Microsoft Teams App Store and search for "Marvin"
- Marvin will be presented in the list. Click on Marvin and add the Bot (which will automatically install it)
- Write a message to Marvin (for example "Hello")
- Marvin will prompt a button to link your Microsoft Teams (Azure AD) account to your company's Service Management. Click on "Link Account"
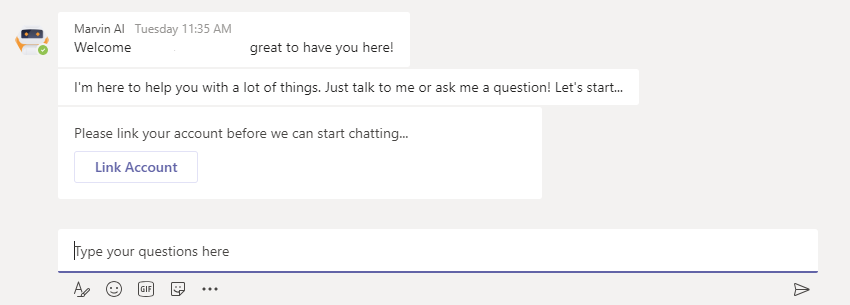
- The Service Management asks the user to login with their Service Management account. After login is complete Marvin will send a success message into the personal chat. The setup is now complete.
Note: If the admin has configured Service Management auto-discovery the user has to click "Link Account" and Self-Service Portal Login will be prompted directly to link the account. If auto-discovery is not configured, the user has to submit their company's Self-Service Portal URL into the service discovery form to complete the account linkage.