Disk Imaging
If you have already installed and configured a Windows operating system, there is a possibility to pull off this complete operating system configuration via disk imaging using the - DiskImageCreate package and distributing it to other computers using the DiskImageDeploy package.
The variables for DiskImageCreate and DiskImageDeploy are required for disk imaging via WinPE.
It is very helpful if you first configure the required PreOS packages for the respective action via Configuration > Views Designer. They can then simply be assigned to a group using drag & drop.

Prerequisites
- Currently, the WinRE partition must be specified with a size of 0.
- BitLocker must be deactivated on the system partition.
Attention: As of Windows 11 24H2, BitLocker is automatically reactivated by Windows after a reboot! - No UEM Agent or Advanced Agent must be installed on the client.
If the VHD contains a running UEM Agent, the PE Agent cannot be started in the early Windows phase in the later deployment and the deployment cannot be completed. - The system environment variable EmpirumServer must be removed.
If the variable is still set before the VHD is created and the corresponding created VHD is used during deployment, then the UEM Agent will try to connect to the Empirum Server defined in the system environment variable during its installation. This can lead to problems if a different depot is to be used during deployment. - Sysprep must currently be executed manually.
- The following PreOS Packages are required to create and deploy a disk image (DebugPackage, HardwareInfo, EndOfLife, LanguageInstallation and EmpirumAgentSetup are optional). These must be present in the Matrix42 Management Console (EMC) under Configuration > Software Management > Depot > Register Matrix42 PreOS Packages tab in this order:

Preliminary measures
Here we explain how to prepare the client from which the VHD is to be created.
The example shown here uses a virtual machine (VM).
- To creat the client from which the VHD is to be extracted, a customized variable configuration is required - SizeWinREPartitionInMB = 0.

- The configuration group via which the client is installed should be given the UEM Agent "Uninstall" command in the deployment options to prevent the UEM Agent from being installed here via inheritance.

Check directly on the client that no further variables are inherited and that the variables you have set via variable configuration actually arrive - Inheritance column!

- After the client has been installed and configured with these options and the necessary settings on your part, the VHD can now be created.
DiskImage - Create
The starting point is a newly installed and configured Windows 10 operating system. This may have been installed using WinPE or EPE 4.
You should generally only log in to Windows with ONE user (installation user). If several users were logged in, the apps to be uninstalled must be uninstalled for each logged-in user!
It is advisable to create a snapshot of this finished configured OS so that you can start again at exactly this point if something is still missing.
Once Sysprep has been executed, this configuration can no longer be used!
- Create a variable configuration with your preferred values (the example contains default or demo values).
See also the description of the DiskImageCreate variable. The creation of a variable configuration is described here.

- Create a configuration group according to the following example:

The "Empirum VHD Create" software package has not been added here, as Sysprep currently has to be run manually. - Activate the options "PULL via DDS/DDC (software packages only)" and "Activate PXE (reinstall computer)" for the group or computer when all settings have been made on the client and all variable values have been filled correctly.
The computer from which the VHD file is to be created is prepared manually for the VHD creation using the system preparation tool (Sysprep). - To do this, a command prompt must be opened in the running system with local administrative rights and the following command must be called:
%windir%\System32\SysPrep\sysprep.exe /generalize /oobe /reboot
The preparation runs automatically and does not require any manual intervention.
Alternatively, the file %windir%\System32\Sysprep\ can be started directly with administrator rights.
Activate the Generalize option (checkmark set).
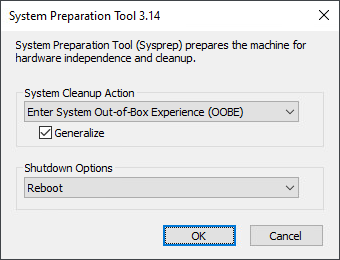
- Confirm with ENTER, or click OK.
Under Windows 10 / 11, this error message may occur:
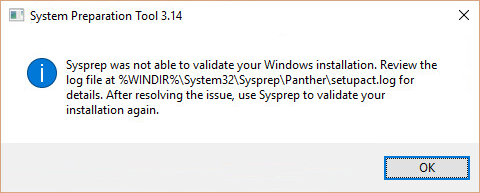
The integrated apps from Microsoft are responsible for this. Tests have shown that it is usually sufficient to uninstall the following apps:
Before Windows 10 (1809-1903) 17763.437, at least one of the following apps must be uninstalled beforehand:
Microsoft.BingWeather        Get-AppxPackage -allusers *BingWeather*      | Remove-AppxPackage
Microsoft.NetworkSpeedTest   Get-AppxPackage -allusers *NetworkSpeedTest* | Remove-AppxPackage
Microsoft.BingNews           Get-AppxPackage -allusers *BingNews*         | Remove-AppxPackage
Microsoft.Office.Sway        Get-AppxPackage -allusers *Sway*             | Remove-AppxPackage
Microsoft Office.Lens        Get-AppxPackage -allusers *OfficeLens*       | Remove-AppxPackage
Microsoft.Todos              Get-AppxPackage -allusers *Todos*            | Remove-AppxPackage
Microsoft.RemoteDesktop      Get-AppxPackage -allusers *RemoteDesktop*    | Remove-AppxPackage
Microsoft.Whiteboard         Get-AppxPackage -allusers *Whiteboard*       | Remove-AppxPackage
As of Windows 10 (1809-1903) 17763.437, the following app must be uninstalled beforehand:
Microsoft.LanguageExperiencePackde-DE Get-AppxPackage -allusers *LanguageExperiencePack* | Remove-AppxPackage
Alternatively, you can start the Power Shell as administrator and uninstall all installed apps with this command:
Get-AppxPackage -AllUsers | Remove-AppxPackage
Up to Windows 11 (23H2) 22631.3447, the following app had to be uninstalled beforehand:
Get-AppxPackage -AllUsers *Microsoft.BingSearch* | Remove-AppxPackage
As of Windows 11 (24H2) 26100.2894, at least one of the following apps must be uninstalled beforehand:
Get-AppxPackage -AllUsers *Microsoft.BingSearch*                | Remove-AppxPackage
Get-AppxPackage -AllUsers *Microsoft Copilot*                   | Remove-AppxPackage
Get-AppxPackage -AllUsers *Microsoft.WidgetsPlatformRuntime*    | Remove-AppxPackage
If Windows 11 24H2 was installed in a workgroup, BitLocker is automatically activated!
After a reboot, BitLocker is automatically reactivated by Windows!
After the apps mentioned above have been uninstalled, BitLocker must also be deactivated.
If the drive is locked, start CMD as administrator, enter "manage-bde -unlock C: -pw" (C refers to the drive letter), then enter the password to unlock the drive.
Enter "manage-bde -off C:" to deactivate BitLocker.
If multiple users were logged in, these apps must be uninstalled for each user!
In general, please note the following:
- Windows should (must) be newly installed to create the master image (no update from a previous version to the current version).
- Logging on to Windows should generally only be done with ONE user (installation user). If two or more users are logged in, it becomes considerably more complicated to uninstall the standard apps.
PowerShell calls (as administrator) to uninstall Appx packages:
Get-AppxPackage -allusers *SkypeApp* | Remove-AppxPackage
Get-AppxPackage -allusers *3DBuilder* | Remove-AppxPackage
Get-AppxPackage -allusers *BingWeather* | Remove-AppxPackage
Get-AppxPackage -allusers *Getstarted* | Remove-AppxPackage
Get-AppxPackage -allusers *Messaging* | Remove-AppxPackage
Get-AppxPackage -allusers *Microsoft3DViewer* | Remove-AppxPackage
Get-AppxPackage -allusers *MicrosoftOfficeHub* | Remove-AppxPackage
Get-AppxPackage -allusers *MicrosoftSolitaireCollection* | Remove-AppxPackage
Get-AppxPackage -allusers *MSPaint* | Remove-AppxPackage
Get-AppxPackage -allusers *OneNote* | Remove-AppxPackage
Get-AppxPackage -allusers *OneConnect* | Remove-AppxPackage
Get-AppxPackage -allusers *People* | Remove-AppxPackage
Get-AppxPackage -allusers *Wallet* | Remove-AppxPackage
Get-AppxPackage -allusers *WindowsMaps* | Remove-AppxPackage
Get-AppxPackage -allusers *WindowsFeedbackHub* | Remove-AppxPackage
Get-AppxPackage -allusers *XboxApp* | Remove-AppxPackage
Get-AppxPackage -allusers *ZuneMusic* | Remove-AppxPackage
Get-AppxPackage -allusers *ZuneVideo* | Remove-AppxPackage
Get-AppxPackage -allusers *windowscommunicationsapps* | Remove-AppxPackage
PowerShell calls (as administrator) to uninstall Appx Provisioned Packages:
Remove-AppxProvisionedPackage -Online -PackageName Microsoft.3DBuilder_13.0.10349.0_neutral_~_8wekyb3d8bbwe
Remove-AppxProvisionedPackage -Online -PackageName Microsoft.BingWeather_4.18.56.0_neutral_~_8wekyb3d8bbwe
Remove-AppxProvisionedPackage -Online -PackageName Microsoft.Getstarted_4.5.6.0_neutral_~_8wekyb3d8bbwe
Remove-AppxProvisionedPackage -Online -PackageName Microsoft.Messaging_3.2.24002.0_neutral_~_8wekyb3d8bbwe
Remove-AppxProvisionedPackage -Online -PackageName Microsoft.Microsoft3DViewer_1.1702.21039.0_neutral_~_8wekyb3d8bbwe
Remove-AppxProvisionedPackage -Online -PackageName Microsoft.MicrosoftOfficeHub_2017.311.255.0_neutral_~_8wekyb3d8bbwe
Remove-AppxProvisionedPackage -Online -PackageName Microsoft.MicrosoftSolitaireCollection_3.14.1181.0_neutral_~_8wekyb3d8bbwe
Remove-AppxProvisionedPackage -Online -PackageName Microsoft.MSPaint_1.1702.28017.0_neutral_~_8wekyb3d8bbwe
Remove-AppxProvisionedPackage -Online -PackageName Microsoft.Office.OneNote_2015.7668.58071.0_neutral_~_8wekyb3d8bbwe
Remove-AppxProvisionedPackage -Online -PackageName Microsoft.OneConnect_2.1701.277.0_neutral_~_8wekyb3d8bbwe
Remove-AppxProvisionedPackage -Online -PackageName Microsoft.People_2017.222.1920.0_neutral_~_8wekyb3d8bbwe
Remove-AppxProvisionedPackage -Online -PackageName Microsoft.SkypeApp_11.8.204.0_neutral_~_kzf8qxf38zg5c
Remove-AppxProvisionedPackage -Online -PackageName Microsoft.Wallet_1.0.16328.0_neutral_~_8wekyb3d8bbwe
Remove-AppxProvisionedPackage -Online -PackageName microsoft.windowscommunicationsapps_2015.7906.42257.0_neutral_~_8wekyb3d8bbwe
Remove-AppxProvisionedPackage -Online -PackageName Microsoft.WindowsFeedbackHub_1.1612.10312.0_neutral_~_8wekyb3d8bbwe
Remove-AppxProvisionedPackage -Online -PackageName Microsoft.WindowsMaps_2017.209.105.0_neutral_~_8wekyb3d8bbwe
Remove-AppxProvisionedPackage -Online -PackageName Microsoft.XboxApp_2017.113.1250.0_neutral_~_8wekyb3d8bbwe
Remove-AppxProvisionedPackage -Online -PackageName Microsoft.ZuneMusic_2019.16112.11621.0_neutral_~_8wekyb3d8bbwe
Remove-AppxProvisionedPackage -Online -PackageName Microsoft.ZuneVideo_2019.16112.11601.0_neutral_~_8wekyb3d8bbwe
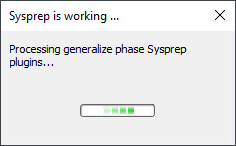
After executing the Sysprep.exe file, the system preparation (generalization phase) of the client takes place.
If the system preparation was successful, the computer is restarted and then the assigned WinPE PXE boot image is executed.
Start of VHD creation
The WinPE based environment is started, drivers are integrated and a connection to the server is established.
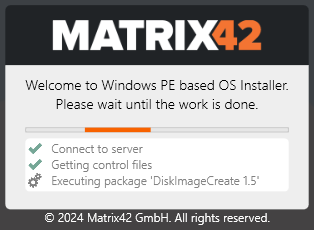
The DiskImageCreate package automatically starts the CreateVHD application.

The progress of the creation can be tracked in the application interface.
OOnce the VHD file has been successfully created, the client is rebooted.
The VHD file is now available on the specified share.
.\Empirum\EmpInst\DiskImages\Win_11_23H2_24-07_PRO_x64_DE_GPT.vhd
Log file
The CreateVHD application creates a log file (X:\GlobalCreateVHD.log) during the execution. This file contains detailed information about the execution of the process. In case of an error, more detailed information can be searched here.
DiskImage - Deploy
After you have created a disk image (VHD) - as described in the DiskImage - Create chapter - this VHD can now be distributed to other computers. In this example, distribution via unicast is described.
- Create variable configuration according to the following example:
The creation of a variable configuration is described here.

- Create a configuration group according to the following example:

- Activate the options "PULL via DDS/DDC (software packages only)" and "Enable PXE (reinstall computer)" for the group or computer.
- Start the client.

The WinPE based environment is started, drivers are integrated and a connection to the server is established.
The DiskImageDeploy package automatically starts the Image Deployment application.

After image deployment, the client starts the standard setup routine. The client is integrated into the domain (if configured), then the UEM agent is installed and then all assigned software packages. A reboot takes place.
After this reboot, the client is fully installed.
Status and logging in the Matrix42 Management Console (EMC)
Log Information on the disk imaging process can be found in the PXE log.
- Right-click on the configuration or assignment group or computer and select Show Log from the context menu.
- Select the PXE Log tab.
All relevant disk imaging information is displayed in square brackets [Imaging].