WinPE via HTTP(S)
As of WinPE Preboot version 1.8.0, connection establishment via http(s) is supported. The following chapter describes the necessary adjustments to the implementation.
Deployment via http(s) requires the use of the latest Matrix42 PreOS packages, which were released with WinPE Preboot version 1.8.0 or newer:
- HardwareInfo 3.0 or higher
- WindowsInstallation 5.0 or higher
- EmpirumAgentSetup 2.0 or higher
Make sure that the boot configuration used was also created with the latest WinPE preboot version 1.8.0 or later.
http(s) support for self-created PreOS packages
It is possible that self-created PreOS packages are not immediately suitable for http(s) transport. The reason for this is usually that the PowerShell scripts access files or directories on the Empirum share in the SMB case that are not part of the PreOS package itself.
In order to facilitate the adjustments, certain peculiarities of the http(s) transfer will be discussed here.
- In general, the http(s) case works with a local cache. Files and directories are transferred from the Empirum share to local directories via http(s). Not all shares are transferred automatically, but only directories and files that are requested.
- In the http(s) case, before the PreOS package is executed, the content of the package (e.g. in the case of the WindowsInstallation PreOS package, the directory
Configurator$\Packages\Matrix42\OsPackages\WindowsInstallation\6.4) is first transferred locally to a cache directory and then the install.ps1 script is executed locally. Relative accesses to files located in the package are thus covered. - If you need to access files in a PreOS package that are not in the package directory, this must be done using the
Get-EmpirumPackagePathcmdlet. This method has already been used in the past to get the path to the Empirum share (or the offline medium). In the http(s) case, this method must first transfer the specified file or directory locally to a cache directory and then return the local path. The PreOS package can then continue working with the local path and access the file or directory. - The cmdlet
Get-EmpirumAgentSetting -PeAgentConfig RemoteLogFoldercannot be used in http(s) to change log files on the Empirum share. The new cmdletGet-EmpirumTransferis provided for this purpose. With theGet-EmpirumTransfer LogFolder -Type RemoteLogFoldercall, theEmpInst$\Wizard\OS\WinPeStatussubdirectory can be transferred locally, similar to the Get-EmpirumPackagePath call. The method returns an object that can be used to access the path to the local cache via the Path property. The PreOS script can initiate the synchronization of the local files to the server via the Sync method after the files in the cache have been adjusted. The local changes are then transferred to the server.
Here is an example from the HardwareInfo PreOS package:
$RemoteFolderObject = Get-EmpirumTransfer LogFolder -Type RemoteLogFolder -Verbose;
…
CreateAndCopyDriverJson $RemoteFolderObject.Path;
$RemoteFolderObject.Sync();
Setting up WinPE-based deployment via http(s)
The following steps describe the adjustments that must be made so that the data transfer for WinPE-based deployment is carried out via http(s) and no longer accessed directly via SMB via the Empirum share.
- Configure and install the Empirum Subdepot Webservices Configuration package on a subdepot via which the deployment is to be carried out via http(s), as described in the Online-Help.
- Create an Empirum Agent template with the HTTP or HTTPS option checked in the transport protocols section. Make sure that the subdepot prepared in the first step is selected as the Fallback Server.

As soon as the HTTP or HTTPS option is selected in the agent template, the SMB protocol is not used, even if it is activated.
If the HTTPS protocol is selected, it must be ensured that the fallback server selected here is also accessible from "outside" under this name.
- Switch to Boot Configurations and execute View > Refresh via the menu so that the current agent templates and their values are read from the database again.
- Select the created Empirum Agent template in a boot configuration.
- If the option "Only trust validated server certificates" is used in the HTTPS case in the agent template used, you must store the thumbprints of the server certificates that are to be trusted. At WinPE runtime, the usual validation via the certificate store and the certificate chains does not work.
- Make sure that the advanced properties of the boot configuration are displayed by activating the Advanced Properties switch.

- In the lower part of the properties area, a list for the thumbprints is displayed to the right of Thumbprints for https validation, which is currently still empty.
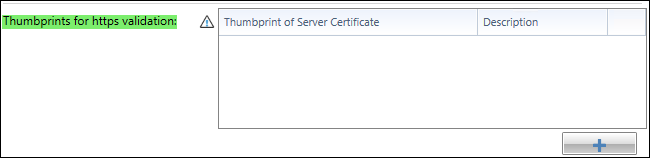
- Add a new thumbprint with the + button.
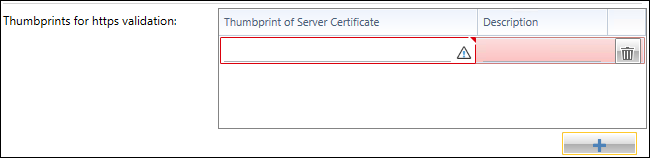
- Now transfer the thumbprint value to the thumbprint column of the Thumbprint of Server Certificate and add a description.
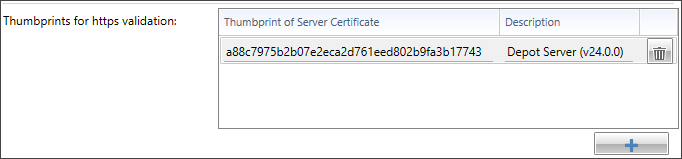
- If the boot configuration is to be used for several depots, repeat the process for each depot and enter the corresponding server certificate thumbprints.
- Save the boot configuration again so that the changes are applied.
- Assign the created boot configuration to the respective configuration group in Administration and activate the deployment.
Read IIS certificate (Thumbprint)
The certificates used by the IIS can be checked in the Internet Information Service (IIS) Manager and their thumbprints can be read out.
- In the IIS Manager, switch to the server name entry in the left-hand tree and double-click on "Server Certificates" in the middle window.

- The certificates are then displayed in the middle window. Double-click on the certificate used to display the properties of the certificate.

- The "Thumbprint" field can now be selected in the "Details" tab.
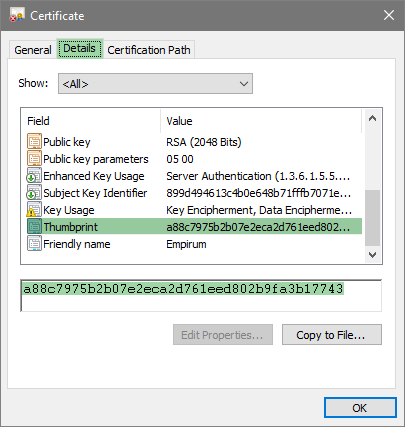
If there are spaces in the thumbprint, these must be removed.
Example: the thumbprint "11 dc 80 bc eb e0 41 a0 ab b2 f9 de bd 91 18 20 0c 25 b0 ef" becomes "11dc80bcebe041a0abb2f9debd9118200c25b0ef".
This can then be entered. - If the boot configuration is to be used for several depots, repeat the procedure for each depot and enter the corresponding thumbprints of the server certificate.
- Save the boot configuration again so that the changes are applied.
- Assign the created boot configuration to the appropriate configuration group in Administration and activate the deployment.
Change default time server
If a time server other than 'pool.ntp.org' is to be used, this can be configured via the variable OS_RegionalSettings.TimeServer. To do this, proceed as follows:
'pool.ntp.org' is used as the default time server. If this is not to be changed, you do not need to perform these steps.
- In the Matrix42 Management Console, switch to Administration and click on Variable Definitions in the Tools menu.
- Double-click the OS_RegionalSettingsvariable in the right-hand window.
- Create the variable TimeServer of the type Operating System and the control element Text (see screenshot).
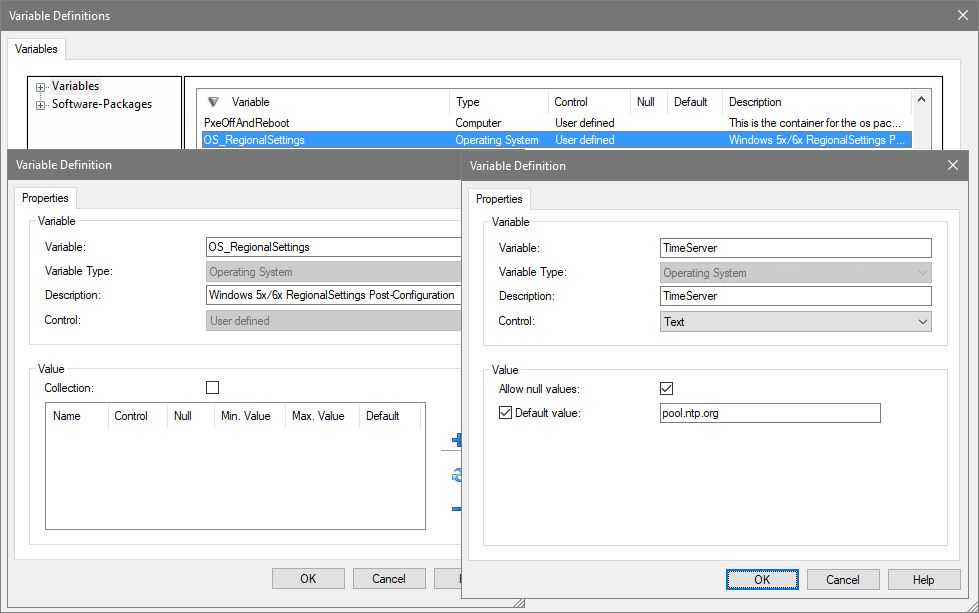
- Click OK to save and close the dialogs.
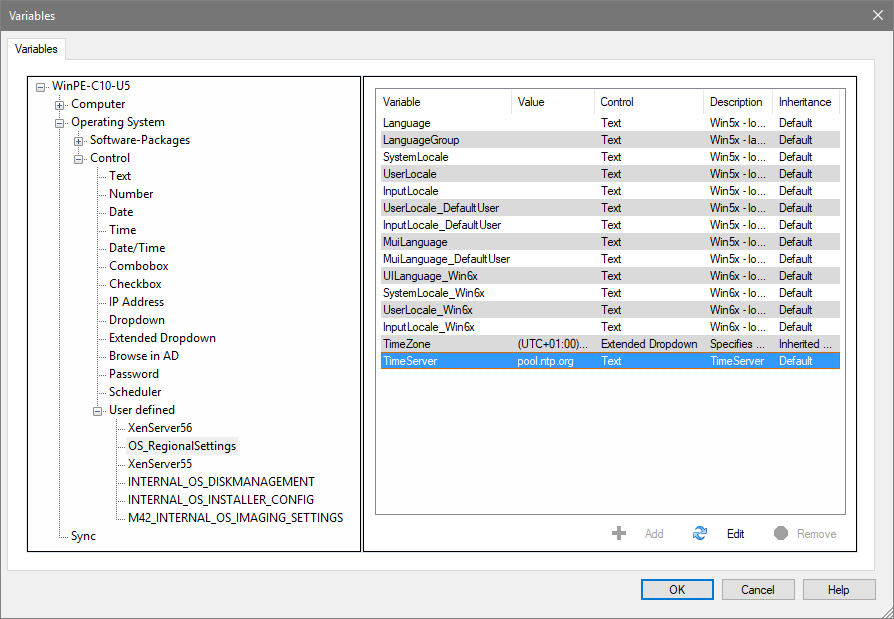
- Then select the client or the respective configuration group and enter the desired time server, e.g. 'de.pool.ntp.org' (see image).
- Activate the deployment.