User Management
Overview
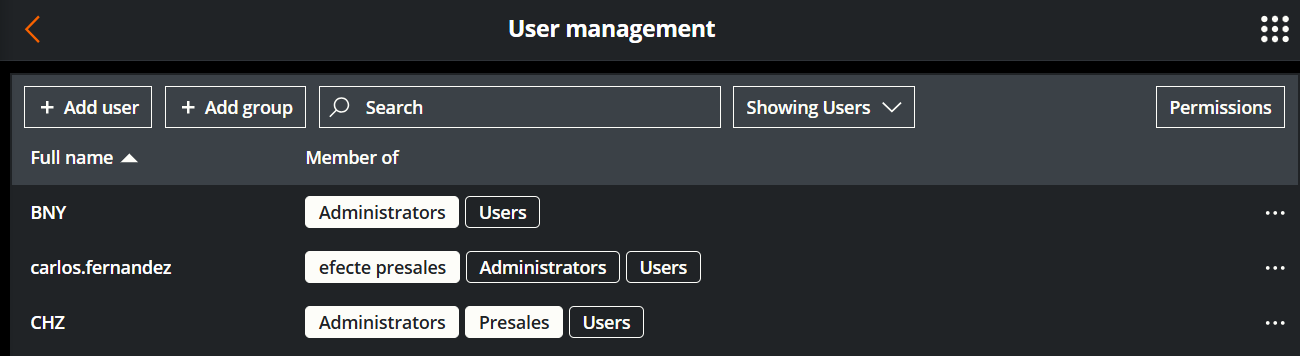
The User Management section in M42 FastViewer allows administrators to create, modify, organize, and control user and group access.
Main User Management View
Key Functions:
- + Add user / + Add group: Buttons for creating new users or user groups.
- Search Bar: Quickly locate users or groups by name.
- Showing Users (Dropdown Filter): Lets you filter the view to show:
- Everything
- Users
- Groups
- Fixed Users (🔒)
- Fixed Groups (🔒)
Table Columns:
- Full name: Displays user names.
- Member of: Shows group memberships for each user.
- One person can be a member of several groups at once.
- Three-dot menu (⋯): Offers context actions - Edit or Delete the selected entry.
Add User
When you click + Add user, a window appears:

Fields:
- Full name: Required. This is the username or identifier of the user.
- Member of: Assigns the user to one or more groups.
- You can search or scroll through available groups.
Next proceeds to sending an invitation email. Cancel exits the dialog without changes.
The Send invitation email page is shown after clicking Next on the Add User window.
Enter the user's email in the Email address field to send the invitation directly to the user's email. Click on the Send email to the invite with login/setup instructions.
Invite using link instead generates a link you can copy and share manually (e.g., via chat or other means).
Click on Close to cancel the invitation process.

Settings Menu (Three Dots ⋯)

Each user/group entry has a context menu with:
- Edit: Modify the user or group.
- Delete: Remove the user or group.
- Open: Open information about the fixed user or group.
Add Group
Clicking + Add group opens a similar window to "Add User":

Fields:
- Full name: Required. This is the group name or identifier of the group.
- Member of: Assign this group to other groups (for nested group structures).
To create a fixed group, modify the group permissions in the Permissions window.
Group Membership:
- The same group list appears, including **Administrators**, **Designers**, and custom groups like *presales*.
- Permissions can be inherited through group relationships.
Save finalizes the creation and Cancel closes the dialog.
Permissions Management
Clicking the Permissions button opens a detailed matrix for managing group-level access and this is used to create fixed groups.

Controls:
- + New entry: Add a group to the permission table.
- Columns available for permission settings:
- View
- Edit
- Add Member
- Remove Member
- Change Permissions
- Download Agent
- Create AdHoc Session
Legend:
- 🟧 Allowed (orange box with check).
- ⬜ Not allowed (empty box).
- ❌ Denied (overrides any allowed/not allowed).
Examples:
- Administrators typically have all options checked.
- Users might only have "View" access.
Best Practices
- Use descriptive group names (e.g., “Sales EU”, “Level 1 Support”).
- Assign the least privilege necessary — avoid giving full access unless required.
- Regularly audit group memberships and permissions.