Accounts
Overview
In FireScope SPM, Accounts represent divisions of your business. Depending on your company’s size and structure, an Account can be a region, location, department, or branch, for example, or any category that makes sense in your environment. As a hosted service, FireScope SPM can host multiple accounts in the same cloud instance and provide true multi-tenancy in a secured and scalable environment. Each account can be a separate customer.
FireScope SPM CMI interface will provide summarized reports and views focusing on individual accounts or view the operational health of the SPM cloud infrastructure.
CMI
The FireScope SPM Cloud Management Interface (CMI) is a tool for creating and managing accounts in SPM.
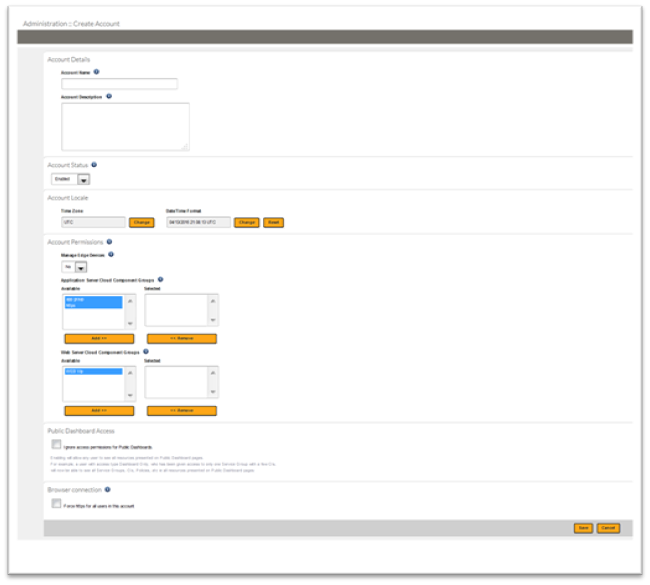
Create Account
- Log in to a UI server using the following credentials:
- Account name: CMI
- User: Contact support
- Password: Contact support
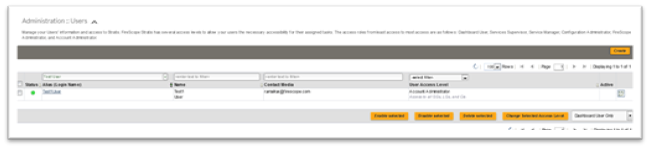
- Manage Account page will be displayed. (You can also go to Manage Account page by clicking on Administration > User Management > Accounts.)

- Click on Create button on the upper right hand corner. Create Account page will be displayed.
- Complete the following required fields. For more information refer to the Section Description Table.
- Account Name
- Account Description
- Click Save. Manage Account page will be displayed.

- Click Add License to upload your license file from the License Expiration column. Edit Account page will be displayed.
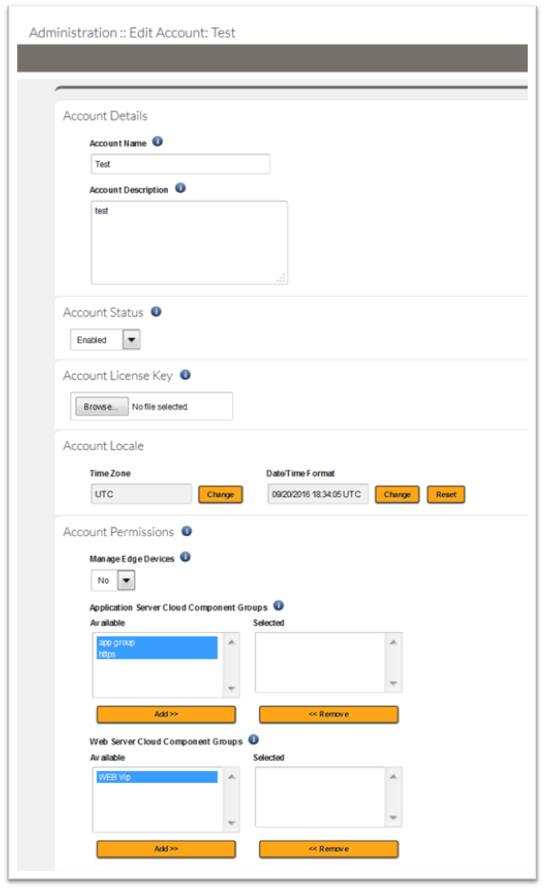
- Click Browse in the Account License Key section and select your license key.
- Click Save.
Section Description
| Section | Description |
| Account Name | This will be used during login, and will be converted to a single word with no spaces. (e.g. a domain name) |
| Account Description | This can be anything you want to describe the account, domain, or other grouping that this Account represents. |
| Account Status | An Account set to ‘Suspended’ will prevent users of the Account from logging in to the system. |
| Account License Key | Upload the license key purchased from FireScope Support to set the permissions for this account. |
| Account Locale | |
| Account Permissions | Optionally allow users of the ‘Account Admin’ User Access Level to control certain aspects of their own account, that would otherwise be the responsibility of the CMI. Manage Edge DevicesAllow users of the ‘Account Admin’ User Access Level the ability to create and register Edge Devices for their account.Application Server Cloud Component GroupsSelect the Application Server Cloud Component Groups this account will have access to for configuring Edge Devices.Web Server Cloud Component GroupsSelect the Web Server Cloud Component Groups this account will have access to for user access to SPM. |
| Public Dashboard Access | Enabling will allow any user to see all resources presented on Public Dashboard pages.For example, a user with access type Dashboard Only, who has been given access to only one Service Group with a few Cis, will now be able to see all Service Groups, CIs, Policies, etc ie all resources presented on Public Dashboard pages. |
| Browser connection | Check to force all users in this account to use HTTPS (Hypertext Transfer Protocol Secure), a secure protocol that provides authenticated and encrypted communication |
Create a User
To create a user, follow these steps:# Log into the CMI.
- Account Name: CMI
- Name: Contact support
- Password: Contact support.

- Click on Administration > User Management > Users. Users page will be displayed.
- Click Create. Create User page will be displayed.
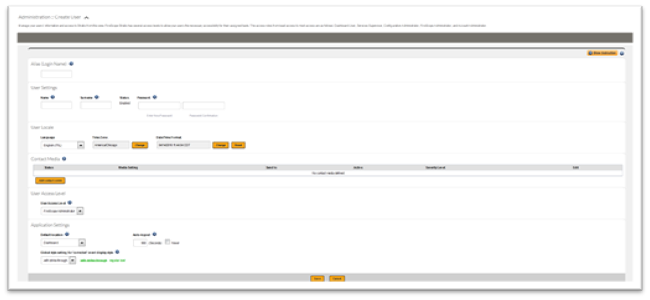
- Complete the following required fields, for more information refer to the Section Description Table below.
- Alias
- Name
- Surname
- Password
- Confirm password
- User Access Level
- Contact Media
- Click Save.