Software Distribution II: Distribute Software Packages
Distribute Software Packages (Empirum)
In order to deploy software or operating systems the required packages needs to be uploaded and registered at the server. This getting started describes the options to prepare and upload the packages for the various package types. The benefit using the Unified User Experience based package upload is that there is no 8 GB file size limit and the packages are automatically registered in Empirum.
Requirements
- Configured File Upload Service
- Configured Enterprise Service Bus with an connected Empirum node
- As user with the management role UEM Object Library Manager
For cloud customers, the File Upload Service and Enterprise Service Bus is installed and configured automatically.
Supported Packages
- Software Packages
- Operating System sources
- Language Packs
- PXE images
- Driver packages
Package Preparation
In order to upload software to Empirum they need to be provided as a *.zip file in the Empirum import format. To do this, do one of the following, depending on your package type:
- Software Packages
- Use the Empirum Package Wizard to create a new software package.
- Install the Matrix42 Packaging Center on a Windows computer and use the option Package Wizard to create a new Empirum software package.
- Choose to create a *.zip file at the end of the process.
- Export an existing package from the Empirum package library of an other Empirum server.
- In the Matrix42 Empirum Management Console -> Configuration -> Software Management -> Depot -> right click on a software package and choose Export Package.
- The package needs to zipped before uploading it via the Unified User Experience.
- Use the Empirum Package Wizard to create a new software package.
- Operating System sources
- Install the Matrix42 Packaging Center on a Windows 10/11 computer and use the option Prepackaged OS Wizard to create an import ready operating system source.
- Before the Windows operating system (ISO) files can be imported, the latest Windows Assessment and Deployment Kit (WADK) must be installed.
- PXE images
- Install the Matrix42 Packaging Center on a Windows 10/11 computer and use the option Offline PXE Image Creator to create an import ready PXE image source.
- Additional information can be found here: Getting started with OS Deployment
- Driver packages
- Install the Matrix42 Packaging Center on a Windows 10/11 computer and use the option Offline Driver Package Creator to create an import ready driver package source.
Upload Package
This allows the upload of Software Packages, OS Sources, Language Packs, PXE images and Driver packages from the browser into the Empirum library.
- Login to your Unified User Experience or Enterprise Service Management Platform
- Launch the Unified Endpoint Management application
- Depending on which type of package you want to upload, start from the following:
- Software Packages
- Navigate to Software Distribution
- Select Software Packages
- Press Add Package
- Drag & Drop your package and proceed
- All other Packages
- Navigate to Operating Systems
- Select your Package Type:
- Boot Configurations = PXE Images
- Operating System Sources = Installation Sources
- Driver Packages = Hardware Drivers
- Language Packs = Language Packs
- Press Add Package
- Drag & Drop your package and proceed
- Software Packages
- After the package is uploaded and imported in Empirum it is ready to use in an Assignment
Some browser extensions like LastPass might interfere with the upload and result in high load and deferred upload start.
Review Upload
When you have access to the Administration application, switch to Administration and select Integration and Enterprise Service Bus. Select Remote Actions and review the Upload File action and open the preview to review the status. When the upload is finished, switch back to Unified Endpoint Management to assign packages.
Assign Packages
After uploading, the package should appear either in the Software Packages section or under Operating Systems. The packages are now ready to be assigned and you can add packages directly to an existing assignment or create a new one from the actions inside the preview. In addition, you can create a new Assignment from the Assignments section and add the target devices and packages separately.
Add to Assignment(s)
Click on the button to open a list of all available assignments. You can now mark one or more assignments and then add them via the button to the assignments. This option is only available for object types which can be added multiple times to an assignment (i.E multiple software packages but not multiple OS installation sources).
Create Assignments
Clicking the button opens the Assignment window, in which an appropriate assignment can be configured for the selected device.
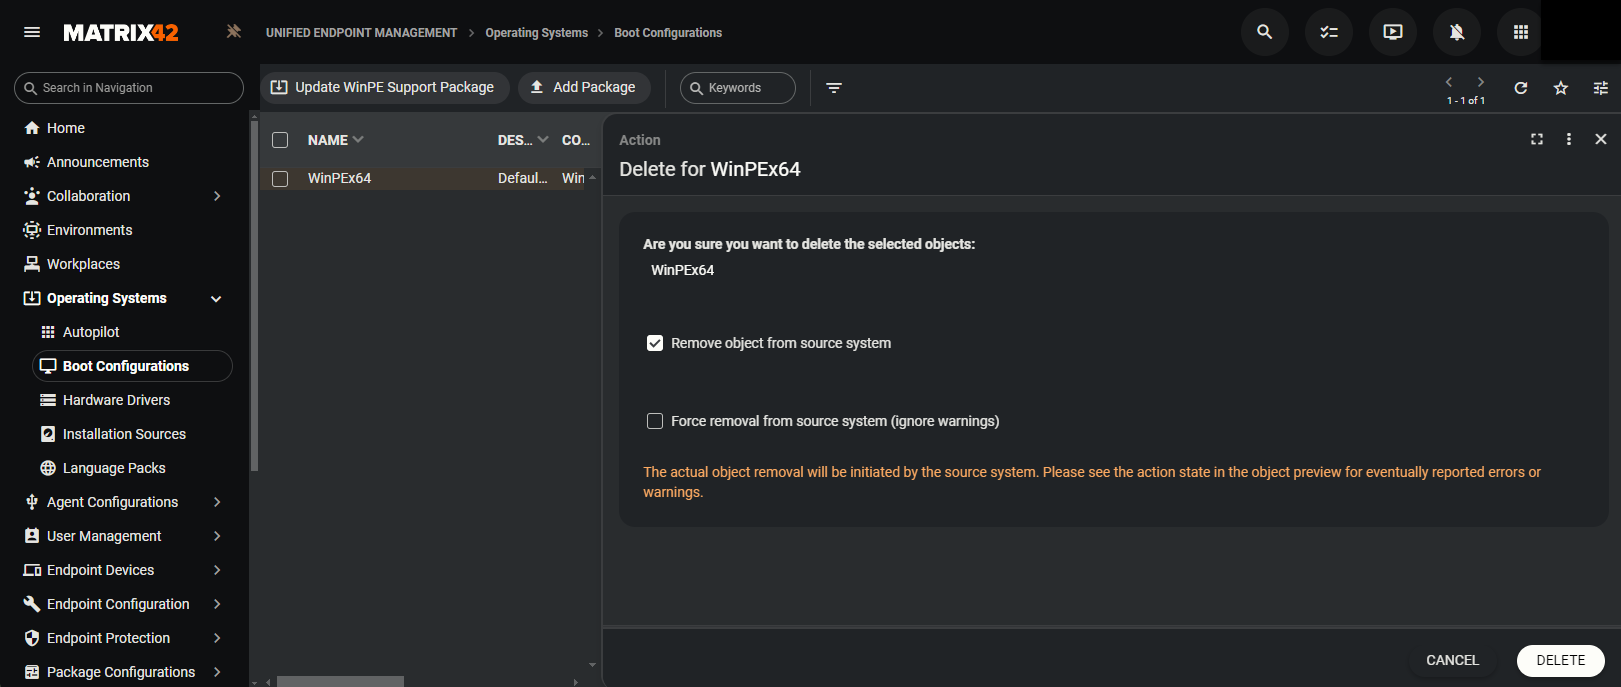
Delete Packages
The Delete action displays a dialog which asks if the object(s) should be removed from the associated core system. To delete a package, open the preview of the package and press the Delete button. As some scenarios exists where the removal is not possible without interaction an option is available to force the removal. The information if a removal is not possible is displayed with the reason in the "Action state" available on the preview. If a removal is only possible with manual resolving the issue also a forced remove will nor work. The issue needs to be resolved in the core system. Examples of not automatically resolvable issues are if the package is in a dependency or sequence of another package. For Empirum objects which currently do not support the removal from Unified User Experience,the Action State in the object preview will state "Unsupported Type value 'xyz" with the status failed. They have to be removed from Empirum via the Empirum Management Console.