Applications
Overview
An Application is a part of software built to fulfill a particular purpose for the user. The Solution Builder, for example, being an application itself, allows users to create applications of their own without or with minor coding involved.
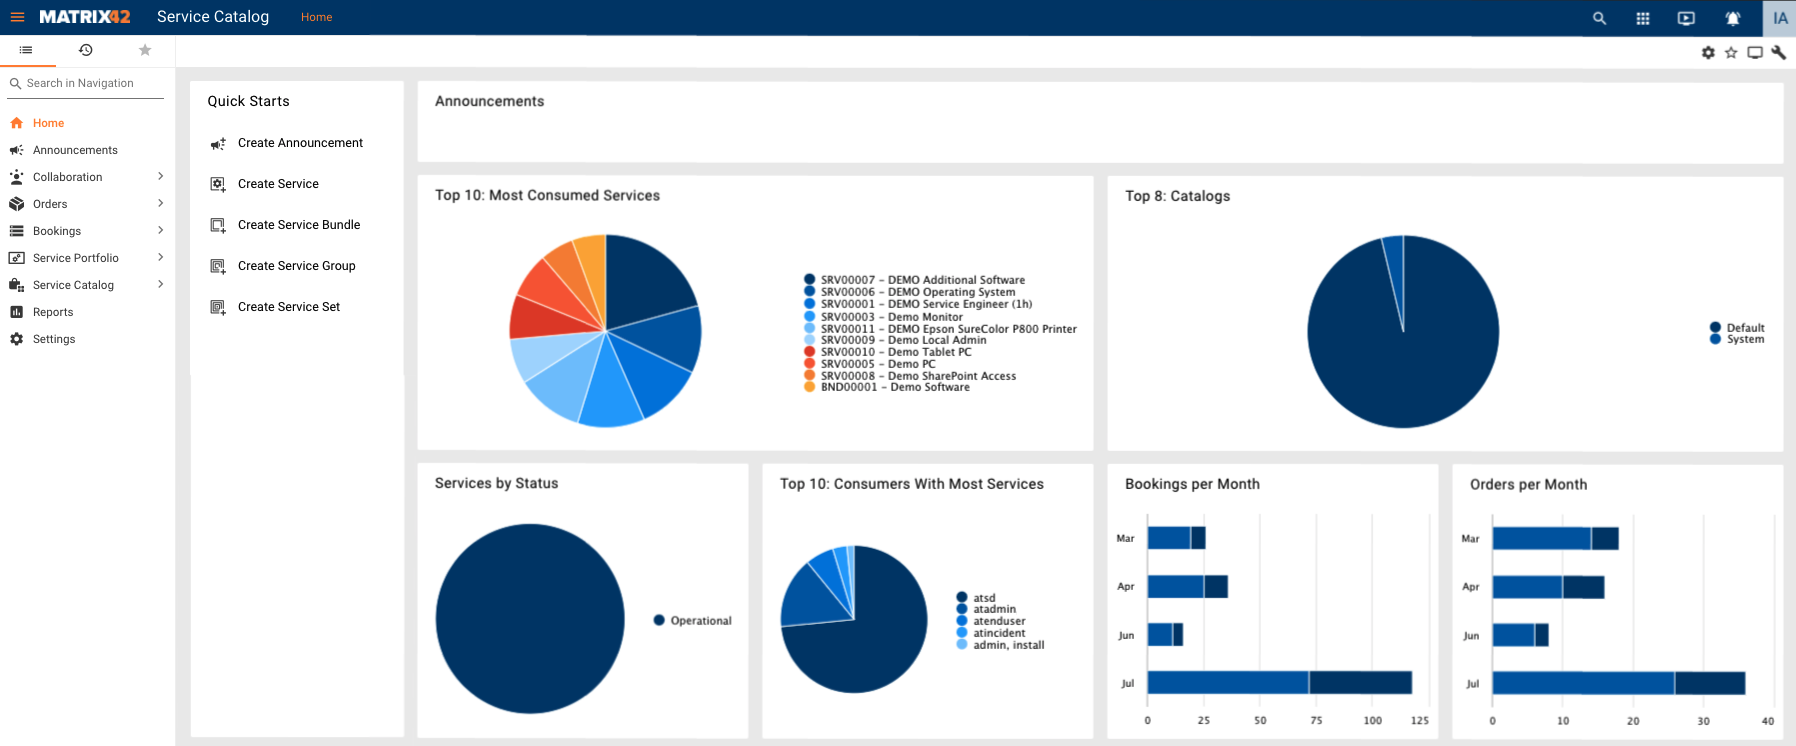
The screenshot below shows the Service Desk application built with the help of the Solution Builder:
Application Header
Each application has a Header/Toolbar at the top.

A Header contains the following elements (left to right)
- Navigation toggle button: Click this button to show/hide the navigation panel.
- Logo: Click a logo to open the application's default page (in most cases it's the Home landing page).
- Application name: Click an Application name to open the application's default page (in most cases it's the Home landing page).
- Breadcrumbs: Shows the current navigation item and a path to it. Click a name in a path chain to redirect a user to the respective navigation item.
- Buttons: the set of the displayed buttons depend on the application settings. Possible options:
- Search button: Click this button to open a global search bar that enables you to search for any object within the current application.
- Application switch button: Only visible if the user has more than one application available. Click this button to open the application picker where you can navigate to another application.
- Notification monitor toggle button: Click this button will show/hide the activity monitor panel.
- Feedback button: Click this button to open the feedback sharing window. Only visible if sending feedback is enabled in the General section of the Global System Settings.
- Notifications Center: Click to preview push notifications center messages.
- Shopping Cart: is available for the Self Service Portal application only.
- User avatar: If a user avatar is set, it will be shown. Otherwise, the first letters of the user's First Name and Last Name will be shown. Moving the mouse cursor over the avatar will trigger a tooltip with the user's First Name and Last Name. Click an avatar to open a menu with items related to user adjustments.
Creating an Application
To create an application:
- Open the Solution Builder from the Matrix42 main toolbar: Applications Button → Administration.
- In the Navigation panel on the left of the screen, click User Interface → Applications.
- Click the Add Application Type button.
- In the Application Type dialog that appears, fill out mandatory fields and make necessary adjustments:
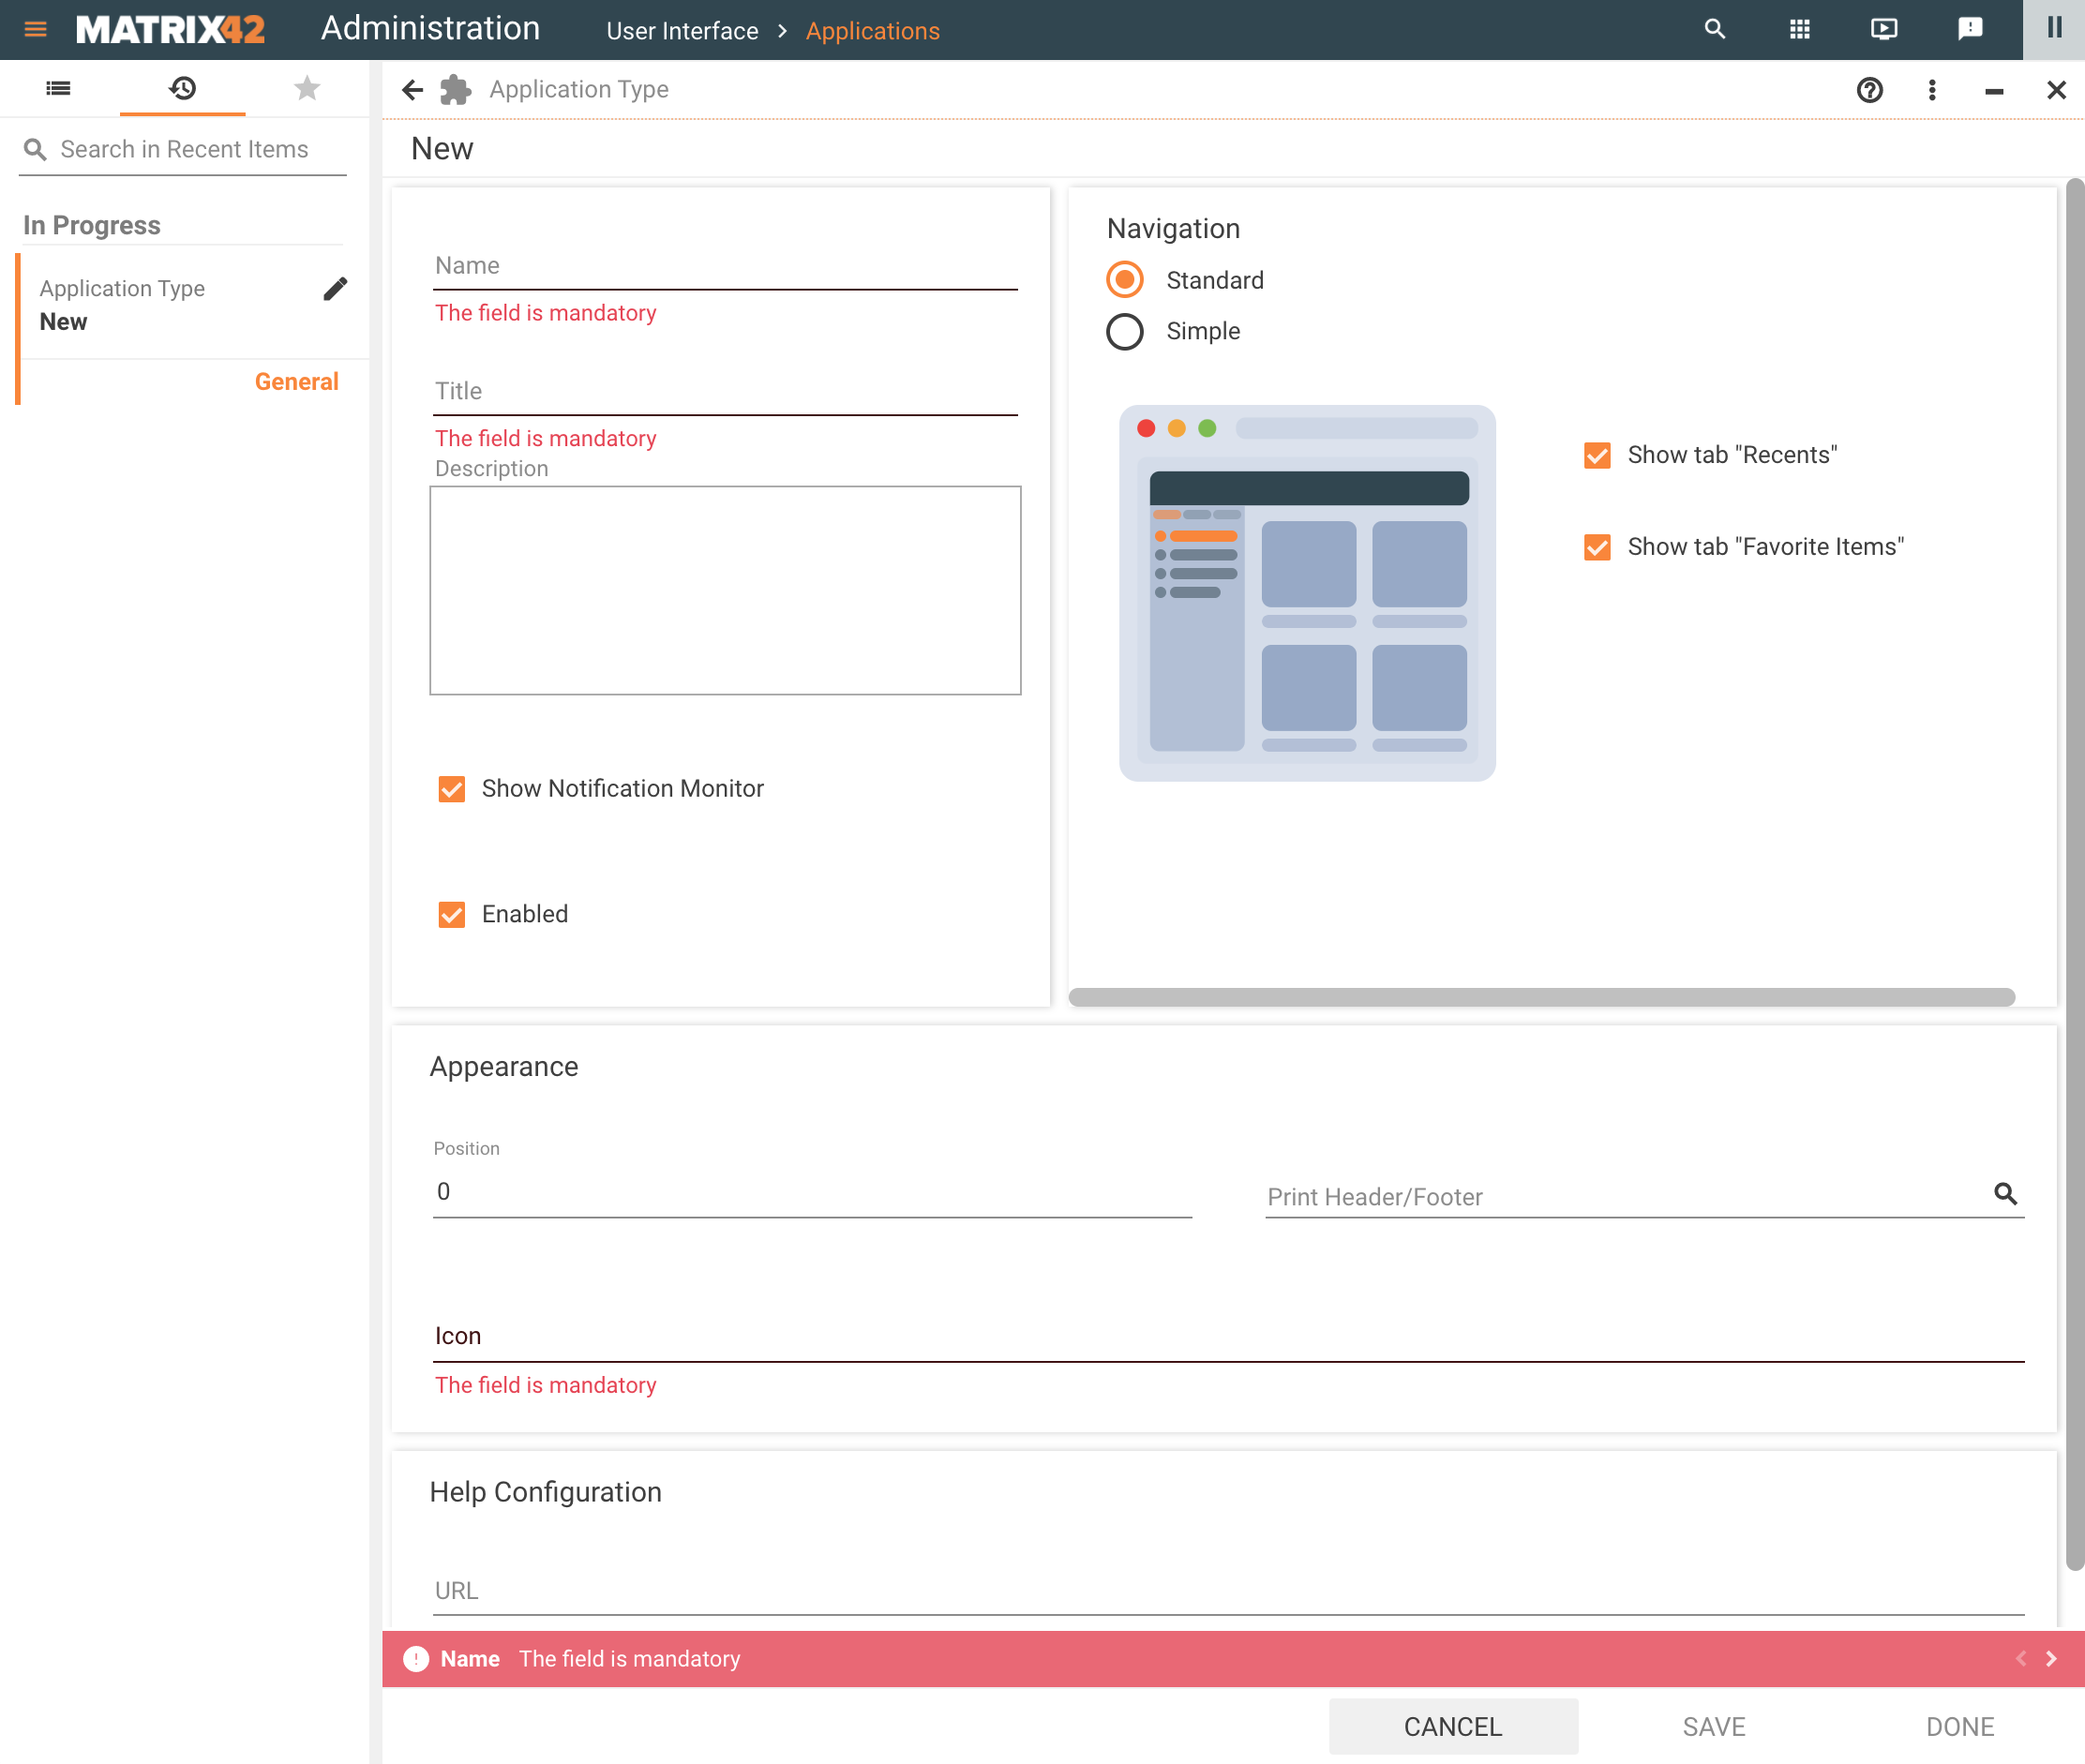
- Name: specify the name of the new application. Use only Latin letters and numbers, no spaces or special characters, in the name. Keep in mind that the name specified here will be part of the application URL.
- Title: specify the title of the new application. The title, unlike the Name, is localizable.
- Show Notification Monitor: define if you need a Notification Monitor action present in your application. By default, the Notification Monitor is shown and can be accessed from the application header as follows:
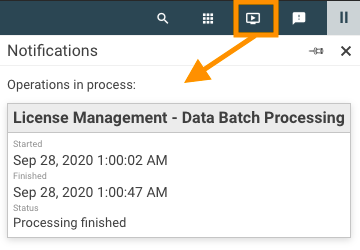
Notification Monitor displays the information that some background processes and a wide range of other tasks are running. The listed notifications cannot be cleaned out manually and serve for informational purposes only. Notifications are cleaned out automatically in 24 hours, when a new task is created by the current user, the system checks if the old messages are still displayed for the user and cleans them, if necessary. - Navigation: define the navigation mode and choose Standard or Simple. The view is shown on explaining images beneath the options.
- Show tab "Recents": define if you need a "Recents" tab of the navigation panel in your new application.
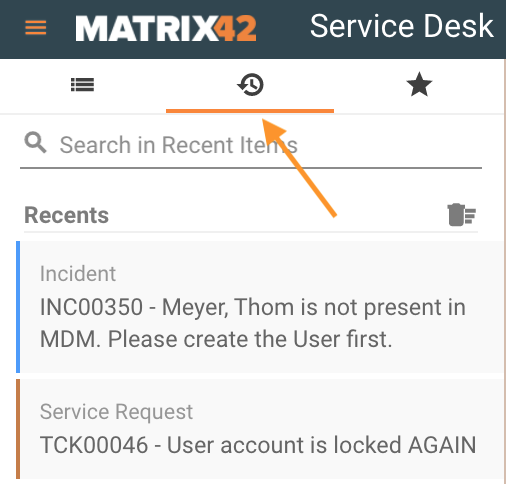
For ESMP v.11.0.1 and higher, the number of displayed items can be changed by the Administrator in the Administration application → Settings → Frontend Settings → Max Recent Searches. - Show tab "Favorite Items": define if you need a "Favorite Items" tab of the navigation panel in your new application. Favorite items provide quick access to the navigation items and other objects and are managed as follows:
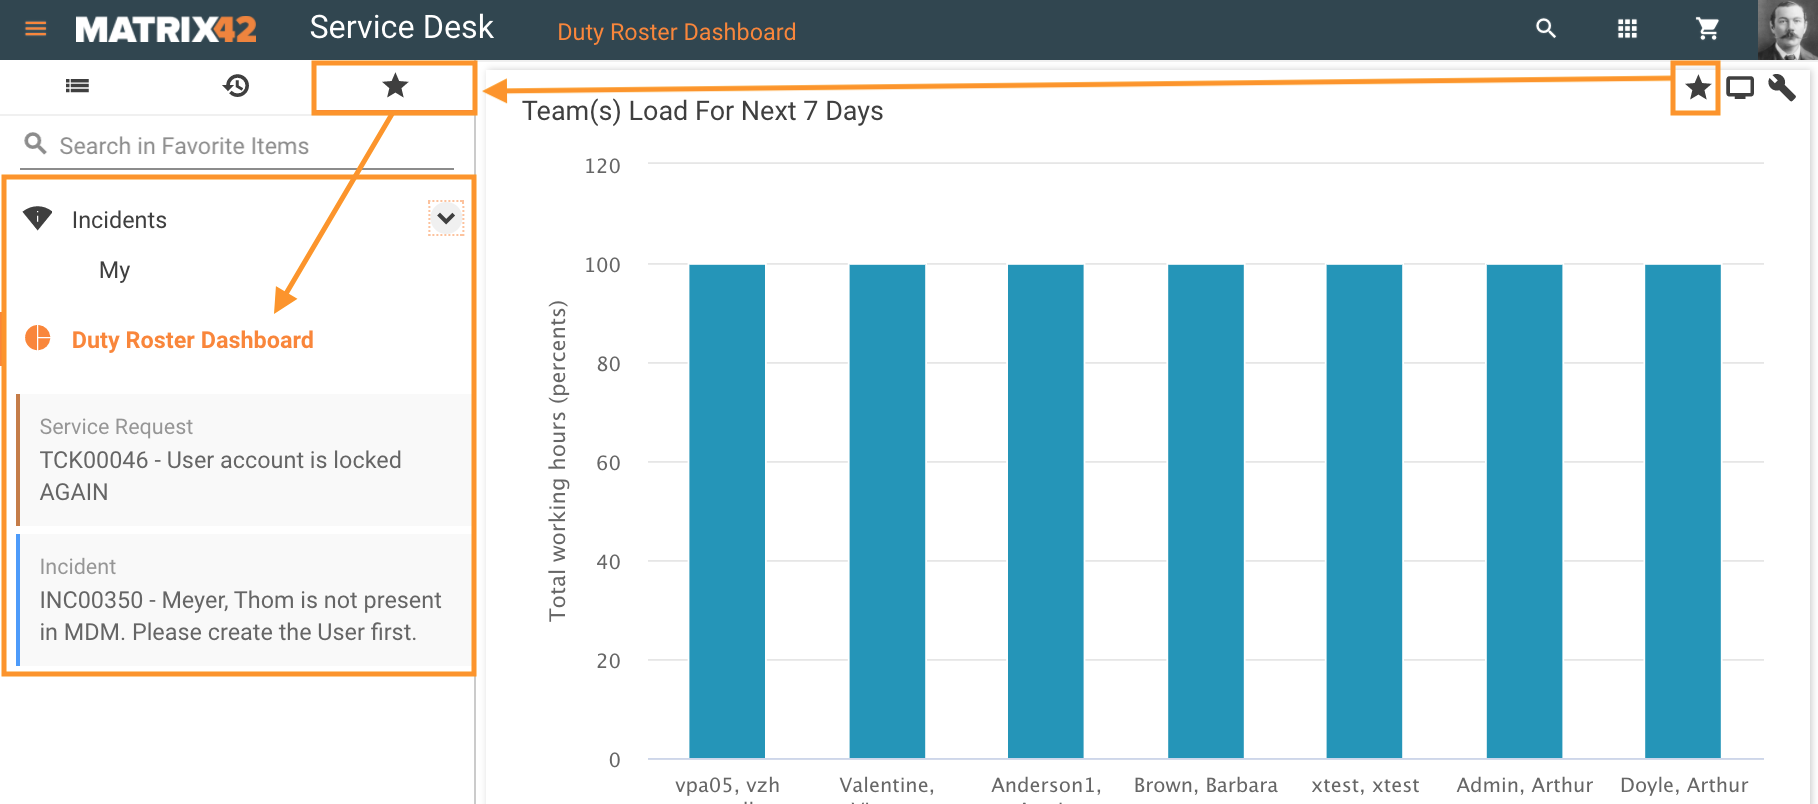
- Description: provide a description of the application for internal use. The description is also localizable.
- Position: the numeric value designating the position of the application in the Application picker (accessible via the Applications Button located in the Matrix42 main toolbar).
- Icon: click the field to display the list of all the available icons, then click the icon you would like to be displayed next to the Application Title in the Application picker (accessible via the Application Button) to add the icon to the dialog.
- Enabled: leave selected for the Application to be available in the Application picker. Uncheck the Enabled checkbox to hide the Application from the Application picker.
- URL: specify the link to the Help Center. To access the online help, click:
- User image in the left corner of the application header;
- Click on the "Help Center" in the main toolbar:
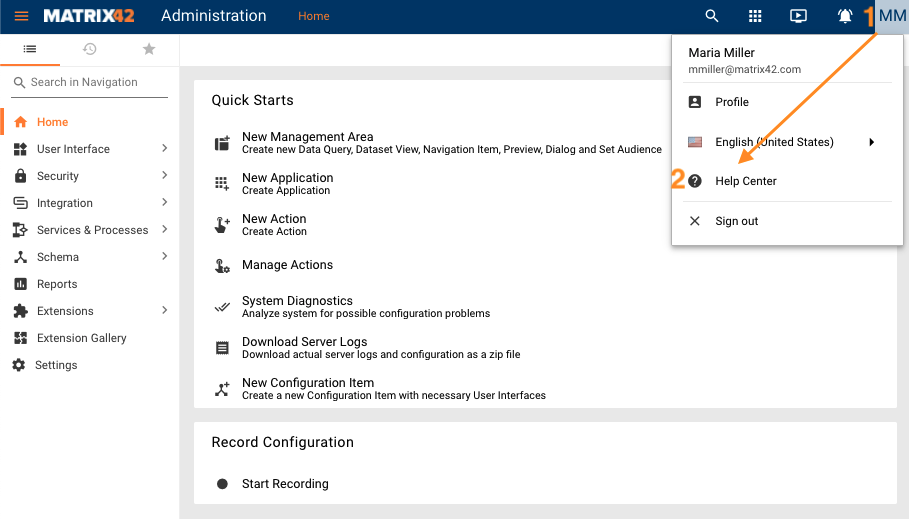
When done specifying the data, click SAVE at the bottom of the dialog to save the changes.
In the Application Type dialog, switch to the Navigation Items tab and create navigation items for the application. The navigation Items you create here will help you navigate your new application. One by one, add as many navigation items as you need to the Application you are building to create the navigation structure.
Switch back to the General tab of the Application Type dialog and specify the Default Navigation Item in the Appearance panel. This is the navigation item whose Action on Click will be performed when users click the Application Icon in the Application picker (Matrix42 main toolbar). Make sure to SAVE the changes.