Azure VM Discovery
Goal
Among the discovery mechanisms FireScope provides is the Azure Virtual Machine Discovery. This process will use a Service principal credential that you create to access and discover virtual machines inside of your Azure environment. As many companies may be broadly distributed across the world in their Azure environments, multiple credentials will need to be created to discover each of the regions or subscriptions inside the customer's Azure enterprise. Each one of these credentials will be required in an individual discovery job which will then discover the virtual machines in that region which are visible by the service principal credential created. We will provide in this document the steps needed to create the credentials, create the discovery jobs, and view the results in the FireScope environment.
Configuring Azure
First, an Azure Service Principal will need to be created which can access specified subscriptions to view VM resources.
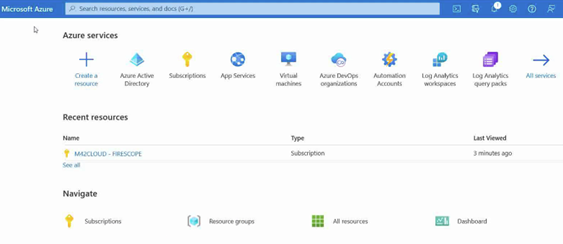
- Log into your Azure portal.
- Inside of Azure Active Directory select app registrations.
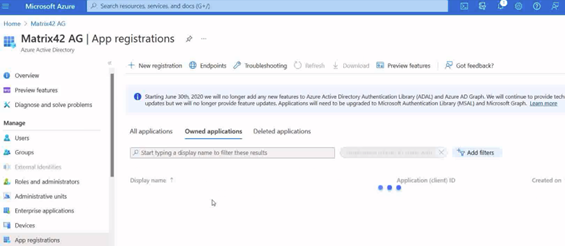
- Click new registration and enter the name that you wish for this application.
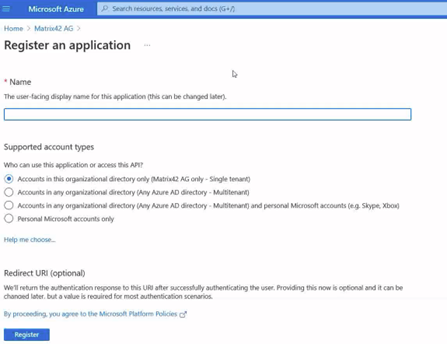
- The first option “Accounts in this organizational directory only” should be selected.
- Click register. Your results page will now be displayed
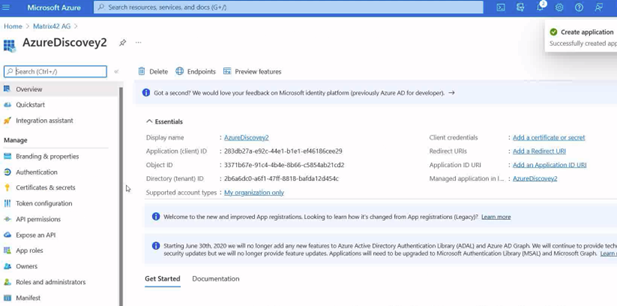
It is important to copy down the Application (client) ID, and the Directory (tenant) ID values that are given on the results page.
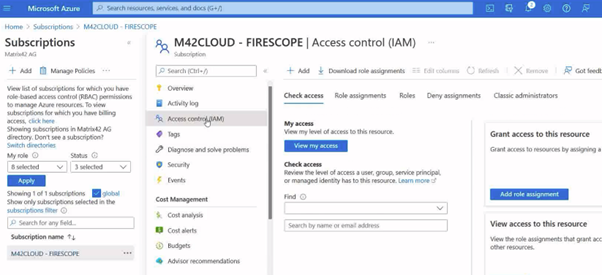
- From Azure portal home go to subscriptions, then click the subscription this credential is created for, then select the Access control (IAM) option.
- Click on add role assignment and choose “Reader” role. Another role could be used here as long as it is able to view VM resources desired.
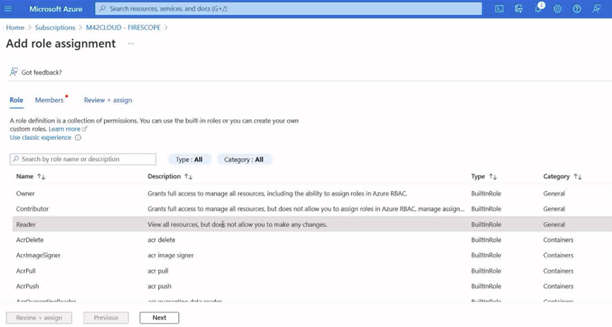
- Click next.
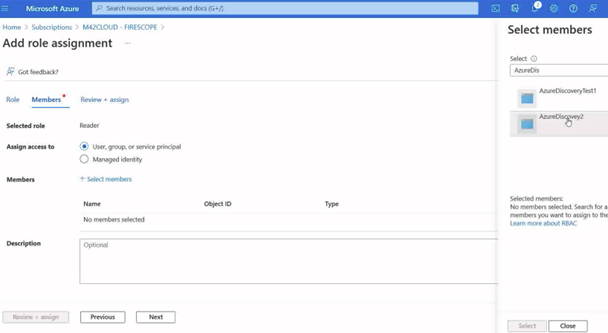
- Click select members.
- Find the new principal you created in the earlier step.
- Click review and assign to make sure the user and the access row is correct.
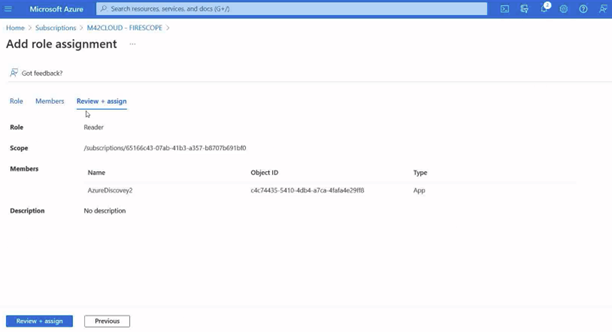
- Accept using Review + Assign button.
- From Azure portal home, click on Azure Active Directory.
- Choose app registrations.
- Select the application you just created.
- Click certificates and secrets.
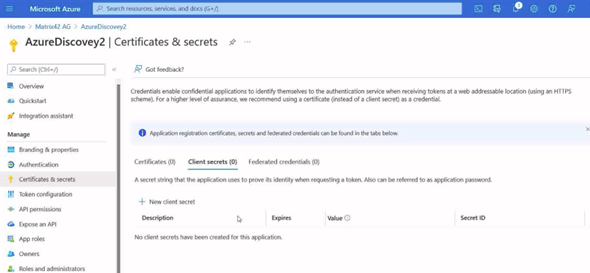
- Under client secrets click new client secret.
- Add a description and an expiration or the client secret.

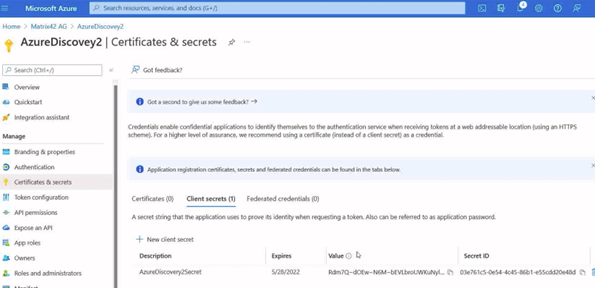
- Click add.
It is now important to record the Value provided in the Client Secrets section for use later. This information will not be displayed again.
- Repeat as necessary for each region or subscription in Azure.
Configuring FireScope
Microsoft Azure Connection Credential
Now that one or many Service Principal credentials have been created. The next step is to add to FireScope's Connection Credentials.
- Log into your FireScope account.
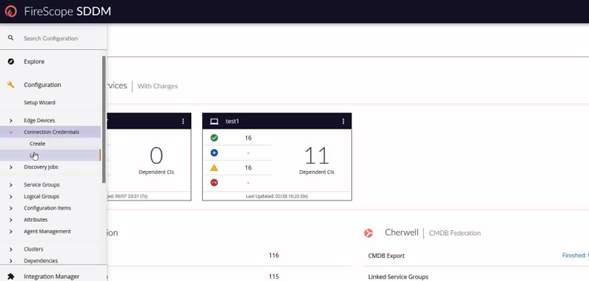
- In the left menu expand configuration, expand connection credentials, click create.
- Select the edge device intend for this discovery.
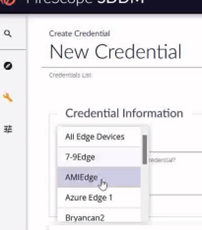
The Edge Device does not have to be in Azure itself, but it will need to be allowed to access Azure from its location.
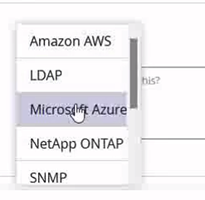
- Select Microsoft Azure.
- Use the Name and Description fields to provide proper naming.
- Enter the application (client) ID, directory (tenant) ID, and the client Secret ID provided from the previous steps in Azure.
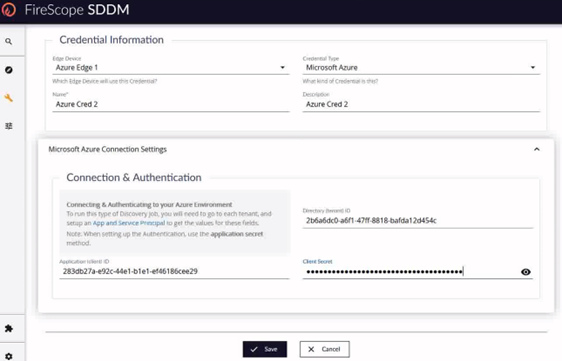
- Verify all fields are correct and click save.
- Repeat as necessary per credential created in the Azure steps above.
Microsoft Azure Discovery Job
Now that Azure discovery credential(s) are created, Discovery Jobs may be created (one per credential).
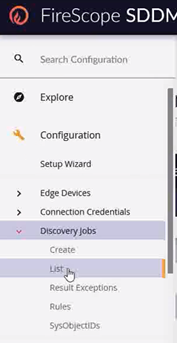
- In the left menu expand configuration, expand discovery jobs, and click create.
- Enter Name, select Edge Device from list, select Microsoft Azure from job type list, and toggle the Enable job in the upper right of the form.
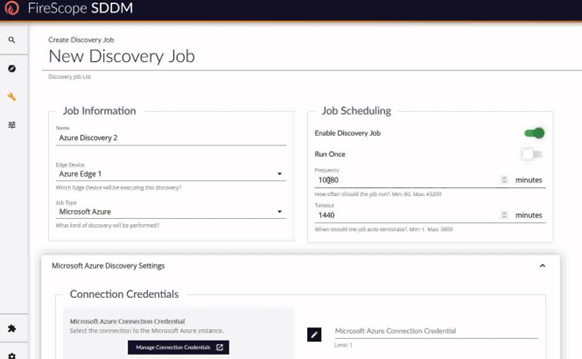
- Frequency and Timeout value are defaulted but are editable.
- Frequency is how often this job will run from the time it finishes
- Timeout is how long to wait before the job will quit due to errors.
- In the Microsoft Azure discovery settings section, click the pencil icon and choose from the list of credentials you have already created for this job.
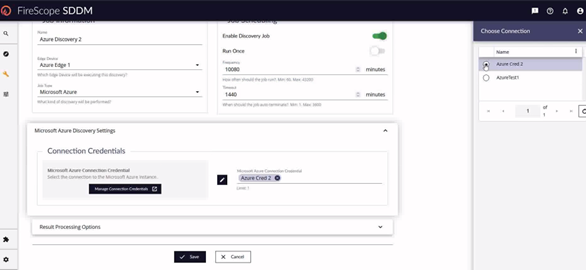
- In the Result Processing options, all the defaults are already toggled for you all you need to do at this point.
- Click save.
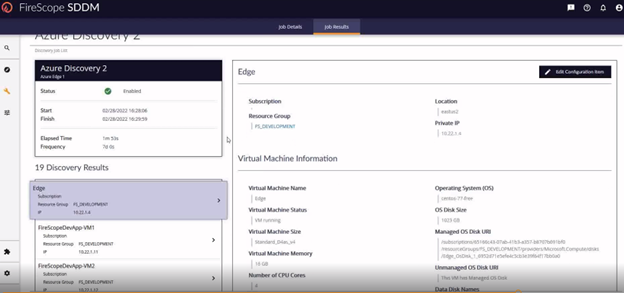
Discovery Job Results
After saving your discovery form, you will be taken to the discovery jobs list. Here, all discovery jobs are listed by category. In the Microsoft Azure section, you will see your job will be pending.
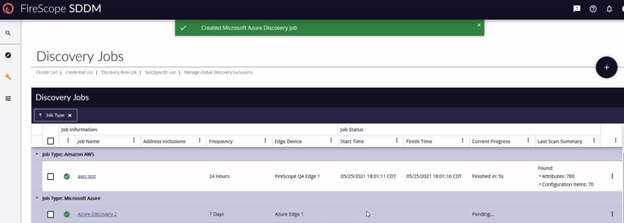
This pending state will continue for some time. Refresh the page using the refresh icon in the bottom right corner of the grid.

Eventually you will see that your job has run and completed.
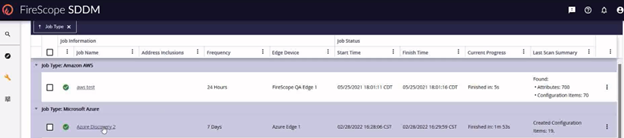
You can then click on the ‘3 dots’ menu on the far right of the row and select view results to see what has been found.
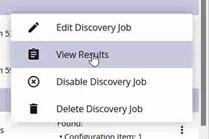
Here, you’ll find a list of VMs found and data on each one.