Edge Device Installation
Overview
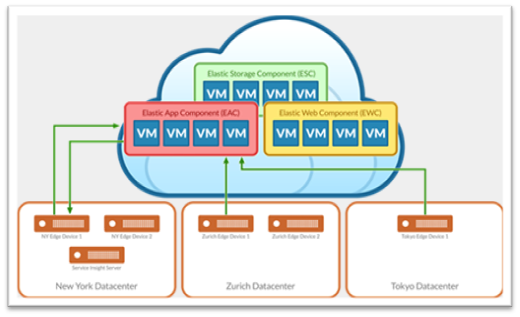
The Edge Device resides at each business location, performs Discovery and data collection, and pushes the resulting data up to the central FireScope SPM cloud. All Edge Device configuration is performed through the central FireScope SPM interface, enabling new business locations to be easily integrated into Dashboards by starting up a new Edge Device and pushing down configuration. Edge devices can be physical or virtual appliances, depending on the size of the environment they reside in and volume of data collected.
Architecture
Communication with the central cloud can be over standard HTTP or HTTPS, is configurable per edge device, and leverages message queuing to ensure accurate delivery of data. Additionally, if an edge device loses connectivity to its cloud, data will be locally cached until connectivity is restored, at which time a secondary history queue is used to push cached attribute data without disrupting real-time data.
Deploy Edge Device
- Download the latest FSEDGE.ova image by visting the Matrix42 Marketplace.
- Once the file is downloaded successfully, connect to ESX Server via vSphere client.
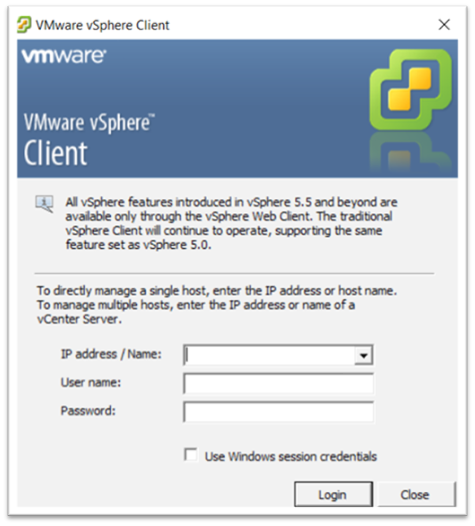
- Log into the Vmware. Deploy OVF template page will be displayed.
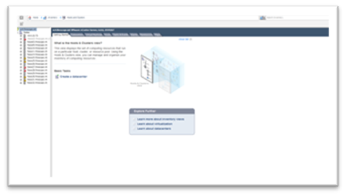
- Click on File > Deploy OVF Template. Deploy OVF Template wizard will be displayed.
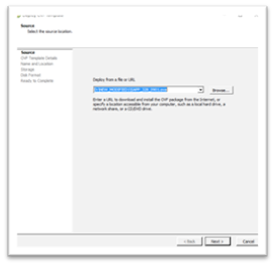
- Click on Browse and select the SEDGE.ova that was downloaded (Step 1) and click Next.
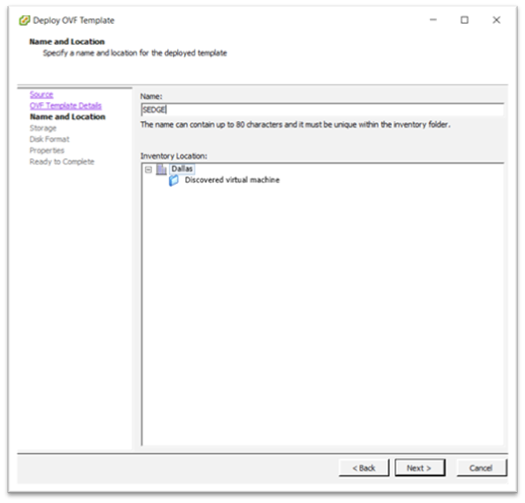
- Specify a Name of the VM (As per company standards)and click Next.
- Select DataStore and click Next.
- Select Thin provision and click Next.
- Check the box Power on Deployment and Click Finish.
- After successful deployment, node will be starting. Once the node is started follow below steps for Network and Hostname assignments.
- Enter 1 for Configure Network Settings.
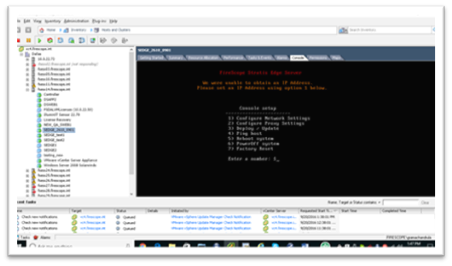
- Select No

- Enter Hostname
- Enter IP Address

- Enter Subnet Mask

- Enter Gateway

- Enter PRIMARY DNS Server

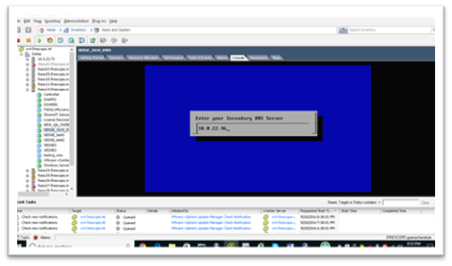
- Enter SECONDARY DNS Server
- Enter NTP Server

Note: Once you enter all above details, FSEDGE Node will be installing required modules / updates and Creates Database and tables etc.
What's Next:
Now that the Edge is installed and accessible, continue to Setup and Register Edge Device(s) to connect your Edge with your SDDM instance.