Hard Disk Encryption
Hard Disk Encryption
Encrypting the hard disk ensures that all the data remains secure from unauthorized users. Data on a hard disk encrypted by FDE cannot be hacked via boot CDs, floppy disks, USB devices, or by removing the hard disk completely for installation in another computer. Also, resetting the Windows user or administrator passwords with some well-known tools does not work on hard disks encrypted by Matrix42 Full Disk Encryption.
Encrypted hard disks display information only to authorized users, or to users who have accessed the disk using a password-protected ERI file either via the HelpDesk or via the ERD. The data on an encrypted hard disk cannot be accessed if you do not have Matrix42 Full Disk Encryption installed, or do not know the key.
Once a hard disk has undergone its initial encryption, Matrix42 Full Disk Encryption will automatically encrypt data newly added to the disk on-the-fly. This means that it functions in a completely transparent manner to the user. As an option, each hard disk partition can be encrypted by a different algorithm.
Hard disk encryption applies to IDE, SATA, and SCSI hard disks formatted using the NTFS file system under Windows. Hard disks formatted using the FAT file system are not supported.
You can encrypt a disk either with Matrix42 FDE or with Windows BitLocker. It means that if one disk is encrypted with Matrix42 FDE and another disk is encrypted with BitLocker they will co-exist in one system.
Algorithms
Matrix42 Full Disk Encryption offers the following range of software FDE encryption algorithms:
| Algorithm | Description |
|---|---|
|
Blowfish |
A strong, fast, and compact algorithm that supports key lengths of up to 448 bits. |
|
DESX |
A widely used cryptosystem and uses a key length of up to 128 bit. |
|
DES
|
A widely used cryptosystem and uses a key length of up to 56 bit. |
|
AES
|
Provides the most effective protection using a 256 bit key. The AES (Advanced Encryption Standard) provides the highest security coupled with fast encryption speed. This algorithm is the optimal choice for most users. |
If you intend to install the PBA component to raise security to a maximum, then please wait until the PBA component is installed and working BEFORE encrypting the hard disk. The reason for this is that if you were to encrypt before installing PBA it is possible that something in the authentication process may fail, you will be unable to access the computer, and you will be forced to perform an emergency recovery procedure. Such typical causes of failure are incorrect smart card provider or incorrect certificates.
Encrypting a hard disk partition
- Matrix42 Full Disk Encryption can only encrypt a hard disk partition if you have local Windows administrator privileges!
- Matrix42 Full Disk Encryption supports the integrated power management mechanisms of Windows ‘Suspend to RAM’ and ‘Suspend to Disk’ with enabled, as well as disabled, PBA.
- If your hard disk is already encrypted using a third-party product, please, decrypt it BEFORE re-encryption with Matrix42 Full Disk Encryption.
- You cannot apply hard disk encryption to the following:
- A remote (network) hard disk
- A drive that uses software BIOS, for example: EZ-Drive, Drive-Pro or Disk Manager.
- Do not encrypt drives, which are already encrypted! This will result in data loss.
- Do not encrypt system logical drives where the operating system is installed.
- Only the “basic” disk type is supported for the second hard disk (for details about “basic” disk types, see Windows documentation or online help).
- Once the encryption process is started, a valid ERI file is created and cached in the PBA partition. This allows users to recover the partition if anything goes wrong during the encryption process. However, the ERI file presents a security risk. Once the encryption process is complete, you should start the Recovery Information module in the Control Center and save an ERI file to external media or a network drive (this will also remove the cached ERI created at the start of the encryption process).
- Make sure that you close, or stop, applications that perform hard disk intensive operations before you start the INITIAL ENCRYPTION.
- Do not turn off the computer or work on the computer while the initial encryption is in progress. Doing so would result in data corruption.
Do NOT modify the encrypted partitions (size change, shrink, etc.). It may lead to data loss.
Encrypting a hard disk partition with FDE
- Open the Control Center (as described in Section 1.5).
- Double-click the Disk Encryption icon.
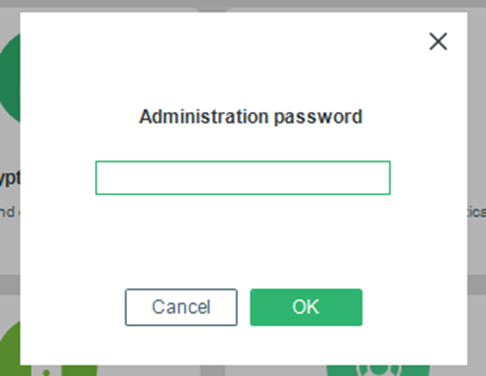
- The Administration password dialog appears.
- Enter the password and click OK.

- When you try to encrypt the disk before re-starting the system after PBA initialization, a message stating to restart the computer appears.
- (Recommended) Click Restart now to restart the system before encrypting the drive.

- The Disk Encryption dialog appears. This dialog lists all the available NTFS partitions/disks on your computer. Plain (unencrypted) hard disk partitions are displayed using a hard disk icon. Encrypted partitions are displayed using a lock icon.

- Select a plain hard disk to encrypt and click Next to continue.
- The Information dialog appears. This dialog enables you to select, whether the whole drive or only used parts of the drive should be encrypted:

| GUI option | Details |
|---|---|
|
Encrypt only the used sectors of the drive
|
When a drive is initially encrypted, either all the sectors (regardless of whether they contain data or not) or only those sectors that contain data, can be encrypted. Encrypting only those portions of the drive that are used is much faster in most cases. Select this option if you want to encrypt only the currently used sectors during the initial encryption. |
|
Encrypt the whole drive
|
Encrypting all sectors of the drive provides more security because even such things as already deleted data will be encrypted. Select this option to encrypt all the sectors of the selected partition. |
- Click Next to proceed with the next step.
- The Algorithm dialog appears. This dialog allows you to select which algorithm will be used for the encryption of the selected drive. For further information about each algorithm refer to the beginning of this section.

- Select an algorithm and click Next.
- The AES (Advanced Encryption Standard) provides the highest security coupled with fast encryption speed. This algorithm is the optimal choice for most users.
- The Key dialog appears:

This dialog enables you to specify the encryption key that should be used for hard disk encryption. The following settings are available:
| GUI option | Sub-option and details |
|---|---|
|
Properties
|
Some encryption algorithms support different key lengths. Use the slider to define the preferred key length for the selected algorithm. The key that will be generated out of the password will be of this length.
With this option you do not have to enter an encryption password. The encryption key will be generated randomly when encryption takes place.
The encryption key will be generated from, but is not a copy of, the password you enter (and confirm) here. The encryption password should be different to the Matrix42 Full Disk Encryption administration password. |
|
Options
|
Define when encryption key input is required:
This option is totally transparent for the user. The encryption password is not required to decrypt the drive or start the system. This option also means that every user with administrator privileges may start a decryption of the hard disk.
As with the option Never, this option is also totally transparent for the user. It provides the same protection as the option Never, but to decrypt a partition requires the input of the encryption password (see above). |
- Key length: It is recommended to choose the maximum key length for the selected algorithm. This provides the highest security with no remarkable performance loss.
- Passwords: If you decide to define your own encryption password choose one that is hard to guess. Use a mix of digits, letters and special characters. The password has to have at least a length of eight characters. A strong password must fulfill the following:
- Be as long as possible (we suggest 16 characters)
- Include mixed case letters, digits, and punctuation marks
- Not be based on any personal information or any word found in a dictionary (in any language)
- It is recommended to keep a copy of this password in a safe place. It might be required at a later time for decryption (if the respective option for Key input is selected), or in an emergency.
- Generate random key automatically: This option is only possible if the key (password) is never requested later on (see the option NEVER in the key Options field). Because nobody knows the random key, it is not possible to enter the key (password) during the startup sequence or to decrypt.
- Before decrypting a partition: The Before decrypting a partition option assumes that the user knows the encryption key (password). Therefore, the Generate random key automatically option should not be checked! Doing so would prevent the user from either decrypting a partition/drive or logging onto the computer.
- If you want to enable an additional layer of security to the disk encryption key, enable the Generate hardware-based key encryption key (HKEK) option and/or Generate TPM-based key encryption key (TKEK) when:
- Initializing FDE or
- Updating FDE settings or
- Creating FDE policies
- It means that HKEK and/or TKEK can be added both before and after encrypting a disk partition.
- This protects against moving the encrypted drive into another computer within the same network, where the same KEK is used.
- Select you preferred options and click Next to continue.
- The Key dialog appears. This dialog allows for creating the ERI file used for the recovery of the disk in case of emergency. Save this file to a flash card or to a network folder.

- Enter the password for the ERI file, confirm it and specify the path for saving the file. Click Next.
- Only the English keyboard layout is supported in the recovery application, that is why please enter the ERI password, which contains no symbols from other languages.

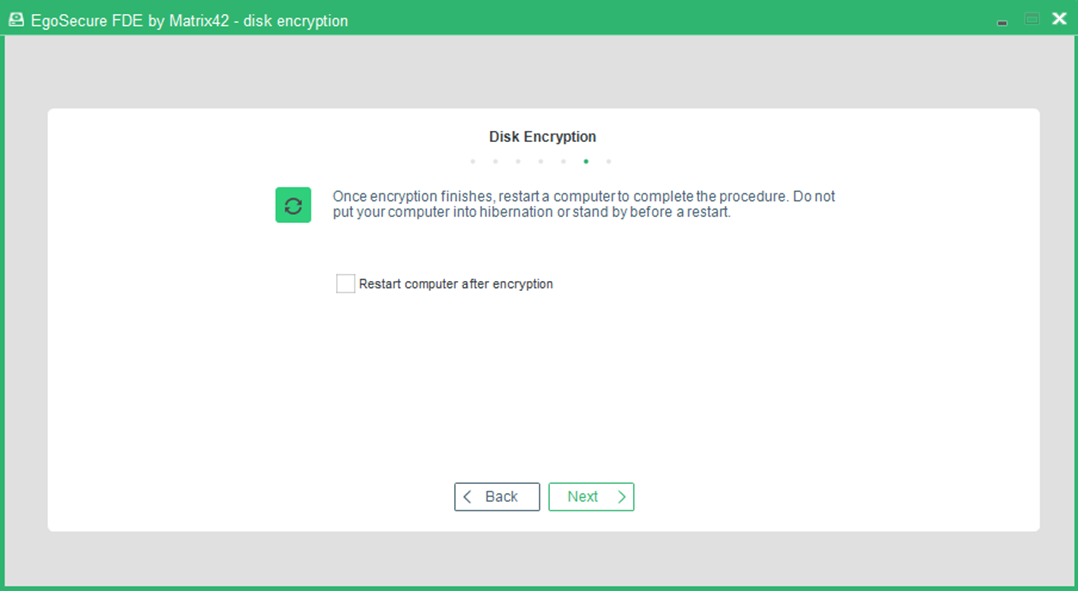
- Set the check box to restart the computer shortly after finishing the disk encryption.
- The Encryption dialog appears:

- Click Start. You can adjust the CPU priority given to the encryption process by adjusting the Priority slider.
- The Initial encryption process starts. Additionally, the icon appears in the notification area of the Windows taskbar (if the Hide FDE tray icon option hasn’t been enabled). When clicking this icon, the Matrix42 FDE dialog appears, where the encryption progress is shown.
Should the power fail during the encryption process or should the process be interrupted for any other reason, this may cause data corruption. However, the encryption procedure can still be continued via the WinPE recovery CD. The initial encryption of a hard disk takes time. Depending on the amount of data on the hard disk and the speed of the computer, the time needed can be an hour or more. The user will be notified by the following Interactive Services Detection dialogs below if the FDE encryption is triggered through a third-party agent running with “local service” privileges using the public-API provided by Matrix42. If the 'Show Message'-flags are not set, the user will not be notified with any messages.

Decrypting a hard disk partition
- Open the Control Center (as described in Section 1.5).
- Double-click the Disk Encryption icon.
- The Enter administration password dialog appears.
- Enter the password and click OK.

- The Disk Encryption dialog appears.
- All the available NTFS partitions on your computer are listed in the Drives list:
- Plain hard disk partitions are displayed with a hard disk icon.
- Encrypted partitions are displayed with a lock icon.

- Choose an encrypted drive to decrypt and click Next to continue.
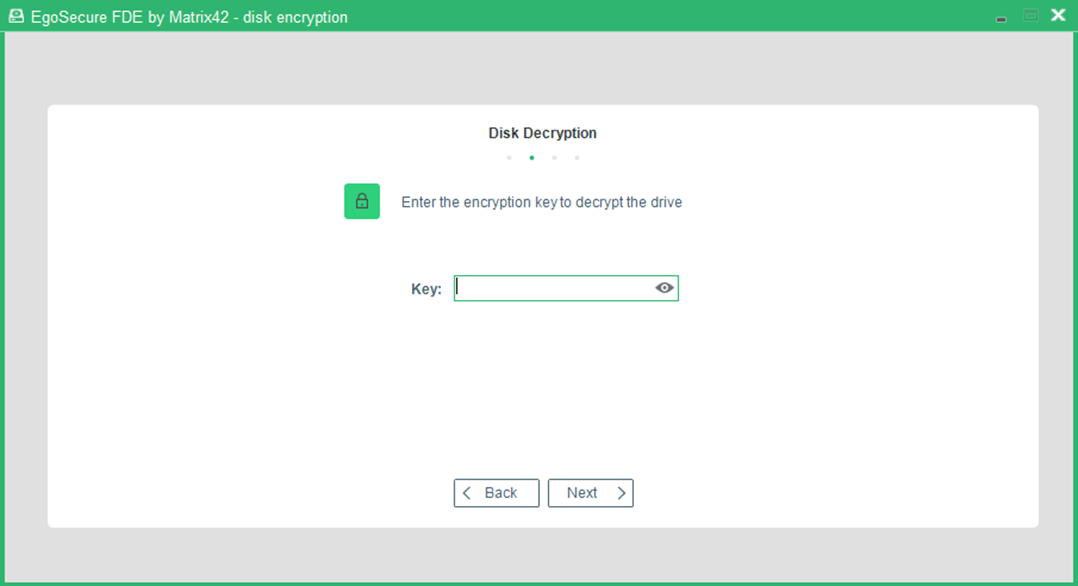
- The Key dialog appears if during disk encryption the Before decrypting a partition option was selected, see step 8 for details.

- Enter the key defined for drive encryption.
- The Restart dialog appears.

- Set the check box to restart the computer shortly after finishing the disk decryption.
- Click Next to continue.
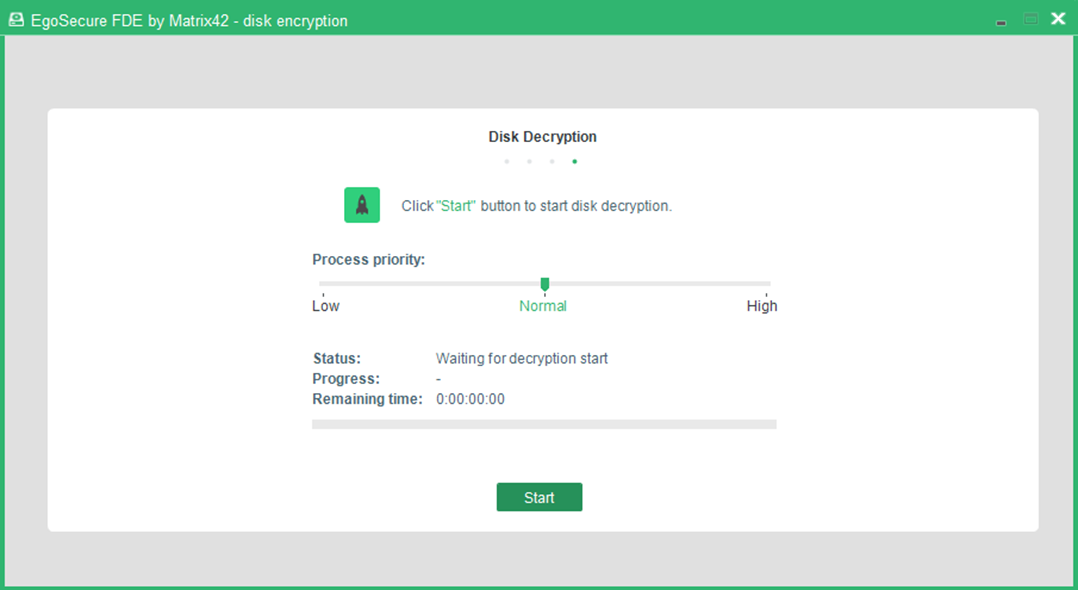
- The Encryption / decryption dialog appears:

- Click Start to begin the decryption of the selected drive. You can adjust the CPU priority given to the decryption process by adjusting the Priority slider.
- The decryption starts.
- Do not shut the computer down or work on the computer while decryption is in progress. If not, it would result in data corruption.
- Once the decryption is complete, a success message appears or the restart starts automatically (if the respective check box was set).