Connect to Google Cloud Platform
Overview
If you want to import your billing data from Google Cloud Platform (GCP) you must configure following system:
- Google Cloud Platform
- Matrix42 Cloud Costs Portal
- Matrix42 Cloud Costs Data Provider
This article provides a step-by-step guideline for connecting Google Cloud Platform with Matrix42 Cloud Costs Management.
Configure Google Cloud Platform
Create a dedicated GCP project
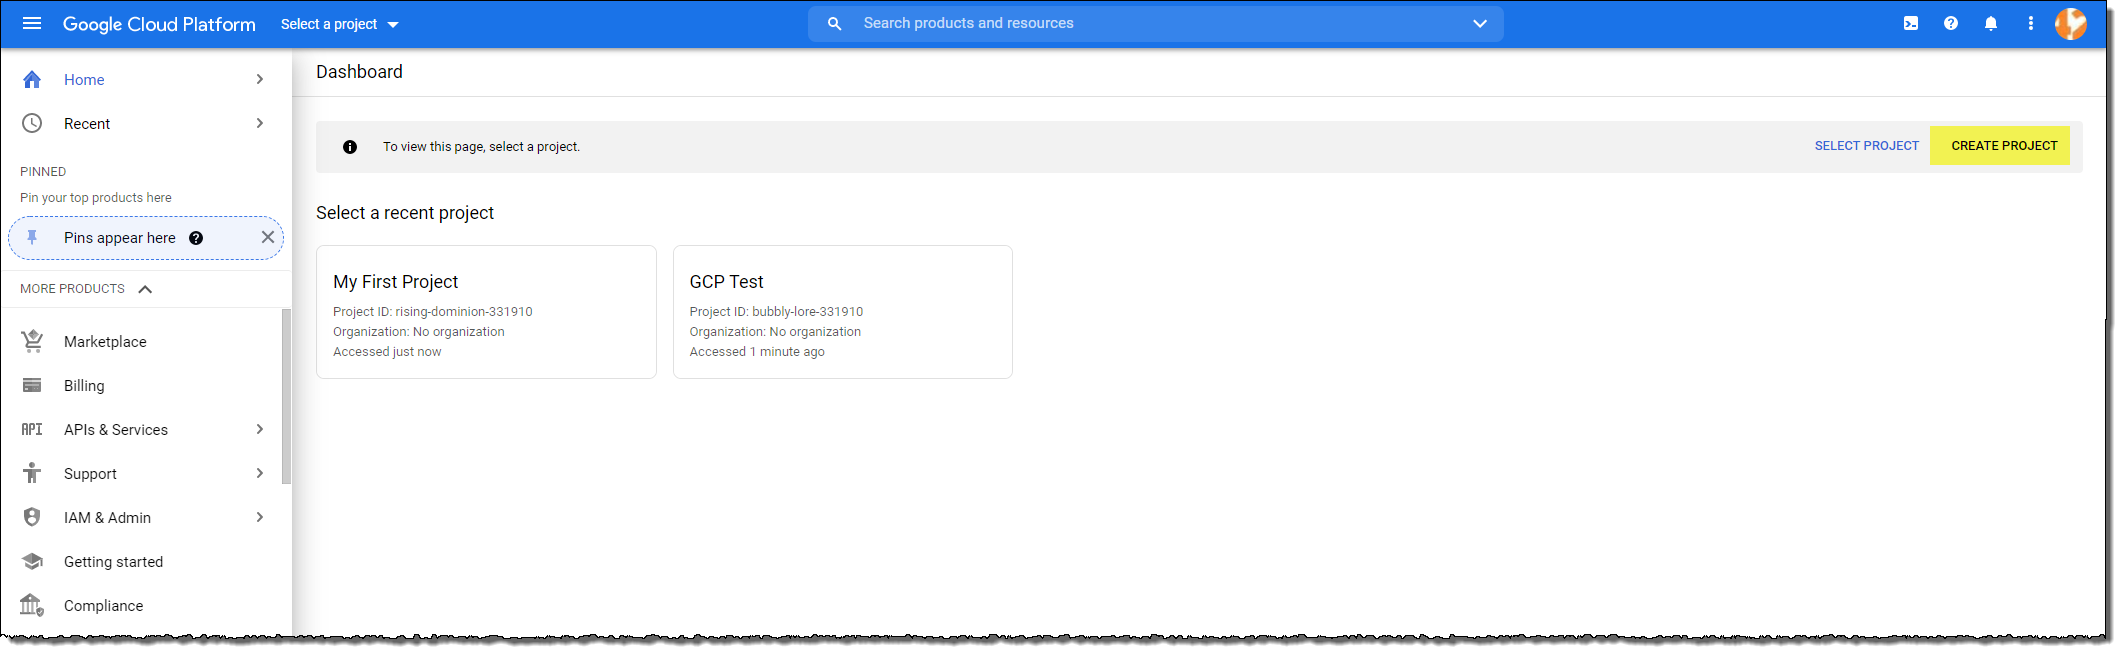
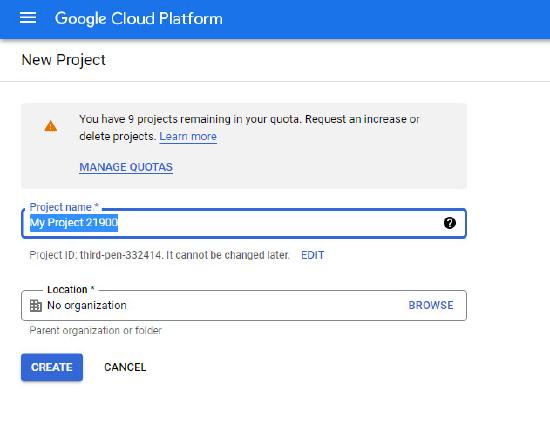
The Google Cloud Platform follows a project-driven approach to differentiate between an independent group of stakeholders. We recommend handling the complete integration between our management platform and your GCP Billing information in a dedicated project. Just log into the GCP console and create a new project here.
External Link: Create a new GCP Project
Create a GCP BigQuery dataset for billing data export
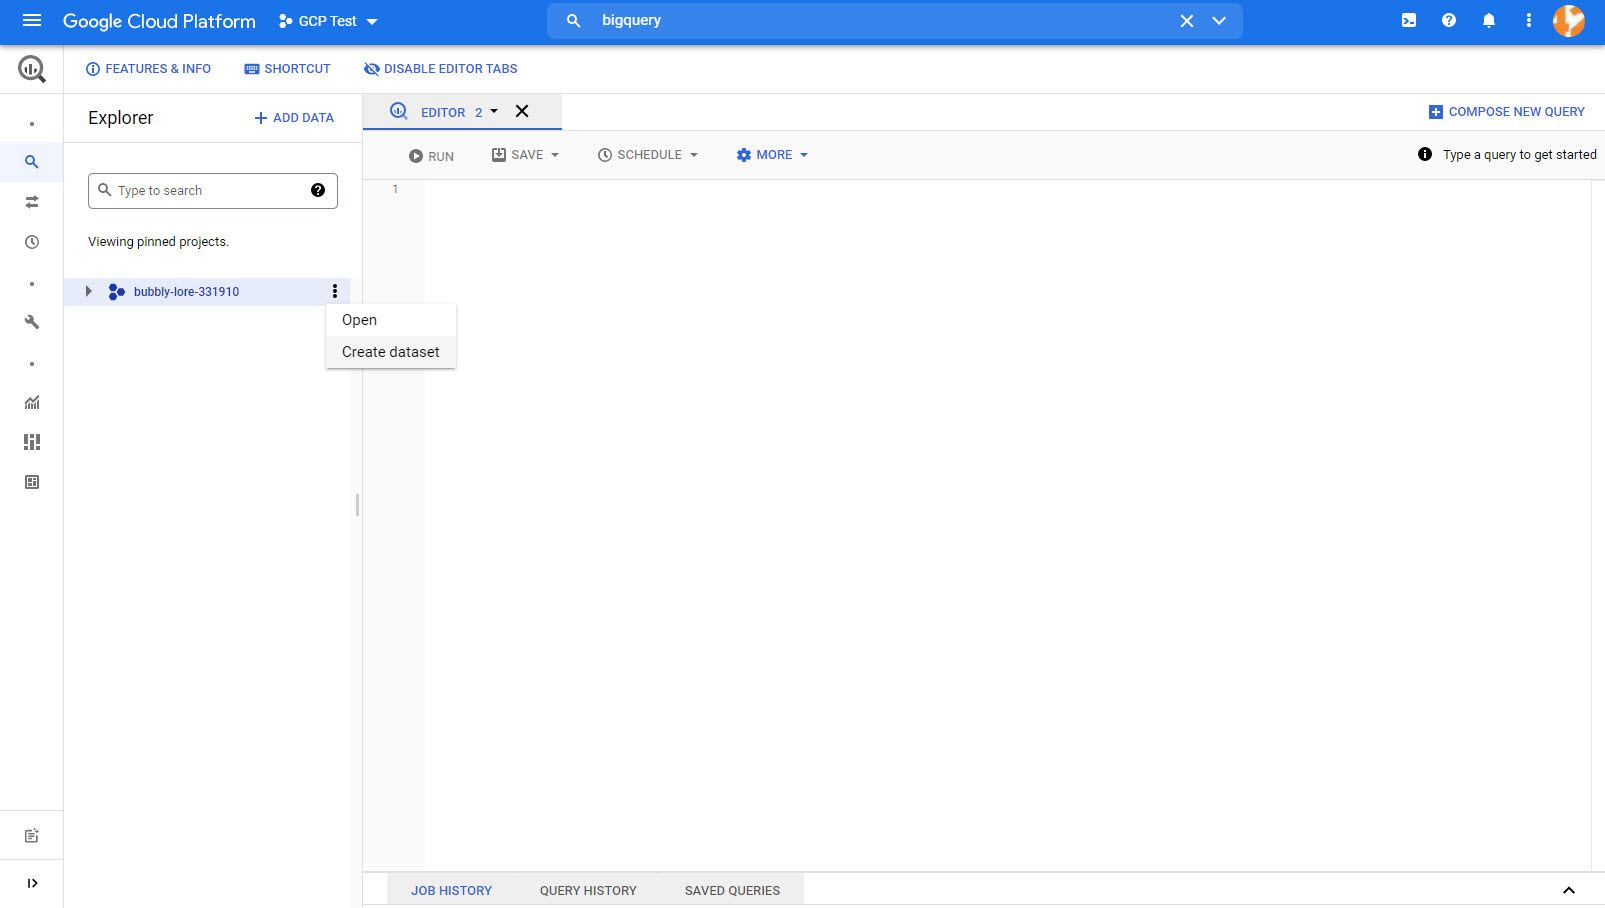
BigQuery is a fully managed data warehouse solution in GCP. The integrated billing system in GCP supports the regular export of detailed consumption data into a BigQuery DataSet, which 3rd party applications can consume. Open the BigQuery management page, select your project, and create a new data set. You find the BigQuery management area in the GCP menu in the "Big Data" section (scroll down the menu aprox. 75%).
External Link: GCP BigQuery Console
Firstly, select your project in the blue header bar, then create new data set.
Enter a suitable name into "Dataset ID" and select the region where your data should be located physically:
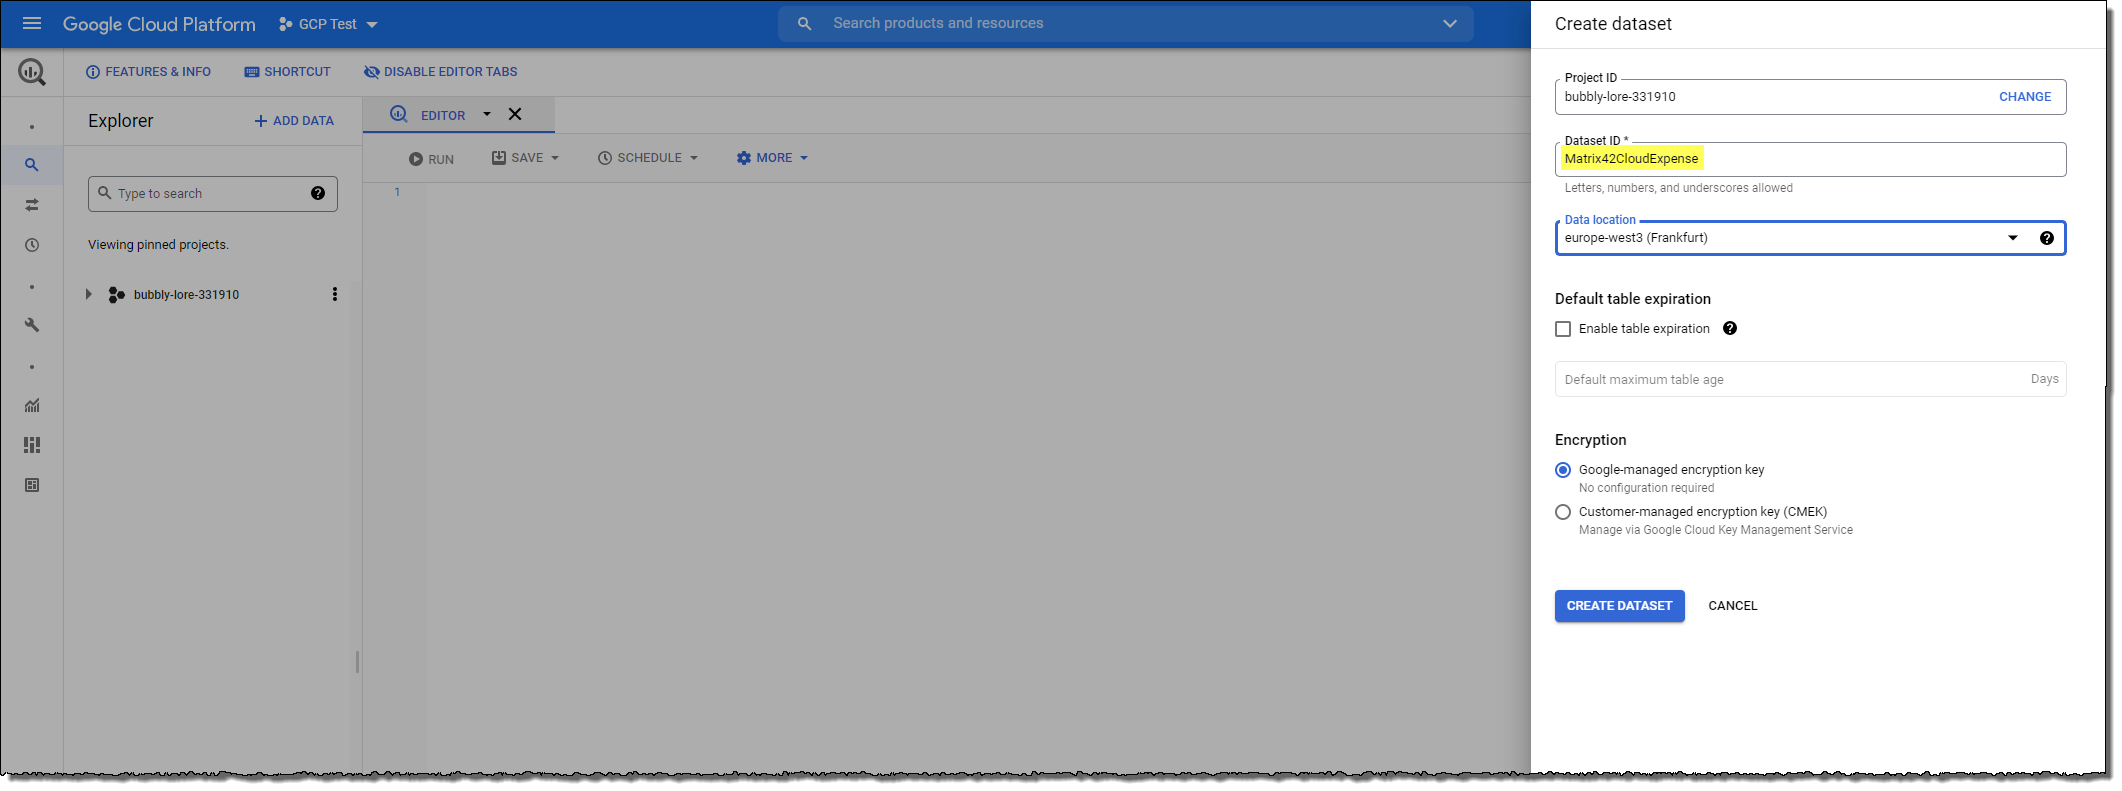
This name must be used later when you register your GCP account in the Matrix42 Cloud Cost Portal
Establish GCP billing data export
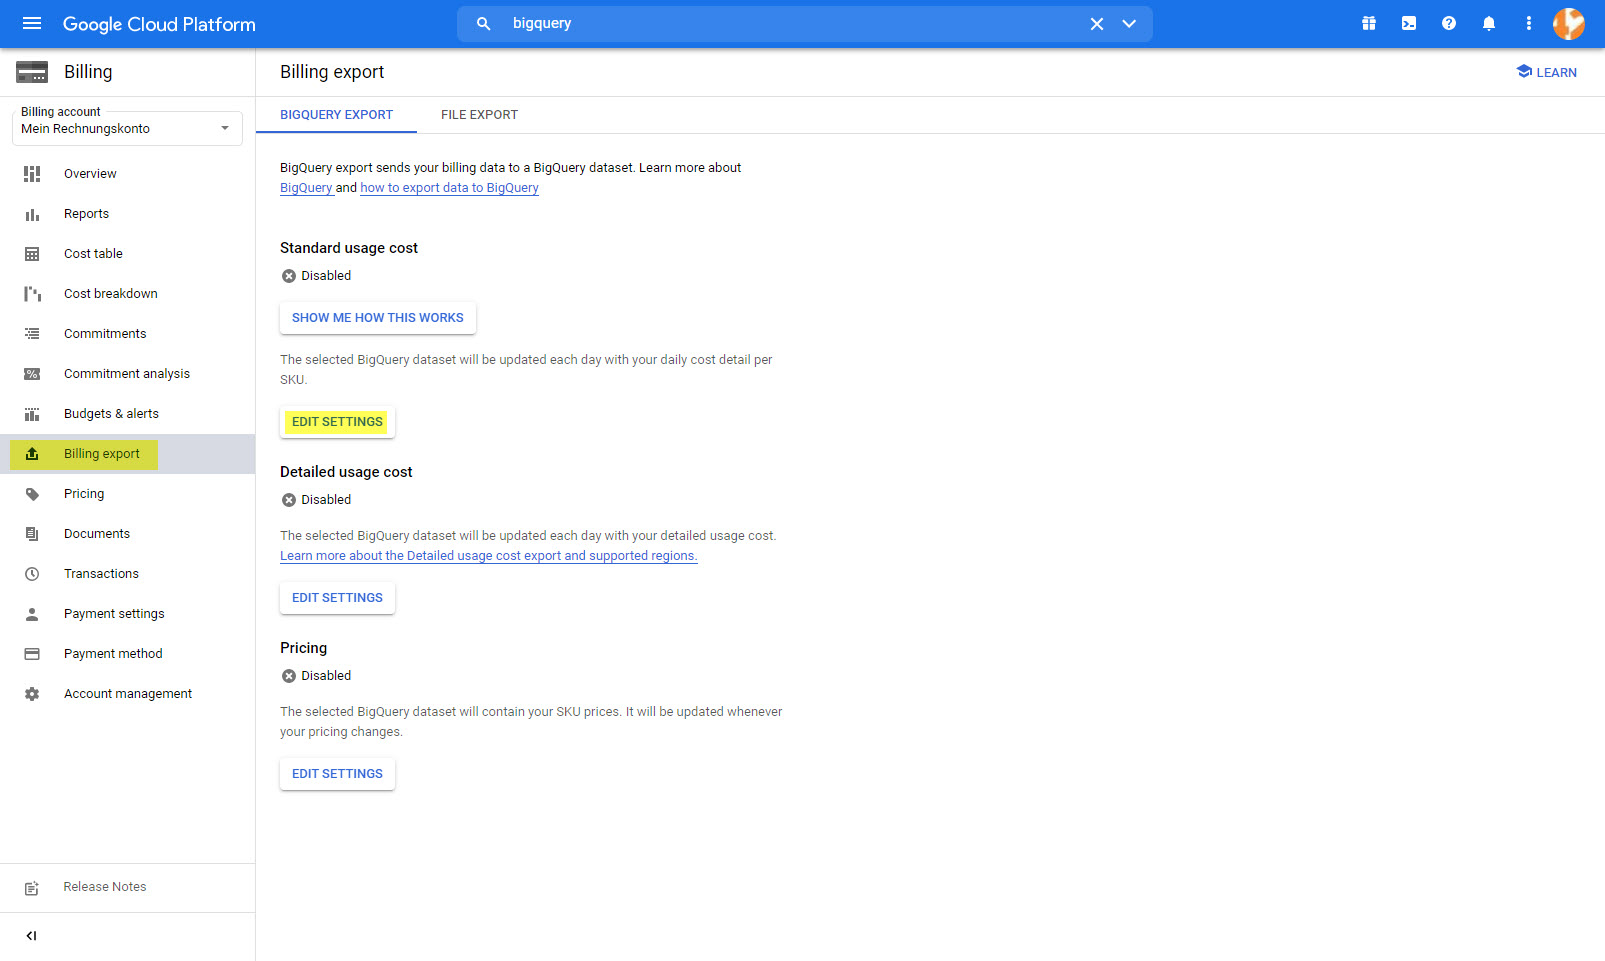
In the billing section of the Google Cloud Platform, enable the export of your billing data into the created BigQuery DataSet. Select "Billing" in the main GCP console menu and there select "Billing export". On the page, click "Edit Settings".
External link: GCP Billing Settings
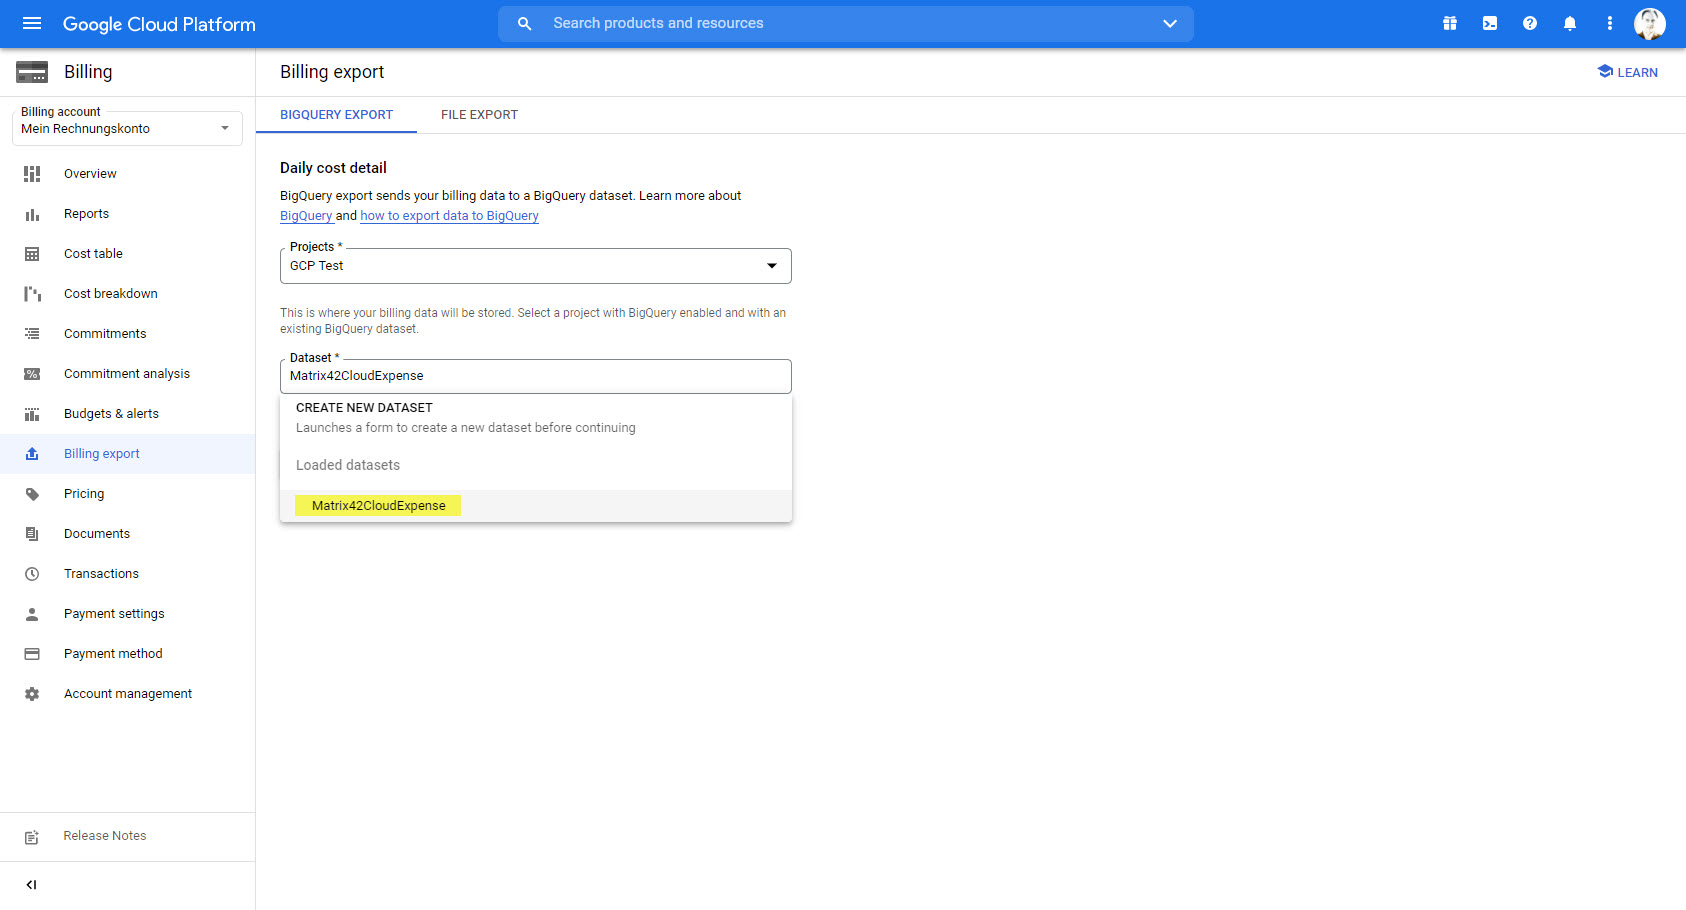
Select your project and the previously created BigQuery dataset and save your changes:
Afterwards, billing export settings are done:
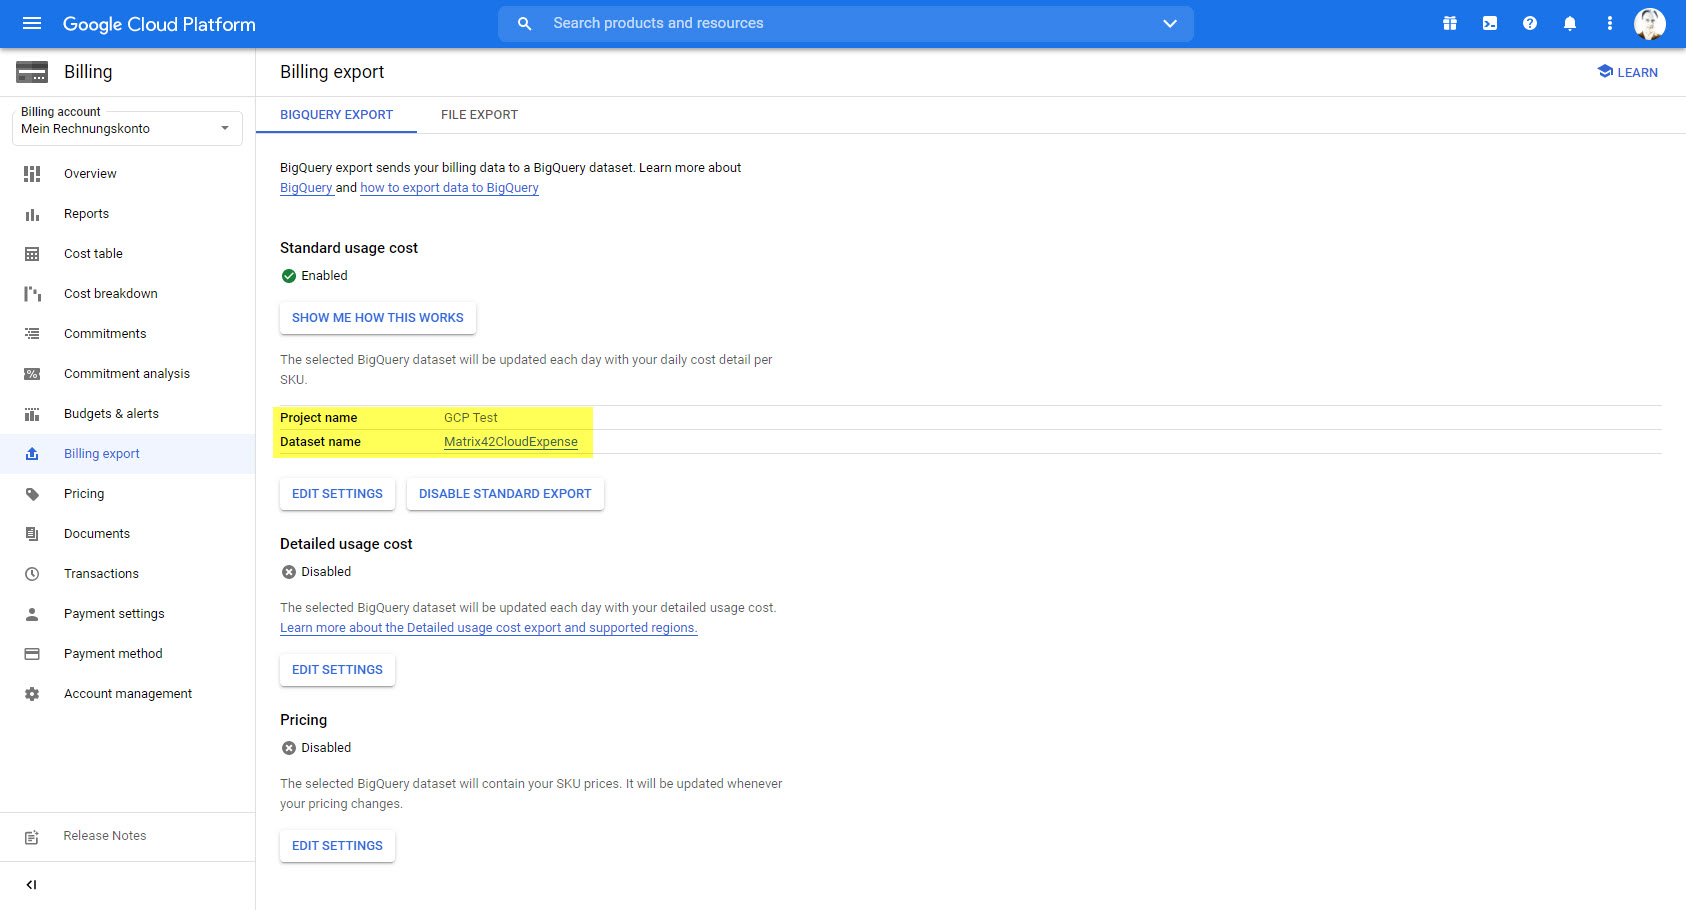
Google needs 24 up to 48 hours to establish regular export. However, you may continue with configuration.
Create a GCP Service Account
Matrix42 Cloud Cost Portal requires access to the generated dataset containing the billing data. The permissions for this access are granted by a Google Service Account, which is the highest security standard currently available. Should you follow our recommendation using a dedicated project, our platform is completely isolated from all other active projects on the Google Cloud Platform.
External link: Create a new service account
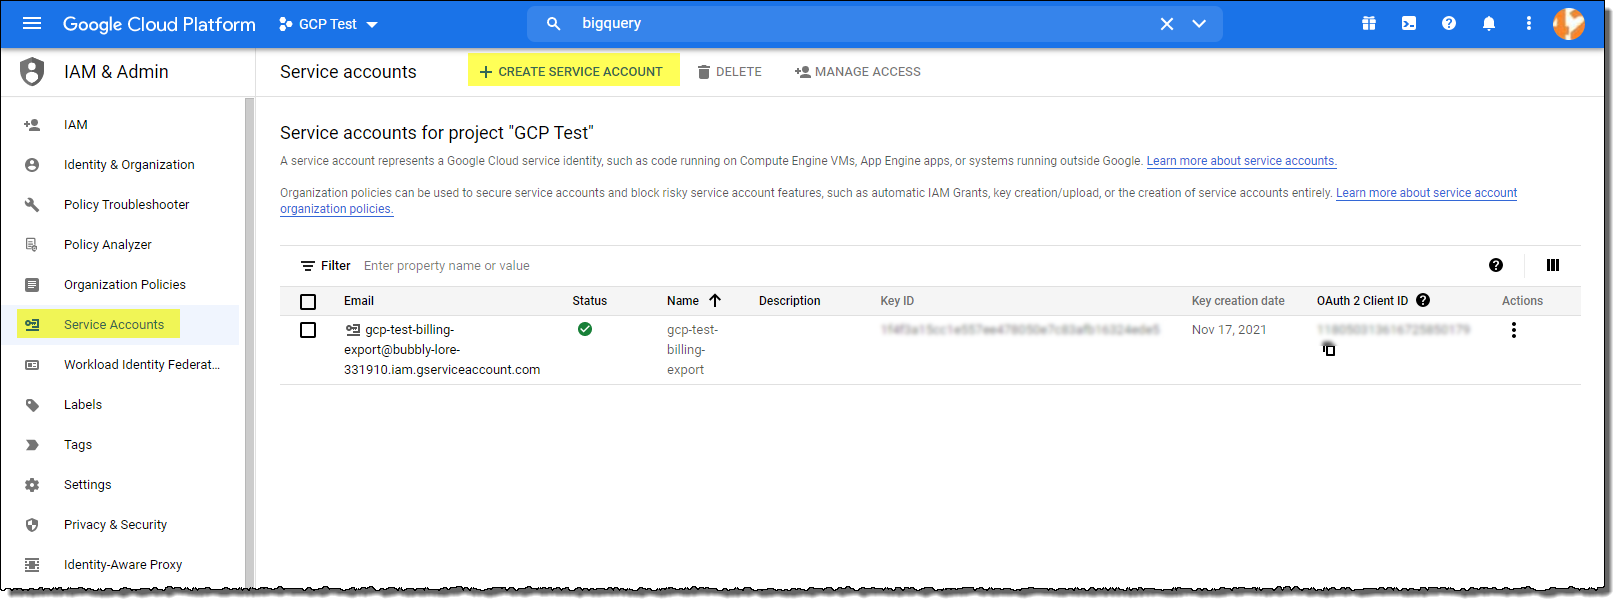
In GCP console main menu, open IAM & Admin and select "Service Accounts" and click on "Create Service Account":
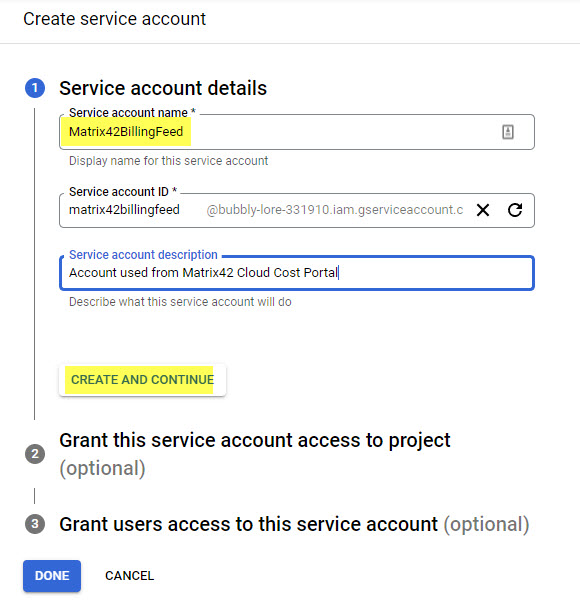
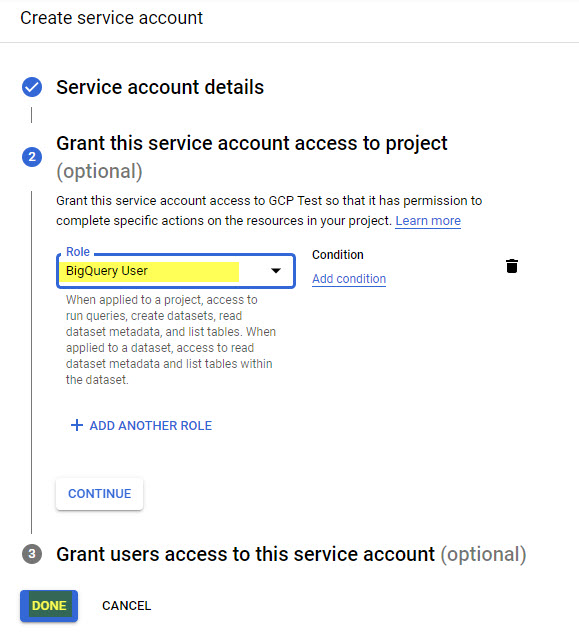
In Step 1, provide account name and a description. Click on "Create and Continue. In step 2, select "BigQuery User" from the role selector. Create the service account with "Done":
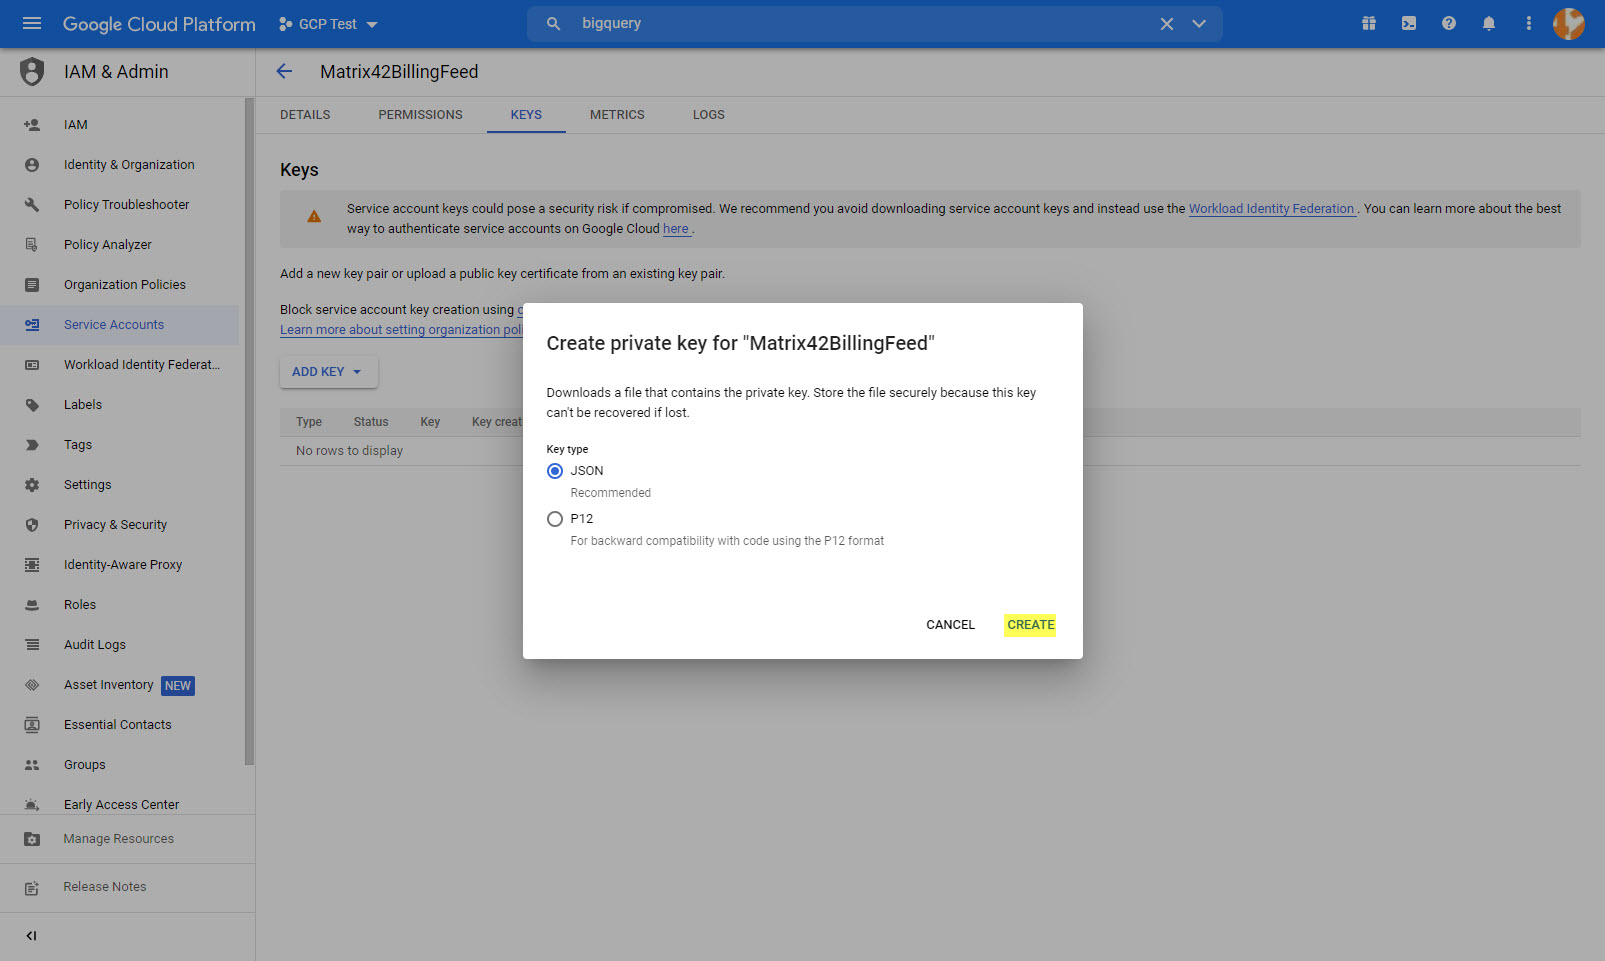
Create Private Key for access from Matrix42 Cloud Costs Portal
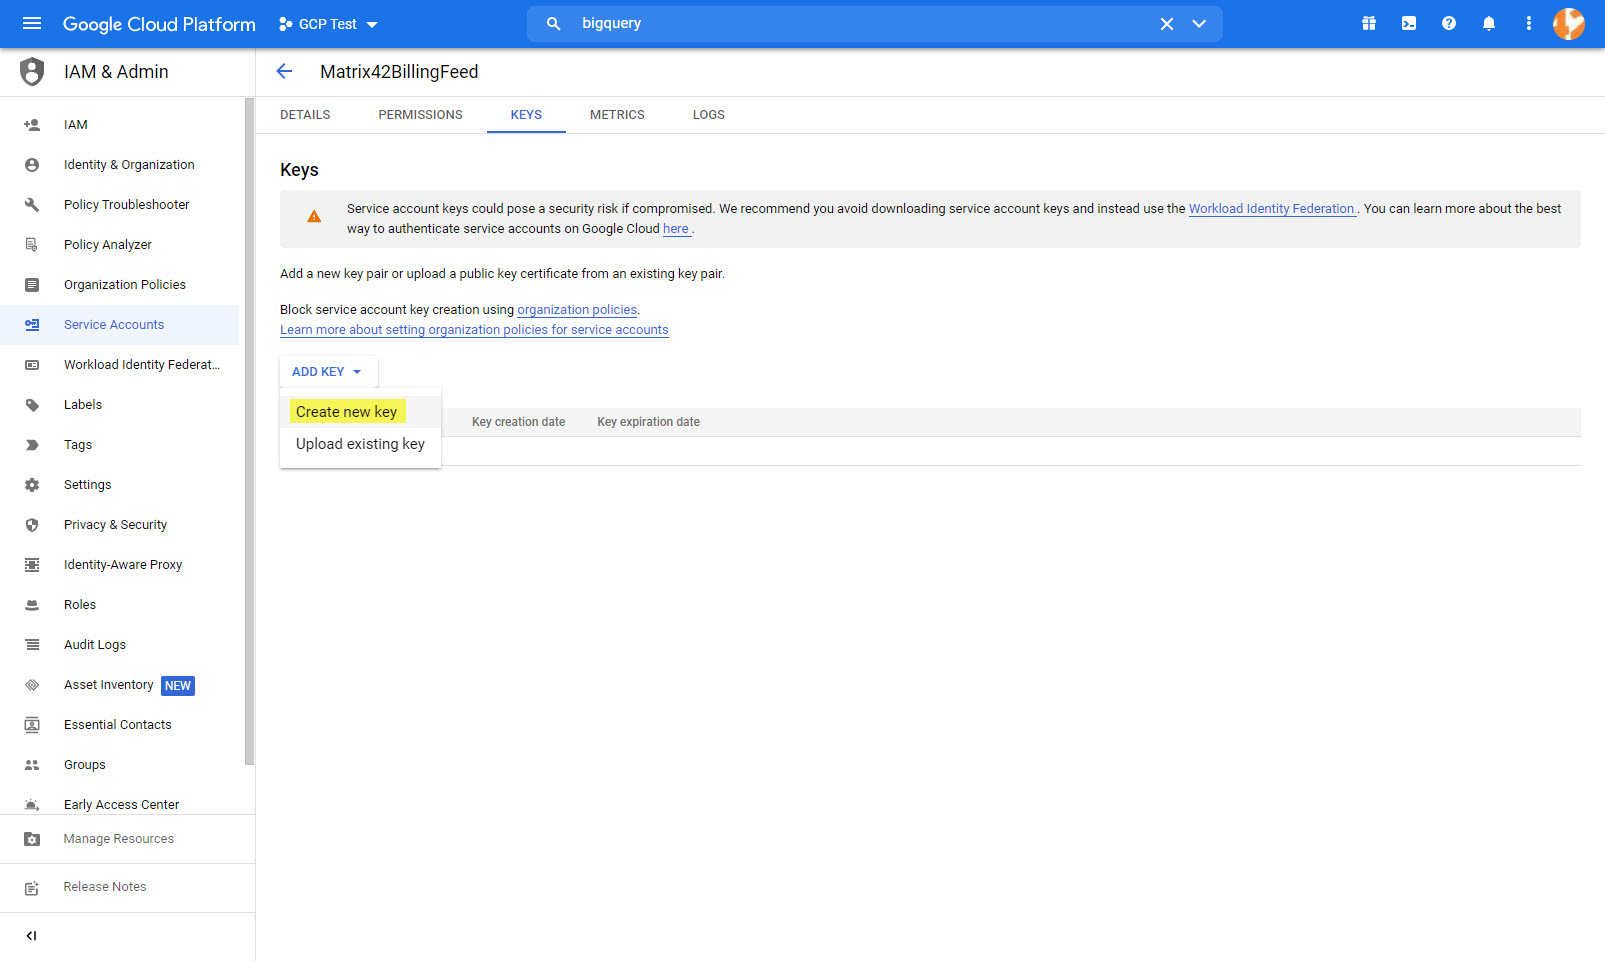
Select action "Manage Keys" for the created account:

Select "Create new key" from the action menu:
Select "JSON" and click on "Create". A JSON file will be downloaded to your computer. Store it in a safe place! You need the content of that file later when we configure the dataset connection in Matrix42 Cloud Cost Portal (see here).
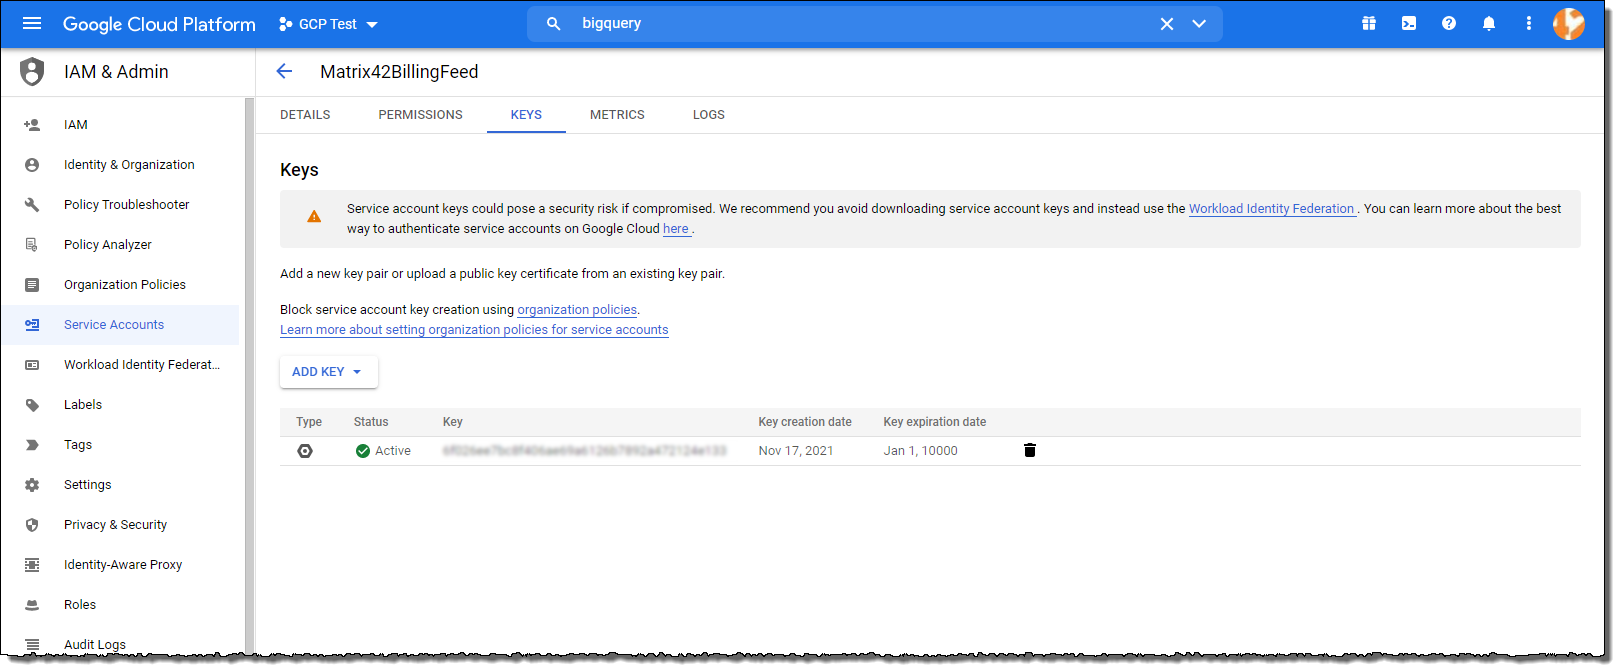
Finally, we have created the necessary safe access:
Configure Matrix42 Cloud Costs Portal
Matrix42 Cloud Costs Portal is a data hub for accessing billing data from different cloud providers.
Logon
Login to cloudcosts.matrix42.com. We recommend to use your Matrix42 account. If you do not have a Matrix42 account, you easily may create one on accounts.matrix42.com.

If your authentication involves your organization's Azure Active Directory, you may encounter an issue. According to your organization's settings for Enterprise Application handling, you may not be able to login and see following error message:

How to resolve:
Allowing users consuming Azure Costs with their existing Azure Active Directory account requires a dedicated administrative action, Microsoft calls it Admin Consent Flow. The administrative consent flow is triggered with the following URL by every Azure Active Directory Administrator:
https://login.microsoftonline.com/co...zure-costs.com
Should more than one Azure Active Directory be managed with the same admin account it's recommended to define the concrete tenant with the following URL scheme:
https://login.microsoftonline.com/{{YOUR AAD Domain}}/adminconsent?client_id=e5dd24ad-e67a-4d84-bd5f-7a60587f884f&redirect_uri=https%3A%2F%2Fazure-costs.com
Customers using the Microsoft Cloud Germany should use the following URL to trigger the Admin Consent Flow:
https://login.microsoftonline.de/com...zure-costs.com
After executing this operation a new application with the name "Azure Costs" appears in the Azure Active Directory and end-user can log into Azure Costs.
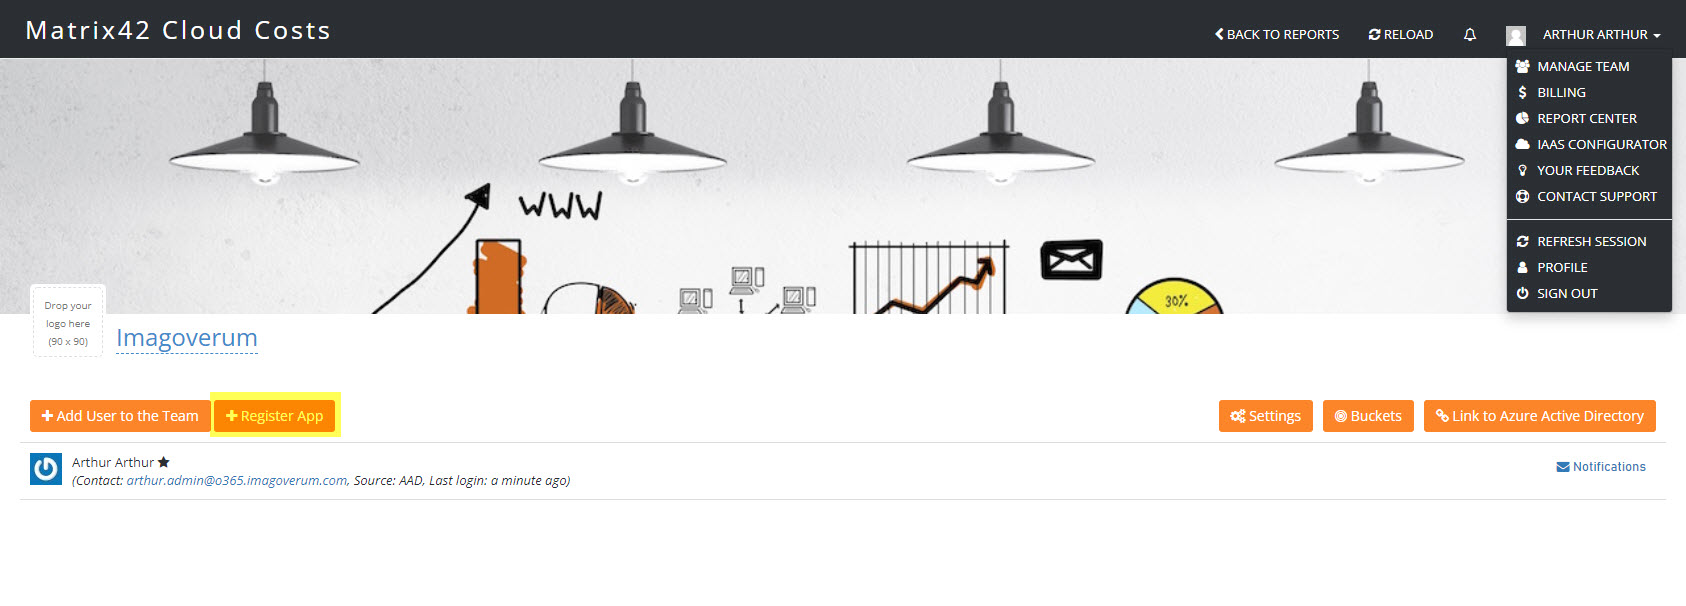
After successful login, click on your account name in the upper-right corner and select "Manage Team".
For managing the team and register an App for connecting the data provider, you must be administrator for the company your account is assigned to in accounts.matrix42.com:
Essential Information
Following information will be required later, when you configure and connect Matrix42 Enterprise Service Management to Matrix42 Cloud Costs Portal. So make sure you save this data in a safe place during this procedure.
| Information | How to obtain |
|---|---|
| Team ID | ID from the URL that is displayed in the address-bar of your browser on the Matrix42 Cloud Costs Portal (see screenshot below) |
| Client ID | Will be displayed in the dialog when you register the app or afterwards in the list of registered apps (see screenshot below) |
| Client Secret | Will be displayed only in the dialog when you register the app |
Team ID in browser URL (GUID between "teams/" and "/manage"):

Register App for Cloud Cost Data Provider
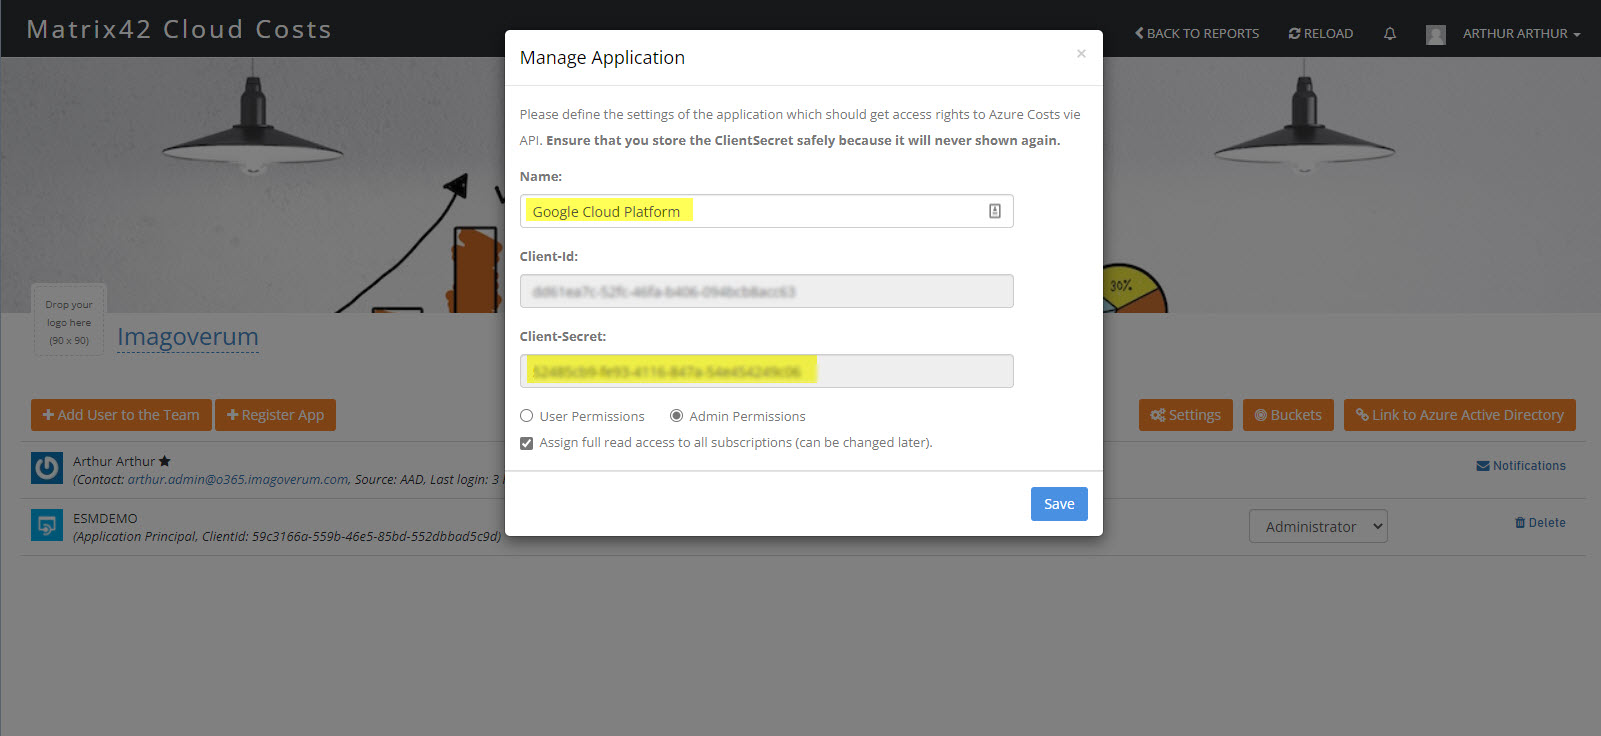
An "App" is an access item for external applications. On creation, a so-called "Client-Secret" is created that is used from the external system for authentication.
The Client-Secret is displayed only once, when you create the "App". So make sure to copy this value and store it in a safe place for future use.
Click on "+ Register App":
Enter a user-friendly name for the application. Also, copy client secret into your clipboard and save it in a text file that you store on a safe place. Select option "Admin Permissions". Finally save your changes:
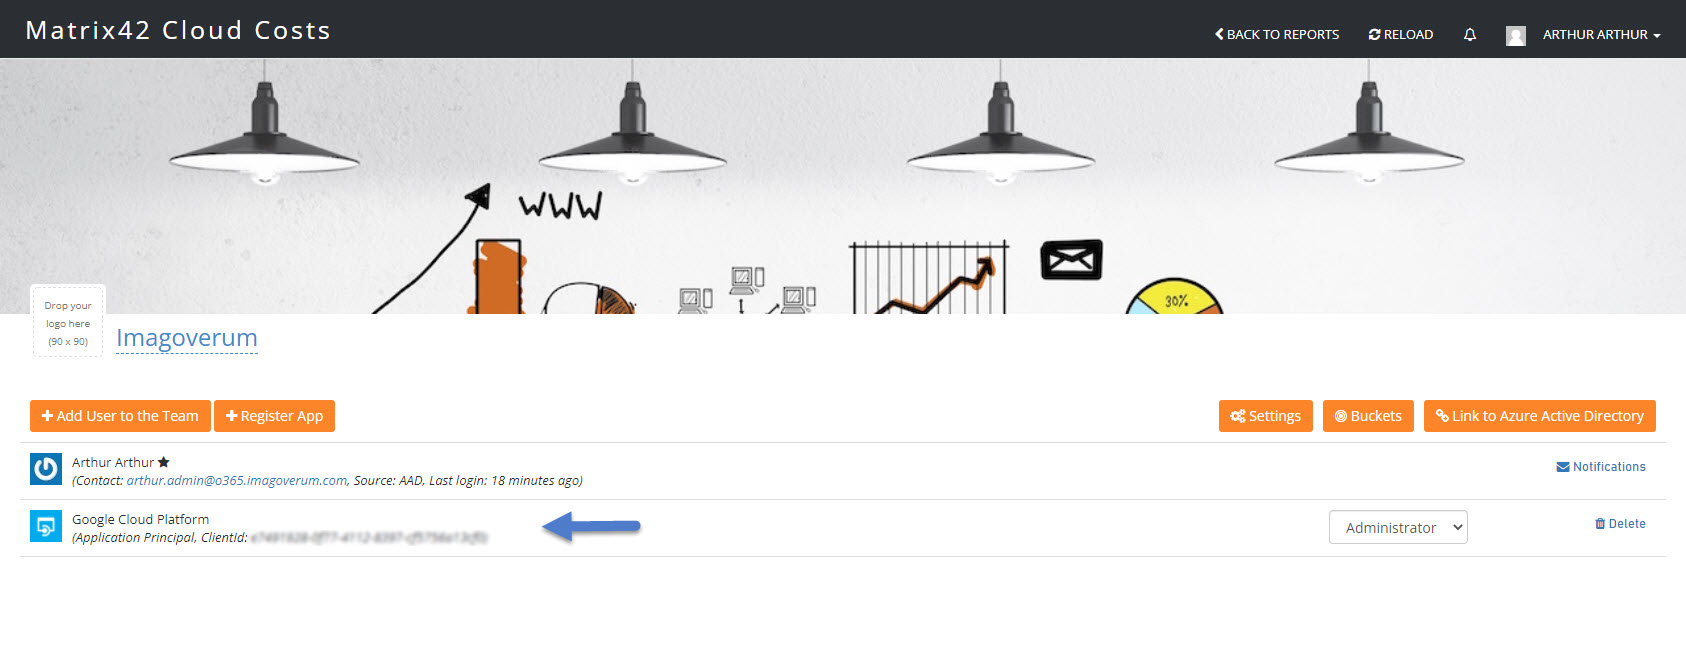
After saving you see the registered app that is used to download and forward your billing data from GCP:
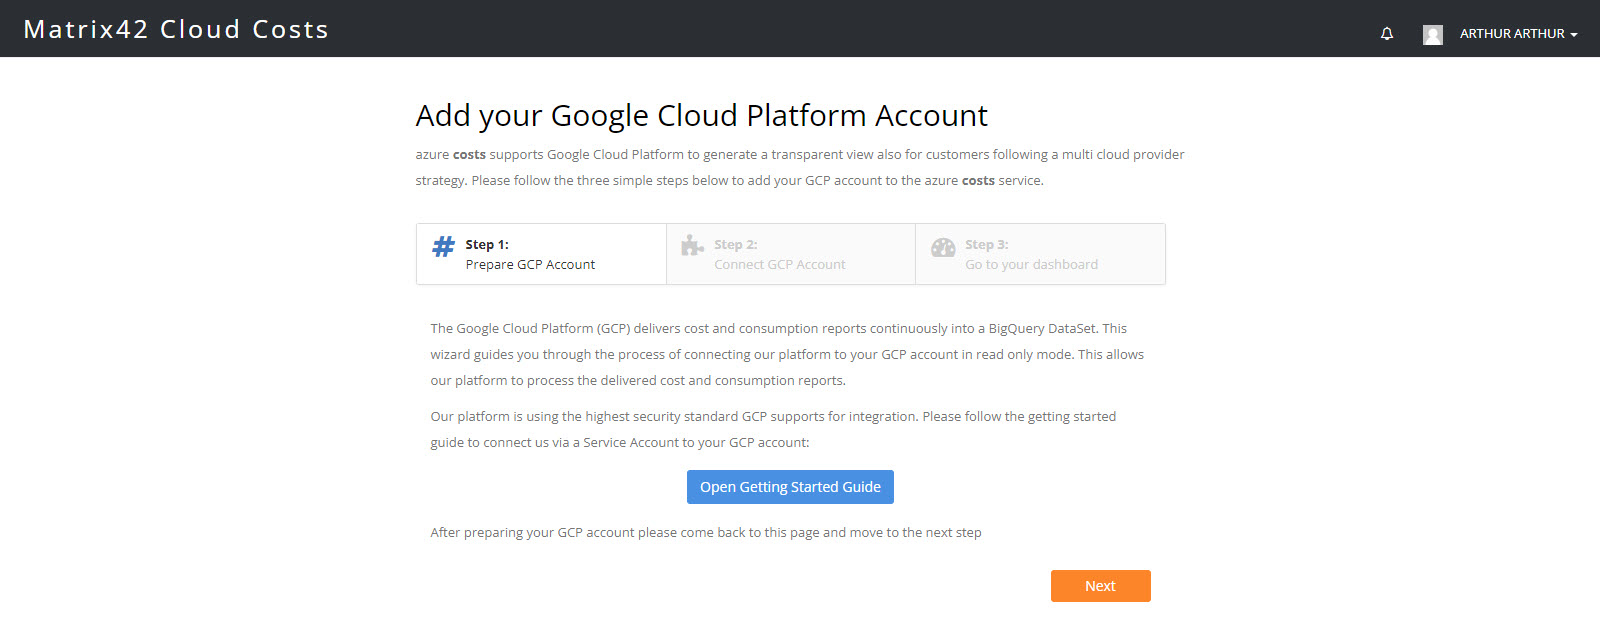
Connect to Google Cloud Platform
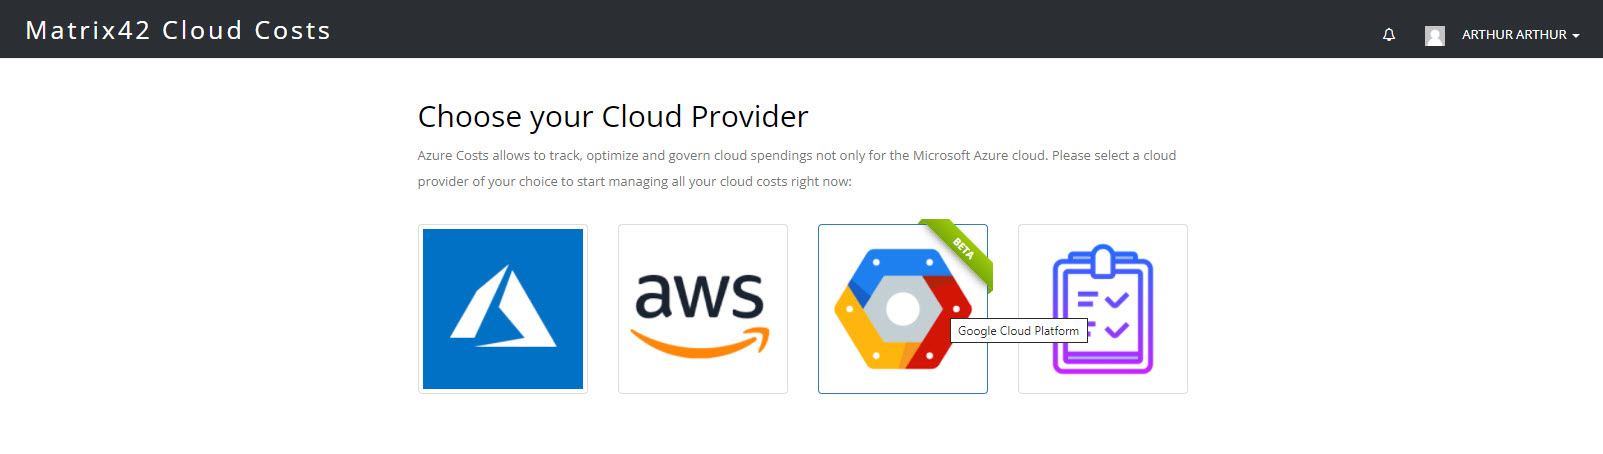
In the black header-bar, click on "Return to reports" (dashboard). There click on "+ Add" to connect to your GCP account:
A new page opens where you select Google Cloud Platform:
Click on the icon for GCP and skip first page:
On the second page, paste the entire content of the JSON-file you downloaded from GCP (see above) and provide the name of your dataset you have created on GCP:
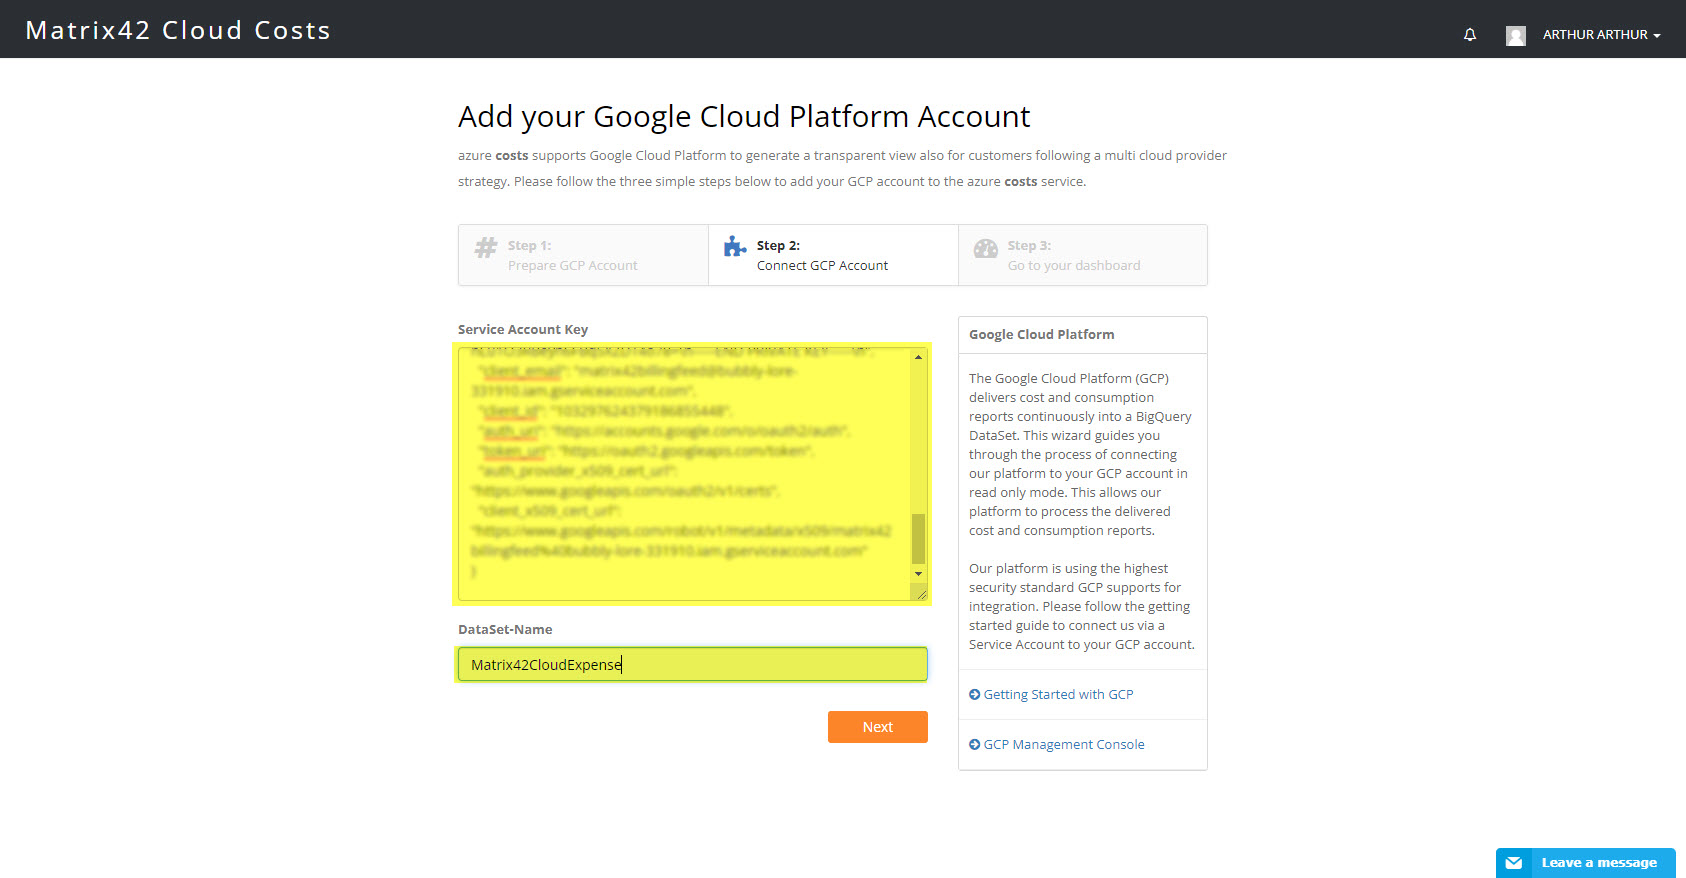
When you click on "Next", the Matrix42 Cloud Portal checks if access to your dataset works. If not, you get an error message. Otherwise, success is reported:
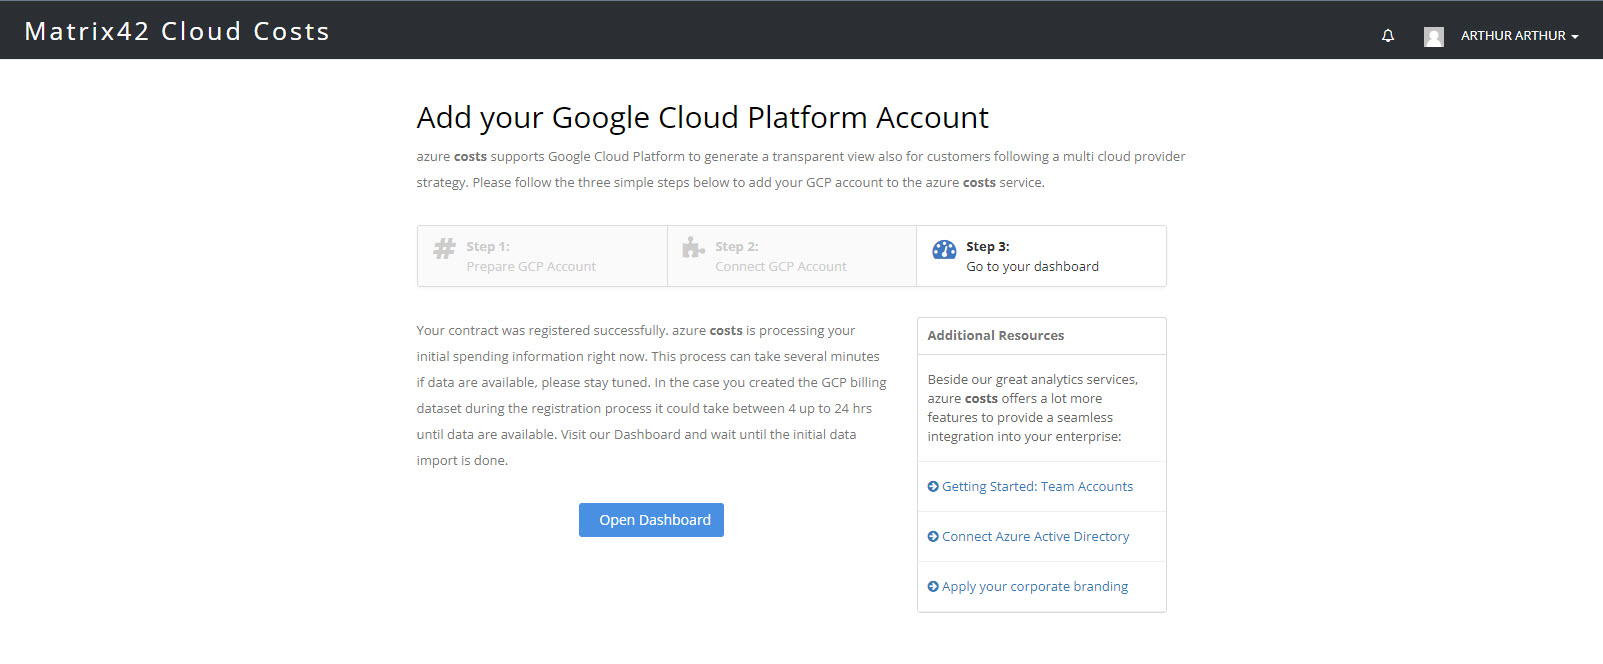
At his point, configuration of Matrix42 Cloud Costs Portal is completed.
Configure Matrix42 Cloud Costs Data Provider
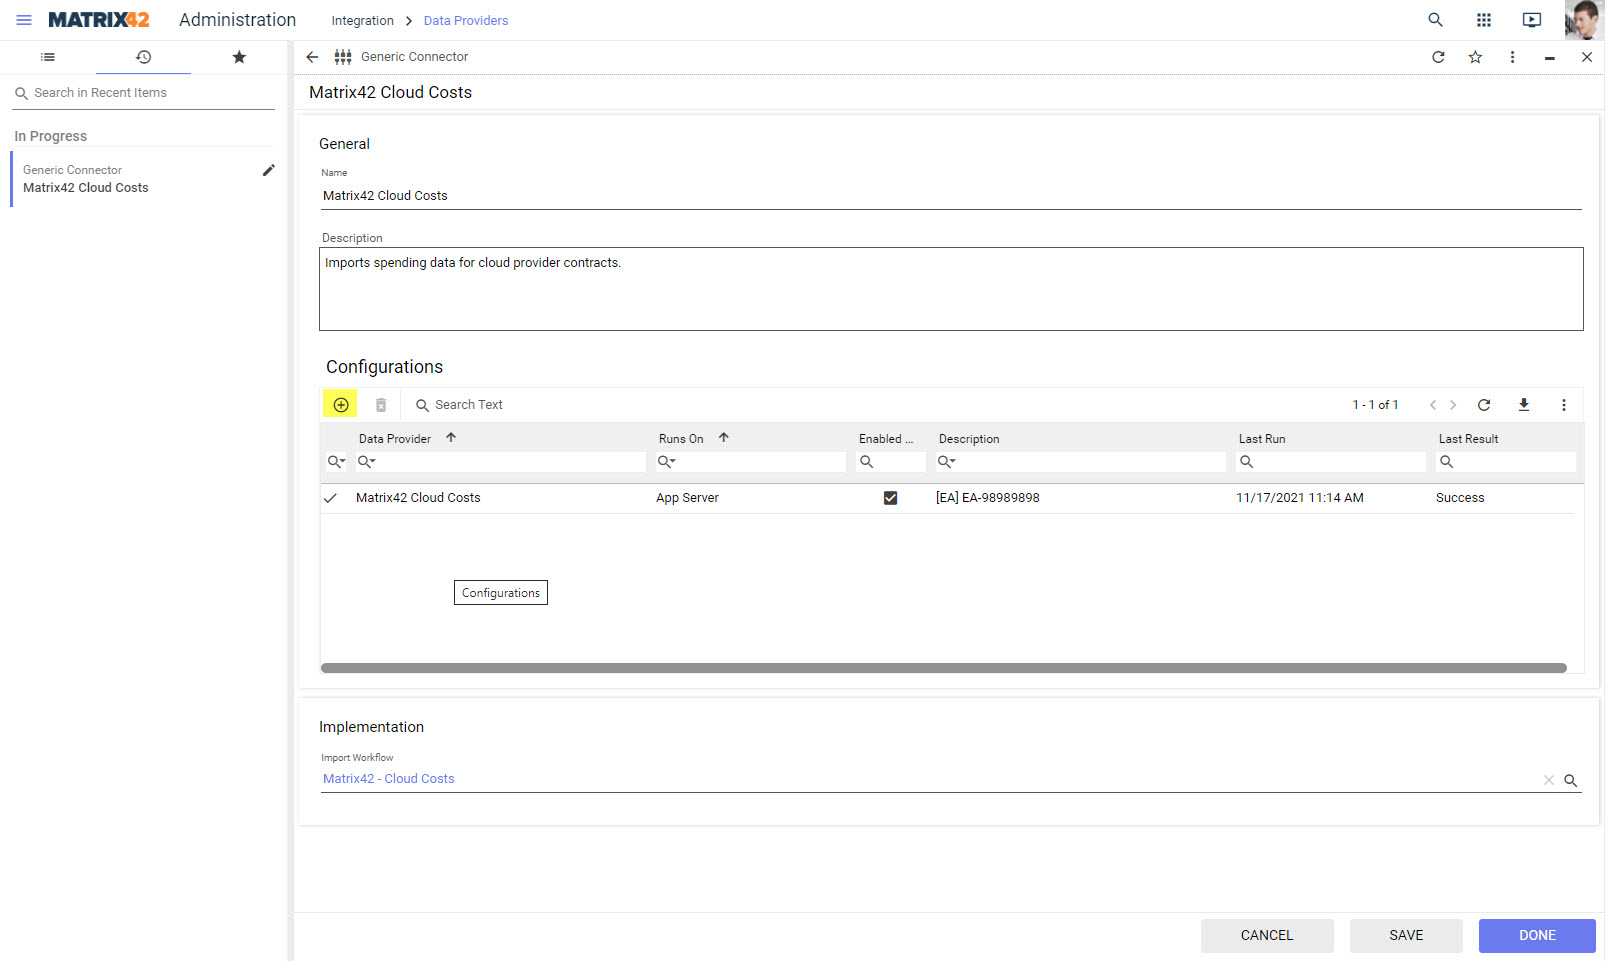
Create new data provider configuration
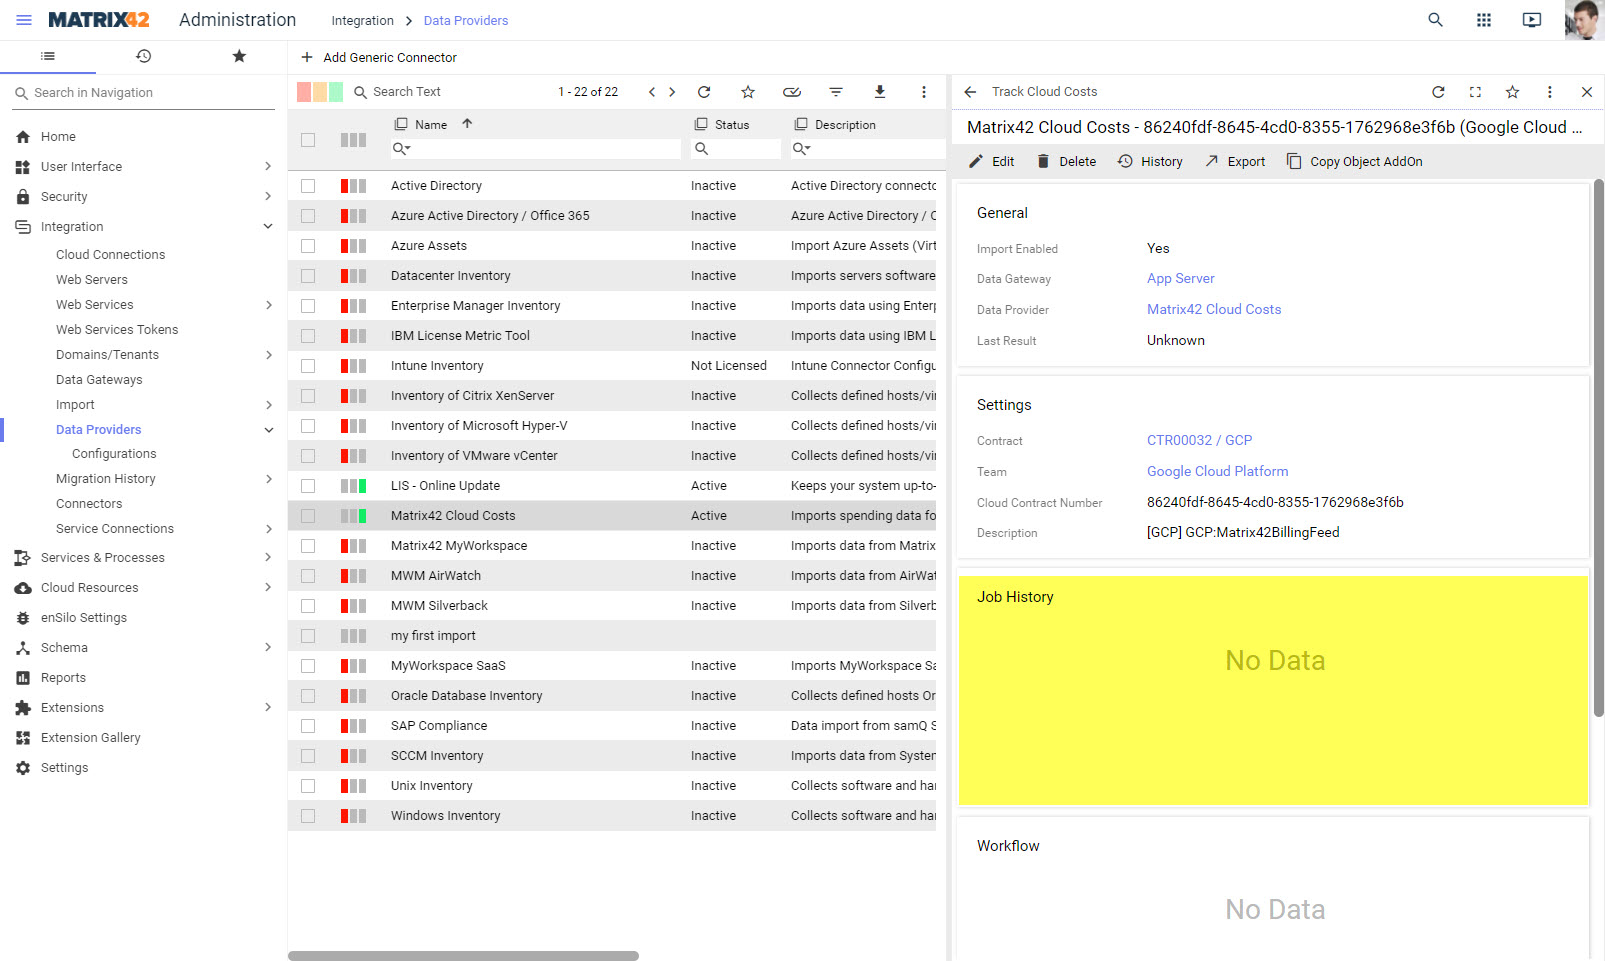
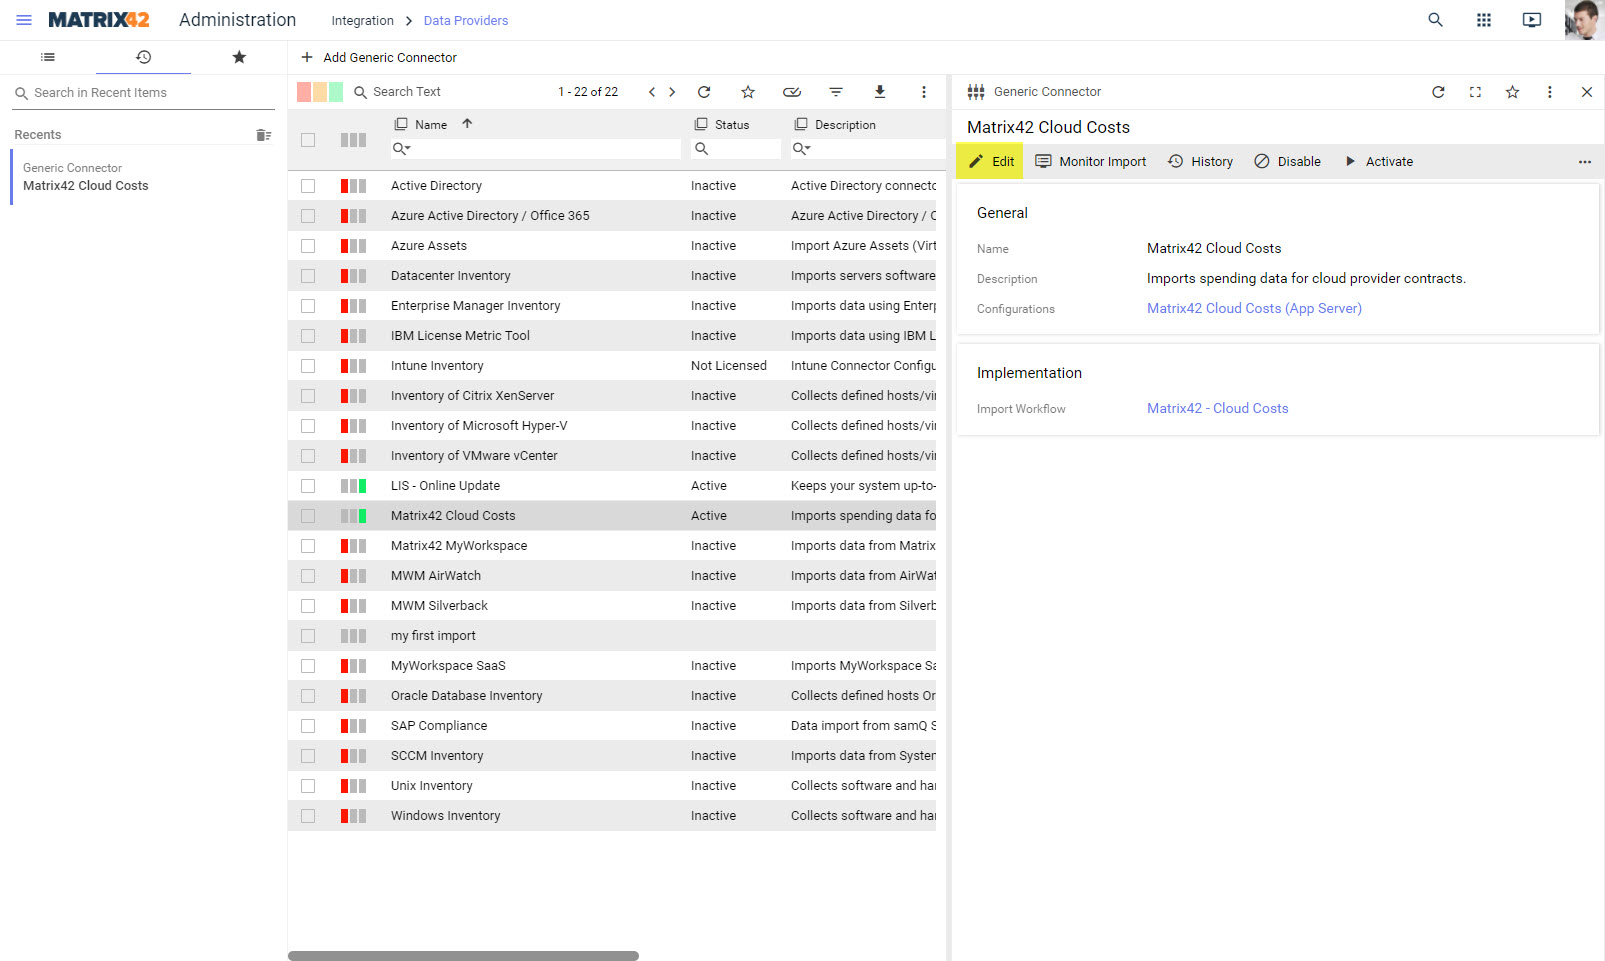
Open "Administration" app in Matrix42 Enterprise Service Management. Navigate to Integration - Data Providers and select the Matrix42 Cloud Costs data provider. Click on "Edit":
Create new configuration:
Connect to Matrix42 Cloud Costs Portal
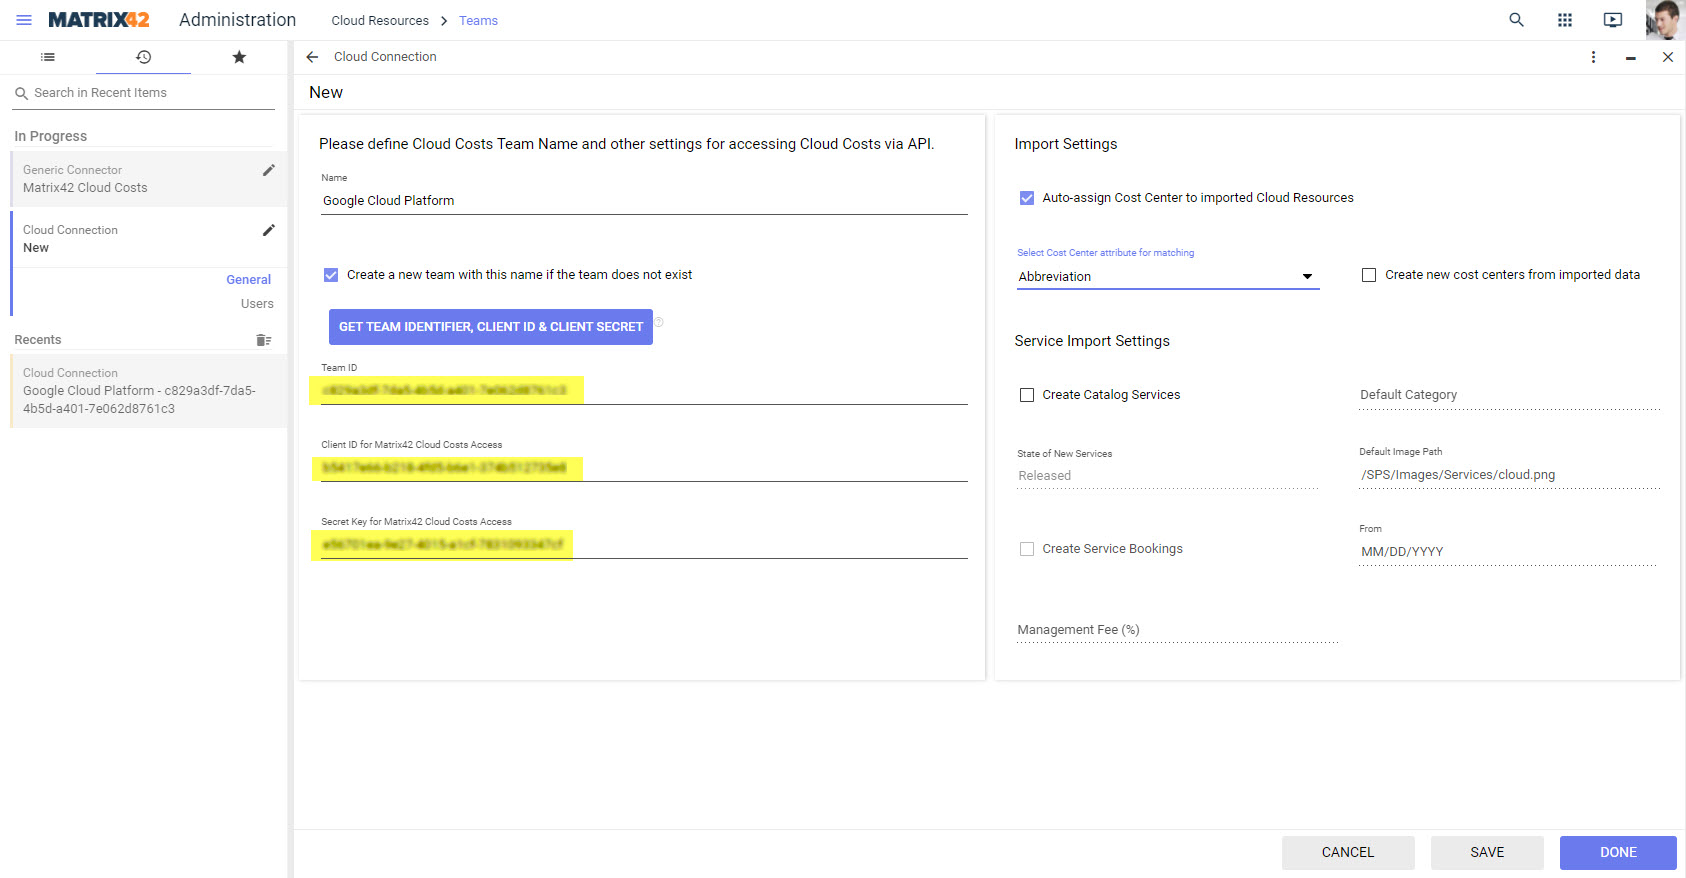
If you configure access to GCP the first time, you will have to create a team for it. Use the search dialog that displays all available teams and click on (+) to create a new one. A team represents a connection to the Matrix42 Cloud Costs Portal. It is specific for any registered "app" for cloud provider access.
In the edit form, provide a user-friendly name. DO NOT click on "Get Team Identifier..." button. Instead, enter Team-ID, Client-ID and Secret Key you have obtained before when you configured the app in Matrix42 Cloud Costs Portal:
Connect to Contract Management
In this step, you bind your subscription contract on GCP with a contract object in Matrix42 Contract Management.
DO NOT click on "Register Your Contract" button, instead select values for following settings:
- Select the team object that holds the credentials to Matrix42 Cloud Costs Portal
- Select a contract from Contract Management that should hold all downloaded billing data
- Select the registered contract connection, you registered on the Matrix42 Cloud Costs Portal
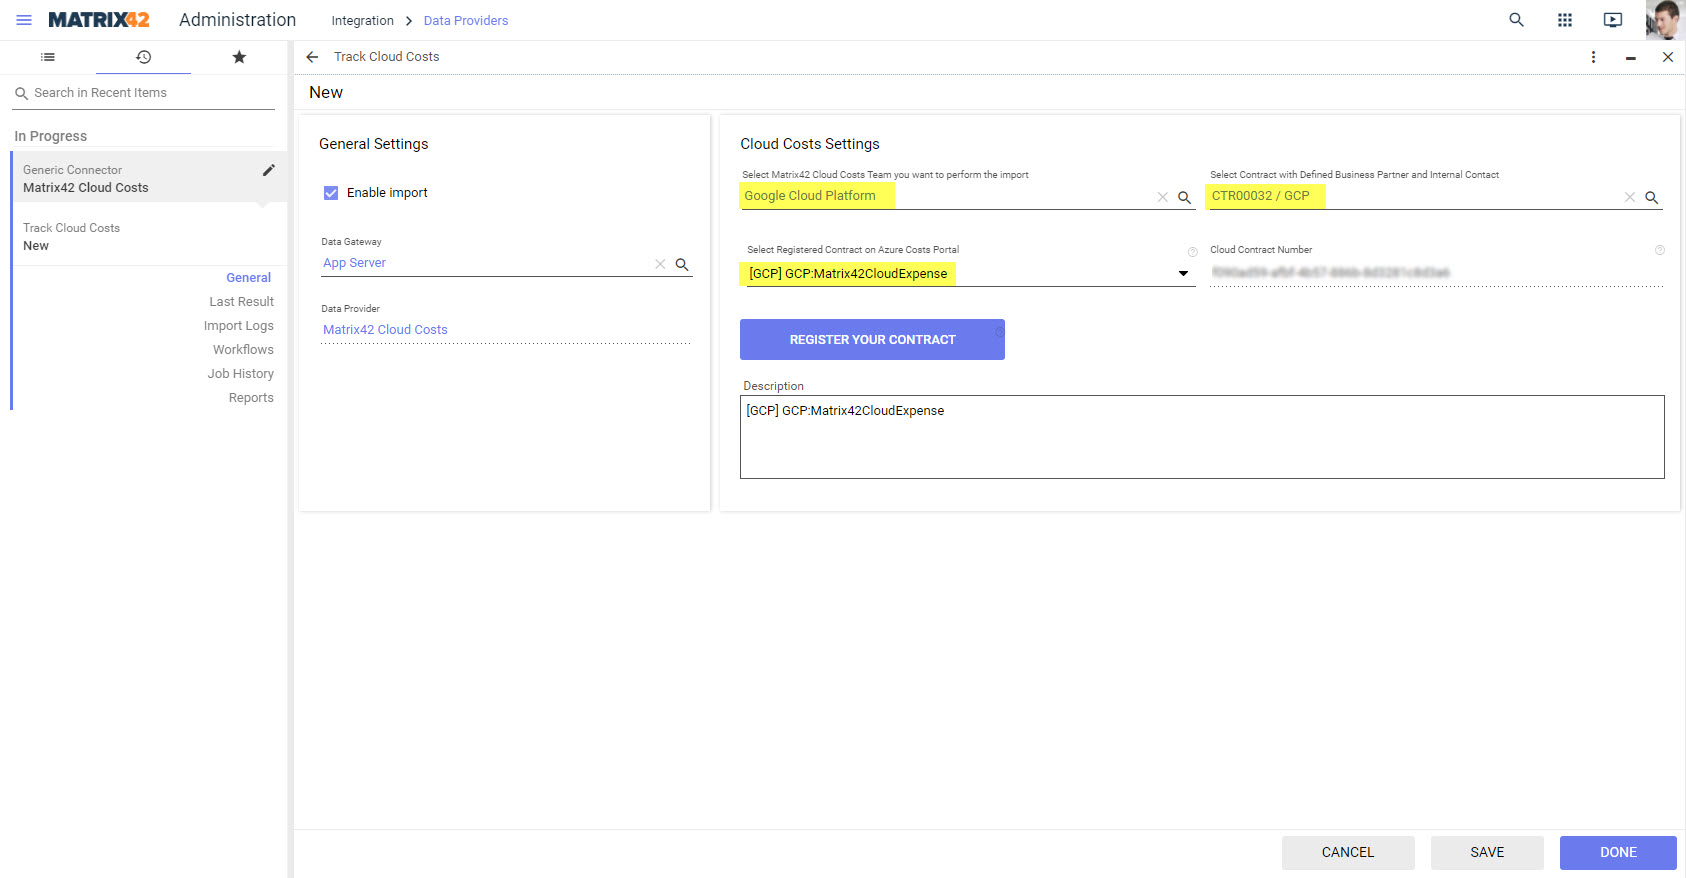
Save your changes in the configuration and also save the modified data provider object.
Execute the data provider
Be aware that GCP needs 24 to 48 hours providing billing data the first time. Therefore your first run will not import any billing data when you run it right after finishing your configuration. However it will tell you, if connections are working. Consider creating an engine activation to run your data provider with all configuration or selected configurations automatically based on a suitable schedule.Run the data provider using the "Activate" action:
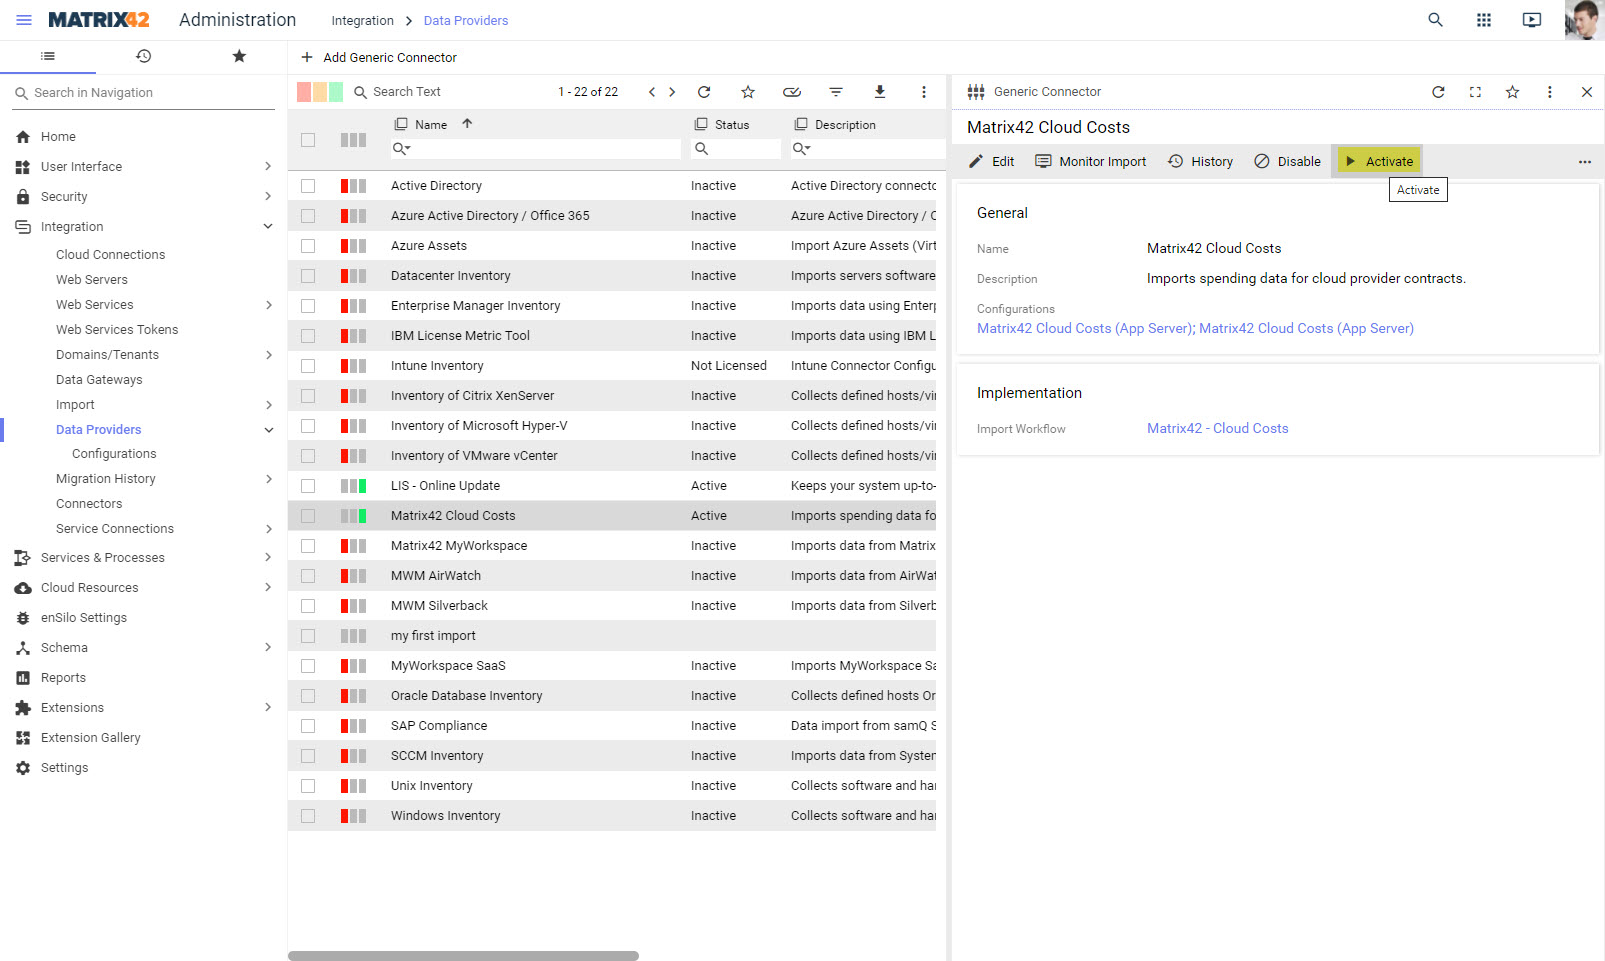
If you open your previously created configuration, you may see the progress of the execution and the result of the import: