Adding custom attributes delivered from FireScope into ESM configuration items
Overview
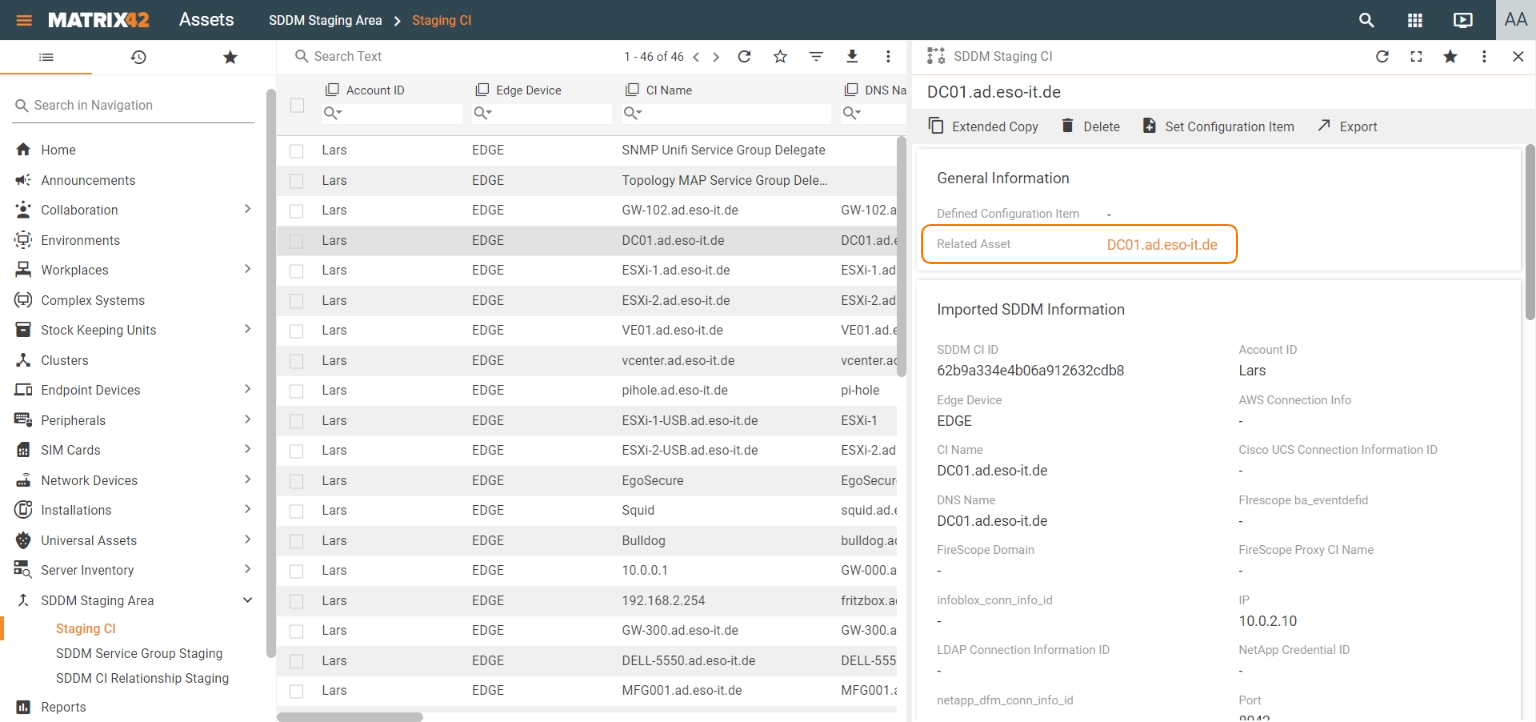
If the SDDM Import data provider delivers also custom attributes that have been set for configuration items in FireScope, by default they will not be mapped to the attributes in Enterprise Service Management. However, you can configure the system so that such custom attributes are mapped to the required attributes in ESM.
For each type of the configuration item with custom attributes, you need to create a separate import definition which will map the custom attributes to ESM attributes.
Step by step guide to creating an import definition for custom attributes
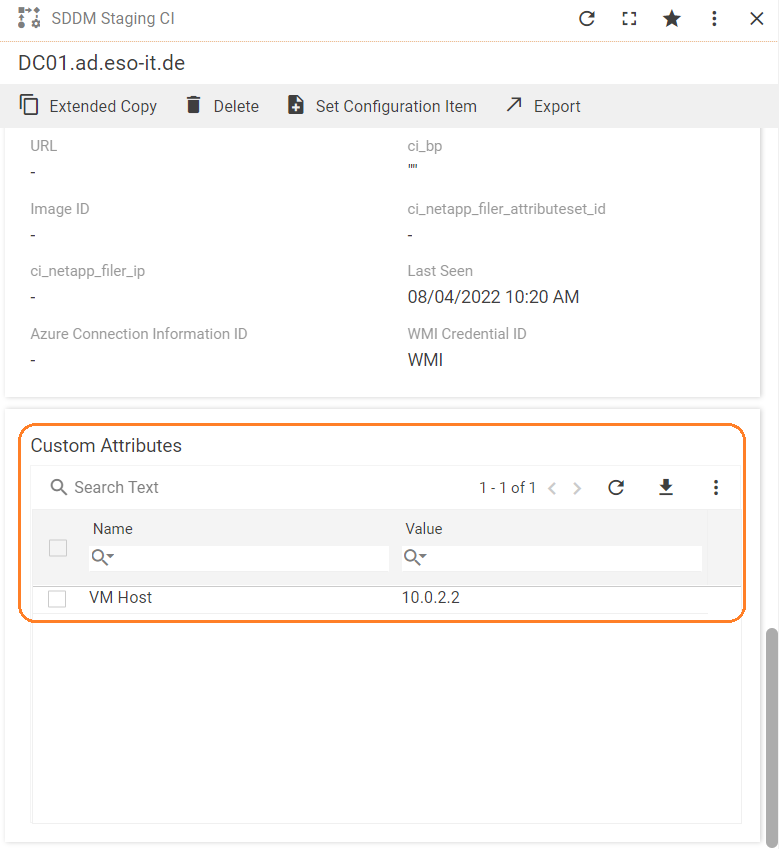
In this example we will map the VM Host custom attribute to the Description attribute of the Computer CI.
Starting with an import definition
To create an import definition:
- Open the Administration application and navigate to Integration > Import > Import Definition.
- Run the Create New Import Definition action. A wizard open.
- Select Computer as the type of object you want to import and click Data Source Definition.
The Specify data source details page
- On the Specify Data Source Details page, fill in the following data:
- Choose MS SQL in the Source Type drop down.
- Enter the ESM SQL Server in the Server field.
- Enter M42Production in the Database field.
- Select the Integrated Security checkbox.
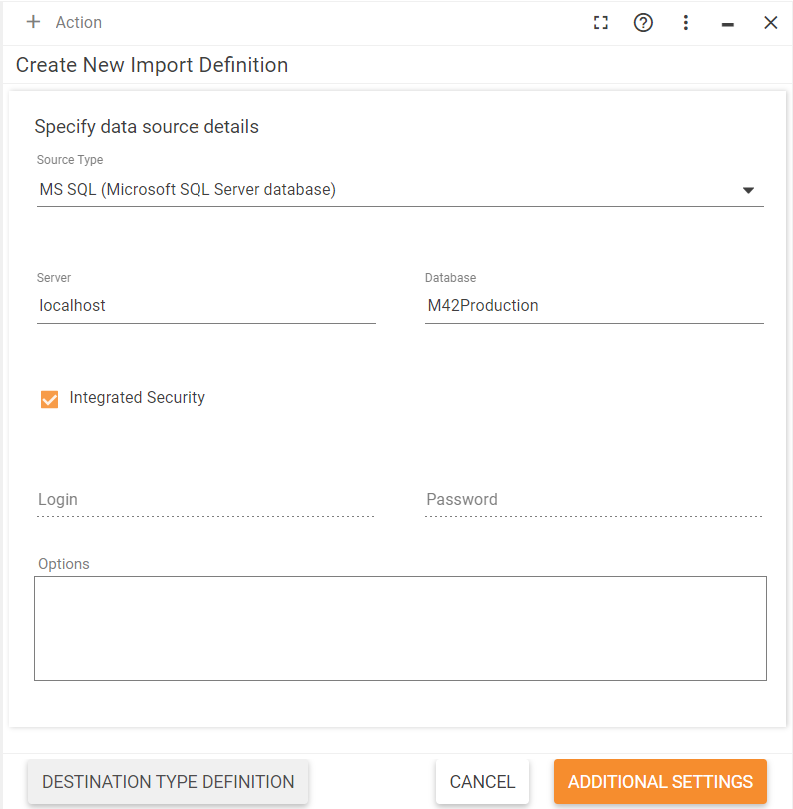
- Click Additional Settings and then Table Source Definition.
The Define the structure of your source tables page
- Select SQL Expression as the central table setting.
- In the Expression field, enter EXEC [dbo].[CUSTPSO_SddmGetCustValues].
This is a stored procedure that is provided with the SDDM Import add-on.
- Click Preview. As a result, you will see all fetched custom attributes under Result Preview.
- Enter the following SQL statement into the Expression field:
select * from (
select
       sa.ObjectId as 'Object ID Asset'
      ,[CUSTPSO_Value]
      ,[CUSTPSO_Name]


  FROM [dbo].[CUSTPSO_SPSSddmStagingClassCustom] cc
  inner join dbo.CUSTPSO_SPSSddmStagingClassBase cb on cb.UsedInTypeCUSTPSO_SPSSddmStagingType = cc.UsedInTypeCUSTPSO_SPSSddmStagingType
  inner join SPSAssetClassBase sa on cb.CUSTPSO_relatedAsset = sa.ID
) x

pivot

(max(CUSTPSO_Value) for CUSTPSO_Name in ([<CUST VALUE NAME 1>],[<CUST VALUE NAME 2>])) p
- Adjust the [<CUST VALUE NAME 1>],[<CUST VALUE NAME 2>] part to include the required custom attributes. For example, [VM Host].
This statement can also be used for printer and network device configuration items.
- Click Preview to see the results. You will see only objects that have the VM Host value filled in.
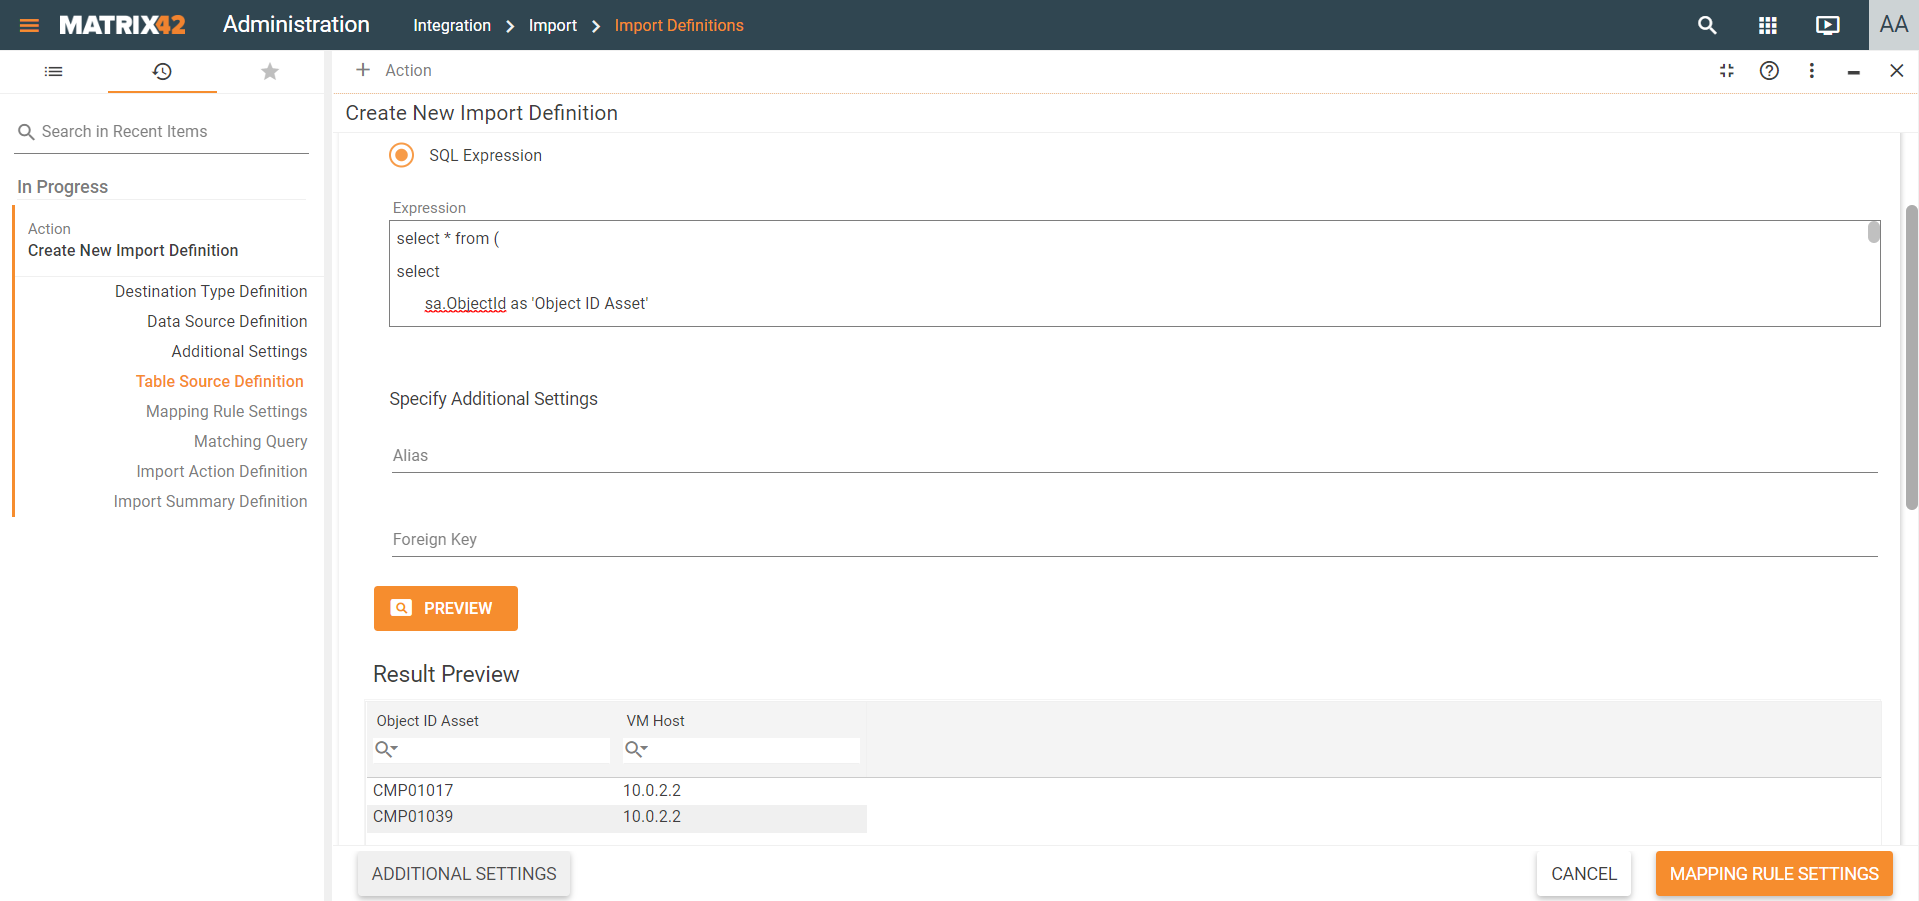
- Click Mapping Rule Settings to proceed.
The Mapping rules page
- On the Mapping Rules page click the add button.
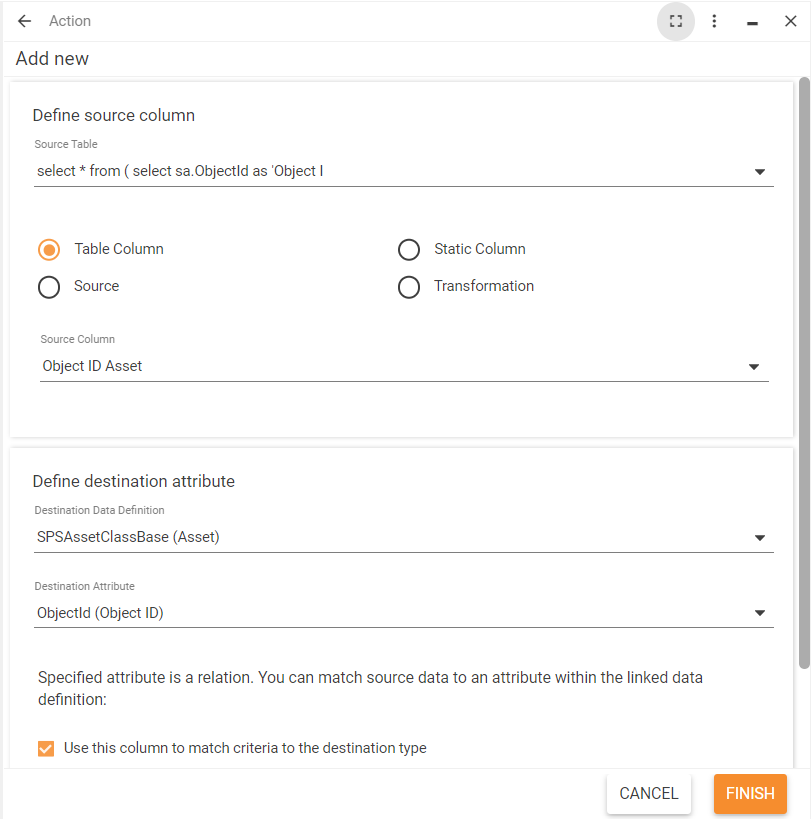
- On the Define Source Column page that opens, fill in the following data:
- Select Object ID Asset in the Source Column drop-down field.
- Select SPSAssetClassBase in the Destination Data Definition field.
- Choose ObjectId in the Destination Attribute field.
- Select the Use this column to match criteria to the destination type checkbox.
- Click Finish to add this mapping rule.
- Click the add button again to add another mapping rule.
- On the Define Source Column page that opens, fill in the following data:
- Select VM Host in the Source Column drop-down field.
- Select SPSAssetClassBase in the Destination Data Definition field.
- Choose Description in the Destination Attribute field
- Click Finish to add this mapping rule.
- Click Matching Query to proceed to the next page. This page allows to review the matching query.
- Click Import Action Definition.
- Clear the Insert checkbox under Specify import actions which should occur for the whole CI and all mapped multifragment data definitions.
- Click Import Summary Definition to proceed.
The Summary of the import definition page
- Provide the name for your import definition.
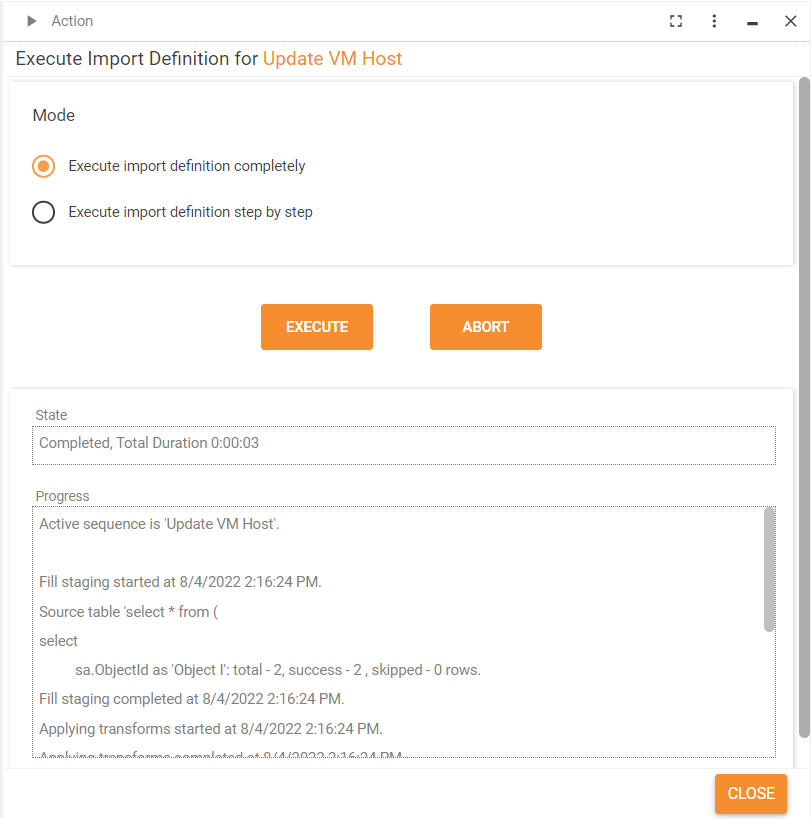
- Click Save and then Execute to make sure the import definition works correctly.
Once the import definition finishes, you can see the result log in the Progress field.
Checking the updated attribute
You can check if the custom attribute has been updated correctly by opening the related endpoint device of the Staging CI in the Assets applicaion.
