OSD
Change from v.20.0! The OS Deployments section has been completely reworked.
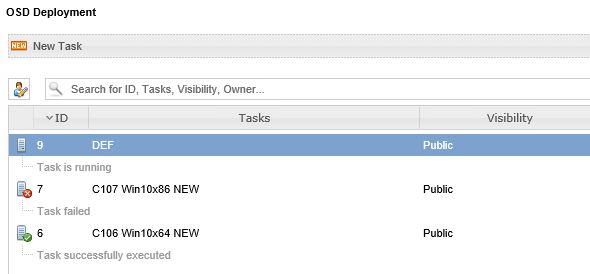
The "OSD" window displays all OSDs created in the EM.

The first step of creating a new OS deployment is to select on which computers the deployment shall be applied, which OSD configuration shall be used (OSD configurations are created in EM under Packages - OSD).
As of version 7.3.1, the time mode, start and end time, as well as the optional/mandatory mode is adjustable again!

The time mode distinguishes between the local time and the UTC time of the client. Depending on what is selected here and in conjunction with the start time, only then is the computer object(s) included in the respective collection.

The start and end time determines when the computer object(s) are added to and removed from the collection.

The mode distinguishes between an optional (press F12 when starting via PXE Boot) and a mandetory (the client runs automatically when booting into the PXE Boot) display of the computer objects.

Depending on which mode is selected here, another Collection is created for it in connection with the selected Task Sequence.
With the mandetory start an additional column for the start time is displayed. Here you can define when the client should run in the mandetory start. Before that the computer object(s) will run in optional mode and will be placed in the respective collection.

In the second step you can optionally add one or more EM rollout plans. These are executed directly after the rollout plans that are part of the OSD configuration.

Step three determines when the packages used by the task sequence are downloaded before or for execution.

In the fourth and last step you must specify who is allowed to view the OSD in the EM console.
The task is saved in the background after pressing "OK" in the user interface. For this, a hash is calculated, which consists of the ID of the task sequence and the parameter Download (see Step 3). This value will later be used to create the collection and the advertisement.
Non-existent computer objects are created both in EM and in SCCM with the corresponding MAC or UUID address. In addition, the PXE flag is removed from the SCCM computer object if one exists. The variables that are additionally stored in the EM are stored in SCCM directly on the computer object.
A collection is then created in SCCM (unless it already exists). The computer object is then added as a Direct Membership Rule.

The SCCM Advertisement is only created if it is not already available.
A collection with a hash value is created when there is a new Task Sequence, another download mode or another deployment mode (optional/mandetory). These three factors are responsible for creating a collection with a hash value.
As of version 7.3.2, the check mark "Use incremental updates for this collection" is no longer set by default in the SCCM Collection. However, it can be set manually, depending on the customer's needs!

This has the following effect on the creation of an EM OSD order:
- The SQL database is not unnecessarily annoyed with queries per job
- Computer objects already known in SCCM are automatically included in the collection
- Unknown / new computer objects are only added to the collection after manual update (Update membership). If the check mark is set, this also happens automatically!
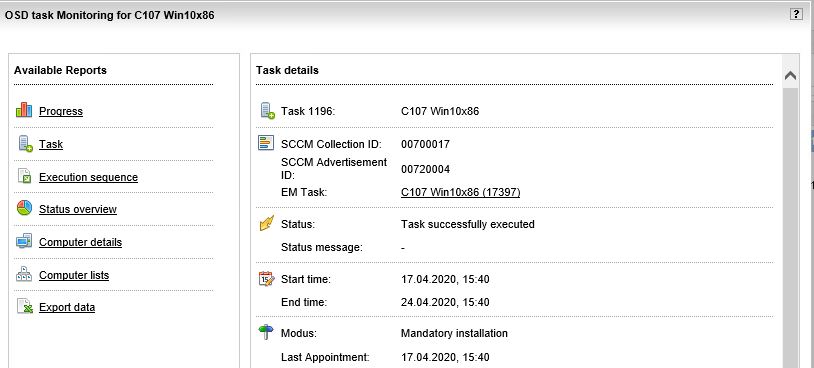
If EM rollout plans are available through the OSD configuration or through the selection in Step 2, in addition to a better overview and determination, the SCCM Collection ID and Advertisement ID are displayed. The Status displays the complete status of the Task, including all contained computer objects.
Under Computer Details, the current status for each individual computer object is displayed.
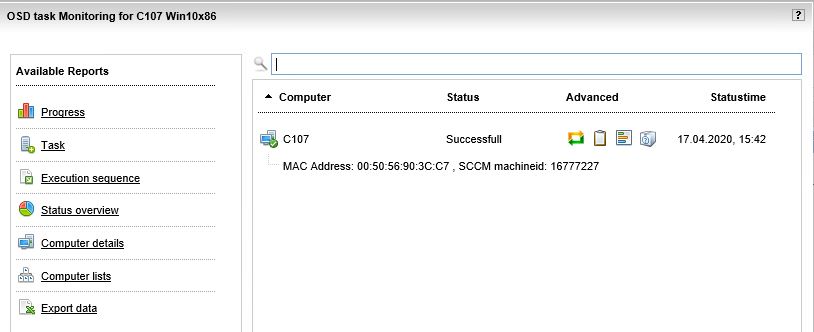
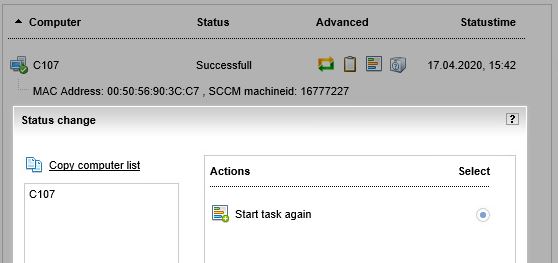
After a successful or faulty run the following contents can be viewed and executed here under "Advanced" (from left to right):
- Restart OSD job for this client (everything is reset, the computer object is added back to the collection and the PXE flag is removed from the computer object)
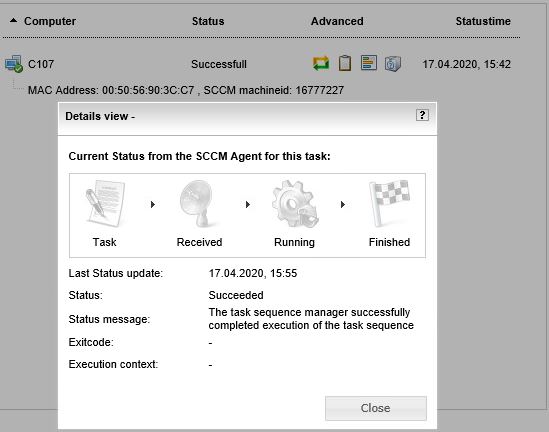
- Status of the SCCM job (run through the SCCM Task Sequence)
- Status of the EM rollout plans
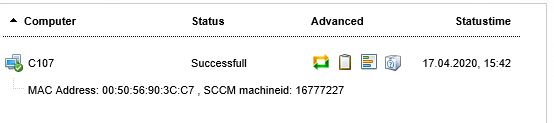
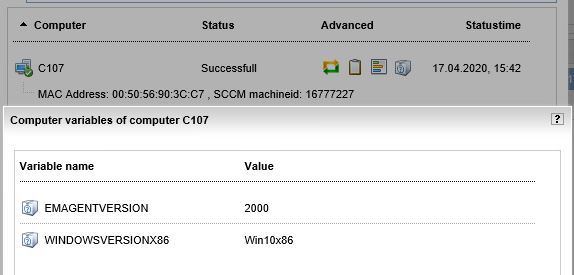
- Assigned EM variables with contents
Status Calculation
First, the status of the SCCM job for the existing computer objects is determined. This is done via a database query on the view <<Sitecode>>_ClientAdvertisementStatus . The status values are read out and converted into an EM format.
Succeed = Successful and the computer object is removed from the SCCM collection (collection remains in place).
Failed = Incorrect and the computer object is removed from the SCCM Collection (Collection remains unchanged).
Waiting, Running, Retrying and Rebbot pending = Deployment is running and the computer object remains in the SCCM Collection.
Then the EM Task status is queried when the computer object is finished with the SCCM Task (Task Sequence).
If both tasks are completed successfully, the computer object will be displayed as Successful in the OSD Task. If a task of both is faulty, it will be categorized as faulty.