Check inventory of Oracle databases step-by-step
This article describes how to check inventory of Oracle databases in a step-by-step approach. This procedure can help finding issues and is normally not required.
Transfer target systems to the scan appliance
To communicate the target systems to be inventoried to the scan appliance, you must execute the "Oracle Database Inventory" data provider, which can be found in the "Administration" section under "Data Providers". To do so, you must use the "Activate" action.
Check the transferred target systems (optional)
If you want to know which target systems have been handed over to the scan appliance, please log into the appliance as user "erunbook".
Use the command line to log into the scan database with the following command:
mysql –u<USER> -p<PASSWORD>
Select the "export_matrix42" database:
USE export_matrix42;
Query the "csystem" table, which contains the systems to be scanned:
SELECT COMPUTERNAME, FQDN, IP, STATUS FROM csystem;
Initiate inventory
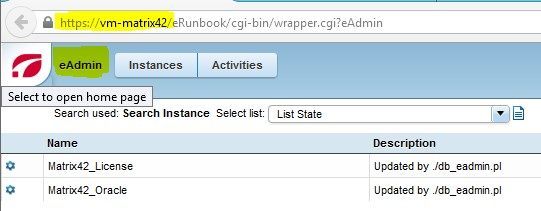
To initiate the inventory of the transferred target systems, you must log into the web front-end of the scan appliance:
https://<hostname der appliance>
Use the password that you have set during the scan appliance configuration for the nova ratio web front-end.

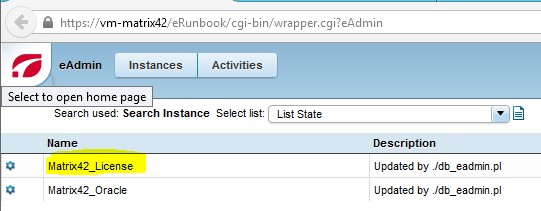
Select the "Matrix42_License" instance in the web front-end.

The overview displays the target systems to be inventoried.
Now, go to the "Tabs" selection in the left upper end above Matrix42 and "Cron Jobs".

Then switch to the expert view:


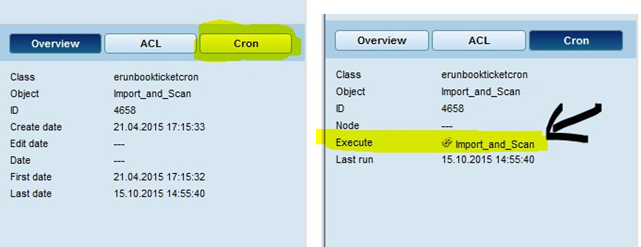
Select the "Import_and_Scan" Cron job.

The Import_Systems and Systemscan Cron jobs are launched via the Import_and_Scan job and must therefore be set to inactive!
Switch to "Cron" in the expert view and execute the Cron job specified above.

The job processing (displayed in a pop-up window) only monitors the execution of jobs, not the scan results!
Inventory monitoring (optional)
To monitor Cron job execution, you must first log into the scan appliance as user "erunbook". You can read the respective log file with the following command:
tail –f /opt/eRunbook/log/Matrix42_License.log
As soon as you see the following entry, the scan on the target systems has been completed:
….MATRIX42_LICENSE PUT.PL: FINISHED
The following entry shows that the processing of the transferred scan data has been initiated:
…Matrix42_License eRunbook.server….get: processing data starts
The following entry shows that the processing of the transferred scan data has been completed:
…Matrix42_License eRunbook.server….get: job: xxx: finished
Validation of result data on the target system
Windows Servers
The file system of scanned target systems always contains the latest scan results in the agent directory:
C:\Program Files (x86)\eRunbook\product\agent\tools
The hardware data are included in the following file:
<HOSTNAME>_WMIInfo.txt
The details on Oracle database instances are included in the following file:
Result_orcl.csv
Linux and Unix servers
The file system of the scanned target systems always contains the latest scan results in the agent directory:
/opt/eRunbook/product/agent/tools
The hardware data can be found in the following file:
<HOSTNAME>_WMIInfo.txt
The details on Oracle database instances can be found in the following file:
Result_orcl.csv
Analyze the scan data
To initiate the analysis of the collected scan data, you must log into the web front-end of the scan appliance:
https://<hostname der appliance>
Use the password that you have set during scan appliance configuration for the nova ratio web front-end.
Select the "Matrix42_Oracle" instance in the web front-end and open the stored Cron jobs.
Then switch to the expert view, as described above.
Select the "Import_Analyze_Export" Cron job:
 The Interface_Matrix42_License and Matrix42_Export Cron jobs are launched by the job and must be set to inactive.
Switch to "Cron" in the expert view and execute the Cron job.
Job processing (shown in a pop-up window) only monitors job execution and not the scan results.
Analysis monitoring (optional)
To monitor Cron job execution, you must log into the scan appliance as user "erunbook". You can read the respective log file with the following command:
tail –f /opt/eRunbook/log/Matrix42_Oracle.log
As soon as you see the following entry, the analysis has been completed and the data have been made available for transfer to Workspace Management (collection by the data provider):
….table … xx records written
As soon as you read the following entries, the analysis has been completed:
…cron job ‘Matrix42_Export’ finish
…cron job ‘Import_Analyze_Export’ finish
Check result data (optional)
To initiate the analysis of the collected scan data, you must log into the web front-end of the scan appliance:
https://<hostname of appliance>
Use the password that you have set during scan appliance configuration for the nova ratio web front-end.
Select the "Matrix42_Oracle" instance in the web front-end.
Several views of result data are available:
Transfer result data into Workspace Management
To import the result data of the scan appliance into Workspace Management, you must reexecute the "Oracle Database Inventory" data provider. It can be found in the "Administration" section under "Data Providers". Use the "Activate" action to execute the data provider.
You can view the result data after the data provider has been executed in the "Licenses" section under "Oracle Database Worksheets" overviews.