User Defined Localization
Overview
Localization is a process of customizing Layouts for a given locale of the System Culture and managing Localization. This process consists mainly of translating display texts for the user interface.
Version 9.0.4 introduces the new feature of User Defined Localization which allows extending the default application languages by adding new languages/cultures along with translation options.
What are the benefits of User Defined Localization?
Using User Defined Localization enables administrators of the application to translate UUX relevant strings to any provided or newly added language/culture.
When to use User Defined Localization?
Whenever the provided translation does not fit your organization's language you might change it to your needs. In addition, new languages/cultures can be introduced to serve languages not yet present by default.
User Defined Localization uses a pre-defined priority to determine which term to display.
- User defined language/culture e.g. de-AT 'Deutsch-Österreich'
- Base language de 'Deutsch'
- Original language (always English)
Example:
- de-AT
- de
- English
Configuration Steps
To set up User Defined Localization two steps are required:
- Define new System Language/Culture
- Define Localization
The following example will show how to add the new culture 'German-Austria' and the localization of the attribute of 'Primary Account'.
Define new system language/culture
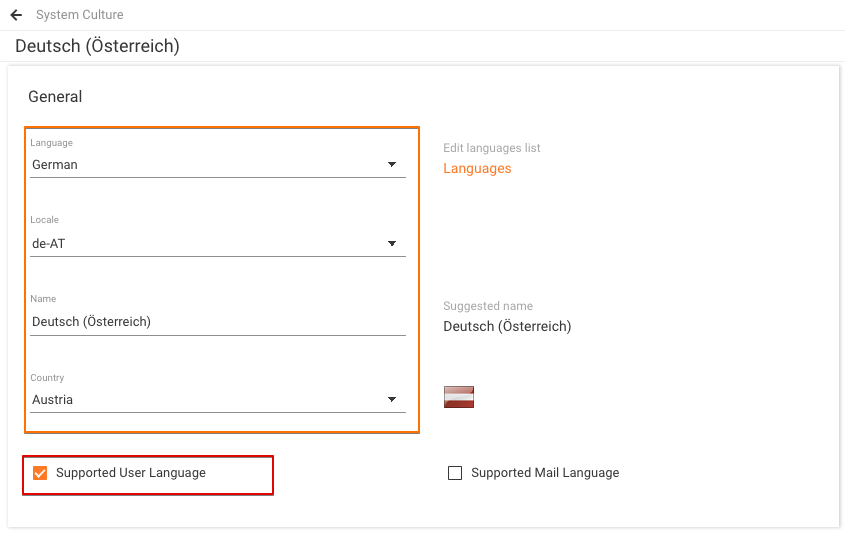
Defining a new system language/culture is done by accessing Administration → User Interface → Regional Settings:
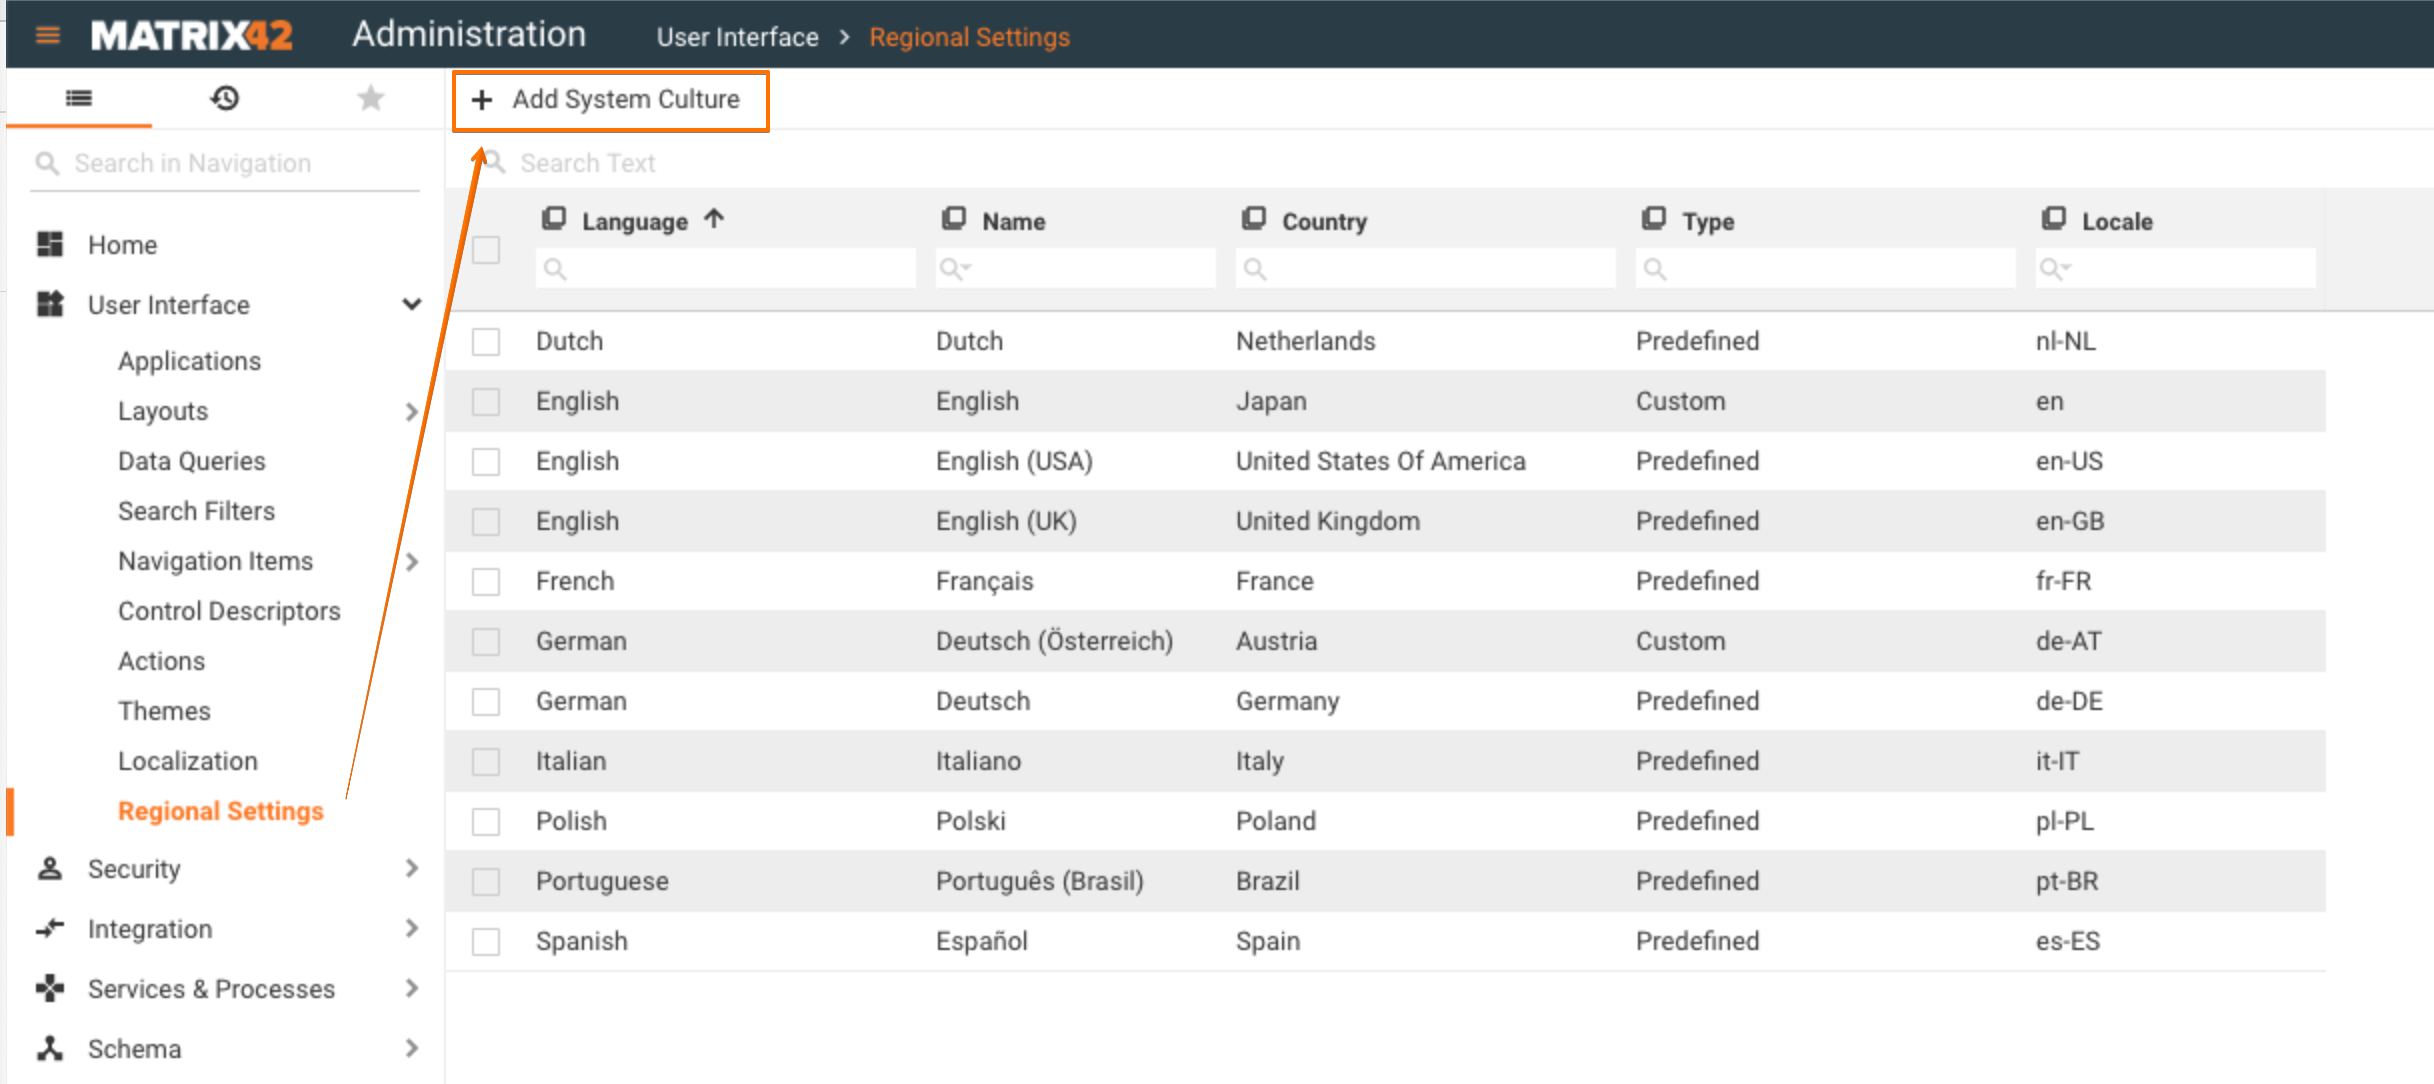
Once you are at the navigation item use the action + Add System Culture to create a new culture. Please make sure that all necessary entries are set up (orange box) and that the option Supported User Language is selected (red box).
After saving the changes the culture will be available in the overview.
The video below shows how a new system culture is added:
The next steps are the actual translation of entries.
Define localization
In order to add localization strings, you need to navigate to Administration → User Interface → Localization and add your created culture to the grid using the Configuration option.
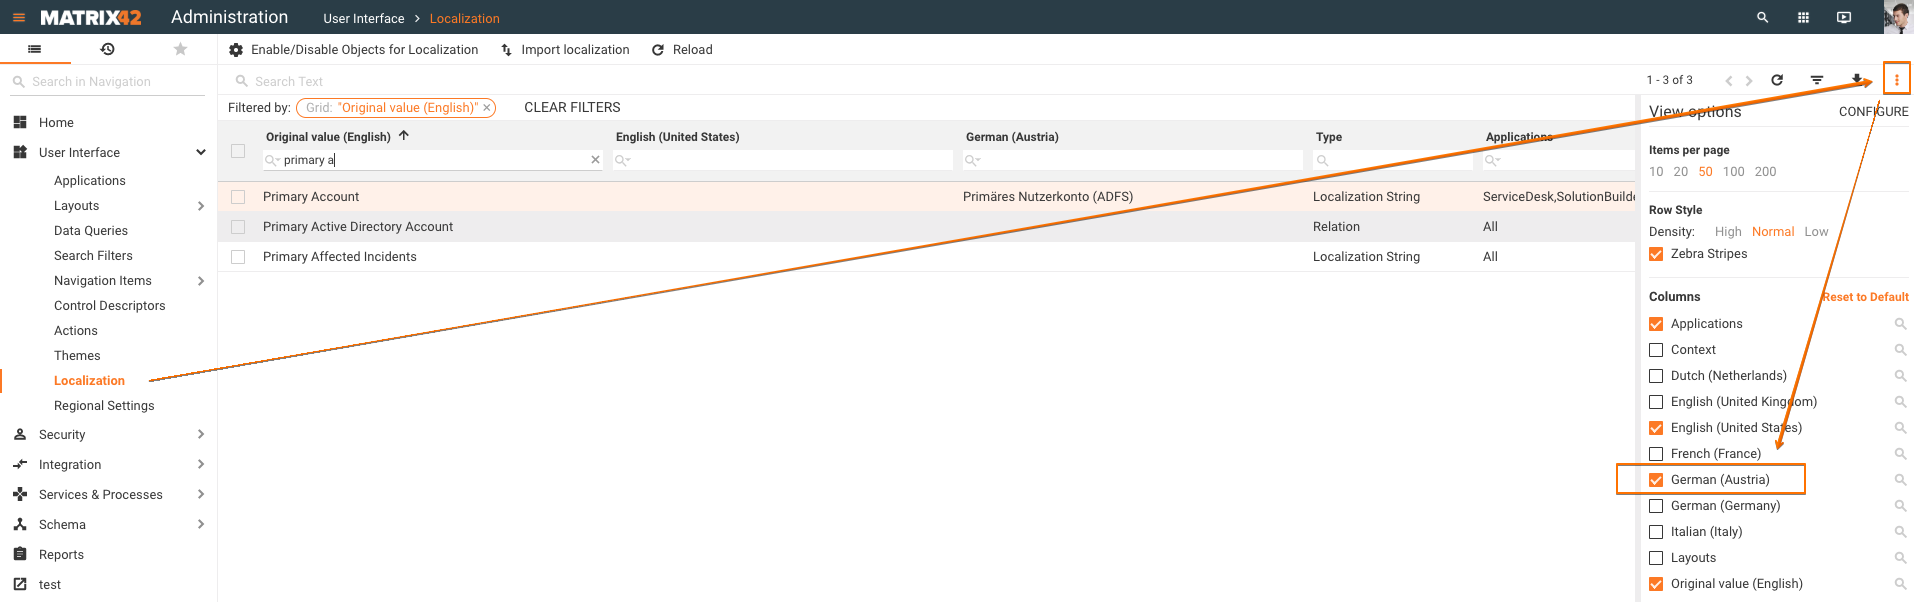
Please be aware that the initial load of data might take some time due to the fact of loading all entries and localizations.
Once in place, simply search for your string and double-click it to open the edit mode. You will find the new culture directly at the base language (German) and by clicking on the name a text box will collapse:
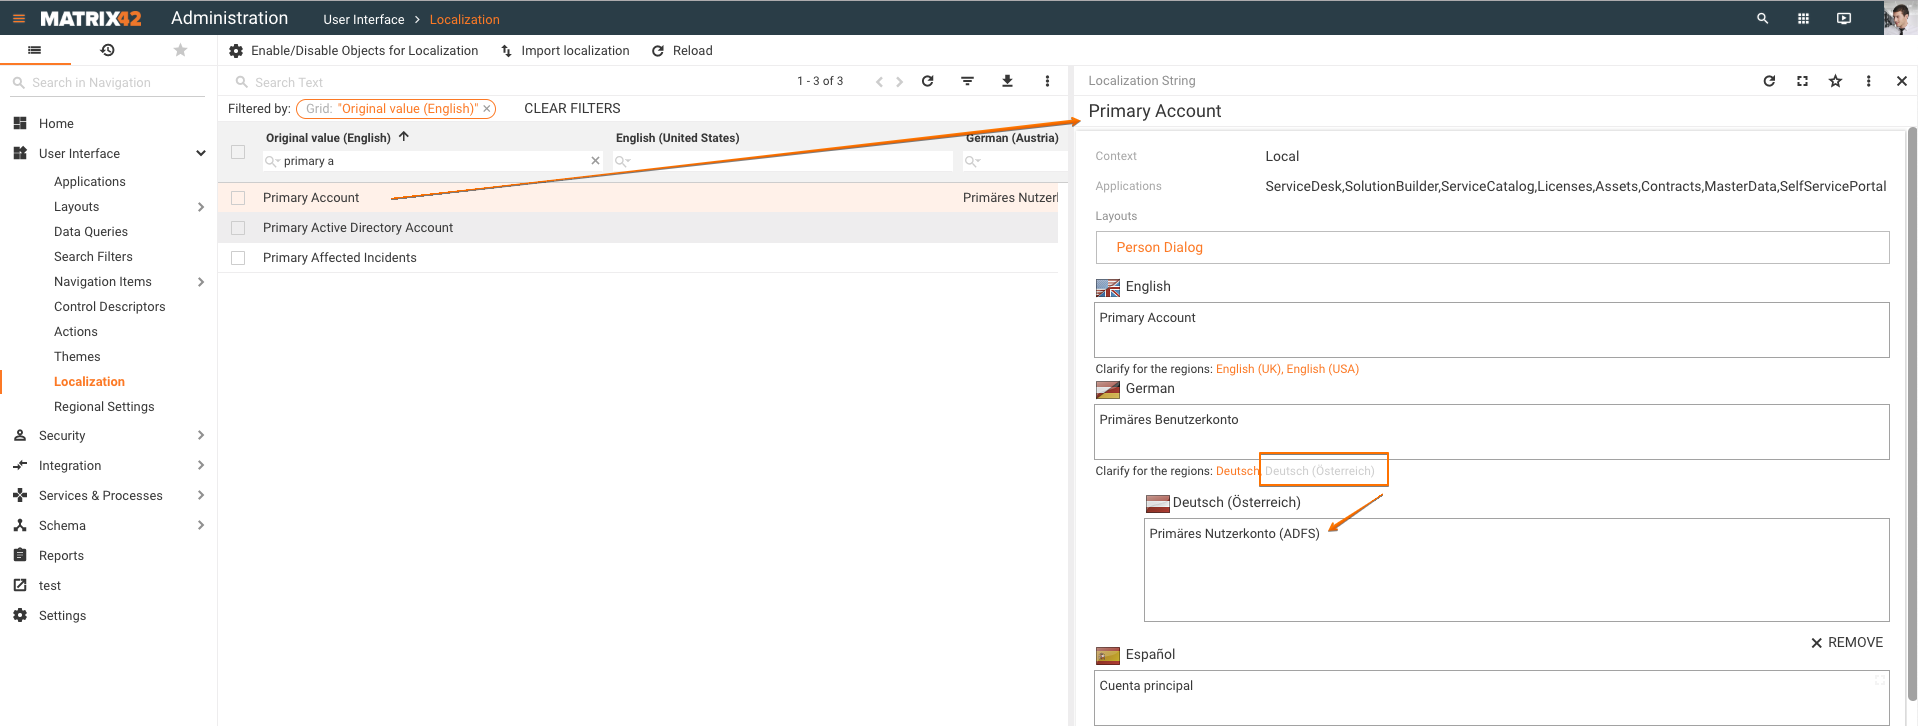
After applying your text make sure to save your changes to take effect.
No IIS reset is required to apply the changes but it might happen that you need to clear your local browser cache to be able to see the result.
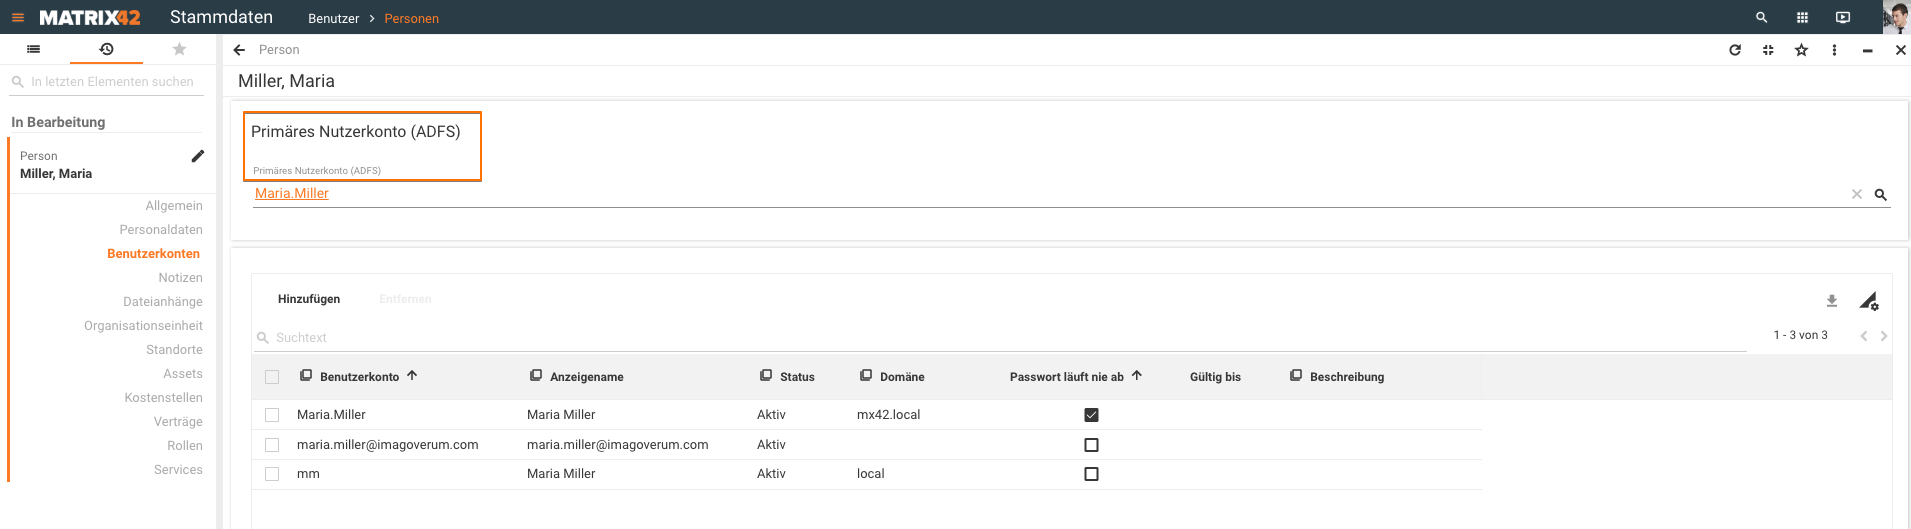
After changing the application language to Deutsch-Österreich navigate to a person record and check the result:
The video below summarizes how to set up a localized string:
Mass update
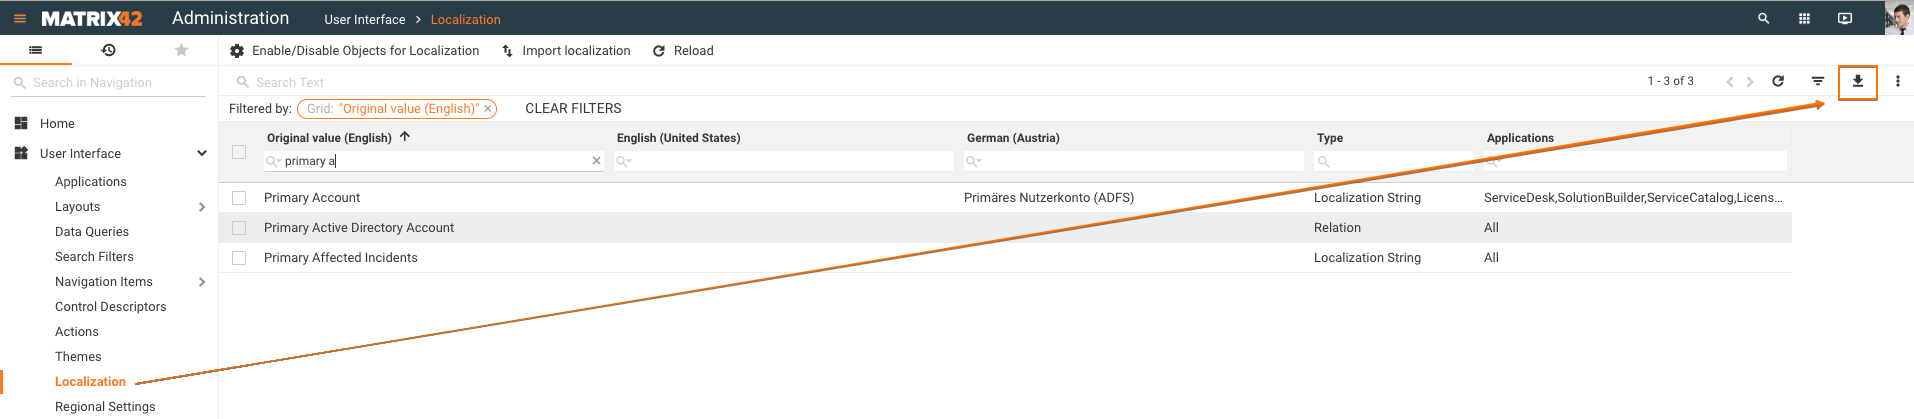
In case it is necessary to update several records the Import localization action can be used.
At first, the records to translate need to be exported using the default export function at Administration → User Interface → Localization. Please make sure that all required languages/cultures are displayed before starting the export.
The export process will take some time in case all entries are exported. This will be indicated during export.
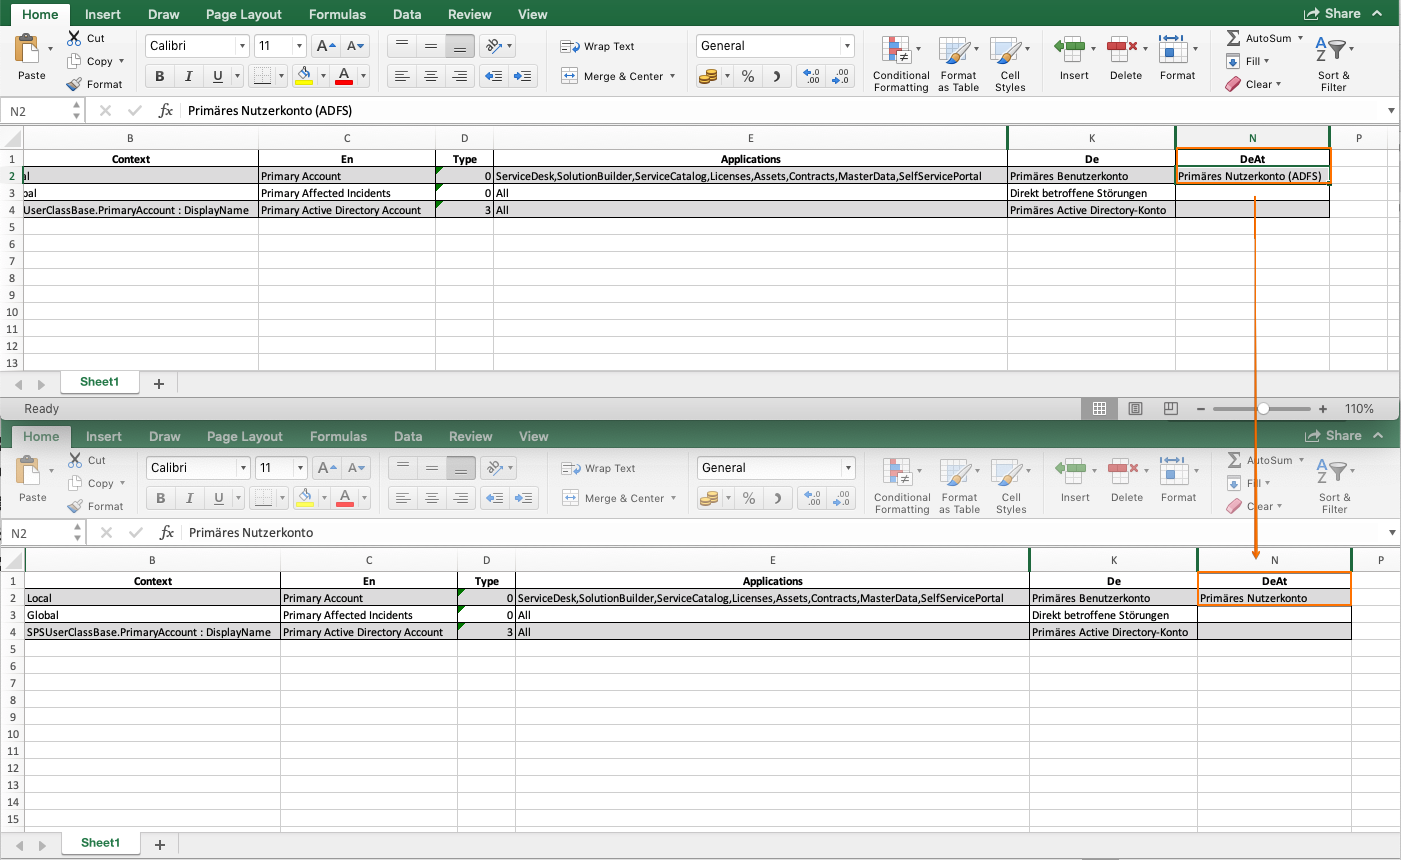
Once exported the changes can be applied directly in the excel file. All exported languages will be visible in a row and will be shown as import options later.
After all the changes have been made, save the file and start the import using the action Import localization.
This action will open a new dialog where you need to specify the file to import first. Based on the available languages/cultures in the file the dropdown will ask for the language to import (orange box).
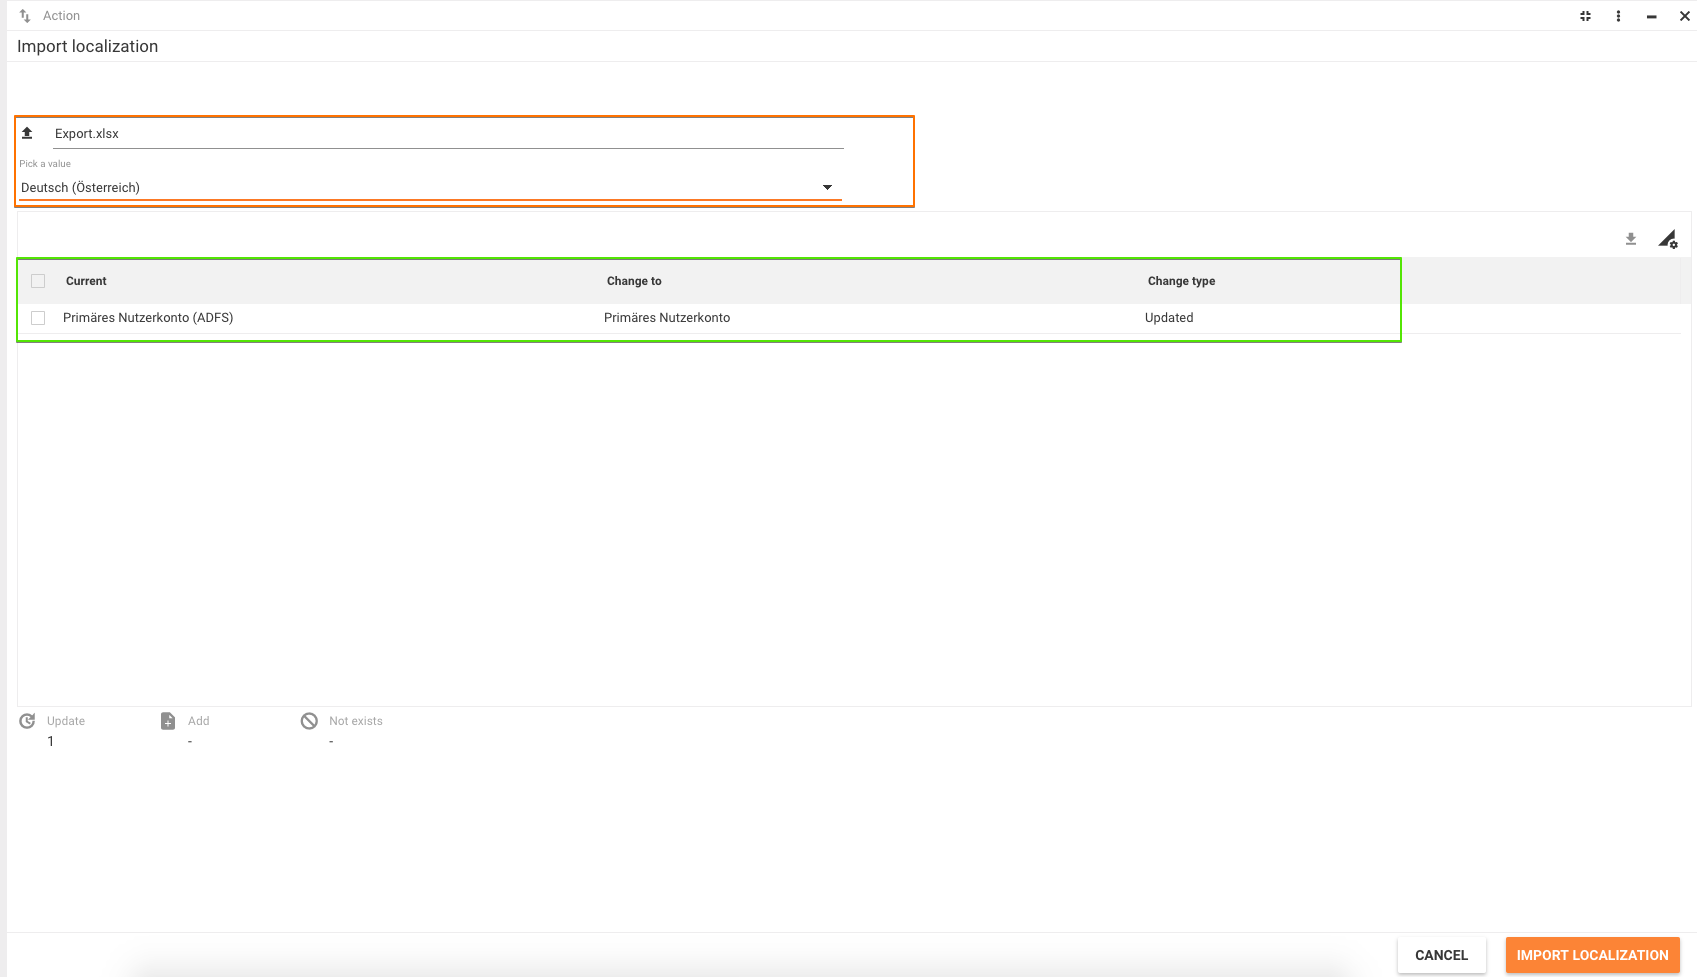
All detected changes will be shown in the dialog with their current and new Change to value (green box). By clicking Import Localization the import will start and the system will apply the changes.
Above mentioned steps are again summarized in a short video:
Change the scope of localized objects
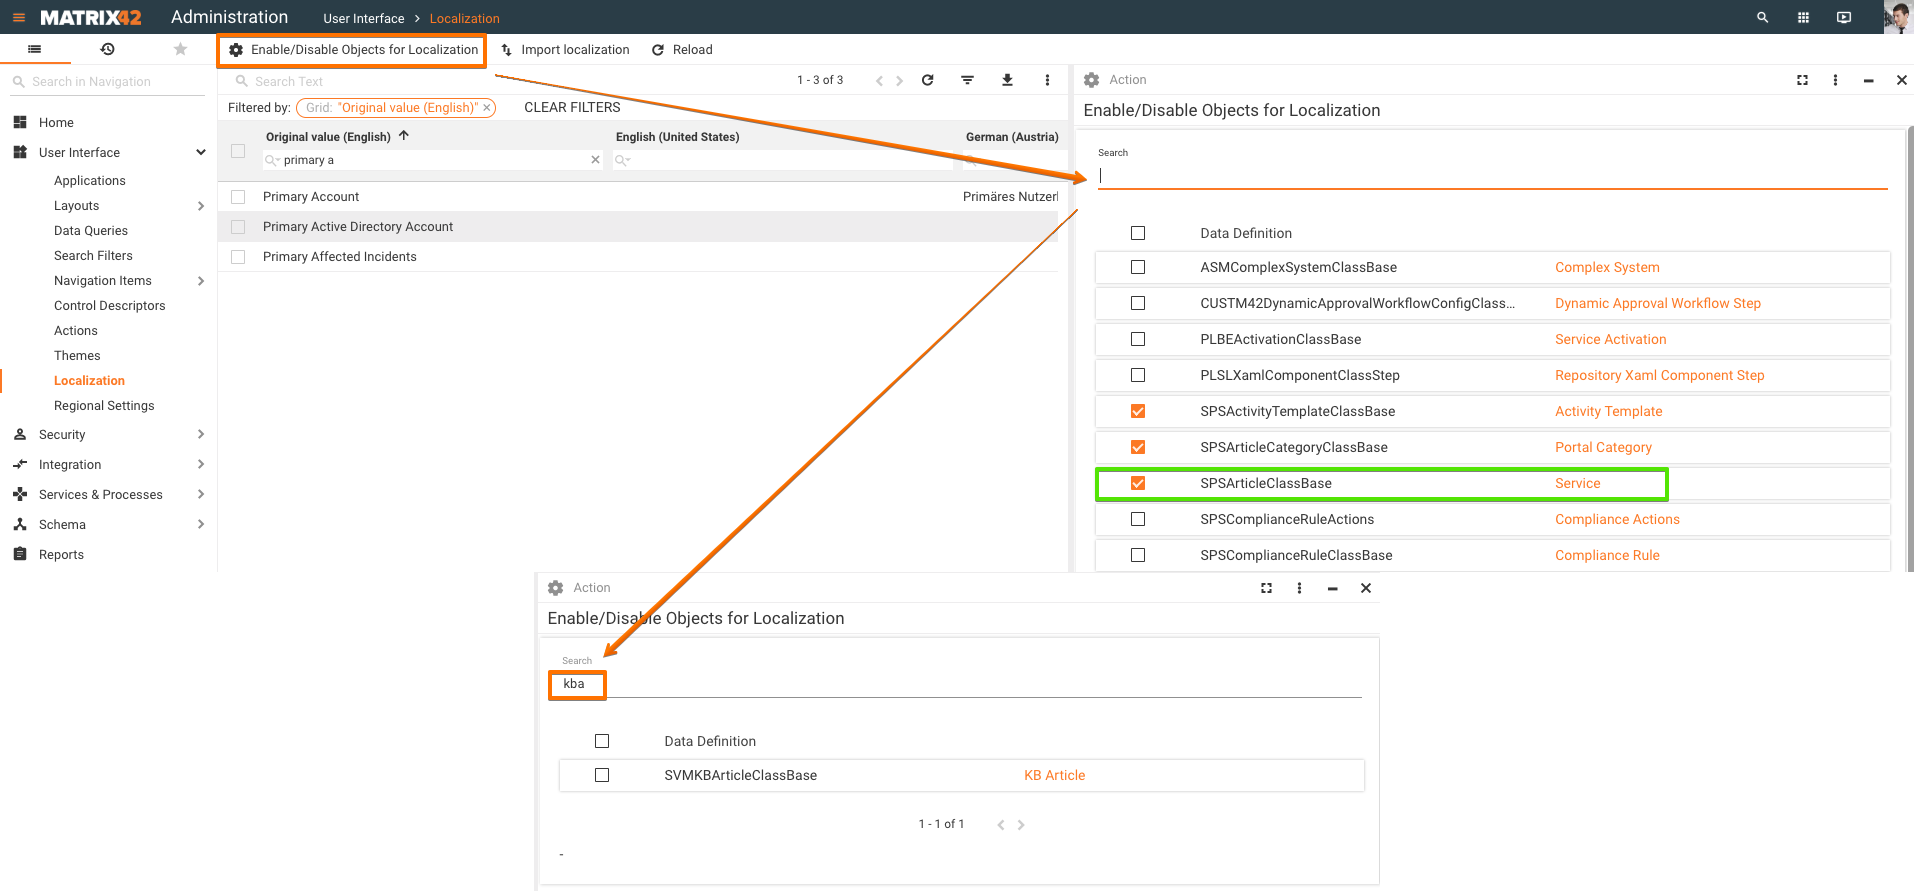
It might happen that the objects shown by default do not fit your organizational needs. In such a case the Enable/Disable Objects for Localization action can be used to apply changes.
The scope only includes UUX relevant objects as the feature does not support our legacy interface.
After executing Enable/Disable Objects for Localization a list of objects will be displayed to enable or disable objects of relevance. For example, Data Definition 'SPSArticleClassBase' which keeps all details of services is already selected. This selection allows localizing service name and description.
If Knowledge Base Articles should be included as well, search for 'kba' and it will show up as an option to select.
Other localization options
There is an additional Enter Localization Mode option allowing Administrators to manage the Localization of the user interface texts.
Localizable fields are actually the attributes of the Data Definition that have the Localization option set to enabled:
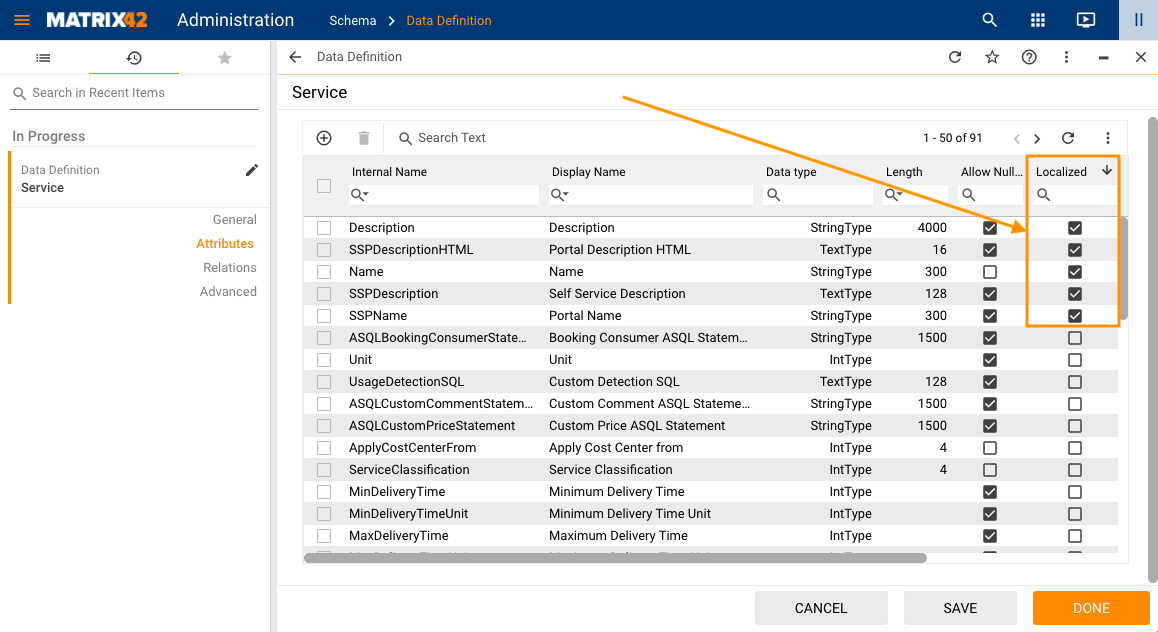
For more information, see Data Definition page.
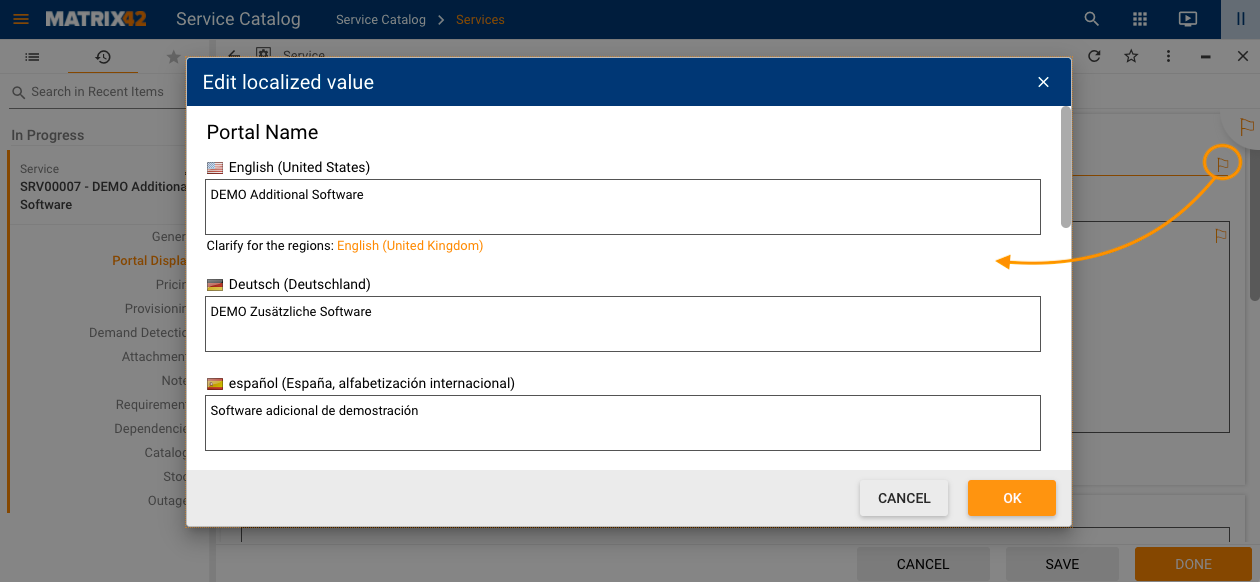
Enter Localization Mode option
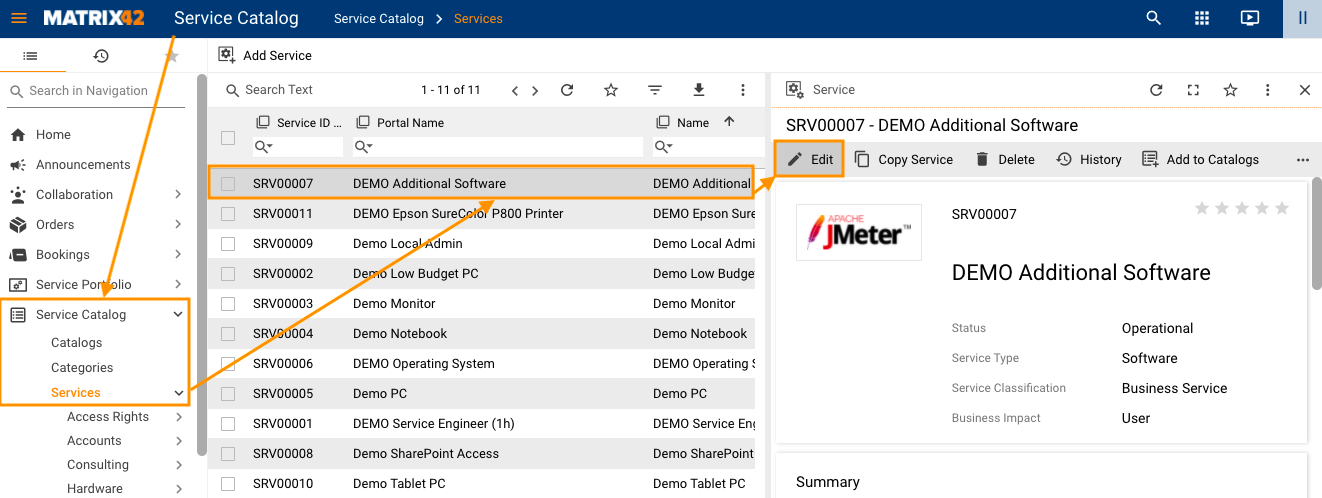
An administrator can Enter Localization Mode in the Dialog Layout directly from the Application, for instance:
- Open Service Catalog Application;
- Go to Service Catalog Navigation Item;
- Open Services menu;
- Click on the Service to open the preview page;
- Click Edit action:
- Click More options... in the Dialog context menu;
- Click Enter Localization Mode:
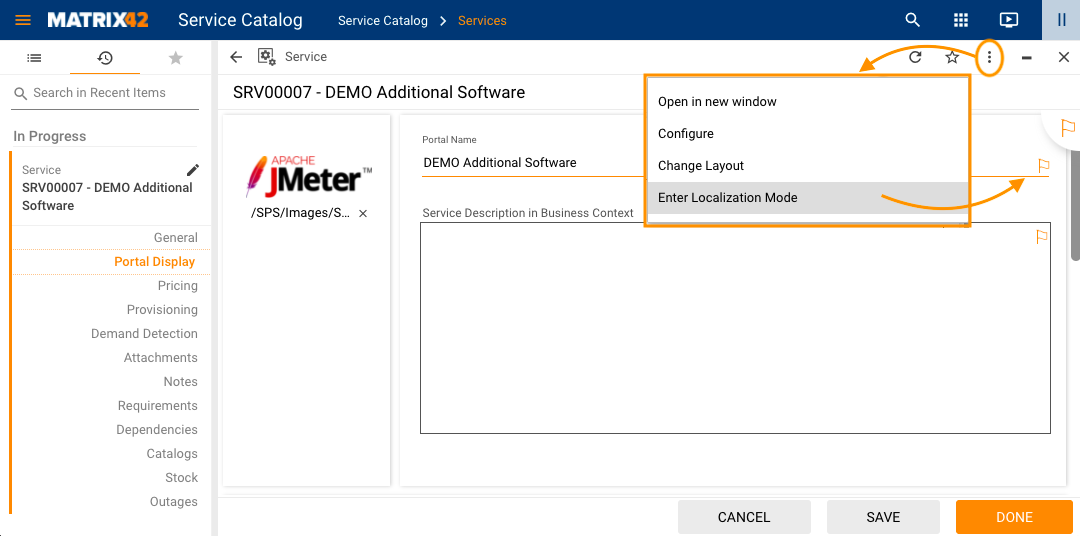
The localizable fields are marked with a flag. - Click on the flag to manage localization:
- When ready, save the changes and click More options... → Exit Localization Mode.