Scan machines via router
Overview
This document describes the configuration of an agent as a router. This makes it possible to scan systems that cannot or may not establish a direct connection to the scan appliance.
Setup
Two steps are necessary to assign router functionalities to an agent. On the one hand a router must be defined via GUI and on the other hand the configuration file of the agent must be adapted.
Create Router
At the beginning one system - there can be more than one - must be defined as a router.
To do this, open the user interface of nova ratio scan appliance and select "Administration => Activities => Create new Scanrouter" from the menu bar:

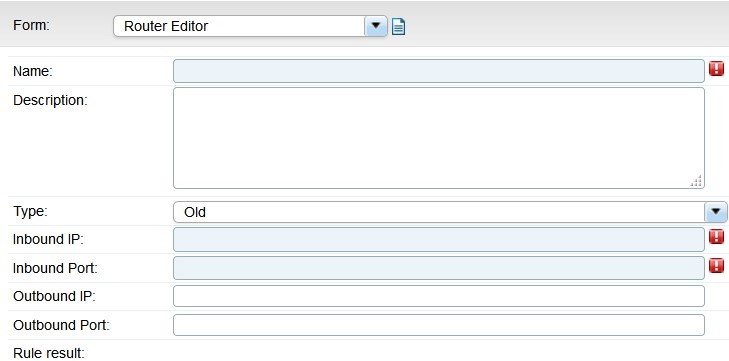
This will take you to the Router Editor. As shown in Figure 2, the following fields are mandatory: "Name", "Inbound IP" and "Inbound Port". Inbound IP is the IP address of the system whose agent is to take over router activities in the future. For the inbound port, the specific agent port 9616 must be selected, as shown below:
Empty Router Configuration:
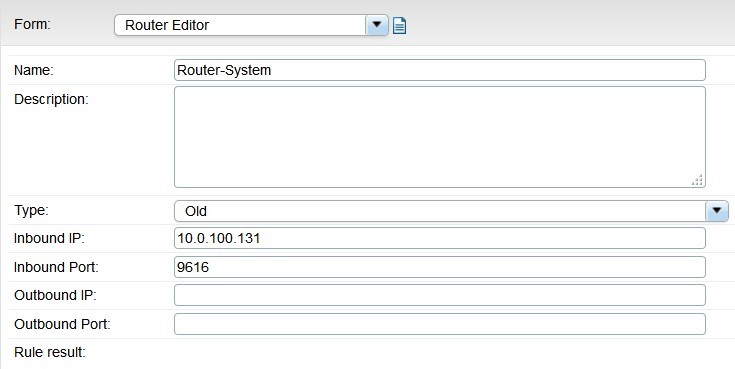
Completed Router Configuration:
Then save the router setting by clicking on "Save". The router is now defined and created on the server side.
In the next step, you have to check on the system of the agent, which should run as router, whether the configuration file is set up accordingly.
Configure Agent
To be able to use an Agent as a router at all, this must be entered in the configuration file of the agent. To check this, you have to connect to the target system (desired router). By default, the configuration file of the agent is located in the following directory.
Windows: C:\Program Files (x86)\eRunbook\product\agent\etc\eRunbook.conf
Unix: /opt/eRunbook/product/agent/etc/eRunbook.conf
- Open this file with a text editor
- Search for "router=" entry
- Set the value to "1"
- Save your change and close the editor
- Restart the agent:
On Windows: The "eRunbookAgentStandard" service must be restarted via the services control panel.
On Unix:
Navigate to the following directory:
cd /opt/eRunbook/product/admin
Run the auxiliary script "eRunbook_agent" with the parameter "restart":
./eRunbook_agent restart
In the next step, you have to create a route as described below.
Create Route
After one or more routers have been defined, a route must now be created.
To do this, open the user interface of nova ratio scan appliance and select the following sub-item from the menu bar: "Administration => Activities => Create new Scanroute".

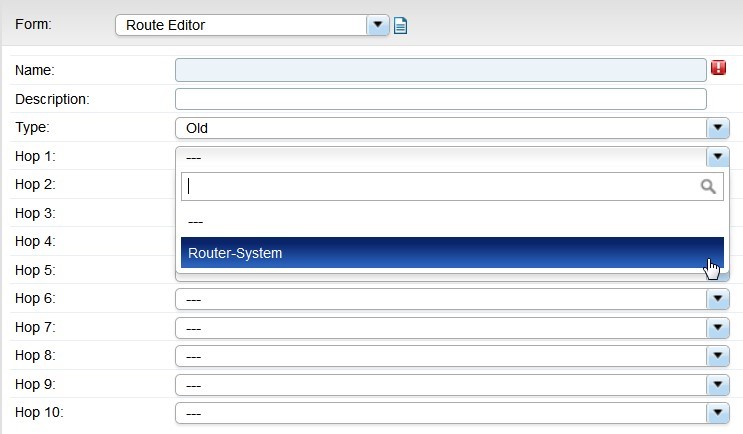
A name must be assigned in the Route Editor. Select one or more of the created routers in the "Hop" fields, which should be used for this route:
Save your changes.
Use Route
After a route has been created with a corresponding router, the systems must still be told that they should be scanned via this configured route.
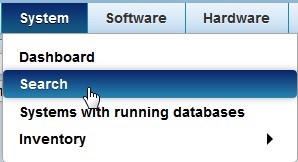
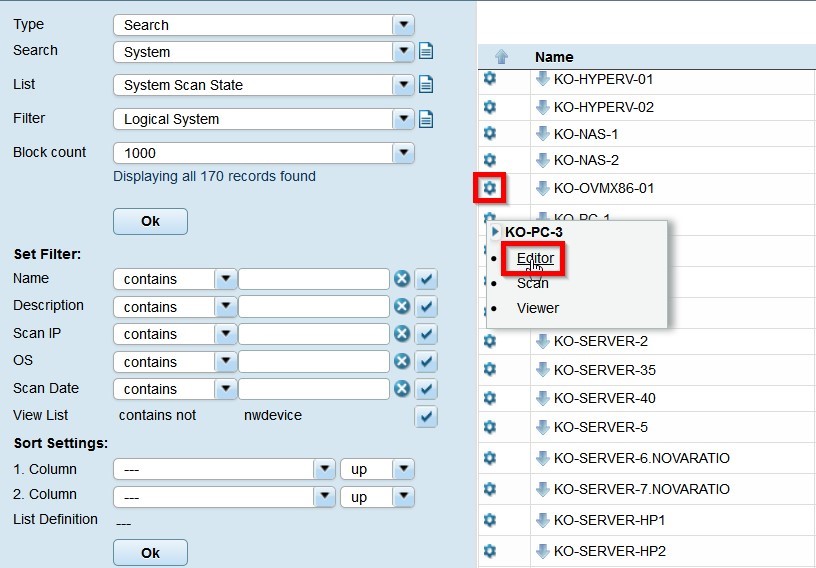
To do this, go to the editor of the desired system which is to use this route in the future. From the dashboard start page click on "Complete System List" to access the desired search:

Alternatively, you can use the menu bar (System Search) to access the desired view:
In the following view, all systems are shown. Here you can select the desired system. A click on the gear symbol to the left of the desired object opens the activity window. There, select the "Editor" sub-item as shown below:
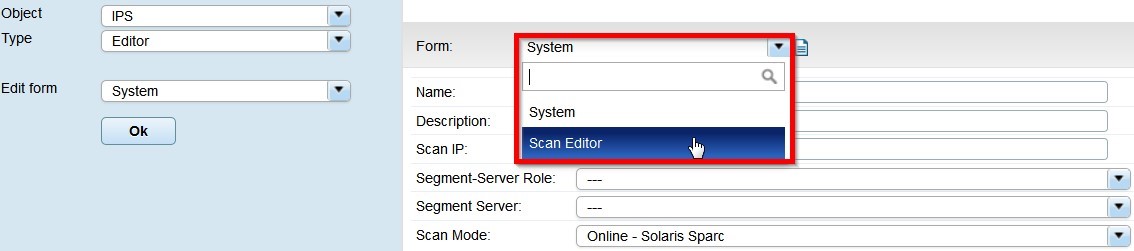
In the editor mode of the system, one now selects the form "Scan Editor" by clicking on the dropdown arrow:
In this form it is now possible to select for the attribute "Scan Route" one of the previously created routes over which the system is to be routed for the scan in the future:
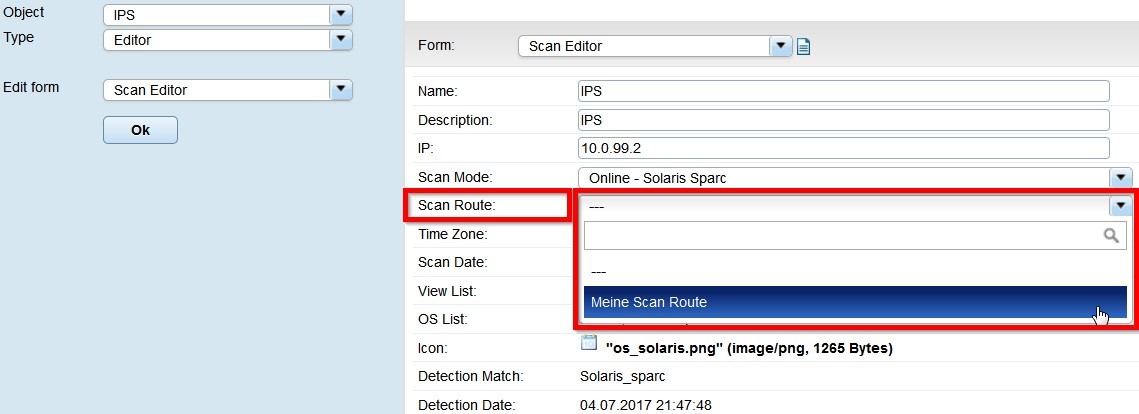
Save your changes, clicking on "Save". From now on the defined route will be used to scan the target system