Release Notes Silverback 19.0
About this release
Matrix42 Silverback 19.0 provides new and improved features that have been implemented. During the development of this version, we have been focusing on valued feedback from our customers and partners in order to provide an ideal feature selection.
Please find the installation files of this version on Matrix42 Marketplace.
System requirements, instructions for installation and update as well as for basic configuration are available in the Matrix42 Help Center.
Overview
Before you Start
Due to this release and upcoming preparations the update process for Silverback 19.0.0 is a little bit different. After updating Silverback, instead of your familiar Login window you may see an error Message "Invalid Request". After that, please follow these steps:
- Open your Silverback URL with the end /sts/clients, e.g. https://silverback.imagoverum.com/sts/clients
- Login with your Administrator credentials
- Click STS settings
- Change STS URL to e.g. https://silverback.imagoverum.com/sts/
- Click Save
- Restart IIS
- Open your Silverback Management Console: e.g. https://silverback.imagoverum.com/admin
- Login with your credentials
As an additional information please note that all new Android features in this release requires Silverback Companion minimum version 19.0.0.1
New Features
- Management Console
- iOS
- Android
- Windows 10
- MacOS
Improvements
- Default search value for Devices has been changed to Username
- Default search value for App Portal has been changed to Name
- Login to API help section is now using the Security Token Service
- Pending commands will now be cleared when devices are not under Managed, Blocked or Checked Out
- Every Administrator is now able to delete other Admin Accounts
- When adding applications into a Tag, select all is now available
- Device Owner Mode Flag is now shown in Device Overview
- Samsung Mail Client is now activated by default for Samsung devices in Device Owner mode
- Samsung Contacts is now activated by default for Samsung devices in Device Owner mode
Minor Changes
- Samsung UMC has been removed
- TPAMS has been removed
- Mandatory description for Tags has been removed
- Android Firebase Cloud Messaging will be used starting from 11th of April
- Companion version has been increased to 19.0.0
Fixes
- Clear Passcode is working again
- VPP Refresh Period is fixed
- PRB32585: Windows Overlay in Policy - OS Version Compliance iOS
- PRB32560: VPP Apps not automatically deployed to devices
- PRB32532: Samsung OS9 Devices remains in Blocked and Companion crashes
New Features
Management Console
Silverback 19.0 offers the following new features for the Management Console
- Device Status Integration
- New Log Files Interface
- Device Name in device overview
- Direct forwarding to Identity Providers for Self Service Portal
Device Status Integration
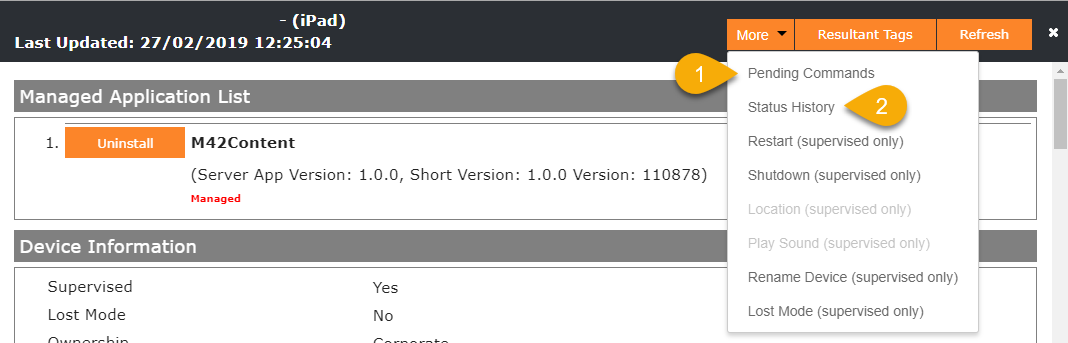
This time we invested a lot to make the device management more UX friendly. As an outcome every Administrator will now see two new actions under the More button in the Device Overview. The first one is the Pending Commands integration, followed by the Status History.
Pending Commands
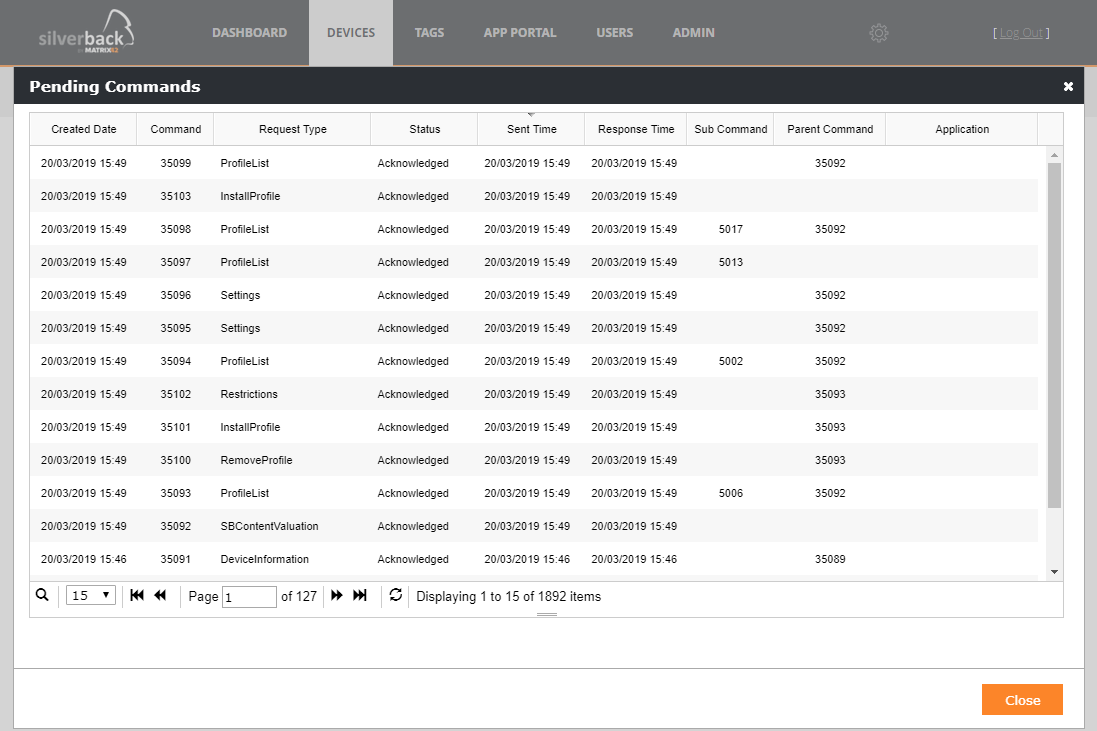
Our pending commands overview will display you all outstanding and historically created commands per device. In general the overview will provide you with the following features:
- Display outstanding Pending Commands
- Display historical Pending Commands
- Sort Ascending and Descending each column
- Search for Request Type and Status
- Display 15,20,25,50 items per page
- A page navigation through all commands
In the following screenshot all pending commands from 20th of March were successfully transferred and the device answered with the status Acknowledged. In this case everything is fine.
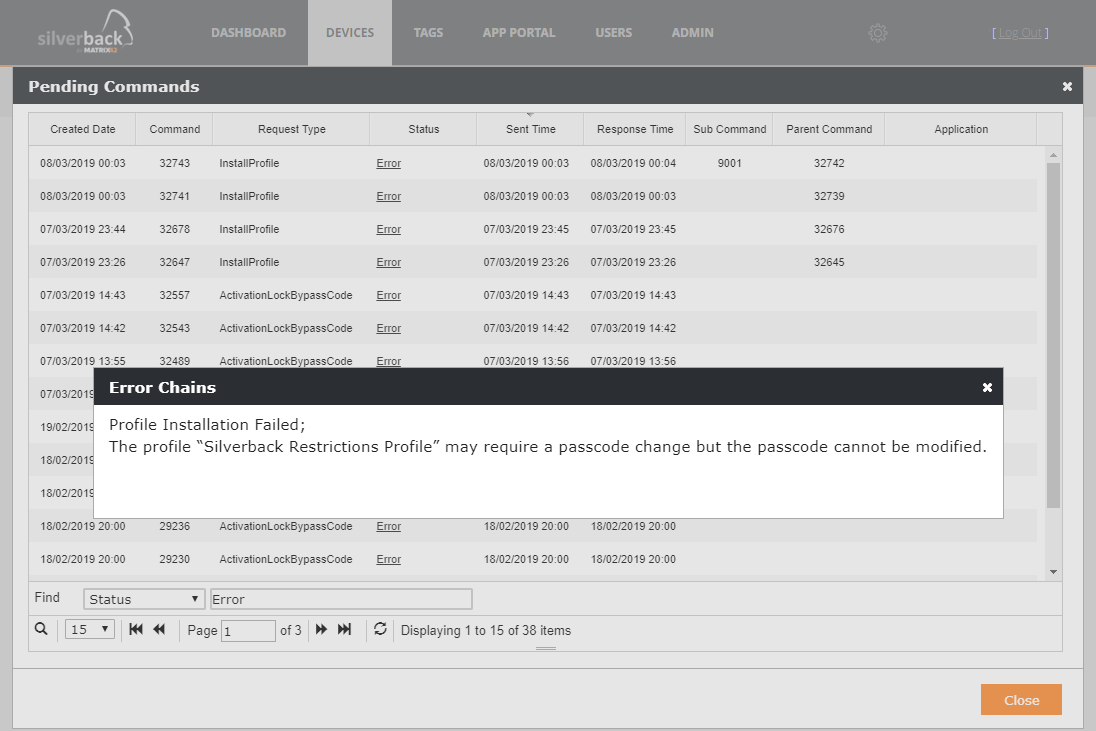
For a troubleshooting case you can first look into the Pending Commands Overview, search e.g. for the Status Error which will help in most of the cases to narrow down the root cause like it is displayed in the following screenshot.
Pending Commands overview displays the following values:
| Value | Description |
|---|---|
| Created Date | Timestamp of the creation |
| Command | Database Command ID |
| Request Type | Which type of command has been send |
| Status |
|
| Sent Time | Timestamp of the outgoing request |
| Response Time | Timestamp of the incoming answer |
| Sub Command | Sometimes request types has sub commands |
| Parent Command | Sometimes request types has parent commands |
| Application | Displays the requested application name |
Status History
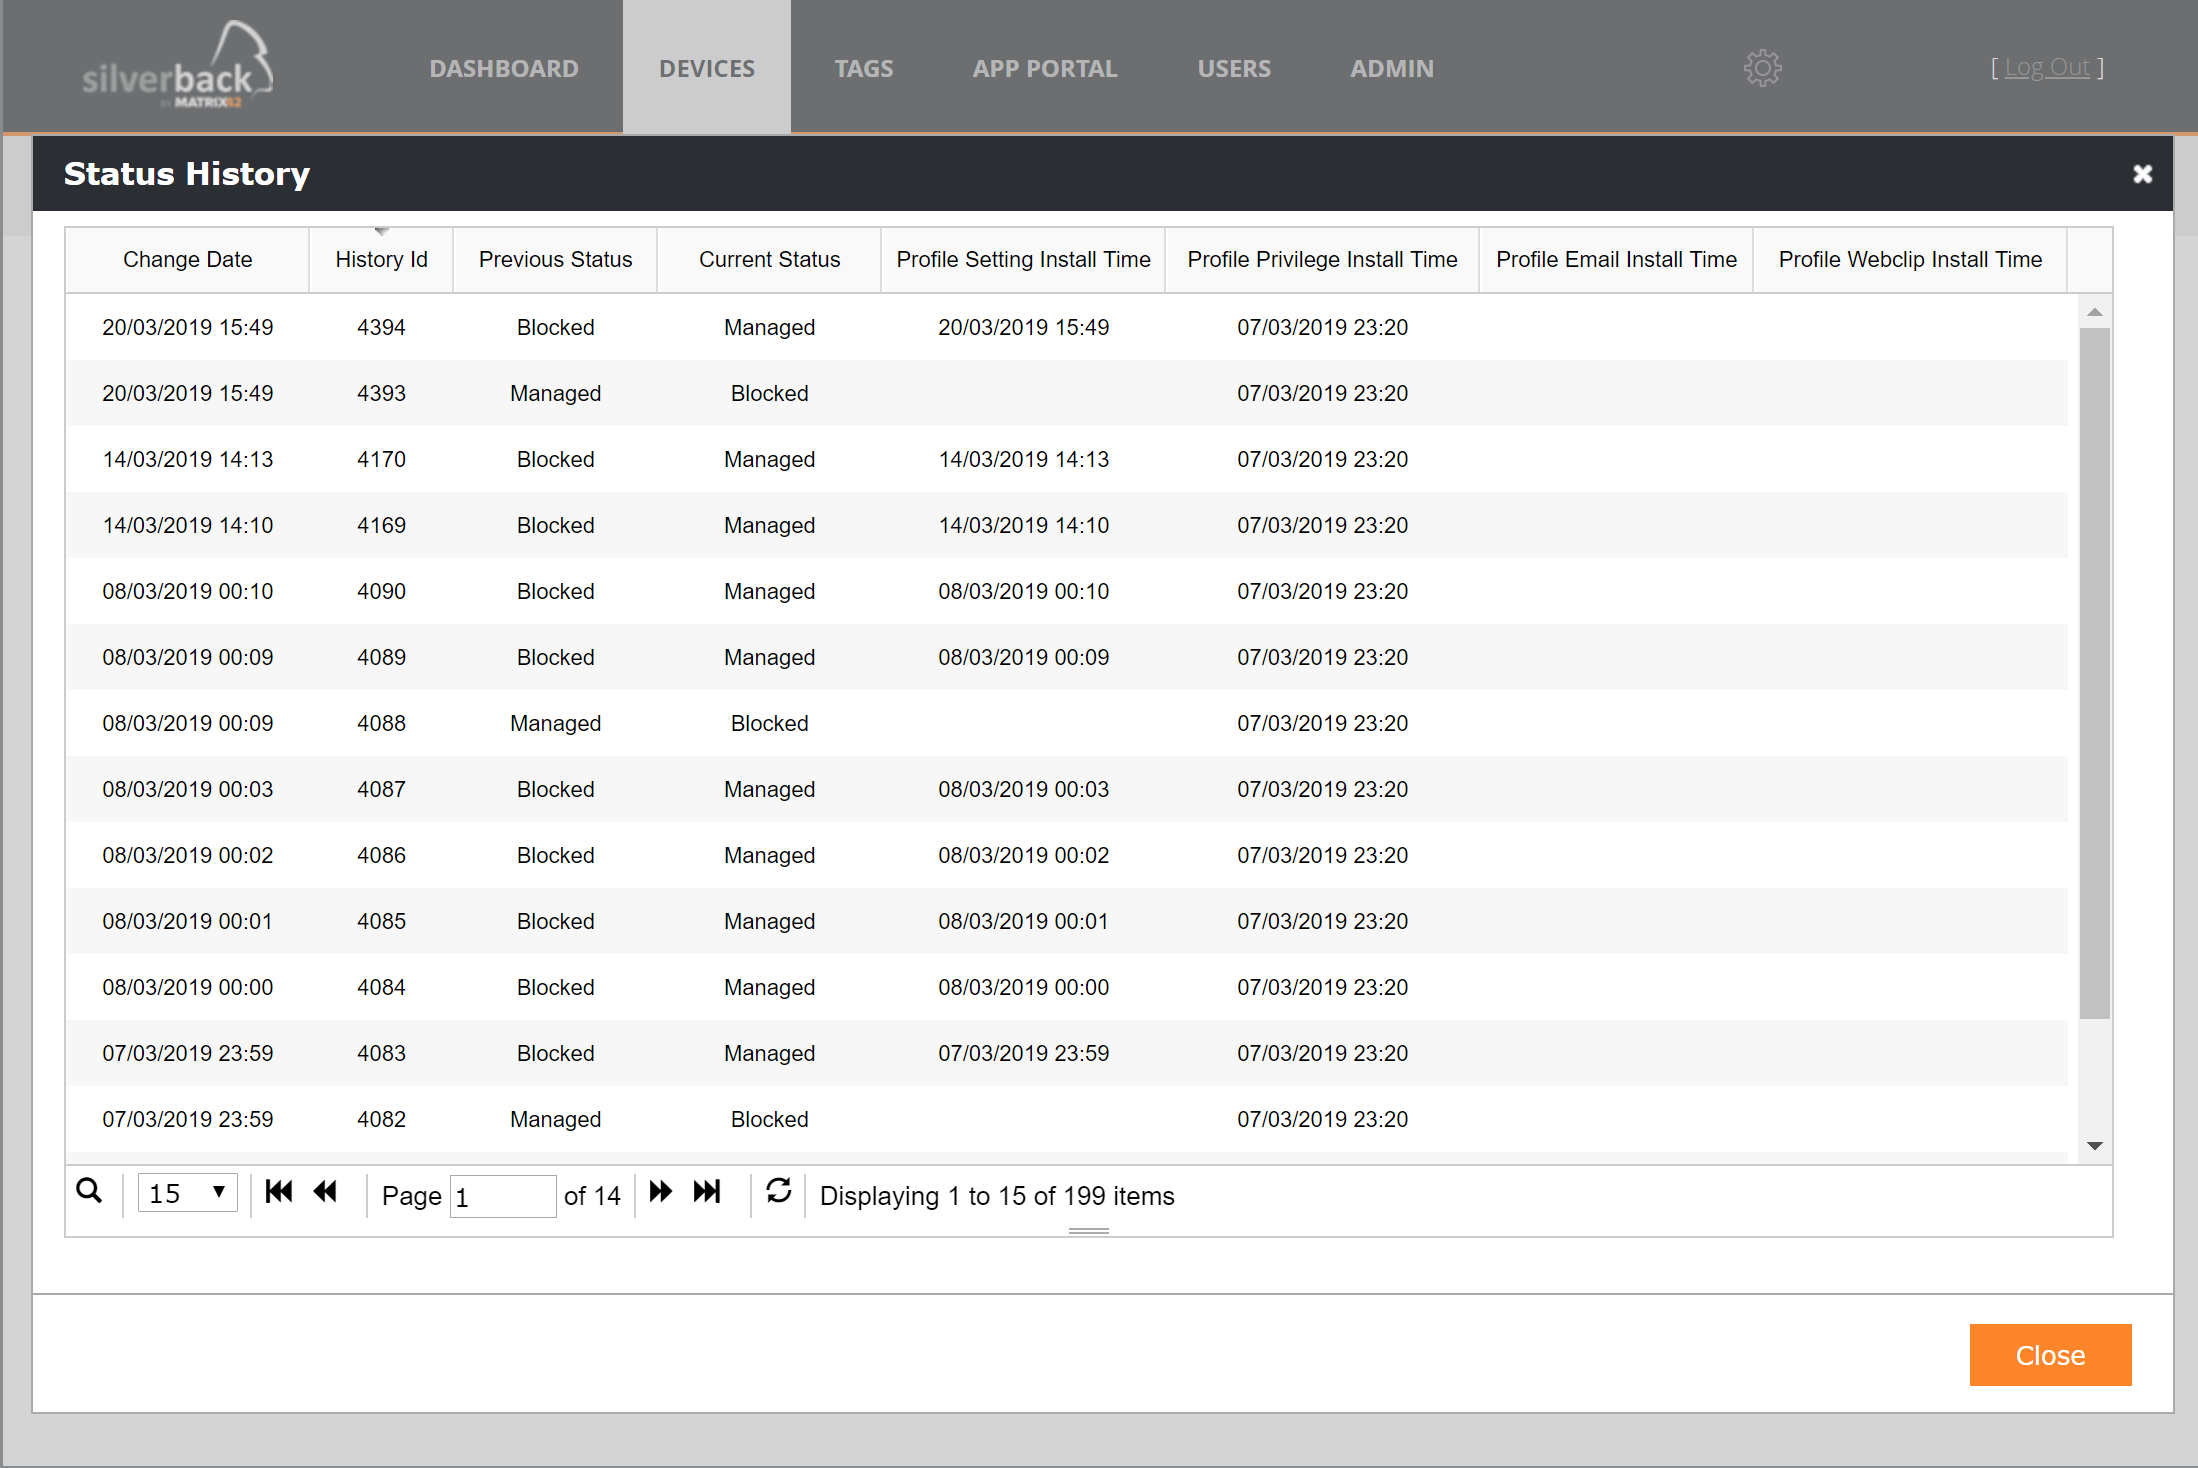
The status history provides an overview of how the device "wandered" during the life cycle in Silverback. It will help to comprehend what happened with the device in the past:
- Has the device been successfully enrolled?
- What is the current status of the device?
- When were which profiles installed?
- When were which profiles updated?
A usual device lifecycle looks like this: Pending > Blocked > Managed > Checked Out
After a Profile Update the device will be temporarily go to Blocked, then back to Managed
Status History overview displays the following values:
| Value | Description |
|---|---|
| Change Date | Timestamp of the change date |
| History Id | Displays the historic Database ID |
| Previous Status | Displays the previous device status, e.g. Pending, Blocked, Managed, Checked Out |
| Current Status | Displays the current device status, e.g. Pending, Blocked, Managed, Checked O |
| Profile Restriction Install Time | Displays the time when the Setting profile has been installed |
| Profile Privilege Install Time | Displays the time when the Privilege profile has been installed |
| Profile Email Install Time | Displays the time when the Email profile has been installed |
| Profile Webclip Install Time | Displays the time when the Webclip profile has been installed |
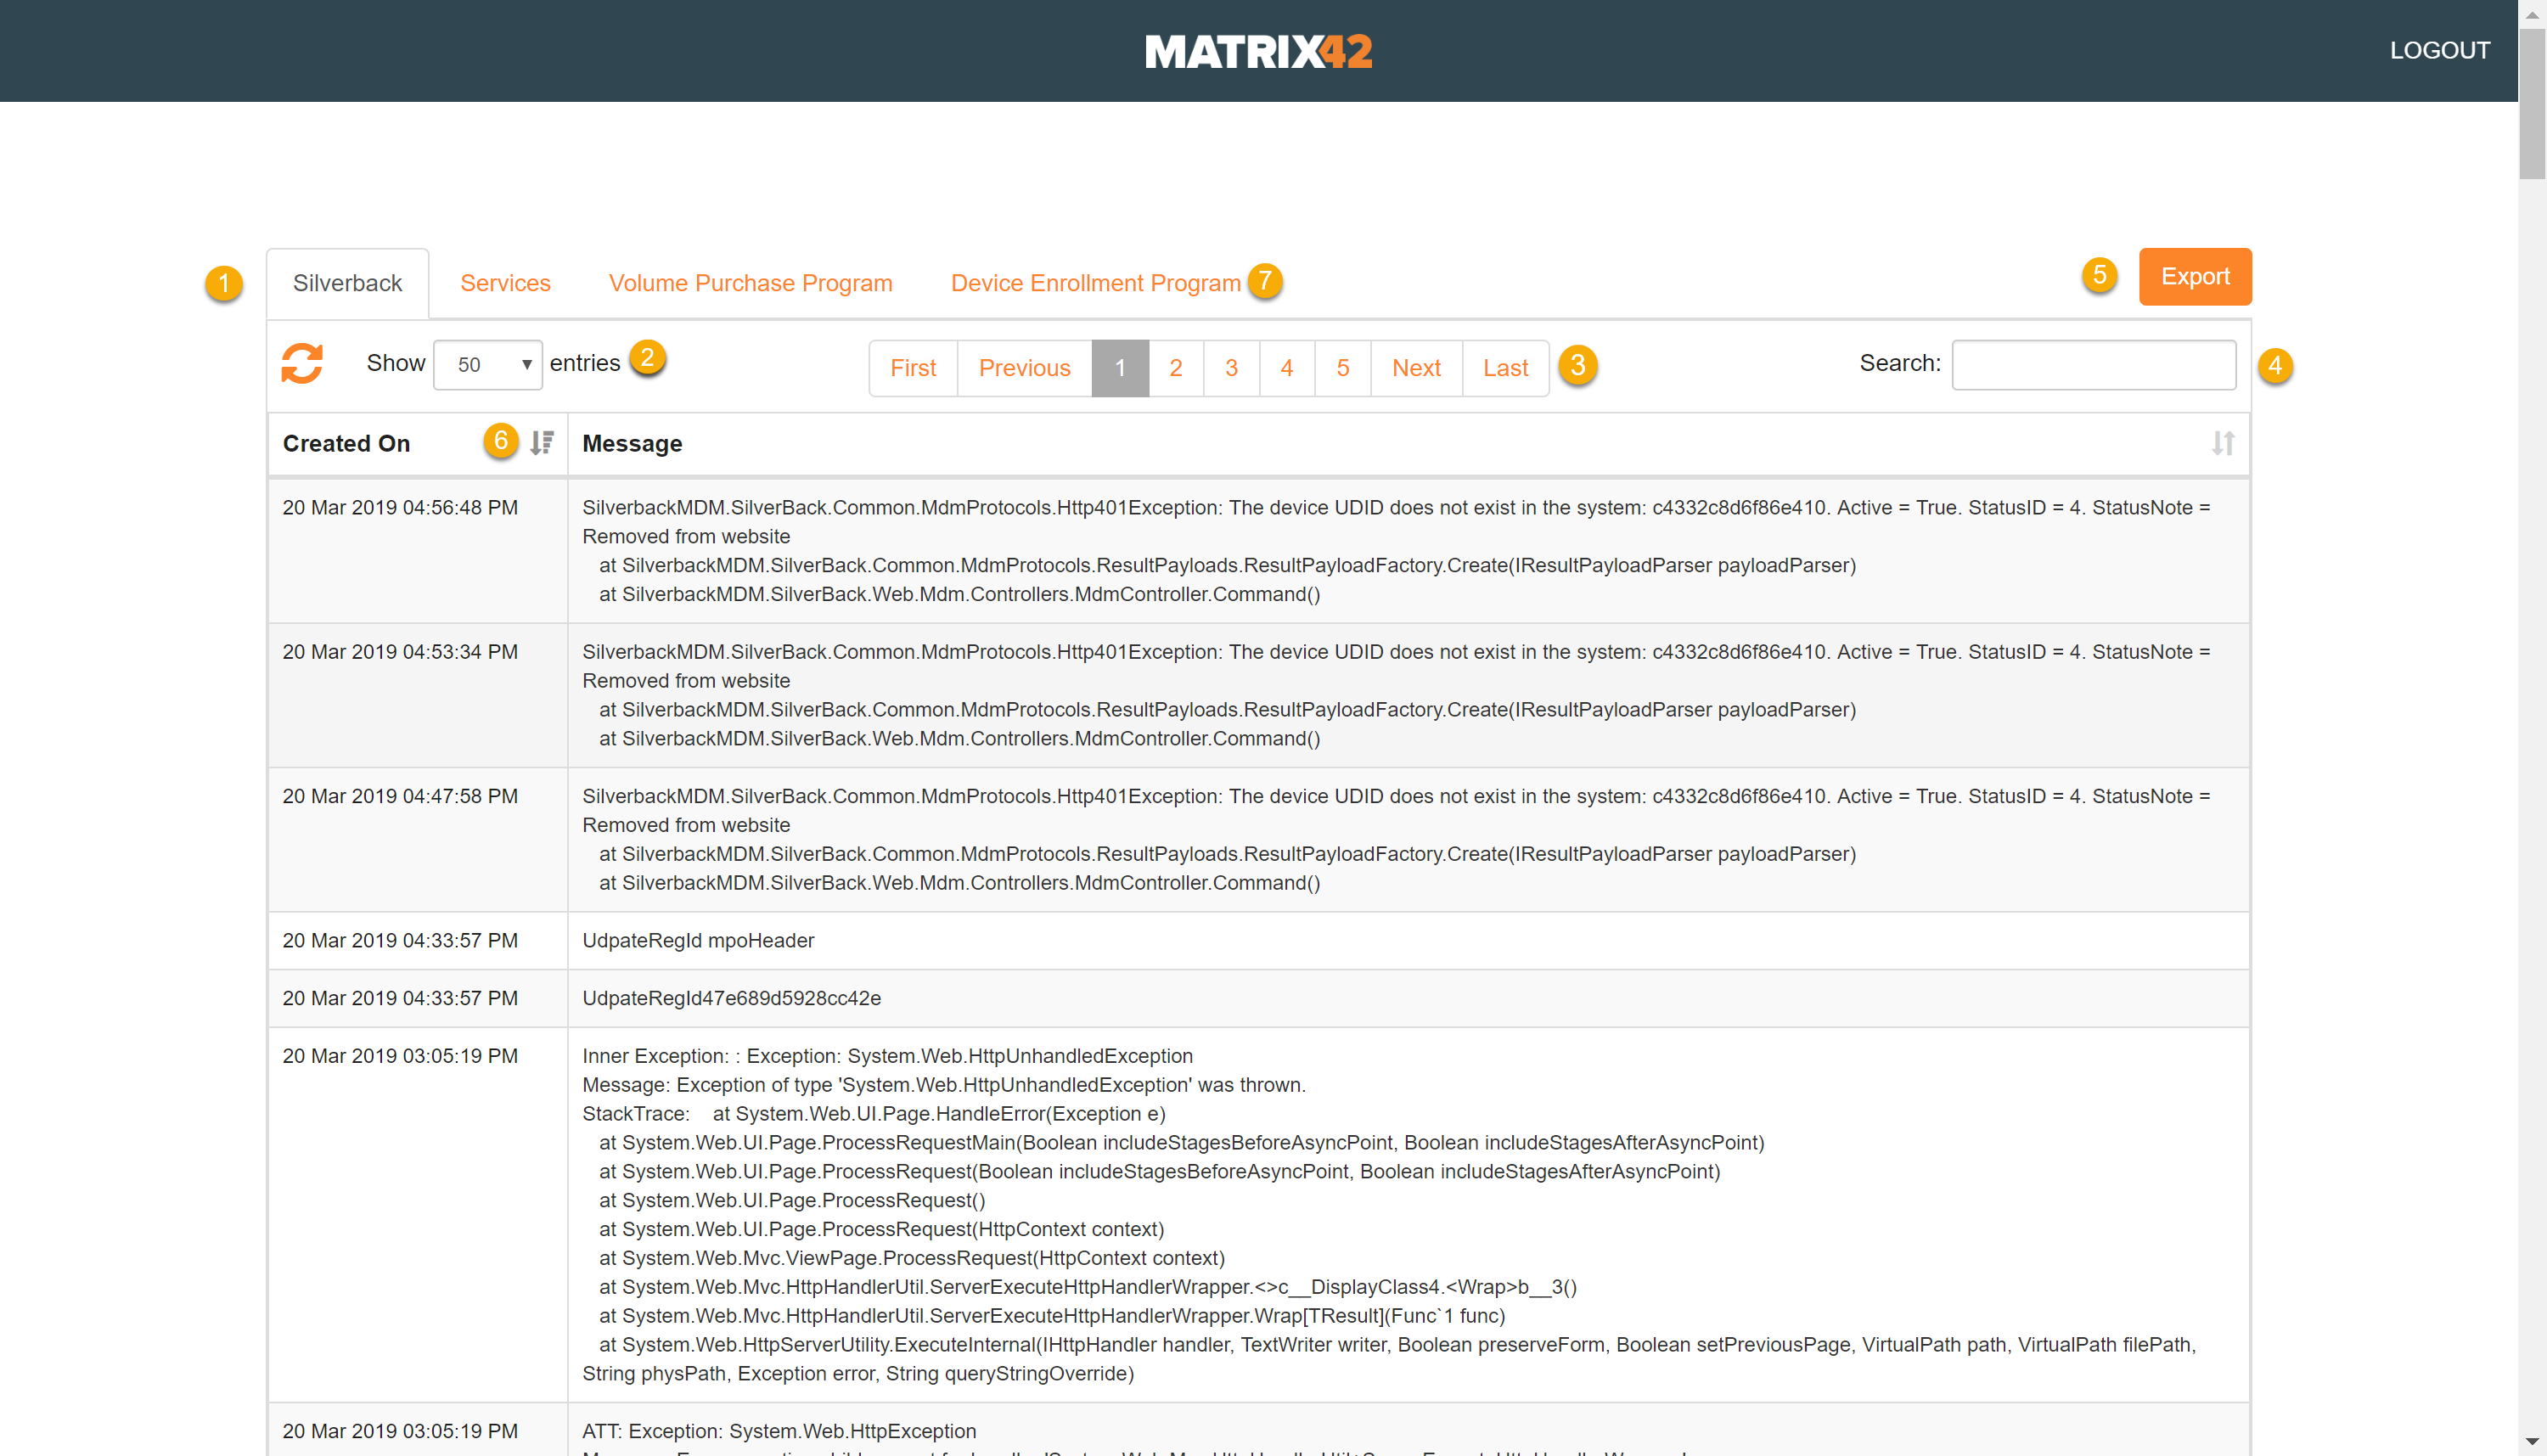
New Log Files Interface
In addition, Silverback 19.0 brings a complete new Log Interface with a couple of new features and enhancements:
- Each Area of Logs is displayed in Tabs
- Views can be extended to 50, 100, 250,500 entries per page and views can be updated with the sync button
- A paging is implemented at the top and at the bottom. Also, when you navigate to the last shown page, new items will be loaded
- A text search is available
- Log files can be exported into a *.txt file for a 3 days period
- Each column can be sorted ascending or descending
- Device Enrollment Program has been extended with connection information and changes in device amount
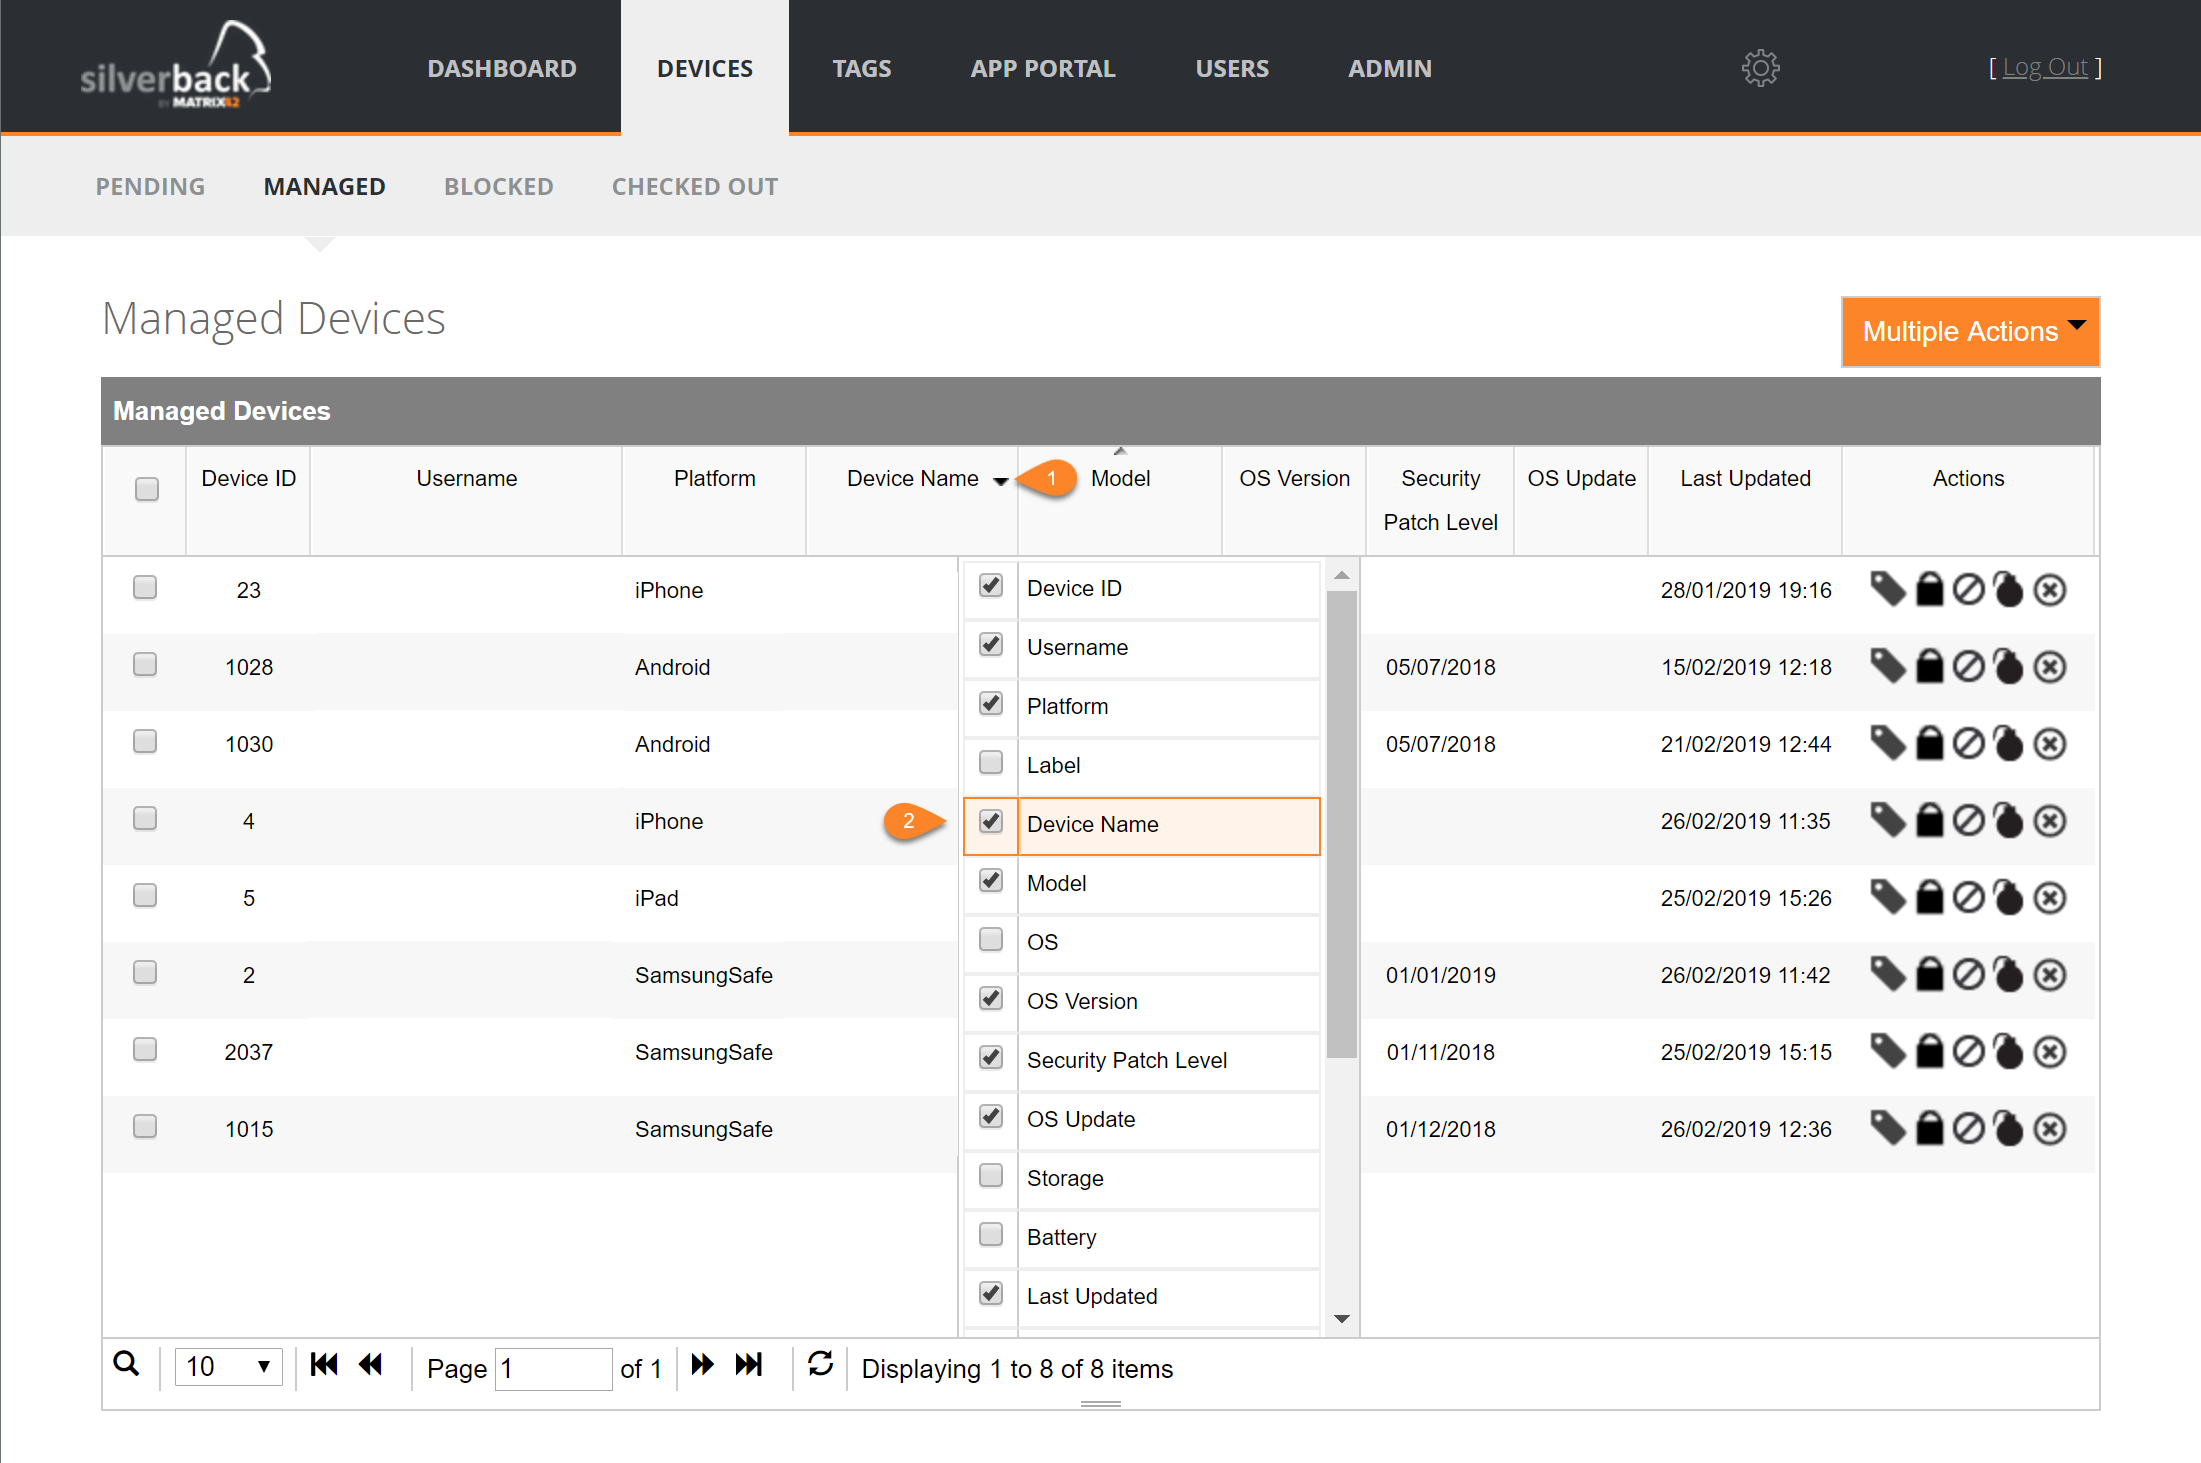
Device Name in device overview
In this new Silverback version we are collecting the Device Names for Android, SamsungSafe, iPhone, iPad and Windows 10 devices. If you want to see the device names in the device overview, perform a left click on the down arrow in any of the column headlines and enable Device Name.
In case Android or Samsung Safe devices aren't able to send the device name, Silverback displays the Bluetooth device name.
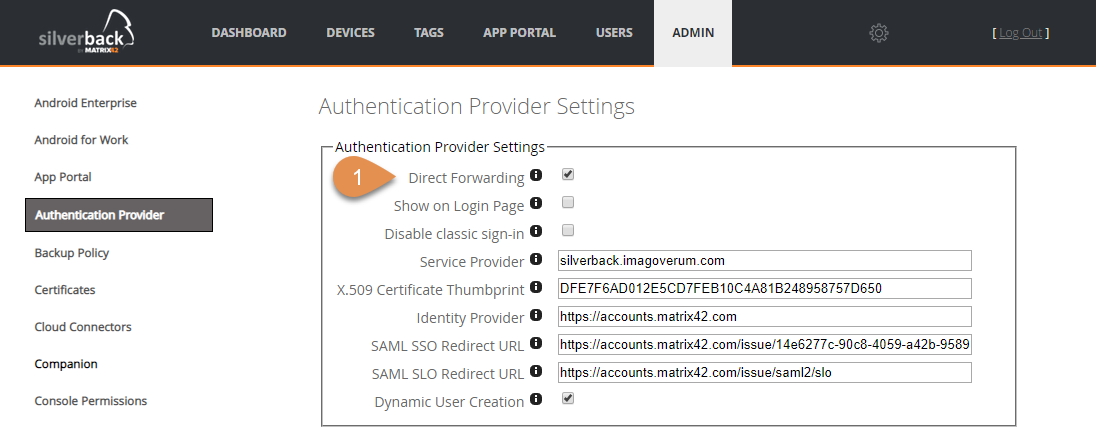
Direct forwarding to Identity Providers for Self Service Portal
With Silverback 18.0 Update 1 we introduced the Generic SAML2 Authentication, so that you were able to integrate Silverback with any Authentication Provider which offers the SAML2 standard. It leverages user logins with e.g. Matrix42 MyWorkspace or Azure Active Directory Identities. With Silverback 19.0 we enhanced the functionality to directly forward your end users to the Authentication pages of MyWorkspace or Azure Active Directory. The benefit here is that end users don't have an extra click on the Silverback Self Service Portal.
Due to fallback scenarios this functionality is only given to the Self Service Portal
If you are highly integrated in the Matrix42 Portfolio you will gain a big advantage in the use case with Windows 10 Autopilot. In this scenario your end users can easily enroll your Windows 10 Device directly from the Out-Of-Box Experience into Silverback and you can deploy your Matrix42 MyWorkspace shortcut to the Desktop, Your end users can easily enroll a second device (Smartphone or Tablet) without entering a second time the Credentials. So in this case your end user can enroll two devices with a one time login during the Windows 10 Autopilot experience.
Let's review the complete flow for a new employee:
- Your new employee unbox a new Windows 10 Device
- Starts the device and enters the necessary information like Region, Language, Wi-Fi and Keyboard Layout
- Receives a Welcome screen from your company, because the device is already registered with Windows 10 Autopilot and linked to your Company
- Enters corporate credentials and enrolls the Windows 10 device into Silverback
- Silverback deploys the Matrix42 Unified Endpoint Management Agent
- Silverback deploys the Matrix42 MyWorkspace shortcut to the Desktop
- Your new employee opens MyWorkspace and starts the Silverback Self Service Portal Application
- New Employee enters his personal phone number and and initiates the second enrollment session
- Receives the SMS on his smartphone and enrolls it!
iOS
Silverback 19.0 offers the following new features for iOS
- Tag based Application Deployment
- Rename Devices (supervised)
- OAuth Support for Native Mail
- Display ID addresses
- Updated App Store API for adding applications
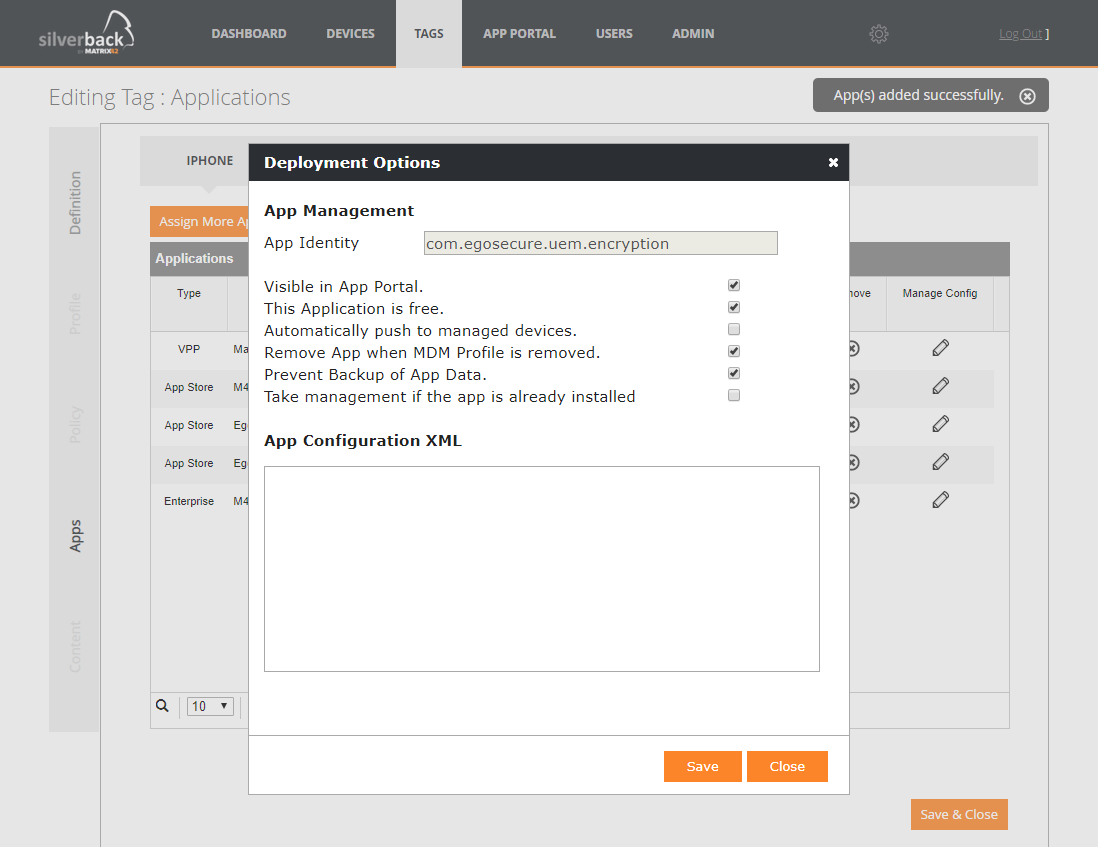
Tag based application deployment
With Silverback 18.0 Update 2 we already implemented the functionality to create Multiple App Configurations for iOS. With this release we extended the functionality and we are happy to share with you the ability to control deployment options on a tag based level. To use the tag based application deployment, please perform the following steps:
- Open or create a new Tag with enabled Apps Feature
- Navigate to Apps
- Assign More Apps depending if it is a new or existing tag
- Click the Edit Button in the Manage Config column
- You will now see the inherited App Portal default configuration
- Edit or Update your Deployment Options
- Click Save
From now on all associated devices will receive the application(s) with this configuration.
Rename Devices (supervised)
From now on Administrators have the ability to rename supervised devices. On the device you will find the Device Name under Settings > General > About. If it is needed you can easily rename the device now through Silverback with just a couple of clicks.
- Navigate to Devices
- Click on any supervised device
- Click More
- Click Rename
- Enter a Device Name
- Click OK
- When the device performs a check-in, the name will be changed

OAuth Support for Native Mail
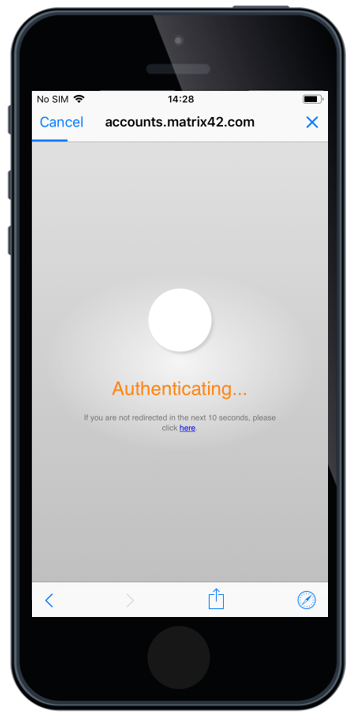
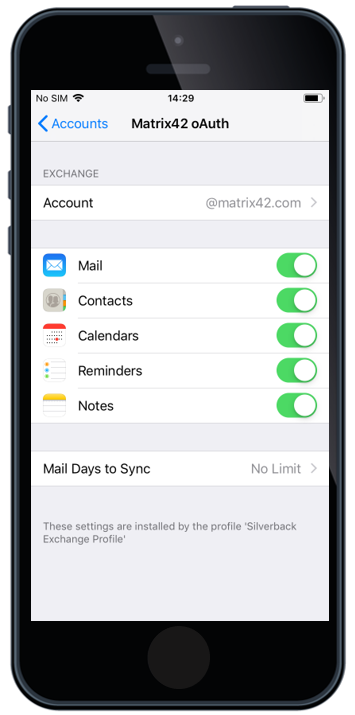
Based on iOS 12, Apple has added OAuth 2.0 support for Microsoft Exchange accounts that can be deployed through an Enterprise Mobility Management. For those who followed the OAuth Introduction into iOS, know that it came already in iOS11, but it was only a user driven feature. With iOS 12 and Silverback 19.0.0, the OAuth checkbox is now a part of the Exchange ActiveSync Settings, meaning that you can deploy an iOS native email account to your iOS fleet with the OAuth capability.
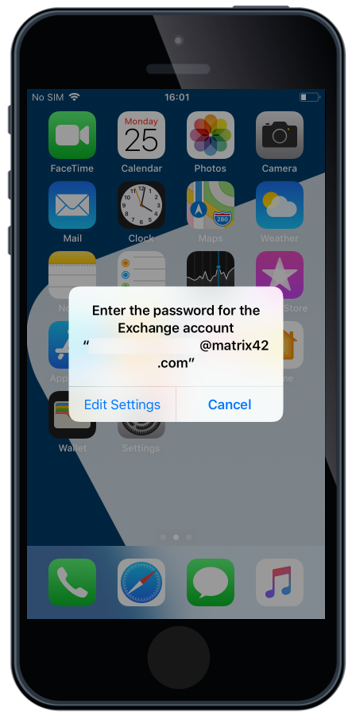
After the OAuth enabled exchange profile is deployed to the device, the end user flow is the following:
- First, users face a popup asking to enter their password for the Exchange account
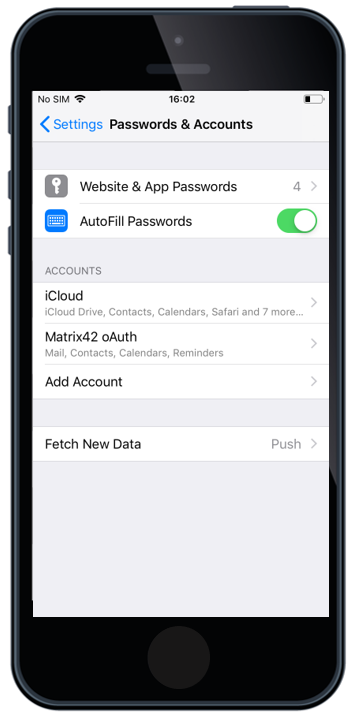
- By tapping Edit Settings the end user will see the Password & Account settings page
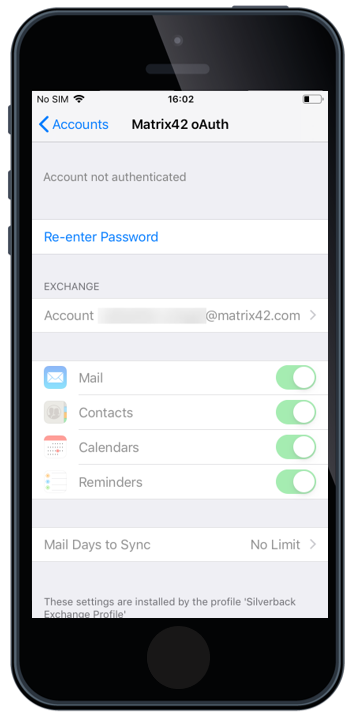
- In the Password & Account settings page the user needs to select the Corporate Account (e.g. Matrix42 OAuth)
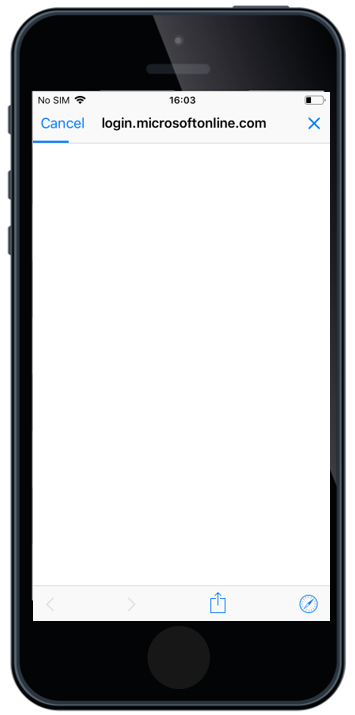
- In the Settings page, the user selects Re-enter password.
- Once selected, the user will be forwarded to authenticate with your Identity Provider (e.g. MyWorkspace).
- Once the user enters the correct credentials and tapps Sign In, their native exchange account will start syncing email.
Please use this functionality only if you don't have any Shared or Group Mailboxes distributed to your end users. OAuth will prevent that other credentials can be used for other accounts
 |
 |
 |
 |
 |
 |
 |
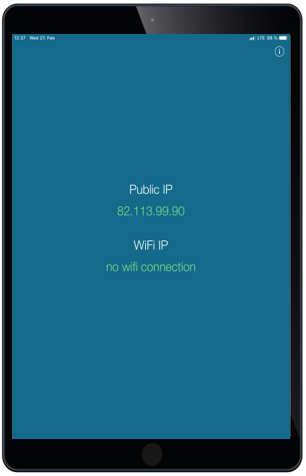
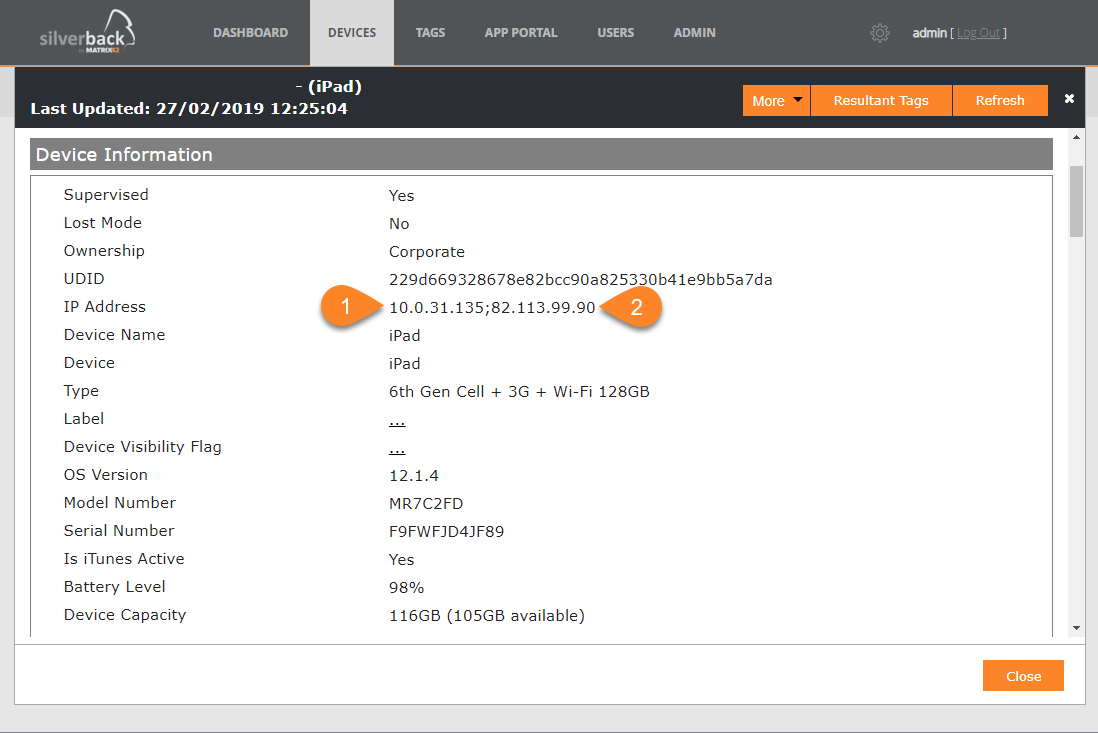
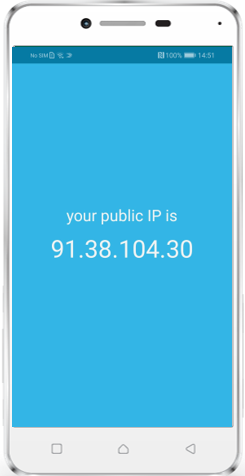
Display IP addresses
From now on it is possible to obtain IP addresses for iOS devices, like iPad and iPhones. Based on your environment setup you may see two different IP addresses as shown in the screenshot. In this case, the first shown IP address is the IP from the incoming request to the Silverback server. The 10.0.31.135 IP address here is the Web Application Proxy, which routes the request from the Internet to the Silverback server. The second IP Address, 82.113.99.90, is the device public address.
 |
 |
Updated App Store API for adding applications
We are happy to share with you one of the most convenient features in this release. From now it is much easier to add App Store Application into Silverback's App Portal. Search for applications in the browser and copy & paste the URL into the Management Console is now history. With Silverback 18.0.3 we have already introduced the search functionality for the creation of a unique Home Screen Layout. From now on we have also adopted it for adding applications.
- Navigate to App Portal
- Select Iphone or iPad
- Click New Application
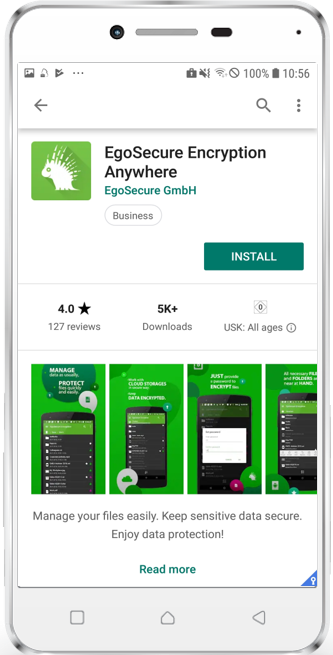
- Start under Name typing the name of the application, e.g. EgoSecure
- You will get now List of all application that can be found with this name
- Select the application you want to add
- All fields will be filled automatically
- Change additional settings if desired and click save

Android
Silverback 19.0 offers the following new features for Android
- Tag based Application Deployment
- Work Profiles on Android Enterprise
- Prevent Factory Wipe
- Restart devices
- Control Mechanism for System Updates
- Install *.apk files
- Display IP addresses
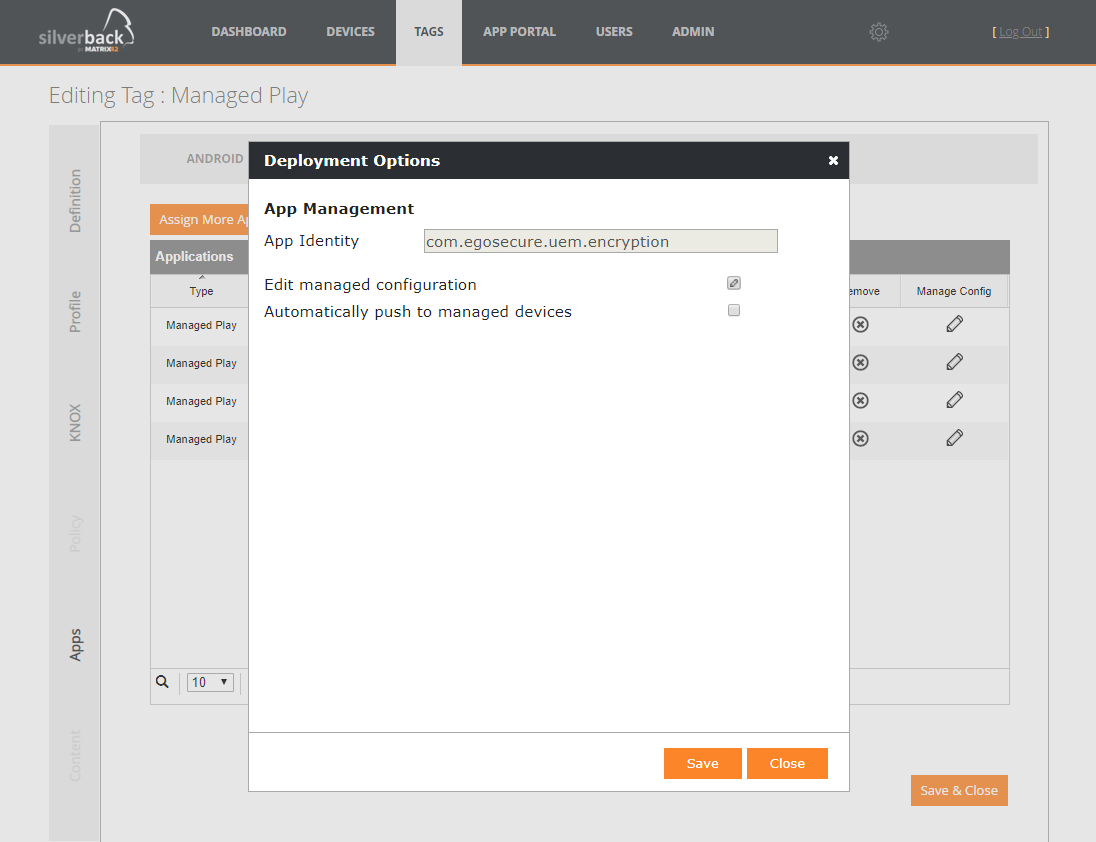
Tag based Application Deployment
Nearby the Tag based Application Deployment on iOS, we are also happy to share with you the ability to control deployment options tag based on Android. To use tag based deployment options, please follow these steps:
- Open or create a new Tag with enabled Apps Feature
- Navigate to Apps
- Assign More Apps depending if it is a new or existing tag
- Click the Edit Button in the Manage Config column
- You will now see the inherited App Portal default configuration
- Edit or Update your Deployment Options
- Click Save
From now on all associated devices will receive the application(s) with this configuration.
Work Profiles on Android Enterprise
Google made with the introduction of Android 5.0 work profiles available for phones and tablets. In the past, the backend setup for bringing these capabilities into Enterprise Mobility Suites (including) Silverback wasn't very easy and you needed a registered Google Managed Domain for Android for Work. You can find these old approach in the Silverback Console under Admin > Android for Work.
In the beginning of the last year we introduced the first step into Google's new ecosystem, Android Enterprise. The Android Enterprise Integration into Silverback can now be done with just a couple of clicks and bring a lot of new capabilities. With Silverback 19.0.0 we are happy to extend these functionalities with the support of Work Profiles on Android Enterprise. Using the same underlying functionality as Android for Work, Android Enterprise is able to create a managed user profile that although sits entirely separately encrypted on disk. With Android 7.0 it utilizes completely different encryption keys for work/personal areas and integrates directly with the current user on the device in order to provide both personal and work applications in the same app drawer – indicated by a briefcase.
Work Profiles are designed for "Bring your own device" and "Corporate Corporate-Owned, Personally Enabled" scenarios. The mix of work and personal apps together on end user devices demonstrates the level of integration. As an end user it feels like just another few apps are installed, despite the underlying profiles working to separate and secure your corporate data. Together with Silverback's Data Leakage prevention policies like Screen Capture and Cross Profile Copy/Paste the transfer of enterprise information outside the work profile can be prevented. With our device control delete business data it is really simple to remove the work profile and leave all user data untouched.
Integrate Android Enterprise
- Fist you need to Integrate Android Enterprise into Silverback
- Please follow the Android Enterprise Integration Guide
- If you have already activated Android Enterprise, proceed directly with the tag creation
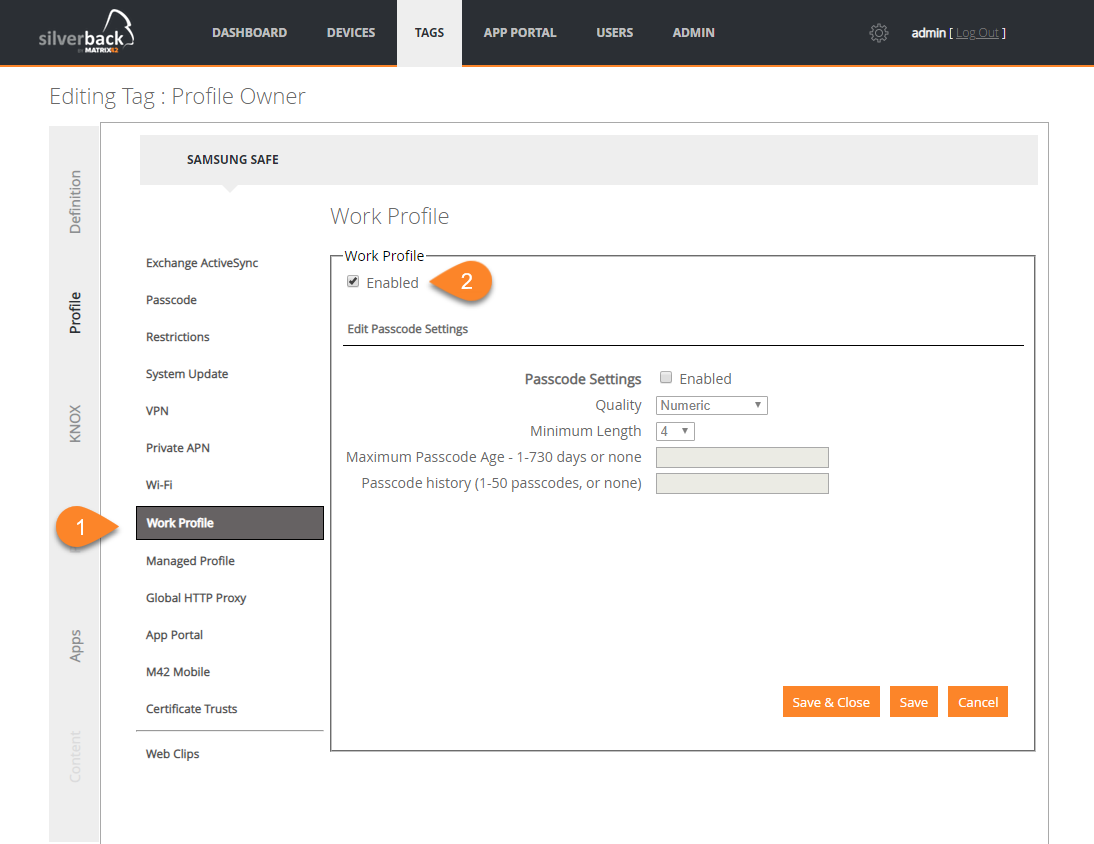
Create a Tag
In order to activate Work Profiles on your Android devices, you will need to create a new Tag.
- Navigate to Tags
- Click New Tag
- Enter as Name e.g Work Profile
- Enable the Profile Feature
- Enable Android and/or Samsung Safe as Device Types
- Click Save
- Navigate to Profile
- Click Work Profile
- Enable the Work Profile
- Click Save
- Click OK
- Navigate to Definition
- Now you should make the decision how to deploy the Tag
- Configure your Auto Population settings or assign these Tag manually to the desired devices
Enroll device
- Follow the instructions of your device Out-Of-Box Experience
- Download the Companion Application from Google Play or bring it via side loading to the device
- Open your Silverback Self Service Portal with Chrome or any other installed browser
- Login with your Credentials
- Perform the Device Enrollment
- Activate Device Administrator
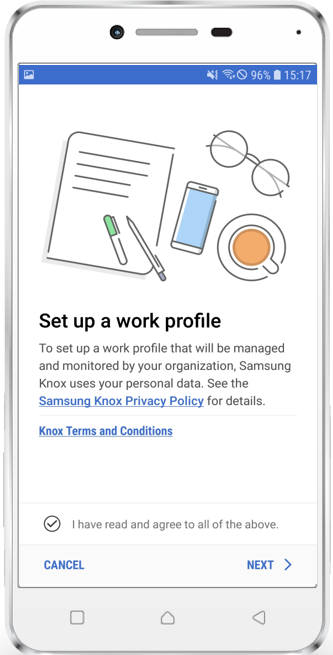
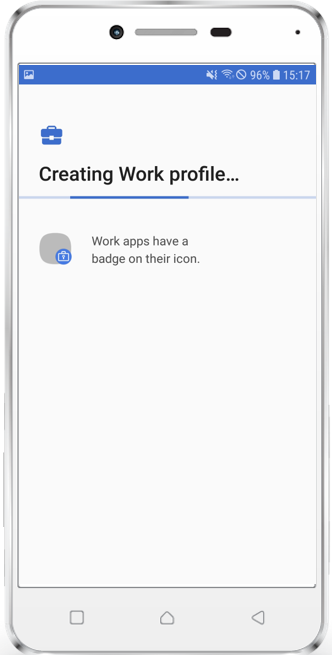
- Depending on your chosen device and operating system version follow the introductions on your screen for activation the Work Profile
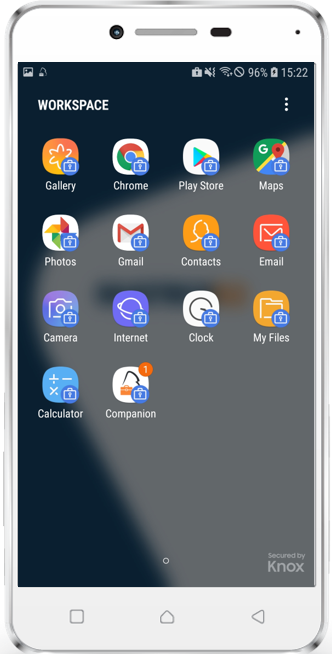
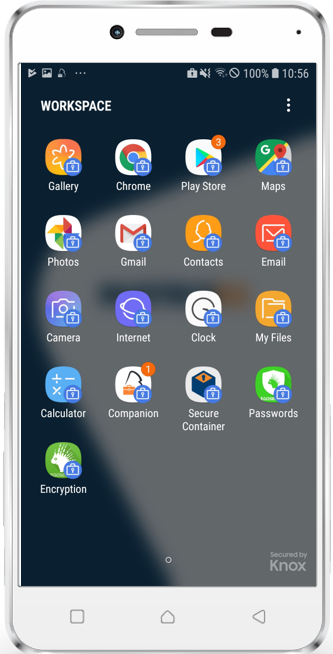
- e.g. Google: Click Accept & Continue, Wait for Profile Creation, Allow Companion Permissions, Close Companion, a new Work Folder will be created
- e.g. Huawei: Click Accept & Continue, Wait for Profile Creation, Allow Companion Permissions, Close Companion, a new Work Folder will be created
- e.g. Samsung: Accept Terms and Conditions, Wait for Profile Creation, Allow Companion Permissions, Close Companion, a new Workspace Folder will be created
 |
 |
 |
 |
Managed Play
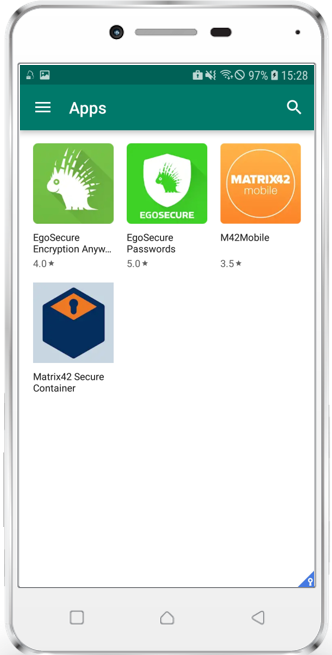
- Open the Play Store in the Work area of your device
- You will notice that the Play Store is currently empty
- Navigate back to Silverback
- Navigate to App Portal
- Select Android or Samsung Safe
- Click New Application
- Select as Type Managed Play
- Add as Name e.g EgoSecure Passwords
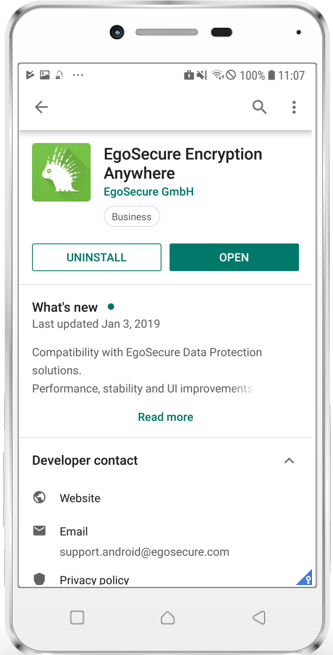
- Enter as description e.g. EgoSecure Passwords is an application that allows you to securely store all your passwords in one place, in the Password container. A Password container is a special file that is encrypted with its own password. You no longer need to remember all of your numerous accounts and passwords. It's just enough to remember the password for the Password container in which they are stored.
- Enter as App Identity e.g. com.egosecure.uem.passwordmanager
- Click Save
- Accept Permissions
- Navigate back to your Work Profile Tag
- Enable Apps Feature
- Click Save
- Navigate to Apps
- Click Assign More Apps
- Select the Managed Play EgoSecure Password App
- Click Add Selected Apps
- Navigate to Definition
- Click Save
- Click Push to Devices
- Wait a couple of Moments and take your device
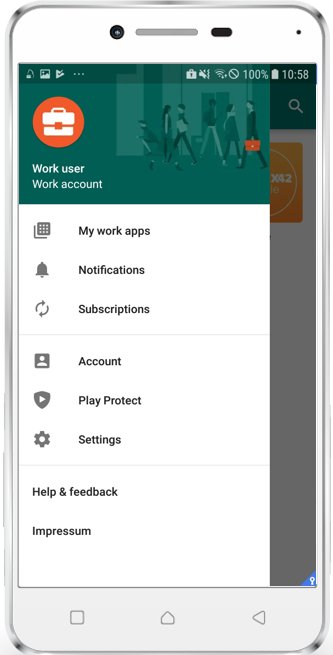
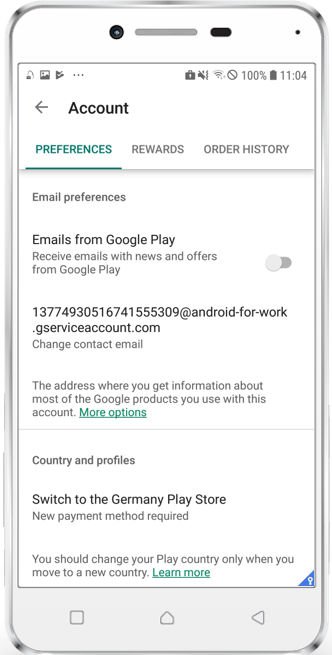
- Perform the following steps to get familiar with the managed Play Store
|
|
|
|
|
|
|
|
|
 |
 |
 |
|
|
|
|
Migration
A Knowledge Base Article for the migration from Android for Work to Android Enterprise is available here: Android for Work Migration to Android Enterprise
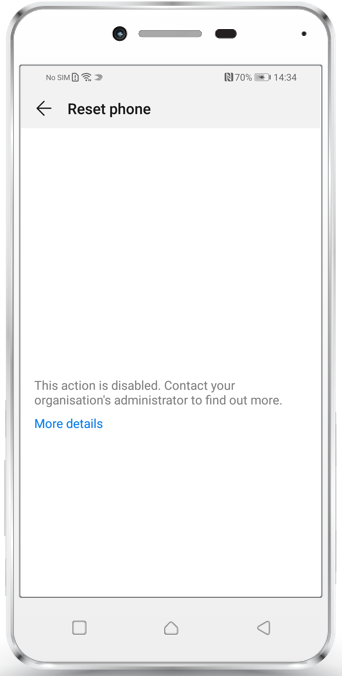
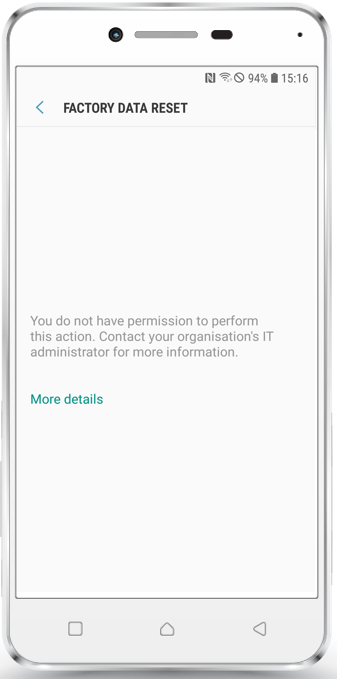
Prevent Factory Wipe
We added a new restriction under Profile > Restrictions named "Allow Factory Wipe". If this restriction is unchecked, Android devices in Device Owner Mode and SamsungSafe devices with activated Device Admin or Device Owner Mode can't be factory wiped anymore by your end users.
|
Android |
SamsungSafe |
|---|---|
|
|
|
|
|
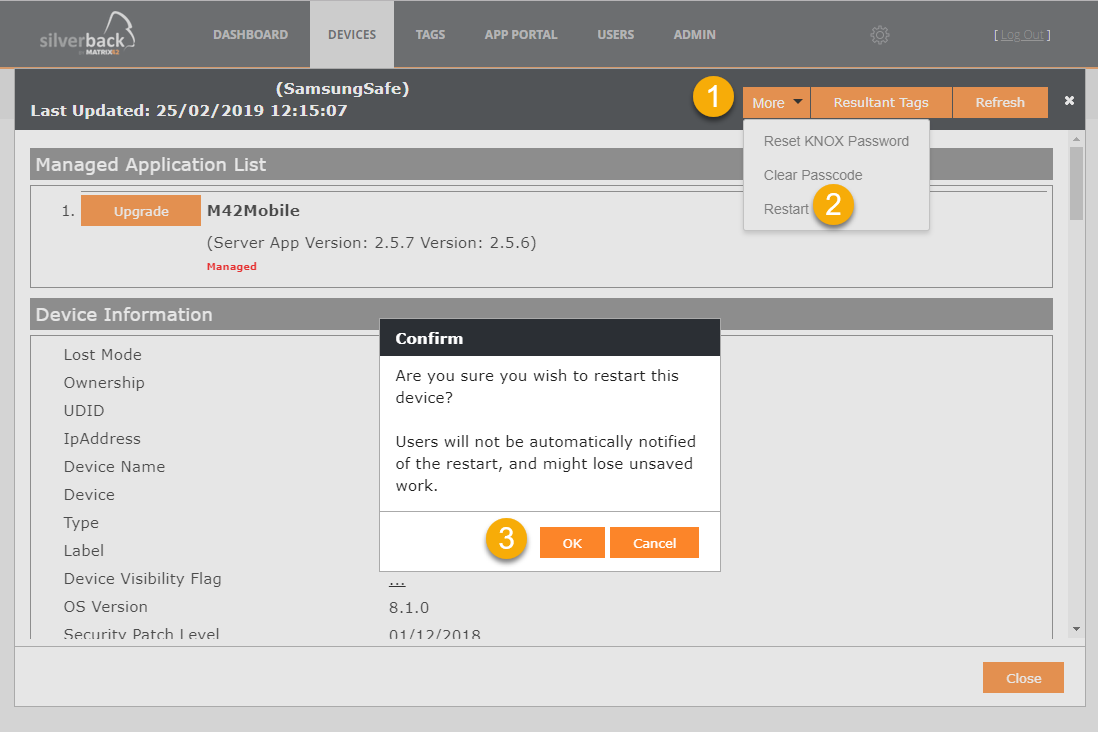
Restart devices
We added also a new Device Action, called Restart under the More button in the Device Overview Page. This action will be shown permanently, but will only get active for the following management methods:
| Android | SamsungSafe |
|---|---|
|
|
Devices will instantly perform a restart after receiving the command. There is no hint for the end users and they might lose unsaved work.
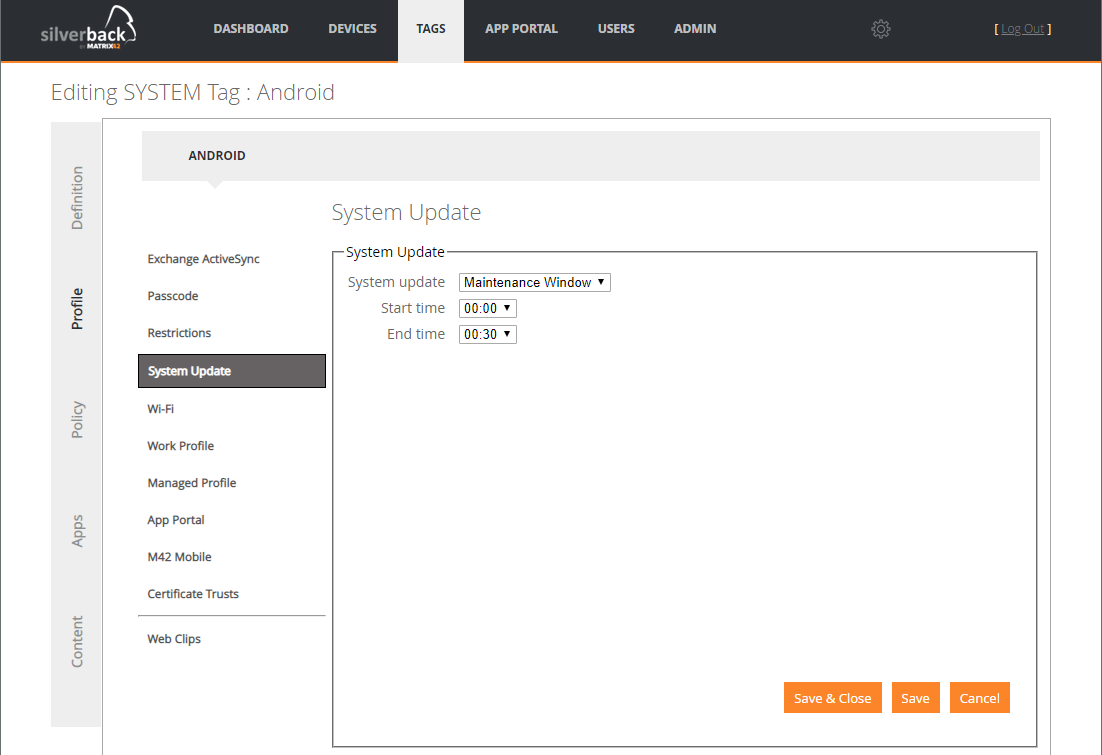
Control Mechanism for System Updates
Android devices can receive and install over-the-air (OTA) updates to the system and application software. Android notifies the device user that a system update is available and the device user can install the update immediately or later. With Silverback 19.0.0 you can now manage system updates device which has been set up in Device Owner mode. The following control mechanisms are available for System Updates.
Options
Automatic: Installs system updates as soon as they become available (without user interaction). Setting this policy type immediately installs any pending updates that might be postponed or waiting for a maintenance window.
Postpone: Postpones the installation of system updates for 30 days. After the 30-day period has ended, the system prompts the device user to install the update.
Postponing OTA updates can prevent devices from receiving critical updates. For this reason device manufacturers or carriers might choose to exempt important security updates from a postponement policy. Exempted updates notify the device user when they become available.
Maintenance Window: Installs system updates during a daily maintenance window (without user interaction). Set the start and end of the daily maintenance window, as minutes of the day, when creating a new windowed policy. The period begins when the system first postpones the update and setting new postponement policies won’t extend the period.
| Setting | Android | Samsung Safe |
|---|---|---|
| System Update |
|
|
| Start time | 00:00 - 23:30 | 00:00 - 23:30 |
| End Time | 00:30 - 00:00 | 00:30 - 00:00 |
| Supported for | Device Owner | Device Owner |
Configuration
- Navigate to Tags
- Create a new Tag or use an existing
- Ensure that Profile Feature is enabled
- Navigate to Profile
- Select System Update
- Choose your preferences
- Click Save
End User Experience
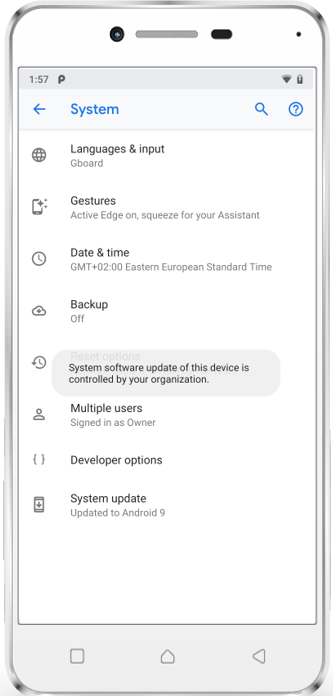 |
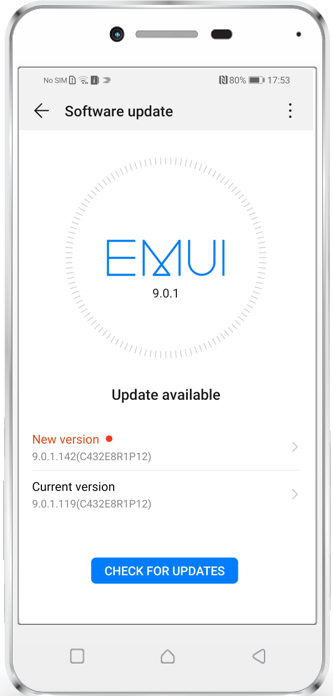 |
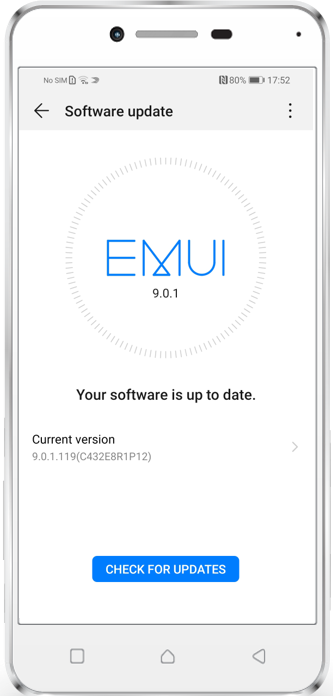 |
| On Pixel 3 a tap on System update will create a prompt | On Huawei update is shown if nothing is configured | And will just be hidden when the Profile is active |
Install *.apk files
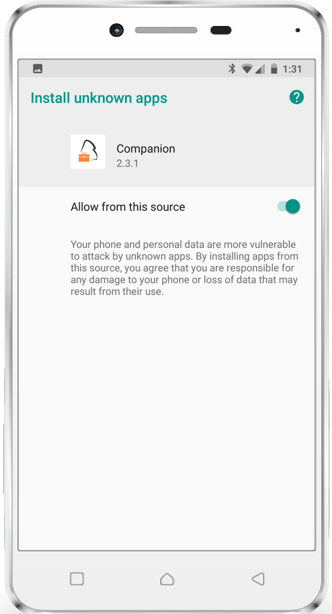
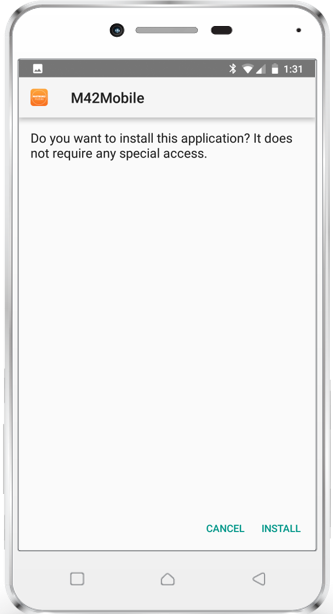
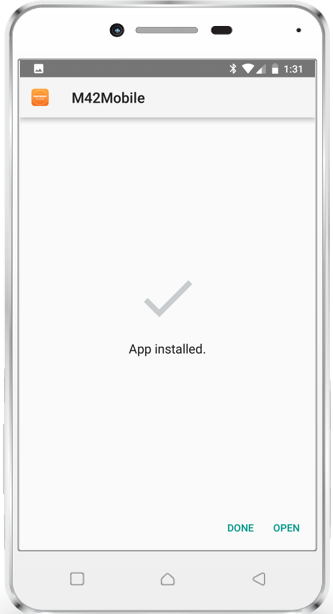
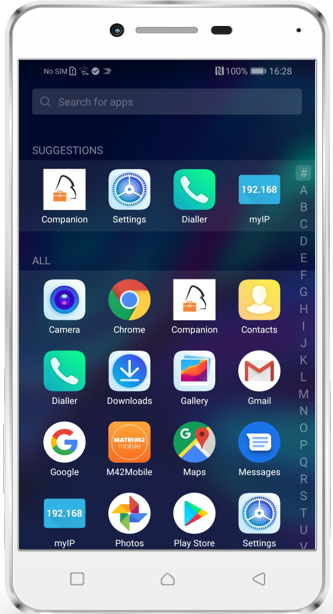
With Silverback 19.0.0 we are happy to close a gap in installing Line of Business applications on native Android Devices. From now on you can deploy your *.apk files to Android Devices. Depending on the operational mode on your Android device the end user experience vary. On Device Administrator (Standard Enrollment) and Work Profiles the end user will be prompted to allow and enable the installation from these sources. It's a common security feature from Android which can't be bypassed. Device Owner Mode devices allows a complete silent installation.
Please note also that on devices with Work Profiles the application will be installed inside the personal area of the devices. Google doesn't support the installation of *.apk files inside the work area. The common way to achieve the installation inside the Work Area is that your application developer assigns the application to your Android Enterprise ID. Please refer to the corresponding Knowledge Base article.
| Device Administrator | Device Owner | Work Profile |
|---|---|---|
| Prompt to allow from this source | Silent Installation | Prompt to allow from this source |
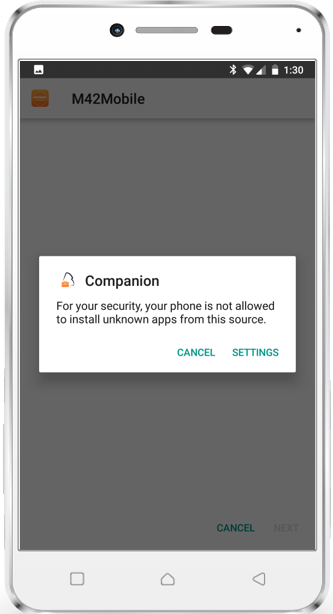
Device Administrator & Work Profile
The following screenshot tutorial displays a short introduction of what your end users needs to do to install distributed *.apk files.
 |
 |
 |
|
|
|
 |
 |
|
|
|
Device Owner
The following screenshot tutorial displays the end user experience on devices with activated Device Owner.
|
 |
|
|
|
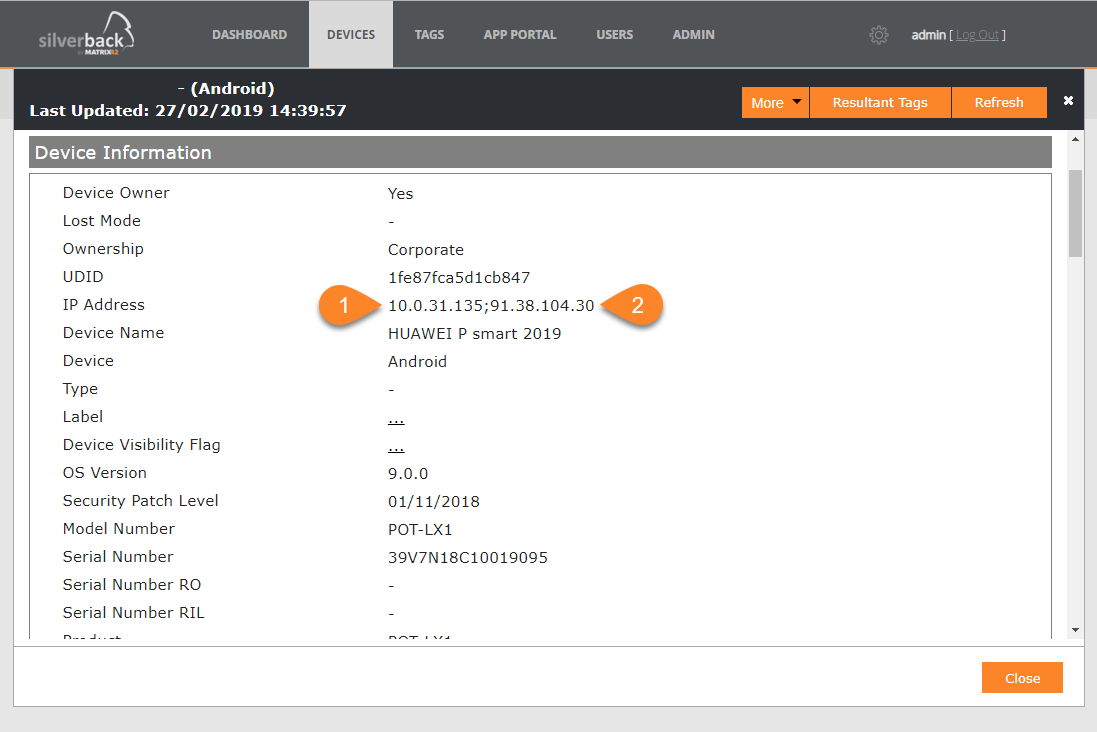
Display IP Addresses
From now on it is possible to obtain IP addresses for Android and SamsungSafe devices. Based on your environment setup you may see two different IP addresses as shown in the screenshot. In this case, the first shown IP address is the IP from the incoming request to the Silverback server. The 10.0.31.135 IP address here is the Web Application Proxy, which routes the request from the Internet to the Silverback server. The second IP address, 82.113.99.90, is the device public address.
 |
 |
Windows 10
Silverback 19.0 offers the following new features for Windows 10
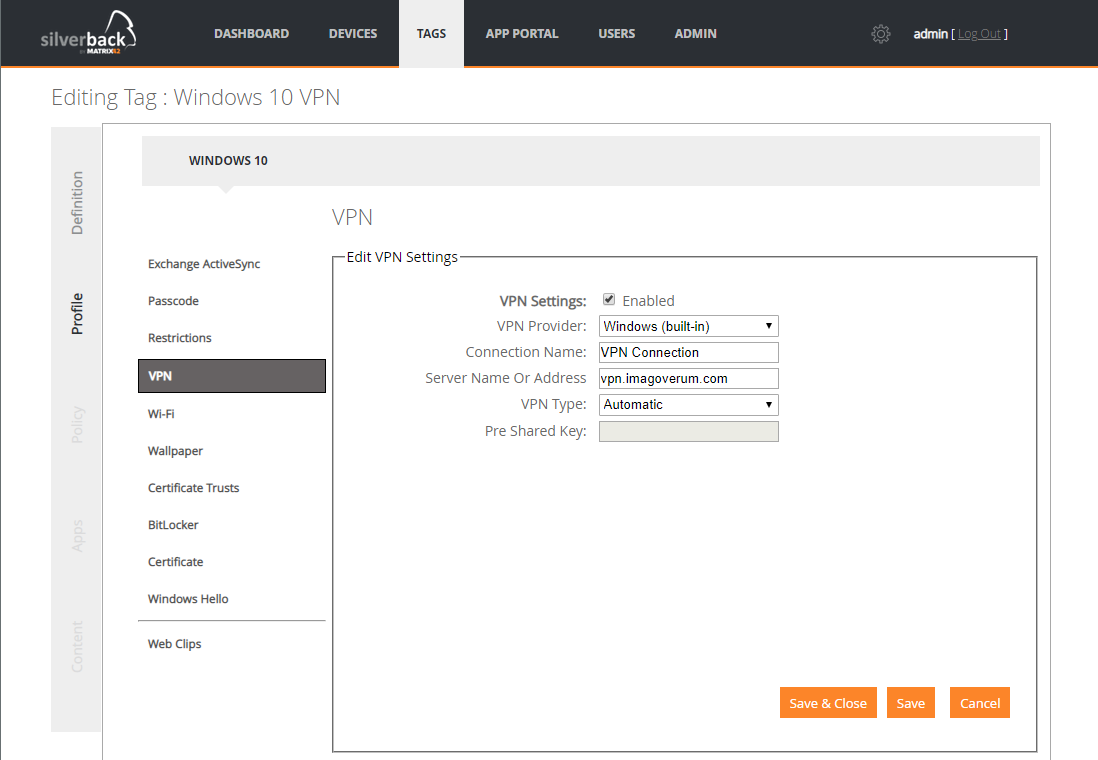
Built-in VPN Support
With Silverback 19.0.0 we added the ability to configure VPN Settings for Windows 10 devices. All settings will configure the Windows 10 built-in VPN plug-in platform using the following tunneling protocols:
- Automatic - Device will try each of the built-in tunneling protocols until one succeeds
- PPTP - Point to Point Tunneling Protocol
- IKEv2 - Internet Key Exchange version 2
- L2TP - with certificate or with preshared key
- SSTP - Secure Socket Tunneling Protocol
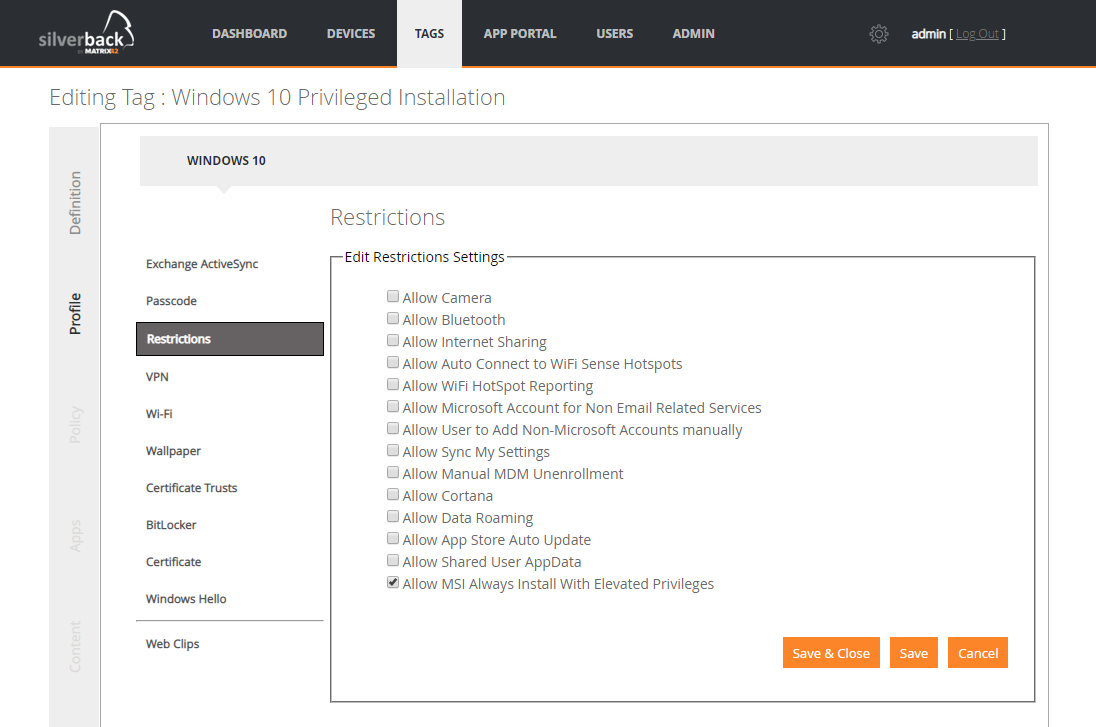
Allow *.msi installation with elevated privileges
This policy requires Windows 10 1803 and directs Windows Installer to use elevated permissions when it installs any program on the system.
If this setting is enabled, privileges are extended to all programs. These privileges are usually reserved for programs that have been assigned to the user (offered on the desktop), assigned to the computer (installed automatically), or made available in Add or Remove Programs in Control Panel. This profile setting lets users install programs that require access to directories that the user might not have permission to view or change, including directories on highly restricted computers.
If this setting is disabled, the system applies the current user's permissions when it installs programs that a system administrator does not distribute or offer.
MacOS
Silverback 19.0 offers the following new features for MacOS
OAuth Support for Mail
Based on macOS 10.14 Mojave , Apple added OAuth 2.0 support for Microsoft Exchange accounts that can be deployed through an Enterprise Mobility Management. To activate OAuth support in Silverback just enable the OAuth checkbox inside your Exchange Active Sync configuration. When the Profile has been transferred to the device, perform these additional steps to authenticate against your identity provider:
- Open System Preferences
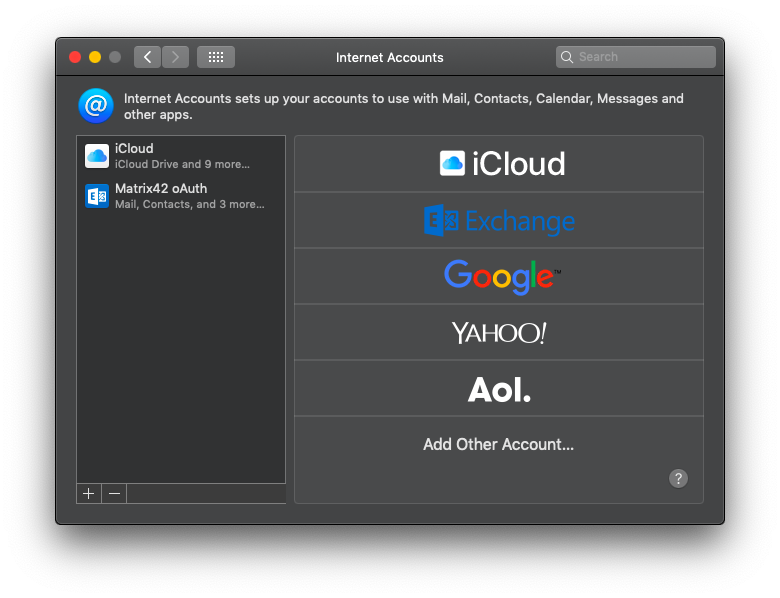
- Navigate to Internet Accounts
- Select the configured Exchange Profile, e.g. Matrix42 OAuth
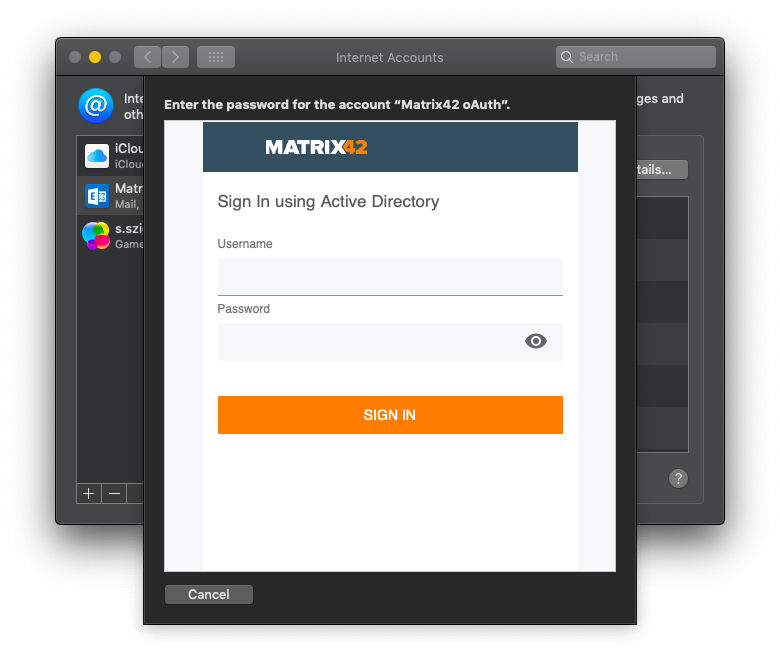
- Once selected, the user will be forwarded to authenticate with your Identity Provider (e.g. MyWorkspace).
- Once the user enters the correct credentials and tapped Sign In, their native exchange account will start syncing email
- Open Mail application to check if mails will be received
 |
 |
 |
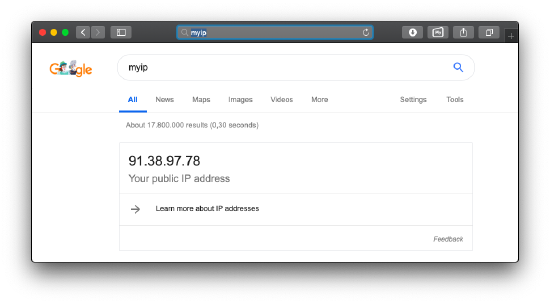
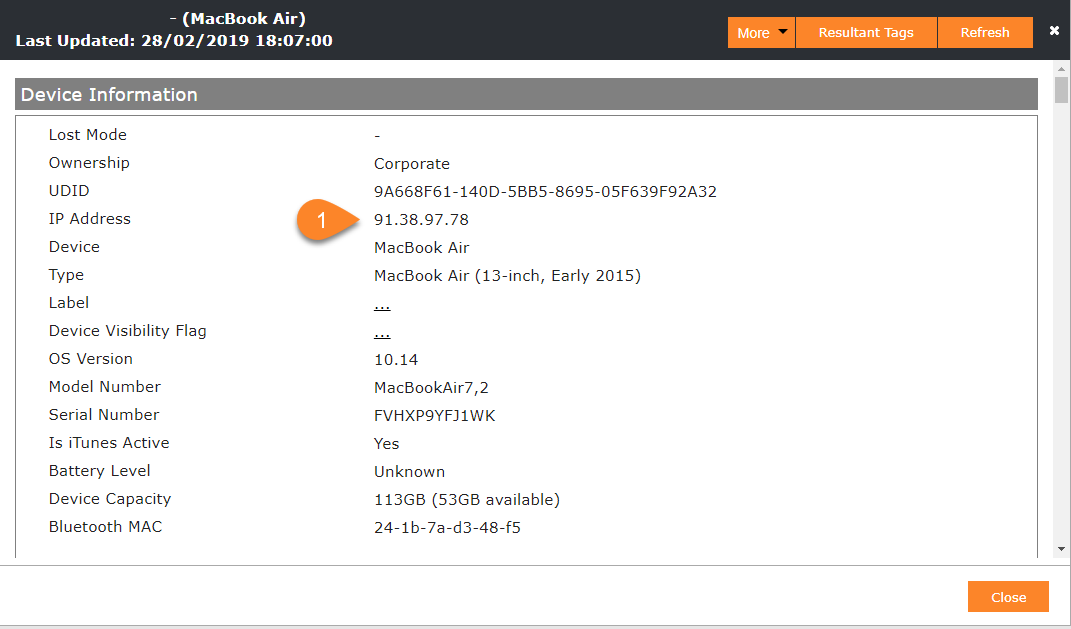
Display IP addresses
From now on it is possible for Administrator to obtain IP addresses for MacOS devices. Based on your environment setup you may see two different IP addresses. In this case, the first shown IP Address is the IP from the incoming request to the Silverback server. The 10.0.31.135 IP address here is the Web Application Proxy, which routes the request from the Internet to the Silverback server. The second IP address, 82.113.99.90, is the device public address.
 |
 |
Known Issues
- Managed applications configurations won't take effect for Device Owner Mode
- Work Profiles: Passcode Settings for Work Profiles aren't working on all devices and platforms
- Work Profiles: Exchange Active Sync Settings can't be removed on some Android devices
- Prevent Factory Wipe: Enabling these checkboxes will prevent also Factory Wipes from the Silverback Management Console
- Windows 10: Changing VPN Profile names will create a second profile
- Windows 10: Pending Commands integration isn't integrated in this Release