Release Notes Silverback 18.0 Update 1
About this release
Matrix42 Silverback 18.0 Update 1 provides new and improved features that have been implemented. During the development of this version, we have been focusing on valued feedback from our customers and partners in order to provide an ideal feature selection.
Please find the installation files of this version on Matrix42 Marketplace.
System requirements, instructions for installation and update as well as for basic configuration are available in the Matrix42 online manual.
Overview
Announcements
New Features
Improvements
Fixes
- PRB31006: Updated Blacklist for DEP & Supervised Devices
- PRB31012: Small fix for Samsung Safe Exchange Settings
- PRB30899: Show default ownership as personal
- PRB30972: Standard Exchange Type for Samsung Safe is set to Android for Work
- PRB30828: Updated German translations
- PRB30999: Invalid MDM Profile during enrollment of iOS
- PRB31092: VPP User/Assets are not correctly synchronized
- PRB31172: VPP Assets are missed
- PRB31186: French Localization Issue
- PRB31148: Apps can’t be added to Tag
Announcements
Windows Phone 8
As of July 11, 2017, Windows Phone 8.1 users are no longer eligible to receive new security updates, non-security hotfixes, free assisted support options, or online technical content updates from Microsoft for public. This means for us that it is time to remove all Windows Phone 8 related settings with our Silverback 18.0 Update 3 by the end of the year. So, if you still using Windows Phone 8 or Windows Phone 8.1 devices we recommend to be prepare when the End of Life of this operating systems will come for Silverback. If you need further information please visit the official Windows Phone 8.1 End of Support: FAQ
Nitro Desk Touchdown
The personal information manager NitroDesk Touchdown or TouchDownTM by Symantec has come to his end of life. Symantec announced the following dates:
- This product reached end of life on July 3, 2017.
- End of access to purchase additional licenses is August 7, 2017.
- End of support will occur on July 2, 2018.
This means for Silverback that we will remove all NitroDesk Touchdown settings from Silverback with our new release Silverback 18.0 Update 2, which will be delivered at the end of September. So if you are still using the deprecated client from Symantec we recommend to be prepared when the End of Life of the client will come as well for Silverback.
Controlled Rollout
With our Empirum product as part of our Unified Endpoint Management we made a lot of very good experiences with a Controlled Rollout, where volunteers will receive a Release Candidate a couple of days before the official release. This Controlled Rollout will be attended from our side to ensure that everything works as planned for you and for all customers. So, if you want to join the Controlled Rollout program for Silverback, please send us a message to silverback@matrix.com and we will contact you soon with further details.
New Features
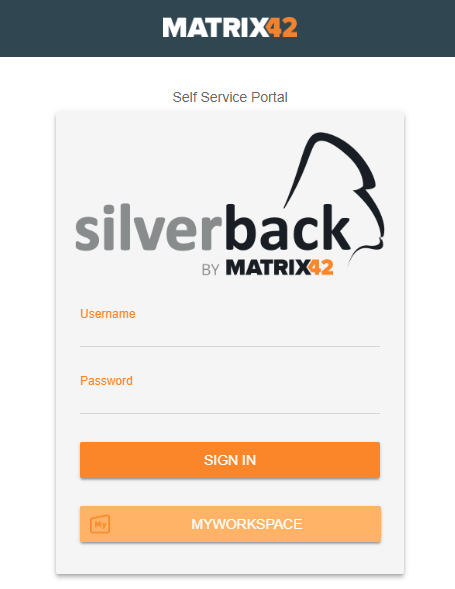
New Login Page
We are happy to announce our new Identity Management Login page which b rings you and your end-users a much nicer starting point with our and in unison your product.
Technically all logins for admins and users will still be the same, but you will have a nicer and smarter view and end-user experience on any device.
The Matrix42 Identity Management Infra-structure is widely adapted from the whole Matrix42 product family and Silverback is now able to participates form the benefits of a joint platform. Due to the implementation we achieved the following benefits for you beside the fact that you are still have some possibilities for your own corporate branding:
- Sessions for Administrators will be longer than before (1440 Minutes).
- You see a page navigation above the Login Screen for Administration and Self Service Portal
- You have the ability to configure an optional button and forwarding for SAML2 Authentications with an Identity Provider like Matrix42 MyWorkspace, Azure Active Directory or Ping Identity. Please compare the Generic SAML2 Authentication section in this Release Notes
You should make sure that your Silverback server respectively your Internet Information Service on the server can work with localhost and with the corresponding external URL, so that your server knows his external URL.
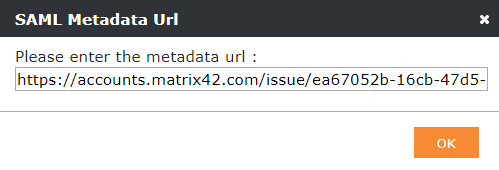
You should check before the update if under Settings Admin > Silversync > STS URL the URL is configured appropriate to your Silverback URL, like this:
If you missed this part, our Support will help here to update this settings for you.
Please backup your machine appropriate before installing this Release.
New adaptive Self Service Portal
Beside the new Login page for Administrators we are also happy to announce our new adaptive design for our Self Service Portal with a couple of included enhancements. First of all, the design is adaptive for all supported devices and operating systems. Second, we implemented a new style of how the country code for the SMS Enrollment is displayed and how the detection works. In a nutshell you are now able to define the country code and the ownership type by default under Admin > Self Service Portal > Frontend. You are also able to activate here a country code detection based on the IP Address and also define the country code by a preset
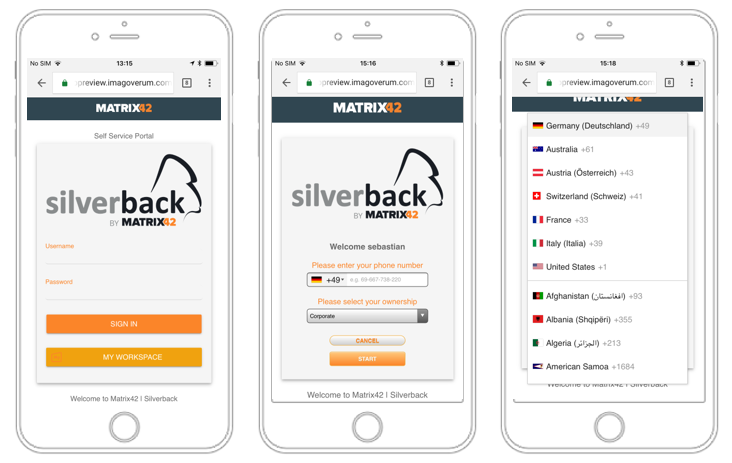
The following settings are available for the new Self Service Portal:
| Option | Description |
|---|---|
| Show Ownership | Shows the Select your Ownership drop down list in the registration process |
| Set Personal Ownership to default | By default, Corporate is the first listed item. With this checkbox you can change it to Personal |
| Detect country code by IP | This functionality will change the country code preset by detecting the location from the device IP address |
| Configure Presets | Here you can select which Country Code should be shown as default and you can pre-define a phone number |
| Define Placeholder | This is the place where you can configure hints for your users of how to enter the phone number. E.g. without +49 |
Generic SAML2 Authentication
Before we give you a detailed information about the configuration we will start with a short introduction about the feature itself. SAML 2.0 is an XML-based protocol that uses security tokens that contain assertions to pass information about a user between a SAML identity provider and a SAML service provider. SAML SSO works by transferring the user's identity from one place (the identity provider) to another (the service provider). This is done through an exchange of digitally signed XML documents. Consider the following scenario: You have an identity provider in place, for example Matrix42 MyWorkspace or Azure Active Directory and you want to login with the stored identities in any of these tenants. With this Release you will be able to exactly do that!
All you need to is activate the checkbox Show on Login Page and enter the needed SAML2 Authentication details in the new page under Admin > Authentication Provider. Let’s compare the look of the additional SAML2 Authentication button on the login pages
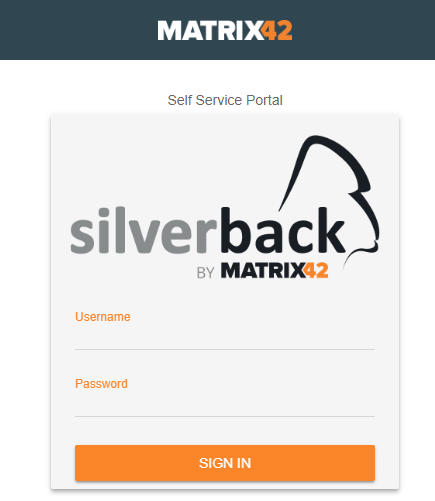 |
 |
| Without configured SAML2 Authentication | With configured SAML2 Authentication |
General Configuration
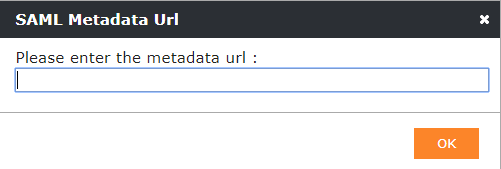 |
With the Import from URL button you can fetch easily your SAML2 configuration from your Identity Provider via URL. |
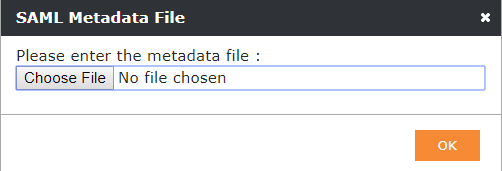 |
With the Import SAML Metadata file button you will be able to upload the settings if you have a Metadata file in XML format from your Identity Provider. |
After importing your Metadata URL or Metadata File you will see that the Authentication Provider Settings will be filled automatically. You just need to enable the button on the login pages with the Checkbox “Show on Login Page”. Additionally, you can enable the Dynamic User Creation, which will be explained in the table above.
Please be aware that you will need every time a corresponding user account (shadow account) in Silverback for the verification if the user is allowed to login into Silverback. This user can be either an Active Directory / LDAP Account or a Local User account.
For Administrators and all other corresponding roles, it is mandatory to have a Local User Account under Admin > User Management. The matching criteria in this case is always the E-Mail Address. The password needs to be set when you create a user under User Management, but this password doesn’t matter if you use SAML2 Authentication.
The following table contains a description of each value you will find in the Authentication Provider area:
1. Authentication Provider Settings
| Option | Description |
|---|---|
| Show on Login Page | With this checkbox a second button appears on each login page. Configuration of the button takes place in the Authentication Provider Button Settings area on this site. |
| The service issuer | Contains the unique identifier of the service provider (Silverback) and will be filled automatically when you import the Metadata URL or file. |
| X.509 Certificate Thumbprint | Contains the certificate thumbprint for signing the payload and the assertion. This field will be filled automatically when you import the Metadata URL or file. |
| Issuer | Contains the unique identifier of your identity provider (e.g. MyWorkspace, Azure Active Directory or Ping Identity). This field will be filled automatically when you import the Metadata URL or file. |
| Saml SSO Redirect URL | This is the URL where Silverback will send the SAML2 requests. This field will be filled automatically when you import the Metadata URL or file. |
| Saml SLO Redirect URL | This is the URL where Silverback will send the SAML2 Logout requests. This field will be filled automatically when you import the Metadata URL or file. |
| Dynamic User Creation | By Enabling User Creation Silverback will create for each SAML2-based login a local user account. This enables you to configure all authorized users within your Identity Provider. |
2. Authentication Provider Button Settings
| Option | Description |
|---|---|
| Title | Defines the text content of the additional button on Administrator and Self Service Portal Login |
| Icon | Defines the icon which will be shown left of the Title. Supported file types are *.jpg, *.png and *gif |
| Color | Defines the background color. It enables you to easily pick a basic or configure a custom color. |
Login with MyWorkspace Identities
For the SAML2 usage with MyWorkspace you’ll need to configure your Tenant in a few clicks. For this please login to your MyWorkspace Tenant as an administrator and perform the following steps:
- Navigate to Administration
- Go to Applications
- Click on the + Symbol on the right bottom
- Search for Silverback Administration or Silverback Self Service Portal (depending on your purpose)
- Enter the display name for this application (e.g. Silverback Self Service Portal)
- Enter a description
- Enter at Base URI your Silverback Server URL (e.g. https://silverback.company.com)
- Decide if you want to recommend that app to your users
- Click “Create Application”
- In the following screen change your icon if desired
- Navigate on the top to Integration Guide
- Scroll down to Number 4 and copy the Metadata URL into your Clipboard
- If you want to use the Dynamic User Creation inside Silverback please go on MyWorkspace to Permissions at the top and configure the access to your desired users or groups
- Now head over to your Silverback Server
- Login with your Admin credentials
- Navigate to Admin > Authentication Provider
- Click on Import from URL
- Paste your fetched Federation Metadata URL from MyWorkspace
- Click OK
- Click OK to save these changes
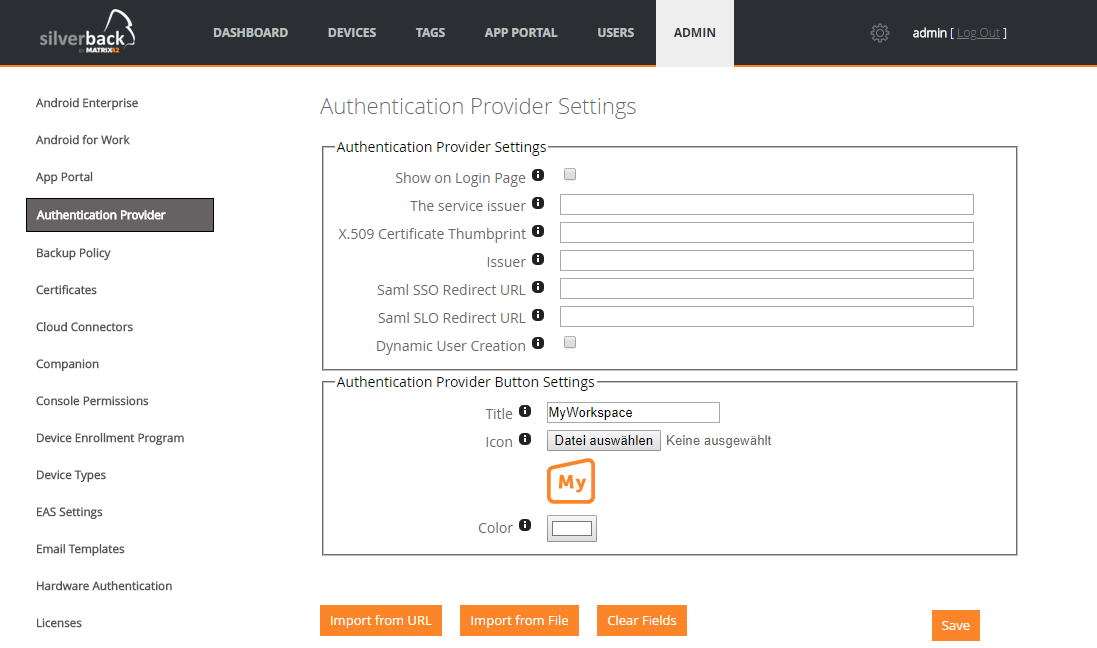
- Afterwards your Authentication Provider Settings should look like this:
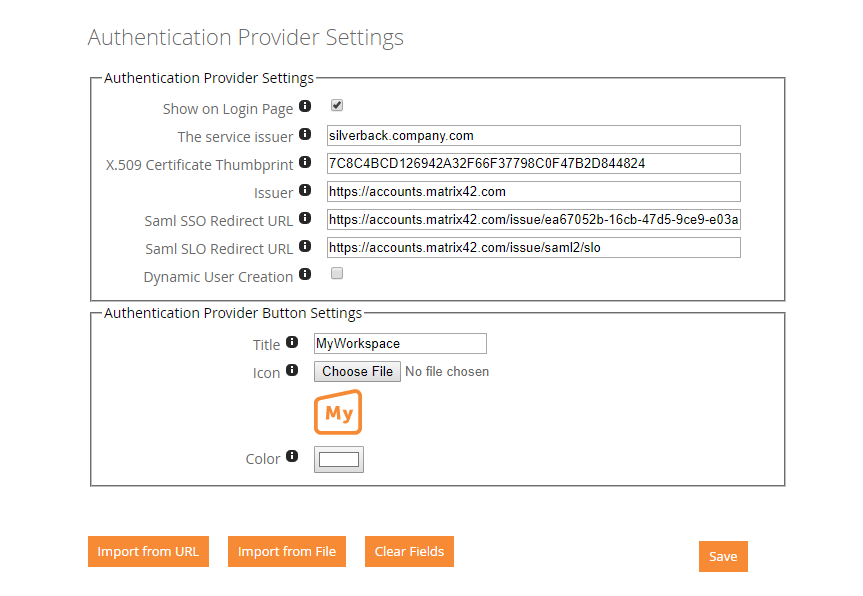
- Enable Dynamic User Creation if desired and click save.
Login with Azure Active Directory Identities
For the SAML2 usage with Azure Active Directory you’ll need to configure your Azure Tenant. For this login to your Azure Tenant as an administrator and perform the following steps:
Navigate to Azure Active Directory > Enterprise Applications
- Create +New application and select Non-gallery application on the top right
- Add a name for your application (e.g. Silverback_SSO)
- Click Add and wait until the creation process is finished
- Navigate to Single sign-on
- Change the mode on 2. Single Sign-on Mode to SAML-based Sign-on
- Enter as Identifier your Silverback URL without https (e.g. silverback.company.com)
- Enter as Reply URL your Silverback URL in the following format: https://silverback.company.com/sts/authorize/login
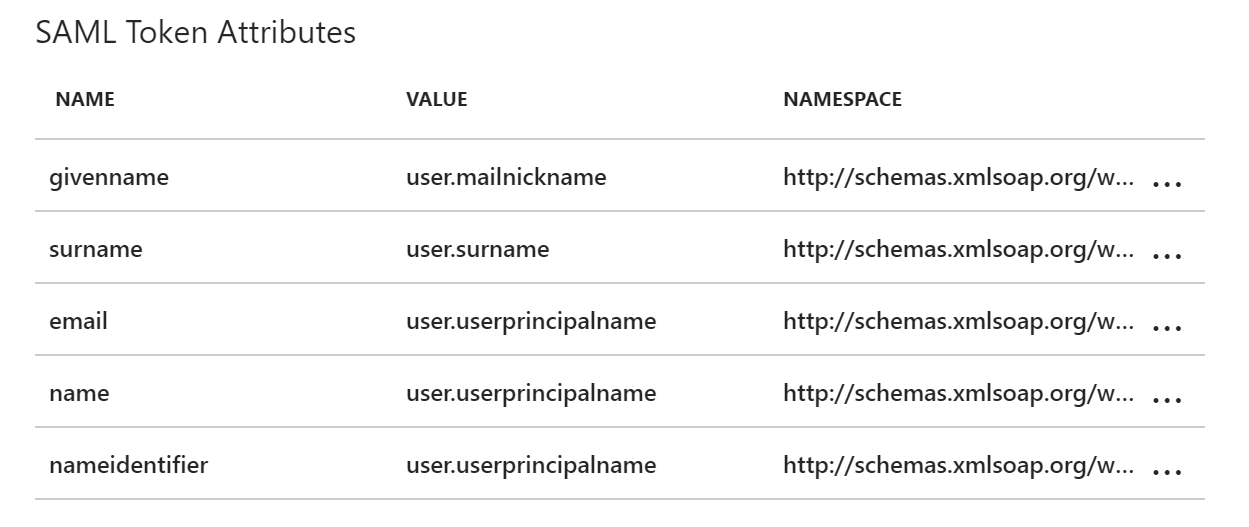
- Activate on 3. User Attributes the View and edit all other user attributes checkbox
- Click on emailaddress
- Change the name to email and the value user.userprincipalname and click Ok
- Click on Add Attribute,
- Name it nameidentifier, select user.userprincipalname as value and add http://schemas.xmlsoap.org/ws/2005/05/identity/claims as namespac
- Click Ok
- At the end it should look like this
-
- Click on the Clipboard Icon on 4. SAML Signing Certificate
- Click Save on the top
- Go to Users and Groups
- Add all groups or users that you want to give access to Silverback via Azure Active Directory
- Now head over to your Silverback Server
- Login with your Admin credentials
- Navigate to Admin > Authentication Provider
- Click on Import from URL
- Paste your fetched Federation Metadata URL from Azure
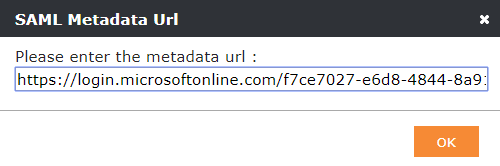
- Click OK
- Click OK to save these changes
- Afterwards your Authentication Provider Settings should look like this:
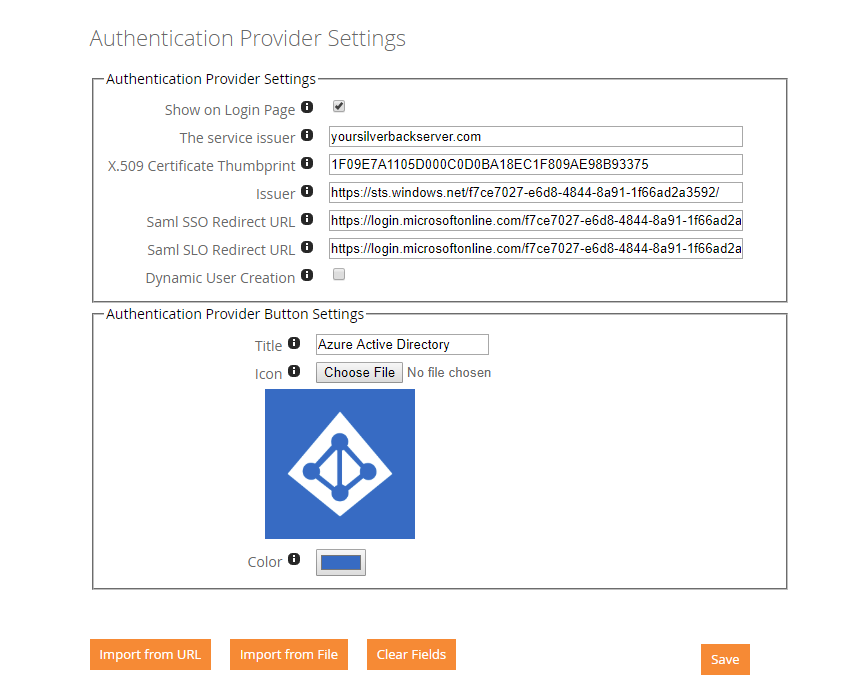
- Now you need to make sure that you import all Users & Administrators and their Azure Active Directory E-Mail address either as Device User or as an Administrator
- As an alternative you can use the Dynamic User Creation functionality
- Afterwards you will be able to login with the Azure AD Credentials into Silverback when you use the SAML2 Button on your login pages.
Clone Tags
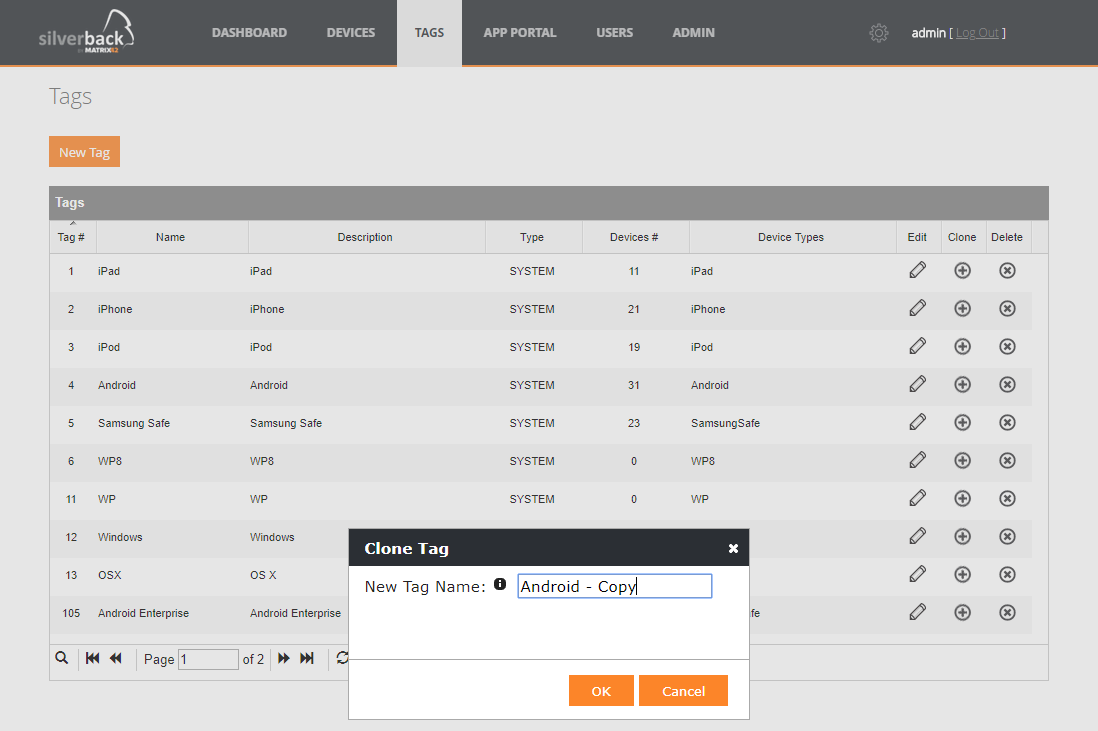
We are are always looking for features which will make the life for all administrators easier. Based on valued feedback of our customers we are happy to announce the Clone Tag functionality. The feature itself is easy to understand. In just a few steps you are able to clone your existing Tags. Just go to Tags and you will see the new button for cloning on the right side of the action area.
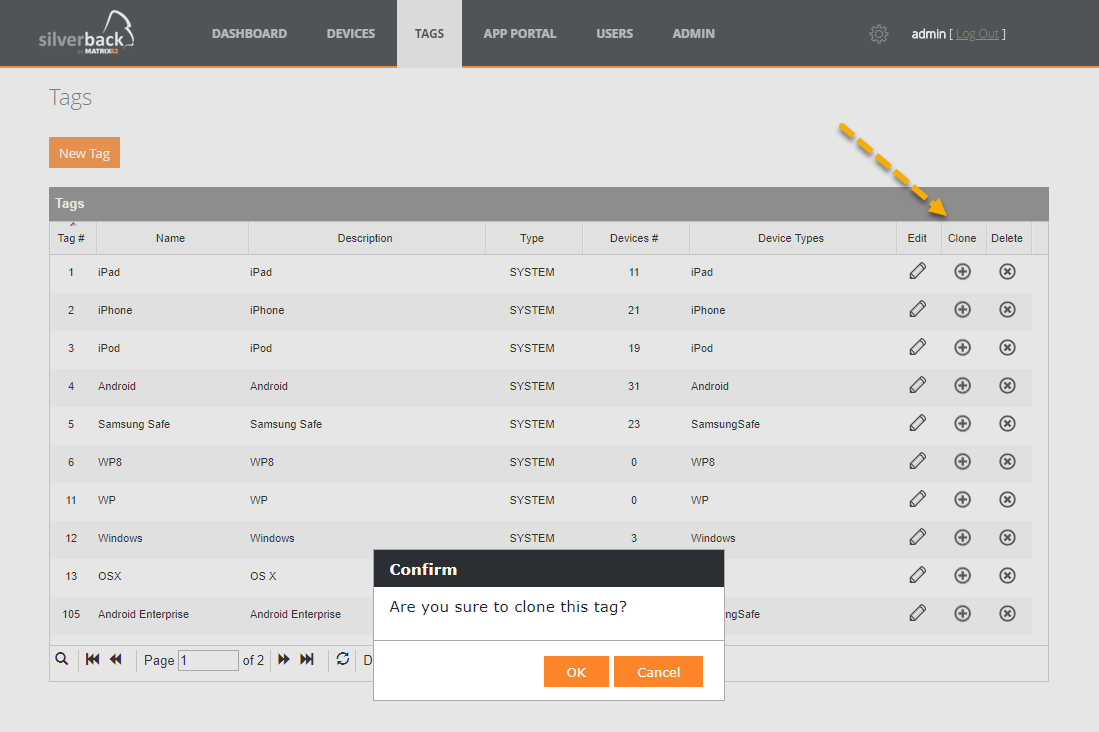
Before the cloning process starts you will first be asked if you really want to clone this tag and second you will be able to enter directly the name for the new cloned tag. What we as well do here is to convert a cloned system tag into an admin tag and if any tag is configured to use auto population, the system will uncheck the auto population. This prevents the system to push automatically the cloned Tag to your device fleet with already existing definitions and applications, Wi-Fi profiles etc.
Currently all previously linked devices will be as well taken over to the new cloned tag. This behavior is already addressed and will be updated in the upcoming release so that you will have the ability to choose if you like to take over the linked devices or not.
Save & Close Buttons
Another feature which will make the life of all Administrators easier is the Save & Close button which you will find in any page of every Tag. By clicking Save & Close all changes will be saved and you will be directly redirected to the overview of all existing Tags.
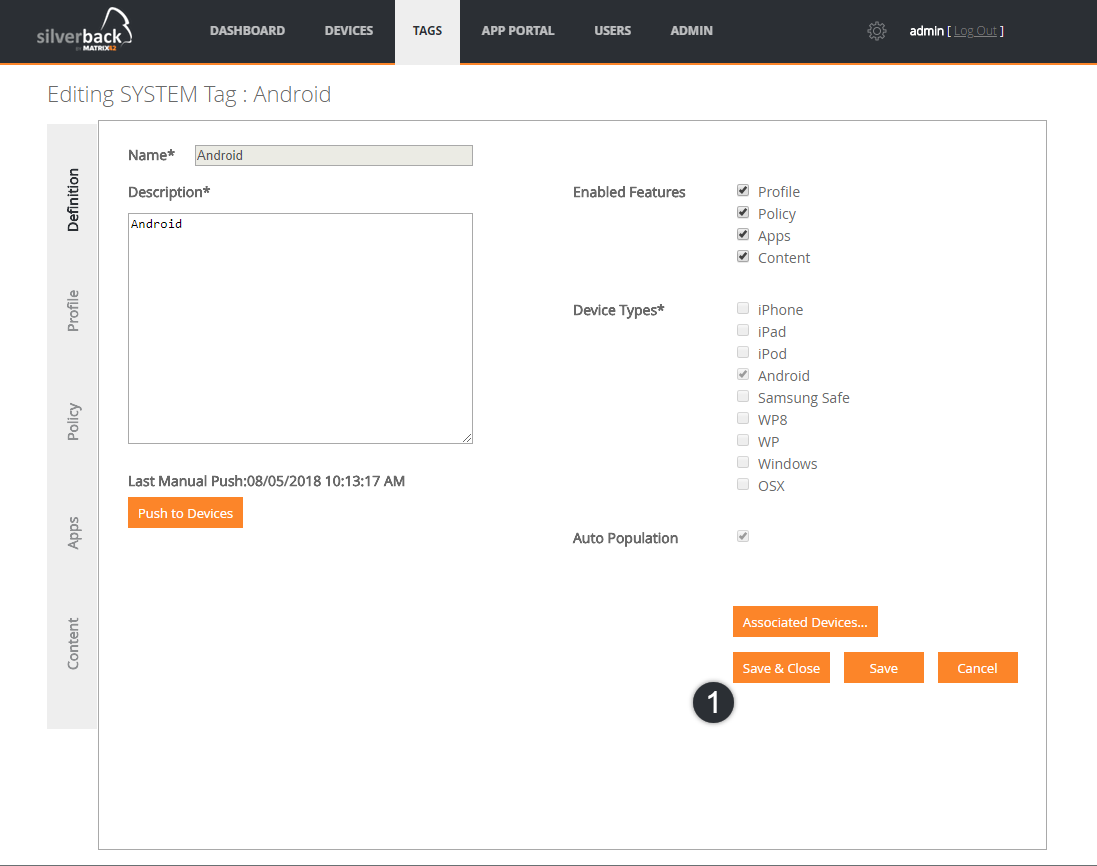
Please be aware that on each page where you find the following form, settings will be saved automatically, but with the Save & Close button you can now directly head back to the Tag overview.
Wallpapers for iOS supervised devices
With the ability to set wallpapers for iOS supervised device we are happy to announce another highly recommended feature from our customers. From now on you are able to set the Home Screen and the Lock screen for your iOS supervised devices. Just go to your iPhone or iPad Tag and navigate to Profile > Wallpaper. There you can enable the Wallpaper for Lock Screen and Home Screen and upload afterwards your desired background picture.
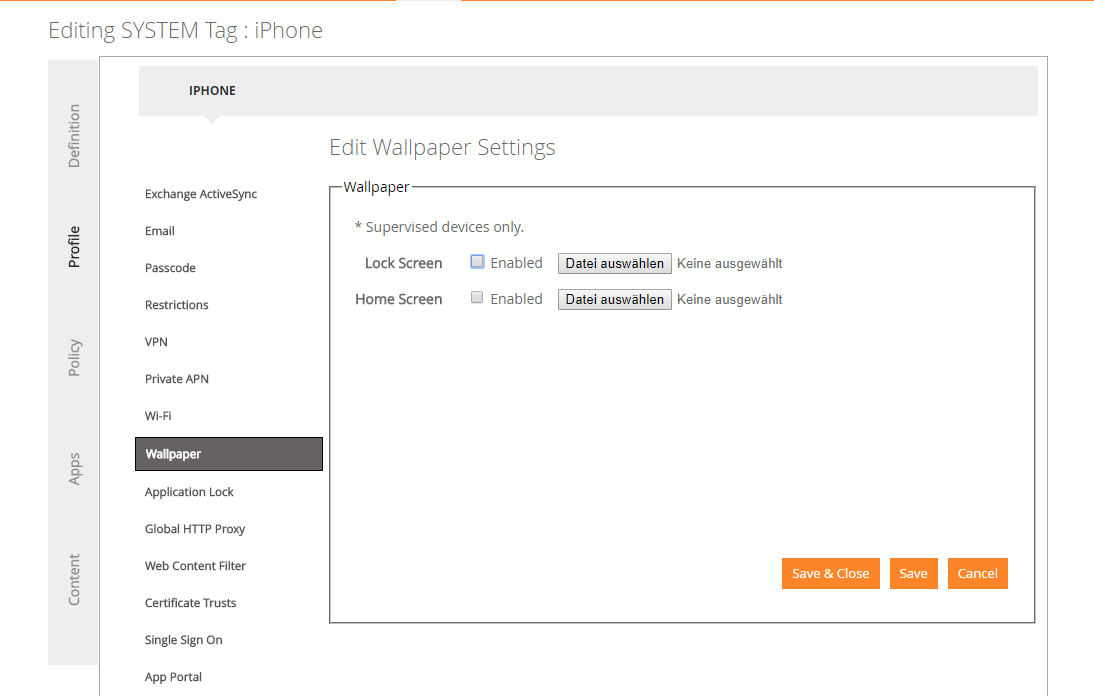
The supported file types are: *.jpg and *.png
Azure AD Smart Enterprise Wipe
When you use Azure AD Enrollment or Windows 10 Autopilot your devices will be listed in Silverback and in your Azure Active Directory (Azure Portal > Azure Active Directory > Devices). With our Smart Enterprise Wipe Feature we will make it possible that when you use the Factory Wipe or Delete Business Data command in Silverback, the devices will be removed as well from your Azure Active Directory, so that these will not have any possibility to use services within your company.
For this we need to give your already created Silverback application inside your Azure environment the needed rights (Compare Product Documentation Windows 10 Guide: Chapter 3 – Azure AD Auto Enrollment) to perform these actions via Silverback with the support of the Graph API. For this you need to perform the following actions, but please do not use this Feature if you have any Conditional Access Policies configured in your Azure Portal..!
1. Give any user the Global Administrator role of your Azure Active Directory. If you want to use your “main” Administrator account you can skip to Step 2.
- Login into your Azure Portal
- Navigate to Azure Active Directory > Users and select any user you like to give the permission. As best practice use a service or functional account.
- Click on the name of the desired account so that the users profile will open
- Navigate to Directory role and set the role to “Global Administrator”
- Click Save
2. Add this user as an owner of your Silverback Application
- Navigate to Azure Active Directory > Mobility (MDM and MAM)
- Click on your created Silverback application (e.g. Matrix42_EMM)
- Open On-Premise MDM application settings
- Click Owners
- Click +Add owner, search for the Global Administrator user, mark him and click on the bottom on select
- Now click on the Settings tab Properties and note down the application ID. We need the ID in a couple of seconds.
- Close all open tabs in Azure Portal. There is no need to save anything.
3. Open Windows PowerShell as an Administrator on your Work machine
- Enter Install-Module MSOnline and accept the prompt with yes
- Enter Connect-MsolService
- A new Window will appear where you need to login with the credentials for the in the previous steps used account
- After the successful login the Window will disappear
- Now open Notepad++ or any text editor you like
- Copy the following string into the text editor and change the orange marked application ID to the application ID of your Silverback application
$ClientIdWebApp = '9ce10ad7-2439-4965-bb53-442f5c1f15d1'
$webApp = Get-MsolServicePrincipal -AppPrincipalId $ClientIdWebApp
Add-MsolRoleMember -RoleName 'Company Administrator' -RoleMemberType ServicePrincipal -RoleMemberObjectId $webApp.ObjectId
- Copy the complete string into your Clipboard
- Go back to Windows Powershell and make a right click
- The script will run and that’s it.
From now on every Factory Wipe or Delete Business data command in the Silverback Console will remove the device as well from Azure Active Directory.
Improvements
Default Ownership for SPP
Let’s assume that your mobile device strategy is based exclusively on private owned devices. In former versions every of your users needed to use the dropdown field in the Self Service Portal and manually select Personal as ownership type. From now on with the new checkbox under Admin > Self Service Portal > Set Personal Ownership as default, the default ownership on SSP will switch to Personal.
Simplified Multiple Enrolments
You will find another improvement in the new structured Self Service Portal area, where we added at the One Time Password Tab two new checkboxes and a new table. Activate Bulk Staging Mode when you have inside your organization a department or an area where you just use one account and always the same OTP for each device enrollment. This enablement will make it possible for you to enroll a second device with the same user and same OTP, even if the first device will stick in blocked mode or something similar. The Set OTP Expiration Date to unlimited will allow, as the name says, to automatically set the OTP expiration time to unlimited for selected users. You need to add each account into the shown table below. Please use the device username, the UPN or the SAM Account name in the table.
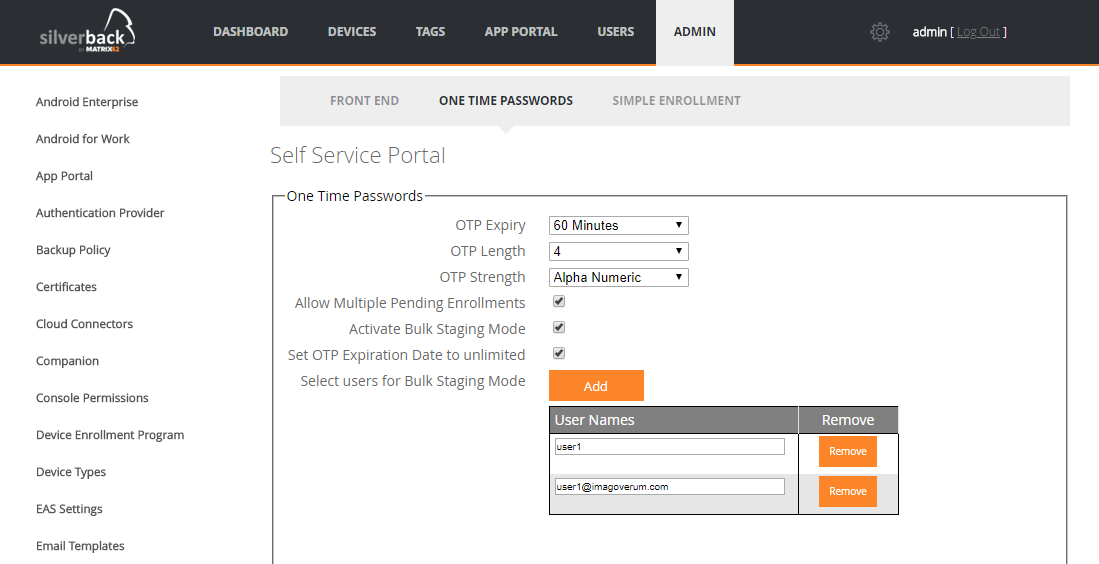
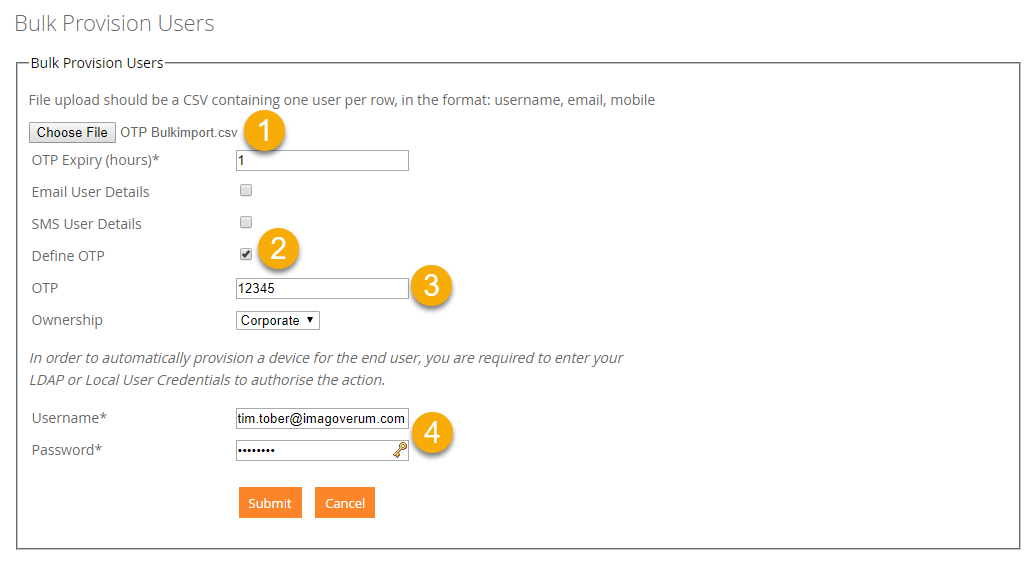
When everything is setup correctly, your OTP expiration changes automatically for the selected users when you use the Bulk Provision users under Devices > Pending > Bulk Provisioning users.
VPP Licensing Enhancements
We implemented based to some issues with the synchronization process of VPP App Licensing information a small but effective improvement, which will only affect a small number of customers. In some cases, Apple unfortunately sends to Silverback corrupt Licensing information about the purchased applications from the Volume Purchase Program. For that we implemented a looping process, which tries and triggers with an exponential break to receive complete and consistent data from Apple. So please be patient if the refresh process of the VPP App Licensing process will take longer than before. The reason here is that we try a couple of times to receive the correct and complete information from Apple here. The duration of the process depends strongly on the needed amount of information that needs to be synchronized and the needed attempts.
Additionally, we added a handling of a previously unknown refunded application statement. This can occur if your credit card details were not sufficient and the purchase needed to be refunded by Apple.
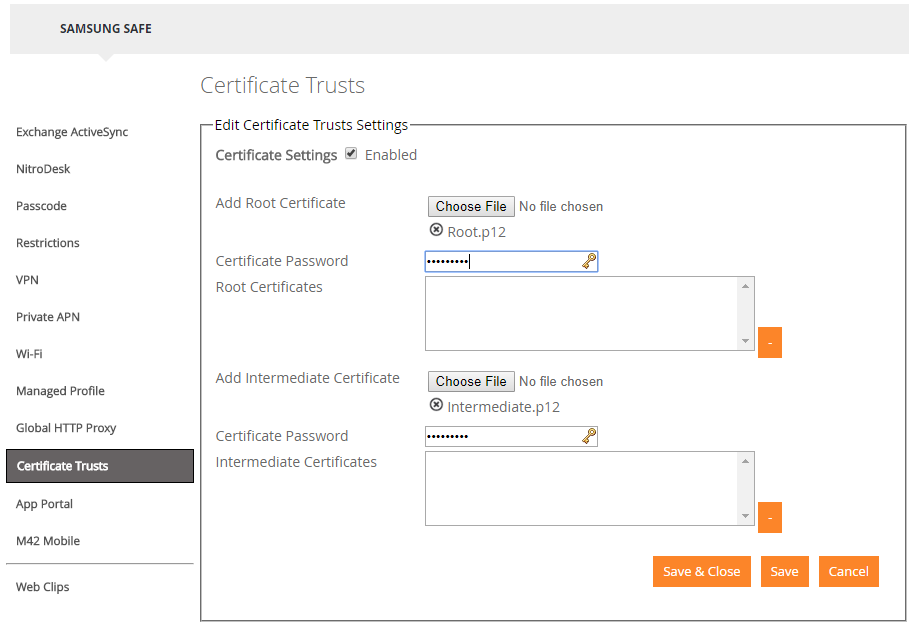
Support for p12 Certificate file types
This feature is easy to explain. We now support the import of p12 file types which are password protected for Certificate Trusts. Just import the File type by “Choose File” and enter the corresponding password. Silverback will import the file and you will be able to distribute these certificates to your devices.