Identity Provider Integration V: Configure Silverback
Import Metadata
- Open your Silverback Management Console
- Login as Administrator
- Navigate to Admin
- Navigate to Authentication Provider
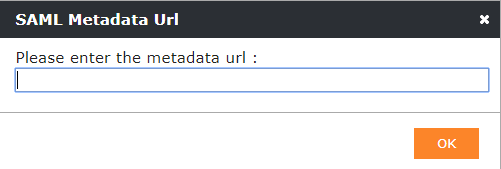
- Click Import from URL
- Paste your fetched Federation Metadata URL
- Click OK
- Click OK to save these changes
- Click OK to confirm
Configure Authentication Provider
- Enable Show on Login Page
- Disable classic sign-in (optional)
- Enable Dynamic User Creation
- Silverback will create for each login a local user account for verification reasons
- Use your Identity Provider as access control mechanism
- Change the Title of your SAML2 Button, e.g MyWorkspace or Azure Active Directory
- Change the Icon
- Change the Color
- Click Save
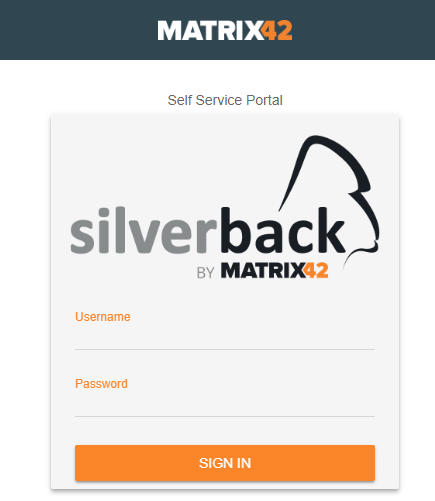
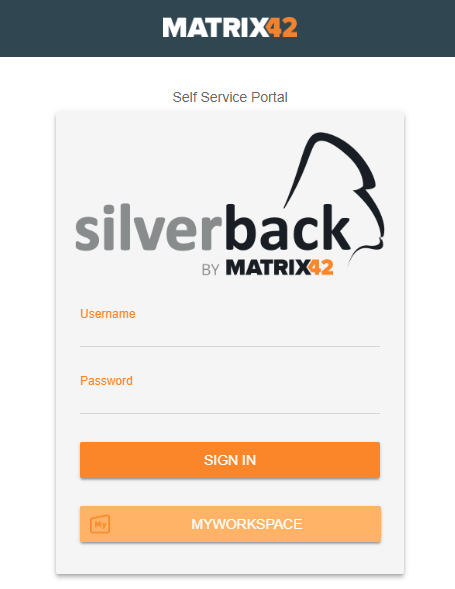
Try a Login as a Device User
- Open your Browser in Incognito Mode
- Open Self Service Portal
- Check the SAML2 button appearance
- Click the SAML2 button
- You will be redirected to your Identity Provider
- Login with your credentials
- When everything went right, you should be logged it into Self Service Portal
- Take a device and perform an enrollment
- In case you have an active LDAP Connection in Silverback, please refer to Co-Existence with LDAP Connection
- Otherwise, please proceed with Identities
Co-Existence with LDAP Connection
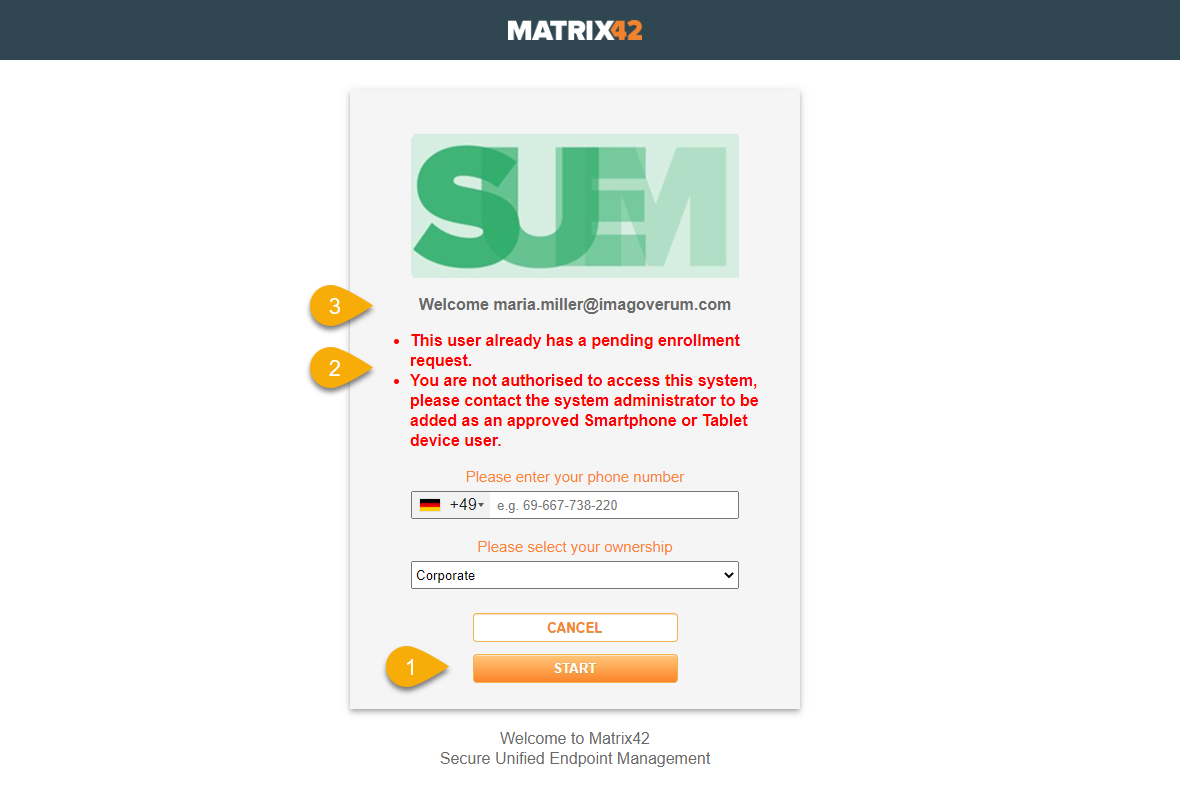
In case you connected Silverback with a LDAP Server, you might receive after pressing the Start (1) button inside the Self-Service Portal, an error that contains a warning that this user already has a pending enrollment request or that you are not authorised to access this system (2). The logic is that if a LDAP connection is available, Silverback checks first your LDAP server if the user is present to query additional LDAP Attributes for the user and to not create dynamically a new local user. To ensure the matching between your Identity Provider and the user in your LDAP Server and to let your users create a new pending enrollment, the value selected for Attribute Statement name (e.g. for your Azure Active Directory application under Attributes & Claims it's set by default to user.userprincipalname) must match with the comparer added in your LDAP User Filter (e.g. userPrincipalName={0}). The captured username from the Identity Provider login (your Attribute Statement) is indicated after Welcome (3) and must match in the Co-Existence with the userPrincipalName of the user in your LDAP server. In case a Group Membership is set in the LDAP User Filter (MemberOf=), the user must be present in the select Group Membership, too. Please keep also in mind, that the LDAP user must have a valid Device Email Field information present. With the LDAP attribute Username, you can ultimately define in this scenario which user name the device will receive in Silverback.
Identities
- Navigate back to your Silverback Management Console
- Navigate to Users
- You should see now a new Username with your Identity Provider E-Mail and Username information
- e.g. Username: tim.tober@imagoverum.com
- e.g. Email: tim.tober@imagoverum.com
System User with SAML2
- Navigate to Admin
- Navigate to User Management
- Click New System User
- Enter a username
- Enter as Email the E-mail used for your Idenity Provider (e.g. tim.tober@imagoverum.com)
- Create any password you like
- Ensure to meet minimum requirements
Type any random password that matches the minimum password requirements as the authentication will be done through the Identity Provider.
- Select Role
- Select Language
- Click Save
Try a Login as System User
- Open your Browser in Incognito Mode
- Open Silverback Management Console
- Click the SAML2 Button
- You will be redirected to your Identity Provider
- Login with your Credentials
- When everything went right, you should be logged it into Silverback Management Console
Additional Notes
In case you enroll devices with the Device Enrollment Program, ensure to use as Authentication Username +OTP if your users has been created dynamically as a local device user (Identities) in Silverback. Due to the authentication with the Identity Provider, these users will be created without any password, so Silverback is not able to perform an authentication for the user at this stage of the device enrollment.
Next Steps
- Check the chapters below
- Check our Integration Guides
- Gather knowledge with Silverback Administrator Guide
- Gather knowledge with Silverback Web Settings Guide
Settings Overview
Settings
| Option | Description |
|---|---|
| Direct Forwarding | Enables a direct forwarding to the IDP on the Self Service Portal. User will not need to click on the Authentication Provider button. |
| Show on Login Page | With this checkbox a second button appears on each login page. Configuration of the button takes place in the Authentication Provider Button Settings area on this site. |
| Disable classic sign-in | Hide classic sign-in login page. Users will only be able to use SAML Authentication |
| Service Provider | Contains the unique identifier of the service provider (Silverback) and will be filled automatically when you import the Metadata URL or file. |
| X.509 Certificate Thumbprint | Contains the certificate thumbprint for signing the payload and the assertion. This field will be filled automatically when you import the Metadata URL or file. |
| Identity Provider | Contains the unique identifier of your identity provider (e.g. MyWorkspace, Azure Active Directory or Ping Identity). This field will be filled automatically when you import the Metadata URL or file. |
| Saml SSO Redirect URL | This is the URL where Silverback will send the SAML2 requests. This field will be filled automatically when you import the Metadata URL or file. |
| Saml SLO Redirect URL | This is the URL where Silverback will send the SAML2 Logout requests. This field will be filled automatically when you import the Metadata URL or file. |
| Dynamic User Creation | By Enabling User Creation Silverback will create for each SAML2-based login a local user account. This enables you to configure all authorized users within your Identity Provider. |
| Title | Defines the text content of the additional button on Administrator and Self Service Portal Login |
| Icon | Defines the icon which will be shown left of the Title. Supported file types are *.jpg, *.png and *gif |
| Color | Defines the background color. It enables you to easily pick a basic or configure a custom color. |
Appearance
| Without configured SAML2 Authentication | With configured SAML2 Authentication |
 |
 |
Import
 |
With the Import from URL button you can fetch easily your SAML2 configuration from your Identity Provider via URL. |
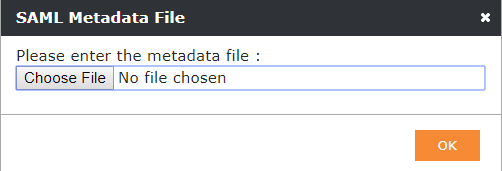 |
With the Import SAML Metadata file button you will be able to upload the settings if you have a Metadata file in XML format from your Identity Provider. |