Push Notifications
Overview
Push Notifications Center is designed to instantly inform you about important events like news, newly received emails, and other messages you would like to receive not only while actively working with ESMP. With Push Notifications, you will know all the latest events within the organization and will get in touch with your day-to-day activities just in one click when the browser window is minimized or even closed.
On this page you may find how to configure, send, receive and manage Push Notifications in ESMP.
As of June 2024, GCM legacy APIs will no longer be supported and will be retired. To avoid any disruption in your push notification service, you must update the client app to register under the FCMv1 platform.
Do the following actions:
- Re-setup Push notification under the Administration Global settings
- Re-login in Matrix42 application
Prerequisites
Browser Push Notifications are shown if the following prerequisites are met:
- Browser Push Notifications feature is available only with ESMP subscription
- Supported browsers:
- Chrome
- Firefox
- Edge
- Configured and enabled push notifications:
- Enabled by ESMP Administrator;
- Enabled in your Profile (Person settings);
- Allowed in your browser.
Browser Push Notifications feature is not supported for Internet Explorer and Safari browsers.
-
Access to Administration application for push notifications configuration.
-
Access to Matrix42 Push Service.
-
Matrix42 Account in role "Push Notification Administrators"
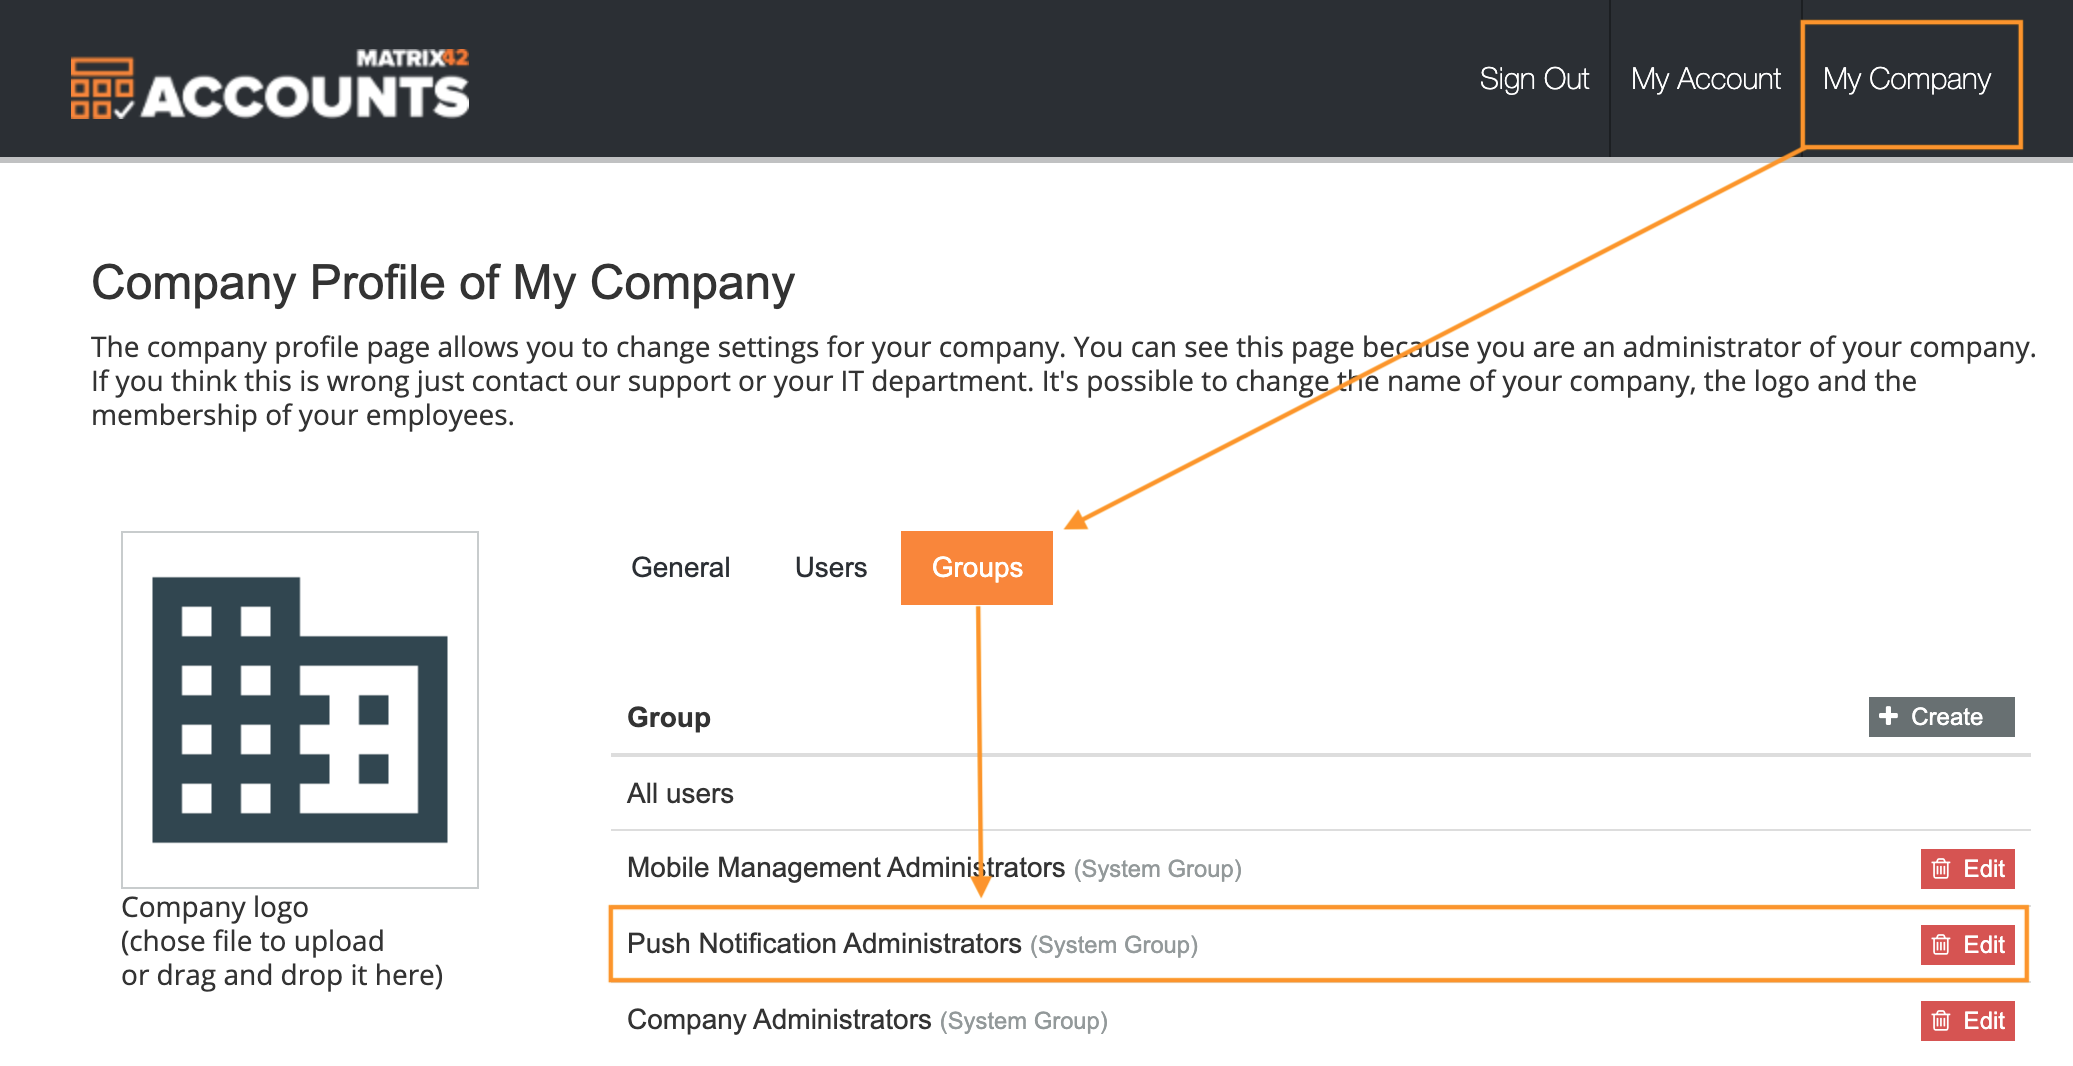
To check and manage access to the Push Service you need a valid Company administrative account: open Matrix42 Accounts page → My Company → Groups → Push Notification Administrators System Group → click Edit:
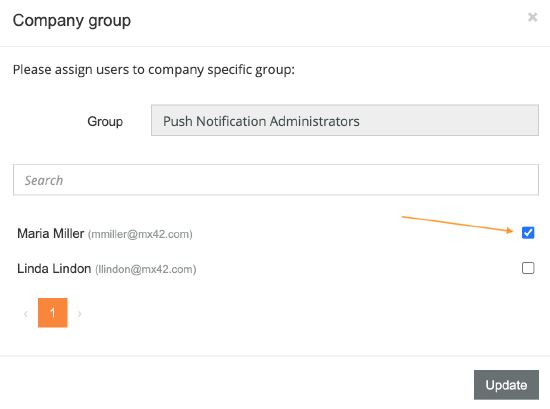
Here you can find a list of current Push Notification Administrators or revoke access by removing the selected for the user checkbox:
Notifications Center and Notifications Monitor
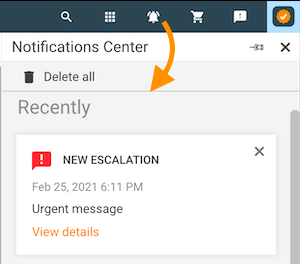
Notifications Center is a new and stand-alone area of the application that can be accessed via the  bell icon and requires Push Notifications license:
Notifications Monitor is managed separately and is available in the application under the  monitor icon:
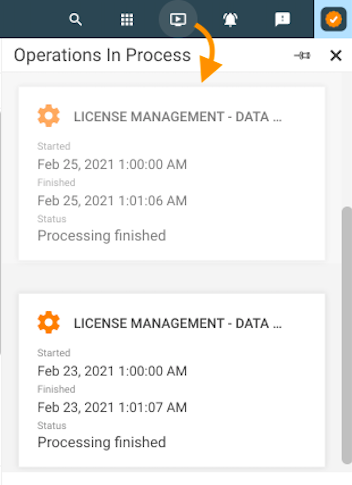
Notifications Monitor is not related to the Notifications Center with push notifications. It doesn't require an additional license and is available in the default version of the ESMP.
Notifications Monitor is available only in those applications that have Show Notification Monitor checkbox enabled in the Application settings.
Push Notifications Configuration
You will receive the Push Notifications after the following configuration steps:
- The Administrator has enabled and configured Push Notifications in the Global System Settings;
- The employee has enabled Push Notifications in personal Profile;
- The employee has enabled push notifications via Notifications Center and has agreed to allow push notifications in the browser.
Administration
The Administrator can enable and configure Push Notifications both for mobile devices and browser as follows:
- Open Administration application → Settings → Edit → Push Notifications;
- Select the Push Notifications Enabled checkbox;
- Click on the Setup Push Notification to configure Matrix42 push server and generate the token. Proceed according to the instructions suggested on the push server.
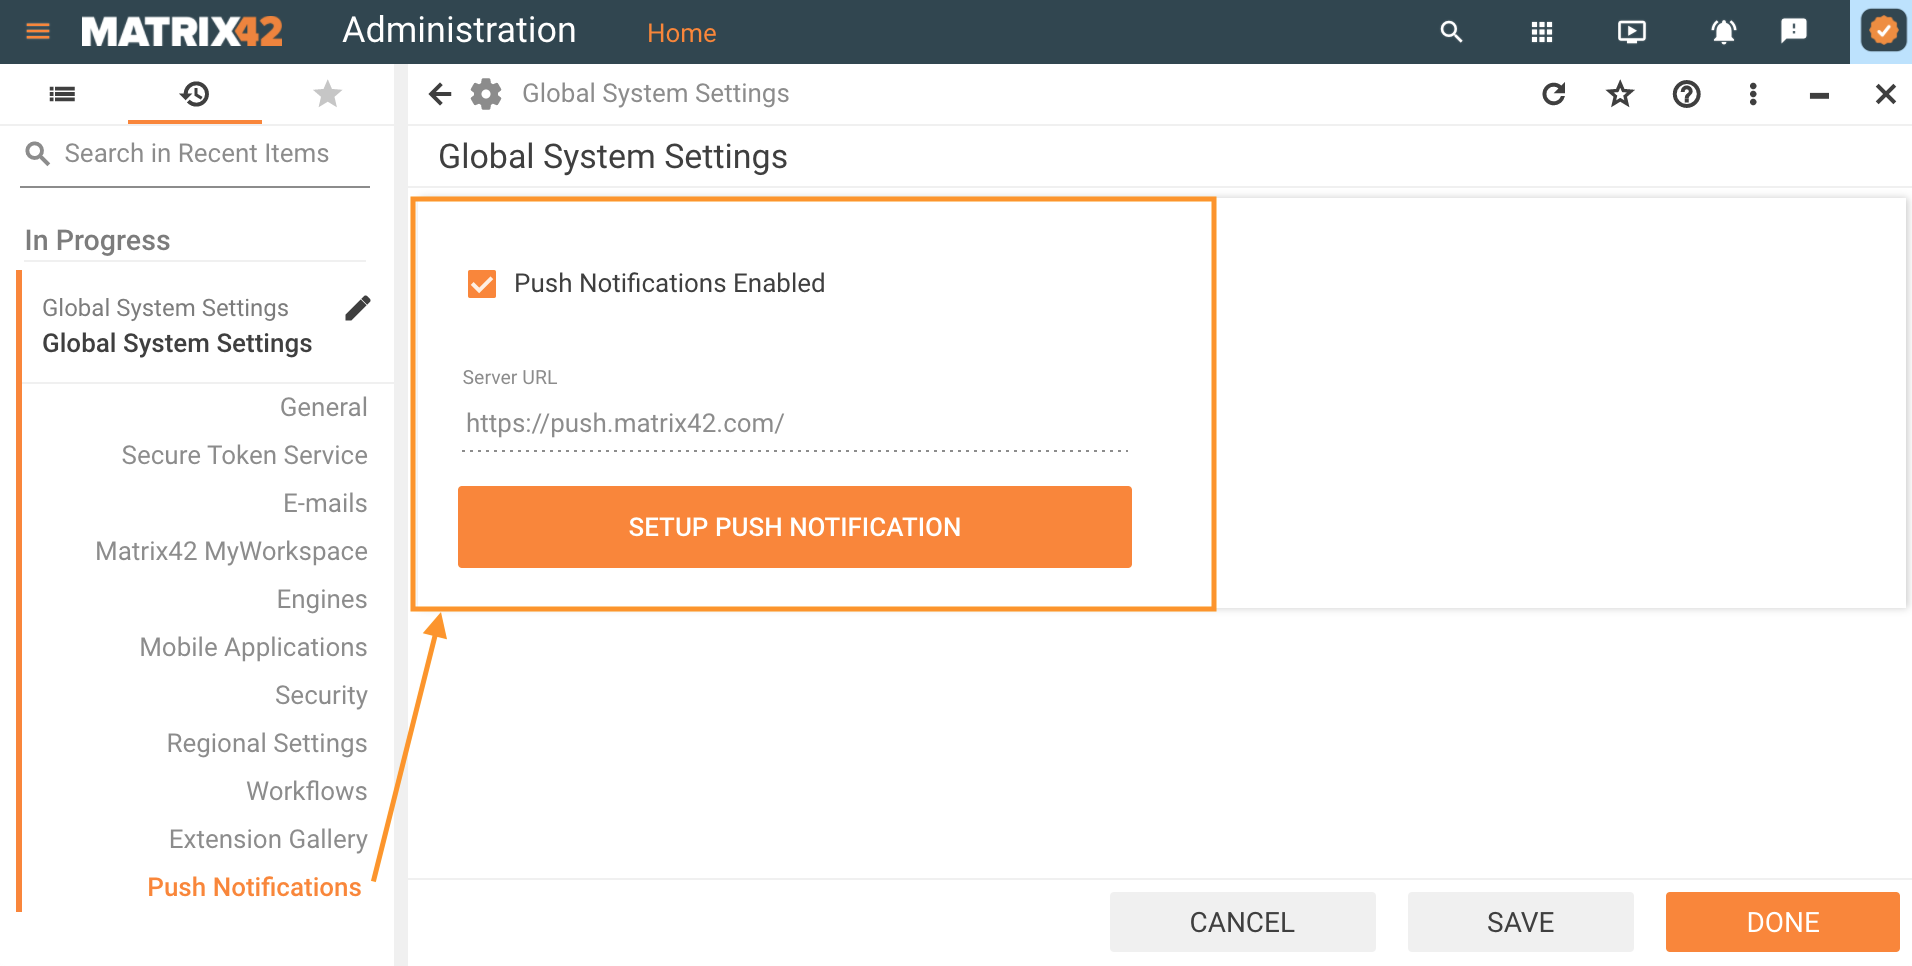
Push Notifications configuration example in the Global System Settings of the Administration application
Push Notifications settings in the Administration application enable push notifications both for the browser and mobile devices.
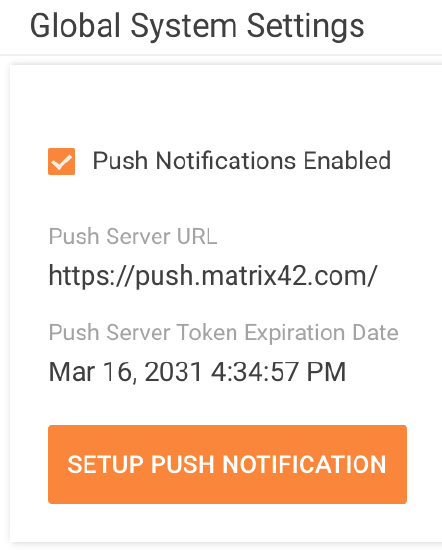
The registered token will be displayed as follows:
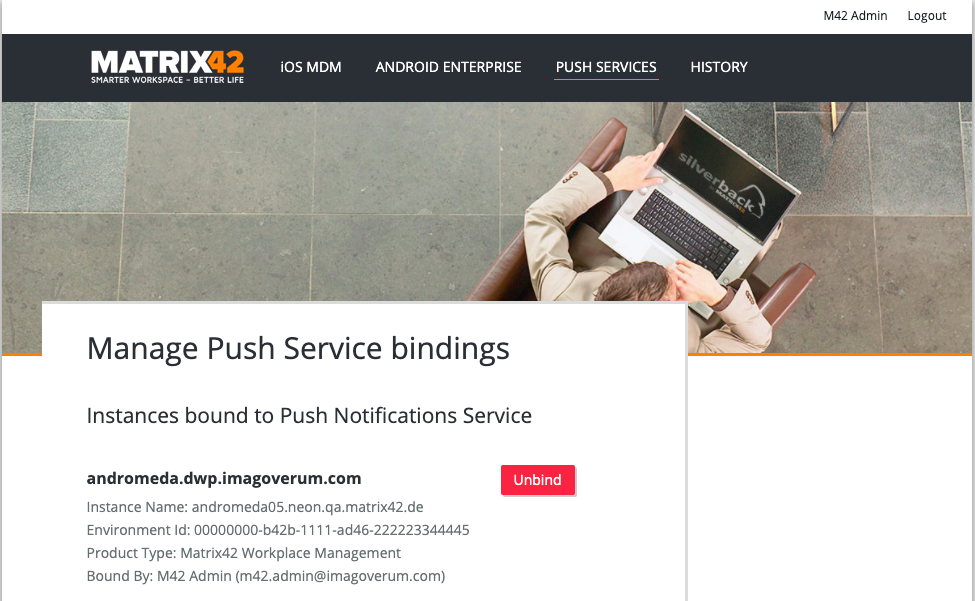
Later on, you can unbind the registered for the Push Notifications Services environment on the Matrix42 Mobile Portal:
Person profile
Push Notification Settings are applied for mobile and browser notifications. Employees define which push notifications they would like to receive in their personal Profile settings:
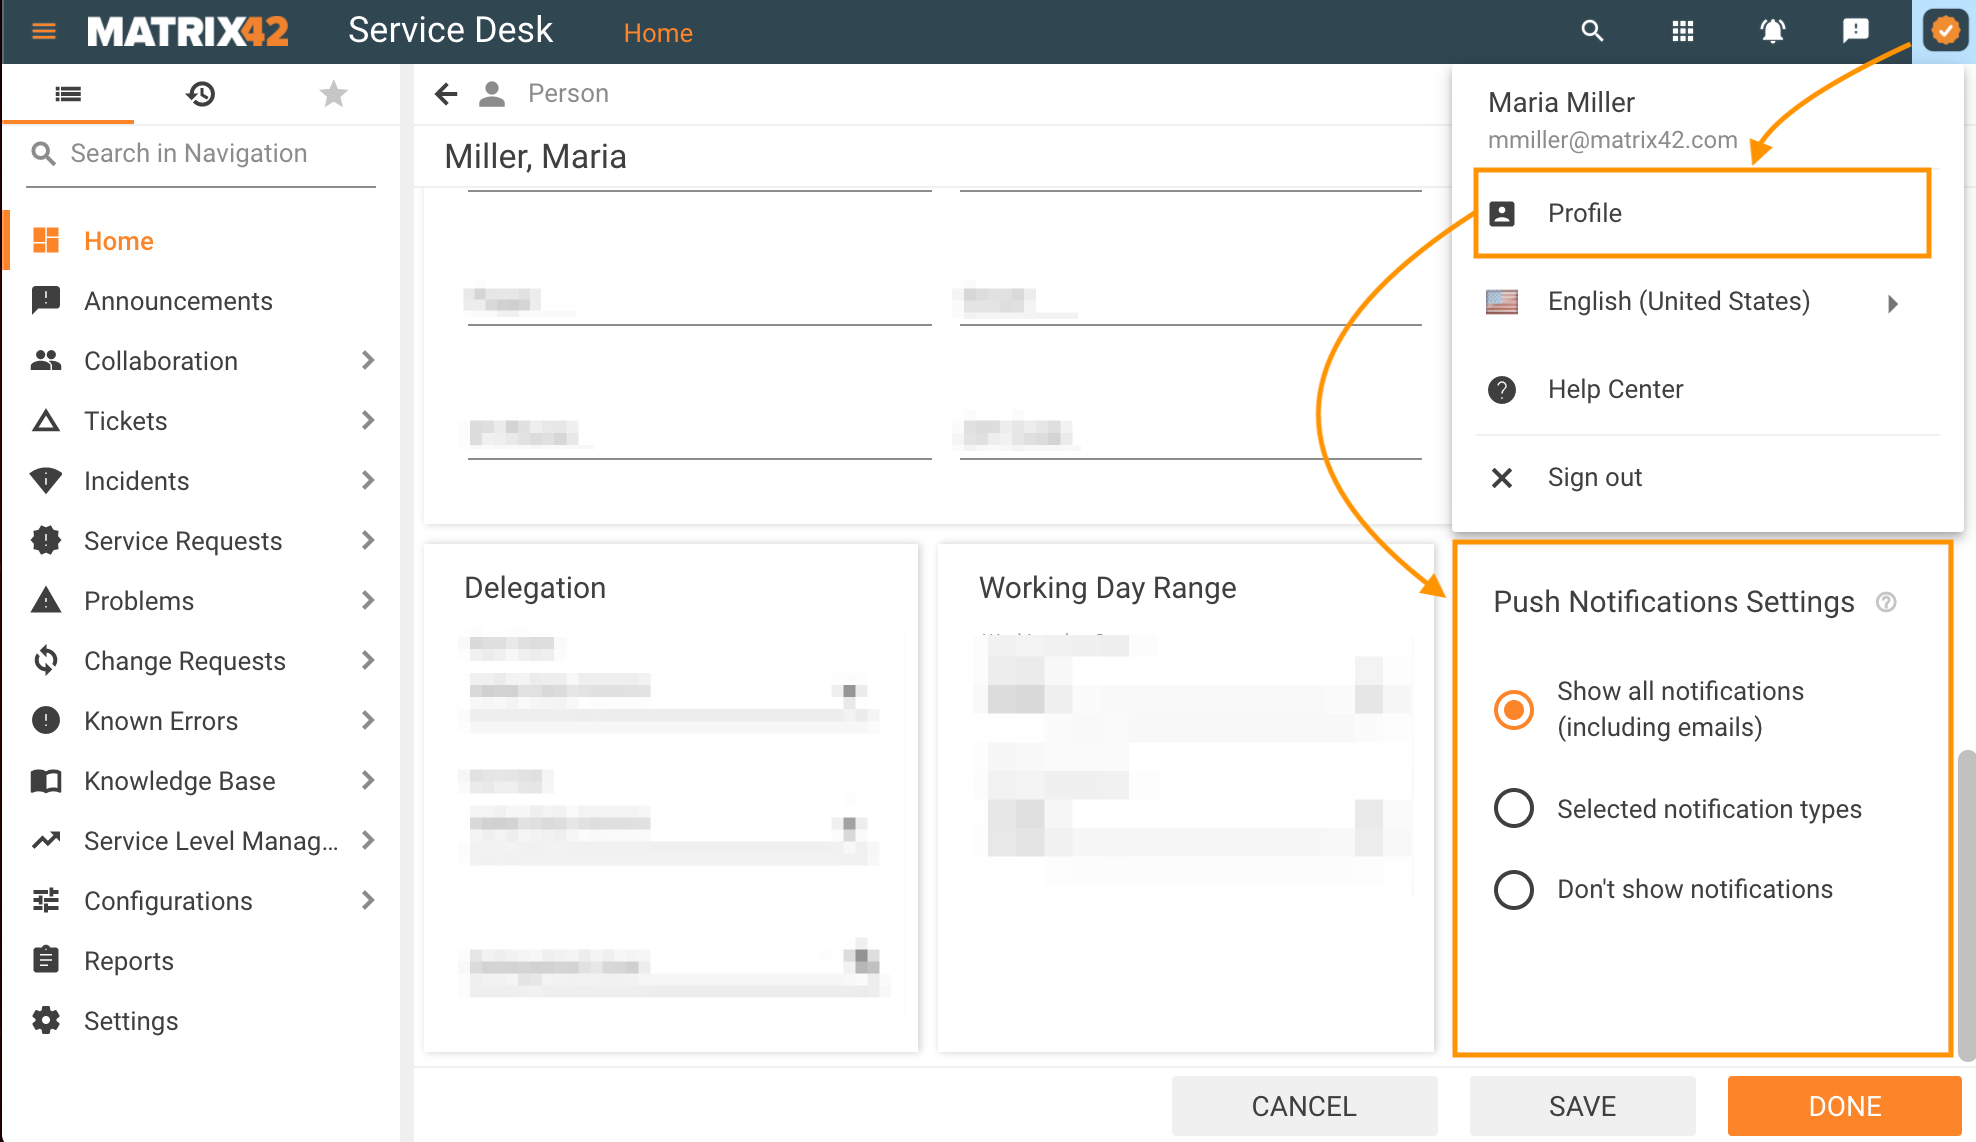
Person Profile: Push Notifications Settings example
Push Notification Settings are available if the Administrator has enabled Push Notifications in Administration application.
Push Notification Settings options:
- Show all notifications (including emails): default option. This option also enables Notification Center in the browser application;
- Selected notification types: choose from the list of available options which types of messages you would like to receive. This option also enables Notification Center in the browser application;
- Don't show notifications: the person will not receive any push notifications. Notification Center in the browser application is not available;
Selected notification types option allows you to see the list of all notification types and choose which of them you would like to receive:
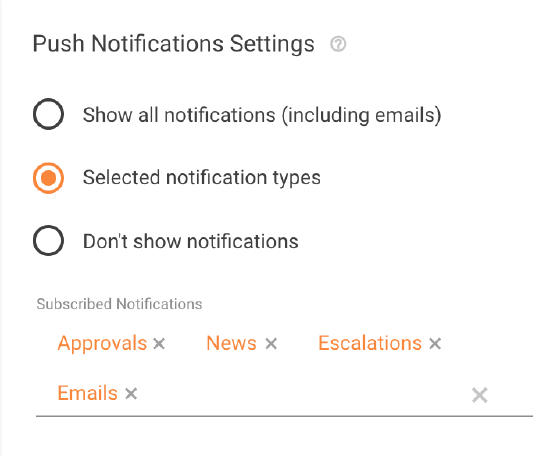
Selected notification types option example
Browser Settings
The last step to enable push notifications is to allow them in the browser you use:
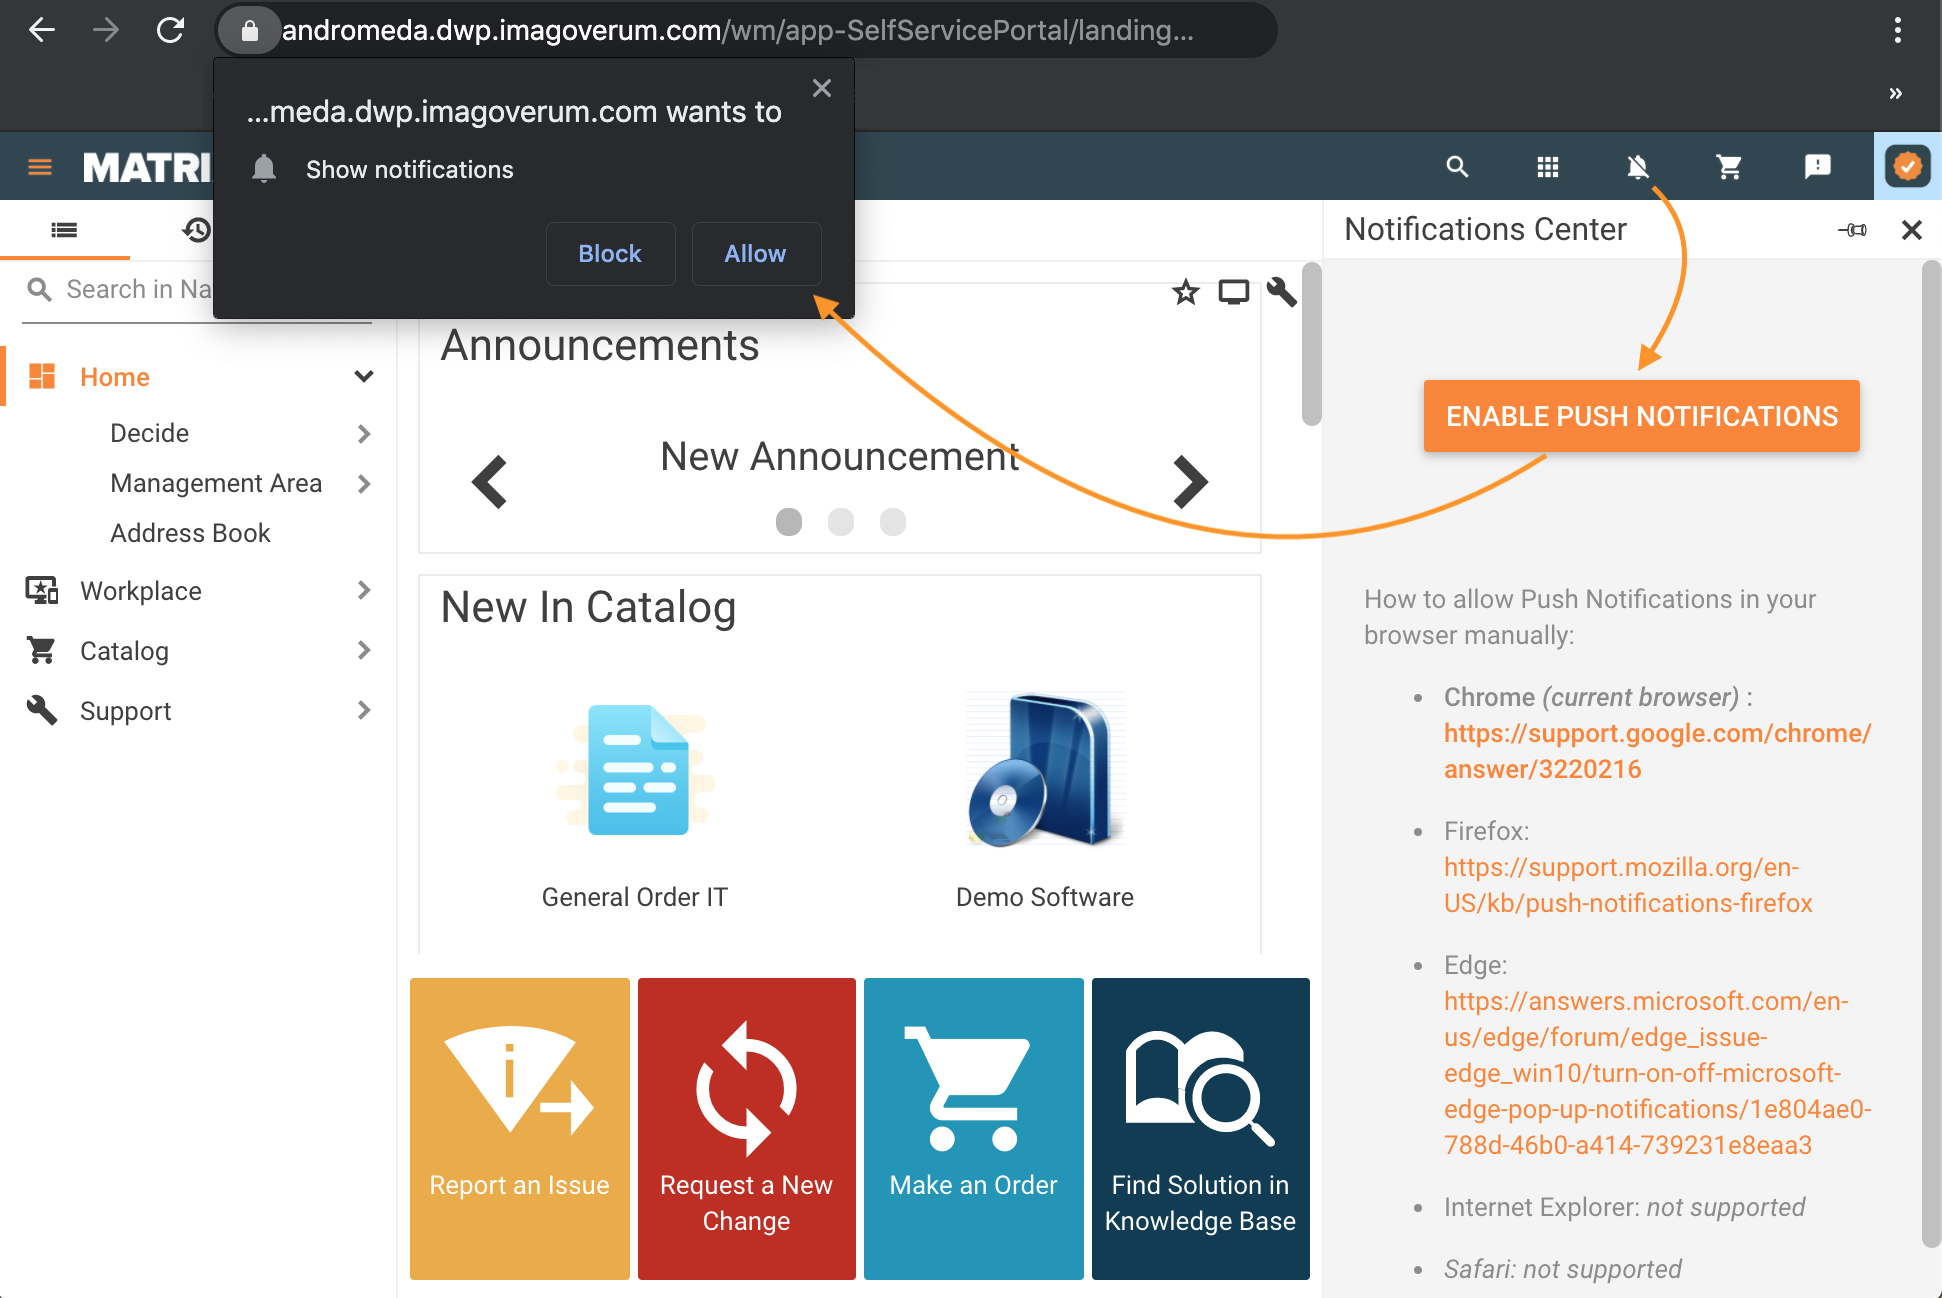
To disable Push Notifications change your profile settings.
Push notifications are supported in the following browsers (including links for manual browser push notification settings):
-
Firefox (https://support.mozilla.org/en-US/kb...ations-firefox)
-
Edge (https://answers.microsoft.com/en-us/...4-739231e8eaa3)
-
Internet Explorer: not supported
-
Safari: not supported
Notification Center
The Notification Center has 2 modes:
 - push notifications are disabled. Click on the icon, enable push notifications, and allow your browser to send notifications. If the "Show notifications" message is not shown, check the browser push notification settings and adjust them accordingly. The system also
- Highlights your current browser
- Informs you about the supported browser
- Suggests links for manual adjustments for the push notifications for supported browsers.
 - push notifications are enabled. You will receive notifications according to your profile settings. Additionally, the badge on the icon shows how many new messages you have.
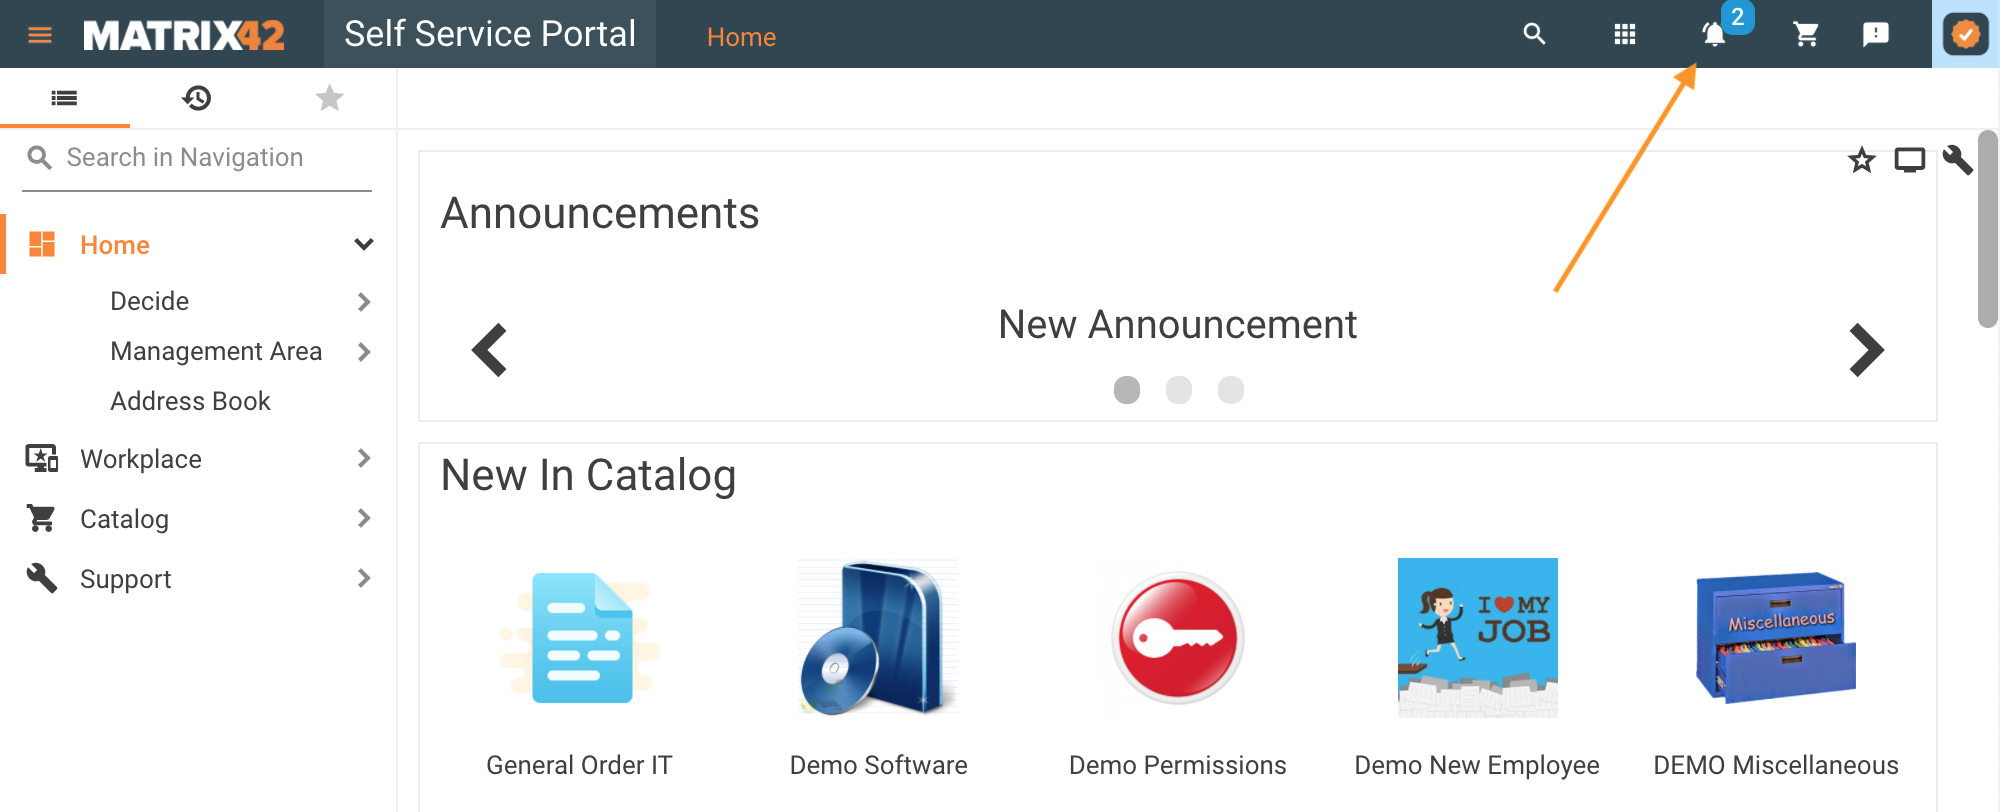
Notification Center with 2 new messages received
Click on the Notification Center icon to see the messages:
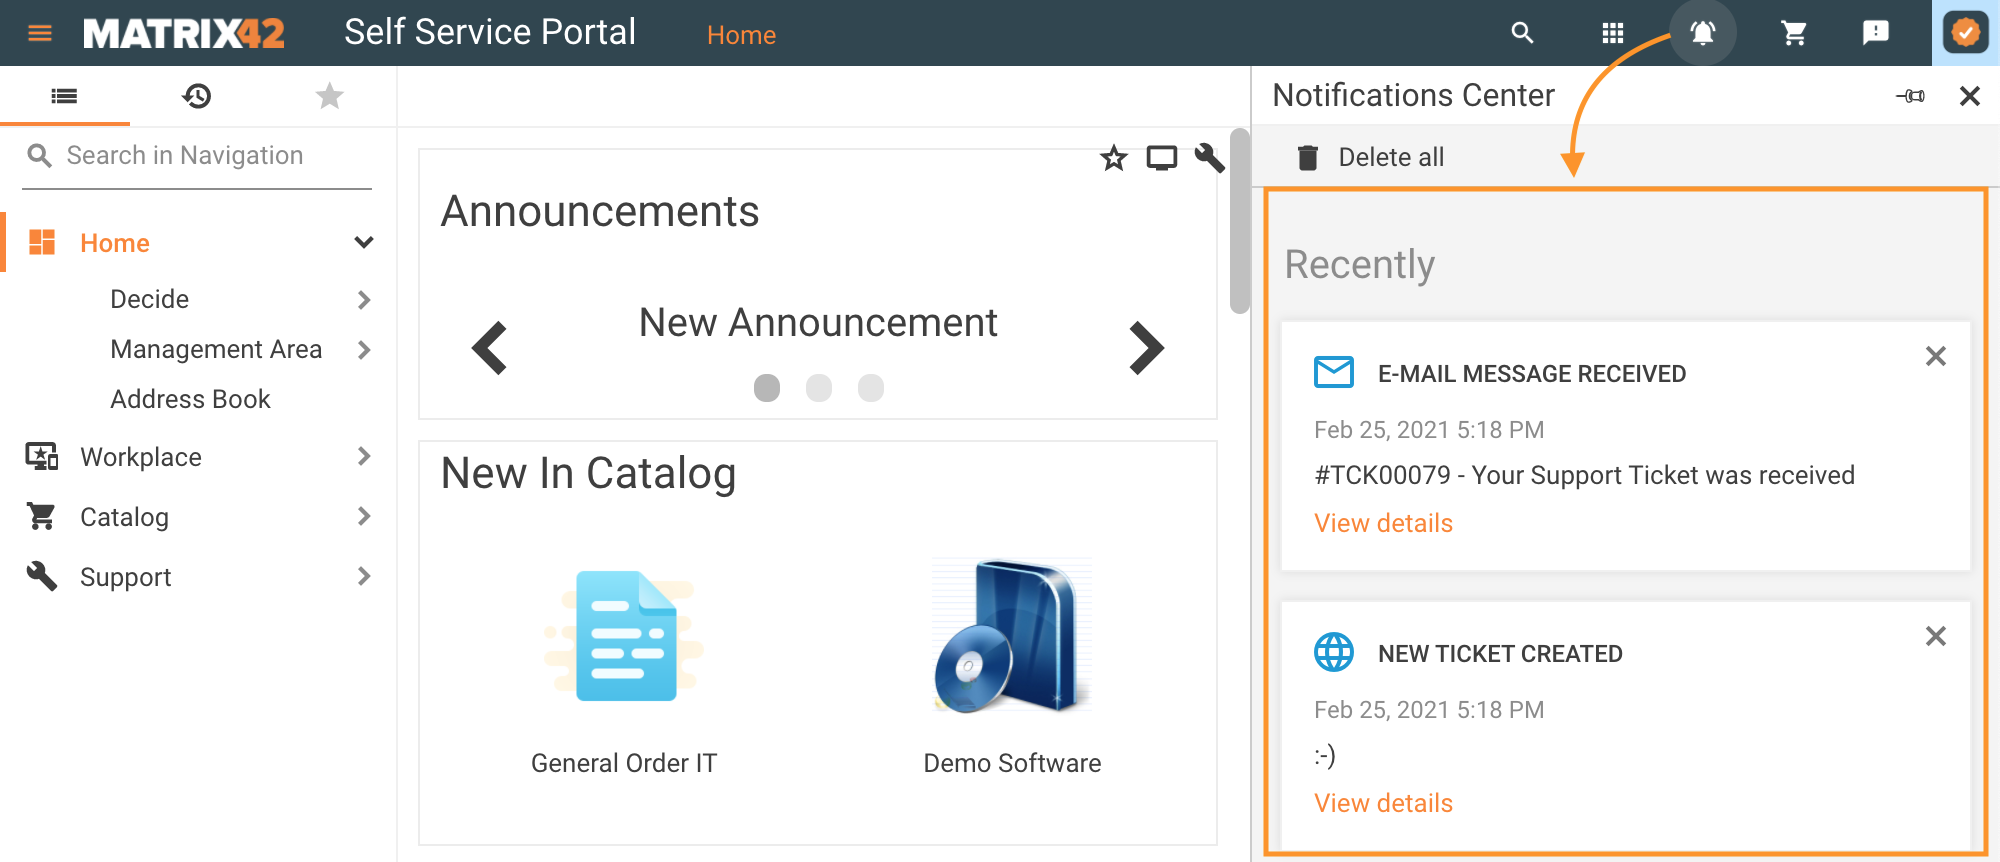
All messages are ordered by time, starting from the most recent. Other messages are grouped and labeled as 1 hour ago, 2 hours ago, etc.
Other options of the Notifications Center:
 icon pins the Notifications Center as a sidebar of the application so that it is always open;
 closes the Notifications Center sidebar
Push notification structure
Each push notification message has a standard structure and consists of the following elements:
- Colored icon
- Title
- Date and time
- Body of the message
- Link
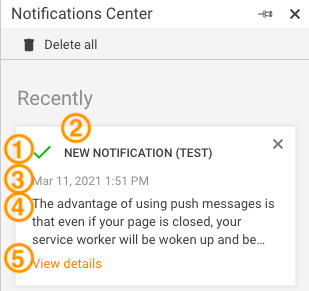
The look&feel of some elements can be adjusted as described in this chapter, but the structure is the same for all types of messages.
Managing push notifications
Notifications Center allows you to view the messages and manage them as follows:
 icon on the notification closes the message. Once closed, the message is no longer available, as the notifications are not stored in the application database.
 Delete all action clears all messages from the Notifications Center. The notifications will no longer be available and cannot be restored after you run this action.
Push notifications storage
Browser push notifications are not stored in the application database and when they are closed or deleted from the Notifications Center they are no longer available, cannot be restored, or resend.
All notifications are received in real-time when the user is logged in to the ESMP application. The browser tab with the active application can be opened, closed, or even the browser can be closed and the user will still receive the notifications. Notifications can be received until the user session expires. Once logged in, the notifications are sent again according to the current browser and user profile settings.
Notifications are stored in the IndexedDB of your browser.
Notification types
Default types
By default, the system has 4 types of notifications, each marked with a specific icon, color, and template for the title and body of the message:
- Escalation
- Approval
- News
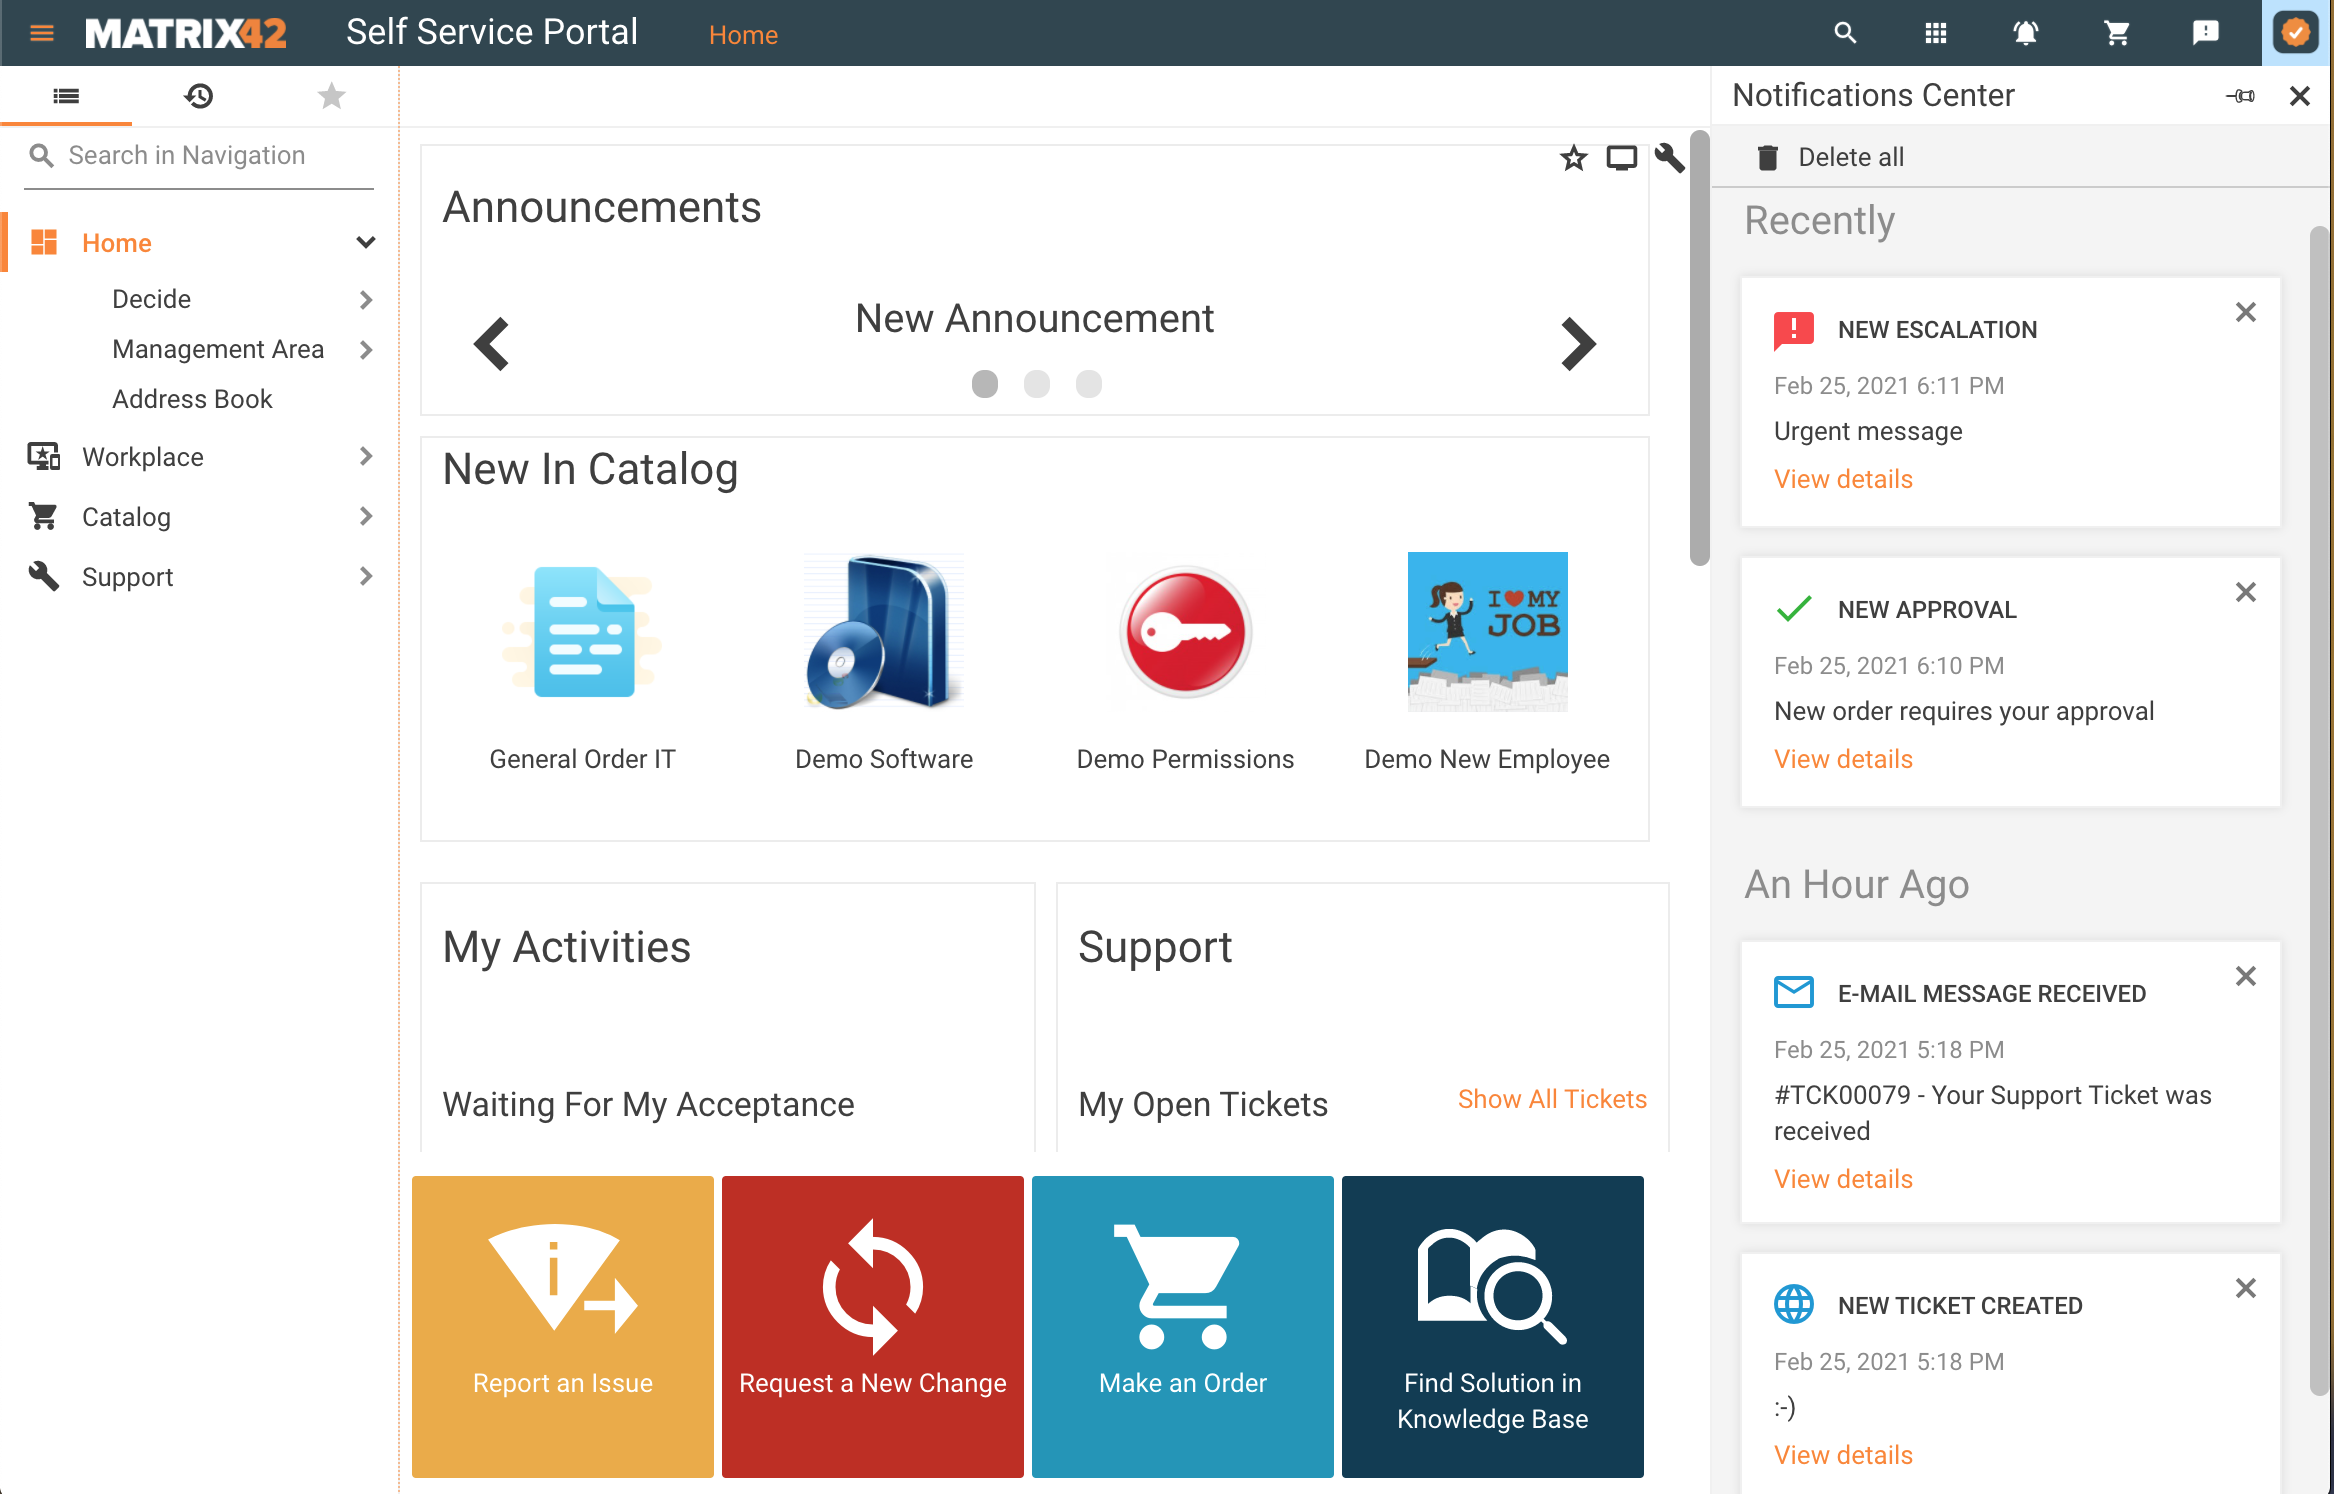
Default push notification types examples starting from the top: Escalation, Approval, Email, News
How to create a new notification type
All push notification types are stored in SPSPushNotificationEventPickupType. This pickup defines the content of the push notification.

SPSPushNotificationEventPickupType with default types of the push notifications
To create a new custom notification type click Add and fill out the following fields:
- Icon: an icon that will be shown for this type of messages in the Notification Center;
- Value: set the value in the 20000-49999 range for the new record;
- Display String: the name of the notification type;
- Color: the color of the selected icon;
- Internal Name: a technical name that can be used in the custom implementation for this notification type, for instance, in the Send Push Notification Workflow activity.
- Title: this text is shown in the push notification message title and is visible for the end-users in the Notification Center;
- Body: this text is shown in the push notification message body and is visible for the end-users in the Notification Center;
Internal name supports only Latin letters, numbers and characters dot(.), minus(-), underscore(_) and at sign(@)
Beware that using other characters might break the push notifications flow.
Notification Source
By default, there are several sources of Push Notifications.
Notifications for New Email received
Push Notification is sent when the new email for the user was created and saved to the database. This notification can be received if the user has subscribed to this notification type in the user Profile settings.
The notification body contains the subject of the e-mail. Click on the link to instantly view the e-mail details:
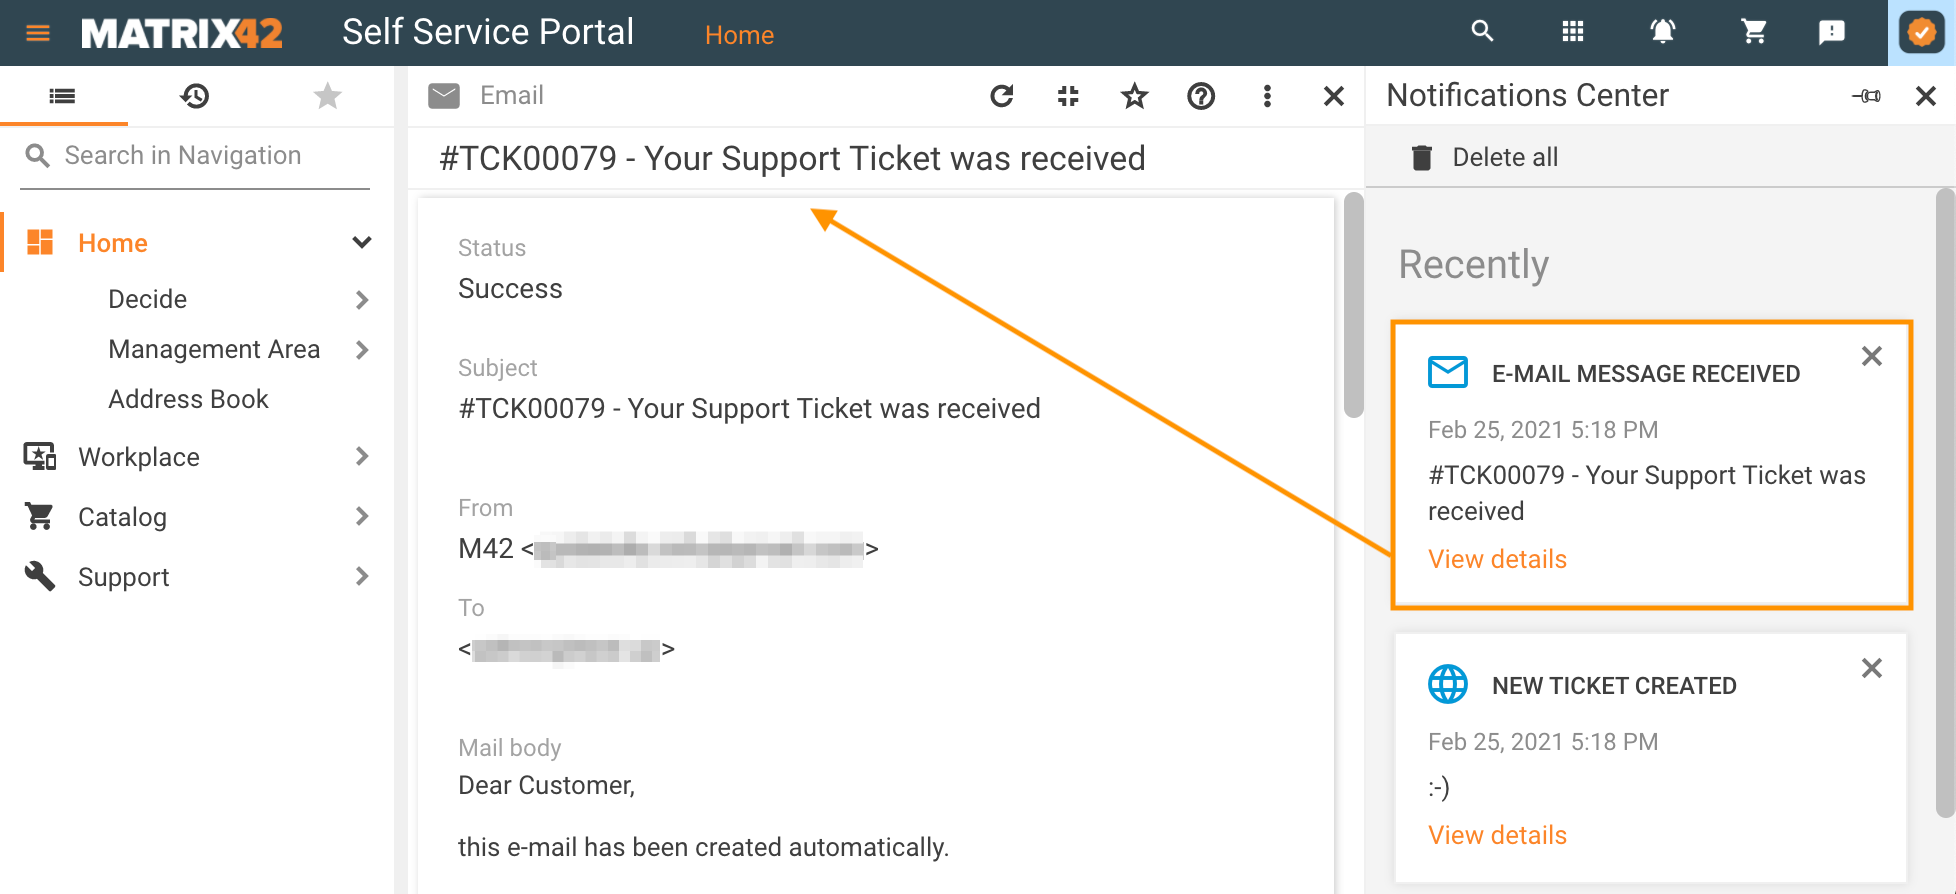
Push notifications about the new emails are sent only when the email is saved to the database. Nevertheless, when the user subscribes to receive the email notifications no extra email settings are required.
Adjustments of the e-mails mode in the Global System Settings of the Administration application are not required or related to the push notifications, but the sending of the e-mails must be enabled and configured.
Notifications from workflow
Notifications are sent when the Order Approval related workflow activities are adjusted accordingly, for instance, Send Push Notification property in the standard 1 Step Approval workflow:
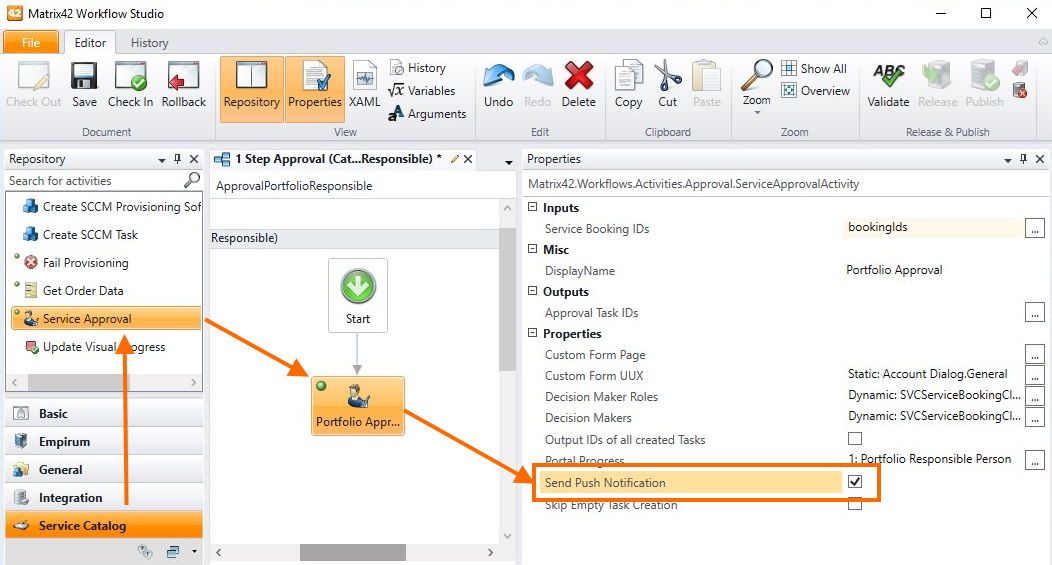
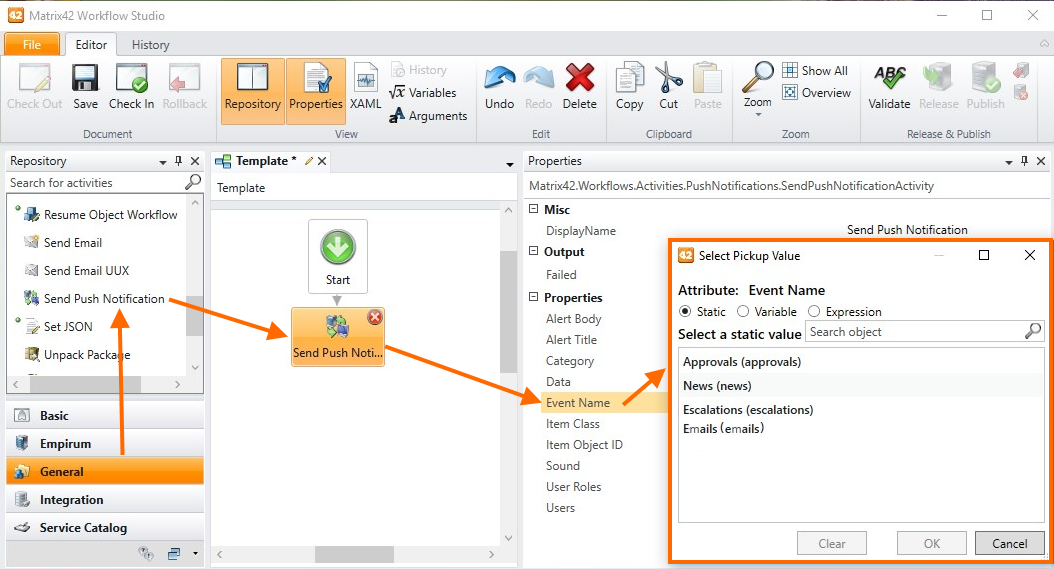
Additionally, push notifications can be configured for the news or other event types in the standard Send Push Notification workflow activity.
Fill out mandatory fields:
- Alert Body: the body of the push notification message;
- Alert Title: the title of the message;
- Event name: choose from the suggested options. The list of options stores all available notification types and is taken from the SPSPushNotificationEventPickupType pickup, see Internal Name field.
- Users: set users or user role.
Custom Notifications
To create a custom push notification:
- Create a new push notification type;
- Configure a Send Push Notification workflow activity in your workflow.
Troubleshooting
Ensure that the endpoints, described in the next articles are not blocked by any software/hardware:
https://support.apple.com/en-us/102266
https://firebase.google.com/docs/cloud-messaging/concept-options#messaging-ports-and-your-firewall