Installation and Configuration
To be able to use the third-party patch management, a WSUS Server and a „Software Update Point“ (SUP) must have been installed accordingly.
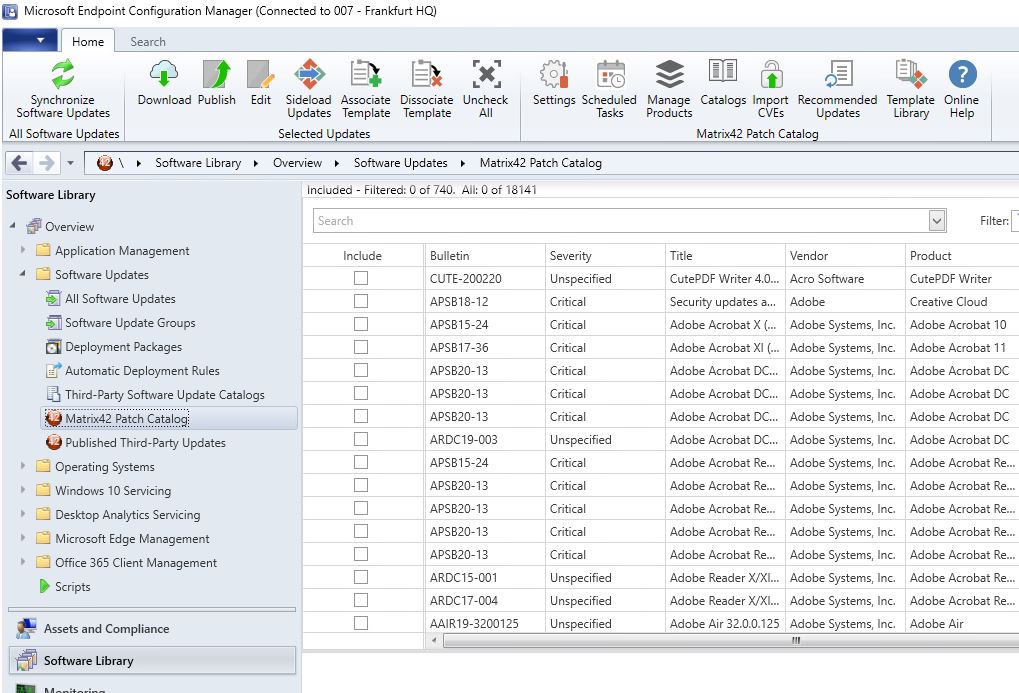
The following section describes installation and configuration of the Matrix42 3rd Party Patch Catalog for SCCM. The patch module allows the administrator to distribute third-party patches (e.g., by Adobe, Oracle, …) without time-consuming packaging. The Matrix42 3rd Party Patch Catalog for SCCM is integrated by executing the Setup routine.
A SQL Server database is now mandatory, and each user must have read/write permission to the database. You can use any version of SQL Server that is supported by Microsoft’s System Center Configuration Manager.
Access to the following URL is required in order to download the new Application catalog: https://application.ivanti.com
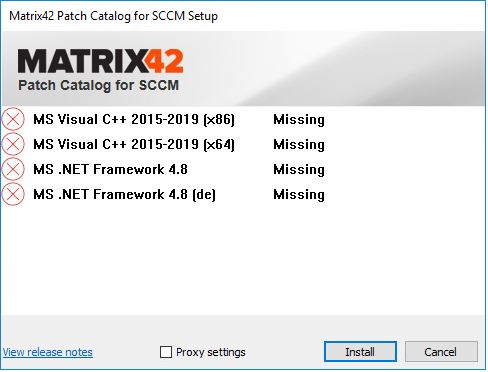
Setup checks all required components are available. Installation of the German components of the .NET Framework 4.8 is not mandatory; installation can be performed without these components.
You can use the 'strg+s' shortcut to bypass this check.
After the plug-in has been installed, you must restart the SCCM console to enable the plug-in.

Since it is necessary to install machine-related certificates during the process, you must open the SCCM console as administrator.
If an update to version 2020.1 is carried out. If the database is created and the connection is checked at the first start!
The following steps are performed when updating to patch for SCCM version 2020.1:
It is determined that no database has been created yet
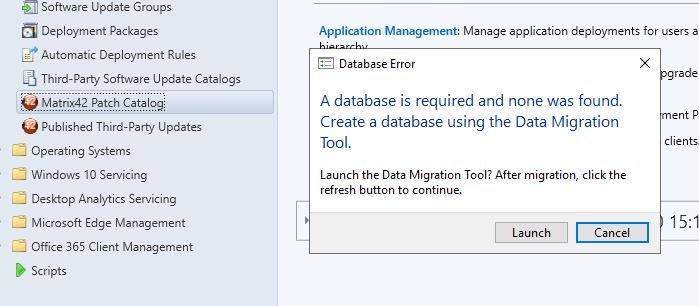
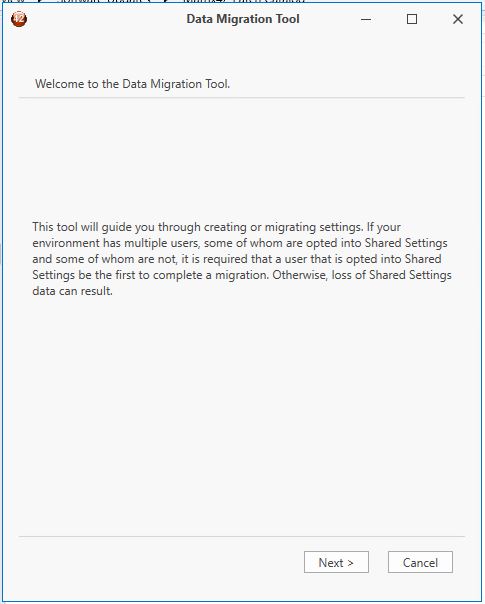
After clicking on "Launch" a new Migration Tool window appears
The next step asks for the SCCM Site Server
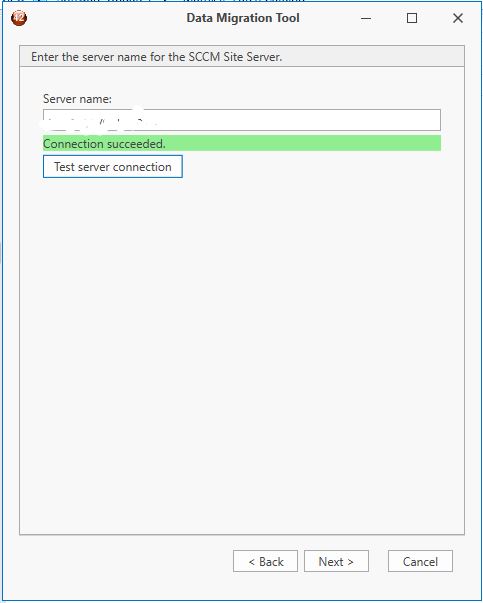
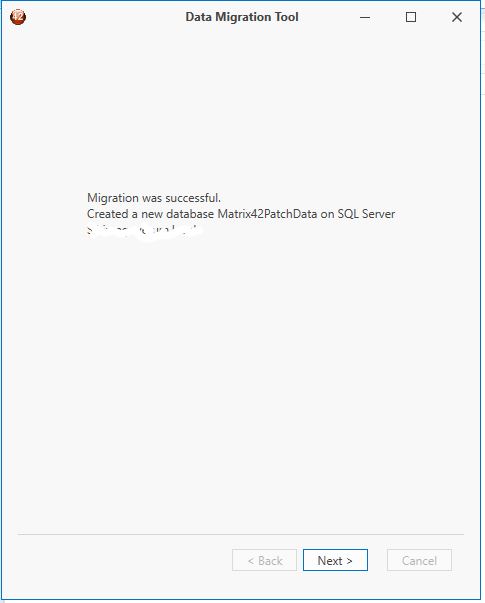
Afterwards the database server is connected
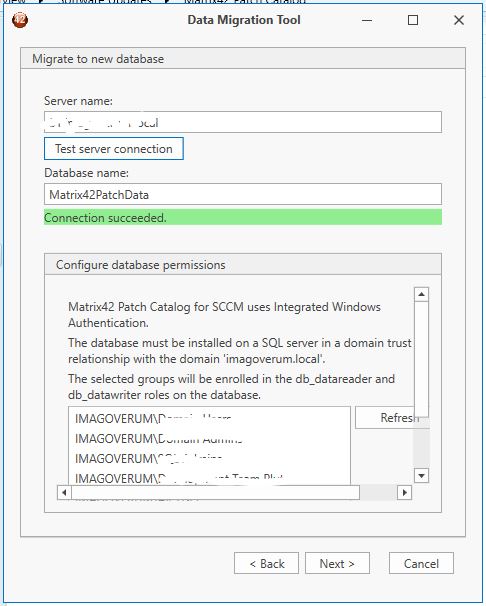
If all steps are completed successfully, the database is created and the migration is finished successfully.
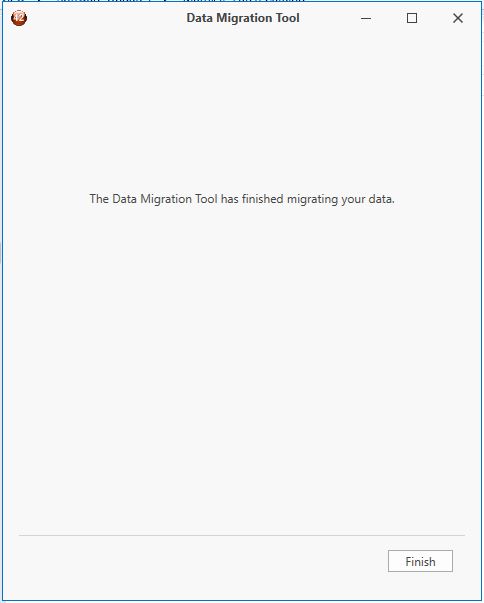
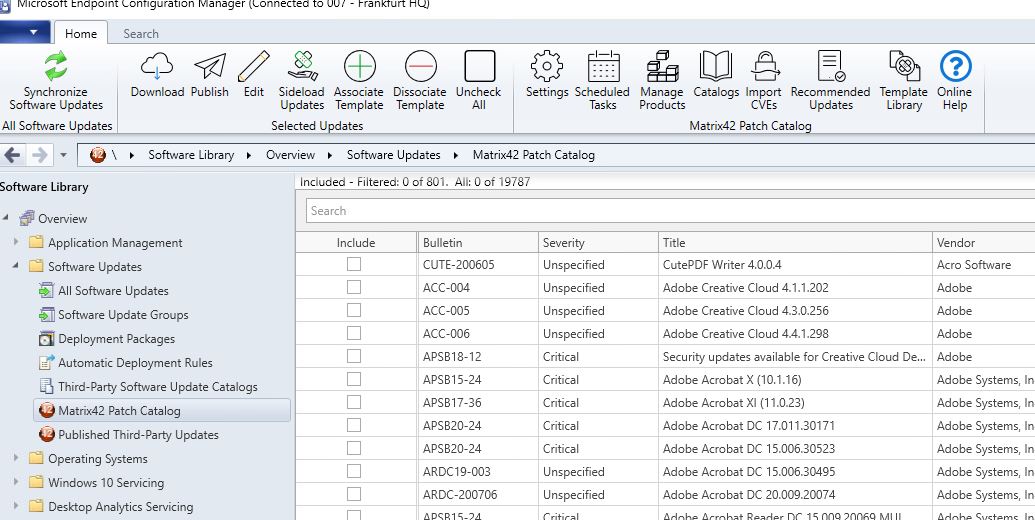
The patches are then loaded back into the console as usual and displayed.
If you click on one of the two new menu options, a dialog for initial plug-in configuration is displayed automatically; it explains the next steps.
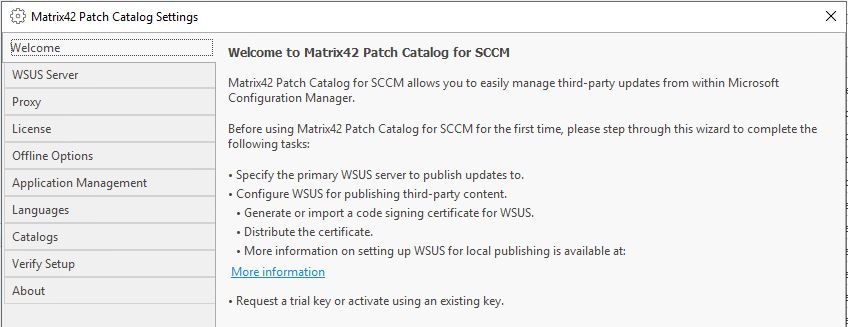
In a second step, the WSUS Server will be configured. Normally, port 8530 for HTTP and port 8531 for an encrypted HTTPS connectivity are used and you must specify the WSUS Server that has been defined in the SUP in SCCM.
To connect the WSUS Server via HTTPS (recommended), an SSL certificate must be generated for the WSUS Server; a detailed description of how to create such certificate can be found here.
In this dialog, you must specify the WSUS Server and import a code-signing certificate.
It is mandatory to generate a code-signing certificate for the M42 Patch Catalog for SCCM.
This certificate is used to sign the content imported through the plug-in in WSUS. The certificate can be generated as a "self-signed certificate" or based on your company's PKI infrastructure. The following steps describe how you can generate a code-signing certificate with a Microsoft CA:
- Create a text file (CS.INF) with the following content:
;————————— cs.inf —————————
[Version]
Signature=“$Windows NT$
[NewRequest]
Subject=“CN=Patch,OU=IT,O=Perfect,OU=Beer,L=Munich,S=Bavarian,C=DE“
KeySpec=1
KeyLength=2048
Exportable=TRUE
MachineKeySet=TRUE
SMIME=FALSE
PrivateKeyArchive=FALSE
UserProtected=FALSE
UseExistingKeySet=FALSE
ProviderName=Microsoft RSA SChannel Cryptographic Provider
ProviderType=12
RequestType=PKCS10
KeyUsage=0xa0
[EnhancedKeyUsageExtension]
OID=1.3.6.1.5.5.7.3.3 ; this is for Code Signing
;—————————————————————-
You may adjust "Subject" as required and at discretion, but all other content must be retained.
- Execute the following command in an administrative CMD console to generate a certificate request based on the INF file:
certreq.exe –new c:\temp\cs.inf c:\temp\cs.txt
- Now you must execute the following command on the CA in a normal CMD console to create the certificate. Please specify a valid template (Code-Signing) of the CA.
certreq.exe –submit –attrib „CertificateTemplate:MyDemoCodeSigning“ c:\temp\cs.txt c:\temp\cs.cer
- Now you must import the certificate on a client or the WSUS Server; the system assigns a private key for the certificate, which must be done in an administrative console:
certreq.exe –accept c:\temp\ca.cer
- Open an MMC and add the certificate snap-in. The certificate can be found in the computer's Personal Store. Use the context menu to export the certificate with a Private Key into a PFX file.
The certificate is now available and can be imported via the Import button.
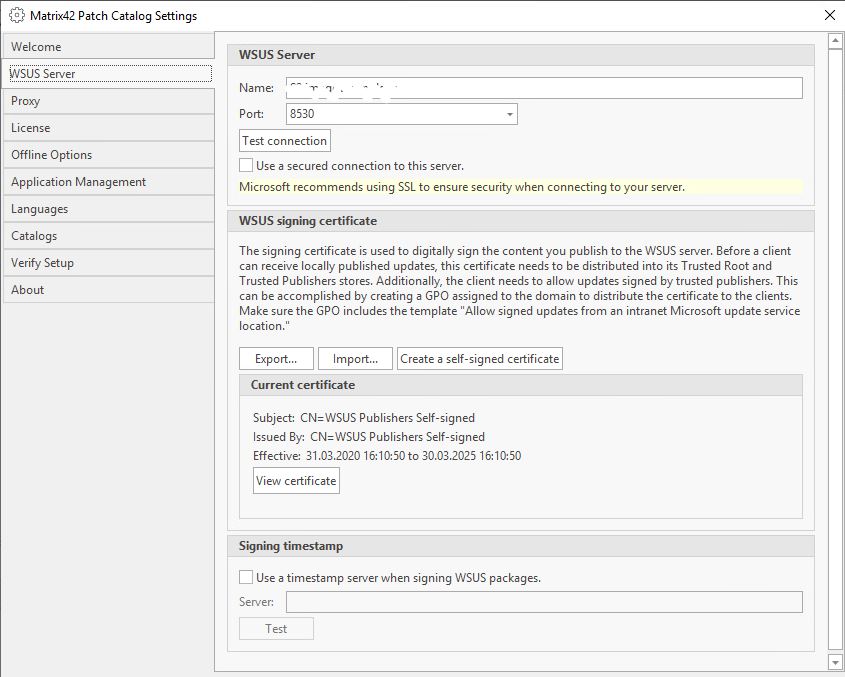
To import a certificate, the connection to the WSUS Server must be secured via an SSL certificate. Otherwise, only a self-signed certificate can be used.
This certificate must be specified on this machine under Trusted Root CA.
To be able to use a self-signed certificate, it must be distributed to all clients. This TechNet article describes a possibility of GPO-based distribution.
Another option is to use the "certutil" command-line tool. The command is as follows:
certutil.exe -addstore TrustedPublisher ca.cer

certutil.exe -addstore TrustedRoot ca.cer
The certificate must be installed on all WSUS servers, machines with SCCM console and all machines to be patched
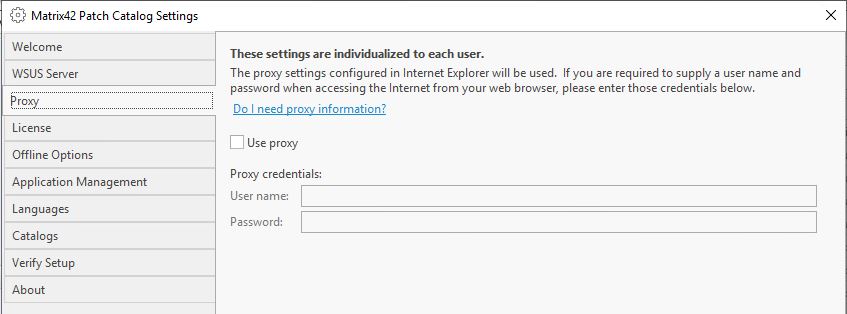
Once you have installed the certificate, you can define the proxy. Enable the "Use Proxy" option only if the proxy server expects authentication; otherwise, the plug-in will detect the required proxy server by itself.
You must enter a license key to be able to use the patch catalog; please contact Matrix42 to request such key.
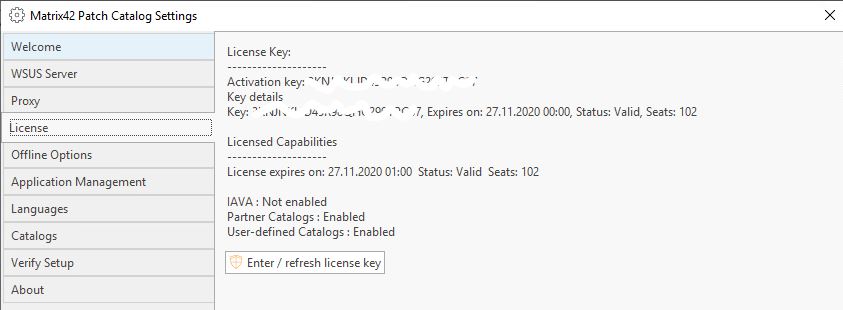
Three steps must be performed to enter this license key:
- Select an activation mode (product license, trial mode or import of a manual license).
- Enter the activation key.
- Select the activation method (online or manual/offline).
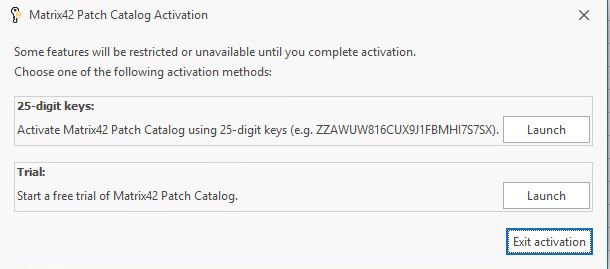
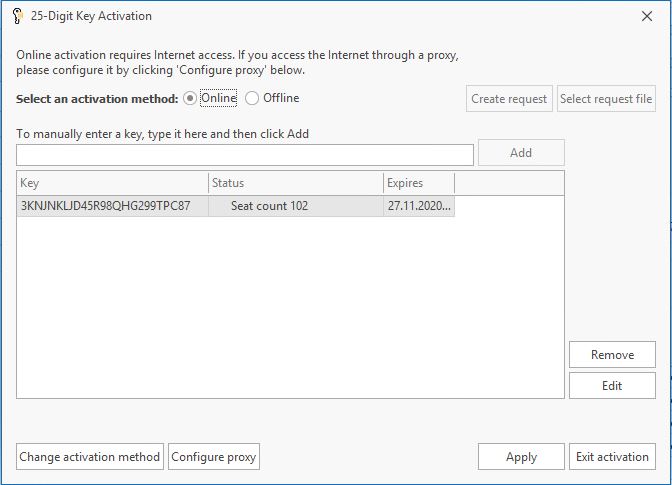
If you select the manual activation method under step 3, the "Activate Online now" button is changed into a "Create Request" button, and a "LicenseInfo.xml" file is created in the background and saved on the desktop. An additional window is displayed that provides instructions on how to activate the license.

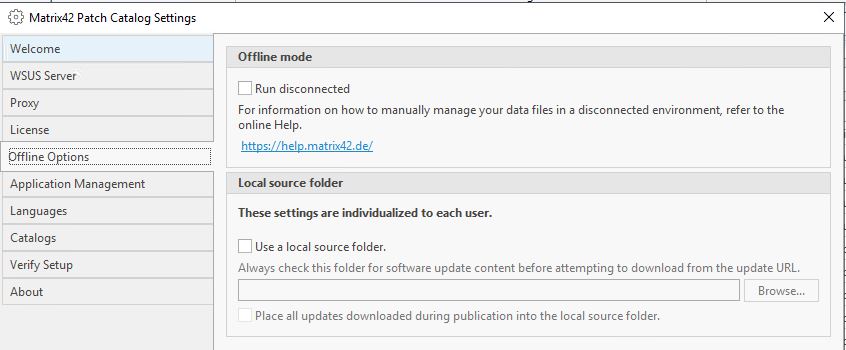
Once you have activated the license successfully, the offline option is configured accordingly. You must specify the local path to where the patches shall be downloaded and you can enable an offline mode.
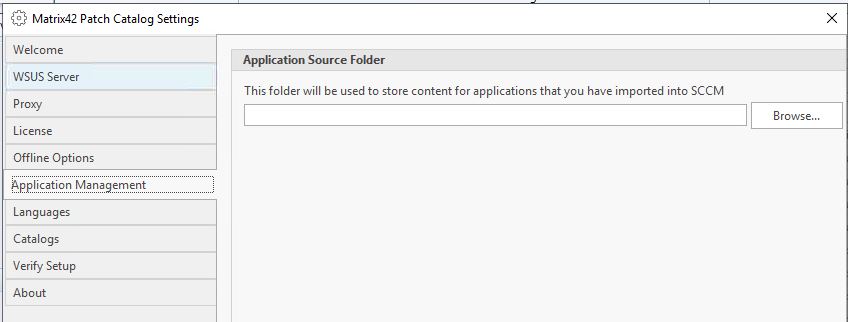
Starting with version 2020.1 there is a new point for the already imported applications in SCCM.
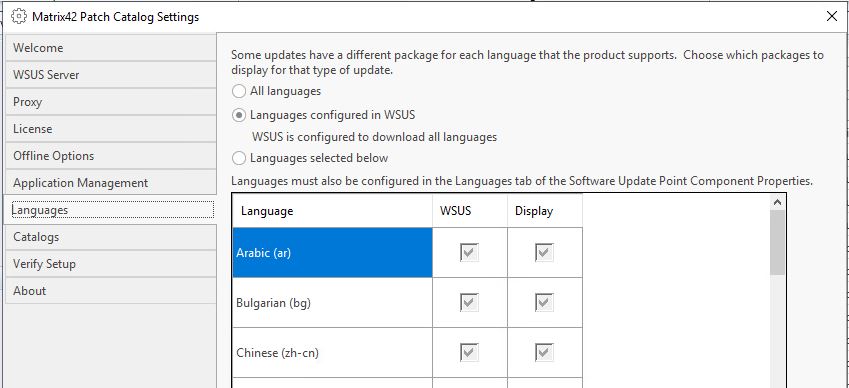
Now you can select the languages that you want to support in your company.
Starting with the latest version 2.3.837 of the Patch Catalog for SCCM, you have the option to integrate additional custom catalogs, in addition to the integrated Shavlik catalog.
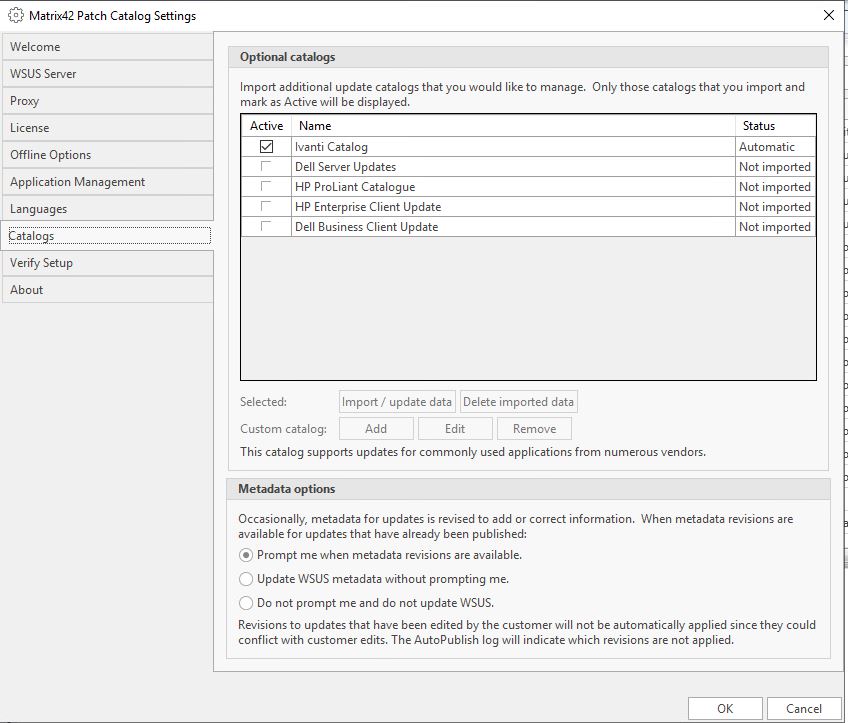
To do so, you must specify a Cab file, its URL path and the catalog name and enter a short description.

In the final step you can test and check the configuration and we urgently recommend that you do so, since both access to the WSUS Server and to the Internet are tested.
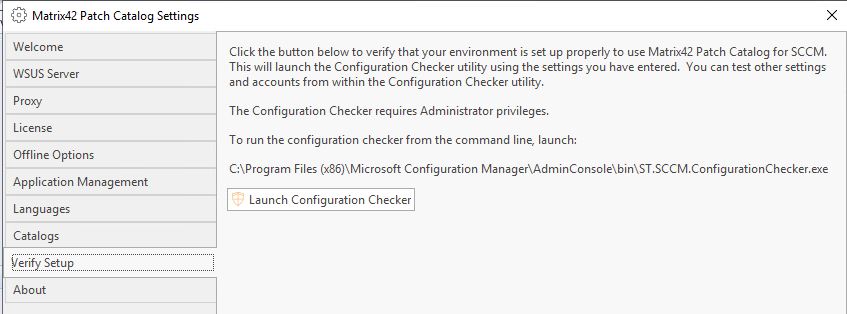
Detailed tests are performed and must be completed successfully. Most information in this dialog is set automatically, but can be modified, if required.
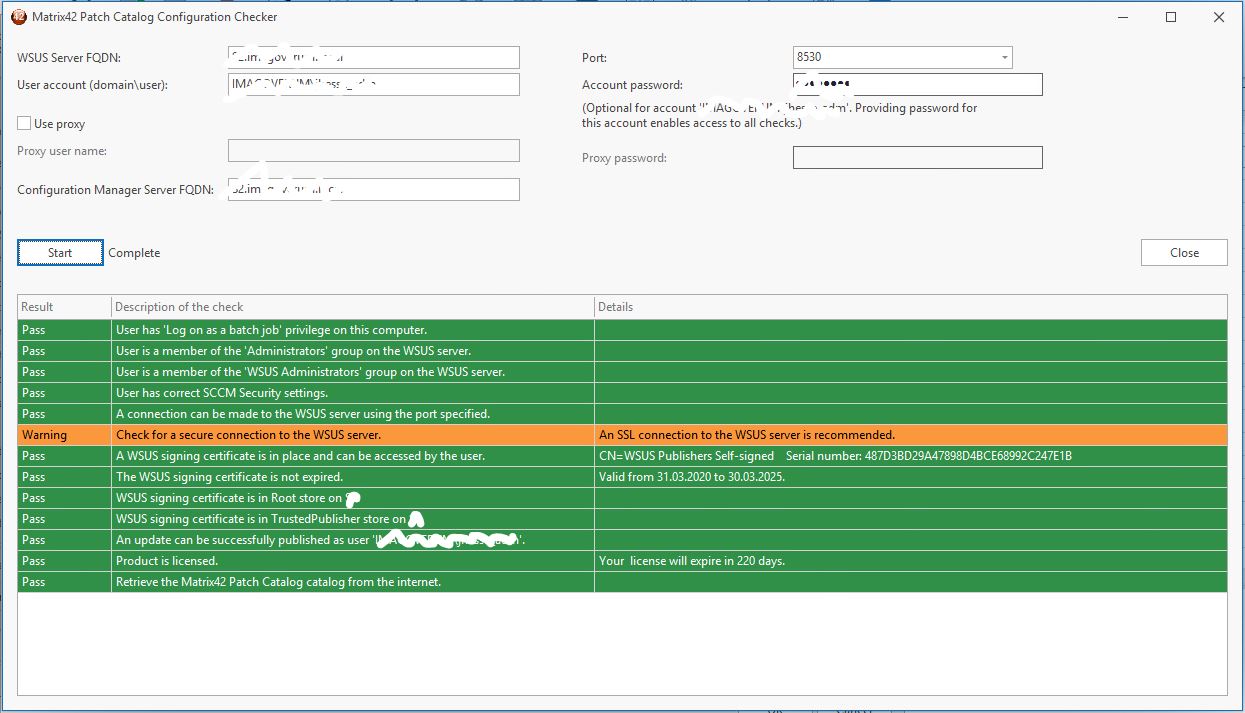
Tests include the following
- Possibility to connect to the WSUS Server, based on a FQDN and a port number
- Possibility to connect to the Protect Cloud, based on a user name and password
- Possibility to retrieve the Shavlik patch catalog
- User account has "log on as batch job" privilege
- User account is a member of the Administrators group and the WSUS Administrators group on the WSUS Server
- The WSUS signing certificate is saved in the trusted root and trusted publisher stores and is up-to-date (has not expired)
In case one of these checks fails, you must resolve the problem before you can use the M42 Patch Catalog.
Once the process has been completed successfully, you can click "Synchronize Software Updates" to download the patch catalog, and the information of the patch catalog will be available in the plug-in shortly thereafter.