Provision of operating system drivers (AddOn)
The following chapter first describes the concept of operating system driver integration. It then describes how to obtain the necessary information using the Matrix42 PreOS package HardwareInfo and how to integrate the information and drivers using the Matrix42 Driver Wizard.
Concept
Before we move on to deploying the operating system drivers, we would like to discuss how hardware detection works and how a driver package is assigned based on it.
The Matrix42 PreOS DriverIntegration package is responsible for integrating the operating system drivers. The package has the option to decide which driver archive or driver directory should be integrated into the operating system based on two variants.
- Direct specification of the driver archive or driver directory via the DriverIntegration.DriverArchiveFileName computer variable
- Automatic determination of the driver archive or driver directory via the Drivers.json control file based on the manufacturer name, model name and operating system type (Windows 7, Windows 10, Windows Server 2016 or Windows Server 2019)
The control file can be found on the Empirum server at:
\\%EmpirumServer%\Configurator$\Packages\Matrix42\OsPackages\Drivers\Drivers.json
The mapping takes place via the manufacturer name, the model name of a hardware and the assigned operating system source. Exactly this information is summarized in the Drivers.json file.
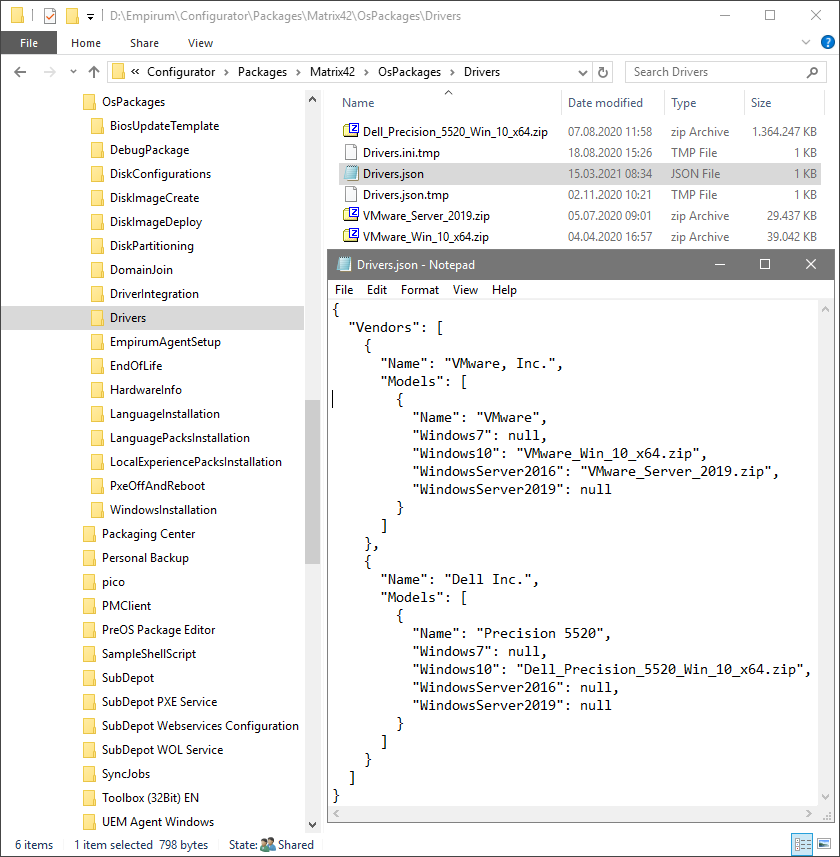
The names for manufacturer and model are not arbitrary, but are as they are read by WinPE at runtime through the Windows Management Instrumentation (WMI) classes (gwmi win32_computersystem). This information can also be obtained by executing the Matrix42 PreOS package HardwareInfo.
With the DriverIntegration PreOS package as of version 2.13, the model name in the Drivers.json file no longer has to completely match the model name read out by WMI. It is sufficient if the model name read out by WMI starts with the model name in the Drivers.json file.
Example:
The WMI model name is VMware7,1
The model name in the Drivers.json file is VMware7
Thus, the driver specified under the model name VMware7 is used, even if the name does not match completely.
If there are multiple model names in the Drivers.json file that match the WMI read model name, the model with the closest match in name is selected.
Example:
The WMI model name is VMware7,1
Model names in the Drivers.json are VMware7 and VMware
Thus, the driver specified under the model name VMware7 is used, since this has a greater correspondence with the model names read out.
Some manufacturers offer driver packages for several models. Whereby the model names differ only by different name endings. With this adaptation, the entries in the Drivers.json file can be combined. It is no longer necessary to create an entry for each individual model variant.
Determine the manufacturer and model
In order to be able to carry out the automated assignment of driver packages logically, you need - as already mentioned - the manufacturer and model designation as determined by the Windows Management Instrumentation.
For this purpose, we provide you with the Matrix42 PreOS package HardwareInfo, with which you can determine all the necessary information, so that you can then enter it into the control file with the help of the Matrix42 Driver Wizard.
- Assign a working WinPE boot configuration and the Matrix42 PreOS package HardwareInfo to the client.
- Activate the client (software and PXE activation).
- Then start the client via PXE Boot.
- After successful execution of the package, you will find a file in the form "debug_drivers_<client>.<domain>.json" in the directory (\\%EmpirumServer%\EmpInst$\Wizard\OS\Auto\WinPeStatus\<domain_ComputerName>).
- The content can now be imported into the Drivers.json control file using the Matrix42 Driver Wizard. The chapter Starting the Matrix42 Driver Assistant describes the wizard and the import of the information in more detail.
Matrix42 WinPE Driver Assistant
The Matrix42 Driver Wizard is a tool that can be used to customize the Drivers.json control file. The control file is used by the Matrix42 PreOS package DriverIntegration to determine the driver archive or driver directory to be integrated.
Prerequisites
- Matrix42 Client Management (v20.0 or higher).
- WinPE Support 1.8.7 or higher
- PreOS package DriverIntegration 2.15 or higher:
- To use the driver wizard, you need the PreOS package DriverIntegration 2.15 (or higher). From this version on, the JSON format created by the driver wizard is supported. Older versions of DriverIntegration do not support this JSON format.
Current functionality
The current functionality of the Matrix42 Driver Wizard for WinPE:
- Support for drivers for Windows 7, Windows 10, Windows Server 2016, Windows Server 2019 operating systems
- Validation of the entries in the Drivers.json control file
- Import of driver entries created by the HardwareInfo PreOS package
- Import of driver entries via the previous version of the Drivers.ini control file
- Automatic migration of the previously used Drivers.ini file, to the new Drivers.json file, if it does not exist yet
- Import driver files or driver directories
- Reference to already imported driver files or driver directories via the import
- Manually adjust the control file
- Add, delete and customize vendor entries
- Add, delete and adjust model entries
- Customize driver references
Restrictions
The following restrictions apply when using the Matrix42 Driver Wizard for WinPE:
- Currently, the driver wizard can only be used on the Empirum master server.
- The created control file is only compatible with DriverIntegration package version 2.15 or higher.
Starting the Matrix42 Driver Assistant
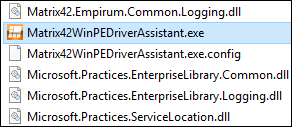
- To start the Matrix42 Driver Assistant, the Matrix42WinPEDriverAssistant.exe application must be started in the .\Empirum\AddOns\WinPEDriverAssistant directory.
Make sure that the user who starts the wizard has sufficient permissions to open, edit, recreate and delete the Drivers.json file on the Empirum share. He should also have the permissions to copy files and directories there.
Creating a Drivers.json file at first startup
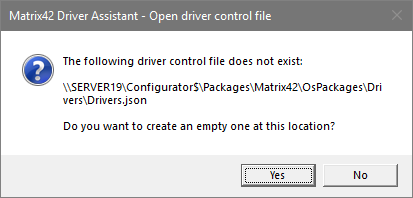
- The Matrix42 Driver Wizard automatically tries to open the driver control file Drivers.json on the Empirum share. If this is not yet available, you will be offered to create an empty driver control file by confirming the following message with Yes.
If a driver control file has already been created manually, this message is not displayed and the Matrix42 Driver Wizard opens directly and displays the contents of the file.
Migration of Drivers.ini configuration from previous versions
- If the driver integration was already implemented via the Drivers.ini file in a previous version, you can use the import function to transfer the entries of the Drivers.ini file to the new JSON format.
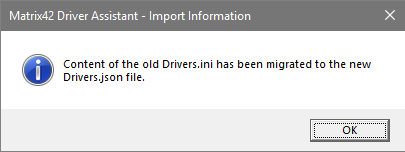
Migration of the previously used Drivers.ini file to the new Drivers.json file takes place automatically when the tool is opened if there was no Drivers.json file yet.
As soon as no DriverIntegration package with version lower than 2.15 is used anymore, the old Drivers.ini file can be safely removed from the server.
As of the DriverIntergration 2.15 package, the Drivers.json file is used to map drivers, but it is also able to manage the Drivers.ini file if the migration from INI to JSON has not yet taken place.
The chapter Import HardwareInfo package output files describes the general procedure for importing. However, in this case you do not import an output file of the HardwareInfo package, but the Drivers.ini file which is located on the Empirum server in the following directory:
.\Configurator$\Packages\Matrix42\OsPackages\Drivers\Drivers.ini
The driver file or directory information in the Drivers.ini file is then always automatically assigned to the Windows 10 operating system in the new JSON format.
The Matrix42 Driver Assistant interface
- After creating an empty driver control file, the assistant opens and displays the open file.
The driver control file Drivers.json and its file path are displayed as the top entry.

Since the driver control file does not yet contain any entries, no subordinate manufacture or model entries are displayed.
Import HardwareInfo package output files
The easiest and safest way to extend the driver control file is to import the output file of the Matrix42 PreOS package HardwareInfo, which automatically creates the HardwareInfo package in the directory .\EmpInst$\Wizard\OS\WinPeStatus\<Domain_ComputerName> . The chapter Determine the manufacturer and model describes in more detail how to create the output file using the HardwareInfo package.
This output file contains the information about the manufacturer and the model of the client used.
- Start the import via the Import button.
The file browser opens in the directory.\EmpInst$\Wizard\OS\WinPeStatuswith the help of which the output file of the HardwareInfo package can be opened.
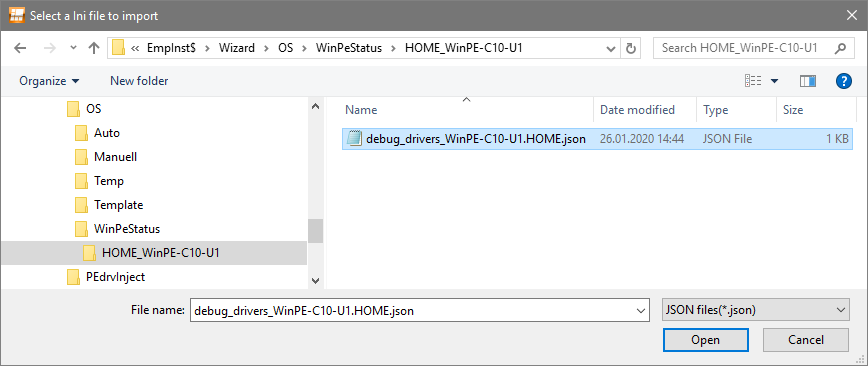
The output file of the HardwareInfo package is located in the directory of the client.
You can also use the search function of the file browser here and search for the client name. The output file of the HardwareInfo package always contains the client name and the domain of the client.
- After the output file has been selected, the import can be started via Open. The wizard then gives a feedback which manufacturer and which model was imported.
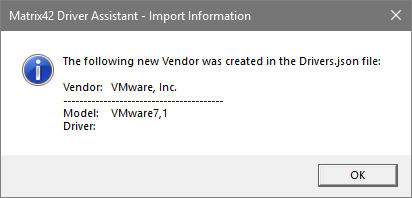
- After confirming with OK, the new entry is inserted into the control file.
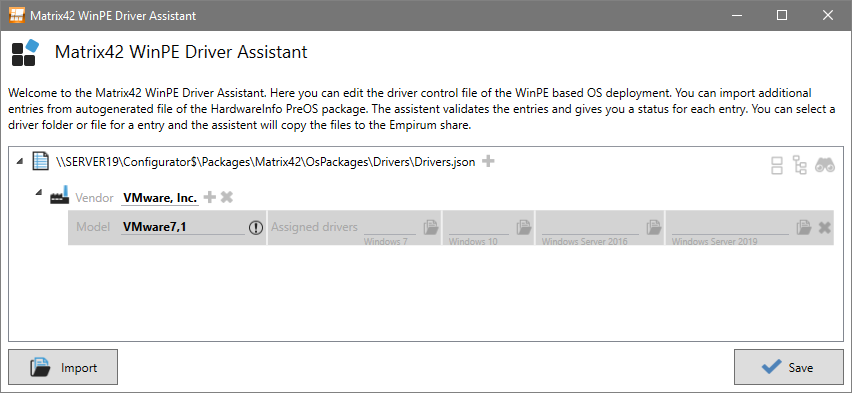
An entry was created for the detected manufacturer (vendor) VMware, Inc. A subordinate entry was created for the detected model VMware7.1.
There are currently no driver files or driver directories assigned to the model entry for the Windows 7, Windows 10, Windows Server 2016 and Windows Server 2019 operating systems. For this reason, the entry is displayed with a light gray background and marked with an exclamation mark . This indicates that the entry is not yet valid, because no driver has been specified for an operating system yet, or a specified driver does not exist on the Empirum share.
Conflict situations during import
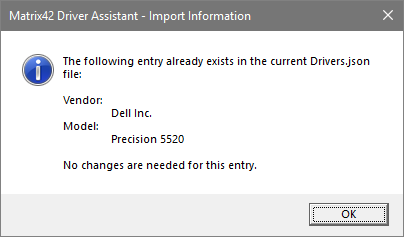
When importing output from a HardwareInfo package, it is possible that it tries to import models that are already existing in the driver control file.
If the model information is identical to existing information, the following message is displayed indicating that no changes are necessary.
However, if a model is imported that already exists and the driver specifications are different, the following message is displayed.
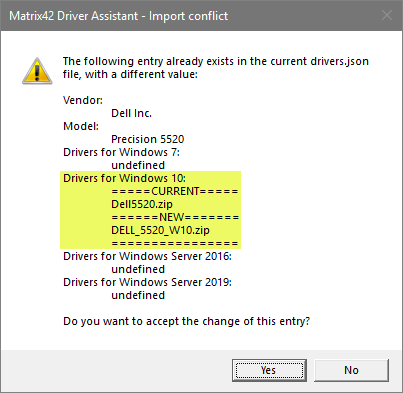
Here you must decide whether the existing driver specification is to be retained or whether the new specification is to be adopted. If Yes is selected, the changes are adopted. If you select No, the existing information is retained.
Driver specifications for the Windows 7, Windows Server 2016 and Windows Server 2019 operating systems always remain untouched during import. These driver specifications remain unchanged even when you import the new specifications.
Import driver file
Most manufacturers now offer so-called SCCM driver packages. These driver packages usually contain all drivers that have been released by the manufacturer for installation as a driver installation file.
This may or may not include all device drivers for the hardware model. Drivers that contain an additional software component are often not included in such packages. In this case, it is a good idea to distribute these as separate software packages on the client. As a rule, the scope of the drivers in the SCCM package can be found in the manufacturer's documentation; in most cases, the drivers that are not included are also explicitly listed.
Matrix42 WinPE based OS Deployment currently supports both unpacked driver directories and compressed archives of type .cab or .zip.
- To assign a driver to the model entry, you can enter a file or directory name directly in the field for the respective operating system. In that case, you must ensure that the corresponding file or directory exists in the directory of the Drivers.json file.
You can also click on the driver import button behind the respective operating system entry to select a driver file or driver directory that will then be copied to the Empirum Share. - In this case, the driver import button
 of the Windows 10 entry is selected to import a driver for Windows 10 to the model.
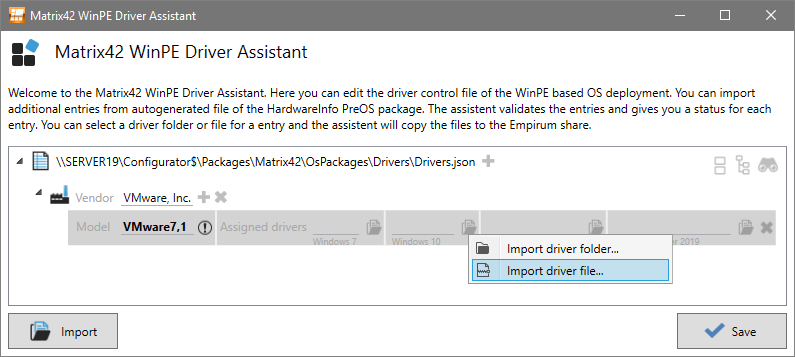
A context menu opens with the help of which you can decide whether a single driver file or a complete driver directory is to be imported. - In this case, a single Zip archive is to be imported, which is why the Import driver file... entry is selected.
The file browser opens with the help of which the driver archive can now be selected.
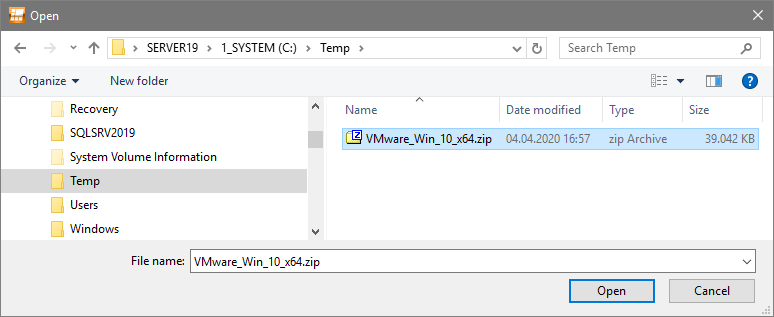
- If the selection is confirmed with Open, the selected driver file is copied to the Empirum share and the Assigned driver value of the Model entry is adjusted.

- The Save button can now be used to save the changes. The confirmation dialog opens.
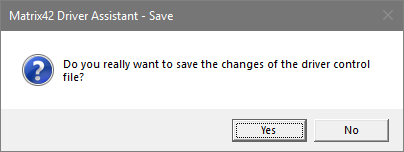
- If you confirm the message with Yes, the changes will be saved in the control file on the Empirum server.

- Confirmation of successful save appears, confirm with OK, this will take you back to the driver wizard view.
References to already imported driver files or directories
Using the import function, you can also create references to already imported driver files or driver directory.
To do this, simply select a file or directory from the Drivers directory when importing the driver file or directory. The driver wizard automatically detects that the file or directory to be imported comes from the Drivers directory.
In this case, the file or directory is not imported again. Only the correct path information is taken over into the driver entry.
The following note is displayed:
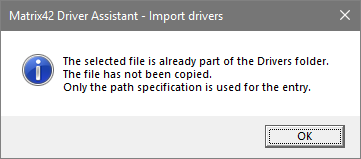
Expand manually
If there are no HardwareInfo package outputs, the driver control file can also be expanded manually. For this the manufacturer name and the model name of a computer are necessary.
New vendor entry
With the help of the  button behind the control file entry a new manufacturer entry can be created.

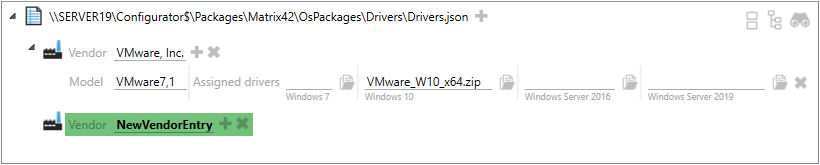
A new vendor entry with the default name NewVendorEntry is displayed under the structure. The vendor entry does not yet contain any model entries.
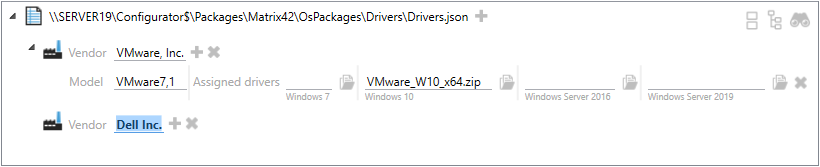
The manufacturer name can now be manually adjusted and extended with model entries. In this example, the manufacturer Dell Inc. is entered.
New model entry
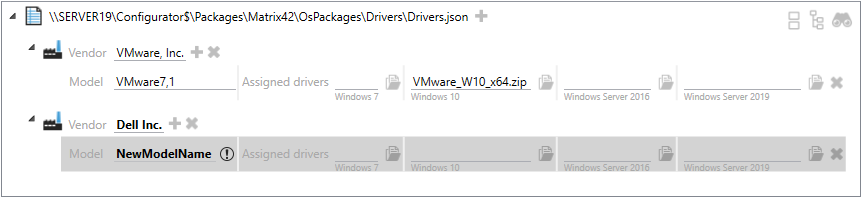
Using the button behind the manufacturer entry, a new model entry can be created for this manufacturer.

A new model entry with the default name NewModelName appears under the manufacturer.
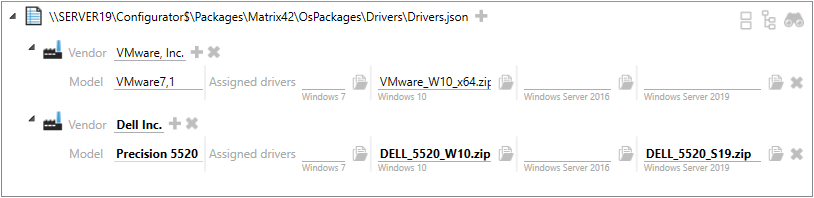
The model name can now be adjusted manually and a driver can be assigned to the entry or imported. In this case, the Precision 5520 model name was specified and the driver archive DELL_5520_W10.zip / DELL_5520_S19.zip was assigned to the Windows 10 and Windows Server 2019 operating systems.
Remove entries
If manufacturer (vendor) or model entries are no longer required, they can be removed via the  button behind the respective entry.
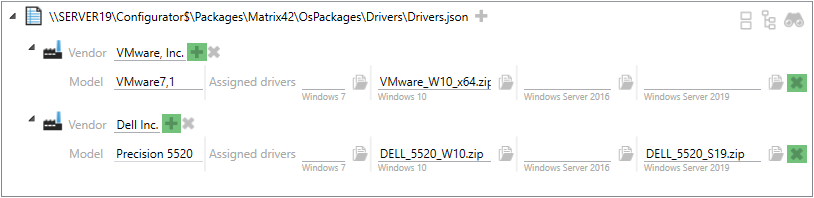
When removing model or manufacturer entries, the associated driver files or directories remain on the Empirum share. They are not deleted in the process.
Conflicts
When manually expanding the control file, conflicts may occur if manufacturer entries with the same name are created, or if model entries with the same name are created below a manufacturer. In these cases, the entries will have a dark gray background. In addition, a warning symbol  is displayed.
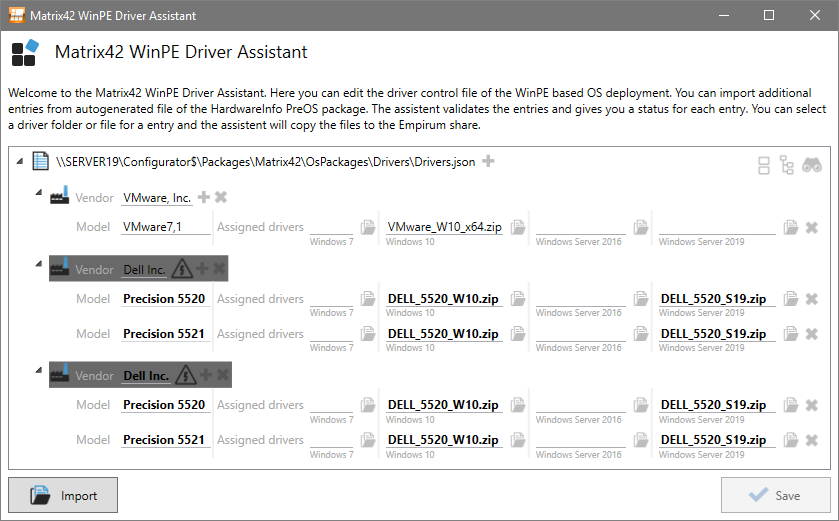
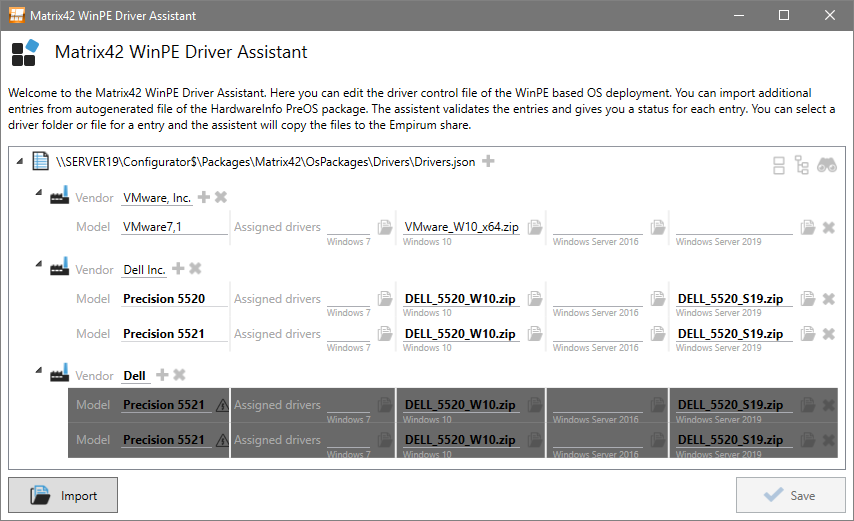
If there are conflicts in the control file, the file cannot be saved. The Save button is grayed out in these cases.
Filtering functions
If the control file is expanded over time and thus gets more and more entries for different manufacturers and models, the view quickly becomes confusing. In order to still be able to find the right entries quickly, a filter function has been provided that can be used to filter out specific manufacturer, model or driver entries.
The filtering function is initially deactivated and can be displayed via the icon  .
.

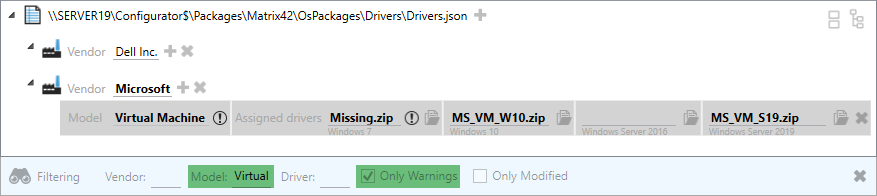
At the bottom of the window the filtering bar is displayed, with the help of which filtering can now be performed.

It can be filtered by the following properties:
- Manufacturer name
- Model name
- Driver name
- Entries with warnings (e.g. driver specifications not available, or conflicts)
- Entries with changes
The filter properties can also be combined. In the following example, only the entries that contain warnings are displayed. These are initially two entries for Dell Inc. Precision 5521 and Microsoft Virtual Machine. In addition, the display is restricted to the model that contains Virtual in its name.
Switch off filtering
If you want to deactivate the filtering of the entries, you can either remove the filtering values and checkmarks, or you can close the filtering display via the directly, which will also display all filtered out entries again.

Ensure that the order of the Matrix42 PreOS package in the depot configuration is correct. The following Matrix42 PreOS packages must be ordered relative to each other as follows:
- DiskPartitioning
- DiskImageDeploy
- DriverIntegration
- WindowsInstallation
- PxeOffAndReboot
- LanguagePacksInstallation
- DomainJoin
- EmpirumAgentSetup
You may not use all of these packages. However, the packages you use must be in the correct order.