Partner Center Getting started
Table of contents
The Partner Center is a specific part of the Matrix42 Marketplace that allows you to manage your own customers, as well as their subscriptions and orders. You can create custom orders for your customers at any time, extend existing subscriptions and much more.
To supercharge your work, we also offer a highly optimized API, which enables you to create and manage your customer orders from outside of the marketplace.
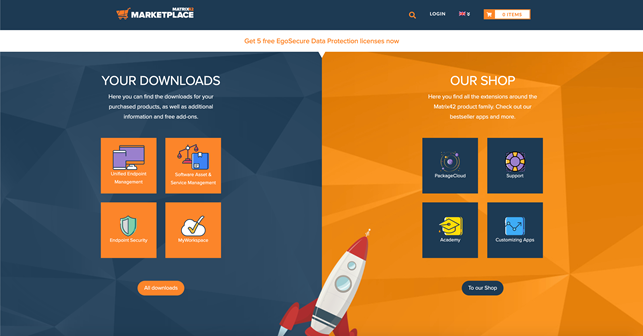
Address: https://marketplace.matrix42.com
Requirements
To use the Partner Center, there are some requirements you need to fulfill. Down below you will find a list of what you need to getting started.
Partner Contract
Before starting with the initial setup, it is required to set up a partner contract with Matrix42.
Matrix42 Company Account
To get started using the Marketplace, you require an account for the Matrix42 Account System. A manual on how to do that is available within the How-To section of this document.
Company Account Verification
After your initial account setup, the Marketplace team will verify your account, which is required before being able to log into the Marketplace.
Marketplace login
The final step is to log in to the marketplace. On the marketplace website, you will find a login link on every page in the navigation bar. Simply click on it and you are prompted to enter your login details.
How to access the Partner Center
The Partner Center can be accessed via the navigation by clicking on the  icon.
icon.
Once you clicked on it, you will be redirected to the main screen of the Partner Center:
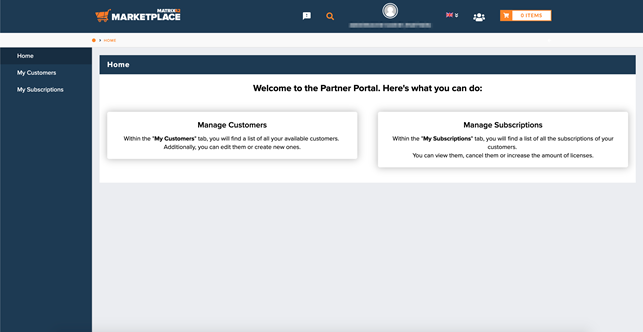
The Partner Center Menu
On the left side of the dashboard, you will find the main navigation, which leads you to the given features. Down below you fill find a short explanation of what you can expect with each of the menu points.
- Home
Further details about the Partner Center - My Customers
Create and edit your existing customers.
- My Subscriptions
View your customer's subscriptions, cancel them, or increase their licenses.
Features
To provide your customers with future orders as convenient as possible, we prepared certain features that help you getting started the easy way.
Customers list
By default, you will find a list with all of your available customers. The list also provides further details within the overview for easy identification from your end.
Add/Update customers
In case one of your customers isn’t available, you can also manually add them to fulfill orders at any time. You can also edit your existing customers at any time for future orders.
Create customer orders
Make orders for your customers directly within the marketplace. Simply add the products you want to order for your customer, choose the customer, and finish the process.
Increase customer licenses
Increase the number of licenses for active subscriptions of your customer. We offer a wizard that allows you to go through the process in no time.
View customer subscriptions
Each subscription offers a detail page to check on for further information about it.
Cancel customer subscriptions
You have the possibility to cancel active subscriptions for any of your customers within the Partner Center. You can cancel each subscription individually.
API Integration
The Partner Center offers a powerful API to create orders for your customers from outside the marketplace, cancel existing subscriptions, and more.
How-to
This section explains each of the features regarding their functionality and usage.
Sign Up for Partner Center
To use the Partner Center, you must first register yourself with a Matrix42 Company Account. To do that, please visit https://accounts.matrix42.com/my/register and fill out the form accordingly.
Please note that if your company is already registered, you do not need to check the box “Create Company Account”
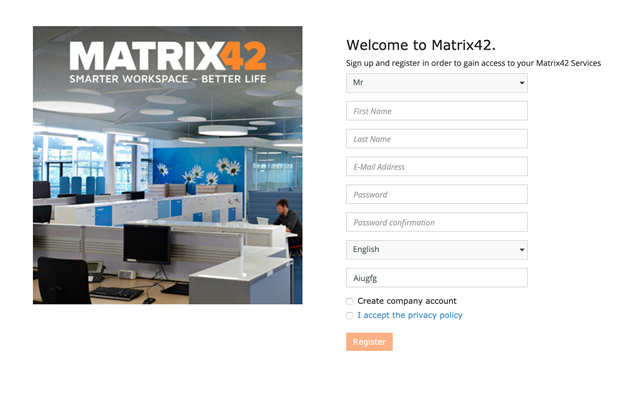
In case your company isn’t registered at the time of signup, please check the box and fill up the additional fields.
For existing partners please send us the email address of an already registered user to marketplace@matrix42.com.
Once done, our Marketplace Team will validate your signup data to verify your account for the usage of our marketplace. During this step, you will also get your unique Customer Number.
After the verification, you will receive a notification and you are ready to use the Partner Center.
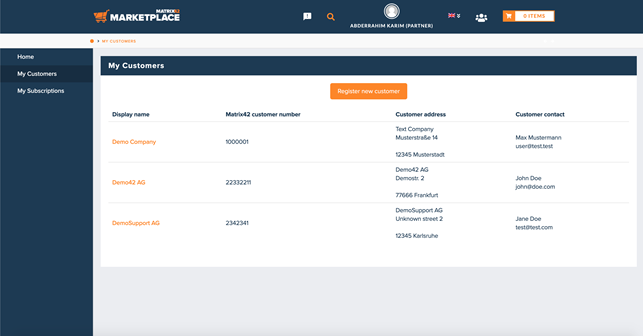
Customers list
To view your currently available customers, simply head into the Partner Center using the  icon and go to My Customers. There you will see a list of your currently available customers.
By default, we will set up your assigned customers automatically to make the start for you as easy as possible.
Within the list, you find further information about each of the customers and their contact persons.
Add customer
Before adding the customer within the Partner Center dashboard, it is recommended to invite the customer to register for the marketplace in case he does not have an account yet. (This will speed up the process for your order to be completed).
To add a new customer, head into the Partner Center using the  icon and go to My Customers. Once there, please locate and click on the button Register new customer.
To create the customer, please fill out the form accordingly.
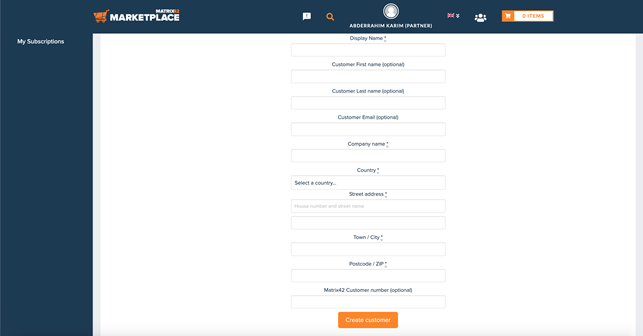
Once a customer is created, it will be visible within the checkout list for creating an order.
Please note that once an order is created, changing the customer details, within the Partner Center dashboard, doesn’t affect the customer details within the order.
Update customer
To update an existing customer, head into the Partner Center using the  icon and go to My Customers. If you know look at the column Display name, you will see the name written in orange. Once you click on it, you will see all of the editable fields of the partner.
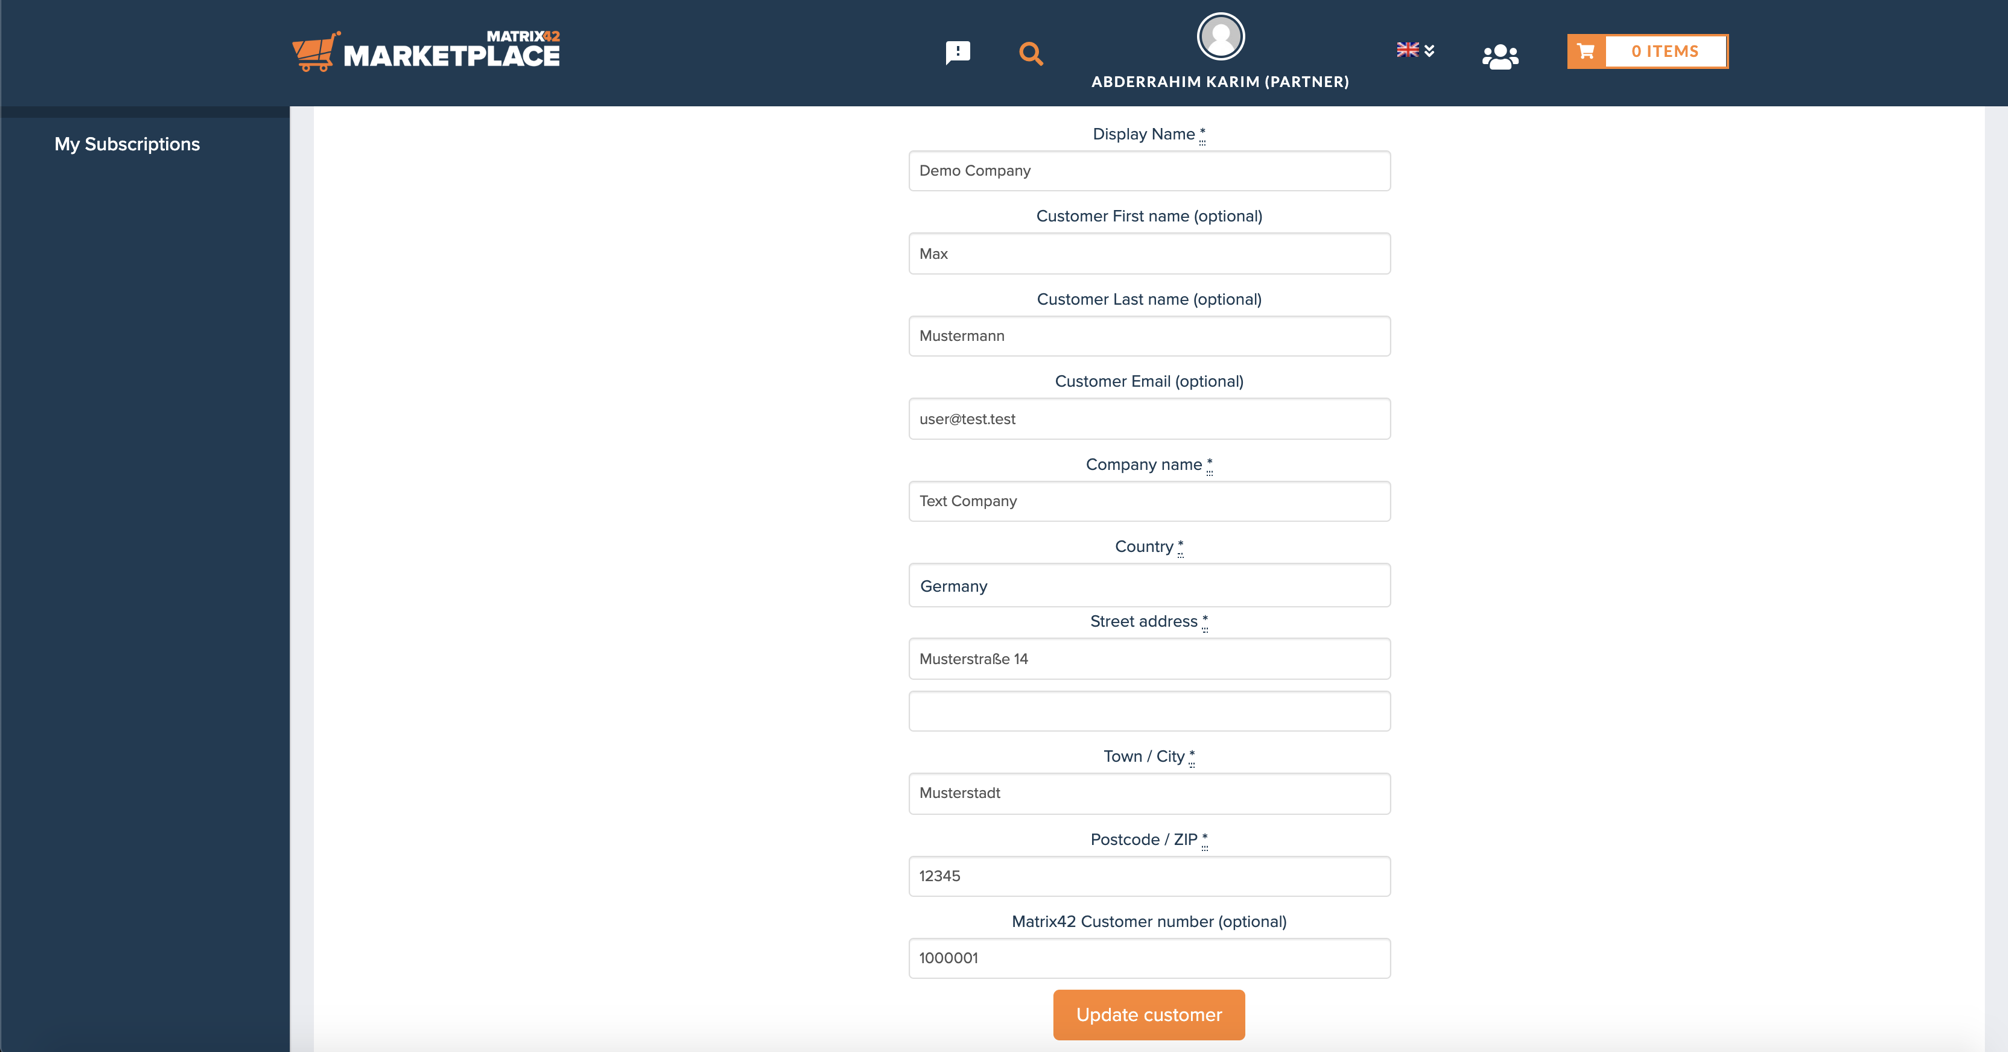
This picture shows the list for an already existing customer. Simply change the values and click Update customer to save the changes.
Create customer orders
The process for creating orders for your customers is very similar to the one you normally use for ordering products on the marketplace.
To get started, you first want to choose the products you want to order for your customer. Therefore, please head over to https://marketplace.matrix42.com/shop/ and select the Partner Center Ready menu item. There you will find all products that are currently available via our Partner Center. Products that are not available within the Partner Center Ready category, are not shoppable at the moment via the Partner Center.
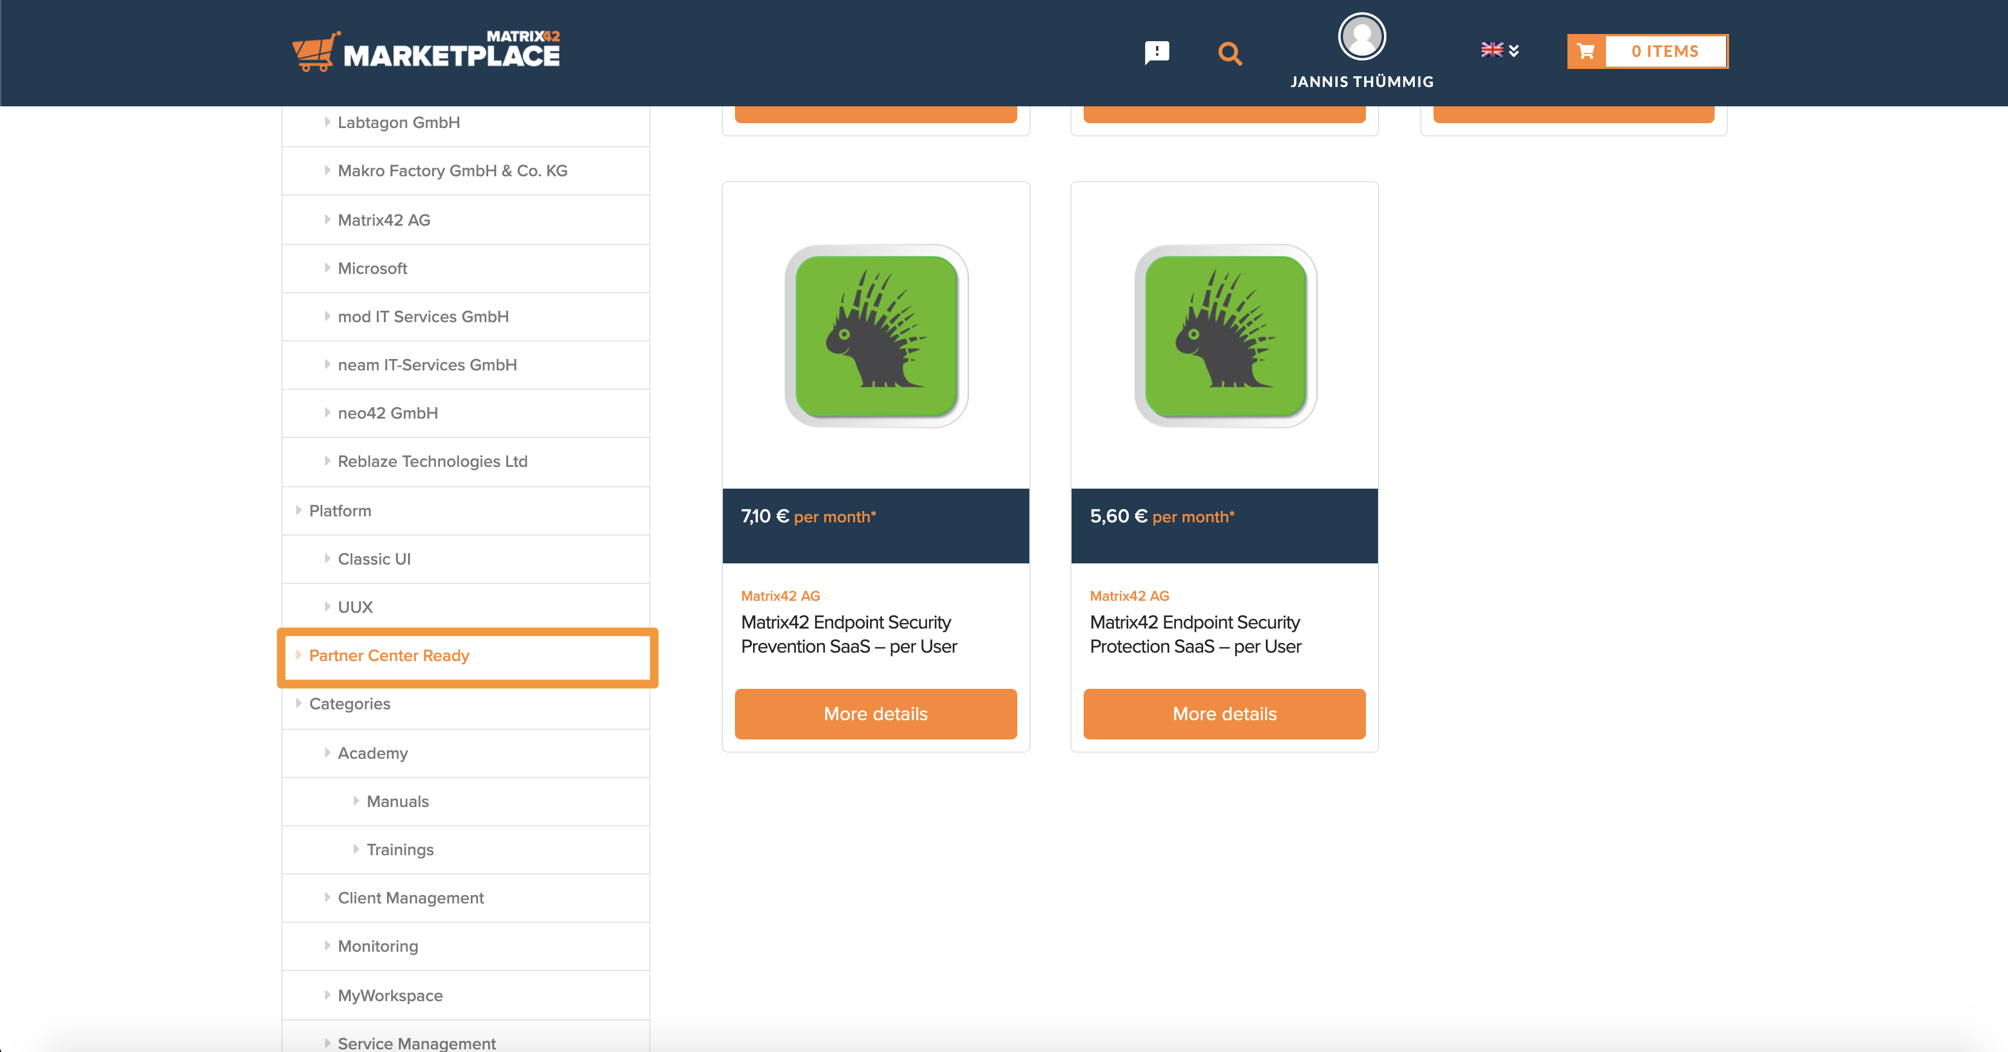
Once you chose your product, simply adjust the quantity, add it to the cart and go to the checkout. The minimum order quantity for Endpoint Security Products is 100 and is increased by an interval of 25 licenses e.g. 100, 125, 150, etc.
There you will find a new widget called Ship to a different customer?, which you can use to assign the order to one of your customers.
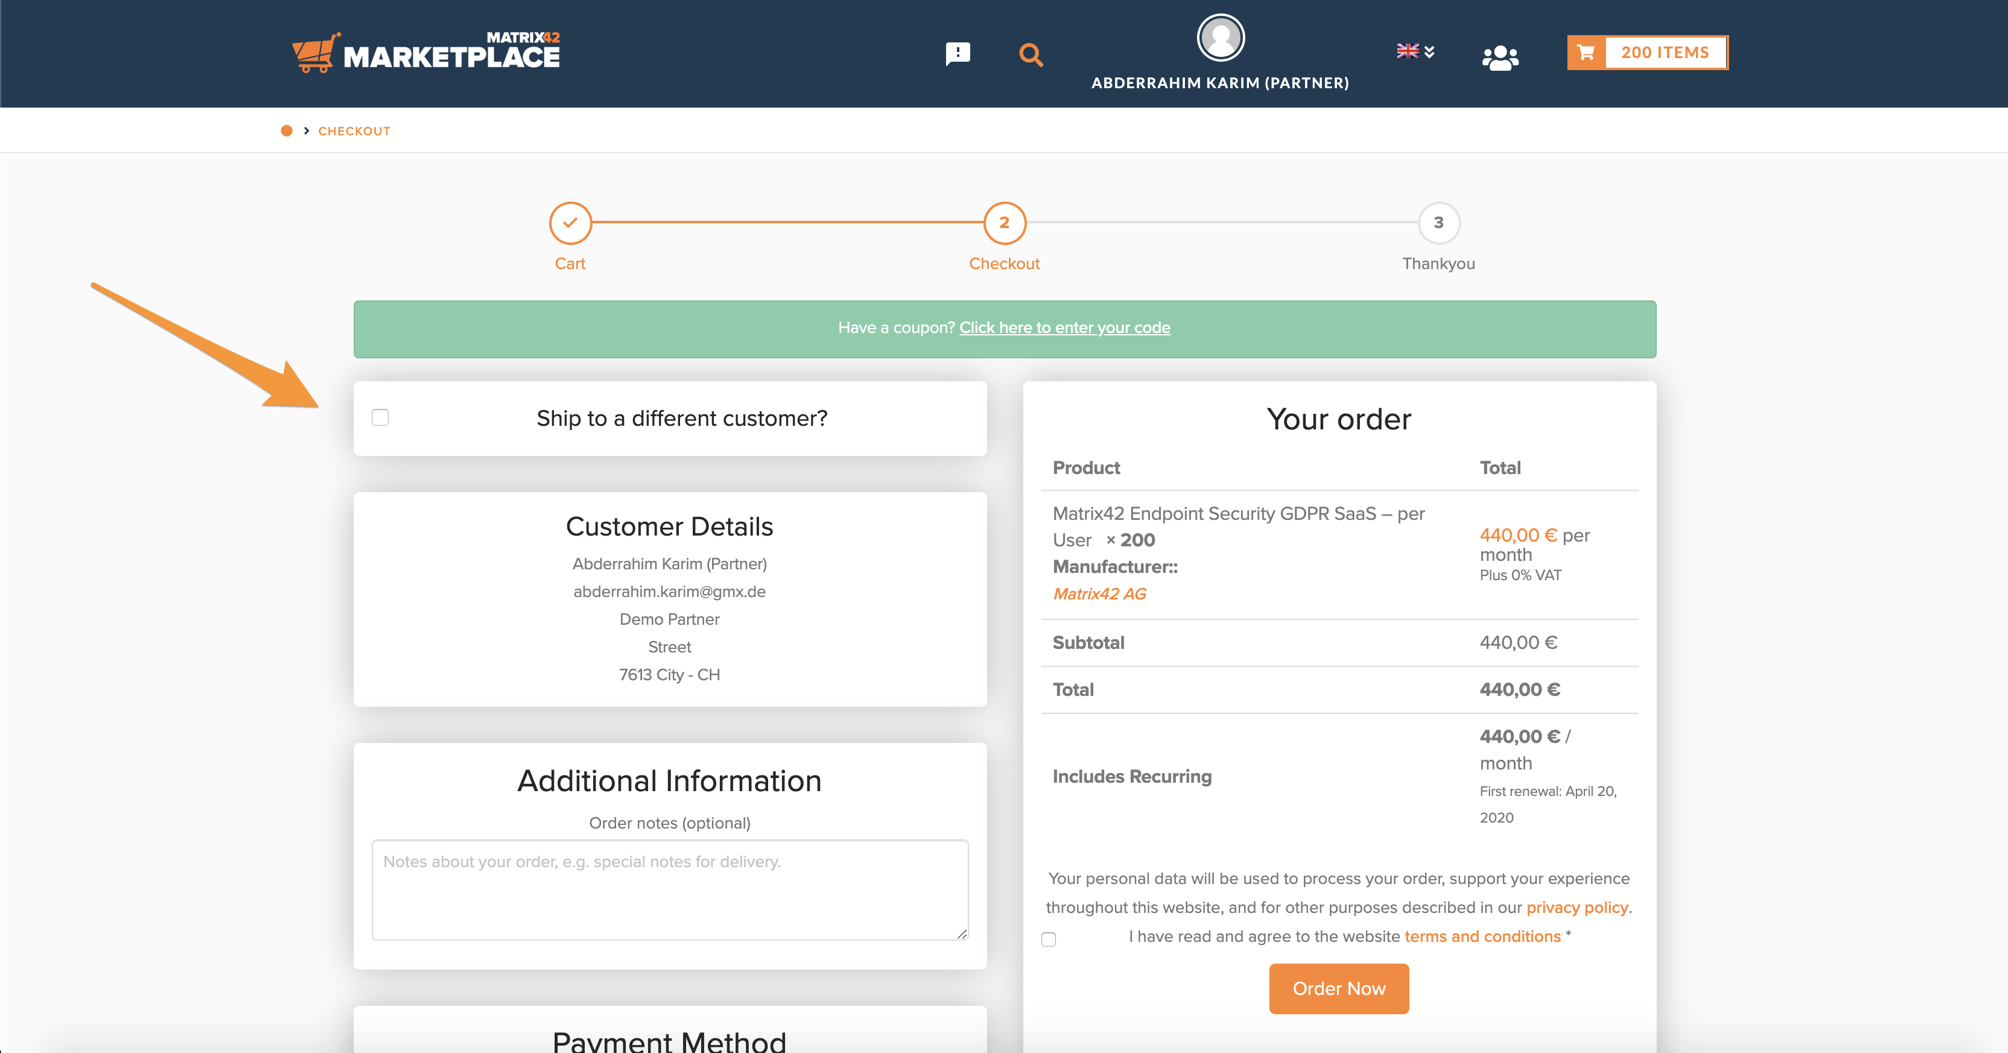
Simply check the box next to it and you will be able to choose a customer from the list to prefill all available values.
If you don’t have any pre-defined customer yet, you can either manually fill the values or create your customer within the My Customers tab of the Partner Center dashboard
After filing up all the mandatory values, all you need to do is to agree to our policies and click Order now – once clicked, the order is created and you will be informed via mail.

As soon as the order was successfully created, you will be redirected to the thank you page, which contains an overview of your order.
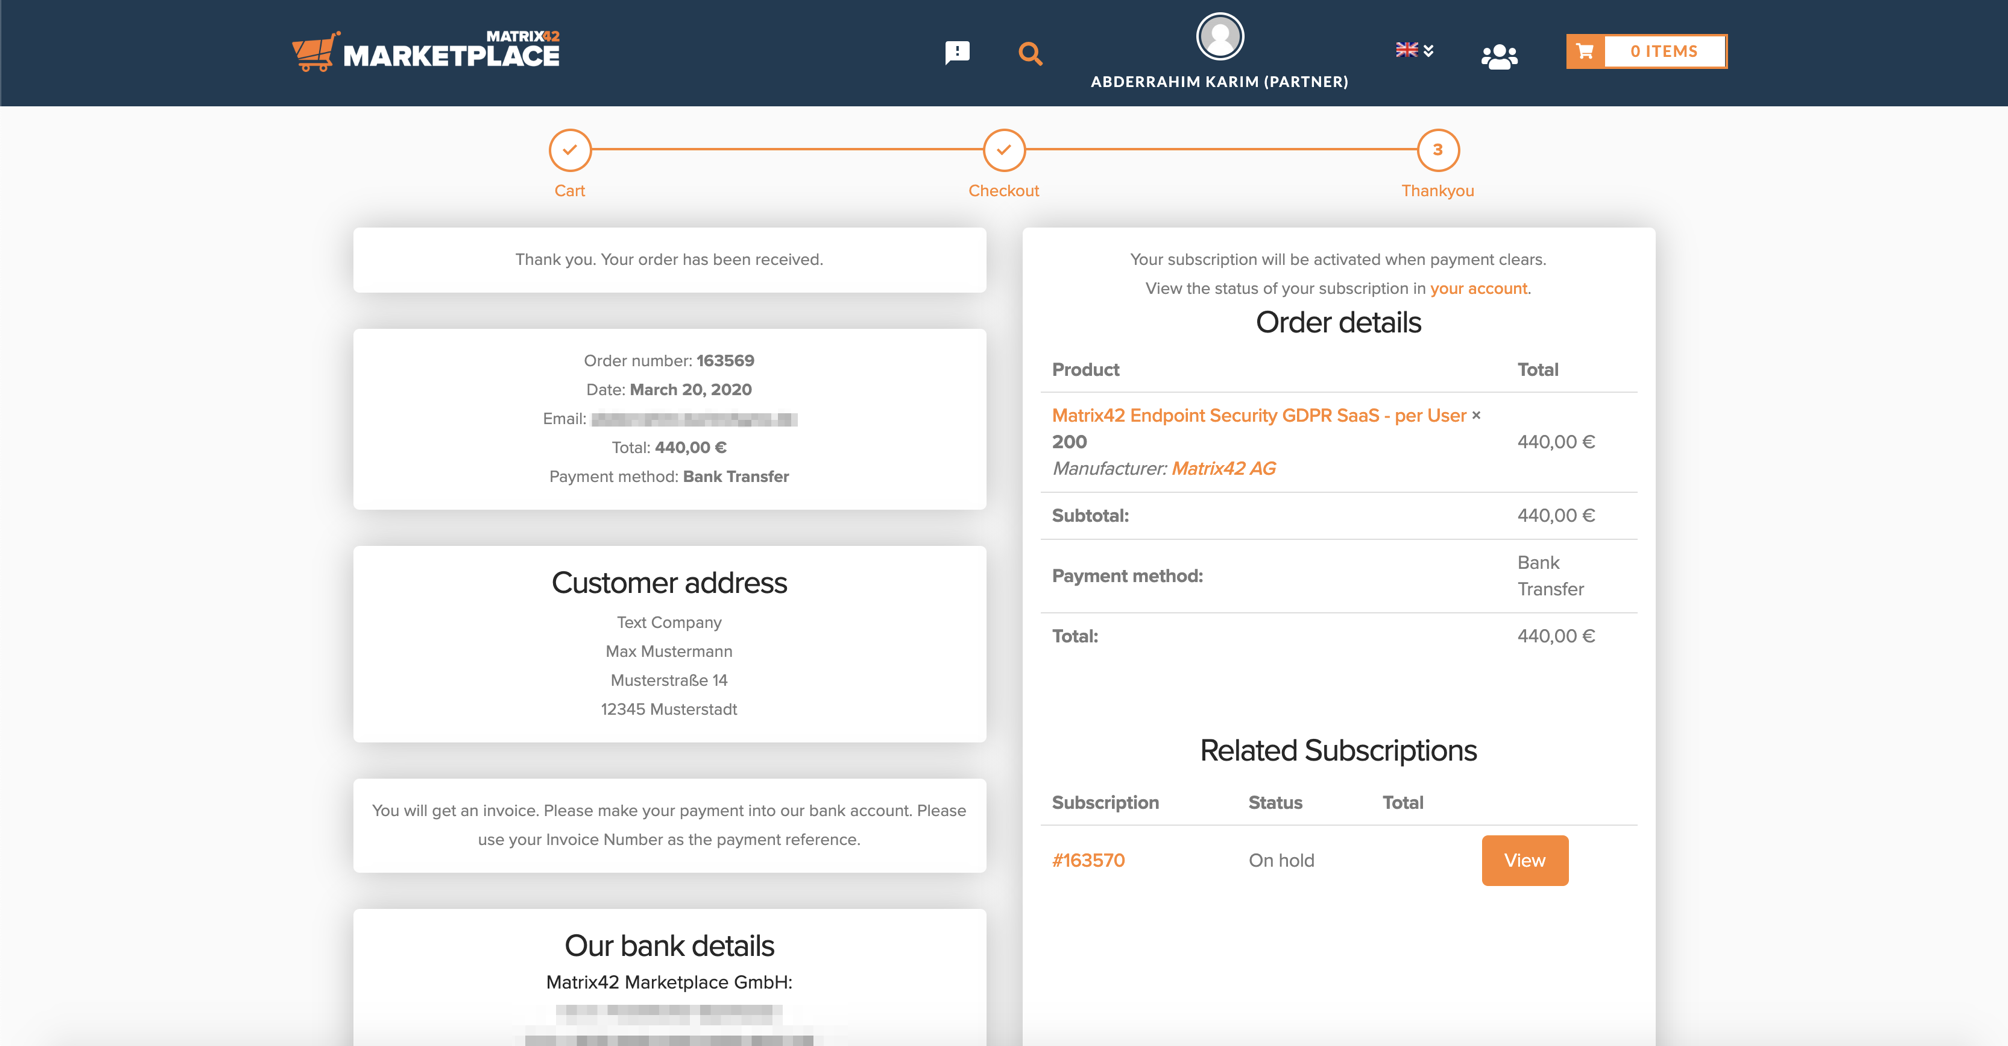
To check the status of this order at any time, you will find further details about it within the Partner Center dashboard under My Subscriptions.
Provisioning Workflow
Once the order is created, we will send over the details to Cloud Operations, which then triggers the provisioning workflow. After the provisioning workflow was successful, the customer receives an email with further details. Please note that it can take up to 40 minutes for the customer to receive the email. Down below, you will find an example of the provisioning mail.

Here’s a list of all the information we send over to Cloud Operations that starts the provisioning workflow:
- Product title
- Product id
- Contract type
- Quantity
- SKU’s for Subscription, Signup fee or regular price
- Cloud Operations related SKU
- Currency
- Metric
- Partner name
- Partner ID
- Partner Email
- Customer Company Name
- Customer Email
- Customer First Name
- Customer Last Name
- Marketplace Order Number
- Provisioning Type
- Order Notes
- Sender System
- Creation Date
View customer subscriptions
To view an order, simply head into the Partner Center using the  icon and go to My Subscriptions. There you will see a button named View, which will redirect you to the details page.
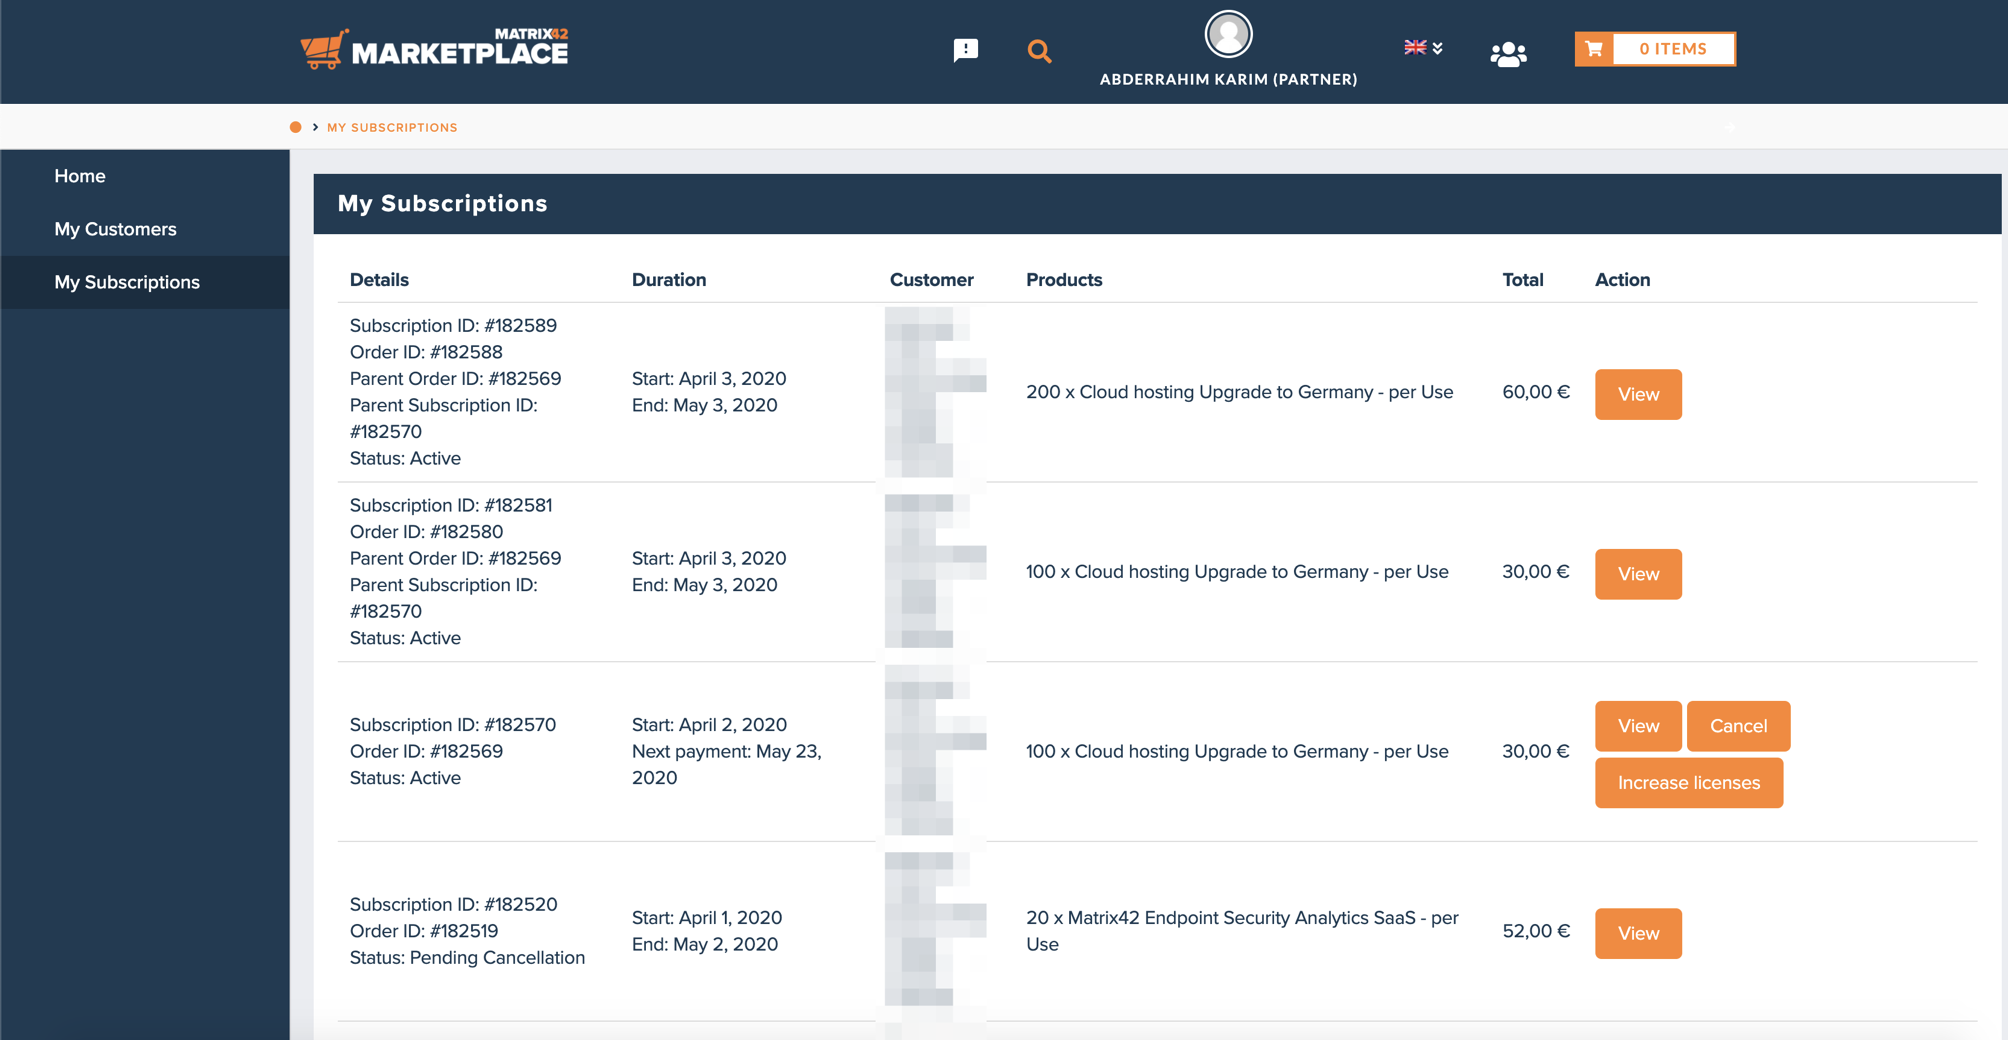
Within the overview, you will be provided with certain information about the subscription. Here is an explanation about each of the columns:
Details
This column contains general information about the Subscription.
- The Subscription ID is the unique identifier of the currently given subscription.
- The Order ID is the unique identifier of the Order. An order can contain multiple subscriptions as well.
- The status tells you the current state of your order. Once your order was completed, it will be updated here as well.
- The Parent Order ID defines the original order that was created for the currently given “license renewal order”. This field is only available within a “license renewal” order.
- The Parent Subscription ID defines the primary subscription that you used to increase the licenses for. This field is only available within a “license renewal” order.
Duration
These are common details about the availability of the subscription. In case of a fix end date, you will see the end date here as well.
Customer
It contains all of the available information of the customer for the specific order/subscription.
Products
This column displays all of the products that are included within the subscription, as well as their quantity.
Total
The total amount paid for the order.
Action
The available actions to modify/review your subscription. You will see a different kind of actions depending on the status of your subscription.
Increase licenses for customer subscriptions
To increase the licenses for a customer subscription, simply head into the Partner Center using the icon and go to My Subscriptions. There you will see a button named Increase licenses, which will redirect you to the details page.
You won’t see the button to increase your licenses if your subscription is not active, or the subscription is created via the “Increase license” feature.
It is only possible to increase a primary subscription (a subscription who was created through the default shopping process). This is important since we automatically cancel license increase subscription as well once the primary subscription gets canceled.

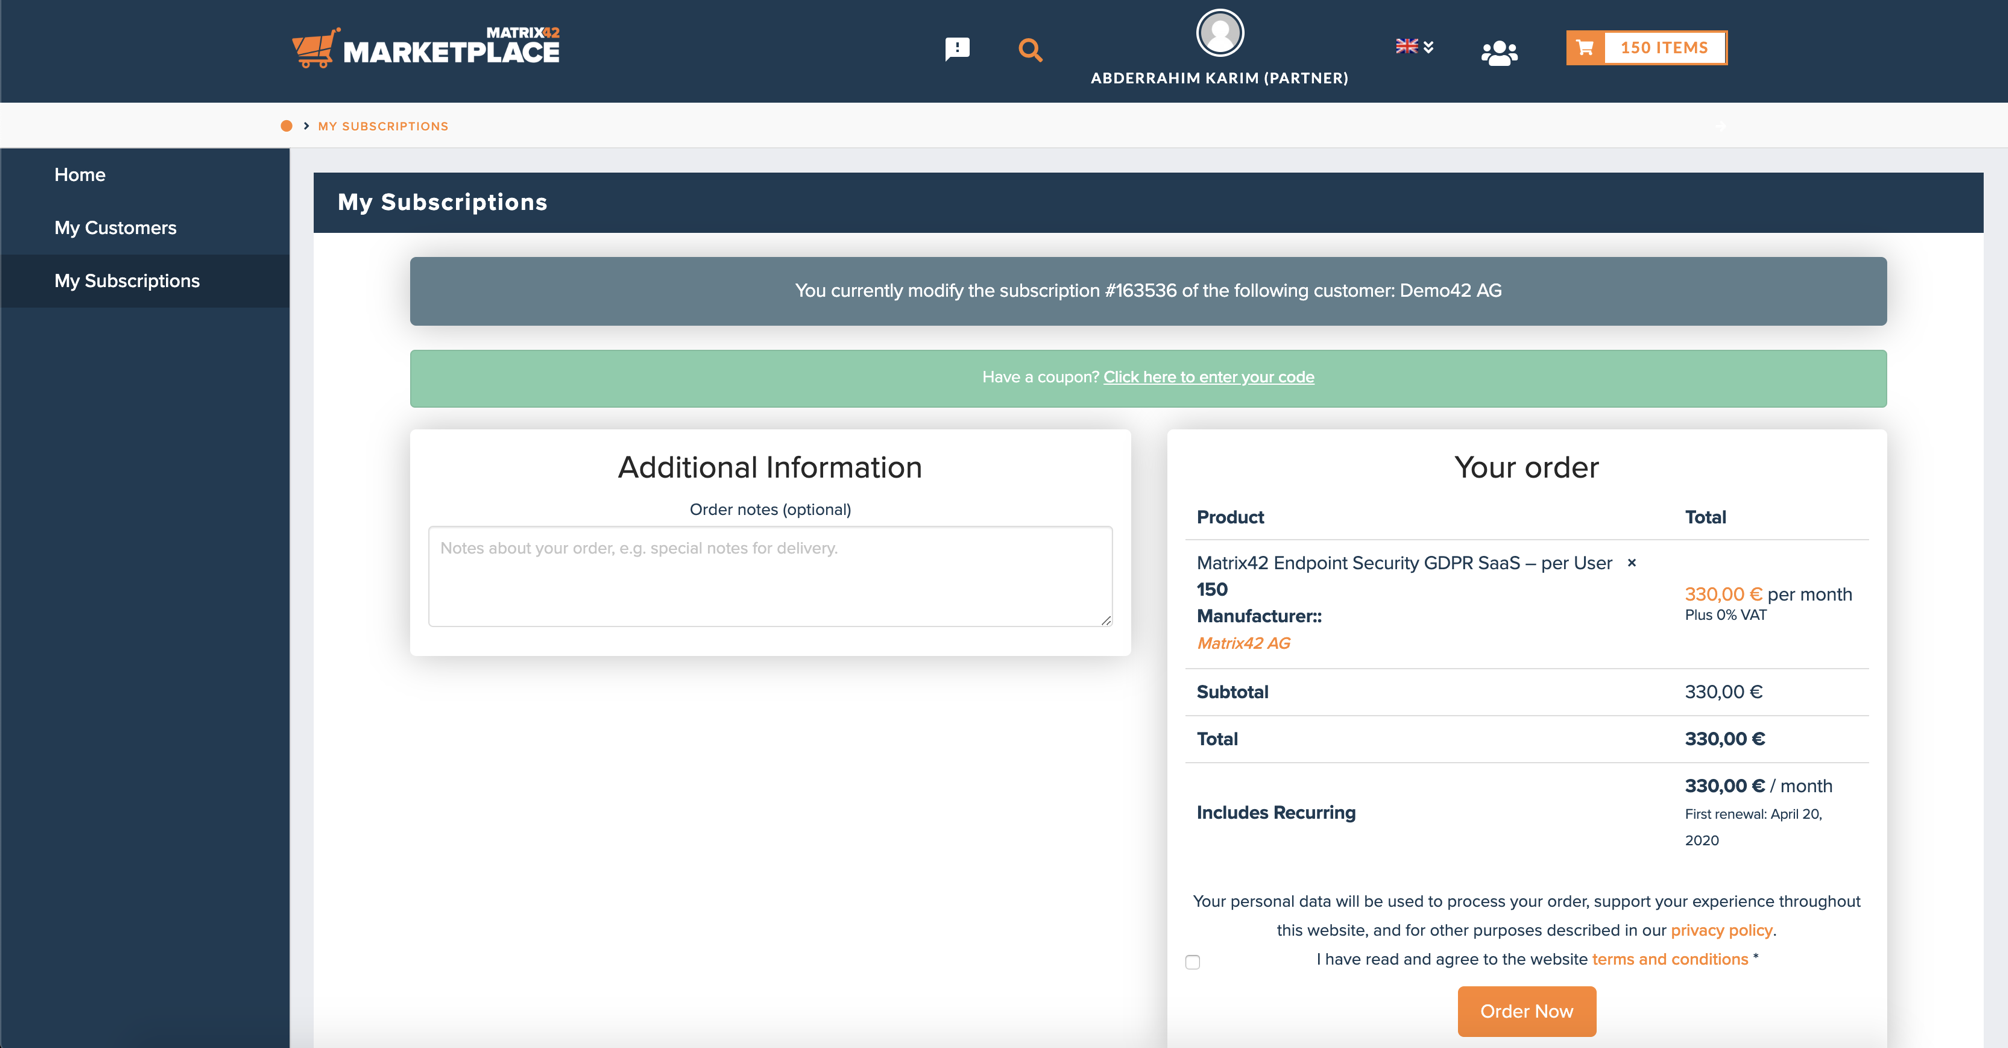
Once clicked, you will be redirected to the licensing wizard. It allows you to modify the current licenses within the subscription to increase the number of available licenses. Simply change the amount of your desired licenses and click Update cart -> Proceed to checkout
At the checkout, you can review again the details of the order. In the blue notice bar, you will see further information on the current subscription you are modifying.
Once you finished the process, Cloud Operations will be informed about the new order via email.
To finish the license update, you must agree to our policies and press Order Now – you will then be redirected again to the new thank you page, which contains further information about your order.
Please note that once you want to leave the order within the wizard, you need to start the process again from the My Subscription screen. Once you try to leave the wizard, you are prompted to confirm that by a browser default popup.
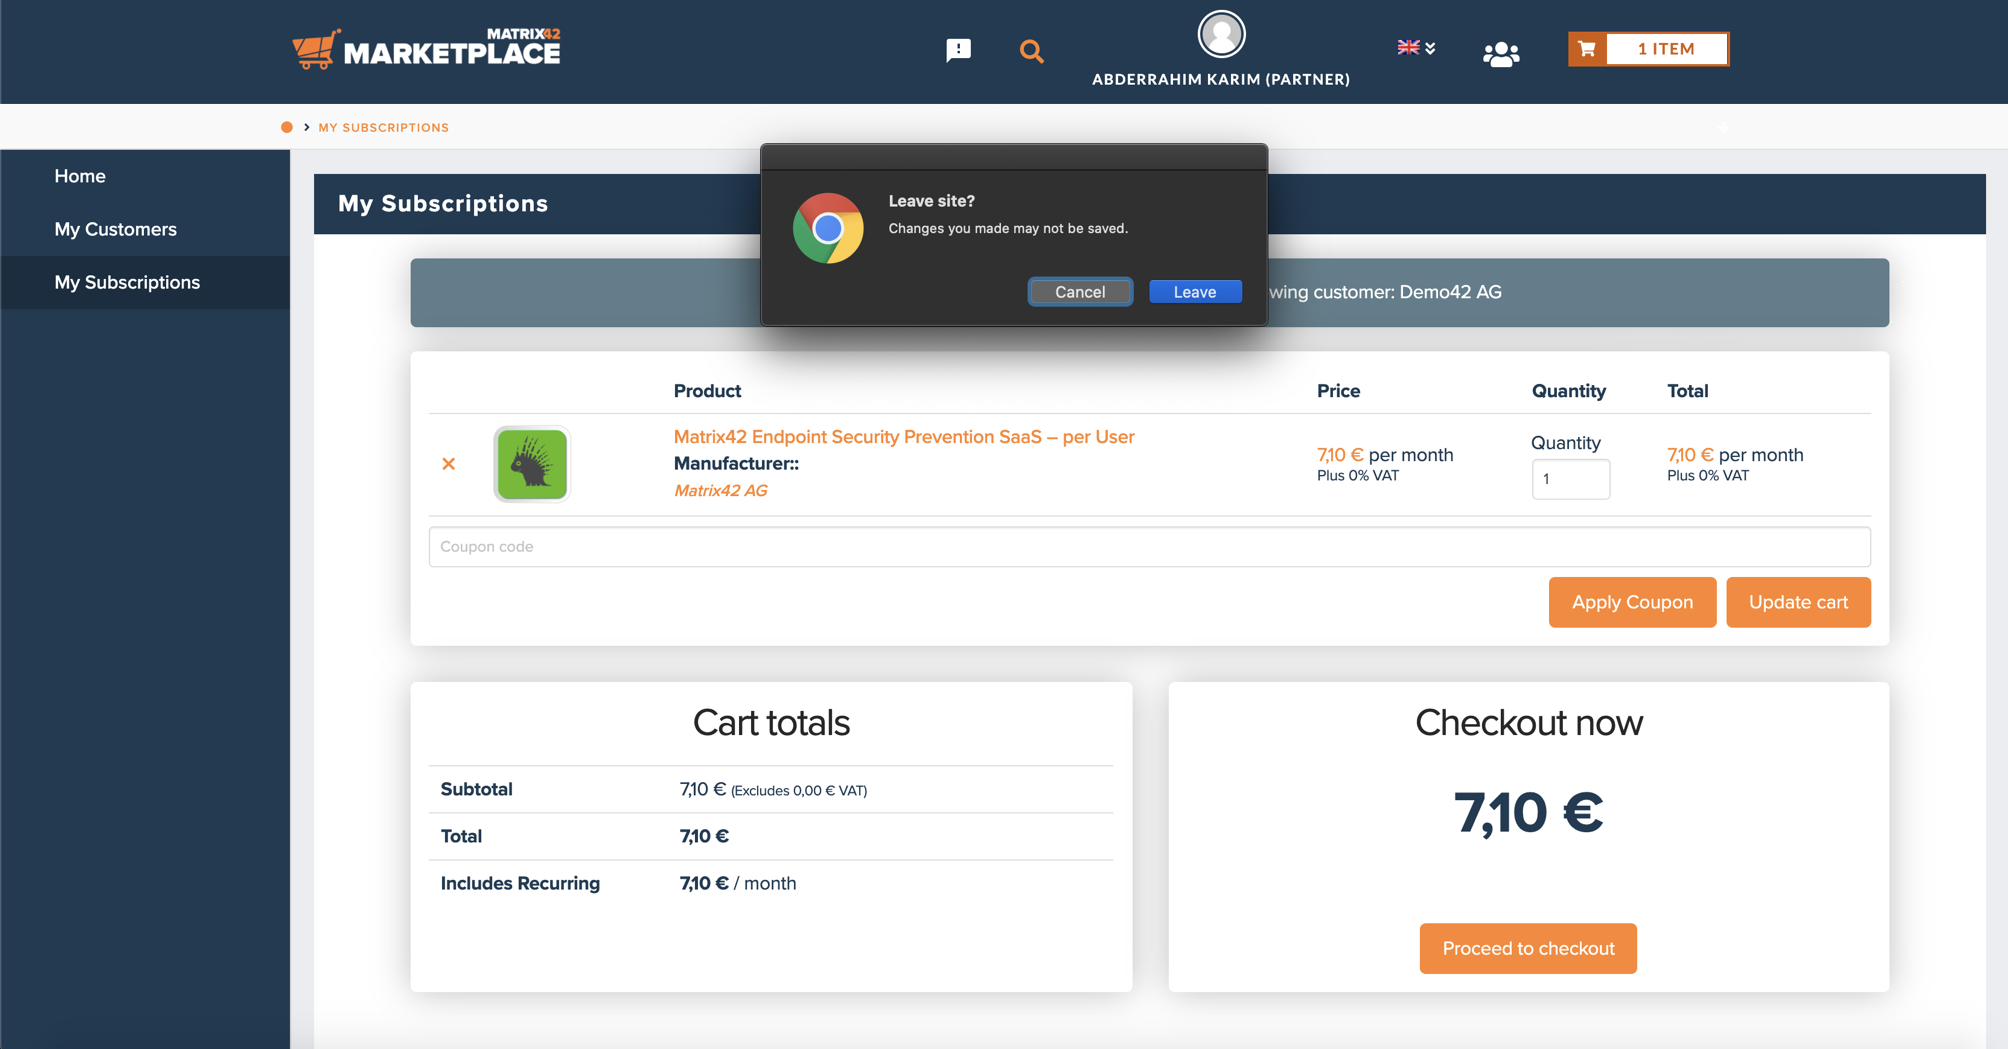
In the screenshot above you can see the popup message that appears once you want to leave the wizard. Please only leave it if you are sure about canceling the increasing process since you otherwise have to start the process from the My Subscription screen again.
During the “license increase” process, we correlate the new order with the subscription order you started the process with.
Cancel customer subscriptions
To cancel the active subscriptions for a customer order, simply head into the Partner Center using the icon and go to My Subscriptions. There you will see a button named Cancel, which will display a confirmation popup you need to agree on for cancellation.

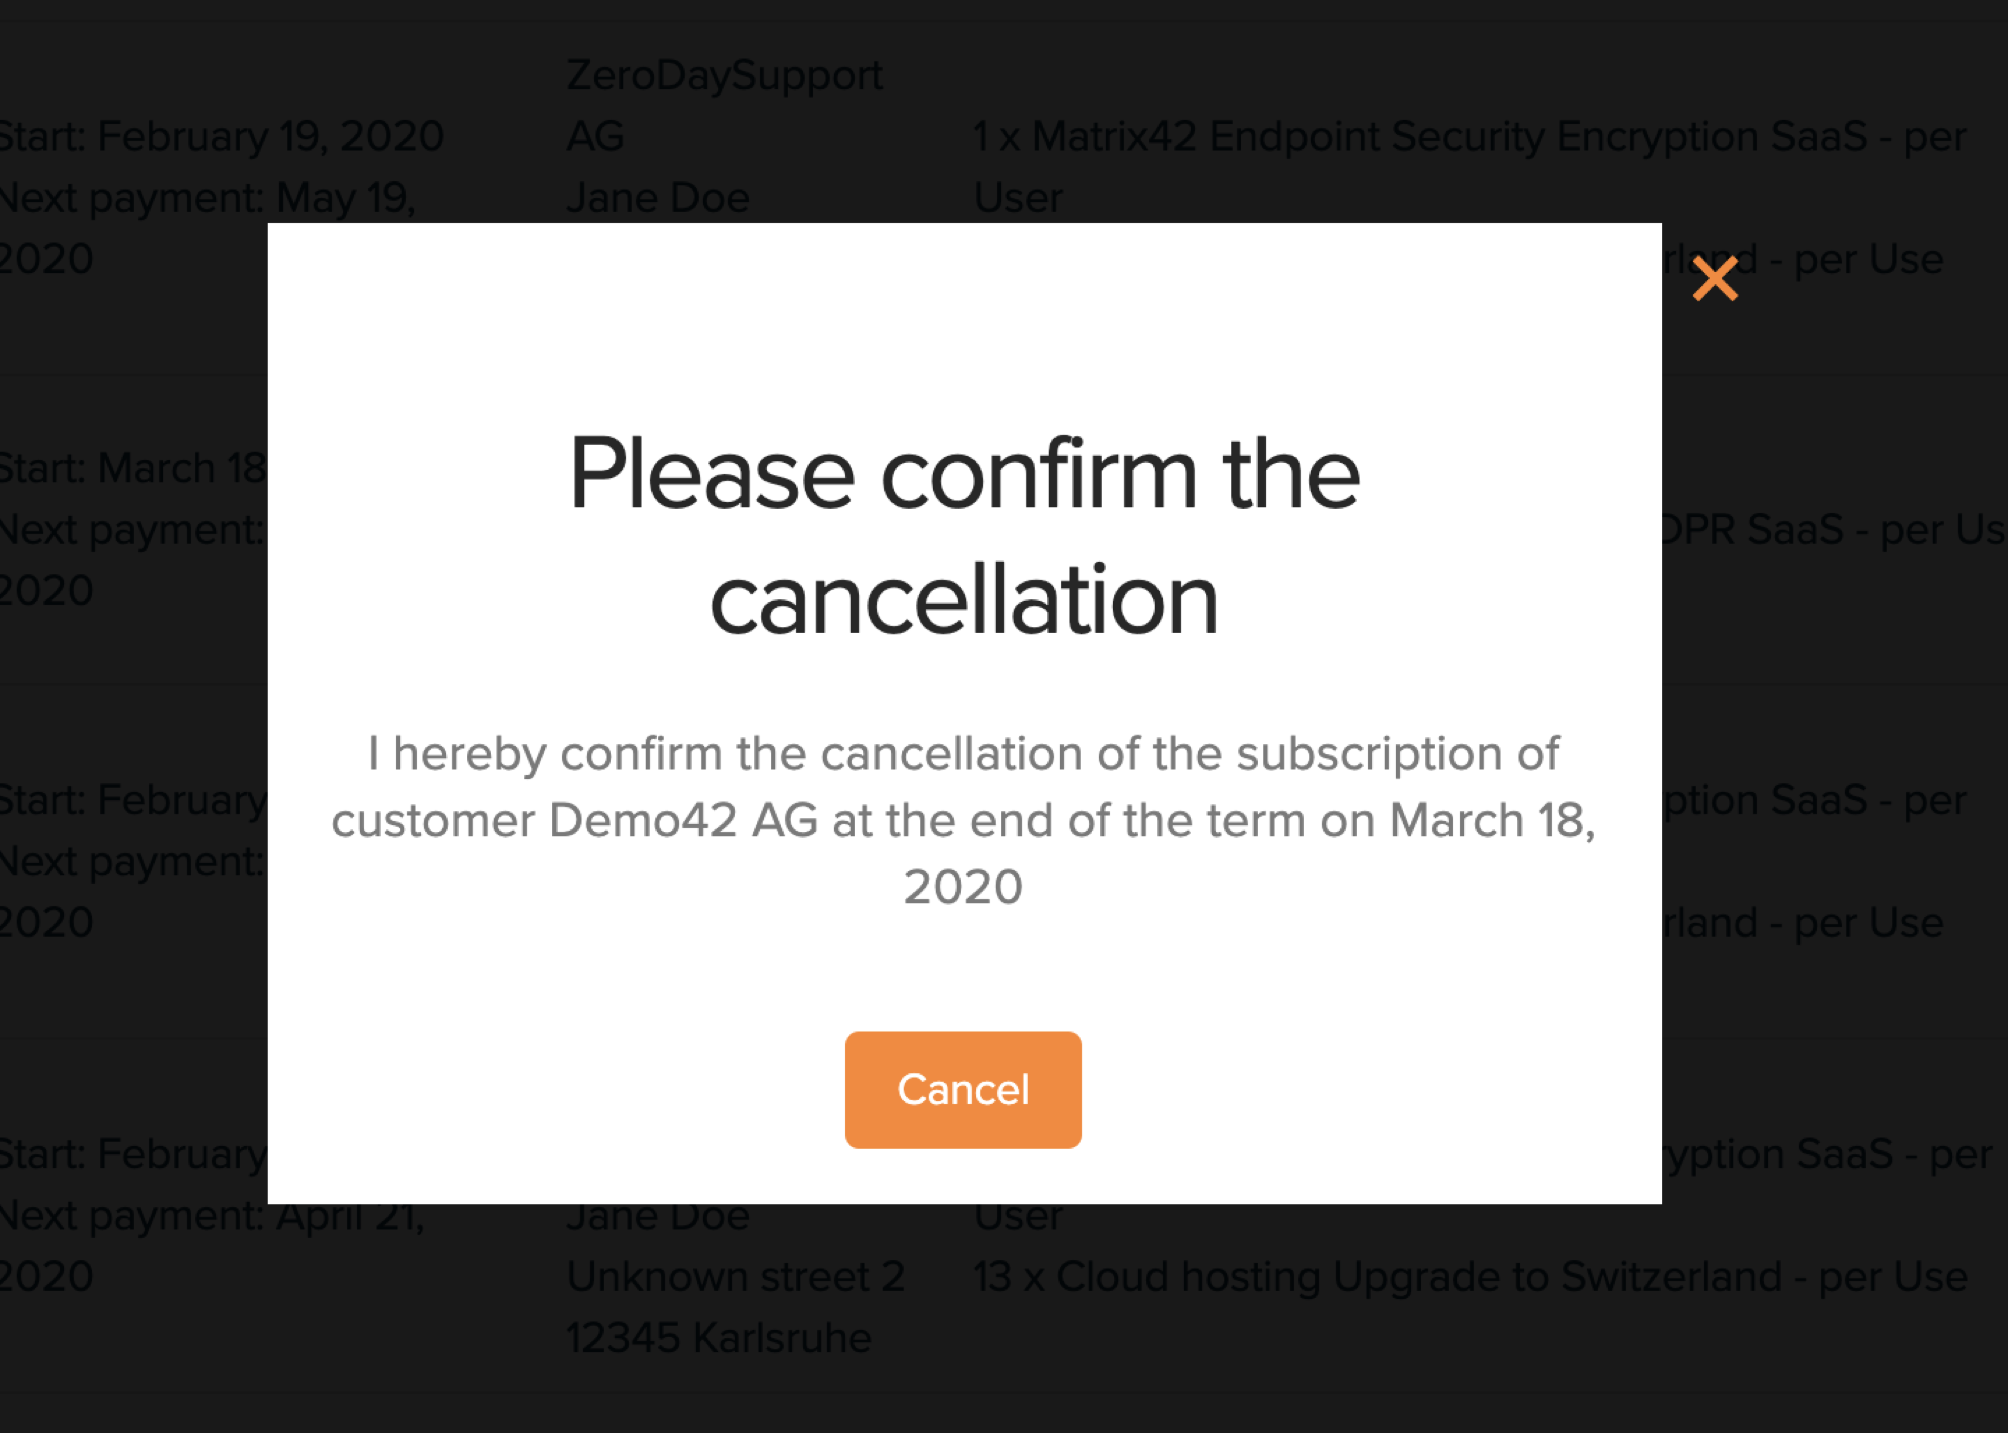
Once you click Cancel, the subscription will be irreversibly canceled and Sales Administration + Cloud Operations gets informed via email about the cancellation.
After you cancel a subscription, the customer will continue to have access to all of his downloads until the prepaid time is over. During this time, your order will have the status “Pending Cancellation”. Canceling a primary subscription (a subscription that is made through the default shop process) results as well in all of the “license increase” subscriptions to be canceled.
Email to Sales Administration
The email to Sales Administration contains certain information about the canceled subscription.
Here is an example of the email with all of the sent values:
Automatic cancellation of “license increase” subscriptions
Once you cancel a primary subscription (a subscription you made using the “Create Customer Order” feature) it results in all of the additional subscriptions you made for this subscription using “license increase, will also be canceled to the given date.
API Integration
The Partner Center API offers you certain features to automate the process of creating orders for your customers.
It allows you to:
- Create orders for your customers
- Cancel existing subscriptions for your customer
- Fetch your existing orders
We have separate documentation available, which explains each of the endpoints in detail.
Egosecure ordering - Supported Use Cases
Down below, you will find a list of supported use-cases for various combinations on how the Egosecure products can be ordered.
Use case 1 – Order contains one product
In this case, the partner only orders a single product, which is not an upgrade. Once this order is sent over to Cloudops, it will create one instance with the default region Netherlands.
Use case 2 – Order contains one product and one upgrade product
This case contains a normal Egosecure product, as well as a regional upgrade product, which adjusts the region of the instance. Once this order is sent over to Cloudops, it will create one instance in the chosen region from the regional upgrade product.
Use case 3 – Order contains two products
Within this use case, the order contains two Egosecure products, which are not regional upgrade products. Once the order is sent over, one instance is created within the default region Netherland.
Use case 4 – Order contains two products and one upgrade product
This case contains two Egosecure products and one regional upgrade product. Once it is sent over to Cloudops, it will create one instance in the chosen region from the regional upgrade product.
Use case 5 – Order contains one upgrade product
This order only contains one regional upgrade product and no normal Egosecure products. Once this order is sent over to Cloudops, it will create a task, which causes a relocation of the existing instance of the customer to the newly chosen region of the regional upgrade product.