HowTo: Configuration of Active Directory Federation Services
Overview
This Guideline will enable you to setup anything necessary in Enterprise Service Management (ESM) to let your end users log in to Self-Service with an Active Directory Federation Services (AD FS) User.
This article requires that you have a Matrix42 MyWorkspace (MWS) Subscription (optional), a fully functional AD FS Infrastructure, and a running ESM.
Supported Authentication Protocols for Identity Providers:
SAML2
IMPORTANT:
Login via SAML2 is possible with MWS Accounts (described at the end of the article) or instead of using MWS you could also import Person (in ESM) objects of your AD Users via an GDIE Import - CSV,XML, etc. (Name and E-Mail address must match in both AD and ESM) or via AD import directly (needs a data gateway if communication happens between different domains or networks, can be for user import ONLY, not authentication).
In this guide we are assuming you are going to use the E-Mail address as NameID Policy.
IN A NUTSHELL
- AD FS
- Configure AD FS Relaying Party Trust (this article)
- Configure Claims Issurance Policy (this article)
- Software Asset and Service Management
- Configure SAML2 Authentication (this article)
- Configure MWS Connector (external article)
- MyWorkspace
- Generate Token for ESM / MWS Connector (external article)
- Configure AD Connector (external article)
Prerequisites
- You will need administration Accounts for the following components
- AD FS Admin
- MWS Admin
- ESM Admin
- The following configurations must be in place
- STS Token must be activated in ESM (For Matrix42 Cloud Services this is activated by default)
- (optional)
- already configured MWS Connector in ESM
- already configured Cloud Connector (AD) in MWS
Prepare AD FS relying party trust for ESM
In this part of the guide, we're preparing the AD FS relying party trust so that the AD Users from your AD FS are able to connect to ESM.
- Open your AD FS console
- Navigate to "Relaying Party Trusts" and create a new object
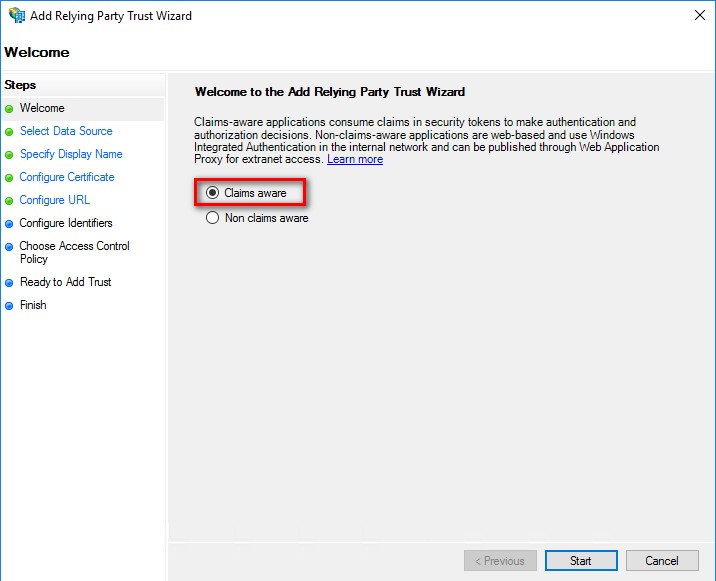
- Choose "Claims aware" in the First page of the Wizard
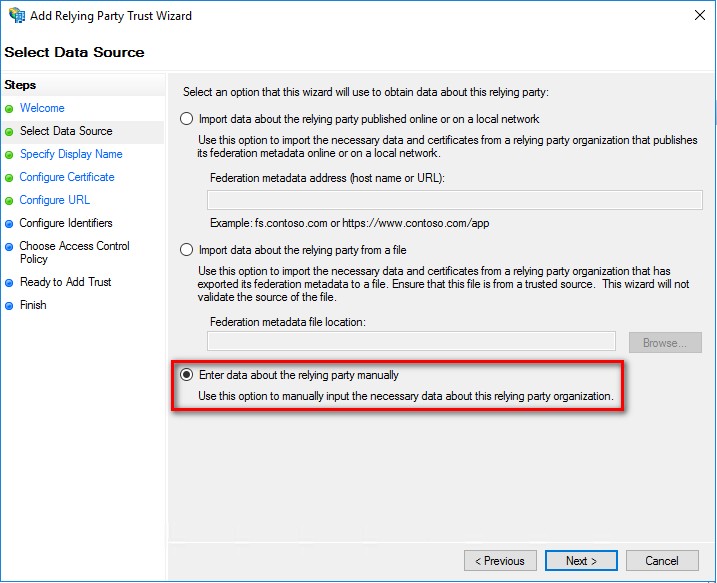
- At "Select Data Source" use the last option "Enter data about the relaying party manually"
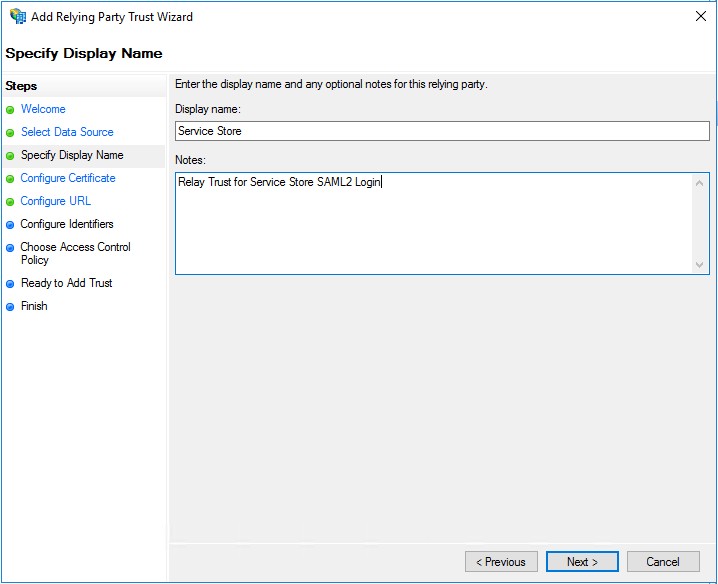
- At the "Specify Display Name" of the Wizard provide information that identifies the relaying trust as a ESM related configuration.
- Do nothing at the "Configure Certificate" area (encrypted communication is not supported at the moment)
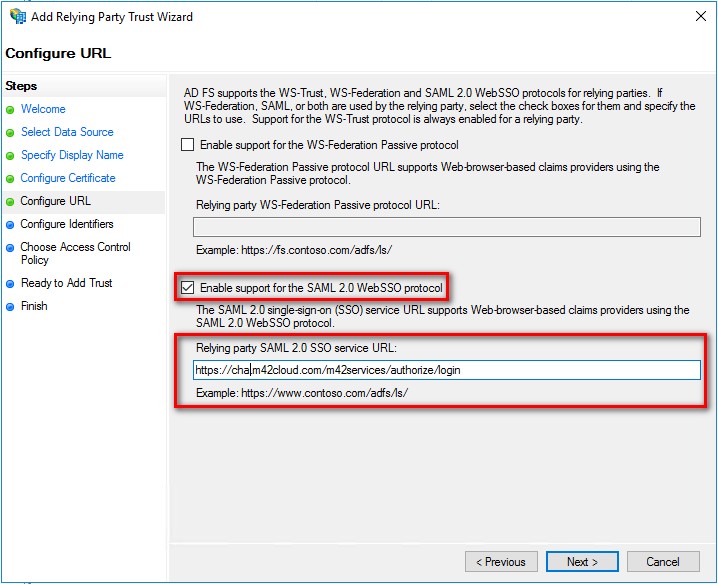
- At the "Configure URL" Page of the Wizard check the "Enable Support for the SAML 2.0 Web SSO protocol" option and fill in your ESM URL followed by:
/m42services/authorize/login
In this use case the URL looks like: https://cha.m42cloud.com/m42services/authorize/login
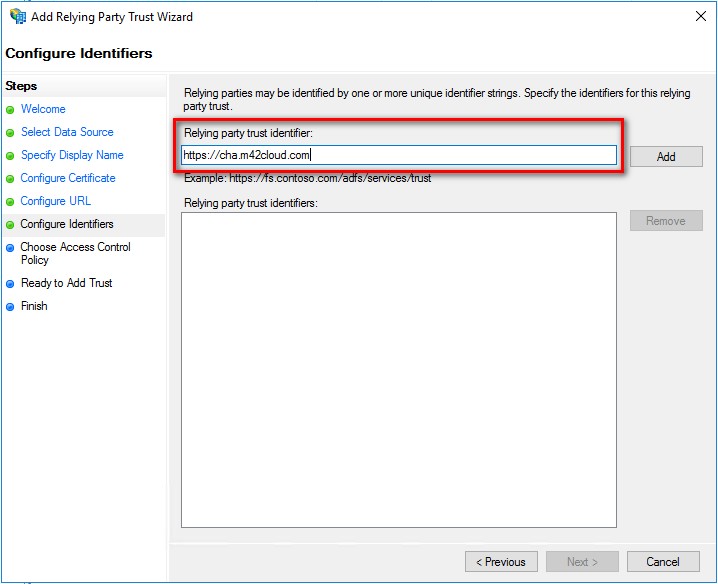
- At the "Configure Identifiers" Wizard Page provide your Top Level Domain as the trust identifier and click "Add"
- For the "Access Policy," we are going to use "Permit everyone". Depending on your company's policies and configuration this may vary.
- Review your settings in "Ready to add trust" and finish the Wizard.
Add AD FS claim issuance policies
Since there is a need to transform some data from AD / AD FS in order to ensure a login we will need to create two claim issuance policies.
- Highlight your newly created ESM relying party trust and click "Edit Claim Issuance Policy" in the right pane.
- In the grid that opens click "Add Rule"
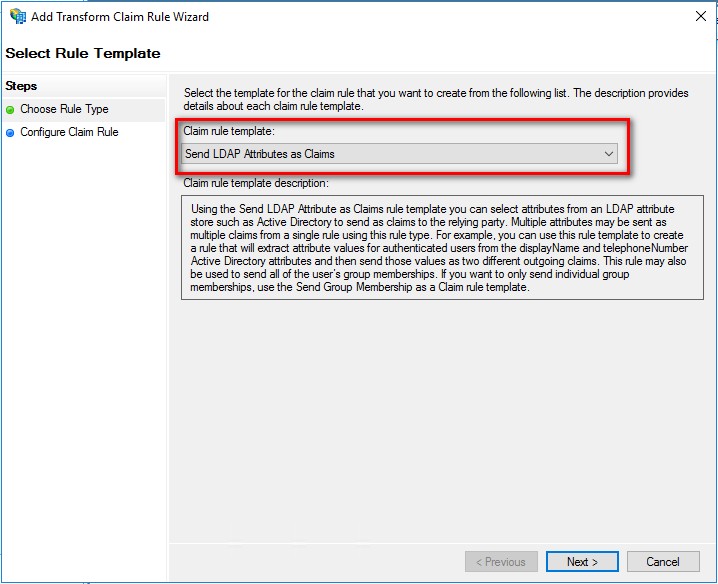
- At the "Choose Rule Type" page select "Send LDAP Attribute as Claims" from the "Claim rule template" dropdown.
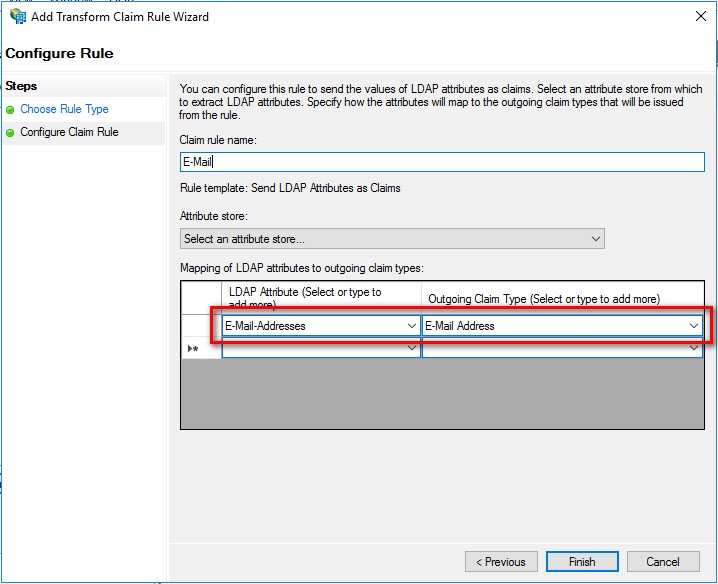
- At the "Configure Claim Rule" page of the Wizard fill in the Claim rule name. We suggest "E-Mail" here.
- From the" Attribute Store" dropdown choose "Active Directory"
- Create a mapping and fill in as "LDAP Attribute": E-Mail-Addresses
- Fill "Outgoing Claim Type": E-Mail-Address
- Click "Finish"
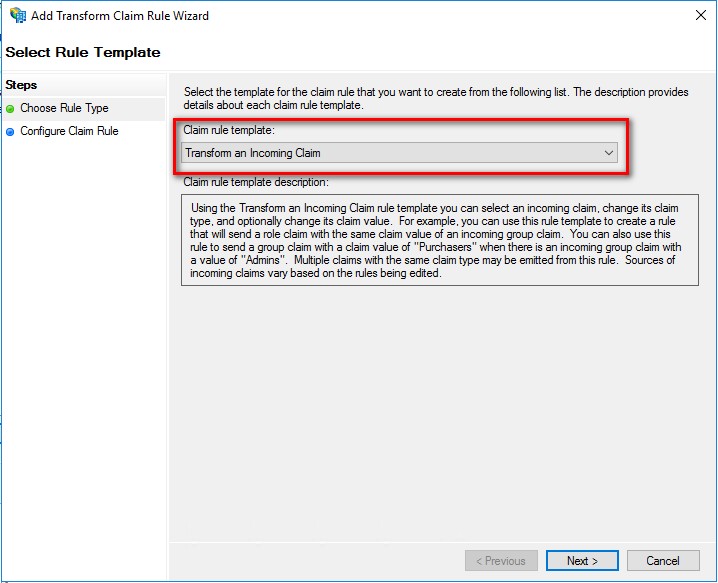
- Now we need another rule, click "Add Rule" again.
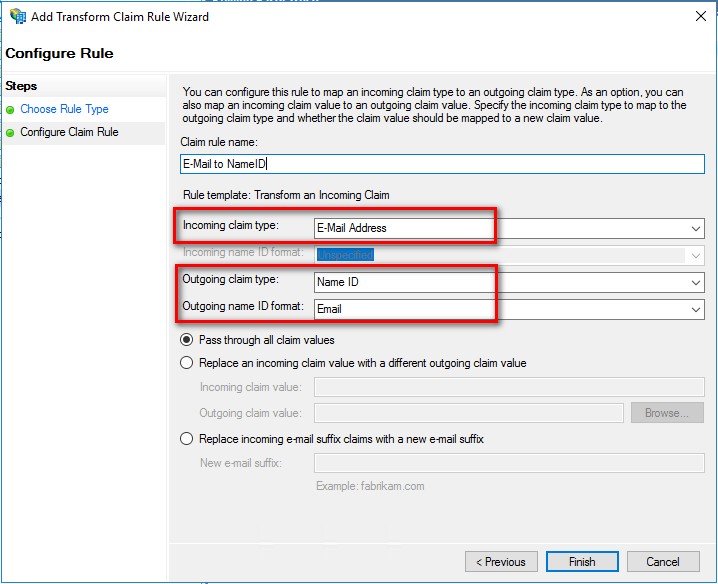
- From the "Claim rule template" dropdown choose "Transform an Incoming Claim"
- Set the Claim rule name to "E-Mail to NameID"
- For the “Incoming claim type” choose “E-Mail Address”
- For the “Outgoing claim type” choose “Name ID”
- For the “Outgoing name ID format” choose “Email”
- Activate the “Pass through all claim values” radio button (default).
- Finish the Wizard
- You should have two Claim Issurance policies in place now:
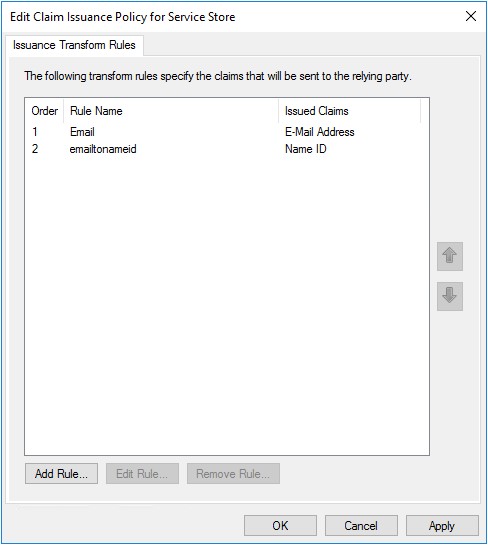
The AD FS Configuration is now done.
Configure ESM for SAML2 authentication
In this step, we are preparing the ESM instance to let users authenticate with SAML2. You will need to fulfill the following prerequisites:
- AD FS Login Endpoint
- AD FS Logout Endpoint
- Identity Provider Certificate String (Token signing)
- Open your ESM instance
- Navigate to Administration > Settings > Edit > Secure Token Service
- Fill in the following fields:
- SAML2 Login Button Title
- Fill in anything you like but give your users a hint that this is the Button for SAML 2 Login
- SAML2 Identity Provider ID
- This is the Domain of your AD FS Instance
- SAML2 Service Provider Issuer Name
- The Domain of your ESM Installation (as configured in the AD FS relying trust)
- Single Sign-On URI Endpoint
- Your AD FS Logon Endpoint (This can also be found in your AD FS Configuration under Service > Endpoints. By default, this is <FQDN of your AD FS>/adfs/ls // This might vary depending on your AD FS configuration
- Single Sign-Out URI Endpoint
- Your AD FS Logout Endpoint (This can also be found in your AD FS Configuration under Service > Endpoints. By default this is <FQDN of your AD FS>/adfs/ls/?wa=wsignout1.0)
- Fill in your “Identity Provider Certificate” string
- You could extract this from your Metadata.xml in AD FS (This can be usually found in <FQDN of your AD FS>/FederationMetadata/2007-06/FederationMetadata.xml). We are using the “signing” certificate here. This can also be found in your AD FS configuration (Service > Certificates > Token signing).
- Set the SAML2 Name ID Policy to "EMailaddress"
- When you're done it should look something like this:
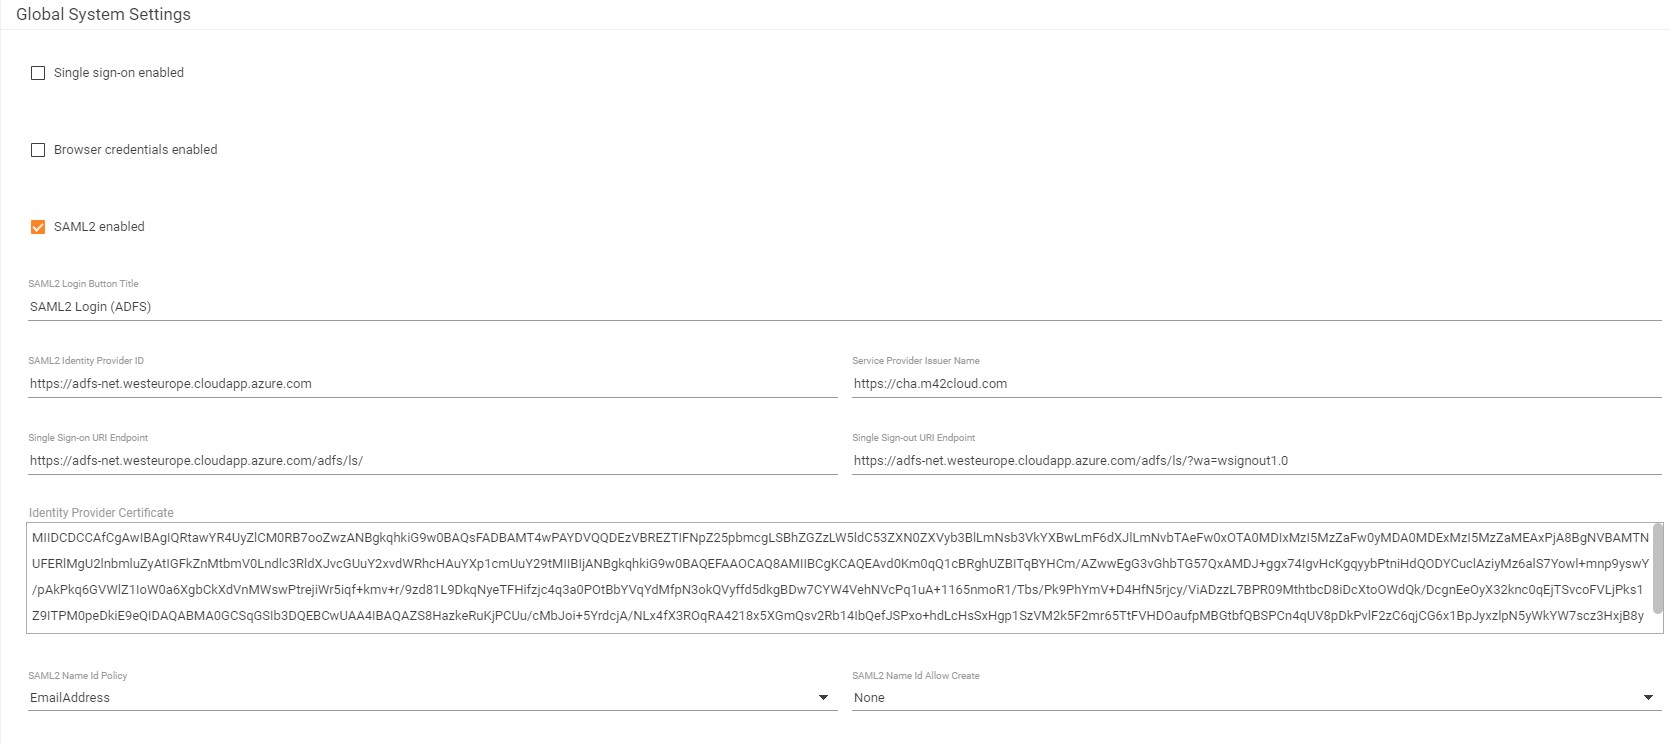
- When you activate "Single Sign On" users will be automatically logged in when already authenticated with AD FS (recommended) or will be redirected to your configured AD FS Logon Entry Point URI if they aren't authenticated with your AD FS yet while opening the ESM Application.
- The SAML2 Configuration is now done and ESM is now ready to accept logins via SAML2 from your AD FS Instance.
- SAML2 Login Button Title
Configure MWS Cloud Connector and ESM MWS Connector
As mentioned above you'll now need the users from your AD (FS) Instance imported to ESM so that they can log in. Since there are extra articles for those configurations this article only provides references to them.
Here is the flow in a Nutshell:
- Download and Configure MWS Cloud Connector for AD (For User Import from AD to MyWorkspace) (Article - Video)
- Wait until all users are imported
- Create an Authentication Token for ESM via M42 Accounts (Article - See: Prerequisites for Importing Accounts Step 1)
- Configure ESM MWS Connector (for User import from MWS to ESM) (Article)
- Since you only want to import the Users you can skip the "Sign On" (SSO) Part.
- As soon as Users from MWS are imported to ESM, they are able to login via SAML2 Authentication.
- Please note: Users logged in this way will have no role assigned and will only be able to see the ESM Portal.
- Roles have to be assigned manually after the import has taken place.
- Roles have to be assigned manually after the import has taken place.
- Please note: Users logged in this way will have no role assigned and will only be able to see the ESM Portal.
If you happen to "lock out" yourself from ESM (if your AD FS is down, for example, network issues, etc.), you could always FORCE the login by using the following parameter in your ESM URL:
- HTTP Redirect is not configured:
/wm?ForceLoginPage=true
Example: https://cha.m42cloud.com/wm?ForceLoginPage.
- HTTP Redirect is configured:
/wm/?ForceLoginPage
Example: https://cha.m42cloud.com/wm/?ForceLoginPage.
This bypasses the default authentication (SAML2 SSO in this case) and enables you to login with an Internal Domain user for example.
If you force the login page so that you want to log in with an internal user for a test case, we recommend that you first log out with your logged-in user at our console. Otherwise, with SingleSign On (SSO) configured, automatic log-in can happen again via Windows authentication in the browser.
Alternatively, you can start a browser in "in private" or "incognito" mode to force the login page.