Car Tracking 3: Car Action "Track on Map"
Goal
The purpose of the Article to show how the new Actions can be added to the UUX application, and how to set up them in an away they always correspond to the current application context. Also demonstrates how Wizards can be used for the Action implementation
Requirements
The article implements one of the parts of the "Car GPS Tracking" feature, which introduce the new Action "Track on Map" for the selected cars. The action only available for "active" selected cars which have the GPS tracker on board. On running the action start a wizard.
Implementation
To see the lesson implementation video please follow the link Car Tracking Acton
On previous two lessons, we implemented and registered new custom Web Service which returns the GPS coordinates for the specified cars, and also we introduced new Control in SolutionBuilder which allows dynamically track on the Google Map multiple objects. In this lesson, we are going to aggregate these result in one action "Track on Map" which is applicable for active selected Cars. The Action starts the wizard which displays the Google Map the selected cars
Step 1: Create New UUX Action
To create a new Action in UUX:
- Open Administration application and proceed to "Actions" management area, and click "+Add Action Button"
- Fill the dialog and Save the Action.
Title: "Track on Map"
Name: "FLM.TrackOnMap"
Implementation: Select the radio button "Run Wizard", open object picker Browse Lookup dialog and create new Wizard with name "FLM Track on Map" which executes nothing. Save the Wizard. - Specify Action Filtering Criteria
To see the Action only in relevant cases the Filtering Criteria should be correctly setup.
Target: "Multiple Objects", the action will be applied to a single or multiple selected cars
Filter by: "Configuration Item"
Type Filter: "Specified Only"
Configuration Items: "FLMCarType"
State Filter: "Specified Only"
Status Values: "Active"
Filter Javascript Expression: to exclude selected Active cars which do not have GPS tracking module on board, besides filter by CI and Status we are adding an additional filter which checks the property "GPS Tracking Enabled". For more details please see the article " How to: Use Javascript Expression for hiding irrelevant UUX Actions "
($object.FLMCarClassBase != undefined && $object.FLMCarClassBase.GPSTrackingAvailable == true) || $object.GPSTrackingAvailable == true
Step 2: Implement Wizard
On creating the Action we created an empty Wizard which does not have Submit (No Operation was selected).
- Adjust Wizard Views
Provide Title and Header for the first Wizard View, the second view is obsolete and need to be removed - Add additional Data Source for getting Cars coordinates
For more information see Layout Designer Data Model.
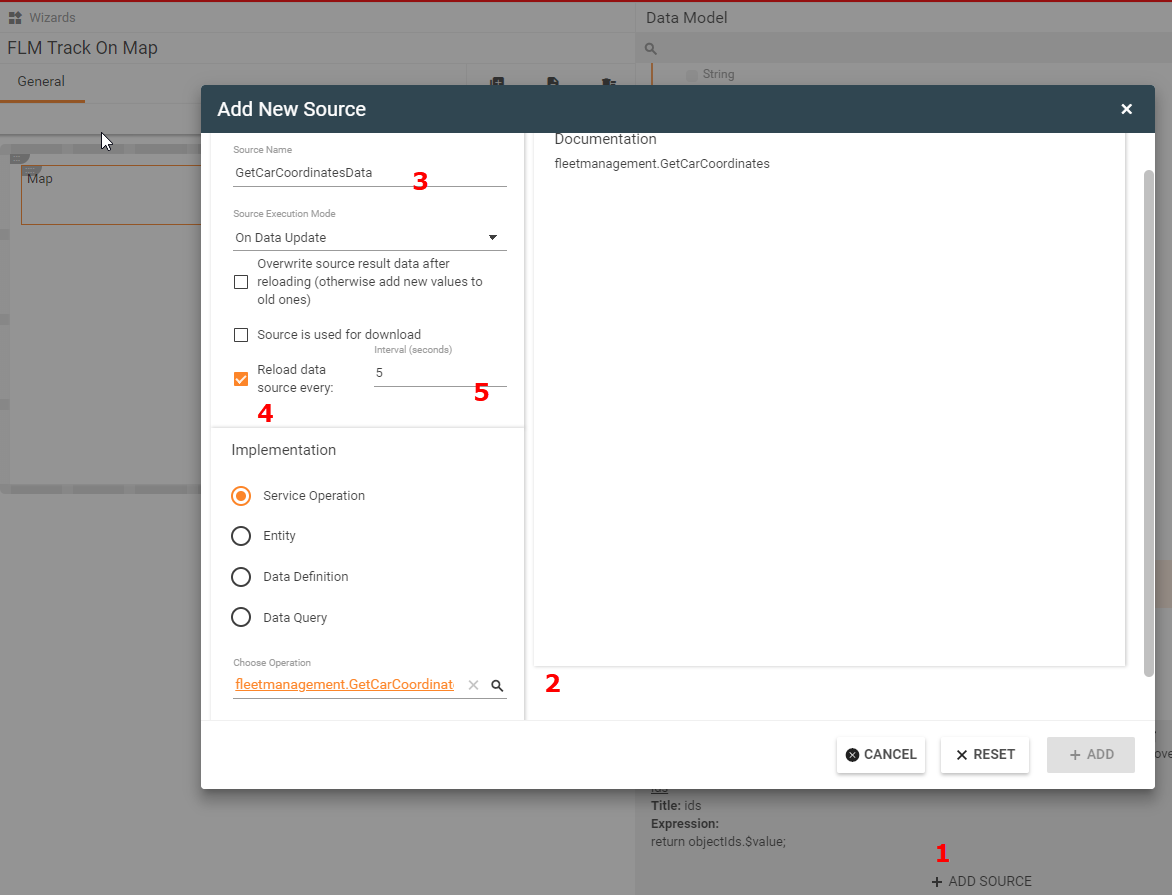
See the picture below. Click on +Add Source (1);
select "Service Operation" and pick a web service implemented on the previous lesson "GetCarCoordinates" (2);
provide the unique name of the Data Source (3);
configure the Data Source automatic refreshment (4) every 5 seconds (5) a

- Drag&Drop Map control to canvas and setup it.
Assign the result of the "GerCarCoordinatesData" to the Map Control Points property.
Set "Zoom" to 9 - Save the wizard

Step 3: Evaluate action implementation
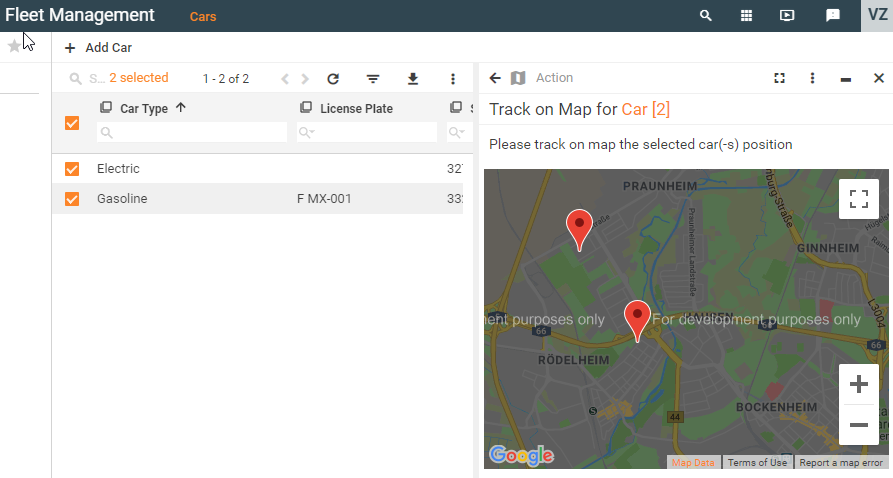
Open Fleet Management application, select a car, or a few cars which are in state "Active" and have Tracking Available, and start the Acton "Track on Map"

Step 4: Add Files to the Configuration Project
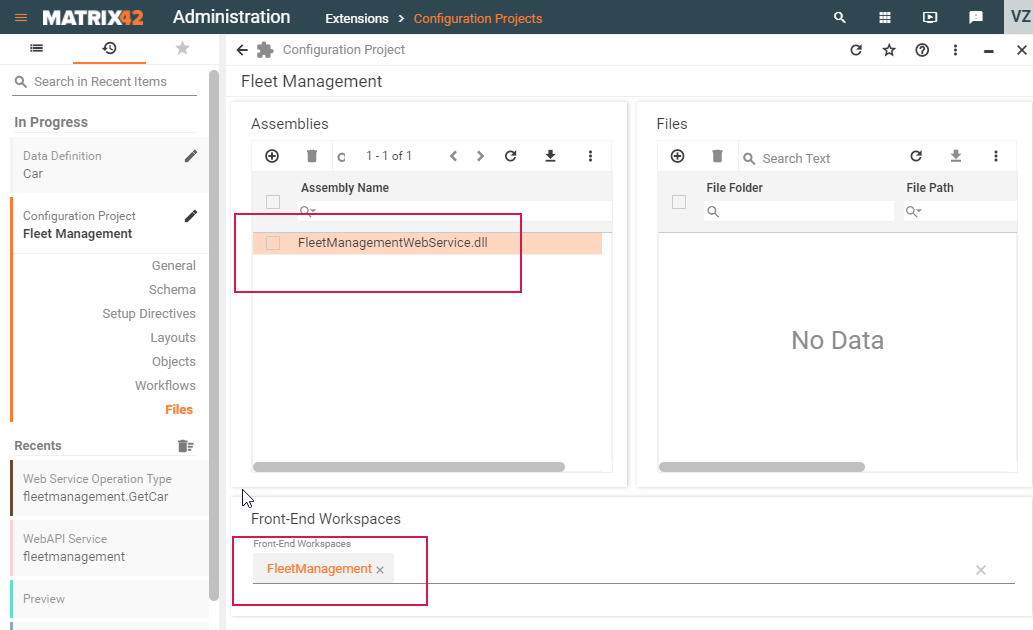
The Configuration Project automatically records only changes in Database which are relevant for the UUX configuration. All other changes (if needed) need to be added manually. In our case, the assembly which implements the "Fleet Management Web Service", as well as UUX Frontend Workspace wit Map control, needs to be referenced in the Project
- Open the "Fleet Management" Configuration Project
- On dialog view "Files" add the reference to "FleetManagementWebService.dll"
- Include to package the new "FleetManagement" UUX Workspace
