Add new Control to Layout Designer
Overview
The article explains how the custom Control can be created and registered in the Solution Builder, to be available in the Layout Designer toolbox for authoring intricate Layouts. Such an use case could be very helpful for cases when the logic of the new Layout cannot be implemented with the range of the standard Control delivered out-of-the-box, or logic could be built with standard tools, but achieved result is not satisfactory from UI or performance perspective
Goal
The article targets the following goals:
- Introduce a new control in Layout Designer, which allow to render the <iframe> on the form, with dynamically defined Frame URL.
- Explain the principles of the construction and usage of the simple Control Descriptor
- Provide an example of the building custom HTML elements with AngularJS Directives
Implementation
Step 1: Build Angular Directive
As described in article Control Descriptor to have a new Control in Layout Designer toolbox, the new Control Descriptor need to be registered in the Solution Builder. For that case, the Simple Implementation Type of the Control Descriptor fits us the best. Literally, we can build the Control Descriptor based directly on standrad HTML Element <IFRAME> (e.g. Link Control Descriptor), but for the sake of the sample, as well as for supporting more intricate functionality (e.g. accessing IFrame Document DOM) we build the custom HTML element, using the AngularJS Framework. For more details please read the AngularJS Directive guide.
In code snippet you can see the simple implementation of such control (see it also in Article attachments):
(function() {
    MxIFrameCtrl.$inject = ['$scope', '$sce'];

    function MxIFrameCtrl(scope, $sce) {

       var vm = this;

       vm.$onInit = function () {
       };

       vm.frameSource = null;
       scope.$watch('vm.src', function(val) {
          vm.frameSource = $sce.trustAsResourceUrl(val);
       });
    }

    angular.module('<YourModuleName>').component('mxIframe', {
          controller: MxIFrameCtrl,
          controllerAs: 'vm',
          bindings: {
             src: '@'
      },
      scope: {},
      template: '<iframe src="{{vm.frameSource}}" style="width:100%;height:100%;border: 1px solid lightgrey;"></iframe>'
   });

})();
Step 2: Include the "mxIFrame" Control to UUX Front-end
To make the implemented control be known by UUX application, references to the Front-end assets (e.g. JS libraries or CSS) need to be properly registered in the UUX platform. For the integrating 3-d party modules, the UUX platform uses "UUX Front-end Workspaces".
Step 3: Create Control Descriptor
Finally the custom control is implemented and registered in UUX SPA application. The final step to make it visible in Layout Designer is a creation of the Control Descriptor.

Inheriting from the "Basic Control" the new registered control automatically gives the basic control properties and behaviours
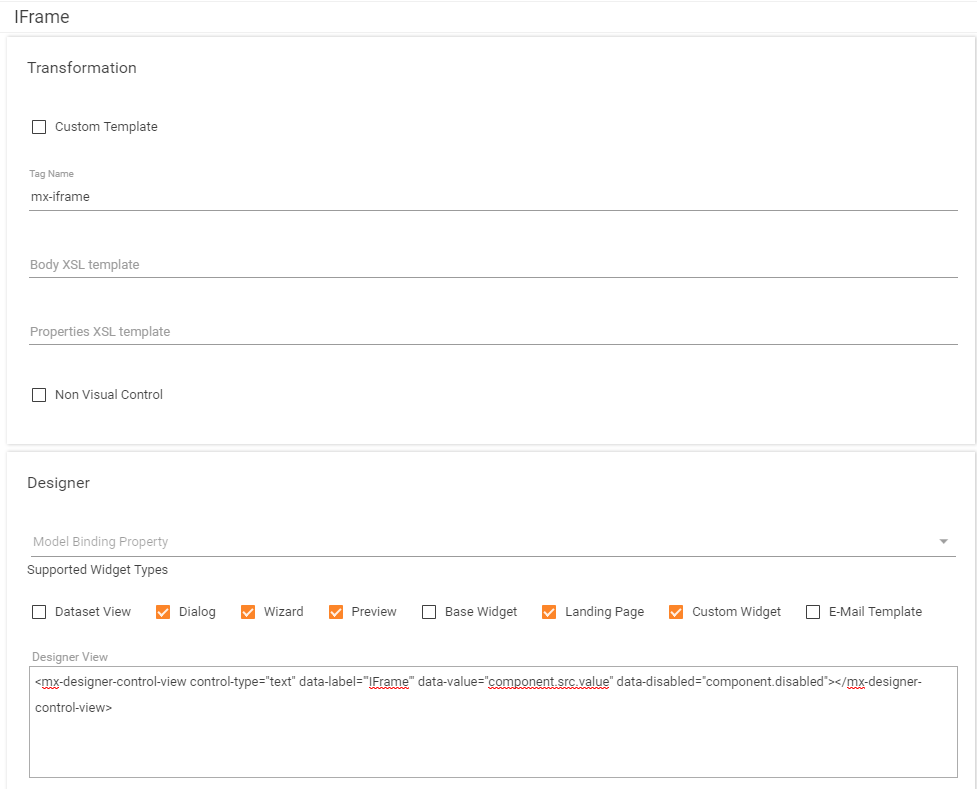
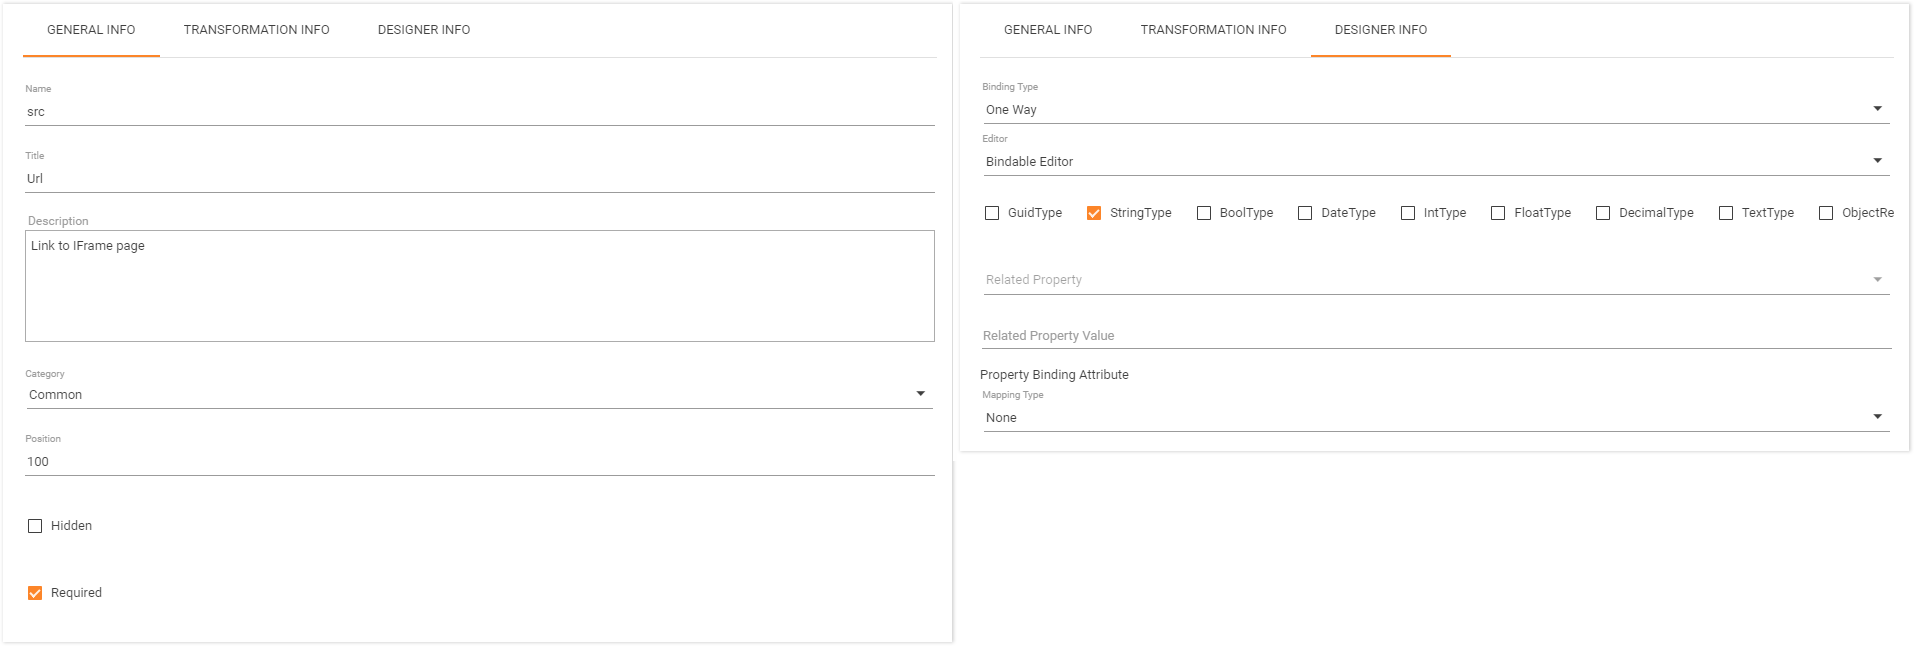
In our AngularJS Directive we have introduced a single inputer argument "src" which need to be also registered in the Control Descriptor
Step 4: Use IFRAME control in Layout Designer
Once the Control Descriptor is created, the new Control is displayed in the Layout Designer, and could be drag&dropped to the designing Canvas.
