Car Tracking 2: Web Service for Tracking Car
Goal
The article targets the following goals:
- Develop a new Web Service from scratch
- Deploy the developed Web Service to a SolutionBuilder Application Server
- Register the new Web Service in the SolutionBuilder Service Repository
- How to debug the Web Service
This article provides a practical example of the principles described in the article Develop and Register Web Service.
Use Case (Requirements)
Implement a new Web Service which is hosted on the SolutionBuilder Application Server, and returns GPS coordinates of specified Cars.
Prerequisites
The environment for developing SolutionBuilder components is installed. To setup a development environment, please follow the article Solution Builder Development Environment.
Implementation
Step 1: Create the C# Project
- Open Visual Studio
- Follow Menu "File - New Project" to start new Project
- Specify Project Type "Class Library", set any folder for the Project, and given Name
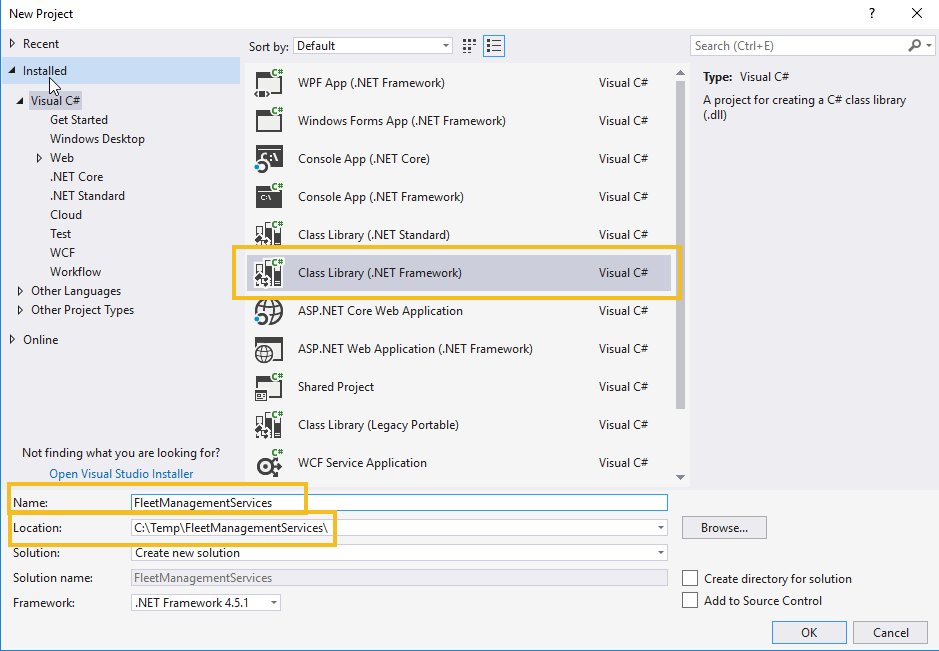
- Press "OK"
- Visual Studio creates the Project file structure and opens the just created Project.
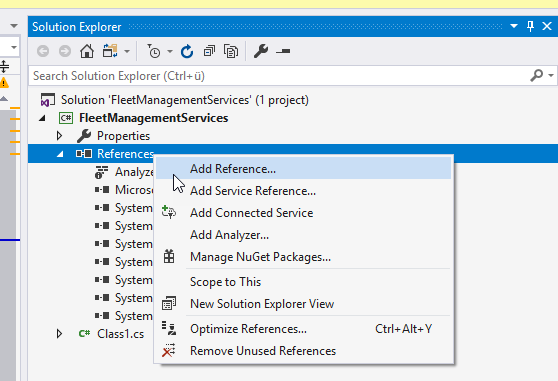
Step 2: Configuring the Project
SolutionBuilder uses the ASP.NET Web API Framework for implementing dervices. To create the Web Service you need to inherit your Web Service class from the standard WebAPI Framework class ApiController. To be able to use resources of WebAPI framework in the Project, they need to be referenced to the Project.
To add any reference to the project, you need to open the Solution Explorer window in Visual Studio, find the node "References" and right-click on it
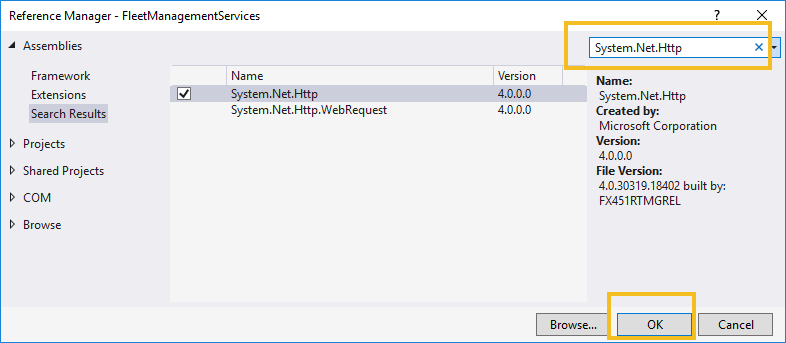
- Add the reference to "System.Net.Http" assembly
The assembly is part of the .NET Framework. Therefore in the Add Reference window proceed to the tab "Assemblies" to find and select it
- Add the reference to "System.Web.Http" assembly.
The assembly is not part of the .NET Framework and delivered as a Nuget extension. To avoid problem of visioning it is recommended to reference this assembly directly from the SolutionBuilder
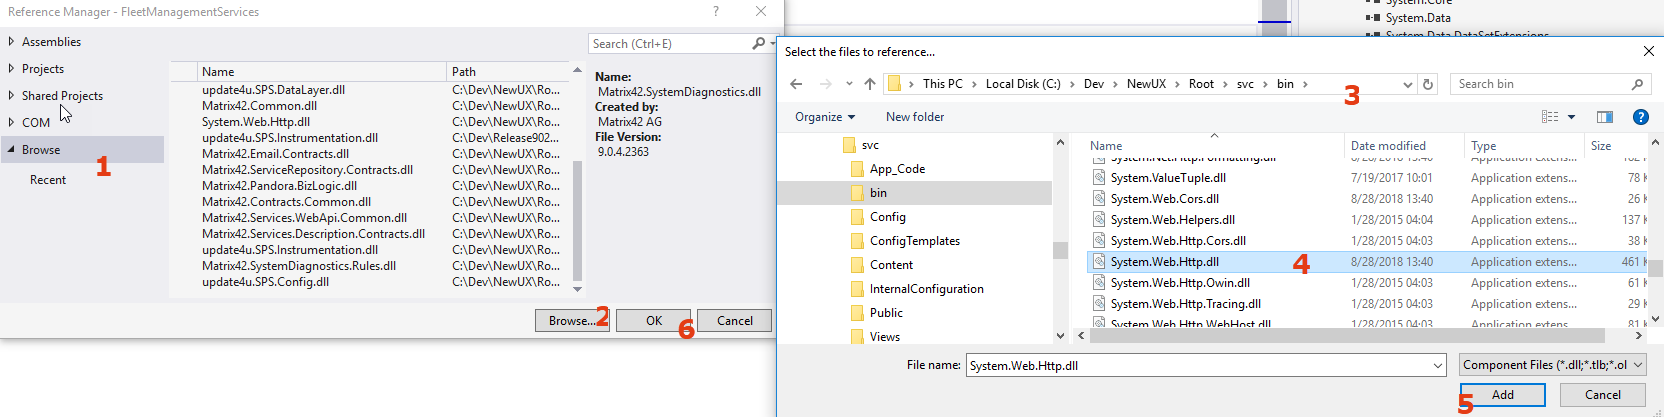
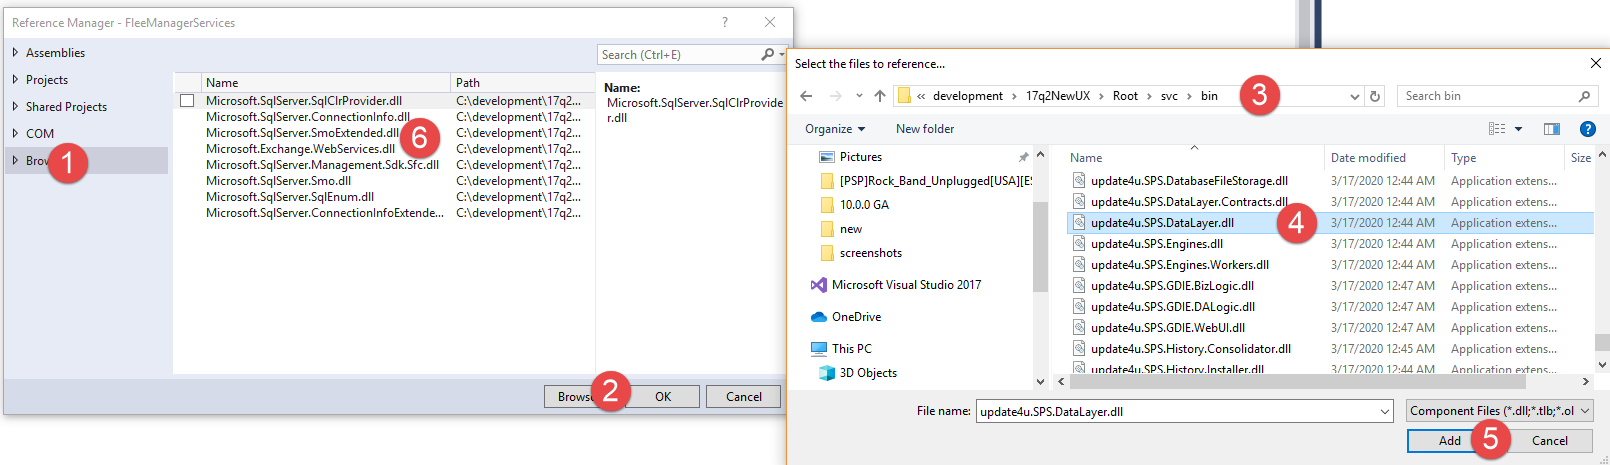
- Add the reference to "update4u.SPS.DataLayer" assembly.
The assembly is part of Platform and needs to be referenced from the InstallationFolder/svc/bin
- Add the reference to "Matrix42.Common" assembly.
The assembly is part of Platform and needs to be referenced from the InstallationFolder/svc/bin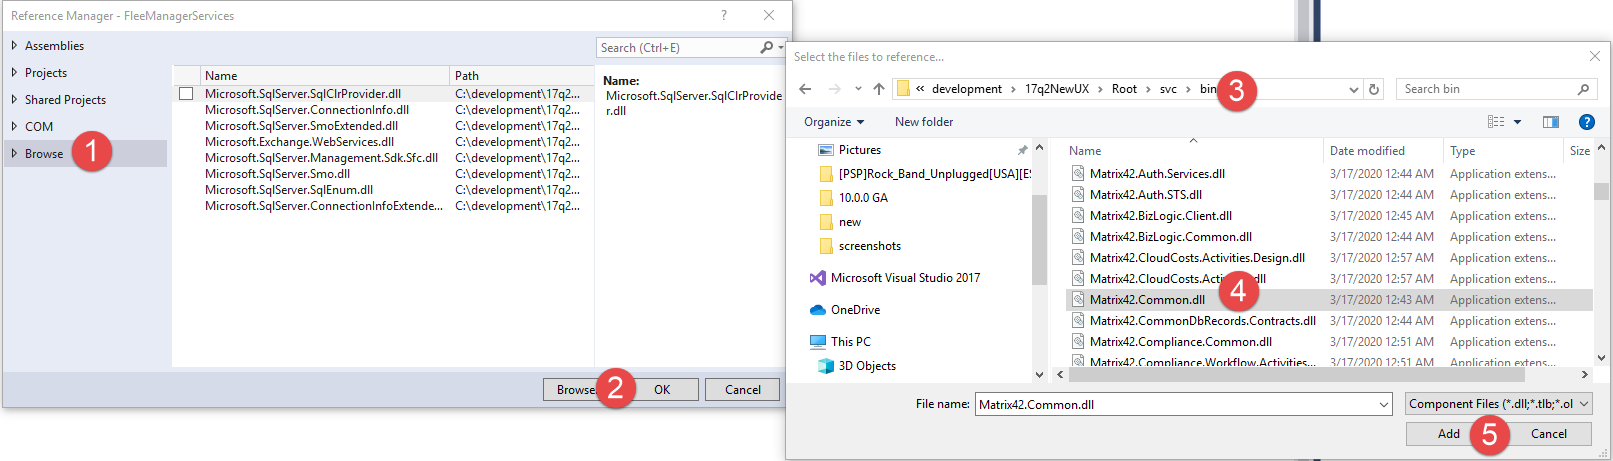
Step 3: Add WebService class
Once the references of the WebAPI resources are added to the project, the new Service Class can be added and programmed.
1. Add a new class with a name that ends with the prefix "Controller".
To add a new Class in Solution Explorer, right-click on Project - Add - Class..
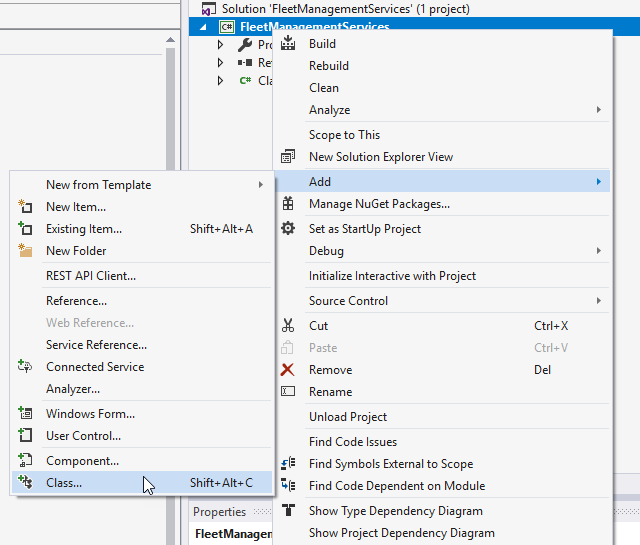
2. Give a name of the class "FleetManagementController"
The name of the Web Service class must always ends with the "Controller" suffix
Step 4: Implement the WebService class
- Inherit the class from the ApiController
- Configure routes for WebService
Routing is how Web API matches a URI to an action. For more details please see the Attribute Routing in ASP.NET Web API 2 - Implement the Service method
using System;
using System.Collections.Generic;
using System.Data;
using System.Linq;
using System.Web.Http;
using Matrix42.Common;
using update4u.SPS.DataLayer;


namespace FleetManagementWebService
{
    [RoutePrefix("api/fleetmanagement")]
    public class FleetManagementController : ApiController
    {
        public static double Move = 0;
        private Dictionary<Guid, Point> cars = new Dictionary<Guid, Point>();

        [Route("carsgeo"), HttpPost]
        public Point[] GetCarCoordinates([FromBody] Guid[] ids)
        {
            Move += 0.001;

            if (ids == null || ids.Length == 0)
            {
                return null;
            }

            var newIds = ids.Where(id => !cars.Keys.Contains(id)).ToArray();

            if (newIds.Length > 0)
            {

                var tbl = FragmentRequestBase.SimpleLoad(SPSDataEngineSchemaReader.ClassGetIDFromName("Ud_FLMCarClassBase"), "Ud_Name, [Expression-ObjectID] as Id ",
                        AsqlHelper.BuildInCondition("[Expression-ObjectID]", ids));


                foreach (DataRow dataRow in tbl.Rows)
                {
                    cars.Add((Guid)dataRow["ID"], new Point()
                    {
                        Id = (Guid)dataRow["ID"],
                        Title = dataRow["Ud_Name"].ToString(),
                        Lat = 50.126 + cars.Count * 0.01,
                        Lng = 8.609 - cars.Count * 0.01
                    });
                }

            }

            foreach (var carsValue in cars.Values)
            {
                carsValue.Lat += Move;
                carsValue.Lng += Move;
            }

            return cars.Values.Where(c => ids.Contains(c.Id)).ToArray();

        }
    }

    public class Point
    {
        public double Lat { get; set; }
        public double Lng { get; set; }
        public string Title { get; set; }

        public Guid Id { get; set; }
    }

}
Step 5: Build and deploy Assembly to Application Server
1. Build the Project
To build Project in Visual Studio, select in menu "Build - Build Solution". If the code does not have errors the Solution is built. Otherwise, resolve the detected errors first.
2. Copy the compiled assembly to SolutionBuilder application.
Once the project successfully compiled the Visual Studio put the generated files to <SolutionFolder>/Debug/bin folder-
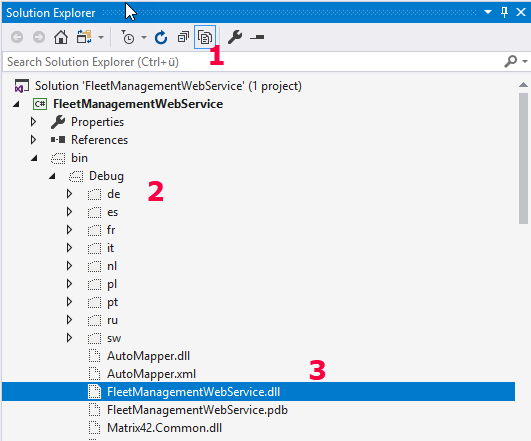
Copy the files "FleetManagementWebService.dll" and "FleetManagementWebService.pdb" to SolutionBuilder application folder <SolutionBuilderFolder>/svc/bin
To automate copying the files from your Project to the SolutionBuilder application, it is recommended to configure a Post Build command (CMD) for the Project after each successful compilation. In order to do so, open the Project Properties, proceed to the tab "Build Events" and set copy command to "Post build event command line"
Step 6: Register a new Web Service in the SolutionBuilder Service Repository
To be able to use the implemented WebService in SolutionBuilder, it needs to be registered in the Service Repository.
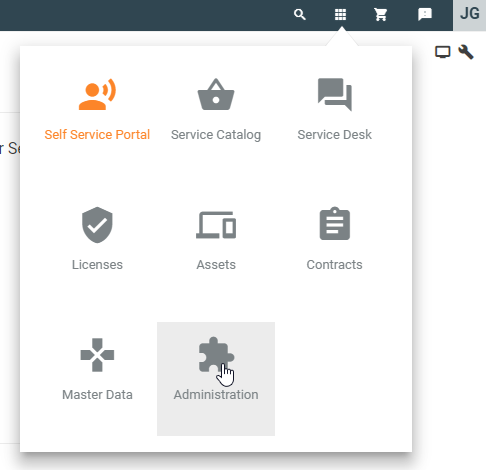
- Open the "Administration" UUX application in the FileChooser Menu
- On the Homescreen, start a Customization Recording

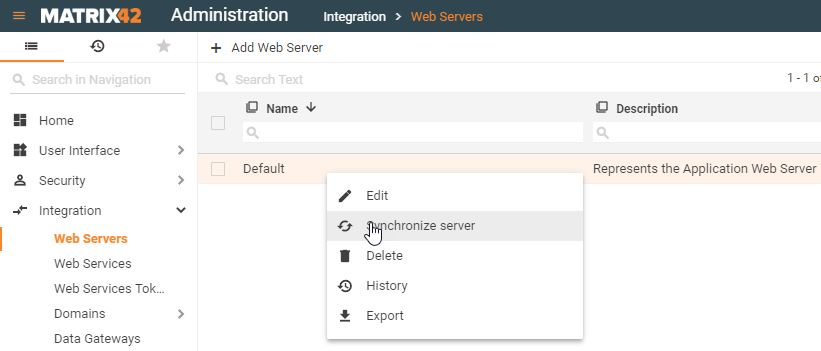
- Navigate to the management area "Integration -> Web Servers"
- Select "Default" web server, and execute the command "Synchronize server"
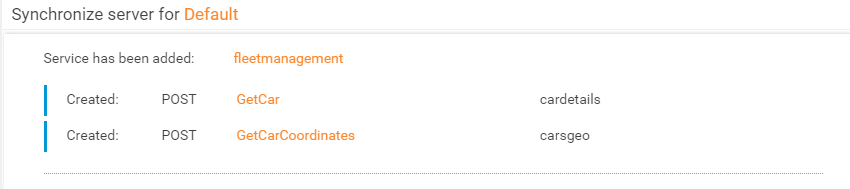
By synchronizing, the system automatically detects all Web Services hosted on the Application Server and adds their information or updates to the Service Repository. All the detected changes are now displayed on the actions result page.
Step 7: Configure Security
Right after the synchronization operation detected and added to the System are restricted, and only people from the Administration group are allowed to execute them. To change it:
1. Open the details of the Web Service operation (e.g. follow the link"GetCarCoordinates")
2. Execute operation "Set Audience"
Step 8: Debug implemented Web Service
To debug the Web Service:
- Open Web Service project in Visual Studio.
- Make sure the latest compiled version is deployed on Application Server
- In Visual Studio Menu, select "Debug - Attach To Process .."
- In popup dialog select "w3wp" process

- Set Breakpoints in the code
- Trigger the Web Service method execution from the application
In case multiple w3wp processes are displayed, you can attach to all of them, or by Process ID in Task Manager identify which exactly Process is running SolutionBuillder, and then attach only to it
What is Next
See the Create Action "Track on Map"