Configure AD user provisioning for “Remote Desktop Connection” and “Remote App” applications
Summary
Matrix42 MyWorkspace offers to automatically provision user accounts in the local Active Directory of a customer, whenever a user gets access to a "Remote Desktop Connection" or "Remote App" application in MyWorkspace. This article describes the necessary steps to set this up.
Goal
After completing this how-to you will have your MyWorkspace AD Connector configured to support user provisioning.
This article requires, that you already have an AD Connector setup. Check out Video: How to integrate Active Directory for how to do this.
First Step - Install the latest AD Connector update
- Download AD Connector latest version from MyWorkspace.
- Stop “Matrix42 Universal Framework” windows service.

- Launch MyWorkspaceCloudConnector.exe.
- Wait untill update will be finished and when setup wizard (wizard where you will be asked to sign in into MyWorkspace) will be opened – just close it.
- For “Matrix42 Universal Framework” windows service change the Log On account that will have enough permissions to create users in AD and add them to groups.
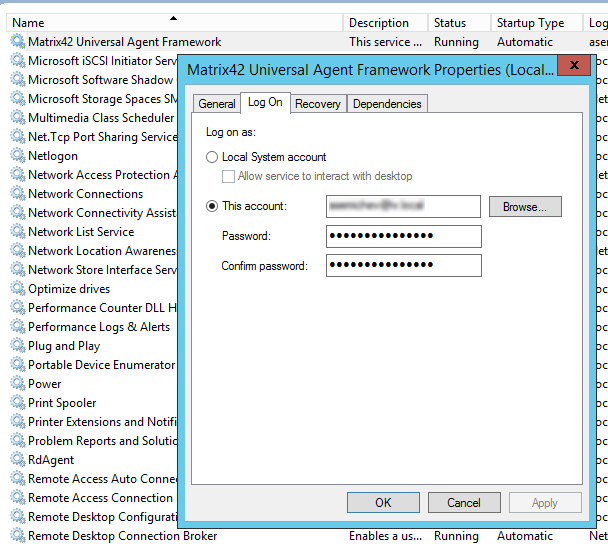
- Click save and restart the service.
Second Step - Create Account mapping script for target AD connector
This JS script will be executed one step before AD user creation by AD provisioning workflow to transform user email from “foo” domain into “bar” domain.
- Select your target AD connector (foo.com as example) and enable option “Dynamic Account Mapping”, and then create the Transformation script.

Transformation script samples:
Example 1:if (context.CurrentUser.MailAddress.endsWith('@foo.com')) { // Transfrom @ foo.com -> .m42@bar.com context.CurrentUser.MailAddress = context.CurrentUser.MailAddress.replace('@ foo.com', '.m42@bar.com'); } else if (context.CurrentUser.MailAddress.endsWith('@foo.br')) { // Transfrom @ foo.br -> .m42@bar.br context.CurrentUser.MailAddress = context.CurrentUser.MailAddress.replace('@foo.br', '.m42@bar.br'); } done(context);
Example 2:context.CurrentUser.MailAddress = context.CurrentUser.MailAddress.replace('@foo.com', '.m42@bar.com'); done(context); - Click save script button on the top panel.

Third Step - Create “Remote Desktop Connection” application with AD account provisioning option
- Create "Remote Desktop Connection" application with the usual settings. Enable account provisioning as explained in the screenshot:
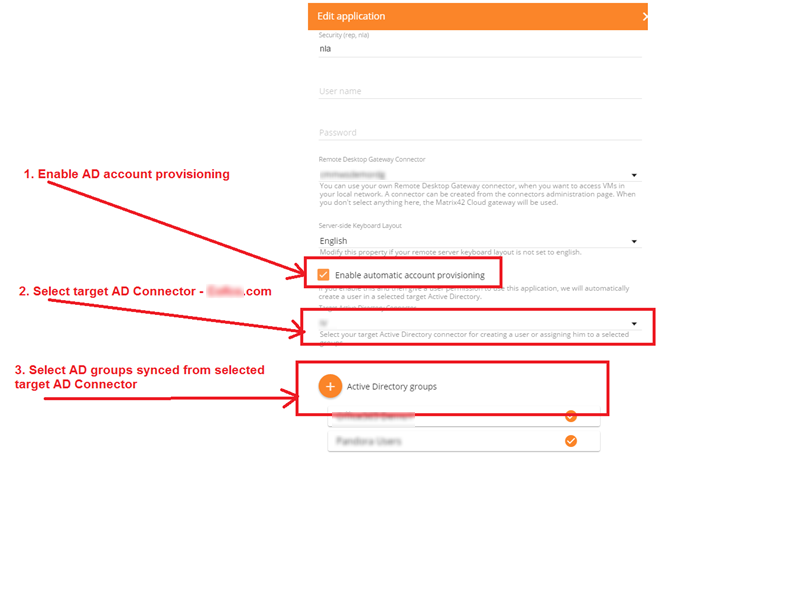
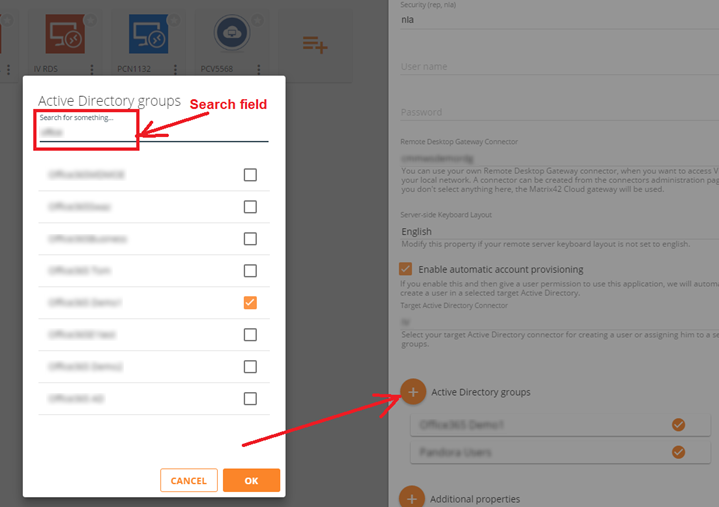
- Add Active Directory groups to which new provisioned users should be assigned to.
Fourth Step - Assign users to “Remote Desktop Connection” application
- Edit permissions for the newly created application.
- Assign users directly to the application as in the screenshot below, to make sure account provisioning is started.
