Email settings: Gmail Configuration for Google Workspace Service Connection
Overview
This page provides a step-by-step guide on how to configure email sending in Administration application via Google Workspace, involving modern authentication (OAuth 2.0) and Service Connections.
This configuration is available starting from ESMP v.11.0.1 or higher.
Email configuration belongs to the basic settings of the ESMP, therefore no extra subscriptions (ESMP Subscription) or licenses are required.
Perequisites
- Enterprise Service Management Platform v.11.0.1 or higher
- An active and available mailbox that is the same as the one registered for your Google Workspace
Configuration
Configuration steps:
- New Service Connection using Google Workspace Service with Google Gmail capabilities;
- Emails settings in ESMP Administration area.
Service Connection
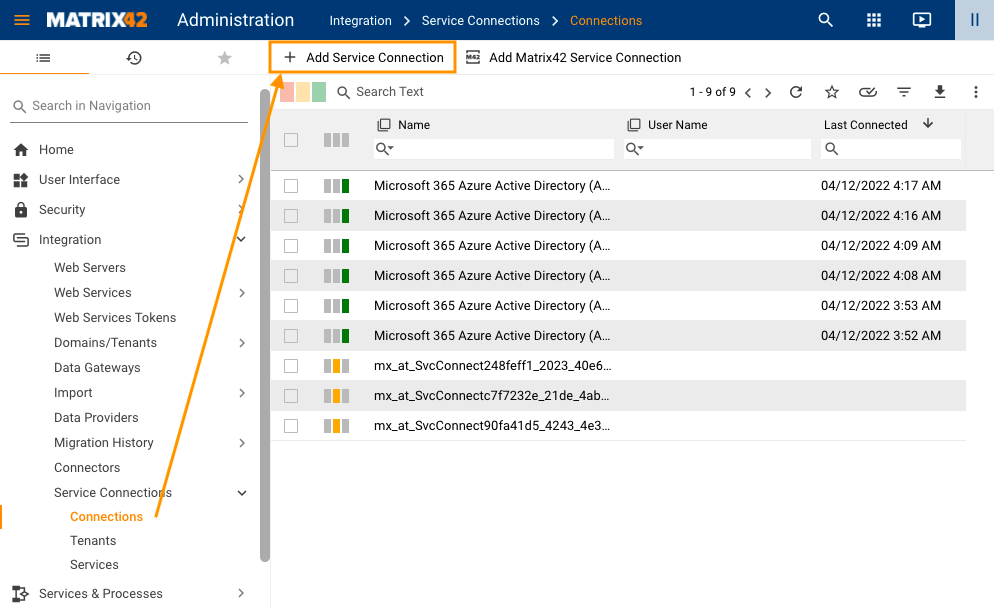
Log in to the Administration area of the Enterprise Service Management Platform, proceed to Integration navigation Item → Service Connections → choose Connections.
- To start configuration, click Add Service Connection action:
- Fill out the required fields:

- In the Service field, select Google Workspace object, which is available by default in the system:

- The name for your Service Connection is auto-generated, but you can modify it if necessary:

- In the Tenant field, proceed with creating a new tenant. Fill out the name:

- In the Service field choose Google Workspace with OAuth Authentication Type:

- For Client ID and Client Secret, sign in to Google Cloud Platform with your Google account:

The Google Cloud Platform interface may differ from the one provided in the example. For up-to-date configuration, refer to the official Google Auth Platform - Google Cloud Platform Console Help documentation. - On the home page of the Google Cloud Platform, in the top bar, next to the Google Cloud logo, click Select a project and create a New Project:

- Provide a project name. Leave the default configuration in the Location settings and click Create:

- In the Notifications area, click Select Project:

- In the search bar, find and enable Gmail API:

Enabled Gmail API is shown in the Enabled APIs & services dashboard as follows:

- In the OAuth consent screen, click Get started:

- Follow the suggested steps and fill out the necessary information:
- In the App Information, enter the App name, select the Gmail User support mail from the suggested list, and click Next:

- In the Audience, choose External user type, so that users outside your organization will be able to use it, and click Next:

- In the Contact Information, enter the developer contact e-mail address(es) and click Next:

- Go through the finish step and click Create:

- In the App Information, enter the App name, select the Gmail User support mail from the suggested list, and click Next:
- In the Branding configuration, scroll down to Authorized domains section and add the necessary domains:
 Click Save and continue.
 - In the Data Access, add Scopes: define the permissions you request users to authorize for your app and allow your project to access specific types of private user data from their Google Account. Choose necessary options from the suggested list or add the scopes manually, for instance:
- Scroll down and click Save and continue. Proceed without changes to the Summary page to save your configuration.
- Go Back to Dashboard → Audience → Publishing status → click Publish App → Confirm:

After publishing, the app will require verification. When you have finished configuring your information, please submit your app for review. Go to verification center as suggested by the app and follow the instructions there (fill out the form, upload a YouTube demo video, etc.)
- Go to Clients → click + Create Client → created OAuth client ID:

- In Application type, choose Web application:

- Scroll down to the Authorized redirect URIs and enter the name and add Authorized redirect URIs. Modify the Authorized redirect URIs according to the example:
https://{hostname}/wm/externalAuth/redirect.html

Click Create to save the configuration. - Use the generated credentials for the Google Workspace Tenant configuration in Service Connections:

Google Cloud Platform: Client ID and Client Secret values for Service Connections Tenant configuration

Enterprise Service Management Platform: Client ID and Client Secret values for Service Connections Tenant configuration - To finalize the Service Connection configuration, in the Administration area click Setup Authentication:

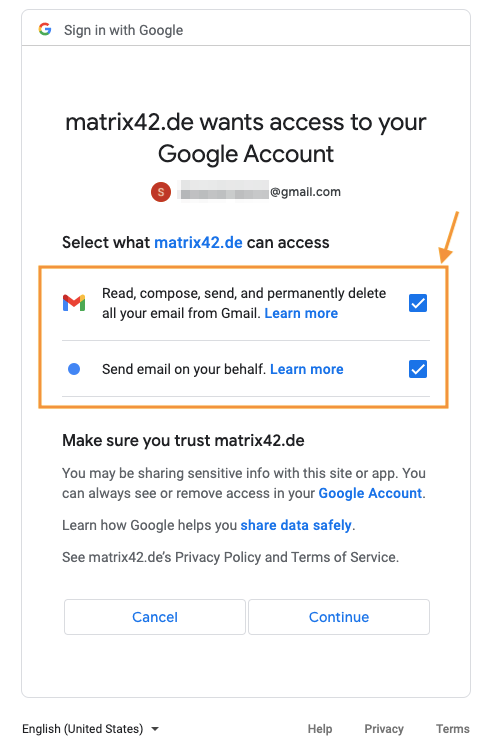
- Sign in with your Google account.
- Accept the requested permissions:
- When Service Connection Authentication has been successfully fulfilled, click Done:


Emails settings
To finalize the emailing configuration, in the Administration area, open Settings → Edit Global System Settings.

In the Emails view:
- Enabled: select the checkbox to enable emailing
- Specify SMPT server according to the email server configuration
- Verify the Default Sender
- Enable SMTP Authentication
- Enable Use SSL option
- Select Modern Authentication (OAuth 2.0) property
- Mailbox Email Address: enter an address of an active and available mailbox that is the same as the one registered for your Gmail Workspace Account
- Service Connection: choose a previously created Service Connection

Click Done to finalize the configuration and save changes.
Now your Enterprise Service Management Platform emailing is working.
You can also use this video tutorial as a reference:
The Google Cloud Platform interface may differ from the one provided in the example. For up-to-date configuration, refer to the official Google Auth Platform - Google Cloud Platform Console Help documentation.