Azure SQL Managed Instance Support
Overview
Azure SQL Managed Instance is a scalable cloud database service that allows managing SQL databases of more than one ESMP instance using a single SQL Server instance thus reducing the licensing costs while keeping the complete isolation of customer data.
Azure SQL Managed Instance is a SQL Server hosted in the Azure Cloud by Microsoft. Additionally, SQL Managed Instance automatically handles automated backups and has high availability solution which drastically reduces management overhead.
Use Microsoft SQL Server Management Studio to connect to the Azure SQL Managed Instance for managing SQL infrastructure.
Analysis Services and Reporting Services are not a part of the Azure SQL Managed Instance and are configured separately.
Prerequisites
- ESMP v.11.0.2 or higher
Installation particularities
For ESMP installation with Azure SQL Managed Instance perform the following steps:
- Configure Azure SQL Managed Instance: for more details see Microsoft Azure SQL Managed Instance documentation.
- Security settings and SQL Server Authentication configuration: to host different customer databases in one database system, on SQL Server, create SQL Server login and password for each customer. Using Microsoft SQL Server Management Studio, in the Object Explorer of the connected Azure SQL Managed Instance, proceed to the Security section → Logins.
ESMP does not support Integrated Security on Azure SQL Managed Instance.
- Create empty databases for a standard set of ESMP databases, which consist of Production-DB, History DB, Data Warehouse DB (see the list of databases in the
Matrix42.ProductInstall.configfile). - Assign user role to the login account for the created databases: using Microsoft SQL Server Management Studio, in the Object Explorer of the connected Azure SQL Managed Instance, proceed to the Databases → database name → Security → Users → user account Properties → Membership page → assign db_owner role:

- Configure Analysis Server: on a dedicated server/Application Server or according to your infrastructure setup create empty database for the Analysis Server
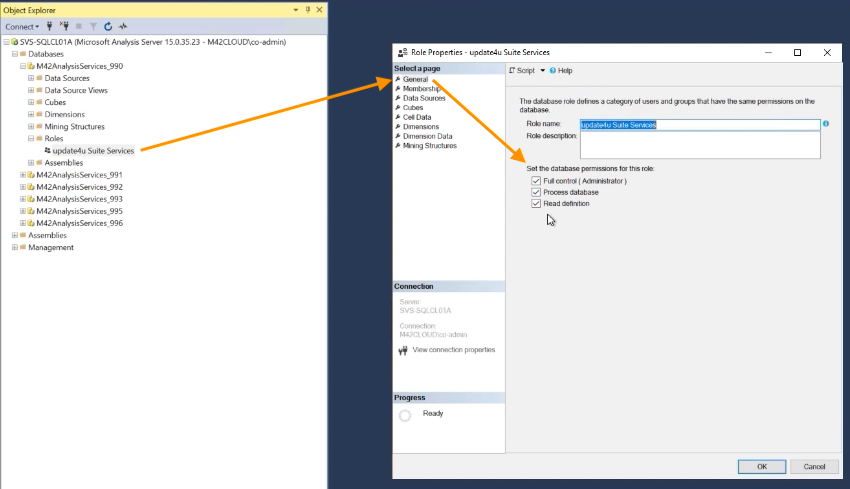
- Security settings for Analysis Server: using Microsoft SQL Server Management Studio, in the Object Explorer of the connected Microsoft Analysis Services, in the Analysis Services for the configured ESMP instance proceed to Roles → right-click to add a New Role → provide a Role Name and assign Full control (Administrator) permissions to the role:
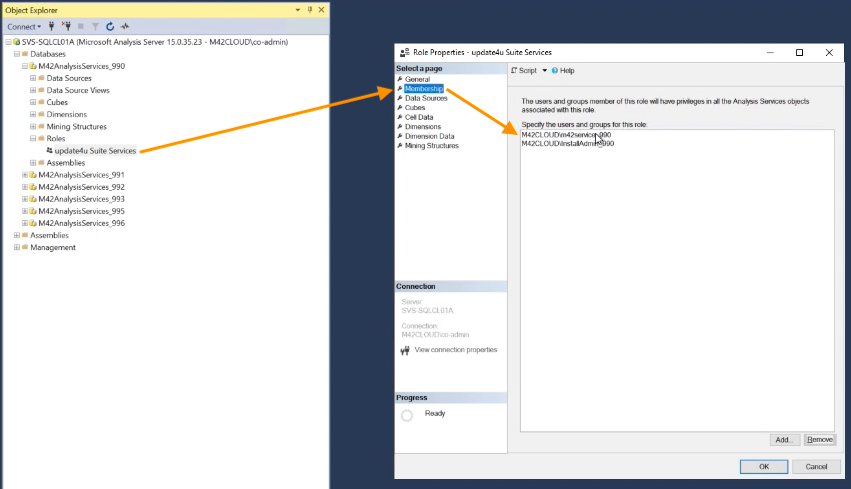
- On the Membership page add an Installation Account as a member:
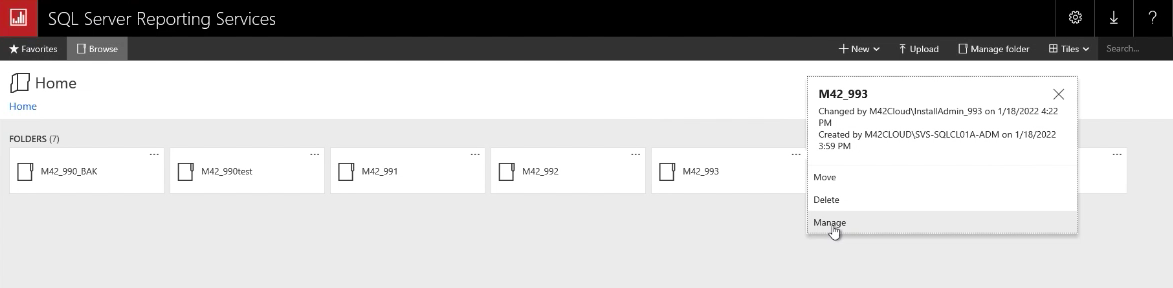
- Configure Reporting Services: create an empty folder for the Reporting Services of the configured instance.
- Security settings for Reporting Services: Reporting Services for several DWP instances can be hosted on the same reporting server in a separate dedicated folder.

On the folder for the currently configured ESMP instance click more options → Manage the folder:
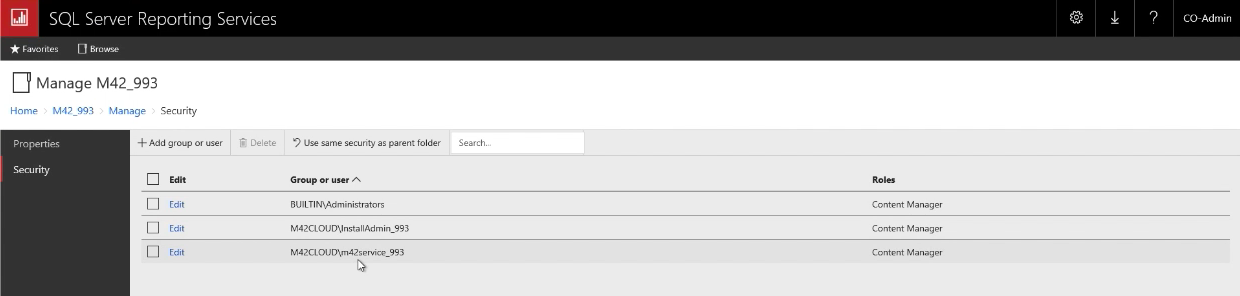
In the Security section, assign the Content Manager Role to the Service Account and Installation Account on the Application Server (integrated security account login):
- To install the ESMP with PowerShell script configure the options of the script that are available in the configuration file, located at
root\Matrix42\Matrix42 Workplace Management\bin\Matrix42.ProductInstall.config
While configuring the file, pay attention to the following properties:- set the
UseExistingDatabasesvalue totrue - set the
ConnectionStringvalue to the managed instance - for Persistence and Monitoring databases use the same value as for the Production database
- if you have a separate dedicated folder for the Reporting Services in your installation, specify the folder name in the
ReportServerFolderkey, otherwise the defaultM42folder will be used
- set the
- Install the ESMP with PowerShell script located at
root\Matrix42\Matrix42 Workplace Management\bin\Matrix42.ProductInstall.ps1
Use this flow for each customer's managed instance.
Update particularities
For an update of a ESMP with Azure SQL Managed Instance perform the following steps:
- Configure the options of the PowerShell script that are available in the configuration file, located at
root\Matrix42\Matrix42 Workplace Management\bin\Matrix42.ProductUpdate.config
While configuring the file, pay attention to the following properties:
- set the
SkipDatabaseBackupvalue totrue
- set the
- Run the product update script located at
root\Matrix42\Matrix42 Workplace Management\bin\Matrix42.ProductUpdate.ps1
For more details see Update with PowerShell script page.