Engines
Overview
When you want to call some background process from Workspace Management, you have the possibility to do so using Engines.
Engines Configuration
First of all, you need to register Engine in Administration → Services & Processes → Engines.
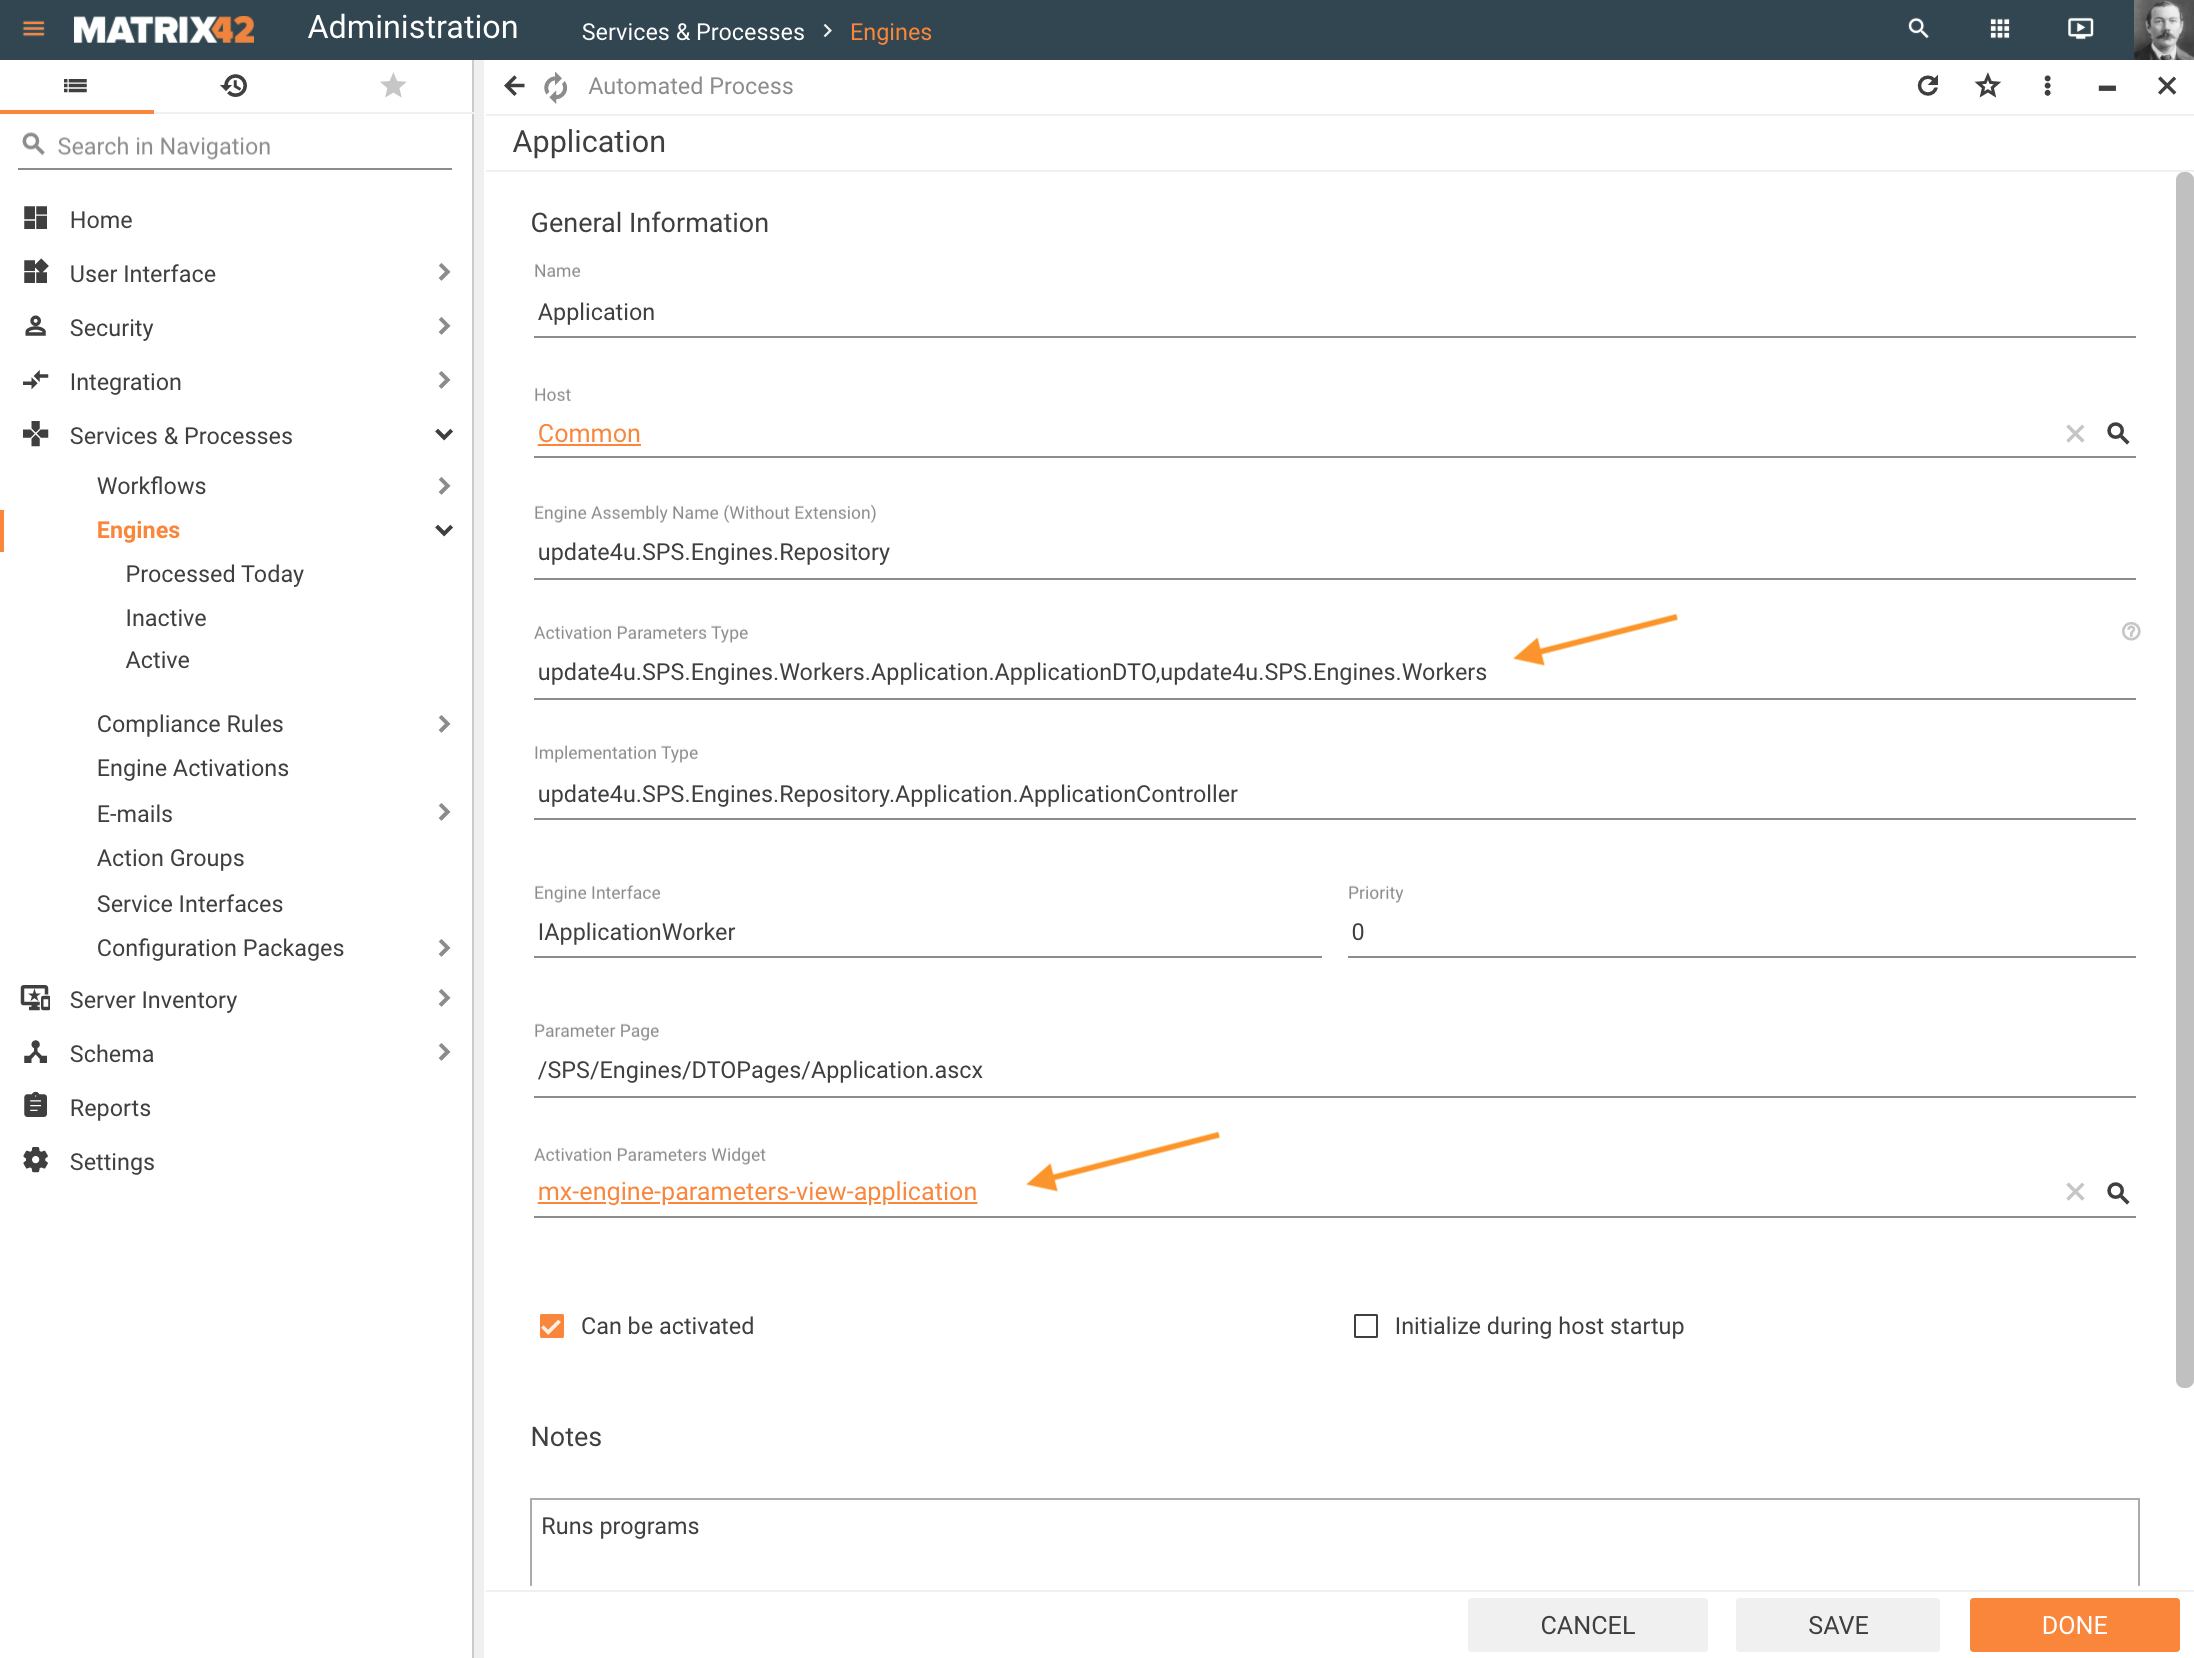
You need to specify a set of parameters:
- Host: choose service which will be used to run your logic from predefined;
- Engine assembly name: name of .dll, without extension, where Engine controller is implemented is needed;
- Activation Parameter Type (optional): when the engine has parameters, specify Implementation Type and .dll name separated by a comma;
- Implementation type: path to the controller with its name;
- Engine Interface: name of Interface for Engine;
- Parameter Page (optional): needed if engine activation needs to be configured in Classic UI and has parameters;
- Activation parameters Widget (optional): when the engine has parameters, you need to create control with Layout Designer which will be used to fill parameters when configuring Engine activation.
If you want to migrate engines with custom parameters to UUX please check this article.
Running Engines in a Sequence
It could be a case that Engine Activations conflict with each other when execution takes a lot of time, for instance, when a new Engine Activation runs according to the schedule and its processing depends on the data from another Engine Activation that due to some reason has not finished yet and is still running. However, previously it was not possible to configure running such Engines in a sequence.
Configuring Engine dependencies on Activation was introduced in 10.0.4 release version.
The Engines that Support Engine Activation Sequence are marked as follows on the Engine Preview page:
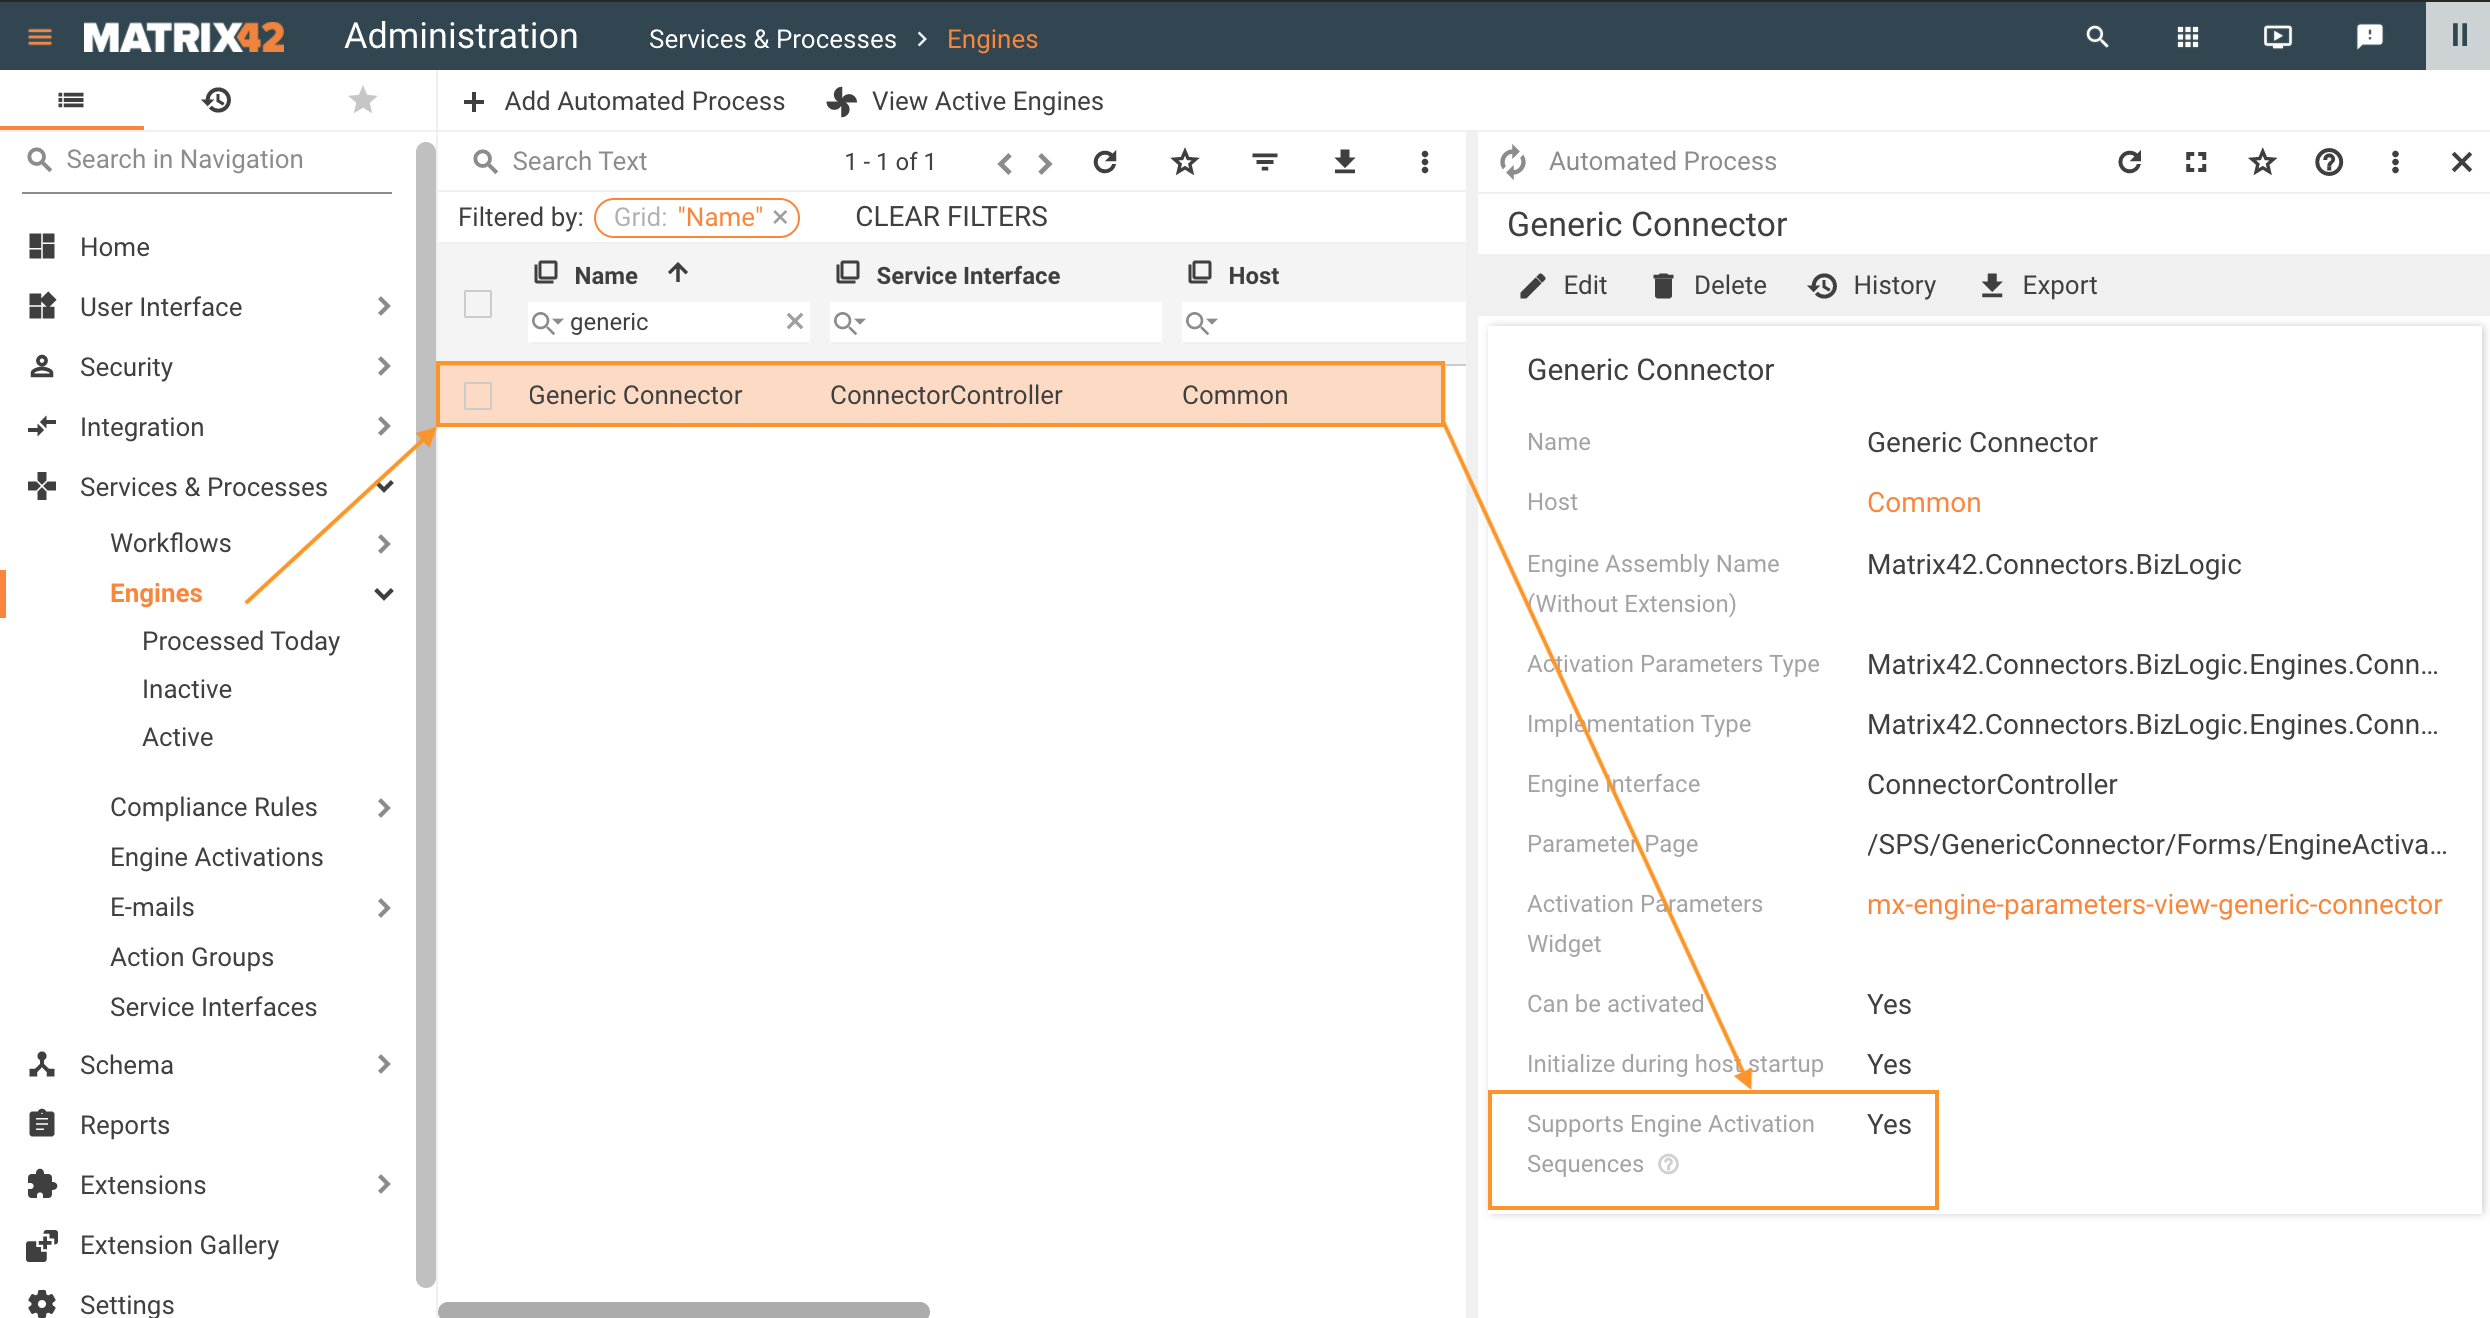
All the default Engines shipped in DWP support the sequence definitions.
Administrators can configure running Engines in a Sequence via Administration application → Services & Processes → Engine Activations → create new or edit → Activated Engines section.
It is possible to configure a dependency between Engines within a single Engine Activation object to start some engines only after the dependent engine finishes processing.
Engine Activation Sequences Configuration
- Add Engine Activation in Administration application → Services & Processes → Engine Activations;
- Configure General section and add Name:
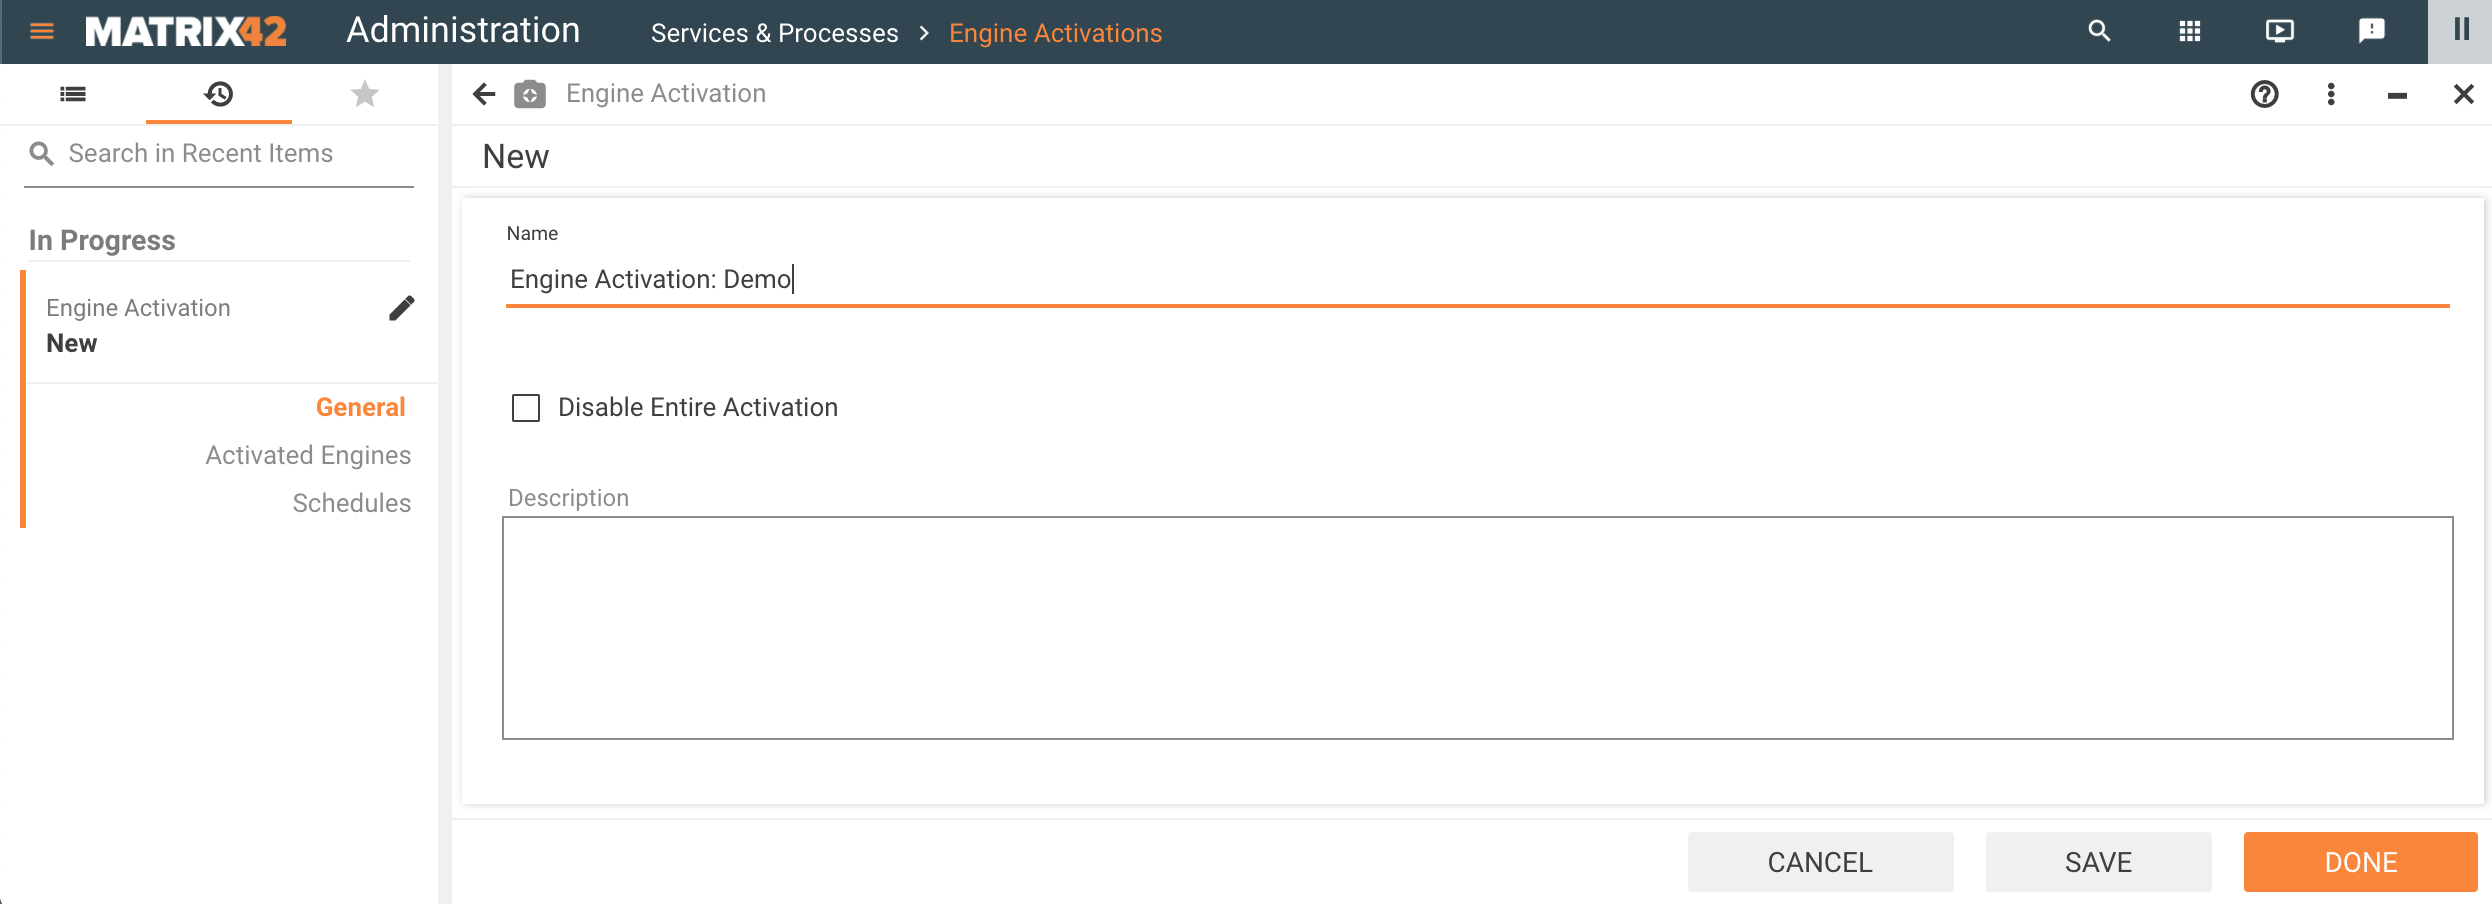
- In Activated Engines, click Create New Item:
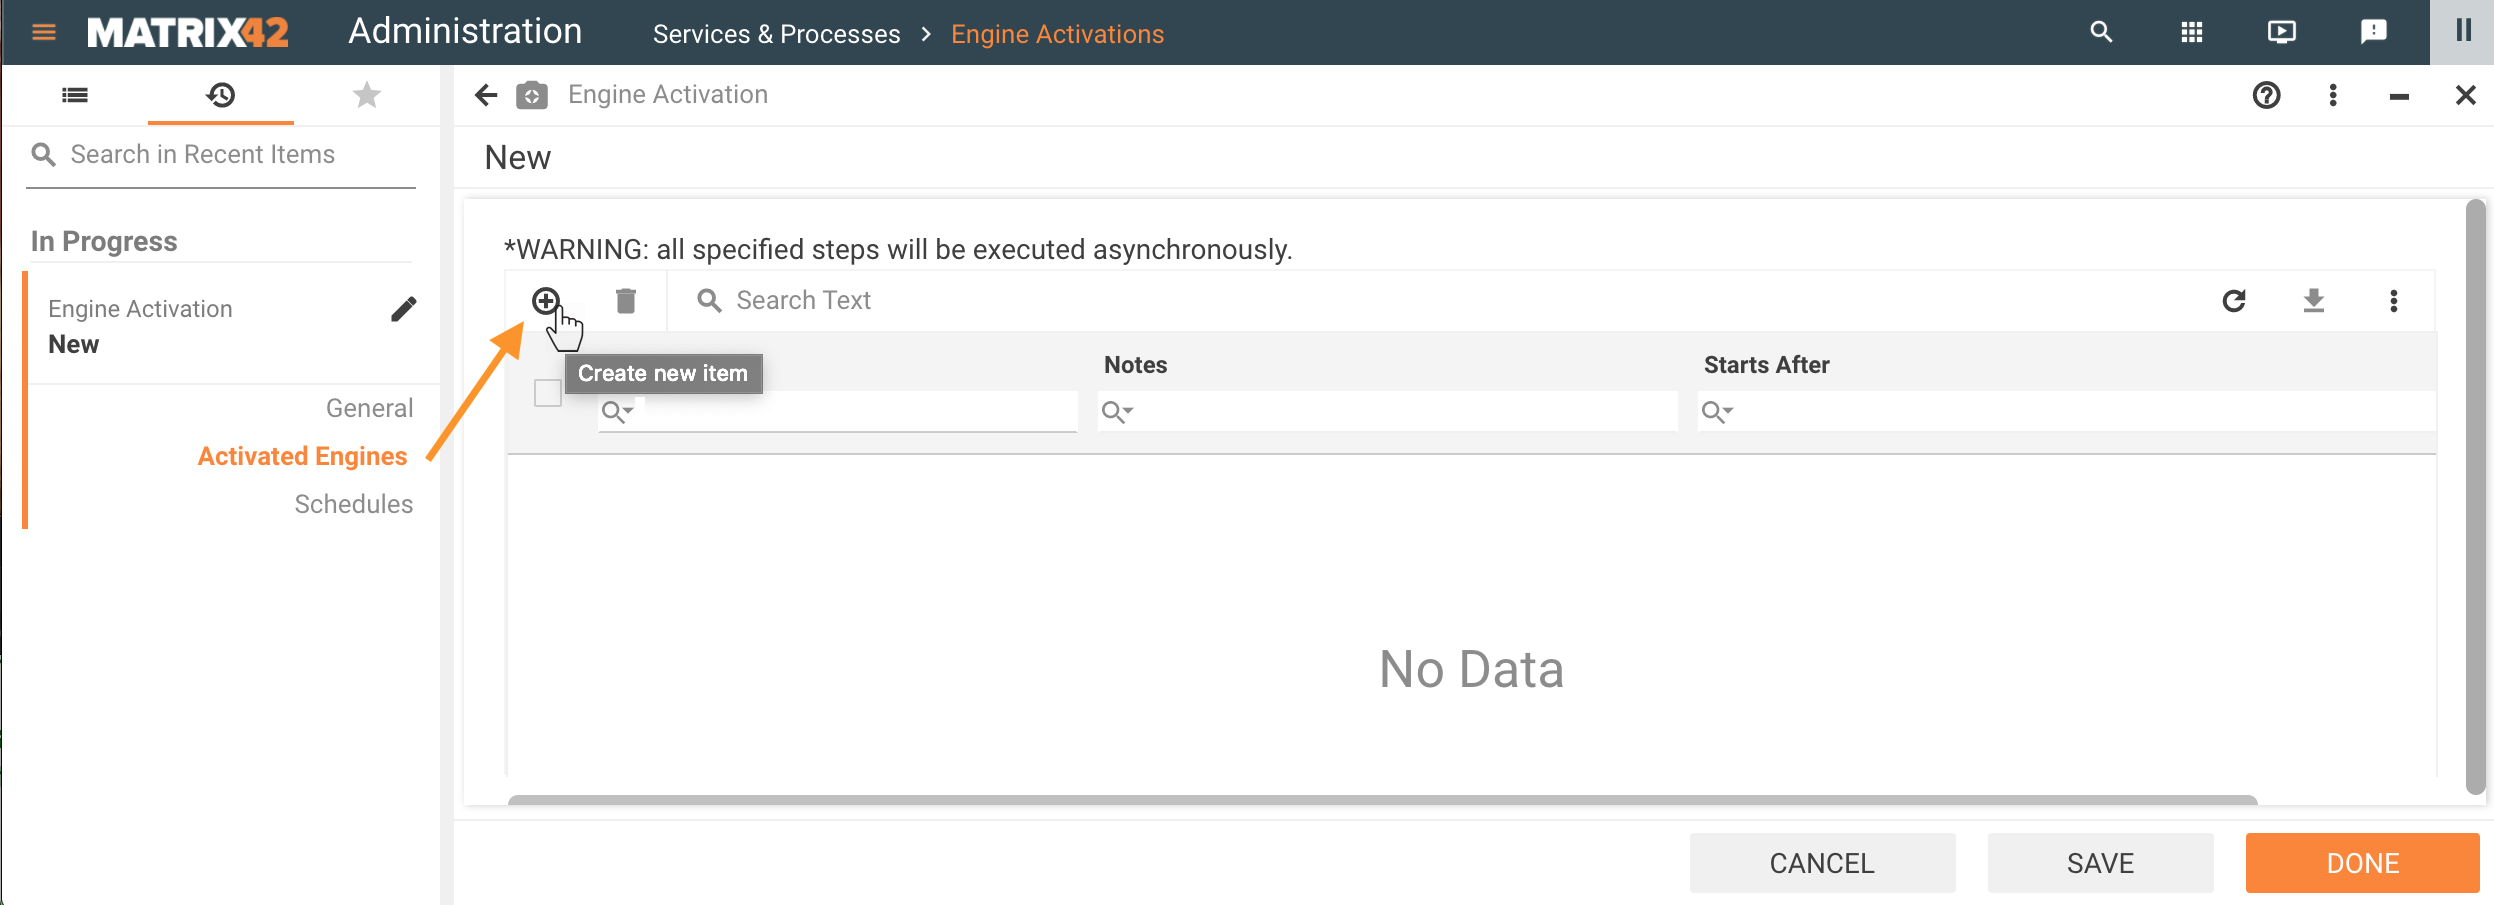
-
Define Engines that are started by this Engine Activation:
-
for instance, in Engine to be Activated field, add Generic Connector as the first Engine:
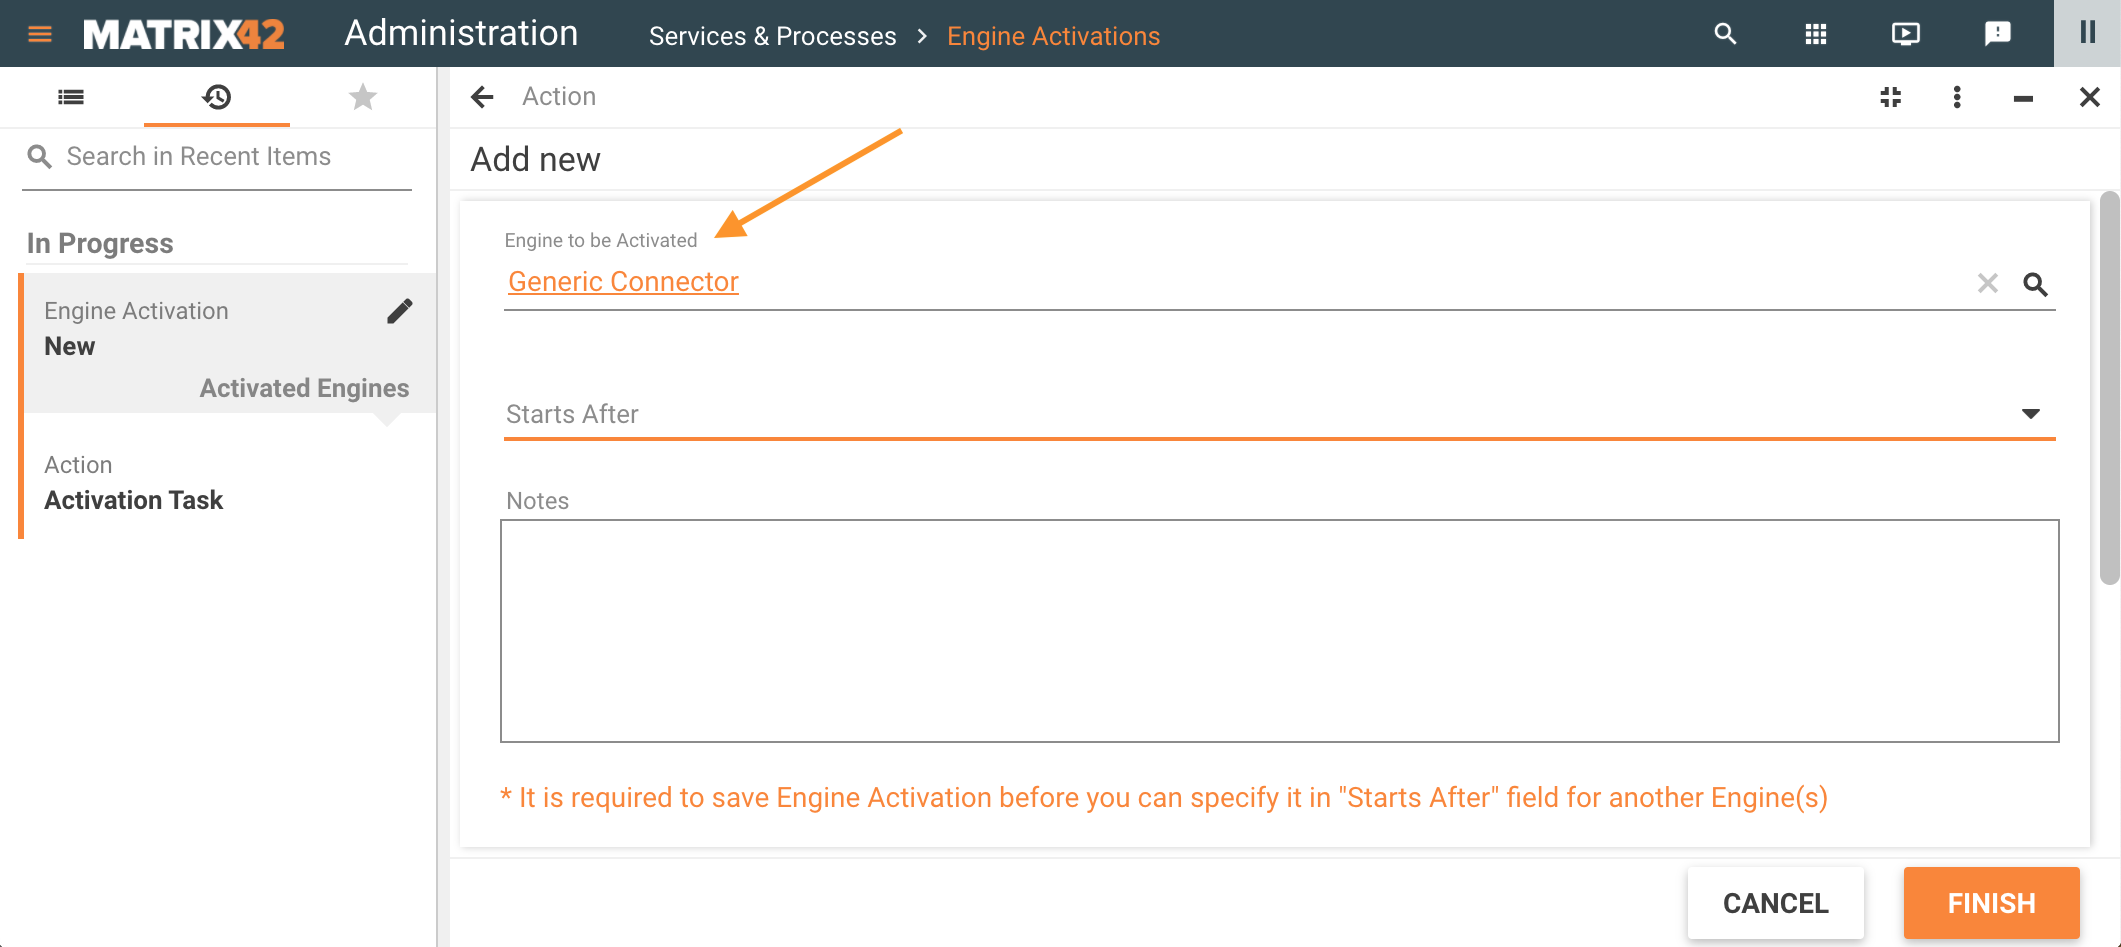
Specify the Engine activation parameters and click Finish. -
To proceed with creating an Engine dependency, click Save in the Engine Activation settings:
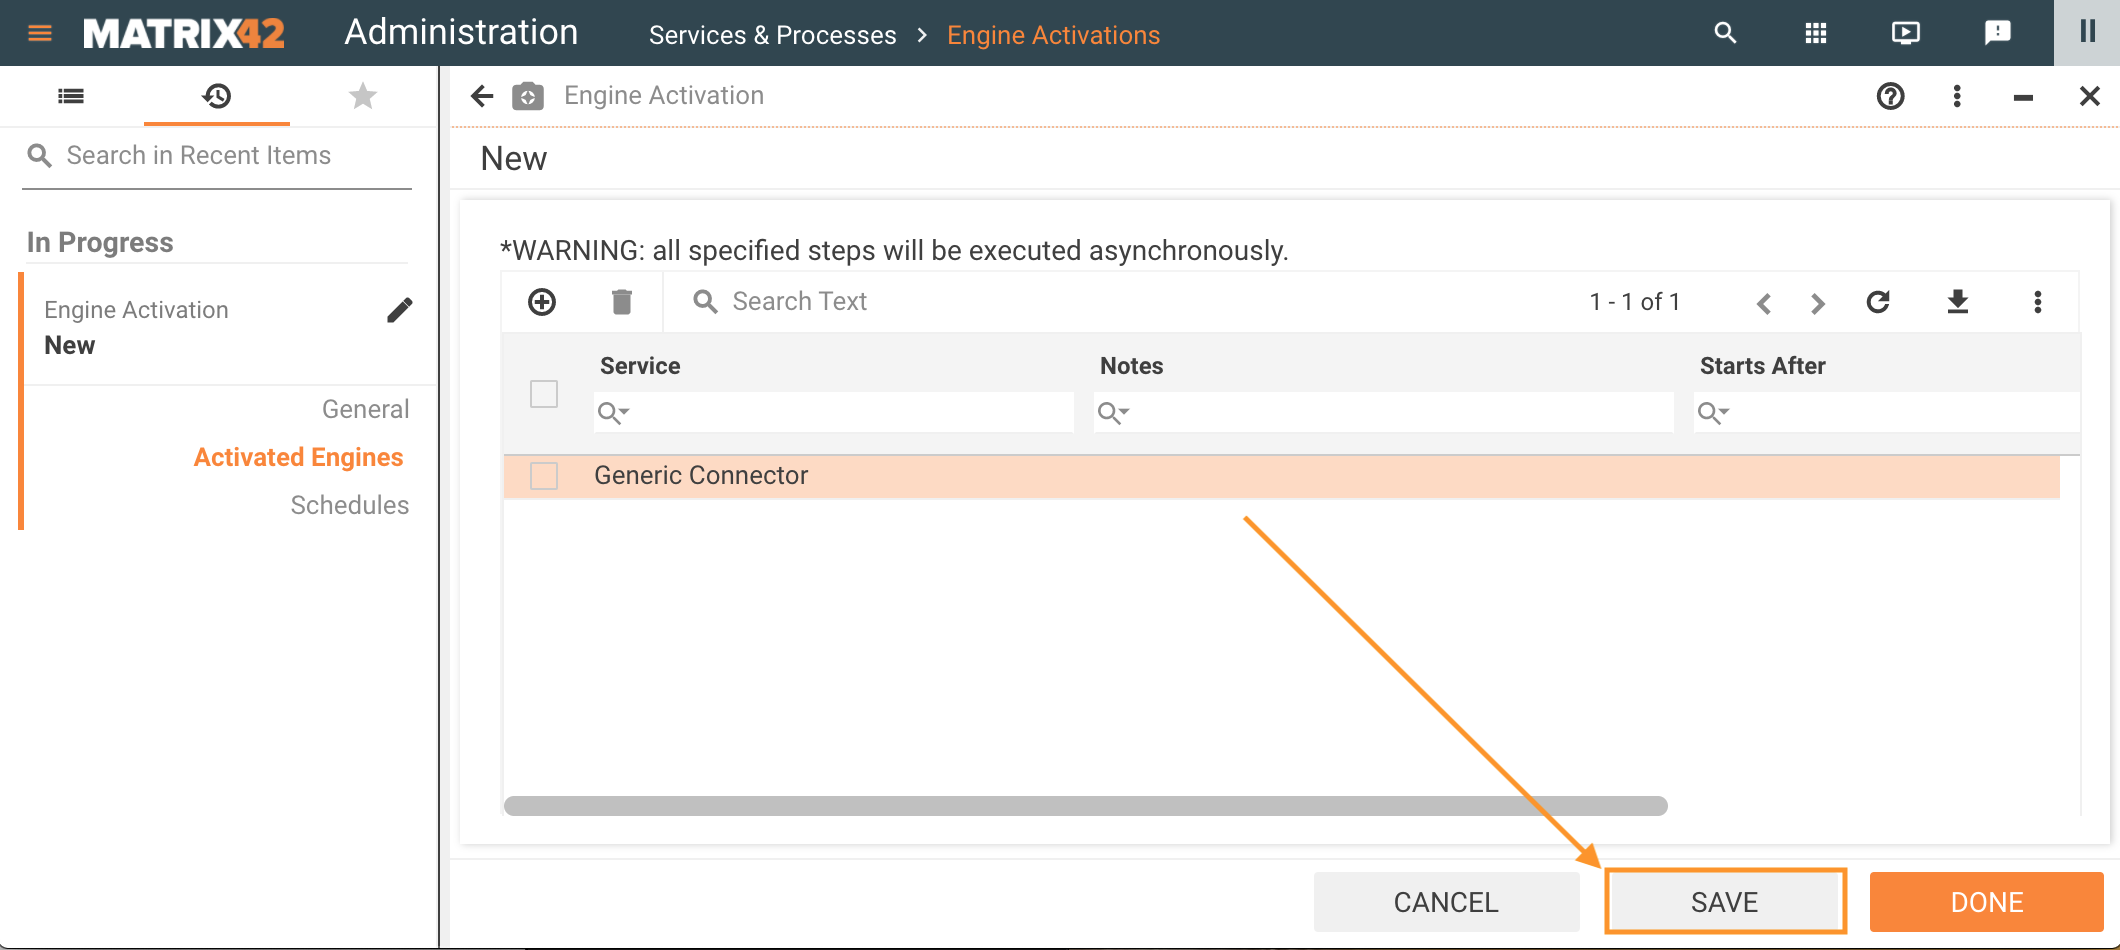
It is required to save Engine Activation before you can specify it in Starts After field for another Engine(s), otherwise, the Engine added to the Engine Activation will not be available in the Starts After list.
-
Add another Engine to be Activated. Choose the Engine from the Starts After field options:
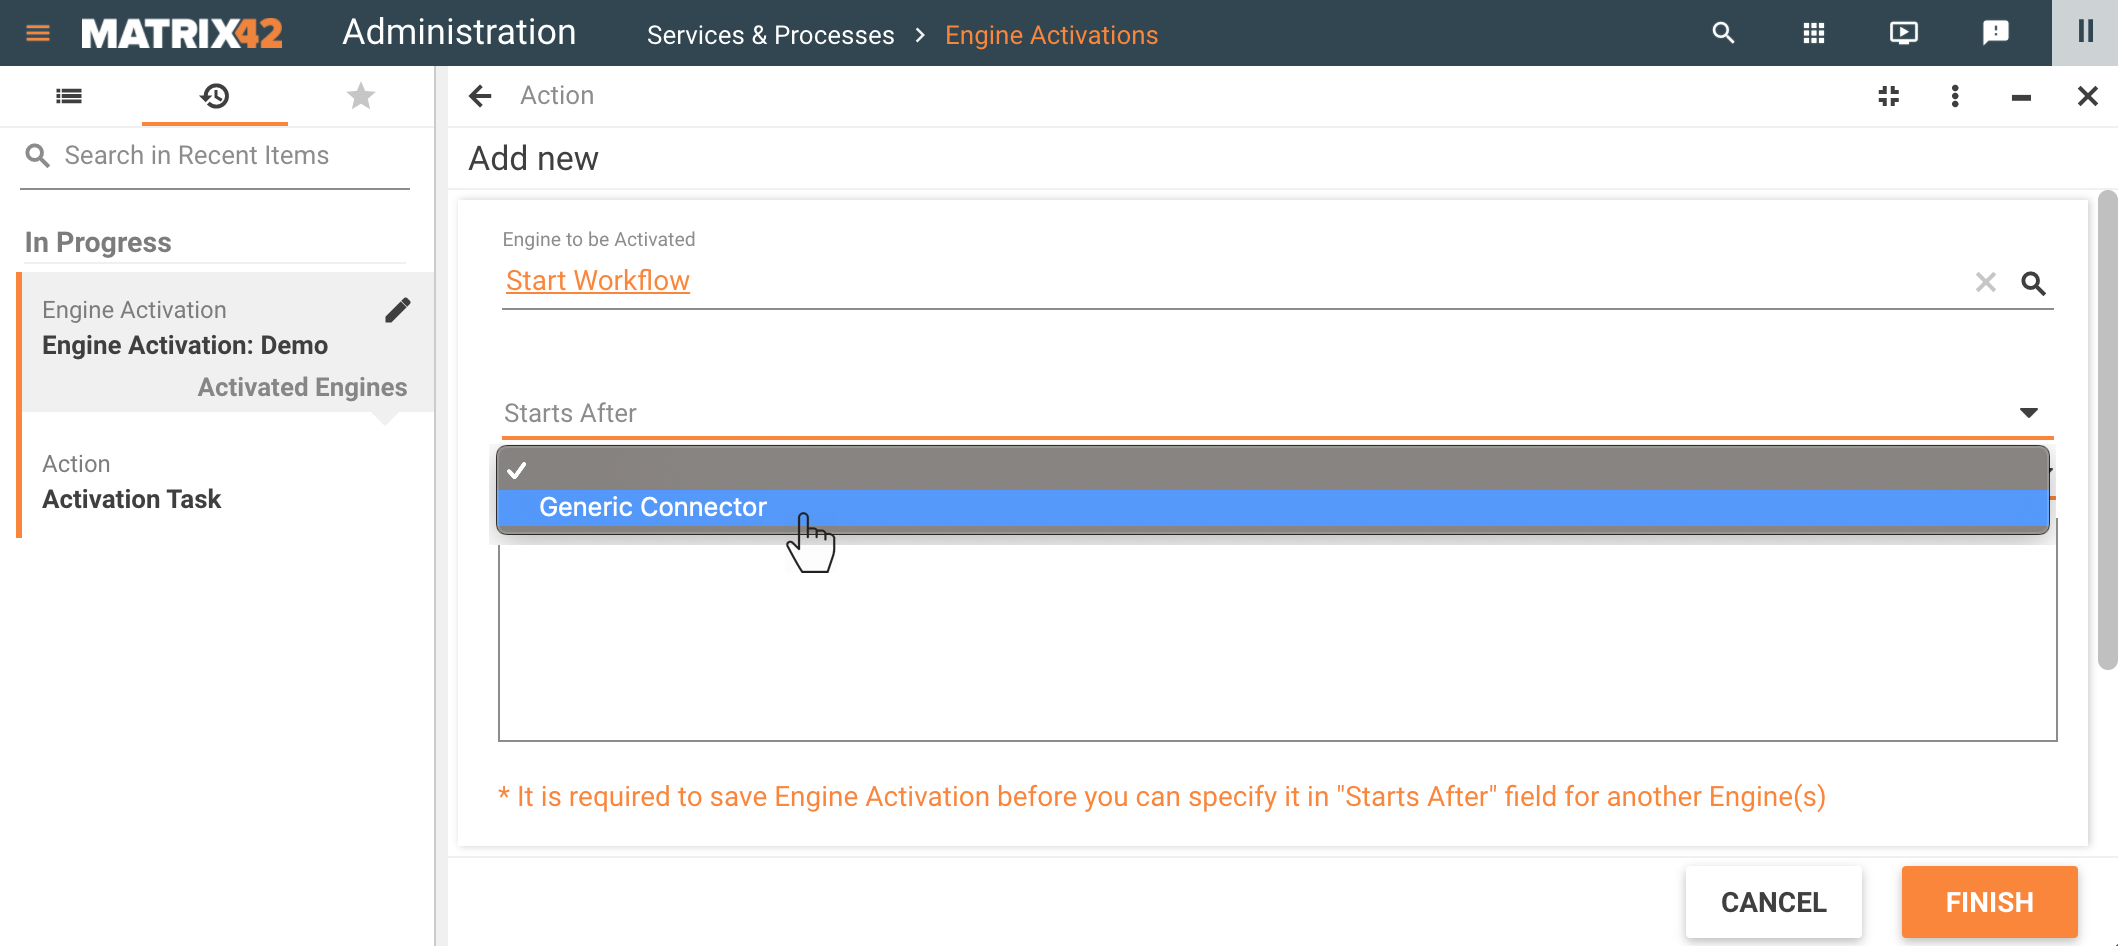
As you previously saved the Engine Activation settings, the Starts After list suggests only those options that are available for the current Engine Activation and support Engine Activation Sequence. Other options are not presented unless they are added and saved as described in the previous step.
If the sequence has already been defined for the added Engine, it is not suggested in the Starts After list and can not be added as a dependency.
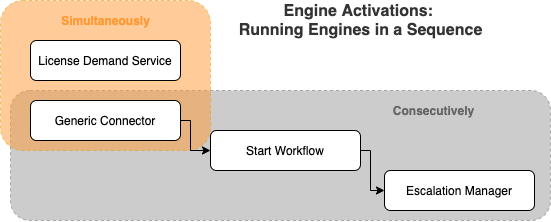
Added Engine dependencies and their sequence is shown in the Starts After column of the Activated Engines settings, for instance:
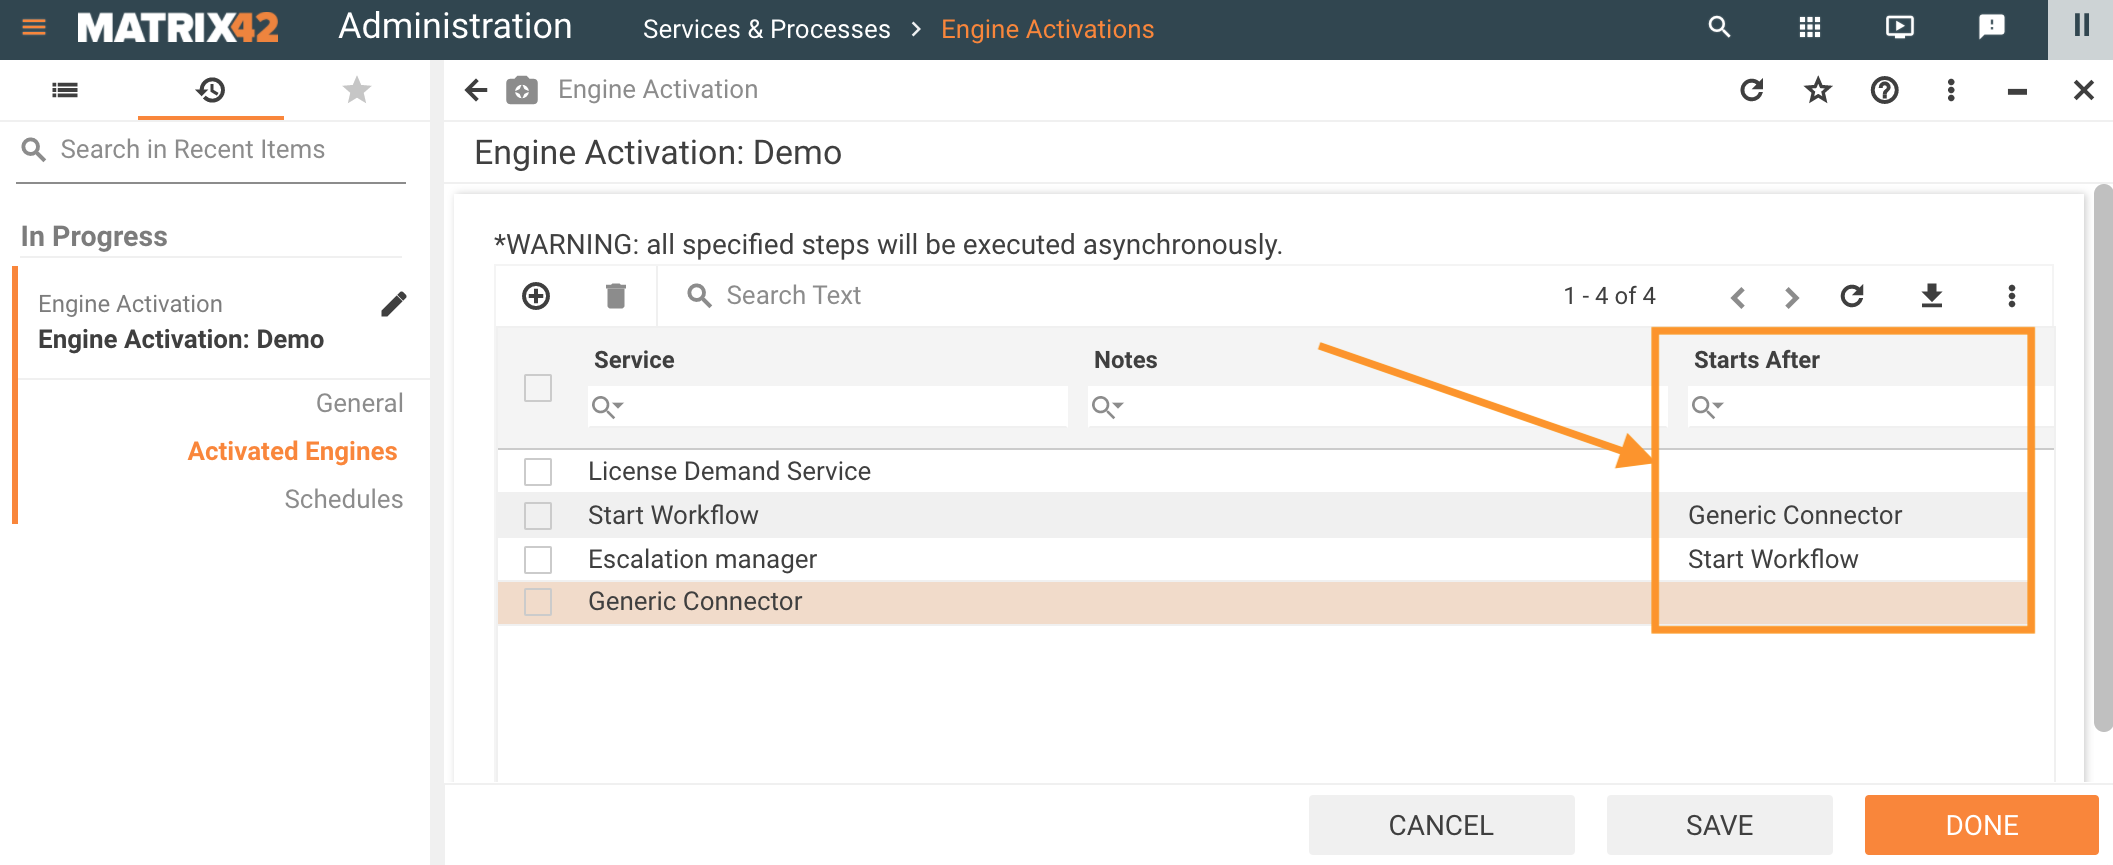
Thus, an Engine Activation runs the Engines in the following sequence:
All Engines that are not part of ESMP by default need to be updated to support running in a sequence.