AI-Native Workflow Designer
Overview
Build and automate business processes in a modern, no-code environment. Use AI-powered actions and advanced automation triggers to create efficient, data-driven workflows — fully integrated into the Enterprise Platform.

Access
To open a Workflow Designer, in the Administration application → Services & Processes → Workflow Designer → open Workflows navigation item and run:
- Add Workflow action on the dataset view page:

- Edit Workflow action:
- Right-click on the dataset view to run the Edit Workflow action:
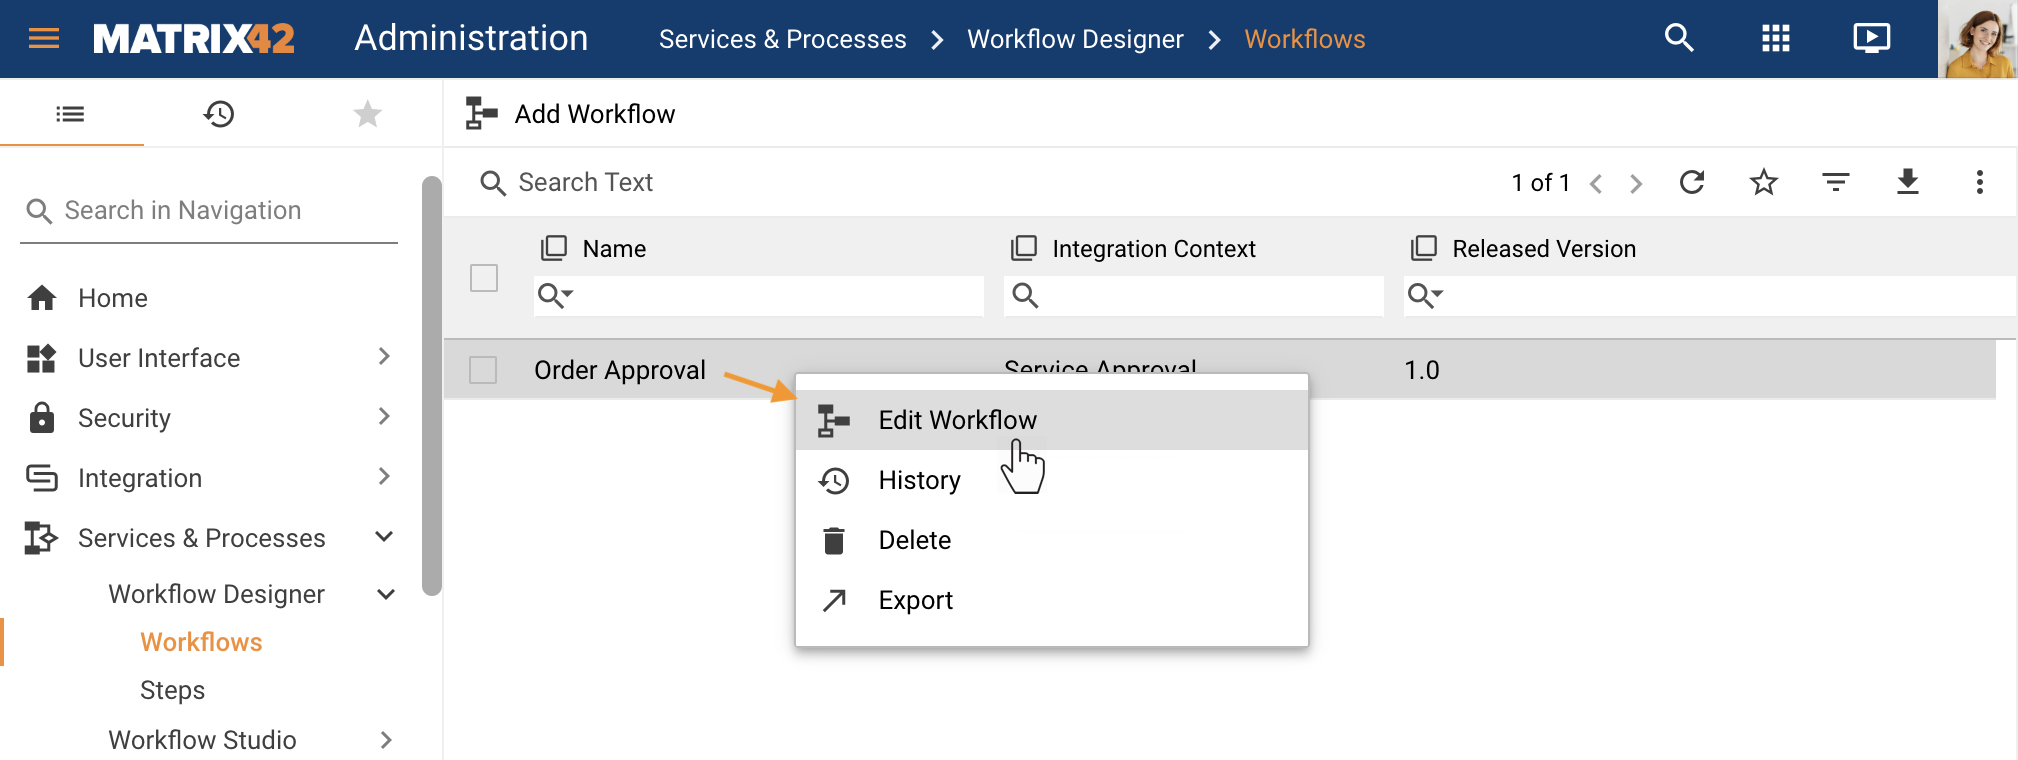
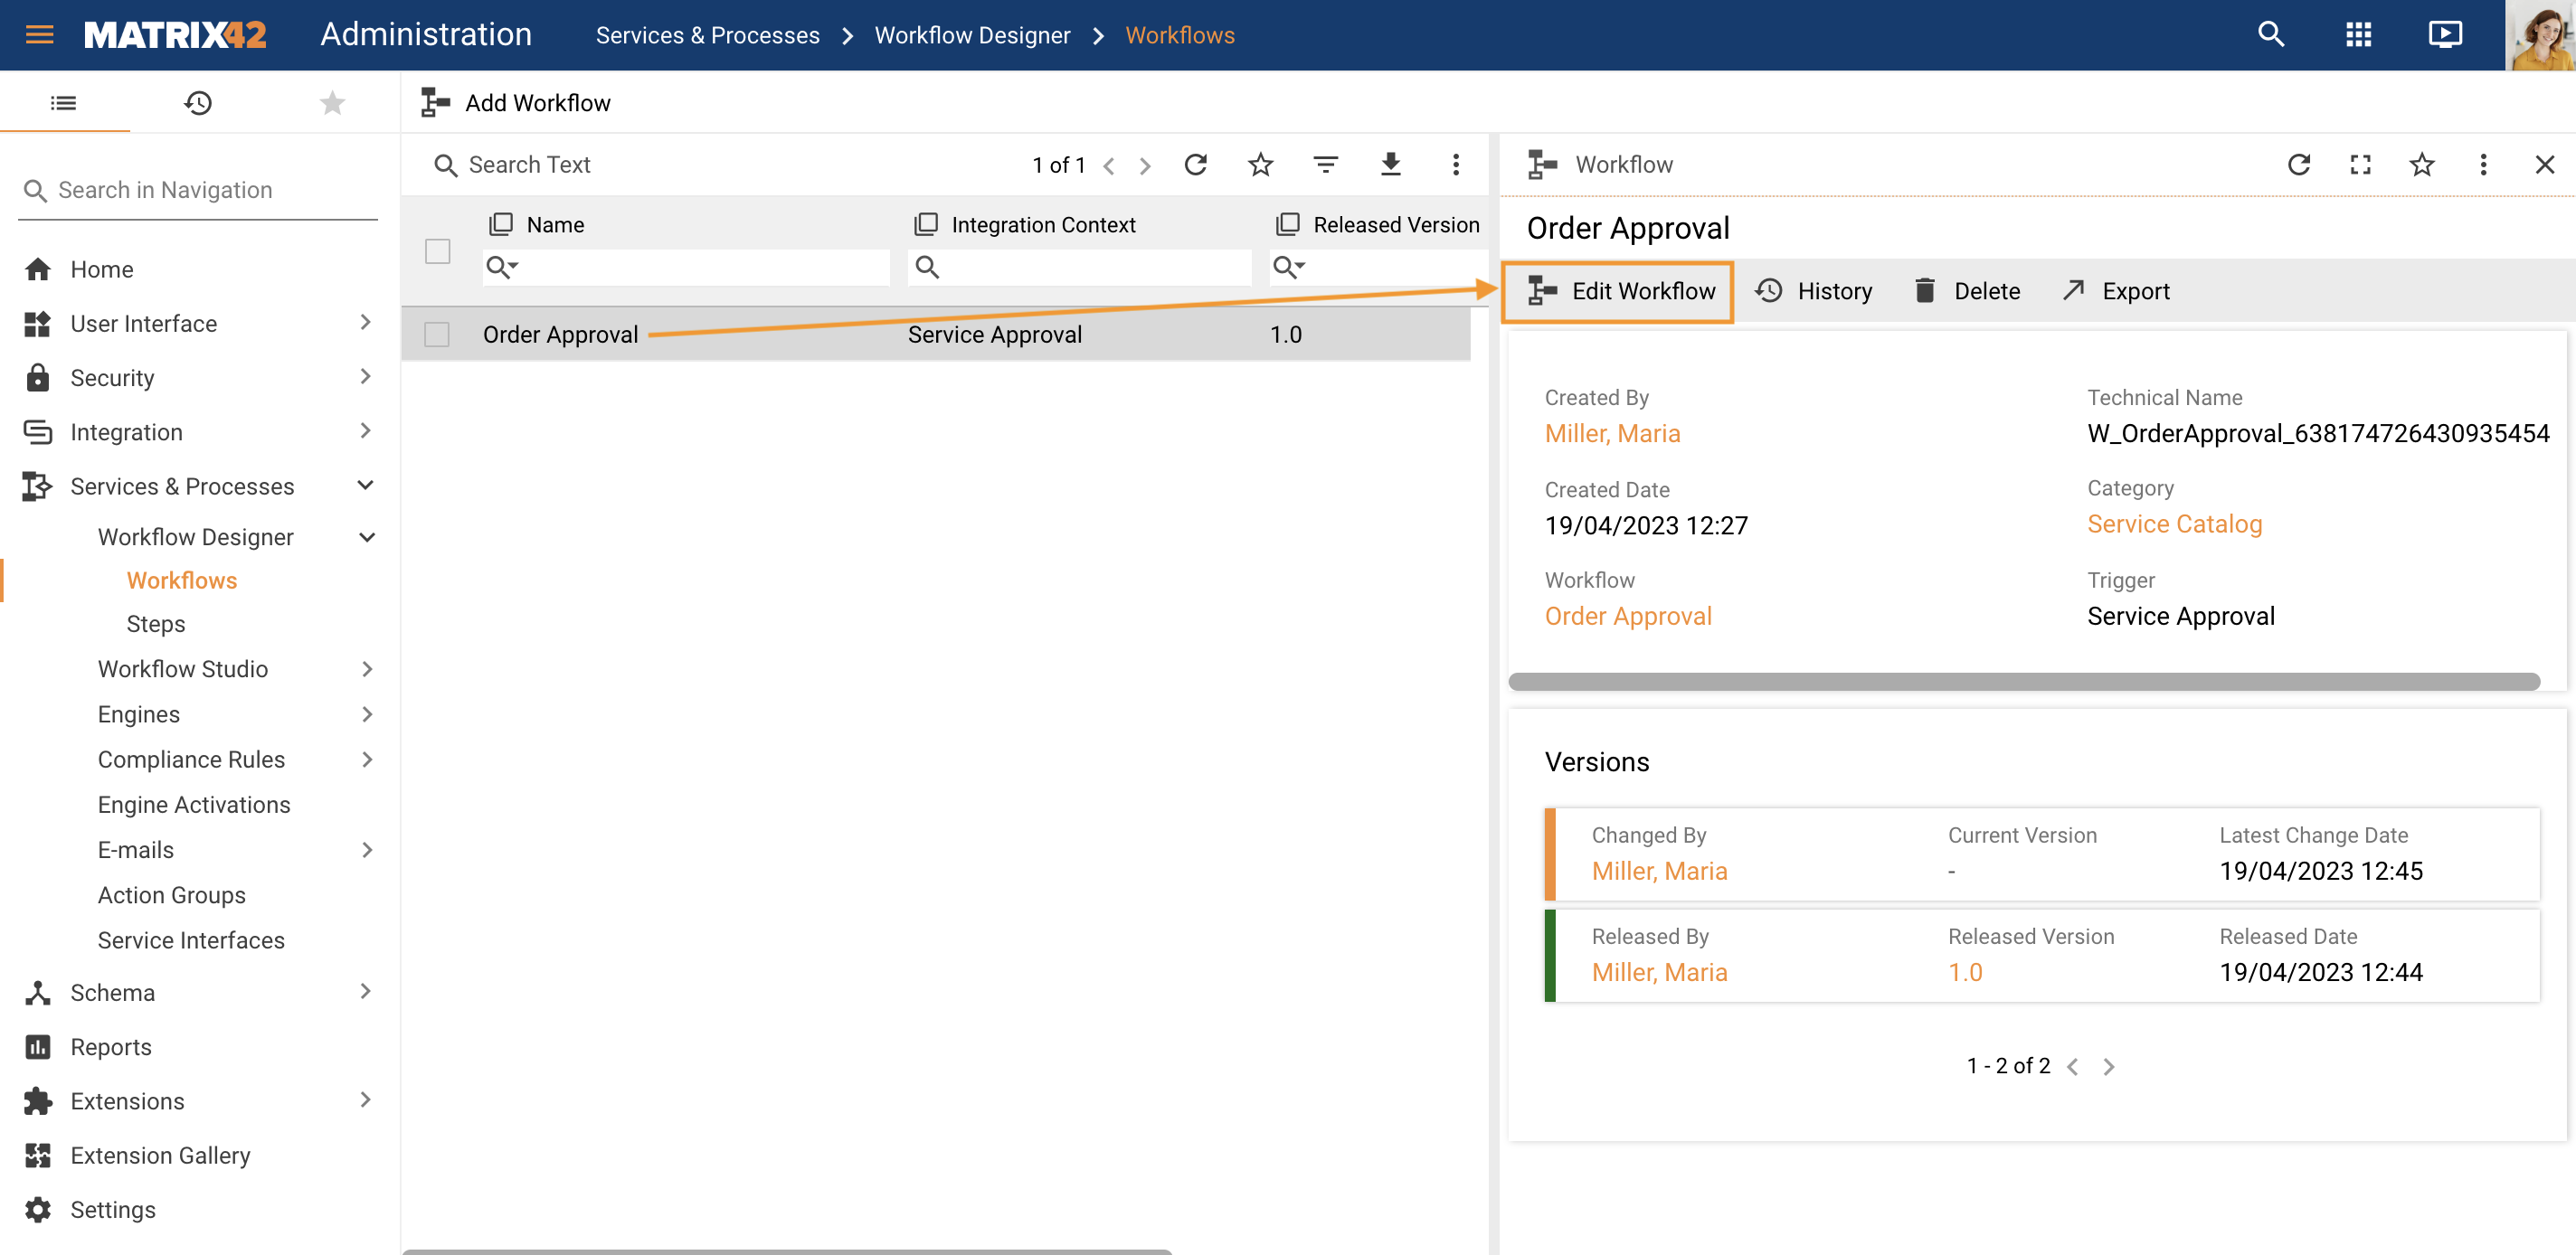
- Choose a Workflow and run Edit Workflow action from the preview page:
- Right-click on the dataset view to run the Edit Workflow action:
Workflow Designer
New Workflow
When adding a new Workflow, provide the Name:

Proceed with editing the workflow Steps in the Workflow Designer as described below.
Edit Workflow
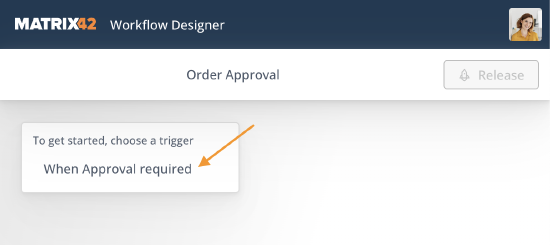
To get started, choose the trigger from the options available in the system, for instance, When Approval Required:
Proceed with adding and configuring Steps.
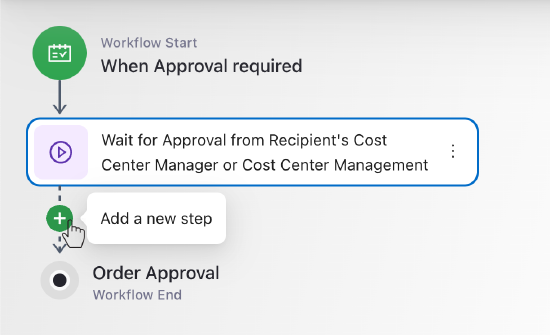
Add a new step to the Workflow
To add a new step, hover over the arrow between the Steps and click the + sign:
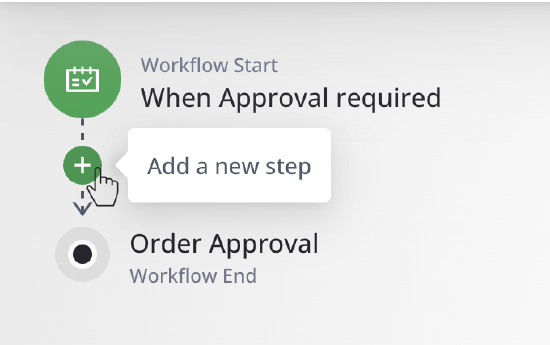
Additional Steps can be added at any stage of the Workflow editing to any area between the Workflow Start and Workflow End points:
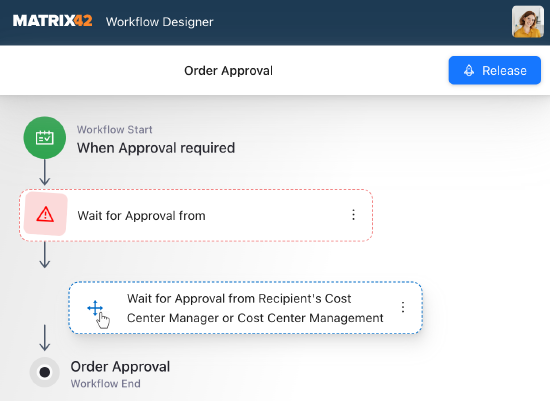
Change the order of the steps
Added Steps can be reordered with drag&drop. Hover over the Step that should be moved, click on the ![]() icon at the beginning of the step, and move the Step to the necessary position between the Workflow Start and Workflow End:
icon at the beginning of the step, and move the Step to the necessary position between the Workflow Start and Workflow End:
Remove step
To delete the Step from the Workflow, hover over the Step that should be removed, click on the  More Options icon placed at the end of the step, and choose Remove:
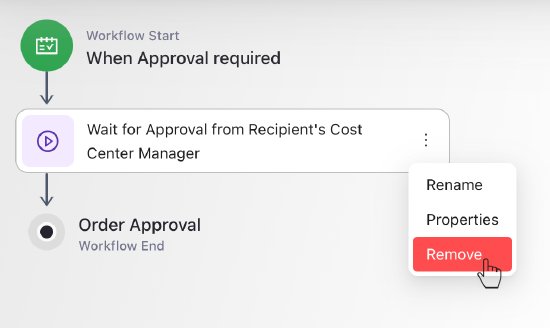
The step is removed from the canvas without an additional confirmation message and this action cannot be undone.
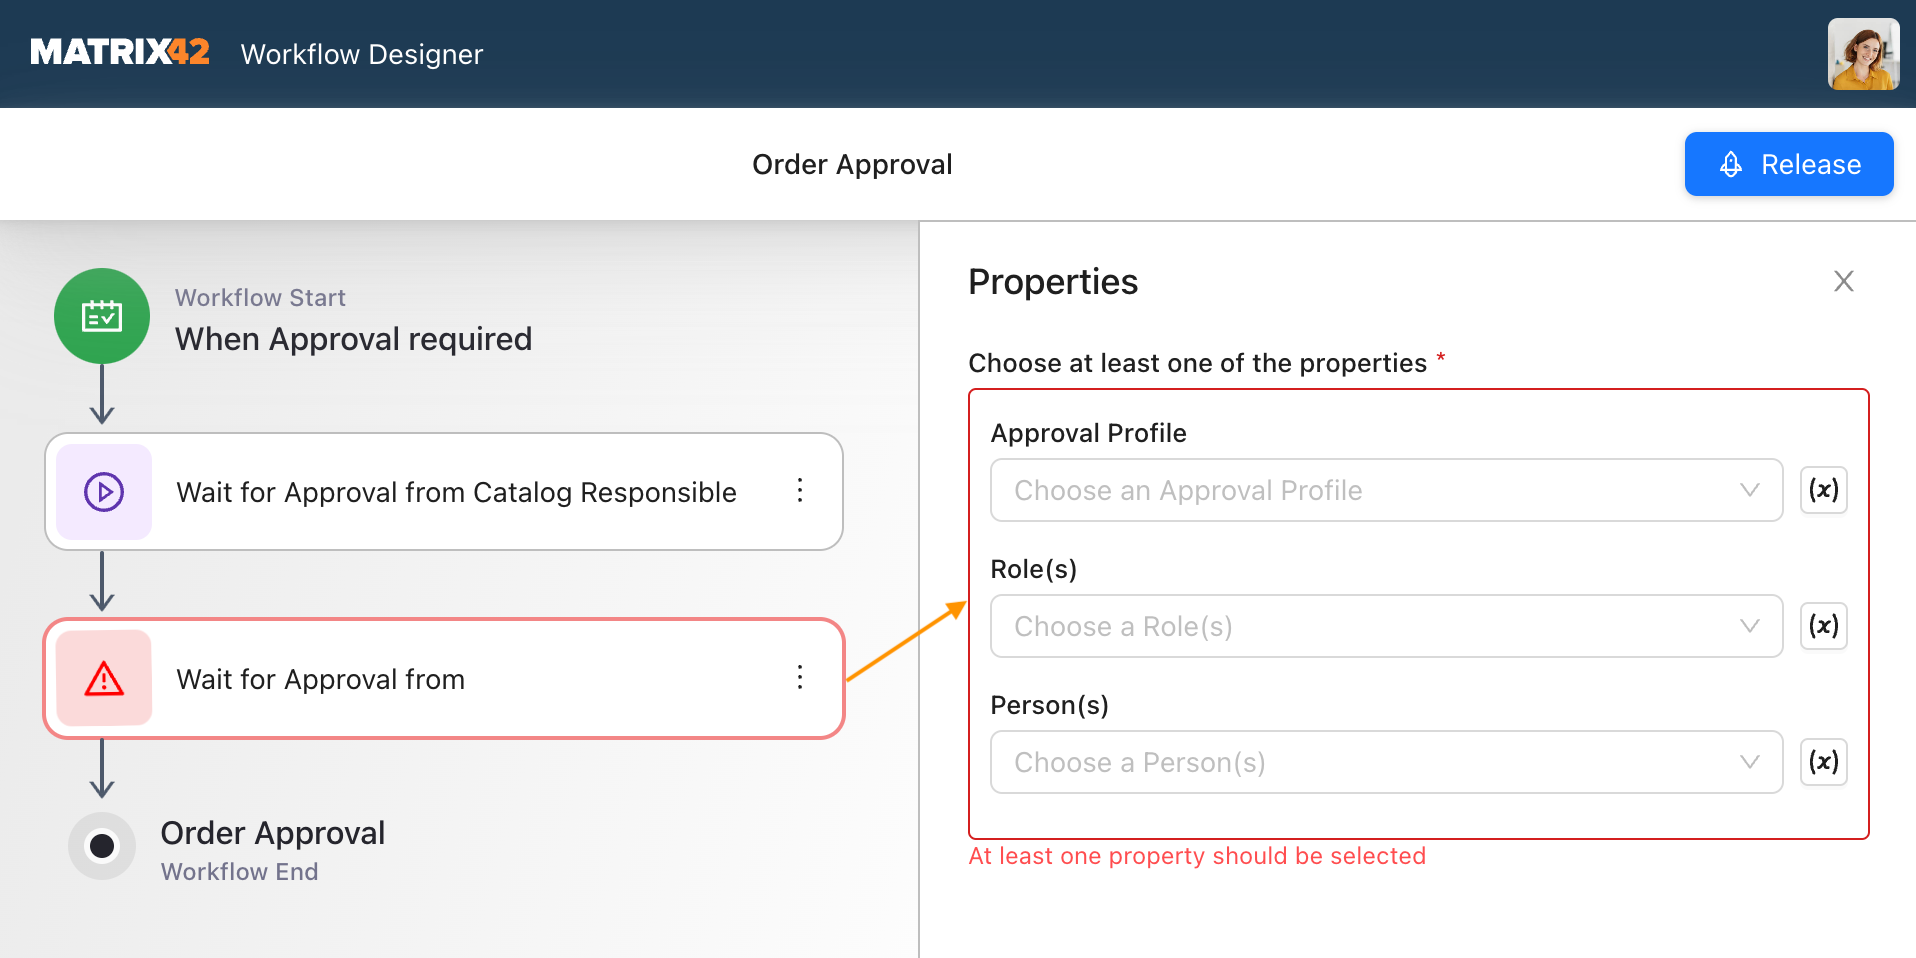
Edit properties
To edit the Step, select configurable options in the Properties panel.
To open the panel:
-
hover over the Step, click on the
More Options icon placed at the end of the step, and choose Properties: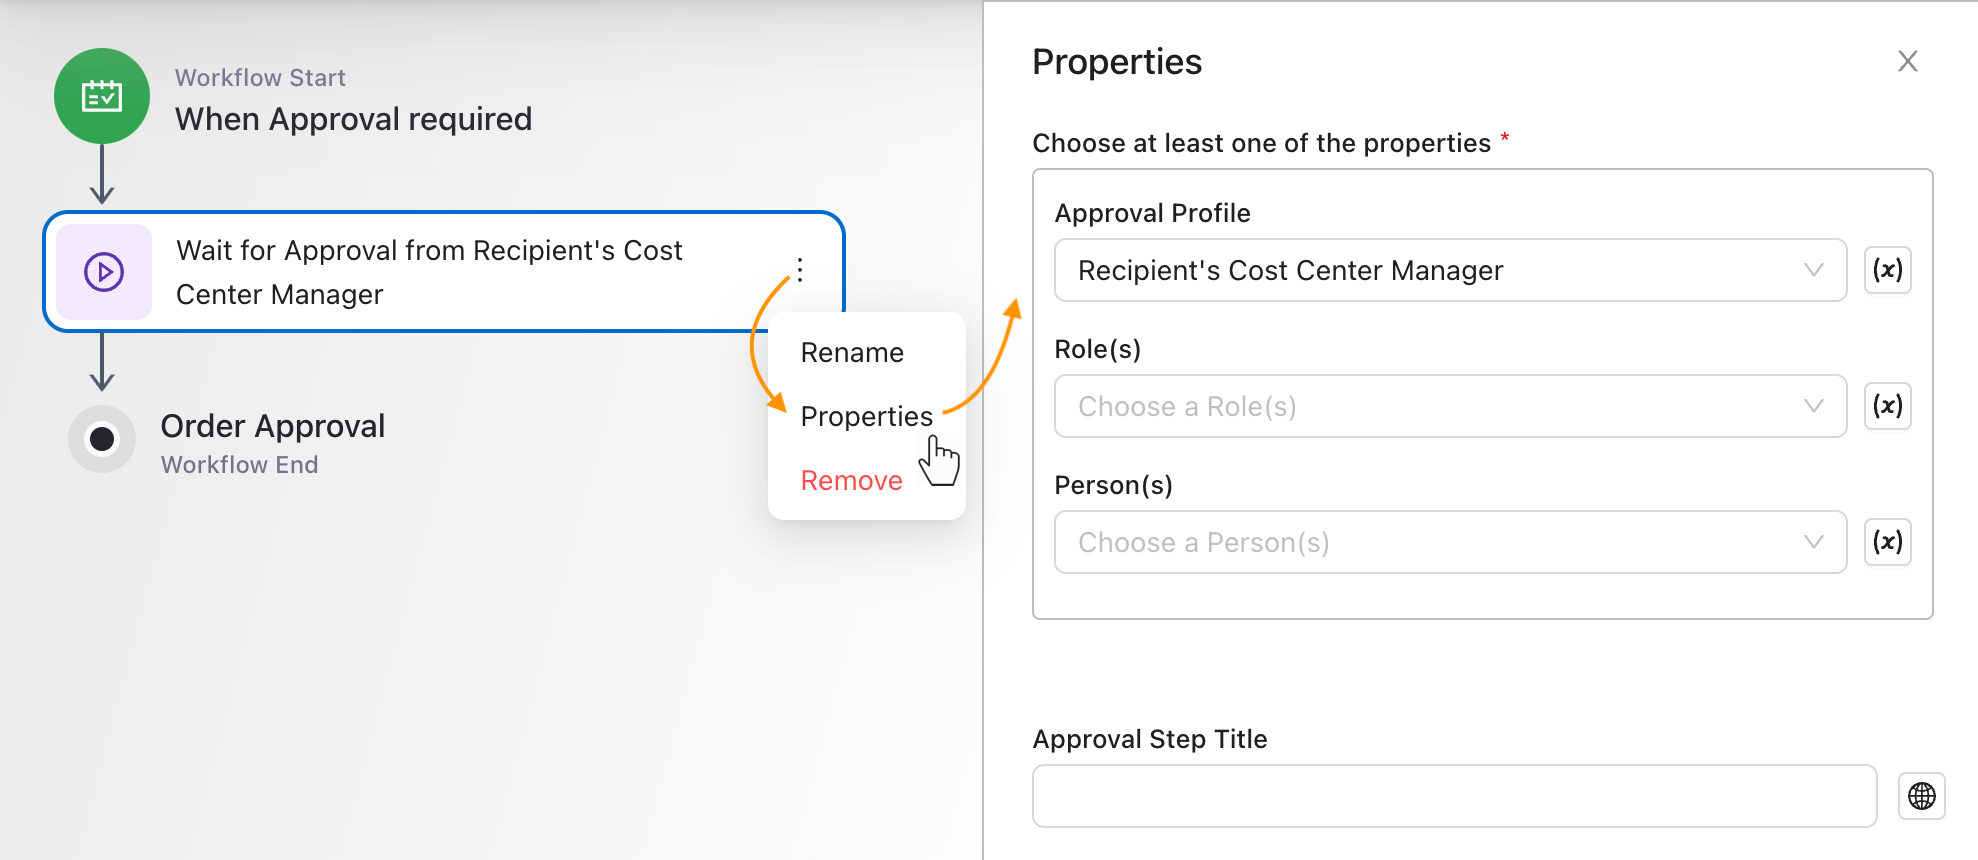
- or click on the Step to edit available properties in the panel:
The set of configured properties in the panel depends on the selected step. For the list of default-provided steps, that are available in the Workflow Designer, see Workflow Designer Default Actions page.
Dynamic content
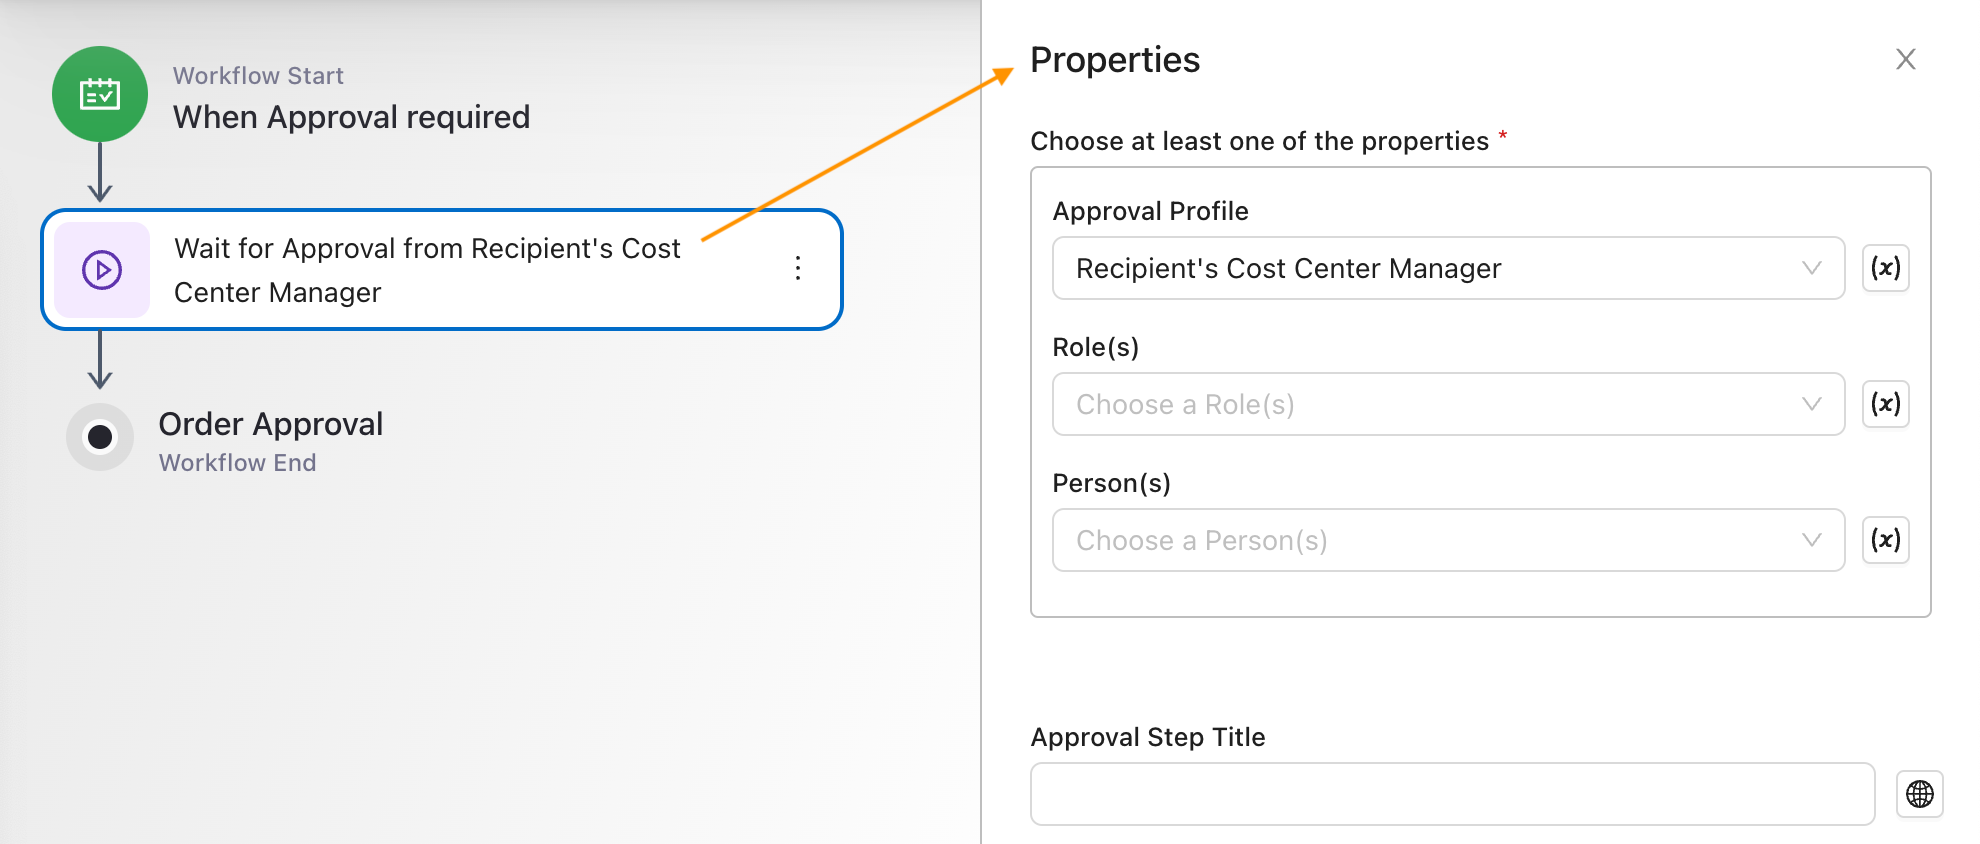
Properties that can have dynamic content are marked with  icon. Click on the icon to select the data source for the property.

The value selected directly in the property field is considered static.
Dynamic Content allows bringing various data to Workflow Context for further processing. The configuration panel suggests properties that are relevant for the current scope which potentially could lead to selecting a valid value selection:
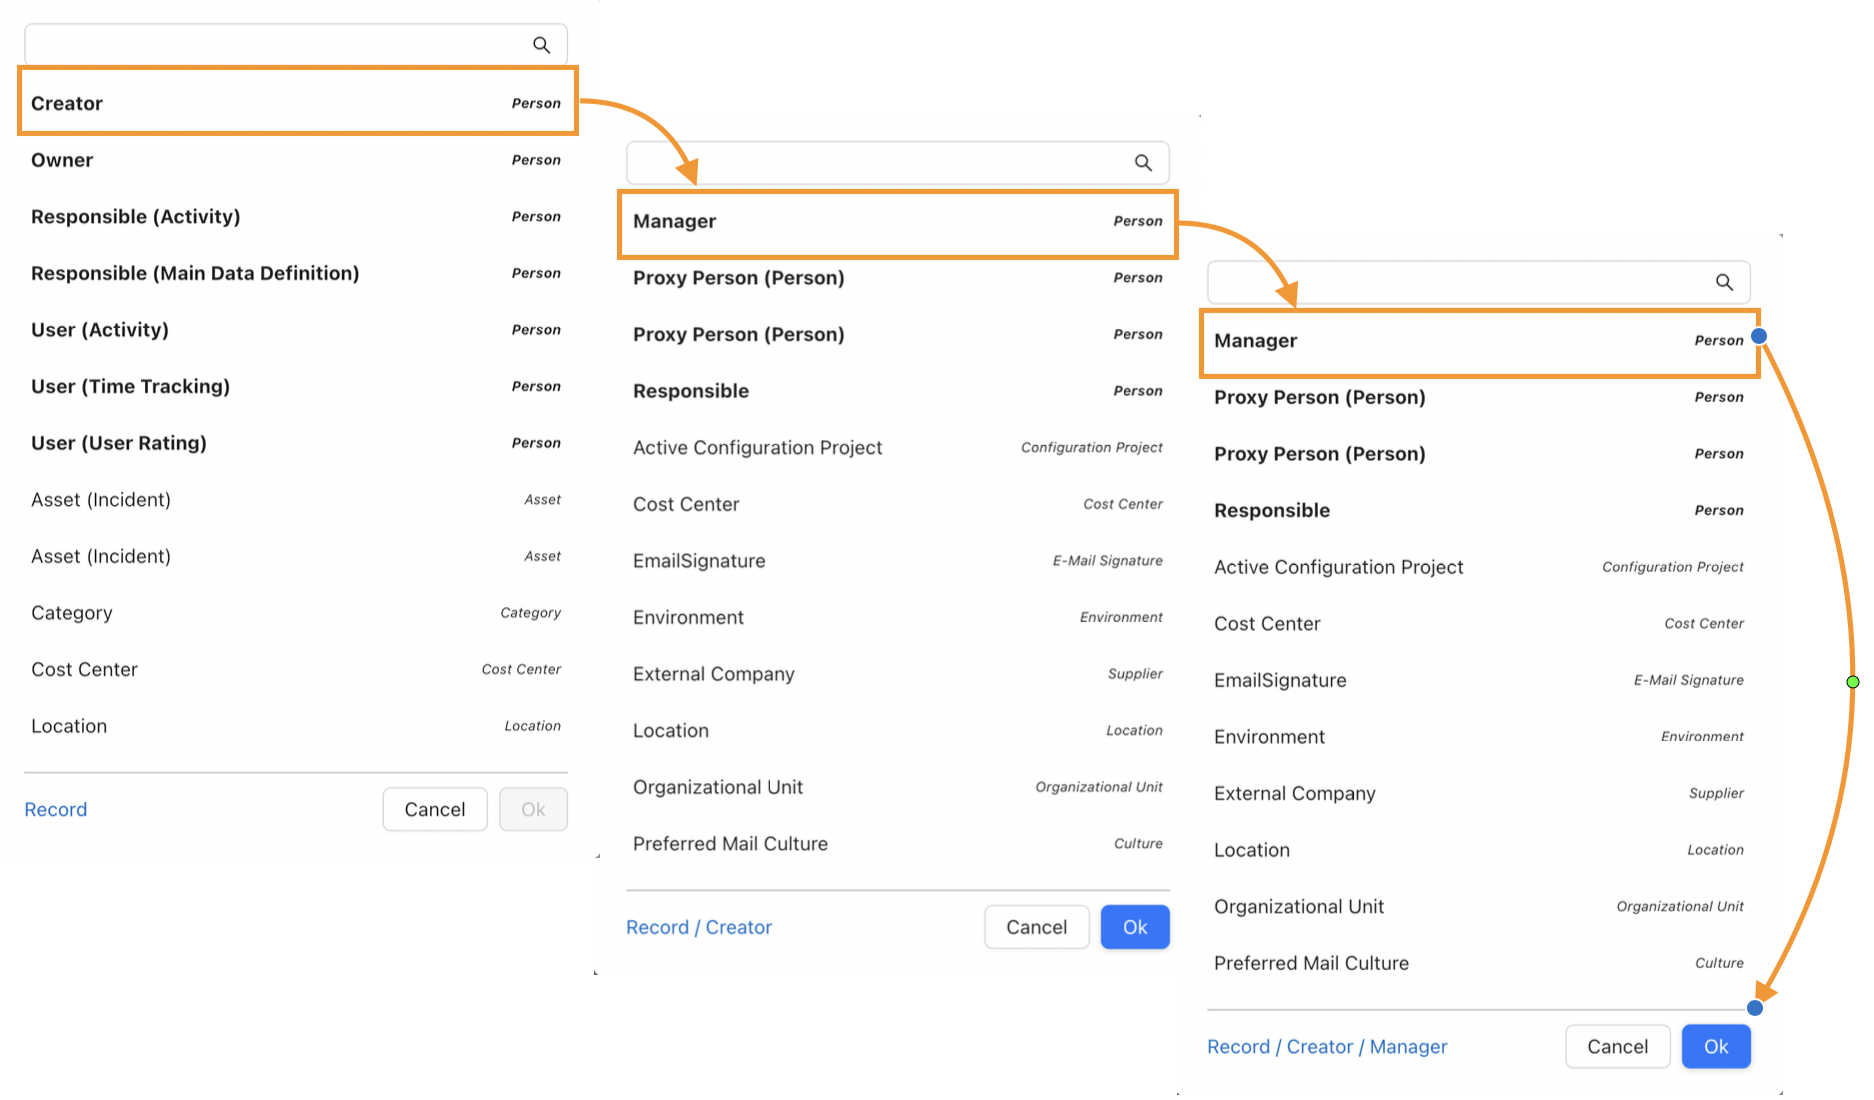
Use the Ok button to apply the selected object. The button is active when the selected object is valid for the current scope:
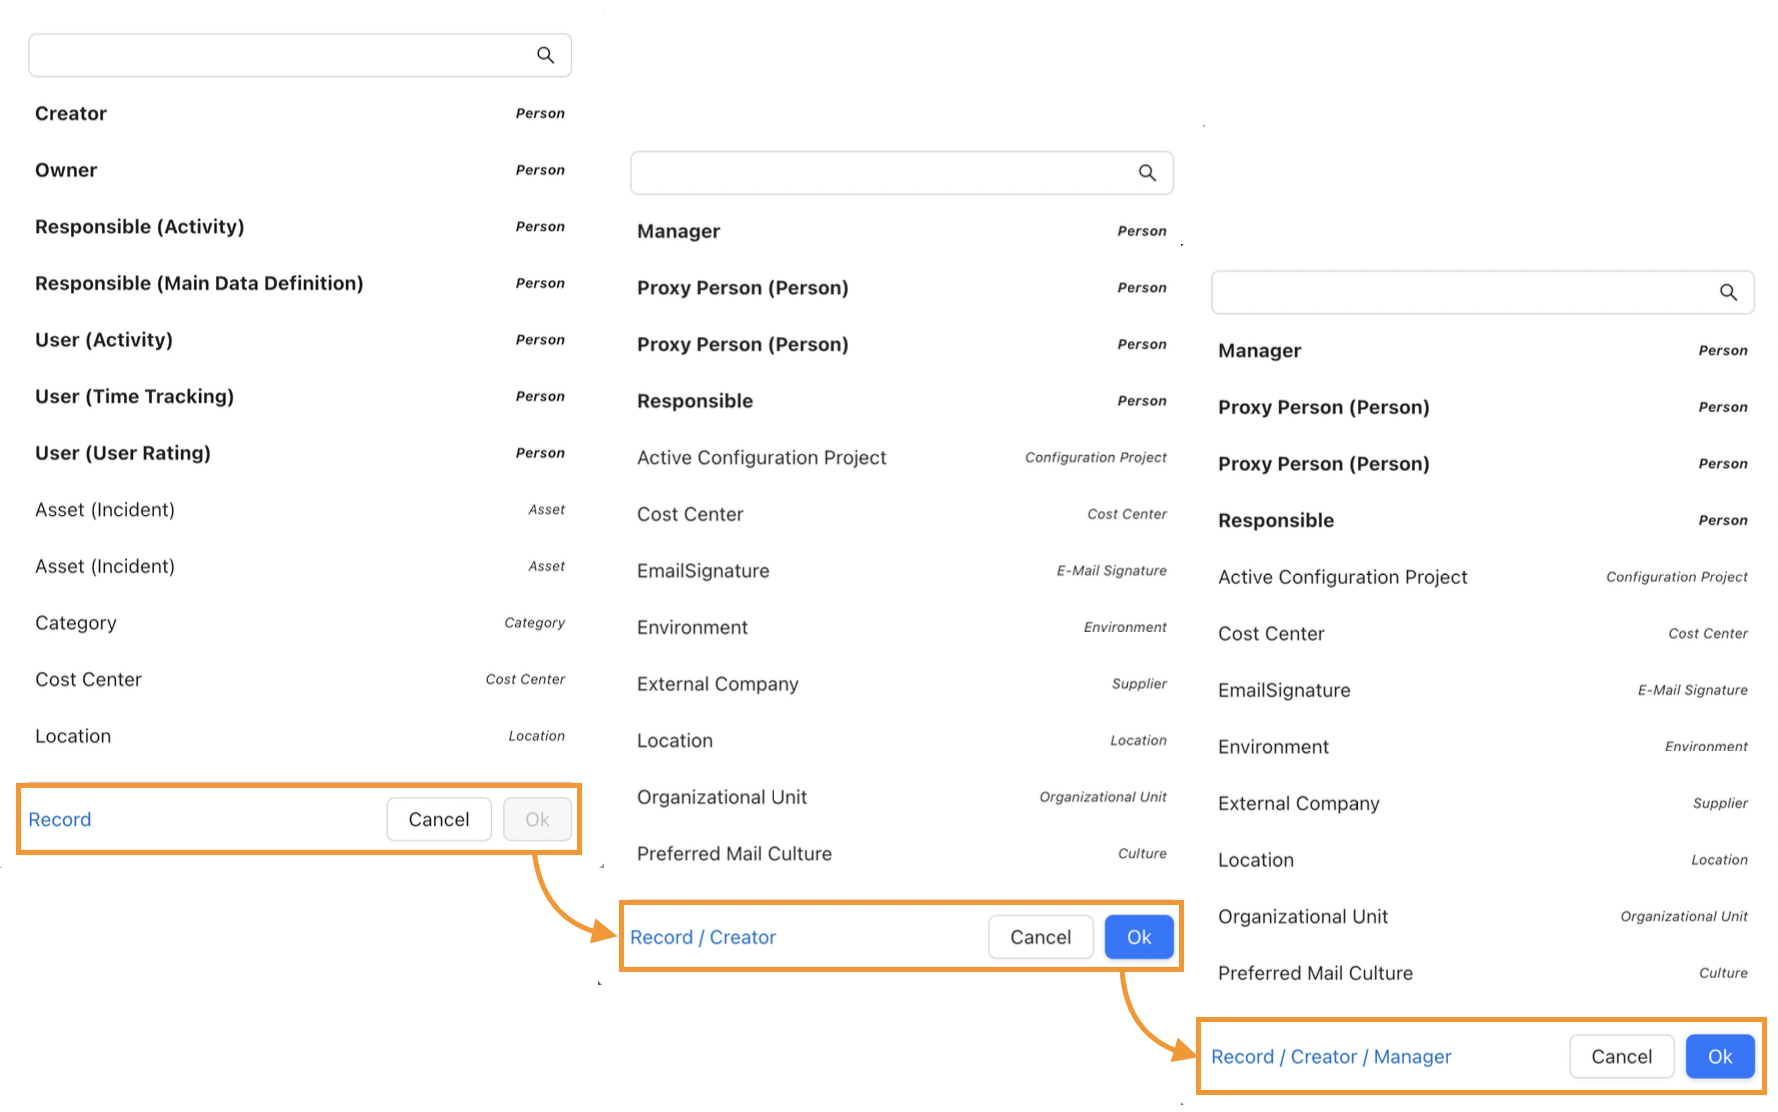
You can always return any level up in the selection by clicking the corresponding link in the selected path.
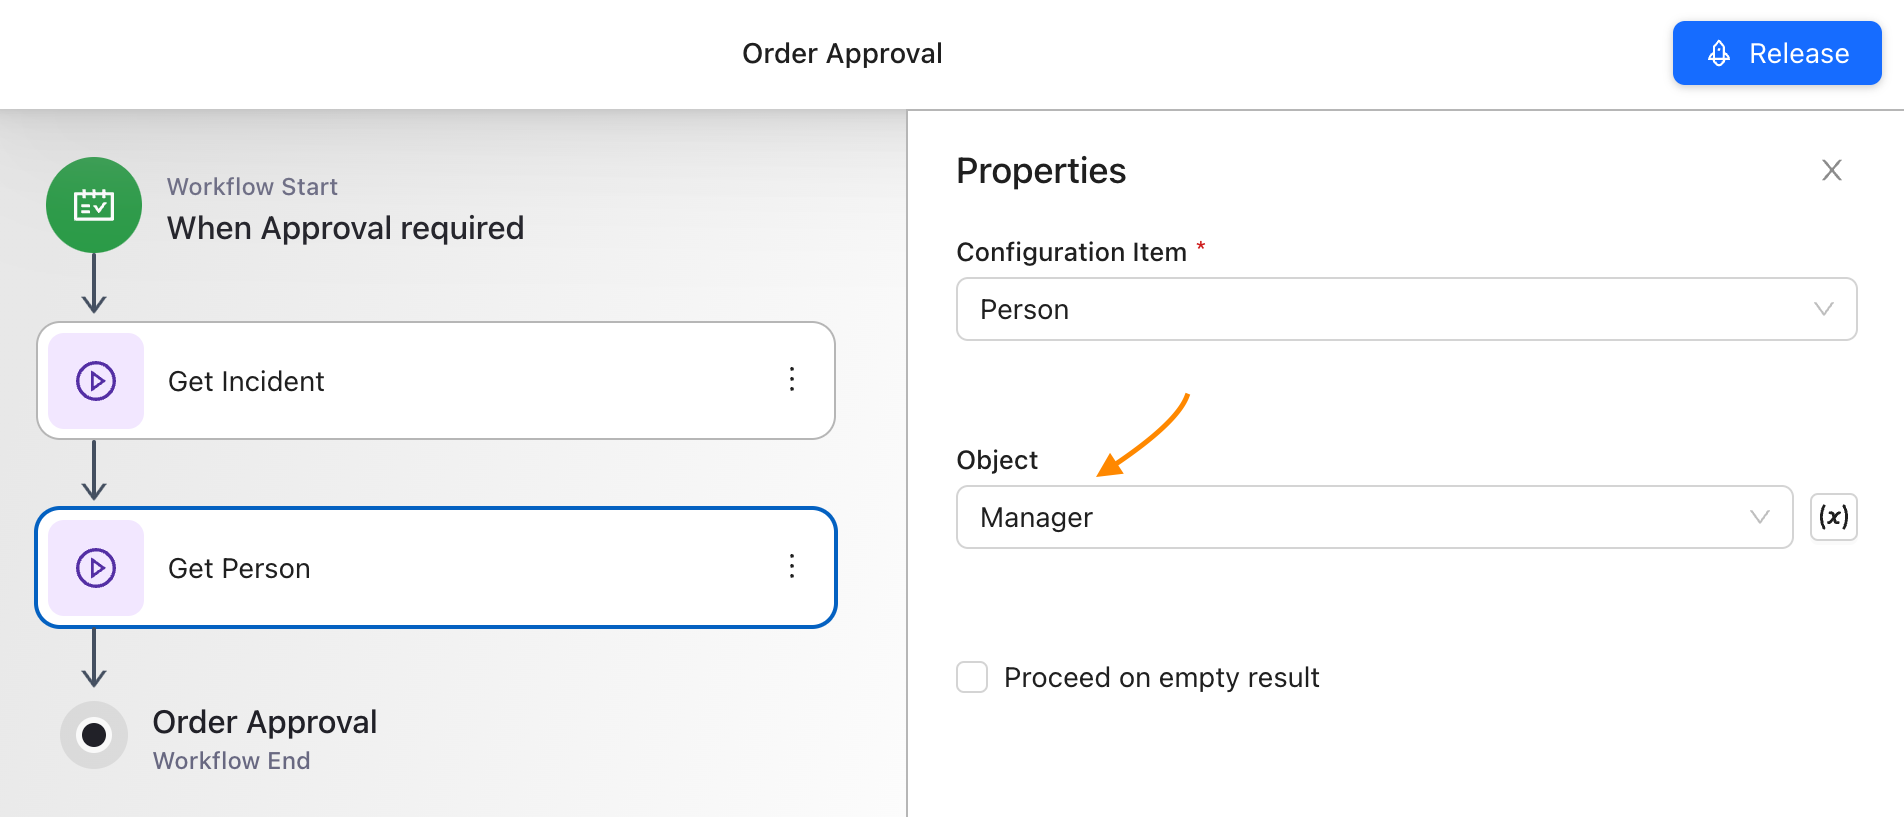
The selected object from the Dynamic Context is shown in the Properties panel as follows:
The changes are automatically saved, and you can edit the workflow without needing to Release it.
Created Workflows are listed in the Administration application → Services & Processes → Workflow Designer → Workflows area.
Release Workflow
Release the Workflow when the Workflow logic is finalized and is considered as ready to be used in the system. The Release button is available in the upper-right corner of the Workflow Designer:
The Workflow can be released when there are no issues detected in the Workflow configuration. For more details, see the Step validation and release issues section of this page.
First release
The newly created Workflow is always released with version 1.0:
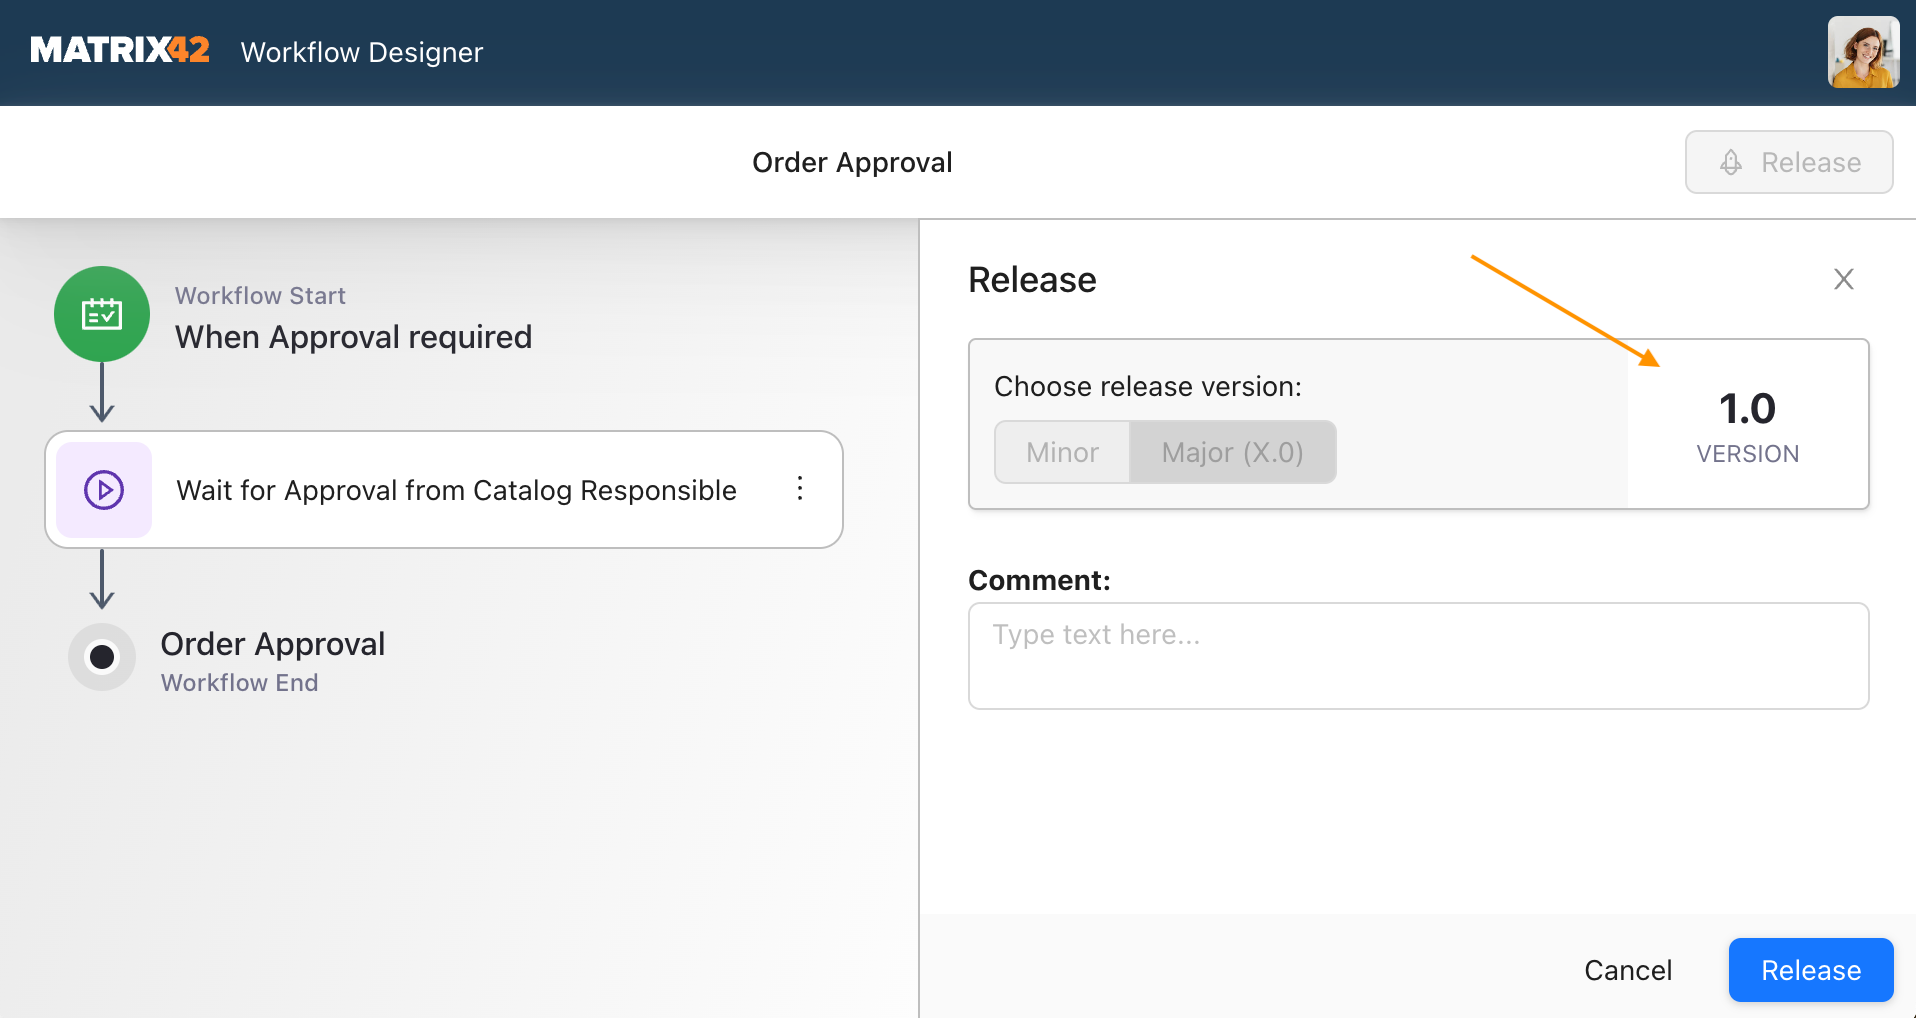
Optionally, add a Comment about the applied in the Workflow changes and click Release to proceed.
Minor version release
After the initial release of the Workflow, every next release will have an incrementally increased version.
When you run the Release action, the new version of the currently released Workflow is generated and suggested in the Release panel automatically.
By default, the application automatically suggests the change of the Minor version in the Release panel as follows:
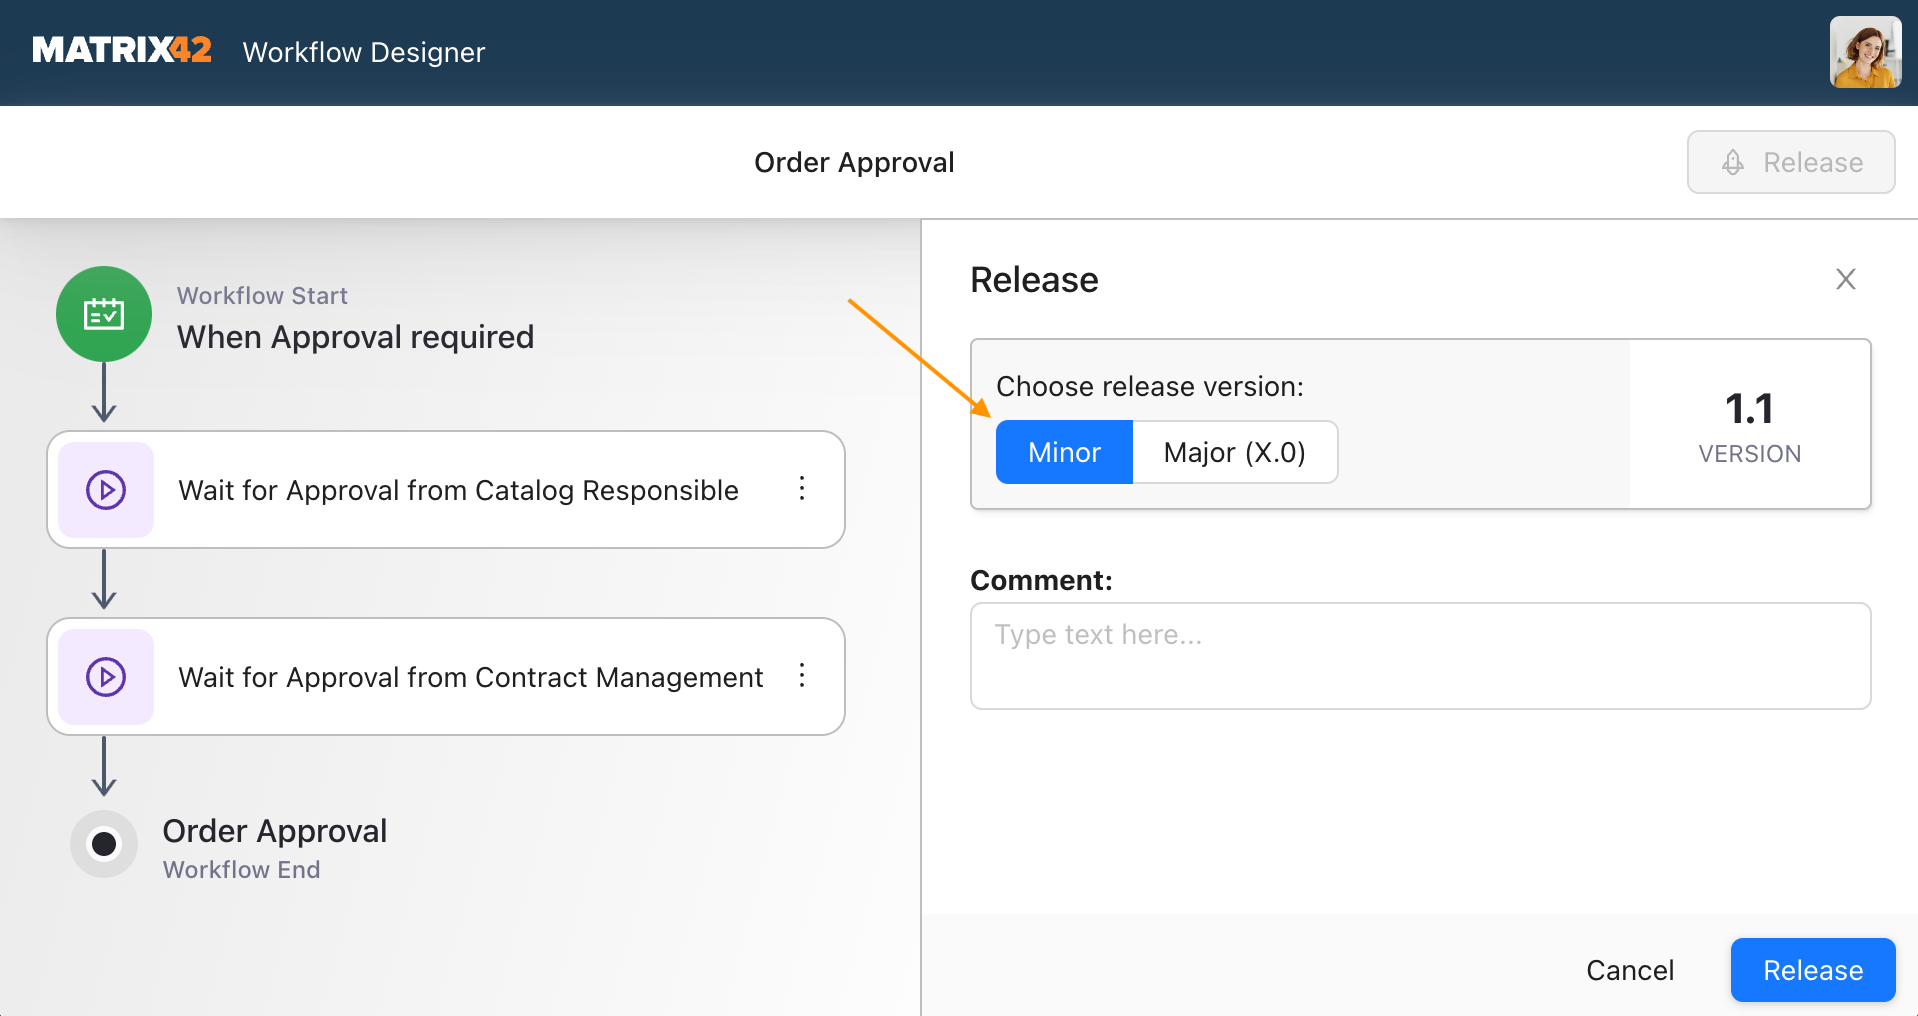
Optionally, add a Comment about the applied in the Workflow changes and click Release to proceed.
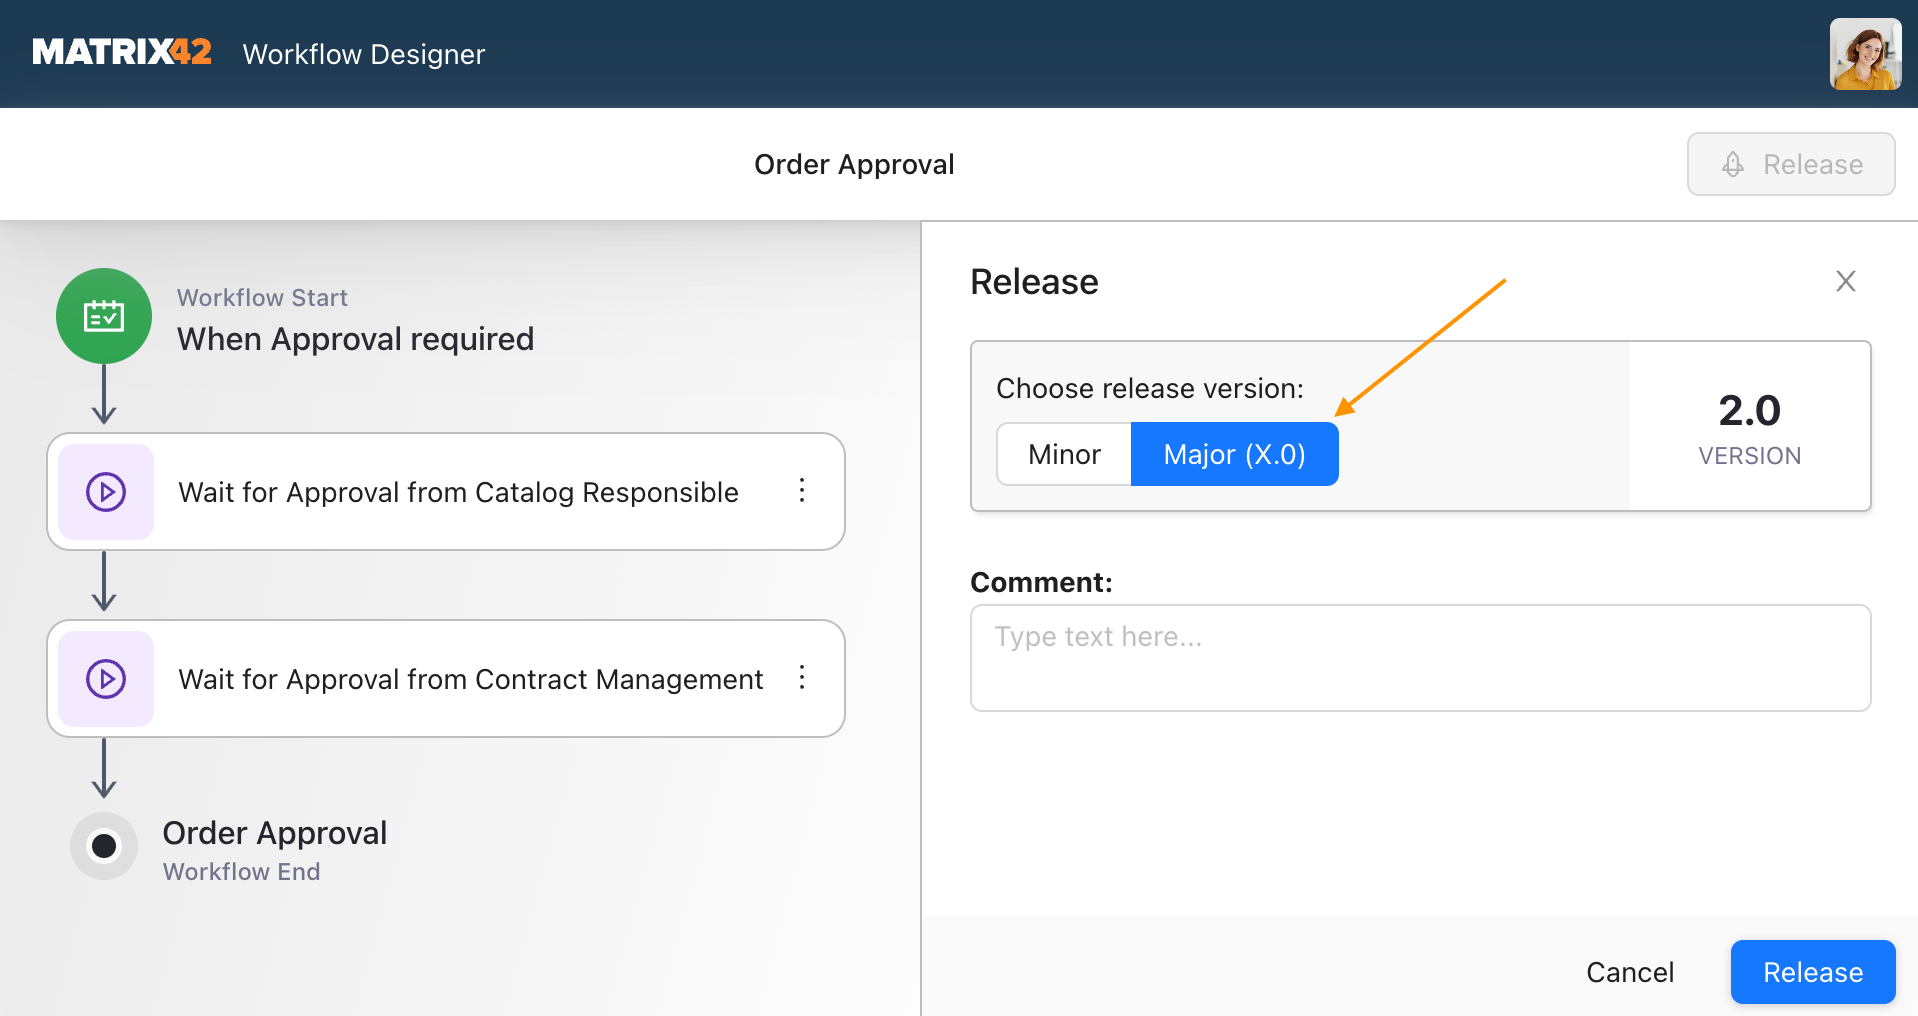
Major version release
To change the Major version of the Workflow, in the Release panel, choose the Major (X.0) option, add an optional comment, and click the Release button:
Error handling
Step validation
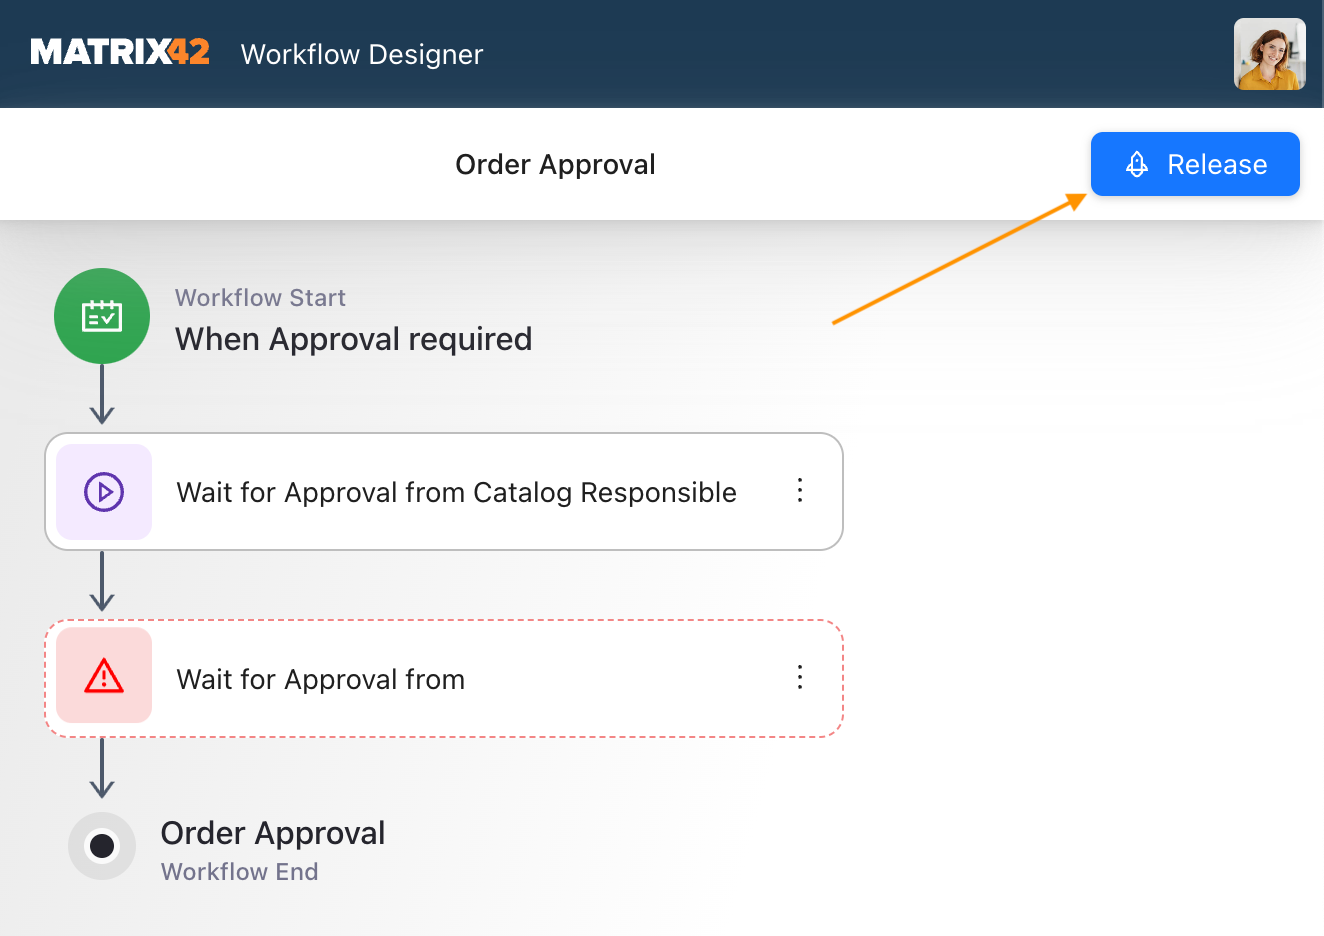
An error in the Step, for instance, a missed required property, is marked with a ![]() warning icon and a red-dashed border of the Step as shown in the example:
warning icon and a red-dashed border of the Step as shown in the example:
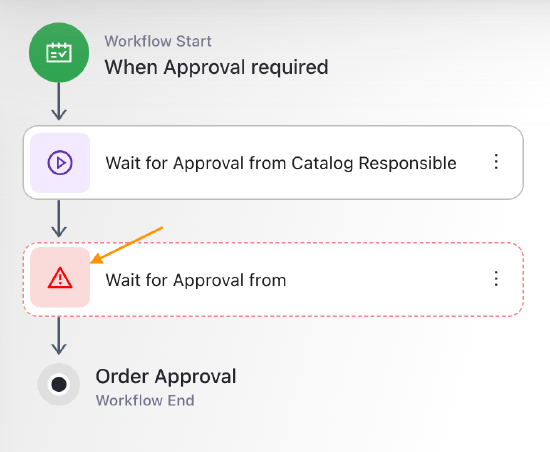
Click on the Step for more details:
Fix the issues to be able to proceed with the Workflow Release.
Release issues
The Workflow can not be released if it has steps with warnings marked with a corresponding ![]() icon.
icon.
Click on the Release action to see the complete list of the issues detected in the Workflow:
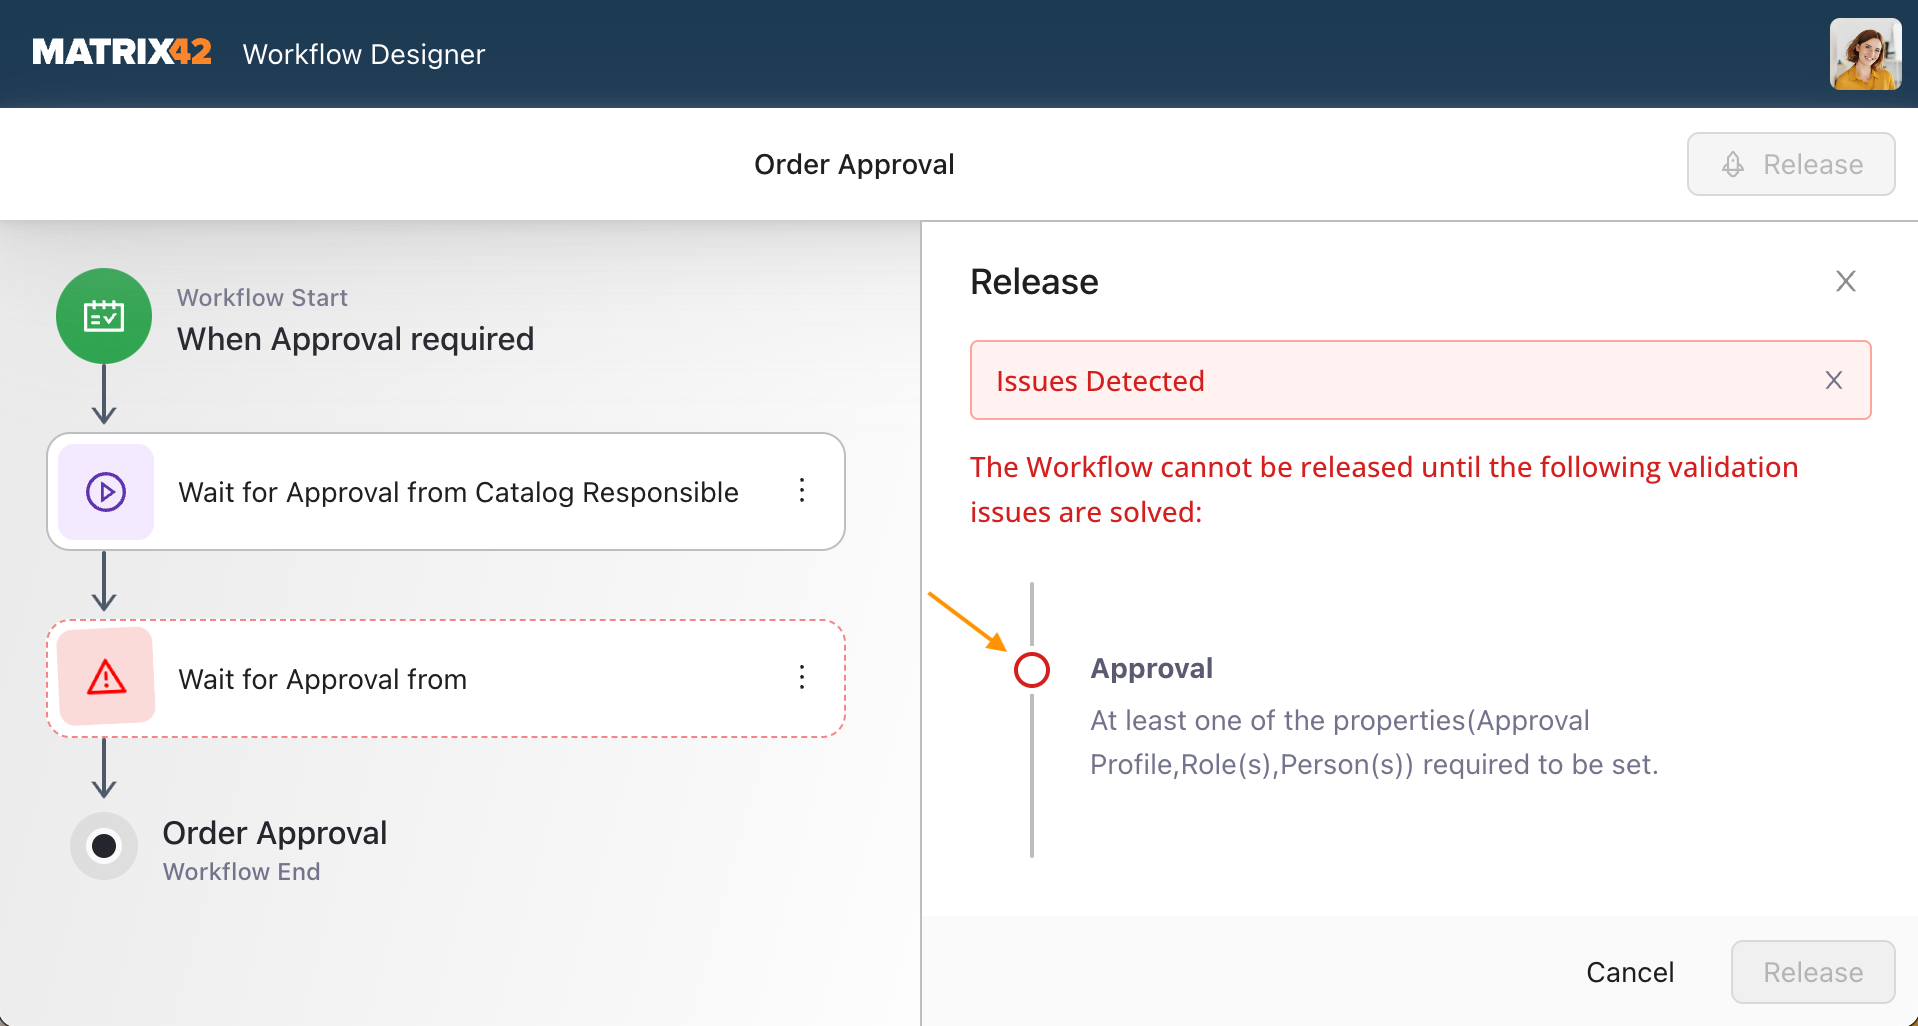
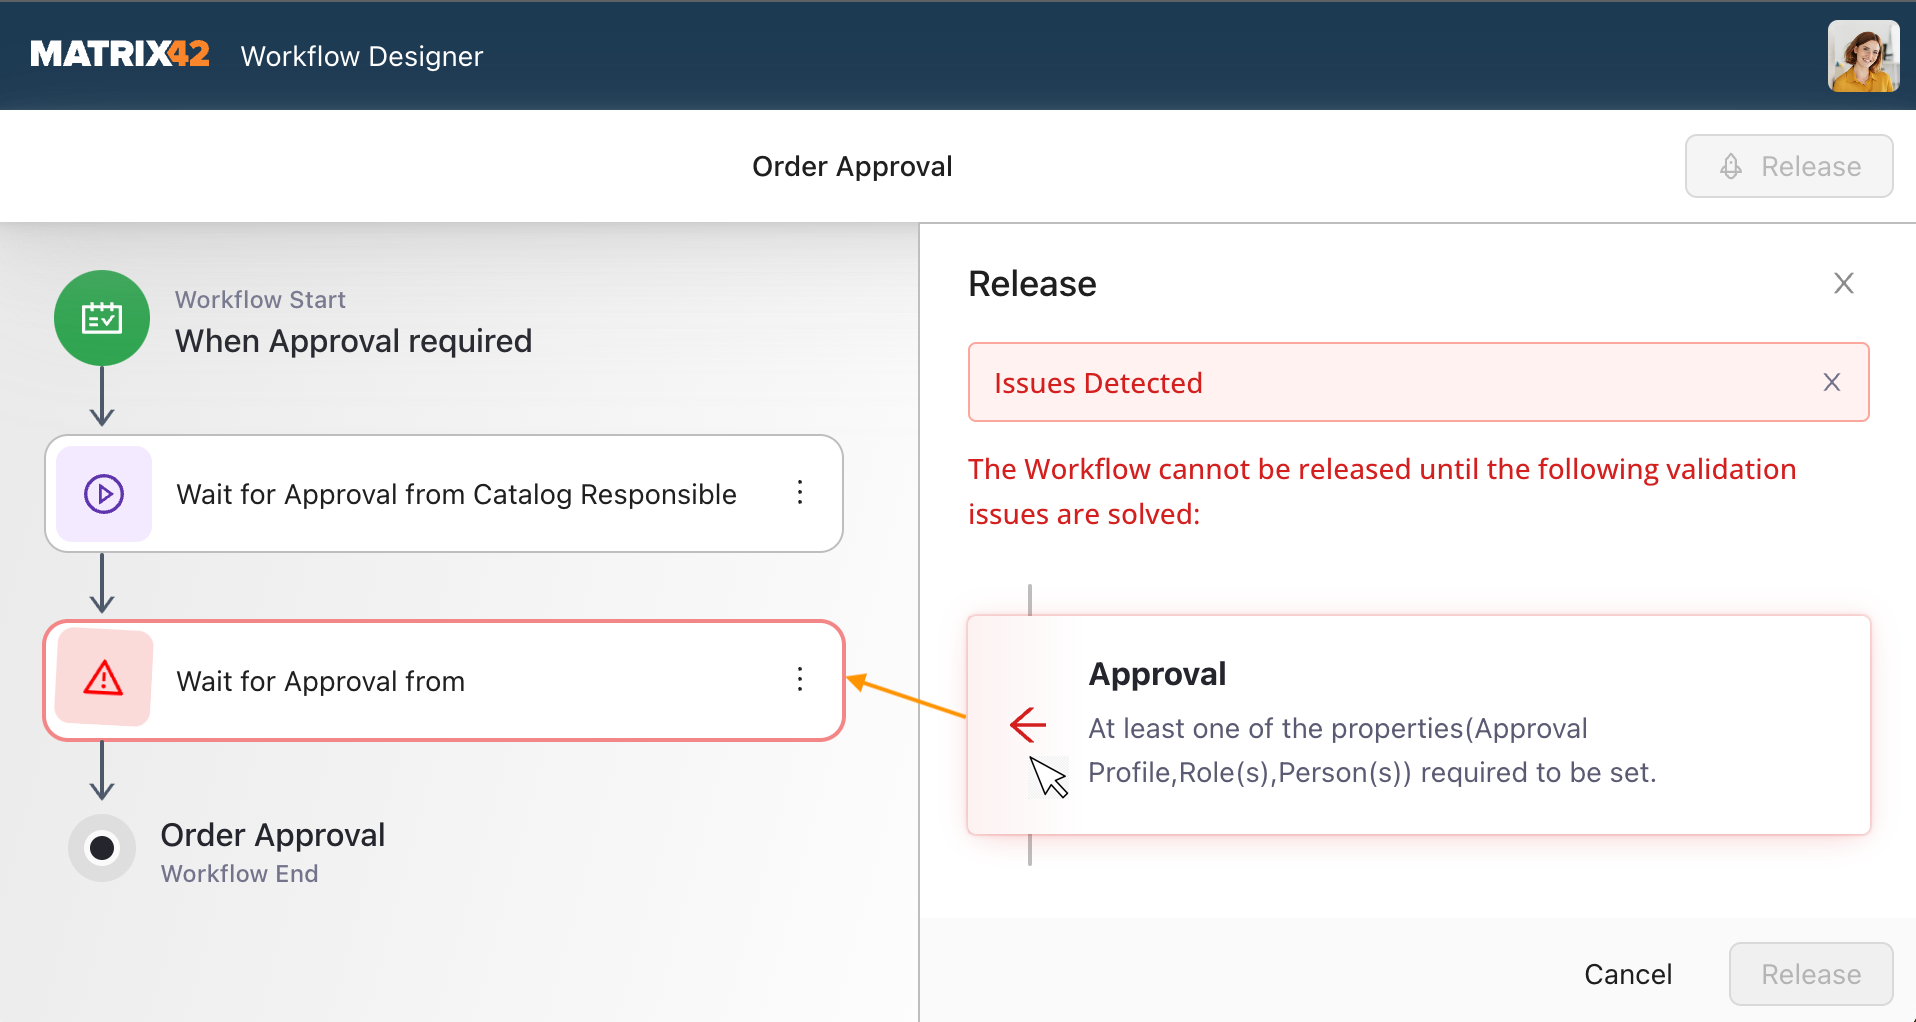
Hover over the detected issue for more details. The misconfigured step is also additionally highlighted on the canvas as follows:
Created Workflows
Created Workflows, released or not, are listed in the Administration application → Services & Processes → Workflow Designer → Workflows area.