SQL Server: How To Enable Encrypted Connections
Overview
Encrypted SQL Server Connection enhances security by limiting data loss even if access controls are bypassed. For example, if the database host computer is misconfigured and a hacker obtains sensitive data, that stolen information might be useless if it is encrypted.
Configuration
Encrypted SQL Server Connections
To enable encrypted connections to SQL Server:
-
Open Microsoft Management Console: right-click Start → Run → type mmc → click OK
-
In the MMC Console, go to File menu → Add/Remove Snap-ins:

-
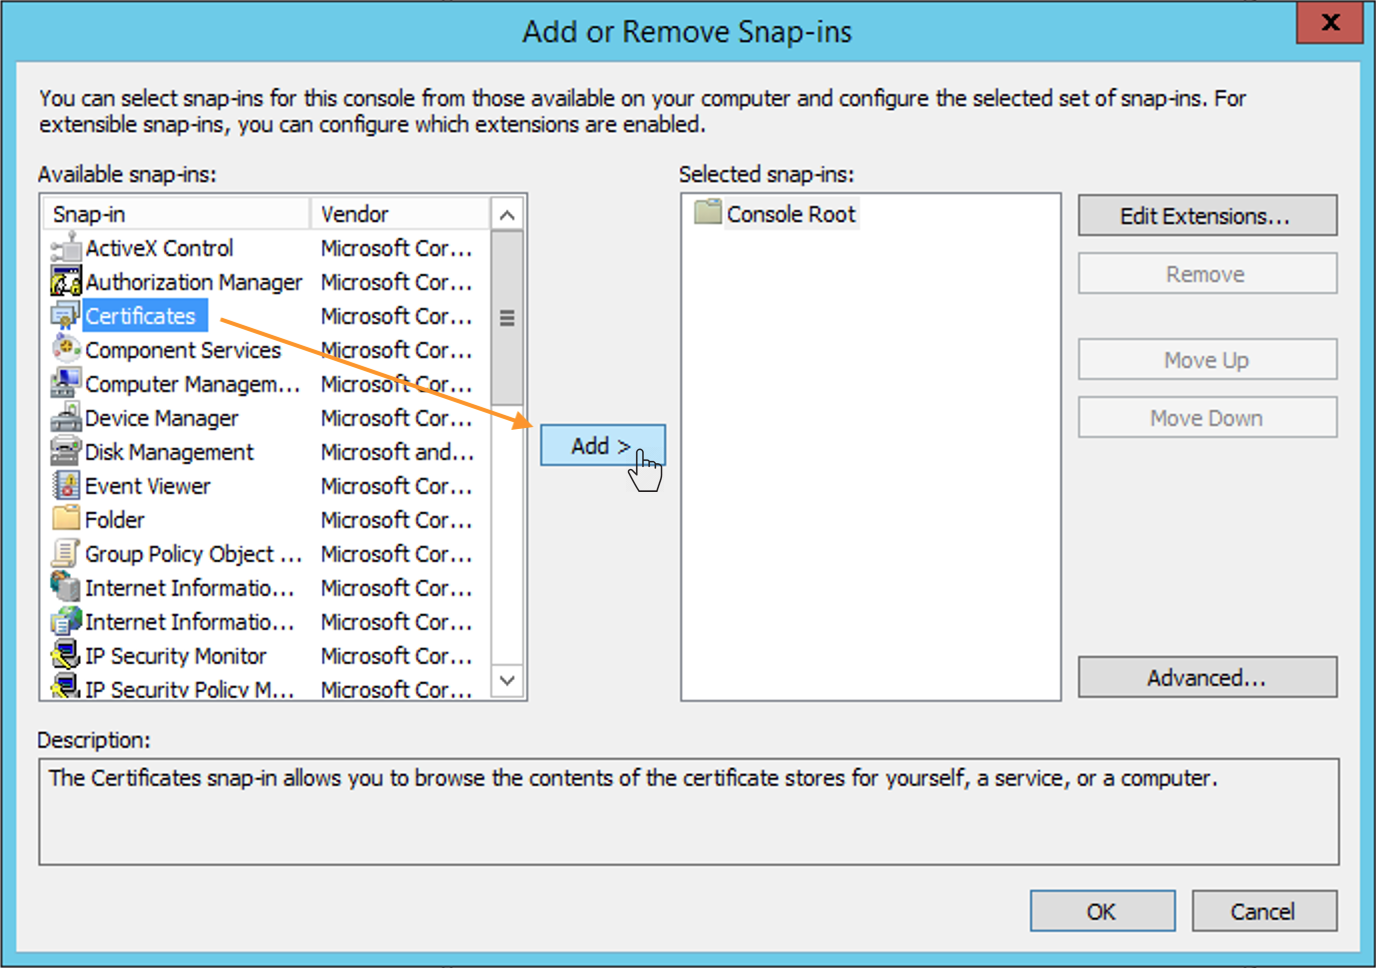
In the Add or Remove Snap-ins dialog box, click Certificates → Add:
-
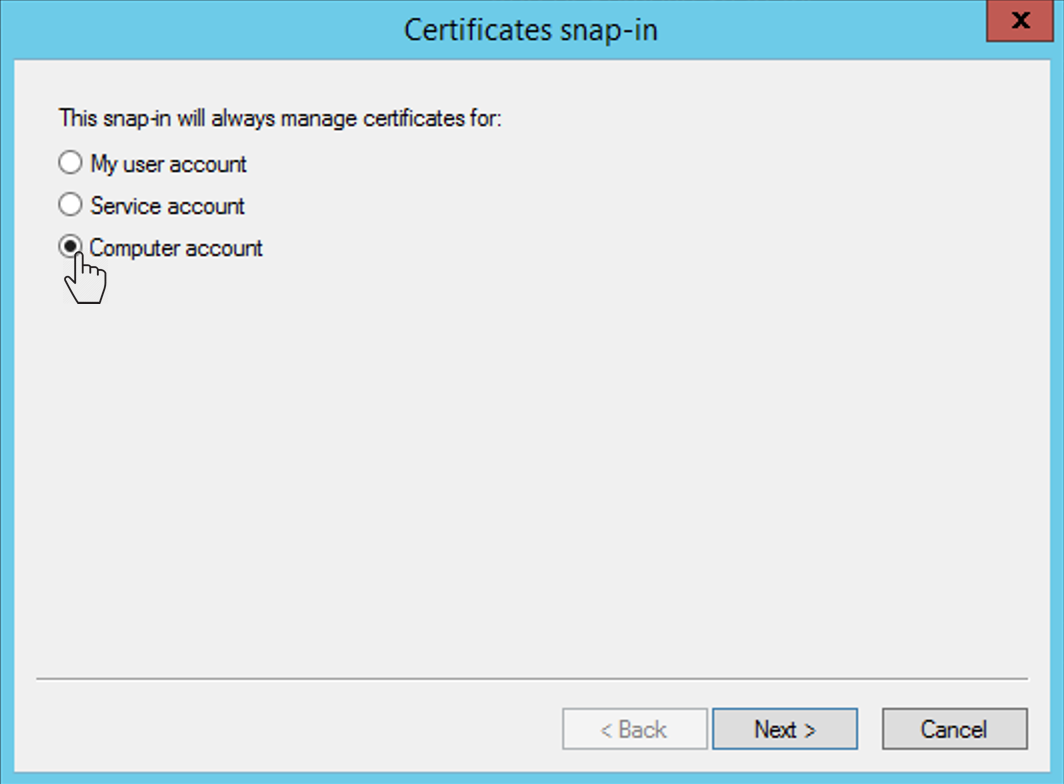
In the Certificates snap-in dialog box, choose Computer account → click Next → select the computer you want this snap-in to manage (by default, local computer) → click Finish:
-
In the Add/Remove Snap-in dialog box, click OK;
-
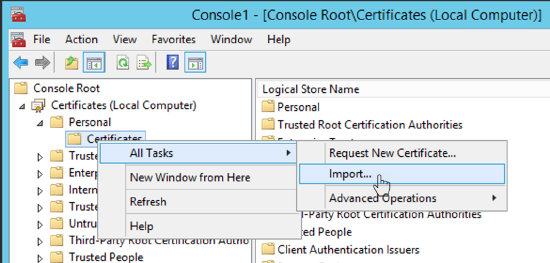
In the Certificates snap-in → expand Certificates → expand Personal → right-click Certificates → point to All Tasks → click Import:
-
Select your certificate or Import new.
-
Click on Certificates → right-click the imported/selected certificate → point to All Tasks → click Manage Private Keys:
-
In the Security dialog box, add Read permission for the user account used by the SQL Server service account and click OK to apply changes:
-
Open SQL Server configuration manager by choosing Start → SQL Server <version> Configuration Manager.
-
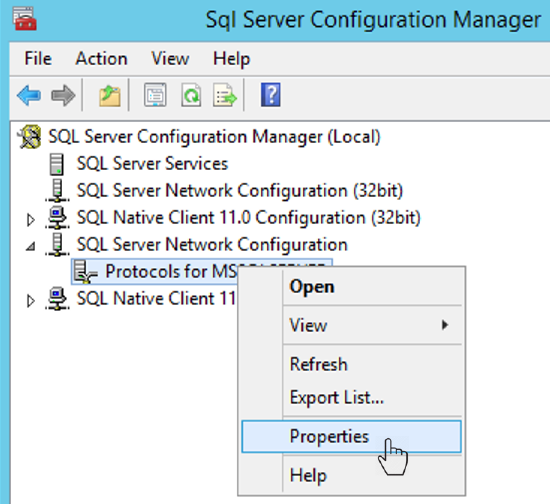
Expand the SQL Server network configuration for Protocols, open the context (right-click) menu for your SQL Server name, and choose Properties:
-
Open the Certificate tab → select the certificate that will be used for connection encryption → click OK:
-
Go back to the Flags tab. To enable encryption by default set the Force Encryption flag to yes:
-
Restart the SQL Server service.
Removing unsecured HTTP connection
Also, you can make secured communication streams between the user clients and the MS-SQL Reporting Services by removing unsecured HTTP connection.
-
Open the Report Server Configuration Manager.
-
Disable unsecured connection for Web Service URL: in Web Service URL → open Advanced configuration → Remove entries from Multiple HTTP Identities section:
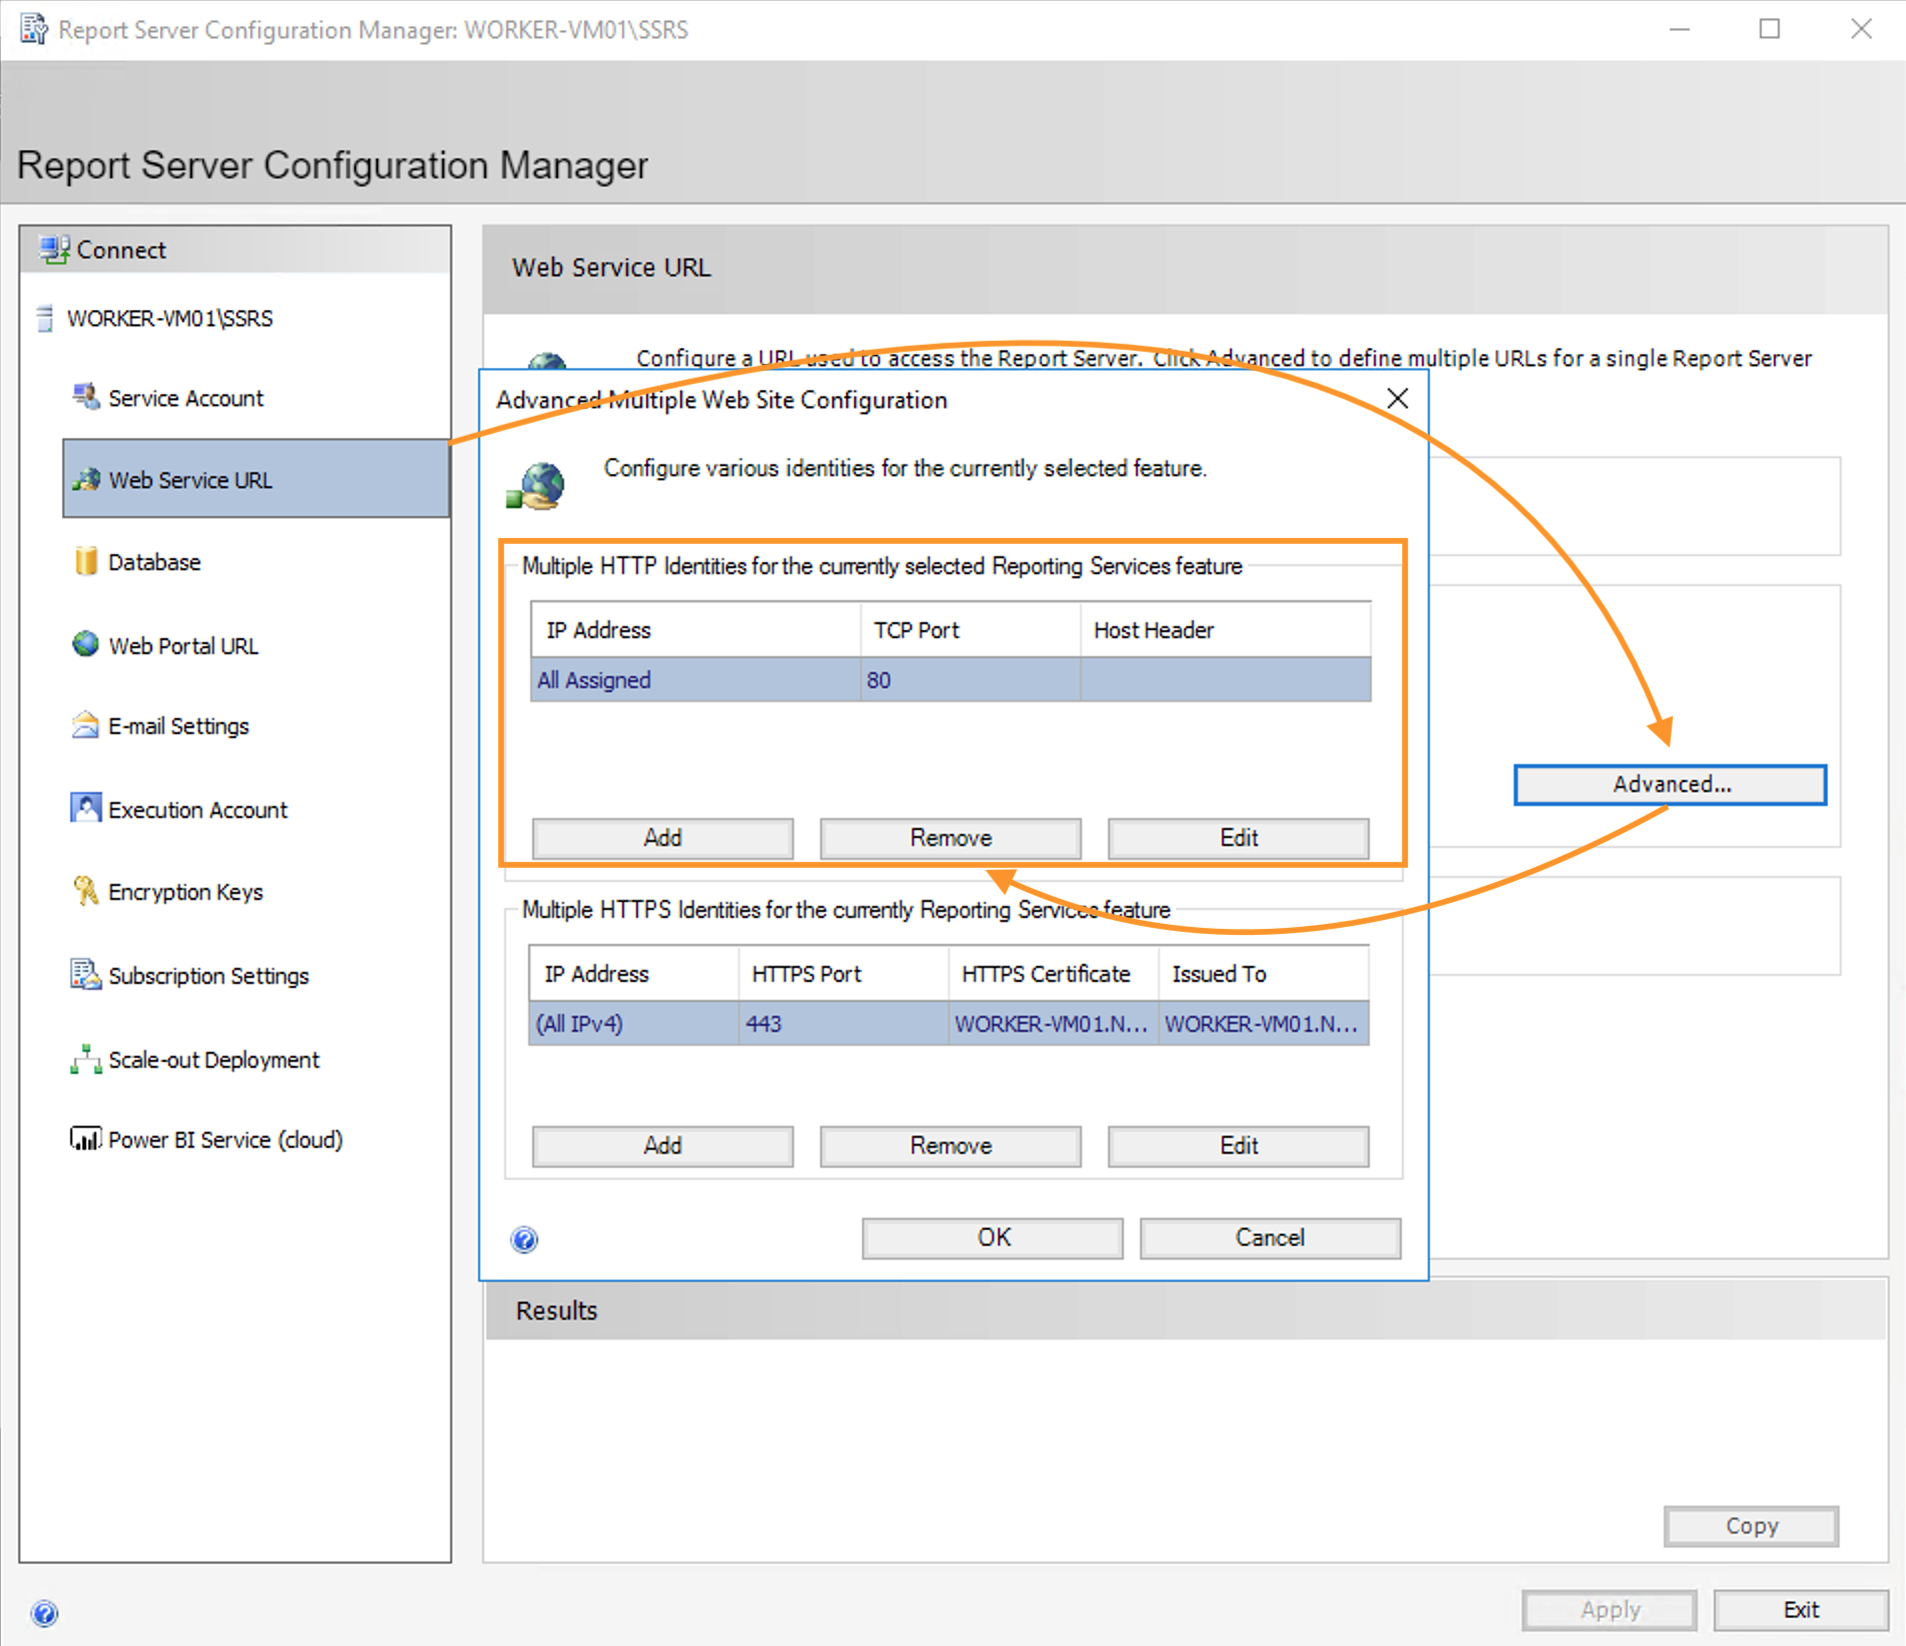
Add HTTPS Certificate(s) to the Multiple HTTPS Identities section, if it is not set.
-
In the same way, disable unsecured connection for Web Portal URL and add HTTPS Certificate(s) if necessary.