How To: Dynamically fill the Multi-Fragment grid
Goal
The article explains how to add records to a multi-fragment grid dynamically (programmatically) without the need of creating a new record by filling out a form, inline record editing or via an external wizard.
The article demonstrates how to work with the Multi-Fragment Grid in Layout Designer. The multi-fragment grid control provides various options to add new records to the grid from the user interface, such as using Inline or Form editing mode or using an external Wizard. These options can be configured by specifying the Edit mode property of the edited in a Layout designer multi-fragment grid.
This page provides an example of configuring new records adding to the multi-fragment grid by means of a Calculated Property which involves specifying the conditions using JavaScript expressions.
Use Case
In the Incident Dialog, dynamically add the time-tracking record on entering the number of minutes to the textbox
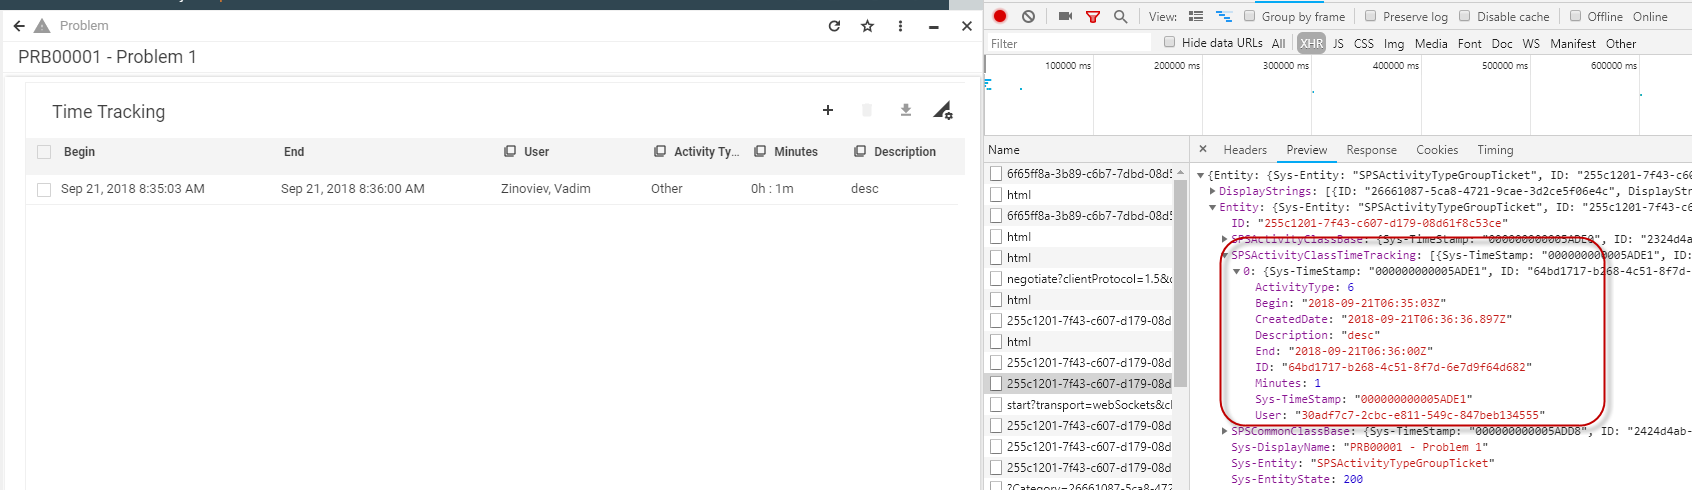
Step 1: Figure out the Multi-Fragment record Data Model
The Data Model of the Multi-fragment Grid record is defined by the related Data Query columns. Also, it is easy to get it over the Network tabulator in the Browser Development Tools:
Step 2: Add controls to Layout
Add controls to Time Tracking View which accepts the value of spent minutes and the added activity description.
- Create new Properties for keeping values of Minutes and Description in Context.
Context.MinutesToAdd, integer
Context.TrackingDescripption, string - Drop controls to the canvas which are bound to the just created Properties:
![]()
Step 3: Update the Multi-Fragment property handler (Advanced Mode)
Multi-Fragment grid is bound to a property of the Data Model which represents an array of Objects. Such data structure arrangement implies that adding a new record to the Grid equals to adding a new element to this array.
- Open Multi-Fragment bound Property for editing and proceed to the Advanced mode;
- Add dependencies (watched) to properties Context.MinutesToAdd and Context.TrackingDescription, and Context.CurrentUser, to recalculate the value of the Property anytime the dependent Properties have been
- Define a logic to add a new element to the Array any time the entered information to related textboxes is compliant. We need to add the element of the same structure we have identified on Step 1. Current Time or Now (new Date() ) is assigned to End property and is subtracted from the entered amount of minutes to automatically obtain the Begin value:
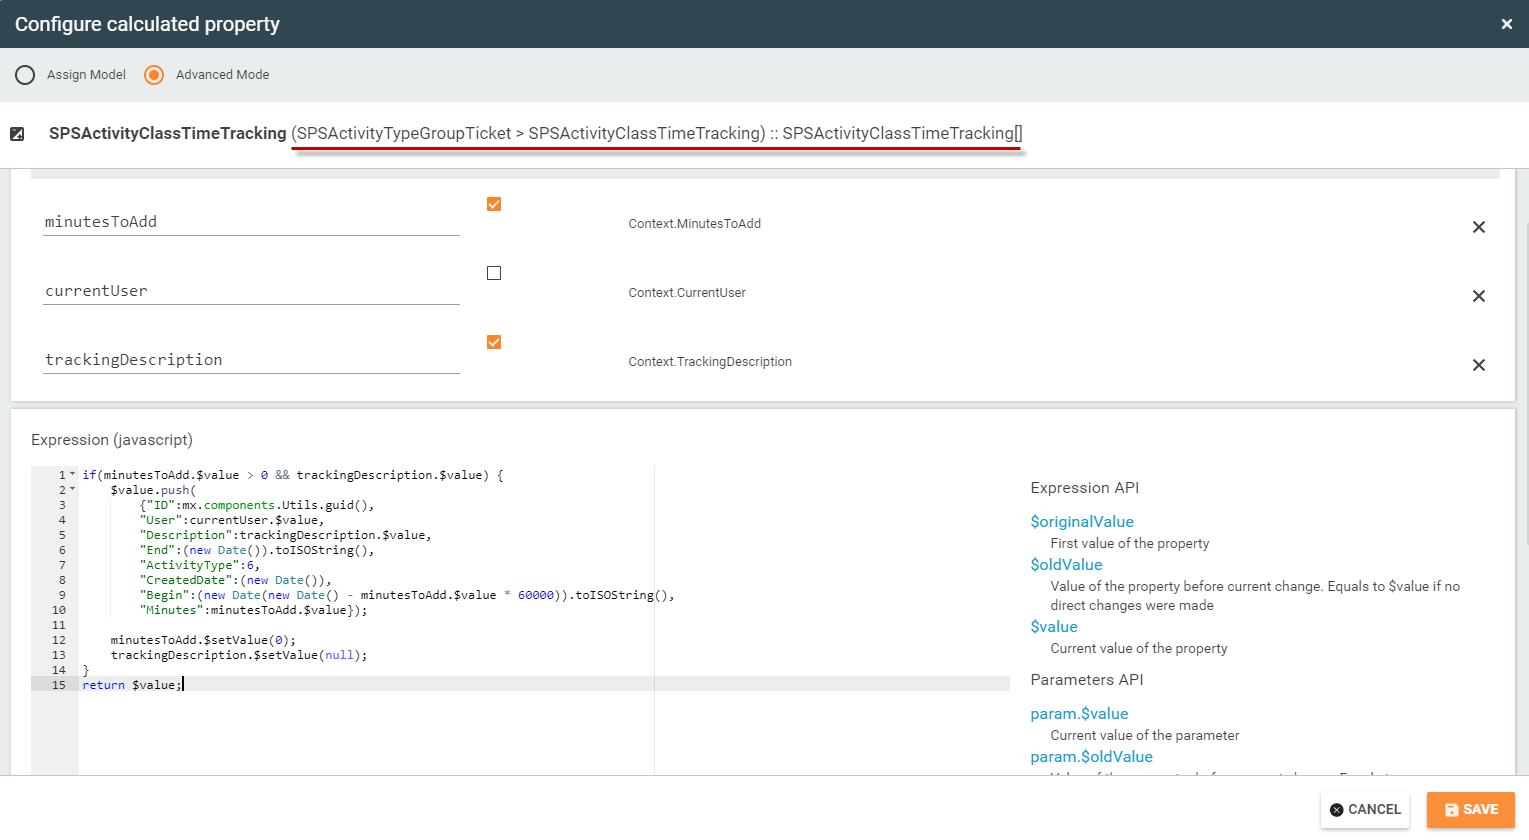
Use JS library function mx.components.Utils.guid() to generate an unique GUID value
 if(minutesToAdd.$value > 0 && trackingDescription.$value) {
    $value.push(
        {"ID":mx.components.Utils.guid(),
        "User":currentUser.$value,
        "Description":trackingDescription.$value,
        "End":(new Date()).toISOString(),
        "ActivityType":6,
        "CreatedDate":(new Date()),
        "Begin":(new Date(new Date() - minutesToAdd.$value * 60000)).toISOString(),
        "Minutes":minutesToAdd.$value});

    minutesToAdd.$setValue(0);
    trackingDescription.$setValue(null);
}
return $value;
We use function $setValue to reset the entered values to Texboxes right after the record is added to the Grid, to be able to add a new Time Tracking record.
Function {property}.$setValue([value]) can be used to set the any value of the Data Model property from another property.
Step 4: Check Result
- Save the modified Dialog in Layout Designer and open it in Product;
- Enter the values to "Amount of minutes to Track" and "Description";
- Check the new record is automatically added:
