Build basic Fleet Management Application
Goal
The article's goal is to demonstrate how the basic structure of the Fleet Management Application can be easily setup based on Data Model prepared in previous lesson "Define Fleet Management Data Model and Configuration Project ", and with action "New Management Area".
In scope of the lesson, we create an Application and define sketches for Preview and Edit Dialog for Car Configuration Item, and configure Cars grid appearances with Data Query object
Step 1: Create an Application
Application is top element of the UUX navigation, which beneath unifies all the artifacts of the related application. For the "Fleet Management" we define dedicated UUX Application.
- Open Administration/User Interface/Applications management area
- Click "Add Application" button, and define the new Application properties
Step 2: Create artifacts for managing Cars
To manage Car objects in UUX, a lot of different Application artifacts need to be created, like Navigation Item to see the area in Application Left Navigation, Dataset View and Data Query for handling display of cars in grid, Preview layout for fast overview of the Car object, and finally Dialog for creation and modification of the Car object. The Solution Builder provides an action "New Management Area" which significantly simplify those steps
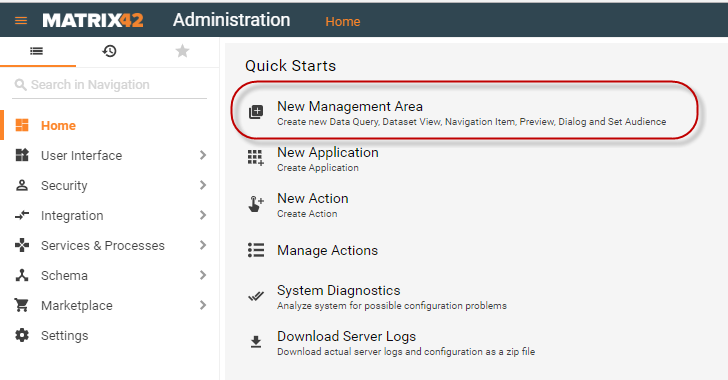
- Open Administration Home page, and start action "New Management area"
- Specify the Configuration Item which is going to be used in the creating area. Select "Car" Configuration Item, which has been created in previous lesson. and proceed to next Wizard step
- Specify the objects which need to be created. Please select the options to create Navigation Item, Dialog, Preview and Data Query. For Data Query also pick the Car CI related Data Definition (UD_FLMCarClassBase). In the Wizard it is possible to setup directly the Security for the created assets, but we consciously skip this step, as the Audience and Security is the topic of the following dedicated lesson. Click on "Configure Navigation " to proceed to next Wizard step
- Define the Title, Position and icon for the Navigation Item. As far as the Cars is top area of the Fleet Management application, select the option "Root Element" and specify the application we created on Step 1 "Fleet Management"
- On the Preview page assure the Wizard is going to create the right objects, and "Submit" the Wizard.
- On operation completion, the Wizard shows the result page, with references to all created objects
Step 3: Adjust the appearance for the Dialog Layouts
The Preview and Dialog layouts have been created by New Management Area in previous step are blank, and for the usage, first need to be "adjusted" in Layout Designer.
In scope of the lesson we build only simple Dialog layout, just to demonstrate the fast way of building the app. More complex use case, like configuring dynamic behaviour on page be covered in the following lessons
- From the "New Management Area" result page, follow the link for just created Dialog. If you accidently closed the Wizard, then you can find the Dialog object in "Administration/User Interface/Layouts/Dialogs" area.
- From the Dialog preview, run an action "Customize" to start Layout designer for the Dialog.
- Layout Designer is WYSWYG editor, which allows with drag&drop technique to build a layout of, almost, any complexity. For more details how to use Layout Designer, see the Working with Layout Designer.
- Save the designer Layout.
Step 4: Adjust the appearance for the Dialog Layouts
Absolutely the same way as for Dialog, the Preview layout also need to be adjusted first.
- From the "New Management Area" result page, follow the link for just created Preview. If you accidently closed the Wizard, then you can find the Preview object in "Administration/User Interface/Layouts/Previews" area.
- From the Preview preview, run an action "Customize" to start Layout designer for the Dialog.
- Use Layout Designer to build the Preview layout and Save the Layout.
Step 5: Adjust "Cars" grid appearance
The full appearance of the Grid could be managed in the appropriate Data Query object
- Open the auto-generated "Car" Data Query
- Review and clean up the list of columns
- Adjust the order and width of the columns
Use the complex A-SQL query for column
To show the full car model name in the "Model" column use the ASQL expression
Ud_Model.DisplayString + '(' + Ud_Brand.DisplayString + ')'
Define Coloring in Grid
The Data Query allows to specify different styles for Row and Cells. To use the defined Car color for highlighting the Model column text.
- Create an additional hidden column "Color" to the Data Query
- Edit column "Model" and set the option "Use Color For" to value "Cell Text"
- In "Color Script" define the javascript expression which returns the value of the "Color" column
return $item.Color;
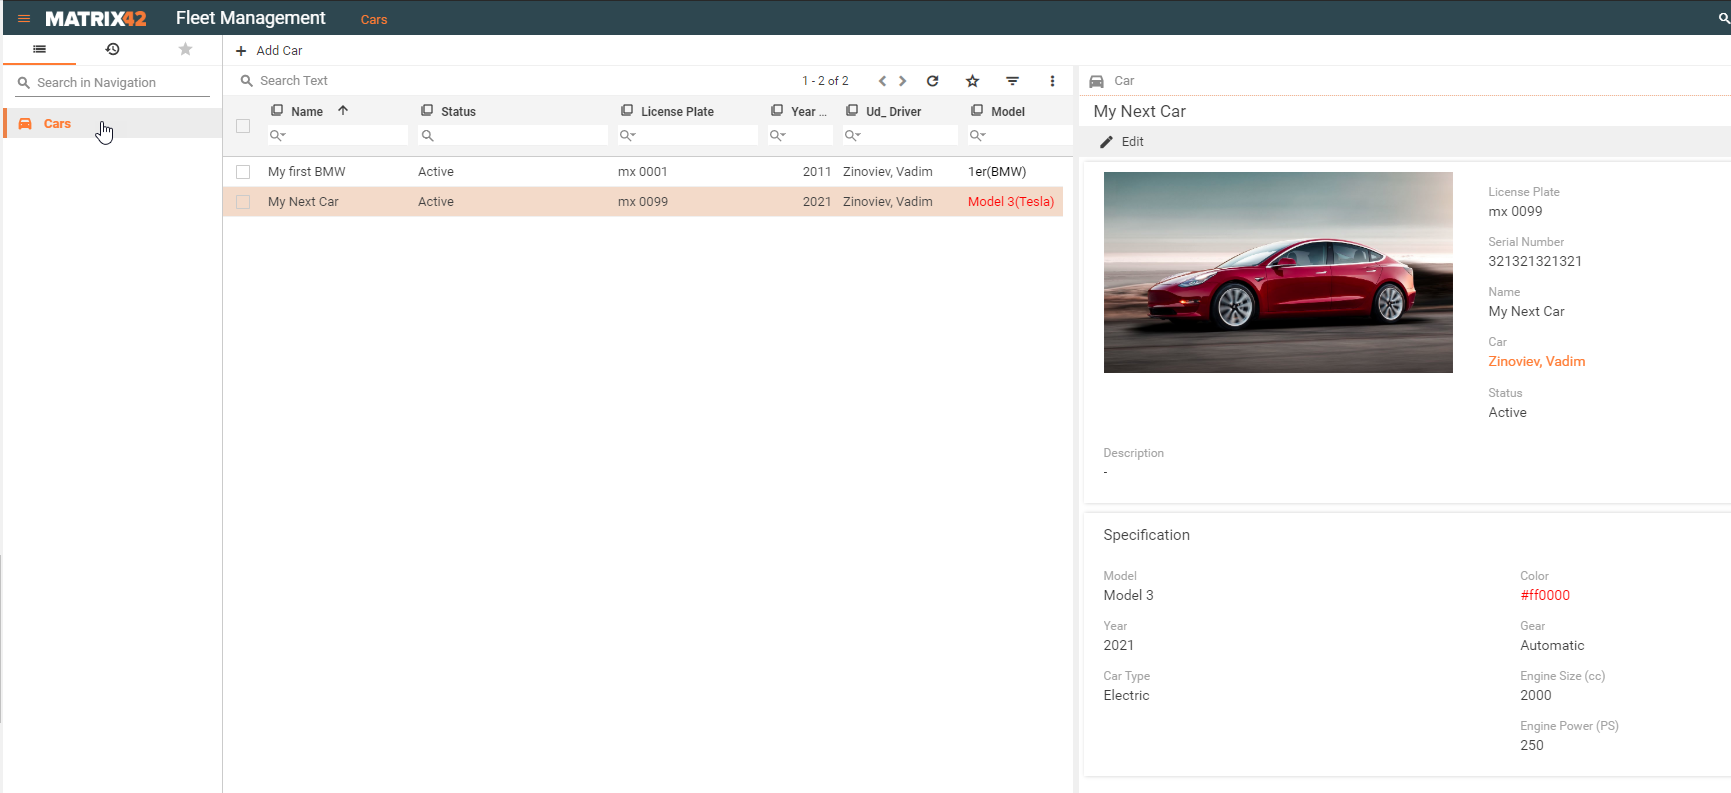
Step 6: Evaluate the achieved results
To assure the designed layouts looks and works as expected, refresh the whole UUX browser page. And in the Application picker on the top right corner select the "Fleet Management"
What's Next