New Management Area
Overview
New Management Area automatically generates all required user interfaces based on the basic schema of the system. New Management Area includes such components as Preview, Dialog, Navigation Item, Data Query, Dataset View, and allows configuring Audience.
New Management Area is available as a:
- next step after New Configuration Item has been created;
- Quick Starts link on the Administration application homepage:
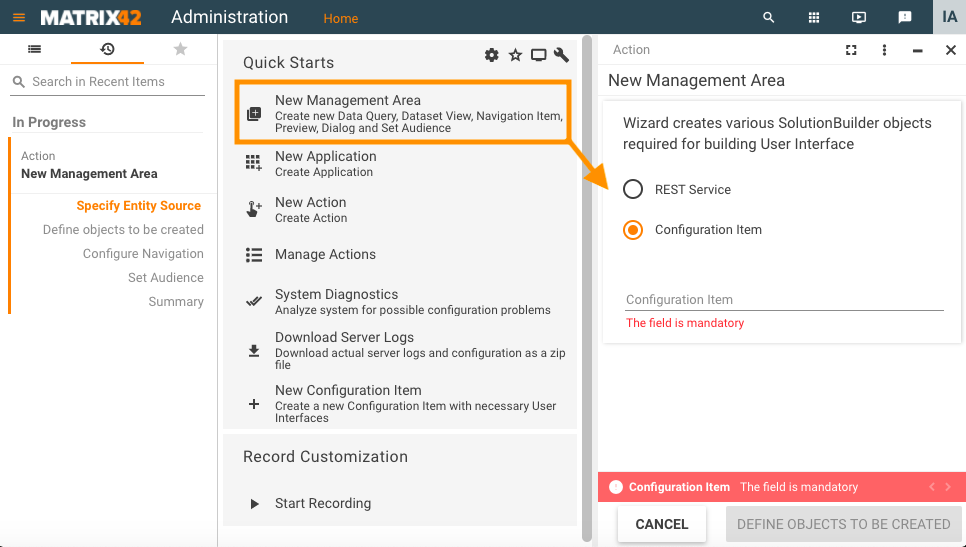
New Management Area wizard
Go through the following steps to create a New Management Area:
- Specify Entity Source: choose between the existing in the system Configuration Item and REST Service.
- Define objects to be created: specify the name that will be used for generating the UI objects and choose the objects you want to create. By default, all options are selected and the wizard suggests to create brand new objects of every available type for the New Management Area:
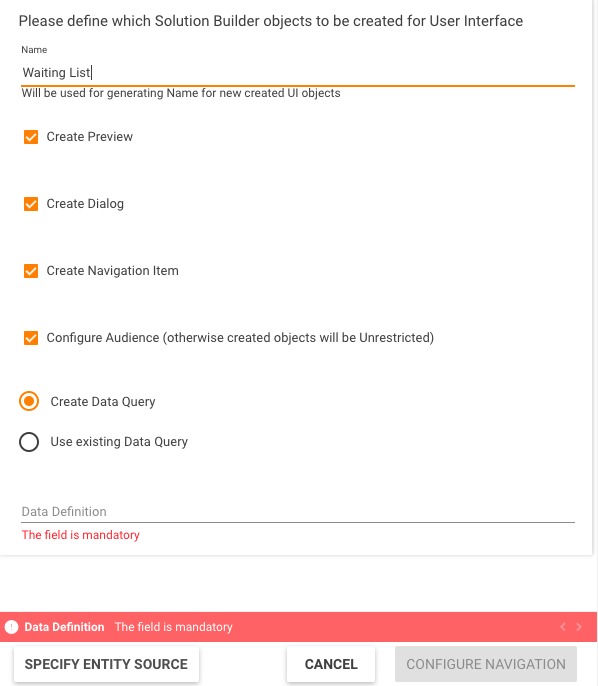
- Create Preview: select the checkbox to create a Preview that can be edited in the Layout Designer later on.
- Create Dialog: select the checkbox to create a Dialog that can be edited in the Layout Designer later on.
- Create Navigation Item checkbox options:
- selected: select the checkbox if you want to Configure Navigation for the New Management Area;
- disabled: clear the checkbox to skip the Configure Navigation step.
- Configure Audience (otherwise created objects will be Unrestricted) checkbox options:
- selected: select the checkbox if you want to Set Audience for the created objects;
- disabled: clear the checkbox to skip the Set Audience step and create all objects as Unrestricted. You can change the audience settings for each of the created objects later.
- Data Query: choose between the options create new or use existing Data Query;
- Choose Data Definition: this field is available for the Configuration Item Entity Source in case you want to create a new Data Query. The field suggests choosing a Data Definition from the previously selected Configuration Item.
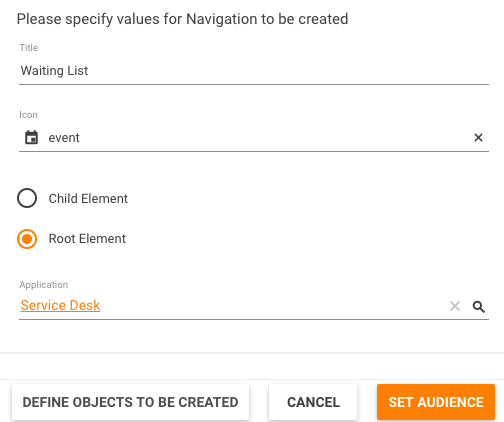
- Configure Navigation: this step is available if the checkbox was selected on the previous step. Set the Navigation Item name, icon, and define how the users can access the New Management Area:
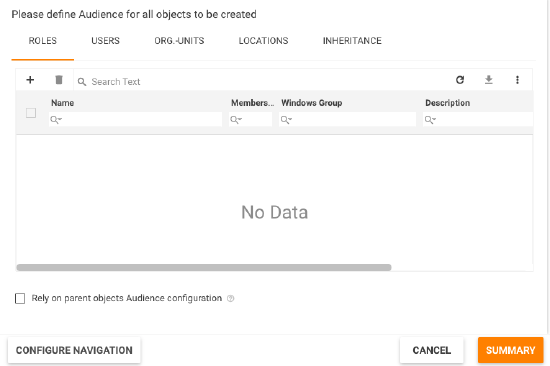
- Set Audience: set rules defining who can access the New Management Area. This step is available if the corresponding checkbox was selected on the Define objects to be created page. Make the necessary settings and proceed to Summary.
Audience settings are applied for each object that is created by the New Management Area wizard:
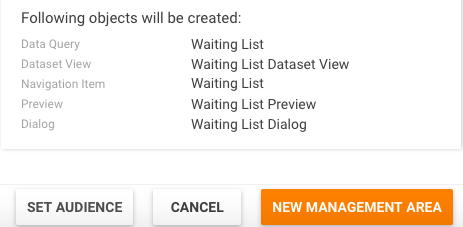
- Summary lists all objects that will be created for the New Management Area based on the wizard settings. Please note that the Dataset View is also generated automatically, although it was not defined explicitly:
Click New Management Area button to see a list of created items as clickable links of the objects that can be previewed and edited.