Agent Installation IV: Installation on IoT Devices
EgeSecure Agent Installation on IoT Devices
EgoSecure Agent is installed on IoT devices remotely via the EgoSecure Data Protection Console. Such EgoSecure Agents have the following limitations:
- Have no graphic user interface.
- Only the Access Control (AC) product can be activated. Via AC only the External storage device class is controlled.
- Works only in the Polling mode. It means that EgoSecure Agent checks the server for new settings in a certain time period (polling interval). The polling interval for Agents on IoT devices is one minute and it cannot be changed.
Installing Agent when IoT device is in the directory service
- On an IoT device, set up WMI to enable the remote access to the device. For details, see the Microsoft article Allow WMI/PowerShell Remote Access on a Device.
- In the EgoSecure Data Protection Console, navigate to Installation | EgoSecure agents | Installation settings.
- In the Remote installation settings area, enter the login data of the administrator who has enough rights for installing the EgoSecure Agent on this device.

- Go to Installation | EgoSecure agents | Install/Update.
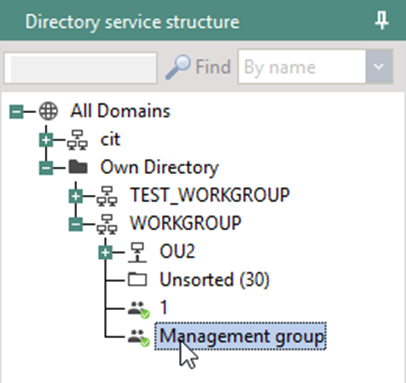
- In the Directory service structure area, select a directory object from the directory structure, to which the IoT device belongs.

The computers of the directory object (e.g. group) are displayed on the right in the Install/Update main area.
- In the Show drop-down list, select Only computers without agents.
- Check devices where EgoSecure Agent will be installed.
- Click Install/Update.
EgoSecure Agent installation starts. Once finished, the icon of the device changes to the following: .
Installing Agent when IoT device is NOT in the directory service
When IoT device is not the directory service structure, create a device with the same name in the Own directory so that EgoSecure Server finds it in the network. Make sure the “Own directory” mode support is enabled under Administration | Synchronization | Directory service settings.
- Add a computer to the Own directory:
- Go to User management/Computer management.
- In the Directory service structure area, right-click an OU or domain of the Own Directory.
- Select Add | Computer from the context menu.
- The Add – Computer dialog appears.
- In the Name field enter the name of the IoT device as is. This name was defined during the installation of Windows on it.
- (Optional) In the SID field, enter the device SID.
- (Optional) In the E-Mail field, enter the contact e-mail address of a device owner.
- Click OK.
The computer entry appears in the Workgroup OU.
- On an IoT device, set up WMI to enable the remote access to the device. For details, see the Microsoft article Allow WMI/PowerShell Remote Access on a Device.
- In the EgoSecure Data Protection Console, navigate to Installation | EgoSecure agents | Installation settings.
- In the Remote installation settings area, enter the login data of the administrator who has enough rights for installing the EgoSecure Agent on this device.

- Go to Installation | EgoSecure agents | Install/Update.
- In the Directory service structure area, select a domain where the IoT device was added in step 1.
- In the Show drop-down list, select Only computers without agents.
- Check device where EgoSecure Agent will be installed.
- Click Install/Update.
EgoSecure Agent installation starts. Once finished, the icon of the device changes to the following:
Installing Agent on IoT device locally
- On an IoT device, set up WMI to enable the remote access to the device. For details, see the Microsoft article Allow WMI/PowerShell Remote Access on a Device.
- Install Windows 10 IoT Core Dashboard.
- Using IoT Dashboard, copy the appropriate installation file (according to the processor and bit value of the IoT device) from the computer with installed EgoSecure Server (C:\Program Files\EgoSecure\EgoSecure Server\IoT\).
- In the directory where the installation file was copied, create a file with settings:
- Name the file as ESAgentSettings,
- Open the ESAgentSettings file and enter the following values in the following order:
- Server port
- Server IP address
- Server host name
- Empty string
- c. Save the changes.
- d. Remove the *.txt file extension: .
 |
 |
- In the IoT Dashboard, install the Agent:
- Launch PowerShell:

- In the new dialog, enter login and password.
- Select the directory where the Agent executable file is stored: cd [path to the .exe file]
- Launch the installation via the following command: .\ESAgent_ARM32.exe -i
The installed Agent appears in the EgoSecure Data Protection Console under Installation | EgoSecure agents | Install/Update.